Author

robert

Browsing

Unlock the Secrets of Coconut Cardamom Rice Pudding

Welcome to the delightful world of Coconut Cardamom Rice Pudding, a tropical dessert that combines the creamy richness of coconut milk with the aromatic warmth of cardamom. This easy-to-follow recipe is perfect for any occasion, whether you’re looking for a comforting family dessert or an impressive dish for guests. With just a few simple ingredients, you can create a dish that’s not only delicious but also visually stunning. Join me as we explore the ins and outs of this beloved dessert, ensuring your pudding turns out perfectly every time!

Why You’ll Love This Recipe

This Coconut Cardamom Rice Pudding isn’t just a treat for your taste buds; it comes with a host of benefits that make it irresistible. Here are five reasons why you’ll adore this recipe:

  • Quick and Easy Preparation: With minimal prep work, you can have this dessert ready in no time. No baking required!
  • Versatile Serving Options: Serve it warm, chilled, or topped with your favorite nuts for added texture and flavor.
  • Nutritious Ingredients: Made with wholesome ingredients like basmati rice and coconut milk, it’s a dessert you can feel good about.
  • Customizable Flavors: The recipe allows for various substitutions and additions, making it easy to tailor to your taste.
  • A Comforting Dessert: Perfect for any occasion, this pudding delivers warmth and comfort with each spoonful.

Ingredient Breakdown

Understanding each ingredient in your Coconut Cardamom Rice Pudding is essential for achieving the best results. Here’s a detailed look at what you’ll need and some potential substitutions:

  • Basmati Rice: 1/2 cup (rinsed thoroughly) – Provides long grains that stay tender without becoming mushy. Substitution: Jasmine rice can be used for a slightly different flavor.
  • Coconut Milk: 2 cups (full-fat) – Adds rich, tropical creaminess to the pudding base. Substitution: Light coconut milk for a lower-calorie version.
  • Whole Milk: 1 cup – Balances the richness of the coconut milk for a silky texture. Substitution: Almond milk for a dairy-free option.
  • Sugar: 1/4 cup – Sweetens the pudding without overpowering the spices. Substitution: Honey or maple syrup for a natural sweetener.
  • Green Cardamom Pods: 4 to 5 (lightly crushed) – Infuses the pudding with a signature floral warmth. Substitution: Ground cardamom (1 teaspoon) can be used if pods are unavailable.
  • Salt: A pinch – Enhances the sweet and spiced elements of the pudding.
  • Vanilla Extract: 1 teaspoon (optional) – Deepens the flavor profile for a rounded finish.
  • Chopped Nuts: 2 tablespoons (optional garnish) – Adds a crunchy contrast to the creamy pudding. Suggestions: Use pistachios or almonds for added texture.

Step-by-Step Instructions for Perfect Rice Pudding
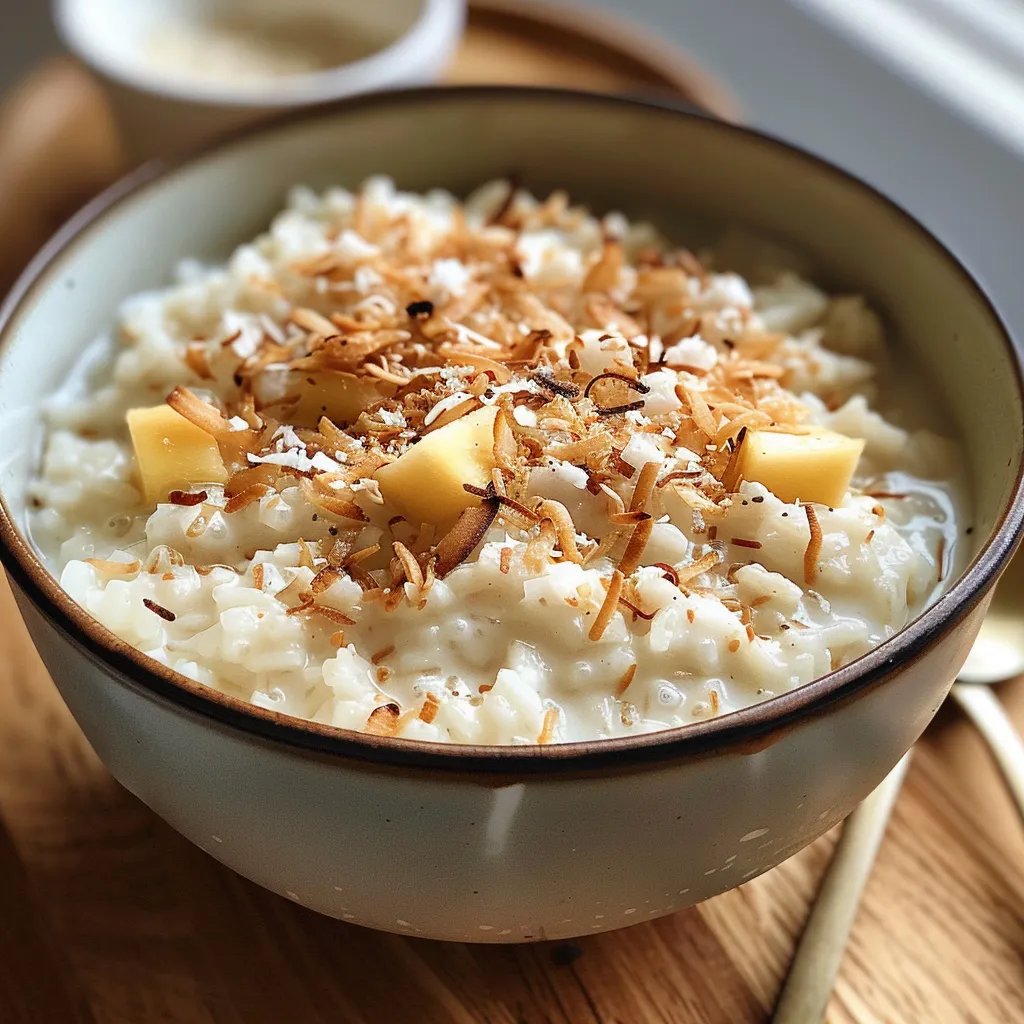
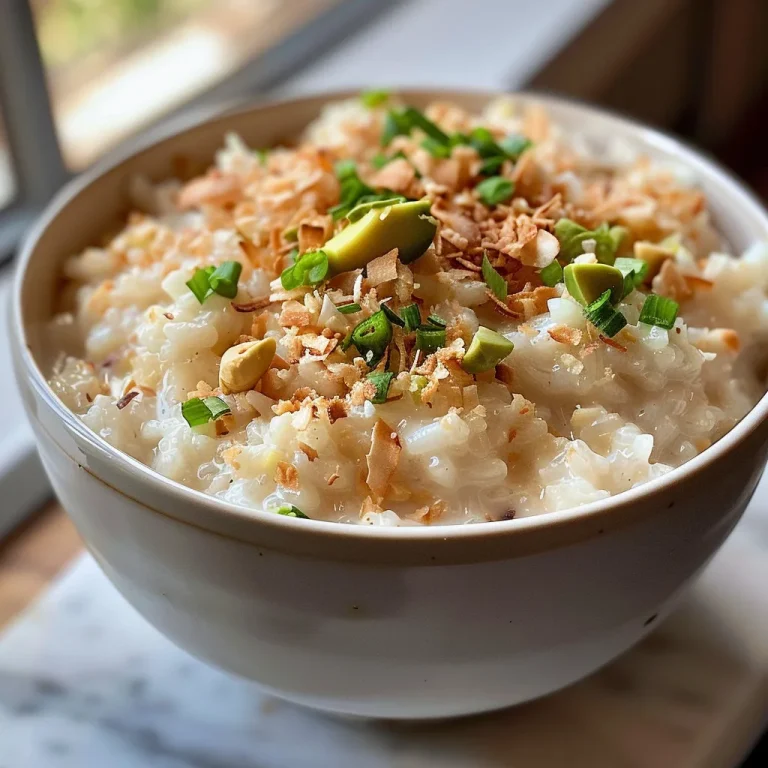
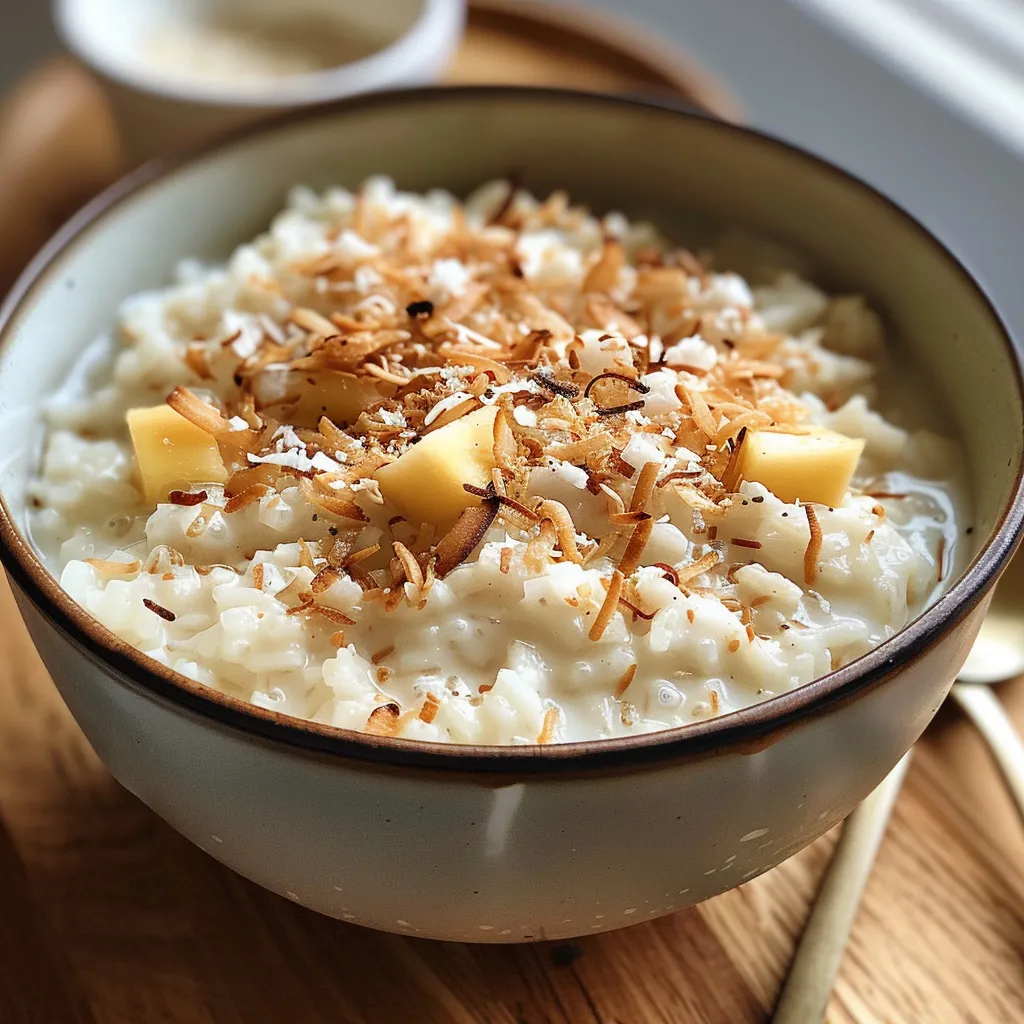
Rich and inviting coconut rice pudding showing grains and spices in a bowl.

Follow these simple steps to create your Coconut Cardamom Rice Pudding:

  • No preheating required; have your saucepan ready and set to medium-low heat.
  • In your saucepan, add the rinsed rice, coconut milk, whole milk, sugar, cardamom pods, and a pinch of salt. Stir gently to mix.
  • Ensure your saucepan has a heavy bottom and is large enough to allow the mixture to expand slightly without boiling over.
  • Place the saucepan on medium-low heat, bringing the mixture to a gentle simmer while stirring occasionally to prevent sticking.
  • Allow it to simmer gently for 25 to 30 minutes, stirring frequently, until the rice is tender and the pudding has thickened to your preference.
  • Stir in the vanilla extract if you choose to use it, and remove the cardamom pods. Let it cool slightly before serving.
  • Spoon into bowls and top with chopped nuts for texture. Serve warm or chill for a refreshing twist.

Expert Tips for Mastering Coconut Cardamom Rice Pudding

To ensure your pudding is nothing short of perfection, here are some expert tips:

  • Choose the Right Rice: Short-grain or medium-grain rice works best, as it releases more starch, creating a naturally creamy texture.
  • Stir Frequently: Regular stirring is crucial to prevent the pudding from sticking to the bottom of the pan and burning.
  • Adjust Consistency: If the pudding is too thick, add a splash of milk to loosen it up before serving.
  • Let It Rest: Allowing the pudding to sit for a few minutes after cooking enhances the flavors.
  • Use a Heavy-Bottomed Pan: This helps to distribute heat evenly and prevents scorching.
  • Experiment with Sweeteners: Feel free to substitute sugar with other sweeteners like agave syrup or stevia for a healthier option.
  • Infuse Extra Flavors: Consider adding a splash of coconut extract or a hint of nutmeg for additional flavor depth.
  • Garnish Creatively: Top your pudding with fresh fruits, toasted coconut flakes, or even a drizzle of honey for a gourmet touch.

Common Mistakes and Troubleshooting

Even the best cooks can face challenges. Here are some common mistakes to avoid and solutions for troubleshooting:

  • Burnt Pudding: If you notice a burnt smell, reduce the heat immediately and stir frequently to prevent further cooking.
  • Too Thick or Too Runny: Adjust by adding more milk or letting it simmer a bit longer to reach your desired consistency.
  • Grainy Texture: Ensure you rinse your rice thoroughly to remove excess starch before cooking.
  • Flavor Lacking: If the pudding seems bland, try adding more cardamom or a pinch of salt to enhance the flavors.

Creative Variations to Try

Don’t hesitate to experiment with your Coconut Cardamom Rice Pudding! Here are some variations to inspire your culinary creativity:

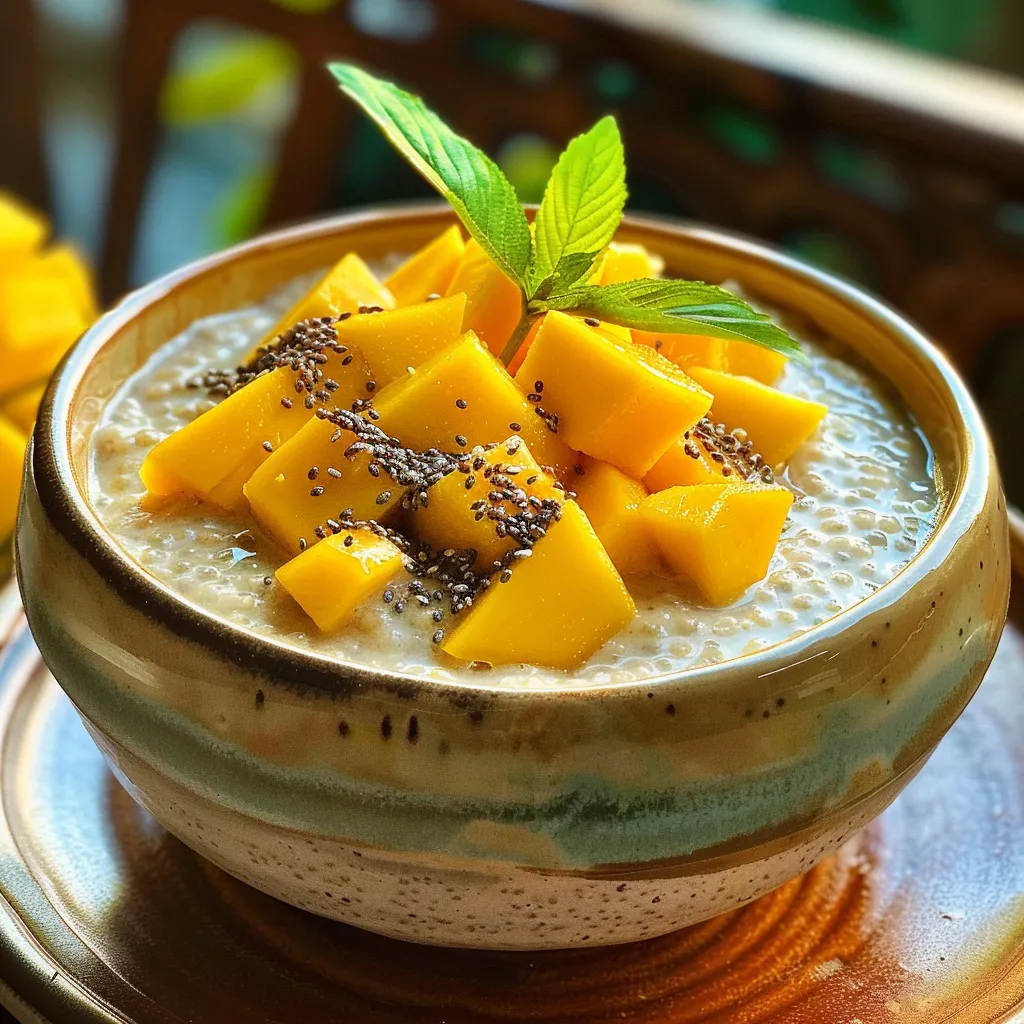
  • Coconut Mango Pudding: Add diced mango pieces for a tropical twist.
  • Chocolate Coconut Pudding: Stir in cocoa powder or chocolate chips for a rich dessert.
  • Spiced Pumpkin Pudding: Incorporate pumpkin puree and pumpkin spice for a seasonal treat.
  • Nutty Chocolate Swirl: Drizzle melted dark chocolate and sprinkle with chopped hazelnuts for a decadent finish.

Storage and Make-Ahead Instructions

This pudding is great for make-ahead meals. Here’s how to store and prepare it:

  • In the Fridge: Store leftover pudding in an airtight container for up to 3 days.
  • Reheating: Gently reheat on the stove with a splash of milk to restore its creamy texture.
  • Make Ahead: Prepare the pudding a day in advance and store it in the fridge; flavors will deepen overnight.

Frequently Asked Questions

Here are some common questions about Coconut Cardamom Rice Pudding:

  • Can I use brown rice? Yes, but cooking time will increase. Brown rice requires more liquid and a longer simmer.
  • Is this dessert gluten-free? Absolutely! This recipe is naturally gluten-free, making it suitable for various dietary needs.
  • Can I make it dairy-free? Yes, simply substitute whole milk with almond or oat milk and use coconut milk.
  • What can I garnish with? Top with chopped nuts, fresh fruits, or even a dollop of whipped cream for extra flair.
  • How do I know when it’s done? The pudding is ready when the rice is tender and the mixture has thickened to your liking.
  • Can I freeze the pudding? While it’s best enjoyed fresh, you can freeze it for up to a month. Thaw in the fridge and reheat gently.
  • How do I prevent clumping? Stir frequently and keep the heat low to ensure even cooking.
  • Can I add more spices? Yes! Feel free to experiment with cinnamon or nutmeg for additional warmth.

Nutritional Tips and Dietary Adaptations

This Coconut Cardamom Rice Pudding can be enjoyed by everyone. Here are some tips for dietary adaptations:

  • Vegan Option: Use coconut milk and almond milk and omit any dairy products.
  • Low-Sugar Version: Reduce sugar or use a sugar substitute to lower the calorie count.
  • Protein Boost: Add protein powder or Greek yogurt when serving for an extra health kick.

Essential Equipment for Perfect Pudding

To achieve the best results, make sure you have the following kitchen tools:

  • Heavy-Bottomed Saucepan: Essential for even heat distribution and preventing burning.
  • Measuring Cups and Spoons: Accurate measurements ensure consistent results.
  • Wooden Spoon or Silicone Spatula: Perfect for stirring gently without scratching your cookware.

Serving Suggestions for Coconut Cardamom Rice Pudding

How you serve your pudding can elevate the dining experience. Here are some creative serving suggestions:

  • In Individual Bowls: Present in small bowls for a charming, personal touch.
  • With Fresh Fruits: Pair with berries or tropical fruits for a vibrant contrast.
  • As a Layered Dessert: Layer with yogurt and fruit for a beautiful parfait.

Conclusion

The Coconut Cardamom Rice Pudding is a versatile and delicious dessert that brings the flavors of the tropics to your kitchen. With its creamy texture and aromatic spices, it’s perfect for any occasion. Now that you have the knowledge and tips to create this delightful dish, it’s time to gather your ingredients and start cooking. Enjoy the process, and savor the delightful rewards of your efforts!

Coconut & Cardamom Rice Pudding

Prep Time 5 minutes
Cook Time 30 minutes
Total Time 35 minutes
Servings 4 servings
Calories 350
A fragrant and creamy rice pudding infused with coconut and cardamom, perfect for a comforting dessert or snack.

Ingredients

Main Ingredients

  • 0.5 cup Basmati Rice (rinsed thoroughly)
  • 2 cups Coconut Milk (full-fat)
  • 1 cup Whole Milk
  • 0.25 cup Sugar
  • 4-5 pods Green Cardamom Pods (lightly crushed)
  • a pinch Salt
  • 1 teaspoon Vanilla Extract (optional)
  • 2 tablespoons Chopped Pistachios or Almonds (optional garnish)

Instructions 

  • Combine rice, coconut milk, whole milk, sugar, cardamom pods, and salt in a heavy-bottom saucepan.
  • Bring to a gentle simmer over medium-low heat, stirring occasionally.
  • Simmer for 25-30 minutes until rice is tender and pudding thickens.
  • Remove from heat, stir in vanilla extract if using, and discard cardamom pods.
  • Let cool slightly, then serve warm or chilled, garnished with chopped nuts.

Notes

For extra flavor, toast the nuts before garnishing.
Calories: 350kcal
Cost: $15
Course: Dessert
Cuisine: fusion
Keyword: rice pudding

Delight in the Simplicity of Baked Cinnamon Apples

Welcome to a delicious journey where the comforting flavors of autumn come alive! This guide will walk you through making easy baked cinnamon and sugar apples that can serve as a delightful dessert or a sweet side dish. With just a handful of ingredients and minimal prep time, you’ll understand why this recipe is a must-try for anyone wanting to impress their family or guests. Let’s dive into how you can create this mouthwatering treat!

Why You’ll Love This Recipe

This recipe for baked cinnamon apples is not just about taste; it’s about bringing joy and ease to your kitchen. Here are five reasons to fall in love with it:

  • Quick Preparation: With only ten minutes of prep time, you can quickly get this dessert in the oven and relax while it bakes.
  • Minimal Ingredients: Using just a few staple ingredients means you can easily whip this up on a whim, making it perfect for unexpected guests.
  • Versatile Serving Options: Whether you enjoy it as a dessert or a side dish, these apples fit perfectly into any meal.
  • Warm and Comforting: The aroma of cinnamon and sugar wafting through your kitchen is an inviting experience that brings warmth and comfort.
  • Kid-Friendly: This recipe is a fun cooking activity for children, allowing them to help with preparation and enjoy the delicious results!

Ingredient Breakdown

To make your easy baked cinnamon and sugar apples, you will need the following ingredients:

  • 6-7 Apples: Choose firm varieties like Granny Smith, Honeycrisp, or Fuji for the best texture and flavor.
  • 1 1/2 teaspoons of Ground Cinnamon: Adds warmth and depth to the dish.
  • 1/2 cup of Brown Sugar: Provides sweetness with a hint of caramel flavor; can be substituted with coconut sugar for a healthier option.
  • 2 tablespoons of Butter (melted): Enhances the richness; can be replaced with coconut oil for a dairy-free version.
  • 1 teaspoon of Lemon Juice: Prevents the apples from browning and adds a bright flavor contrast.
  • 1 teaspoon of Vanilla Extract: Adds a lovely aromatic sweetness.
  • 1/4 teaspoon of Sea Salt: Balances the sweetness.
  • 1/2 teaspoon of Corn Starch: Helps thicken the mixture and gives the apples a lovely glaze.

How to Make Easy Baked Cinnamon & Sugar Apples

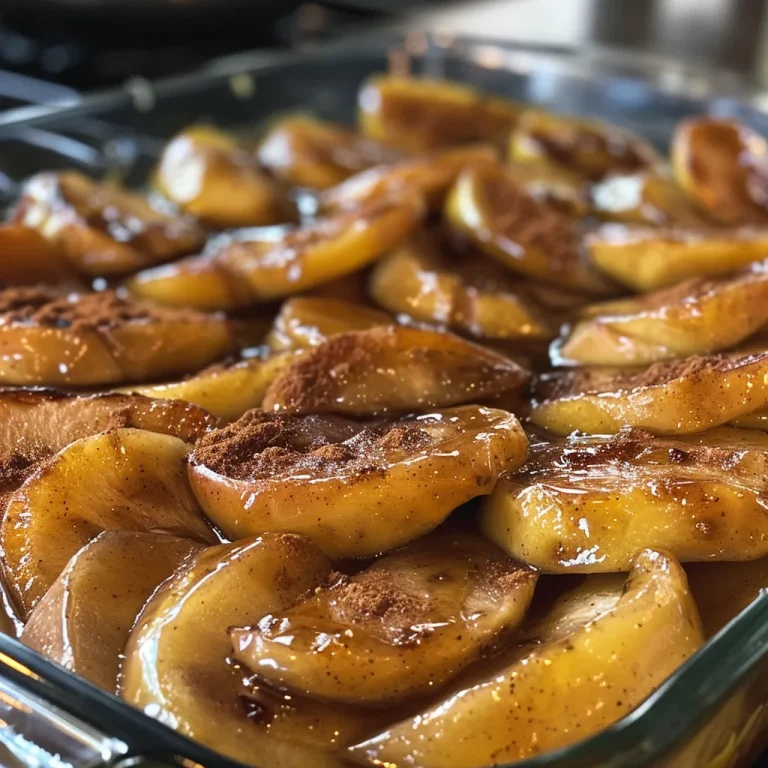
Vibrant, cooked apples topped with cinnamon and brown sugar.

Follow these simple steps to create your delightful baked apples:

  1. Preheat the Oven: Set your oven to 350 degrees Fahrenheit (175 degrees Celsius).
  2. Prepare the Apples: Wash, peel (optional), core, and slice the apples. Toss them in a bowl with lemon juice to prevent browning.
  3. Mix Dry Ingredients: In a large mixing bowl, combine brown sugar, cinnamon, cornstarch, and sea salt.
  4. Melt the Butter: In a small microwave-safe bowl, melt the butter and stir in the vanilla extract.
  5. Combine Ingredients: Pour the melted butter mixture over the apple slices, then sprinkle the cinnamon-sugar mixture evenly over them.
  6. Coat the Apples: Stir the apples gently to ensure they are evenly coated.
  7. Bake: Cover the baking dish with aluminum foil and bake for 35 minutes. Remove the foil and bake for an additional 10 minutes until tender.
  8. Check for Doneness: Insert a fork into the apple slices; they should feel tender when done.

Pro Tips for Perfect Baked Apples

Here are some expert insights to elevate your baking experience:

  • Choose the Right Apples: For the best flavor and texture, opt for a mix of tart and sweet apples.
  • Don’t Overbake: Keep an eye on your apples to avoid them turning mushy; they should be tender yet hold their shape.
  • Experiment with Spices: Try adding nutmeg or ginger for an extra flavor kick!
  • Consider Toppings: Serve with a scoop of vanilla ice cream or a dollop of whipped cream for a decadent treat.
  • Use a Baking Dish: A glass or ceramic dish will allow you to monitor the baking process more easily.
  • Double the Recipe: If you have a crowd, feel free to double the recipe; just ensure you have a larger baking dish!
  • Let Them Cool: Allow the apples to cool slightly before serving to enhance their flavor and texture.
  • Store Leftovers Wisely: Keep any leftovers in an airtight container to maintain their freshness.

Common Mistakes and Troubleshooting

To ensure your baked apples turn out perfectly, avoid these common pitfalls:

  • Skipping the Lemon Juice: This can lead to browning and affect flavor; always include it!
  • Not Slicing Evenly: Uneven slices can lead to inconsistent baking. Aim for uniform thickness.
  • Overloading on Sugar: Adjust the sugar to taste; too much can overpower the apples’ natural sweetness.

Variations to Try

Feel free to customize your baked apples with these delicious variations:

  • Nutty Delight: Add chopped walnuts or pecans for crunch and added nutrition.
  • Dried Fruit Addition: Incorporate raisins or cranberries for a chewy texture.
  • Maple Twist: Substitute brown sugar with maple syrup for a unique flavor.
  • Spiced Rum Infusion: Drizzle a tablespoon of spiced rum over the apples before baking for an adult twist.

Storage & Make-Ahead Instructions

Here’s how to store your baked apples and make them ahead of time:

  • Refrigeration: Store leftover baked apples in an airtight container in the fridge for up to five days.
  • Freezing: You can freeze baked apples for up to three months. Thaw in the fridge before reheating.
  • Make Ahead: Prepare the apples and sugar mixture the night before. Bake them fresh when ready to serve.

Comprehensive FAQ

Here are answers to some common questions about baked cinnamon apples:

  • Can I use different types of apples? Yes! Mixing different apple varieties can enhance the flavor and texture.
  • Is this recipe gluten-free? Absolutely! All the ingredients listed are naturally gluten-free.
  • Can I make this vegan? Yes! Substitute butter with coconut oil and omit the vanilla extract if desired.
  • How can I tell when the apples are done? They should be tender when pierced with a fork but not mushy.
  • What can I serve with baked apples? They pair beautifully with ice cream, yogurt, or as a topping for pancakes.
  • Are baked apples healthy? Yes! They are a nutritious dessert option when enjoyed in moderation.
  • Can I add oats? Certainly! A sprinkle of oats can add a nice texture and make it more filling.
  • How do I reheat leftovers? Reheat in the microwave or oven until warmed through.

Nutritional Tips and Dietary Adaptations

For a healthier twist on baked apples, consider these dietary adaptations:

  • Reduce Sugar: Use less sugar or a sugar substitute like stevia to lower calories.
  • Add Fiber: Incorporate chia seeds or flaxseeds into the mixture for added health benefits.
  • Boost Protein: Pair your baked apples with Greek yogurt for a protein-rich dessert.

Equipment Recommendations

Here are some essential tools to make your baking experience seamless:

  • Sharp Knife: For easy peeling and slicing of apples.
  • Mixing Bowls: A large bowl for mixing ingredients and a smaller one for melting butter.
  • Baking Dish: A glass or ceramic baking dish that conducts heat evenly.
  • Aluminum Foil: Essential for covering the dish during the initial baking phase.

Serving Suggestions

When it comes to serving your baked cinnamon apples, consider these delightful options:

  • Top with Ice Cream: Vanilla or caramel ice cream pairs beautifully with warm apples.
  • Drizzle with Caramel Sauce: A sweet caramel drizzle adds extra indulgence.
  • Garnish with Fresh Mint: A sprig of mint adds color and freshness to the plate.

In Conclusion

Creating these delightful baked apples is not only simple but also rewarding. With their sweet aroma and comforting flavors, they are sure to become a go-to recipe in your kitchen. Whether enjoyed warm as a dessert or chilled as a refreshing side dish, these apples will impress everyone at your table. Remember, with a little creativity and the right ingredients, your culinary adventures can lead to wonderful results. Happy baking!

Easy Baked Cinnamon and Sugar Apples Recipe

Prep Time 10 minutes
Cook Time 45 minutes
Total Time 55 minutes
Servings 4 servings
Calories 250
Enjoy tender, cinnamon-sugar coated baked apples with minimal effort. Perfect for a cozy dessert or snack.

Ingredients

Apples

  • 6-7 pieces Apples (Wash and peel (optional))
  • 1 1/2 teaspoons ground cinnamon
  • 1/2 cup brown sugar
  • 2 tablespoons butter (melted)
  • 1 teaspoon lemon juice
  • 1 teaspoon vanilla extract
  • 1/4 teaspoon sea salt
  • 1/2 teaspoon corn starch

Instructions 

  • Preheat oven to 350°F (175°C).
  • Core and slice the apples, then toss with lemon juice and place in a baking dish.
  • Mix cinnamon, brown sugar, cornstarch, and salt; melt butter and vanilla, then combine.
  • Pour the butter-vanilla mixture over apples, sprinkle with cinnamon-sugar, then cover and bake for 35 minutes. Remove foil and bake 10 more minutes.

Notes

Adjust baking time for softer or firmer apples as desired.
Calories: 250kcal
Cost: $10
Course: Dessert
Cuisine: American
Keyword: apples

Welcome to a delightful journey through the world of baked apples! This baked apples recipe is not just a dessert; it’s an experience that combines simplicity with mouthwatering flavor. Here, you will discover how to transform everyday apples into a scrumptious treat with minimal effort. By using ingredients like brown sugar, cinnamon, and a hint of lemon juice, you can create a dessert that impresses every time.

Why You’ll Love This Recipe

There are countless reasons why this baked apples recipe should be your go-to dessert option. Here are a few highlights:

  • Quick and Easy: This recipe requires just a handful of simple ingredients and minimal prep time, making it perfect for busy weeknights.
  • Versatile Ingredients: You can easily adjust the recipe based on what you have at home. Whether you use coconut oil instead of butter or add nuts for a crunch, the possibilities are endless.
  • Healthy Comfort Food: Packed with nutrients, baked apples provide a healthy dose of fiber and vitamins, making them a guilt-free indulgence.
  • Family-Friendly: Kids and adults alike will love the sweet and aromatic flavors of this dish, making it a hit at any family gathering.
  • Impressive Presentation: Serve them warm, drizzled with caramel or topped with ice cream, and watch them disappear!

Ingredients Breakdown

Let’s dive into the ingredients that make this baked apples recipe a standout. Feel free to customize based on your preferences:

  • 6 to 7 apples: Choose firm varieties like Granny Smith or Honeycrisp for the best results. You can even mix different types for a unique flavor profile.
  • 1 ½ teaspoons ground cinnamon: This is essential for that warm, comforting flavor.
  • ½ cup brown sugar: Provides sweetness and caramelization. You can substitute with coconut sugar for a healthier option.
  • 2 tablespoons melted butter: Use coconut oil or a dairy-free alternative if you’re looking for a vegan option.
  • 1 teaspoon lemon juice: This adds brightness and prevents the apples from browning.
  • 1 teaspoon vanilla extract: Enhances the overall flavor.
  • ¼ teaspoon sea salt: Balances the sweetness.
  • ½ teaspoon corn starch: Helps thicken the juices for a perfect consistency.

How to Make Baked Apples

Follow these simple steps, and you’ll be enjoying your baked apples in no time:

  1. Preheat the oven to 350°F (175°C).
  2. Wash and peel the apples if desired. Then core and slice them into evenly sized pieces.
  3. Toss the sliced apples with lemon juice in a large bowl to coat and prevent browning.
  4. In a separate bowl, mix brown sugar, cinnamon, corn starch, and sea salt.
  5. Melt the butter in a small microwave-safe bowl and stir in vanilla extract.
  6. Pour the butter mixture over the apples and toss to coat.
  7. Sprinkle the dry mix over the apples and stir until evenly coated.
  8. Transfer the apples to a baking dish and cover with foil.
  9. Bake for 35 minutes, then remove the foil and bake for an additional 10 minutes until tender.
  10. Check for doneness by inserting a fork; the apples should be soft but not mushy.

Pro Tips for Perfect Baked Apples

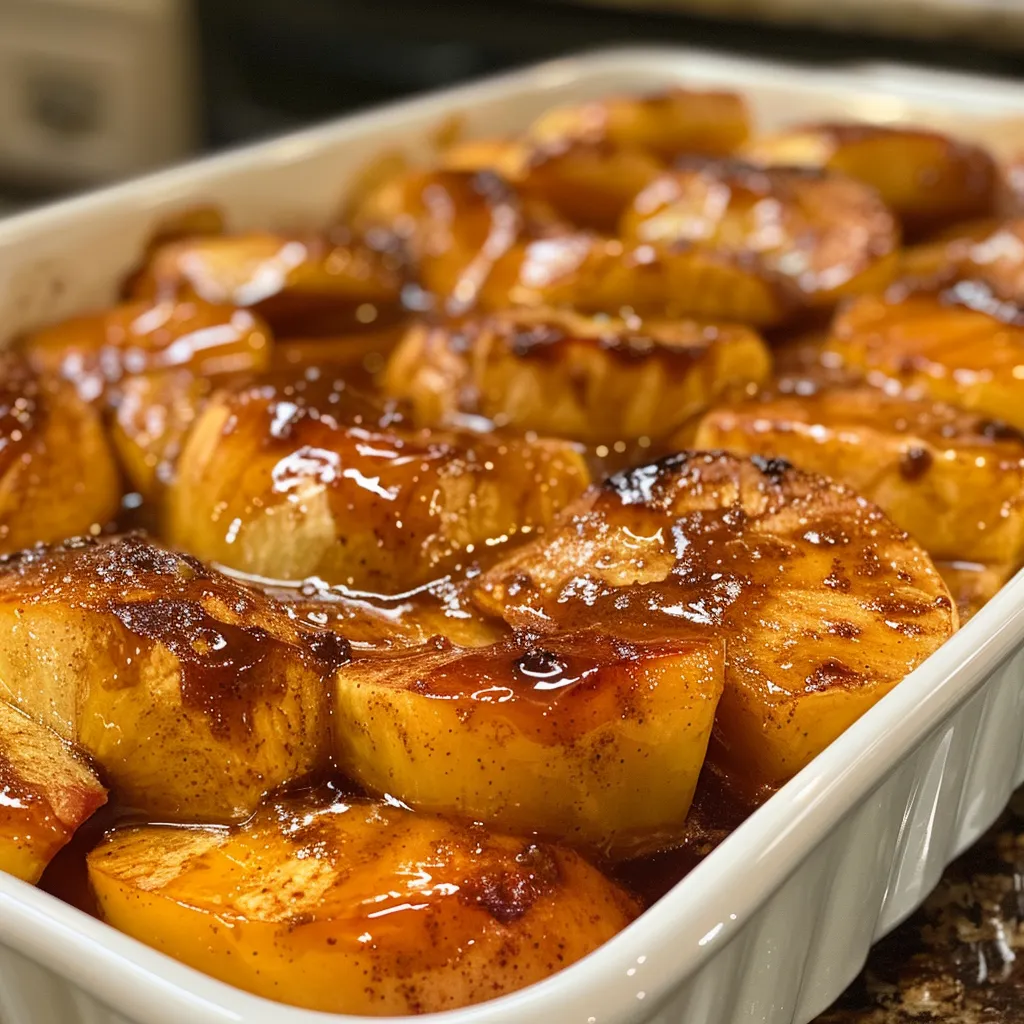
Ready-to-serve baked apples with a glossy finish, showcasing the delicious filling.

To ensure your baked apples turn out perfectly every time, keep these expert tips in mind:

  • Choose the right apples: Firm apples hold up better during baking. Avoid soft varieties that may turn mushy.
  • Experiment with spices: Add a pinch of nutmeg or allspice for an extra flavor kick.
  • Don’t skip the lemon juice: It adds essential acidity that complements the sweetness of the apples.
  • Adjust sugar to your taste: If you prefer less sweetness, reduce the amount of brown sugar.
  • Use a baking dish with high sides: This helps contain the juices that caramelize as the apples bake.
  • Consider layering: For an interesting texture, alternate layers of apples and the sugar mixture.
  • Serve warm: Baked apples are best enjoyed fresh out of the oven, topped with ice cream or whipped cream.
  • Store leftovers properly: Keep in an airtight container in the refrigerator for up to 3 days.

Common Mistakes and Troubleshooting

Here are some common pitfalls and how to avoid them:

  • Overbaking: Keep an eye on the apples, as baking times may vary based on the size and variety of apples used.
  • Not enough flavor: Make sure you adequately coat the apples with the sugar and spice mixture.
  • Dry apples: If you find your apples drying out, try adding a splash of apple juice to the baking dish.
  • Not using enough butter: Ensure the apples are adequately coated to enhance flavor and moisture.

Variations of Baked Apples

Feel free to get creative! Here are some variations to try:

  • Nutty Delight: Add chopped nuts like pecans or walnuts to the filling for a crunchy texture.
  • Caramel Drizzle: Drizzle caramel sauce over the apples before serving for an extra indulgent treat.
  • Granola Topper: Sprinkle granola on top before baking to create a crunchy topping.
  • Dried Fruits: Mix in raisins or dried cranberries for added sweetness and chewiness.

Storage and Make-Ahead Instructions

Need to plan ahead? Here’s how to store your baked apples:

  • Refrigerator: Store in an airtight container for up to 3 days.
  • Freezing: Baked apples can be frozen for up to 2 months. Thaw in the refrigerator overnight before reheating.
  • Make-Ahead: You can prepare the apple mixture and store it in the fridge before baking. Just add a few extra minutes to the baking time.

Frequently Asked Questions

Here are some common questions about baked apples:

  • Can I use different types of apples? Yes, feel free to mix varieties for a unique flavor experience.
  • What can I serve with baked apples? They’re delicious on their own, but you can also serve them with vanilla ice cream or yogurt.
  • Are baked apples healthy? Yes! They are a good source of fiber and vitamins when made with minimal added sugar.
  • Can I make this recipe vegan? Absolutely! Substitute butter with coconut oil for a dairy-free option.
  • How long do baked apples last? They can be stored in the fridge for up to 3 days.
  • Can I add other fruits? Yes, adding pears or berries can provide a nice flavor twist.
  • What’s the best way to reheat baked apples? Reheat them in the oven at 350°F until warmed through, about 10 minutes.
  • Do I need to peel the apples? Peeling is optional; leaving the skin on adds texture and fiber.

Nutritional Tips and Dietary Adaptations

This baked apples recipe is easy to adapt to fit various dietary needs:

  • Gluten-Free: This recipe is naturally gluten-free, making it a great option for those with gluten sensitivity.
  • Low-Sugar: Reduce the brown sugar or replace it with a sugar substitute to lower the sweetness.
  • Dairy-Free: Use coconut oil instead of butter for a completely dairy-free version.

Equipment Recommendations

To make the process smooth and enjoyable, consider these essential kitchen tools:

  • Sharp Knife: For slicing and coring apples efficiently.
  • Mixing Bowls: At least two—one for the apple mixture and one for the dry ingredients.
  • Baking Dish: Choose a sturdy baking dish that can hold the juices from the apples.
  • Measuring Cups and Spoons: Ensure accurate measurements for the best results.

Serving Suggestions

Bring this delightful dish to the table with these serving ideas:

  • Warm with Ice Cream: Serve hot baked apples with a scoop of vanilla ice cream for that classic dessert experience.
  • Garnish with Nuts: Sprinkle chopped pecans or walnuts on top for added crunch and flavor.
  • Drizzle with Honey: A light drizzle of honey or caramel sauce can elevate the dish to new heights.
  • Pair with Whipped Cream: A dollop of whipped cream is a perfect finishing touch.

In conclusion, this baked apples recipe is not just about creating a delicious dessert; it’s about enjoying the process and sharing it with loved ones. With simple ingredients and clear steps, you can master this recipe and make it your own. Happy baking!

Baked Apples Recipe

Prep Time 10 minutes
Cook Time 45 minutes
Total Time 55 minutes
Servings 4 servings
Calories 250
Enjoy warm, tender baked apples infused with cinnamon and vanilla for a comforting dessert.

Ingredients

Fruits

  • 6 to 7 pieces apples (preferably tart varieties)
  • 1 ½ teaspoons ground cinnamon
  • ½ cup brown sugar
  • 2 tablespoons melted butter
  • 1 teaspoon lemon juice
  • 1 teaspoon vanilla extract
  • ¼ teaspoon sea salt
  • ½ teaspoon corn starch

Instructions 

  • Preheat oven to 350°F (175°C). Core and slice apples.
  • Toss apples with lemon juice. Mix brown sugar, cinnamon, cornstarch, and salt.
  • Melt butter, stir in vanilla, and pour over apples. Sprinkle dry mix and stir to coat.
  • Cover with foil and bake for 35 minutes. Remove foil and bake 10 more minutes.
  • Test with a fork; apples should be tender. Serve warm.

Notes

For extra flavor, add a sprinkle of nutmeg or serve with vanilla ice cream.
Calories: 250kcal
Cost: $10
Course: Dessert
Cuisine: American
Keyword: apples

Welcome to a world of flavor where healthy meets delicious! This Coconut Mango Chia Pudding is not just a treat; it’s a vibrant experience that brings together the creamy essence of coconut milk and the sweet, tropical notes of ripe mangoes. In this guide, I’ll walk you through every aspect of making this delightful pudding, ensuring that even the busiest home cooks can whip it up with ease.

Why You’ll Love This Recipe

  • Quick and Easy: With just a few simple ingredients and minimal prep time, you can create a stunning dessert or snack that satisfies your sweet tooth.
  • Nutritious Ingredients: Packed with chia seeds, which are rich in omega-3 fatty acids, fiber, and protein, this pudding is as healthy as it is delicious.
  • Customizable: Feel free to tweak the recipe with different fruits, sweeteners, or toppings to fit your personal taste.
  • Vegan and Paleo-Friendly: Made with plant-based ingredients, this pudding is suitable for various dietary preferences.
  • Perfect for Meal Prep: Make it ahead of time and store it in the fridge for a quick grab-and-go treat.

Essential Ingredients

Let’s dive into the ingredients that make this mango chia pudding a tropical sensation:

  • 1/2 cup chia seeds: These tiny powerhouses absorb liquid and create that signature pudding texture.
  • 2 cups full-fat coconut milk: For an ultra-creamy consistency that feels indulgent; you can substitute with light coconut milk for a lower-fat option.
  • 2 ripe mangoes, diced: Fresh mangoes add natural sweetness and a burst of tropical flavor; frozen mango works too if fresh isn’t available.
  • 2 tbsp honey or maple syrup: Sweeten to taste; substitute with agave syrup for a vegan option.
  • 1 tsp vanilla extract: Enhances the overall flavor profile, making every spoonful a delight.

How to Make Coconut Mango Chia Pudding

Follow these straightforward steps to create your pudding:

  • In a medium bowl, whisk together the chia seeds, coconut milk, honey or maple syrup, and vanilla extract until smooth.
  • Cover and refrigerate for at least 4 hours or overnight until the mixture thickens into pudding.
  • While chilling, peel and dice the mangoes into small cubes.
  • In serving bowls or glasses, layer the chia pudding and diced mango for an appealing presentation.
  • Garnish with additional mango slices or shredded coconut before serving.

Pro Tips for Perfect Pudding

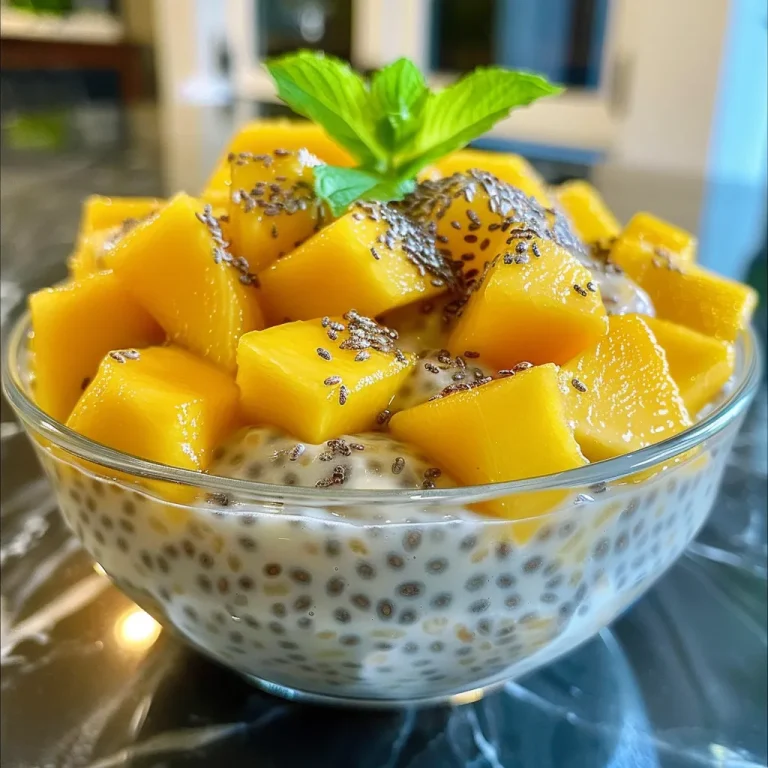
Detailed shot of a layered Coconut Mango Chia Pudding with a smooth coconut texture.
  • Consistent Ratios: For best results, maintain a chia-to-liquid ratio of 1:4.
  • Whisk Well: Ensure the chia seeds are evenly distributed to prevent clumping.
  • Adjust Sweetness: Taste the pudding after it has set and adjust sweetness if necessary.
  • Use Quality Ingredients: Opt for high-quality coconut milk and fresh mangoes for the best flavor.
  • Experiment with Textures: For added crunch, consider topping with granola or nuts.
  • Chill Time: Allowing the pudding to sit overnight yields the best texture.
  • Presentation Matters: Layering the pudding with mango creates a beautiful visual appeal.
  • Portion Control: Use small jars for individual servings, perfect for meal prep.

Common Mistakes and Troubleshooting

Here are a few pitfalls to avoid:

  • Too Much Liquid: Adding excess liquid can make the pudding runny. Stick to the recommended ratios.
  • Not Whisking Enough: Insufficient whisking can lead to clumps of chia seeds. Mix thoroughly!
  • Using Overripe Mango: Ensure your mangoes are ripe but not overly soft to maintain a good texture.
  • Skipping Chilling Time: Don’t rush the chilling process—it’s essential for achieving the right pudding consistency.

Delicious Variations

Feel free to explore these creative twists on the classic recipe:

  • Berry Bliss: Swap mango for mixed berries like strawberries and blueberries for a berry-infused version.
  • Chocolate Delight: Add cocoa powder to the base for a rich chocolate flavor.
  • Matcha Magic: Incorporate matcha powder for a green twist full of antioxidants.
  • Nutty Coconut: Add shredded coconut for extra texture and flavor, or mix in nut butter for richness.

Storage and Make-Ahead Instructions

This pudding is perfect for meal prep:

  • Storage: Keep the pudding in airtight containers in the fridge for up to 5 days.
  • Make-Ahead: Prepare the pudding up to three days in advance for quick breakfasts or snacks.
  • Separation is Normal: If the pudding separates, simply stir gently before serving.

Comprehensive FAQ

Here are answers to some common questions:

  • Can I use frozen mango instead of fresh? Yes, just thaw the mango before using it in the recipe.
  • How long does Coconut Mango Chia Pudding last? It can last up to 5 days in the fridge when stored properly.
  • Is this recipe vegan? Yes, by using maple syrup as a sweetener, this pudding is entirely plant-based.
  • Can I substitute chia seeds? Flax seeds can be used, but the texture will differ. Chia seeds are essential for the pudding consistency.
  • What can I use instead of coconut milk? Almond milk or oat milk are good alternatives, but they will yield a different flavor.
  • Can I add protein powder? Absolutely! Mix in protein powder for an added nutritional boost.
  • How do I make it less sweet? Reduce the amount of sweetener or omit it entirely for a more natural taste.
  • Can I serve it warm? This pudding is best served chilled, but you can warm the coconut milk before mixing if you prefer.

Nutrition Tips and Dietary Adaptations

This pudding is not only delicious but also nutritious. Here are some dietary insights:

  • High in Fiber: Chia seeds are an excellent source of dietary fiber, promoting digestion and fullness.
  • Low in Sugar: By adjusting the sweetener, you can create a low-sugar dessert that fits your dietary needs.
  • Gluten-Free: Naturally gluten-free, this pudding caters to those with gluten sensitivities.
  • Rich in Healthy Fats: The coconut milk and chia seeds provide healthy fats that support overall health.

Equipment Recommendations

To create this pudding, here’s what you’ll need:

  • Mixing Bowls: A medium bowl for mixing the ingredients.
  • Whisk: To ensure even mixing of ingredients and avoid clumps.
  • Airtight Containers: For storing your pudding in the fridge.
  • Measuring Cups and Spoons: For accurate ingredient measurements.

Serving Suggestions

Present your Coconut Mango Chia Pudding in style:

  • Layering: Use clear glasses to showcase the beautiful layers of pudding and mango.
  • Toppings: Enhance with fresh fruit, shredded coconut, or a sprinkle of nuts for added texture.
  • Breakfast Bowl: Serve it as a breakfast bowl topped with granola and additional fruit.

In conclusion, this Coconut Mango Chia Pudding is a versatile and delicious option that caters to various dietary preferences and occasions. Whether it’s a quick breakfast, a satisfying snack, or a stunning dessert, you can count on this recipe to impress. So gather your ingredients and dive into this tropical delight—you won’t regret it!

Coconut Mango Chia Pudding

Prep Time 10 minutes
Total Time 10 minutes
Servings 4 servings
Calories 250
A delicious and healthy vegan dessert featuring creamy coconut milk, sweet mango, and nutritious chia seeds.

Ingredients

Base

  • 1/2 cup chia seeds
  • 2 cups full-fat coconut milk
  • 2 tbsp honey or maple syrup
  • 1 tsp vanilla extract

Toppings

  • 2 ripe mangoes mangoes, diced

Instructions 

  • Mix chia seeds, coconut milk, honey or maple syrup, and vanilla extract until smooth.
  • Refrigerate for at least 4 hours or overnight until thickened.
  • Peel and dice mangoes.
  • Layer chia pudding and mango in serving bowls.
  • Garnish with additional mango slices or shredded coconut before serving.

Notes

For extra flavor, add a sprinkle of shredded coconut or a few mint leaves.
Calories: 250kcal
Cost: $10
Course: Dessert
Cuisine: Tropical
Keyword: chia, coconut, Mango

When it comes to simple yet satisfying desserts, baked cinnamon apples are a time-honored favorite that never disappoints. This recipe is designed for home cooks looking for a quick, delicious treat that can be made with minimal fuss. Whether you’re hosting a gathering or enjoying a quiet night in, these baked apples deliver warmth and comfort with every bite.

With just a handful of ingredients and straightforward instructions, you’ll discover how easy it is to create a dessert that not only tastes incredible but also fills your kitchen with the irresistible aroma of cinnamon and sugar. Let’s dive into what makes this recipe a must-try!

Why You’ll Love This Recipe

  • Quick and Easy: With just a few simple steps, you can have a delightful dessert ready in under an hour.
  • Versatile Serving Options: Serve it warm as is, over a scoop of ice cream, or with oatmeal for a cozy breakfast.
  • Minimal Ingredients: This recipe requires just six core ingredients, making it perfect for last-minute preparations.
  • Customizable Flavors: Adjust the spices or add toppings like nuts or caramel to suit your taste.
  • Healthy Twist: Using fresh apples and natural sweeteners, this dessert can fit into various dietary plans.

Ingredient Breakdown

Before you start cooking, let’s take a closer look at the ingredients you’ll need for this delicious dish, along with some helpful substitutions.

  • Apples (Honeycrisp or Granny Smith): 6 medium, peeled and sliced. These apples are firm and tart, providing the perfect balance of sweetness and acidity.
  • Brown Sugar: 1/3 cup. Adds a rich, caramel-like flavor. For a healthier option, consider using coconut sugar or a natural sweetener like maple syrup.
  • Granulated Sugar: 2 tablespoons. This can be omitted or replaced with a sugar alternative to reduce calories.
  • Ground Cinnamon: 2 teaspoons. This spice is essential for that classic cinnamon flavor.
  • Nutmeg: 1/4 teaspoon. Adds warmth and depth; feel free to skip it if you prefer.
  • Butter: 4 tablespoons, cut into small cubes. For a dairy-free version, use coconut oil or vegan butter.
  • Vanilla Extract: 1 teaspoon. Enhances the overall flavor profile and adds a touch of sweetness.
  • Salt: 1/8 teaspoon. Balances the sweetness and enhances flavor.

Instructions for Making Baked Cinnamon Apples

Now that you have your ingredients ready, follow these simple steps to prepare your baked apples:

  1. Preheat your oven to 375°F (190°C) and lightly grease a baking dish.
  2. In a large bowl, toss the sliced apples with brown sugar, granulated sugar, cinnamon, nutmeg, vanilla, and salt until evenly coated.
  3. Transfer the apples to the greased baking dish and dot the top with cubes of butter.
  4. Spread the apples into an even layer, ensuring they are snug but not overcrowded.
  5. Bake uncovered for 35–40 minutes, stirring once halfway through, until the apples are tender and the sauce is bubbling.
  6. Let cool slightly to allow the sauce to thicken.
  7. Serve warm as is, or over a scoop of ice cream, pancakes, or oatmeal.

Pro Tips for Perfect Results

A collection of perfectly baked cinnamon-spiced apple slices served in a bowl.
  • Choose the Right Apples: Firm, tart-sweet varieties like Honeycrisp or Granny Smith hold their shape best when baked.
  • Slice Evenly: Make sure to slice the apples into uniform pieces to ensure even cooking and texture.
  • Layer Flavors: Consider adding a splash of apple cider or a sprinkle of nuts to enhance flavor and texture.
  • Watch the Baking Time: Keep an eye on the apples as they bake; overcooking can lead to mushy results.
  • Cooling Time: Allowing the baked apples to cool slightly thickens the sauce, making for a better presentation.
  • Experiment with Spices: Feel free to add a pinch of cardamom or allspice for a unique twist.
  • Make Ahead: Prepare the apple mixture a few hours in advance and bake just before serving.
  • Garnishing: Top with whipped cream or a sprinkle of cinnamon sugar for added flair.

Common Mistakes and Troubleshooting

Even the best of us can encounter hiccups in the kitchen. Here are some common mistakes to avoid and tips for troubleshooting:

  • Overbaking: If the apples are mushy, check your oven temperature or reduce the baking time next time.
  • Insufficient Sweetness: If the apples aren’t sweet enough, consider adding more brown sugar or a drizzle of honey before baking.
  • Soggy Texture: Ensure apples are not overcrowded in the baking dish to allow for proper caramelization.
  • Flavor Variability: Adjust spices to your preference; if cinnamon isn’t strong enough, add more next time!

Variations

While the classic version of baked cinnamon apples is delightful on its own, here are some creative variations to try:

  • Caramel Baked Apples: Drizzle caramel sauce over the apples before baking for a rich, indulgent treat.
  • Nutty Crunch: Add chopped nuts (like pecans or walnuts) to the apple mixture for added texture and flavor.
  • Apple Crisp Variation: Top with a mixture of oats, flour, butter, and brown sugar to create a crispy topping.
  • Spiced Rum Apples: Add a tablespoon of spiced rum to the apple mixture for a fun adult twist.

Storage and Make-Ahead Instructions

These baked cinnamon apples can be stored and enjoyed later:

  • Storage: Keep leftover baked apples in an airtight container in the refrigerator for up to 3 days.
  • Reheating: Warm in the microwave or in a skillet over low heat until heated through.
  • Make-Ahead: Prepare the apple mixture and store it in the fridge for up to 4 hours before baking.

Frequently Asked Questions (FAQs)

  • Can I use frozen apples? Using frozen apples is not recommended as they can become too mushy when baked.
  • What can I serve with baked cinnamon apples? They pair wonderfully with vanilla ice cream, yogurt, pancakes, or oatmeal.
  • How do I know when the apples are done? The apples should be tender when pierced with a fork and the sauce should be bubbling.
  • Can I make this recipe vegan? Absolutely! Substitute butter with coconut oil and use a plant-based sweetener.
  • What types of apples are best for baking? Firm apples like Honeycrisp, Granny Smith, or Fuji work best for this recipe.
  • Can I add other fruits? Yes, you can mix in pears or berries for a fruit medley.
  • Can I use less sugar? Yes, you can adjust the sugar to your taste or use a sugar alternative.
  • How can I enhance the flavor? Adding a splash of lemon juice or a bit of ginger can brighten the overall flavor.

Nutritional Tips and Dietary Adaptations

These baked cinnamon apples can fit into many dietary preferences. Here are some tips:

  • Gluten-Free: This recipe is naturally gluten-free, making it suitable for gluten-sensitive individuals.
  • Dairy-Free: Substitute butter with a non-dairy alternative to make it dairy-free.
  • Lower-Calorie Version: Reduce sugar and consider using stevia or monk fruit sweetener.

Equipment Recommendations

To make the baking process smoother, consider using the following:

  • Baking Dish: A 9×13 inch or similar-sized dish works best for this recipe.
  • Mixing Bowl: A large mixing bowl for tossing the apples and ingredients.
  • Measuring Cups and Spoons: Essential for accurate measurements of ingredients.

Serving Suggestions

After you’ve perfected your baked cinnamon apples, here are some tempting ways to serve them:

  • Over Ice Cream: A warm scoop of baked apples over vanilla ice cream is an indulgent treat.
  • With Yogurt: Serve with a dollop of Greek yogurt for a healthier option.
  • As Breakfast: Add to oatmeal for a delicious twist on your morning routine.
  • Garnished: Top with whipped cream, a sprinkle of cinnamon, or chopped nuts for added flavor and texture.

In conclusion, this recipe for baked cinnamon apples is a delightful way to enjoy a comforting dessert that’s easy to make and full of flavor. Whether you’re preparing it for yourself or sharing it with loved ones, the warm, spiced goodness is sure to please. Don’t hesitate to experiment with variations and find your perfect combination. Happy baking!

Baked Cinnamon Apples

Prep Time 10 minutes
Cook Time 40 minutes
Total Time 50 minutes
Servings 4 servings
Calories 180
Enjoy warm, tender apples infused with cinnamon and nutmeg, perfect for a cozy dessert or snack.

Ingredients

Fruits

  • 6 medium Apples (Honeycrisp or Granny Smith) (peeled and sliced)
  • 1/3 cup Brown Sugar
  • 2 tablespoons Granulated Sugar
  • 2 teaspoons Ground Cinnamon
  • 1/4 teaspoon Nutmeg
  • 4 tablespoons Butter (cut into small cubes)
  • 1 teaspoon Vanilla Extract
  • 1/8 teaspoon Salt

Instructions 

  • Preheat oven to 375°F (190°C) and grease a baking dish.
  • Toss apple slices with sugars, cinnamon, nutmeg, vanilla, and salt until coated.
  • Transfer apples to dish, dot with butter cubes.
  • Bake for 35–40 minutes, stirring halfway, until tender and bubbling.
  • Let cool slightly, then serve warm.

Notes

This simple baked apple recipe is perfect for a comforting dessert or snack.
Calories: 180kcal
Cost: $10
Course: Dessert
Cuisine: American
Keyword: apples

Effortless Vegan Mini Lemon Tarts: Your Guide to a Zesty Delight

Welcome to your ultimate guide for making vegan mini lemon tarts that are both simple and bursting with flavor! These delicious little tarts are perfect for any occasion, from casual gatherings to more formal events. Using easy-to-find ingredients, this recipe ensures that you can whip up a delightful dessert without spending hours in the kitchen. Let’s dive into the delightful world of lemon tarts!

Why You’ll Love This Recipe

  • Quick and Easy: This recipe takes under an hour to prepare and bake, making it a great choice for a last-minute dessert.
  • Delightfully Zesty: The use of fresh lemon juice and zest provides a refreshing and tangy flavor that perfectly balances sweetness.
  • Vegan-Friendly: Made without dairy or eggs, these tarts cater to various dietary preferences without compromising on taste.
  • Customizable: Feel free to experiment with different toppings and fillings, allowing you to make each batch unique!
  • Make-Ahead Option: These tarts store well and can be prepared in advance, making them a stress-free option for any event.

Ingredients for Vegan Mini Lemon Tarts

Gather your ingredients to create these delicious mini lemon tarts:

  • 250g of plain flour: Provides the base for your tarts. You can substitute gluten-free flour to make this recipe suitable for gluten-free diets.
  • Zest of 1 medium lemon: Enhances the lemon flavor and adds aromatic zest to the crust.
  • 50g of caster sugar: Sweetens the crust just right, balancing the tartness of the filling.
  • 200g of dairy-free block butter: Ensure it’s softened for easy mixing.
  • 160g of lemon juice: Freshly squeezed lemon juice will give the best flavor.
  • 250g of coconut milk: Use the cream only for a rich filling.
  • 250g of caster sugar: For the filling, providing the perfect sweetness.
  • 6 tablespoons of cornflour/cornstarch: Helps to thicken the lemon filling.
  • Pinch of turmeric: Optional, for a lovely yellow color in the filling.
  • 220ml of dairy-free whipping cream: For a luscious topping or filling.

How to Make Vegan Mini Lemon Tarts

Close-up of a Vegan Mini Lemon Tart, featuring a rich lemon filling and a dusting of zest.

Here’s your step-by-step guide to creating these delightful tarts:

  • Prepare the tart shells: In a mixing bowl, combine the flour, lemon zest, and caster sugar. Add the softened butter and mix until crumbly. Press this mixture into mini tart pans and chill for 30 minutes.
  • Bake the shells: Preheat your oven to 180°C (350°F). Bake the chilled tart shells for 15-20 minutes until lightly golden. Allow them to cool completely.
  • Make the lemon filling: In a saucepan, combine lemon juice, coconut cream, sugar, cornflour, and turmeric. Whisk until smooth and cook over medium heat until thickened, stirring constantly.
  • Fill the tart shells: Pour the lemon filling into the cooled tart shells and let them set in the fridge for at least 2 hours.
  • Whip the cream: Whip the dairy-free cream until soft peaks form. Top the chilled tarts with whipped cream before serving.

Expert Tips for Perfect Mini Lemon Tarts

  • Use fresh ingredients: Fresh lemons for juice and zest will make a significant difference in flavor.
  • Be patient while cooling: Allow the tart shells to cool completely before adding the filling to prevent sogginess.
  • Adjust sweetness: Taste the filling before pouring it into the tart shells and adjust the sugar as needed.
  • Chill before serving: These tarts are best served cold, allowing the flavors to meld beautifully.
  • Experiment with flavors: Try adding other citrus juices or extracts for a unique twist on the classic lemon flavor.
  • Don’t skip the cream: The whipped cream adds a delightful texture and flavor contrast to the tartness of the lemon.
  • Use a fine strainer: Strain the lemon filling to remove any pulp for a silky-smooth texture.
  • Check for doneness: The filling should be thick enough to coat the back of a spoon when ready.

Common Mistakes and Troubleshooting

Here are some common pitfalls to avoid:

  • Overbaking the shells: Keep an eye on the tart shells to avoid burning. They should be just golden.
  • Not cooling the shells: Filling warm shells can lead to a soggy bottom. Always cool them completely.
  • Under-thickened filling: If the filling doesn’t set, it may need more cornflour. Ensure you whisk continuously while heating.
  • Skipping the chilling step: Chilling the tarts is essential for the texture. Don’t rush this process.

Variations on Vegan Mini Lemon Tarts

Feel free to mix things up with these variations:

  • Berry Topped: Add fresh berries on top of the whipped cream for extra flavor and color.
  • Chocolate Drizzle: Drizzle melted vegan chocolate over the top for a decadent touch.
  • Coconut Cream Filling: Instead of lemon, use coconut milk with a hint of vanilla for a tropical twist.
  • Lemon Meringue: Top the tarts with a vegan meringue made from aquafaba for a classic lemon meringue tart experience.

Storage and Make-Ahead Instructions

Proper storage will keep your tarts fresh:

  • Refrigeration: Store the tarts in an airtight container in the fridge for up to 5 days.
  • Freezing: Freeze the tart shells separately for up to a month. Fill them with lemon filling just before serving.

Frequently Asked Questions (FAQs)

  • Can I make these tarts gluten-free? Yes! Simply substitute the plain flour with gluten-free flour.
  • What can I use instead of coconut milk? Almond milk or any other dairy-free milk can work, but the texture may vary.
  • How do I know when the filling is done? The filling should be thick enough to coat the back of a spoon and hold its shape.
  • Can I use bottled lemon juice? While fresh is best, bottled lemon juice can be used in a pinch.
  • How long will the tarts last? They can be stored in the fridge for up to 5 days.
  • Can I use a different sweetener? Yes, maple syrup or agave nectar can be used, but adjust the quantities accordingly.
  • Is it necessary to chill the filling? Yes, chilling helps the filling set properly.
  • What can I serve with these tarts? They pair wonderfully with fresh fruit, a dollop of whipped cream, or a scoop of vegan ice cream.

Nutritional Tips and Dietary Adaptations

To keep the tarts balanced, consider these tips:

  • Reduce sugar: You can cut down on the sugar in the filling and crust for a healthier option.
  • Boost fiber: Add ground flaxseed to the crust for additional fiber and nutrients.
  • Healthy fats: Use avocado instead of butter for the crust for a heart-healthy alternative.

Recommended Equipment

For best results, utilize the following kitchen tools:

  • Mini tart pans: Essential for shaping your tarts.
  • Mixing bowls: For combining the ingredients efficiently.
  • Whisk: A good whisk will help incorporate ingredients smoothly.
  • Spatula: Useful for scraping down the sides of bowls and spreading filling evenly.

Serving Suggestions

Enhance your serving experience with these ideas:

  • Fresh Herbs: Garnish with mint or basil for a fresh twist.
  • Citrus Zest: A sprinkle of additional lemon zest on top adds a burst of flavor.
  • Serve Chilled: Offer the tarts straight from the fridge for a refreshing treat.

Conclusion

These vegan mini lemon tarts are not just a dessert; they’re a delightful experience that combines simplicity, flavor, and a touch of elegance. Whether you’re making them for a special occasion or just because you deserve a sweet treat, this recipe is sure to impress. Happy baking!

Vegan Mini Lemon Tarts

Prep Time 20 minutes
Cook Time 15 minutes
Total Time 35 minutes
Servings 8 pieces
Calories 250
Delight in these zesty and creamy vegan lemon tarts, perfect for a refreshing dessert or snack.

Ingredients

Dough

  • 250 g plain flour (gluten-free optional)
  • 1 medium lemon zest
  • 50 g caster sugar
  • 200 g dairy-free block butter (softened)

Filling

  • 160 g lemon juice
  • 250 g coconut milk (cream only)
  • 250 g caster sugar
  • 6 tablespoons cornflour / cornstarch
  • Pinch turmeric (or yellow food gel)

Topping

  • 220 ml dairy-free whipping cream

Instructions 

  • Preheat oven to 350°F (180°C). Prepare tart shells with the flour, butter, and a pinch of salt, then bake for 15 minutes.
  • Mix lemon zest, caster sugar, lemon juice, coconut milk, cornstarch, and turmeric in a saucepan over medium heat until thickened.
  • Pour the lemon filling into the baked tart shells and chill for at least 2 hours.
  • Whip the dairy-free cream until soft peaks form and spread over the chilled tarts.
  • Serve chilled and enjoy your vegan mini lemon tarts!

Notes

Use fresh lemon juice for the best flavor. Chill the tarts thoroughly before serving.
Calories: 250kcal
Cost: $12
Course: Dessert
Cuisine: vegan
Keyword: lemon

Welcome to your guide for creating stunning Mini Lemon Meringue Tarts! This delightful dessert marries the tartness of fresh lemons with the lightness of fluffy meringue, resulting in a treat that not only pleases the palate but also impresses at any gathering. Whether you’re a seasoned baker or a beginner, this recipe is designed to be straightforward and rewarding. Let’s dive into the delicious details of these mini lemon meringue tarts.

Why You’ll Love This Recipe

Mini Lemon Meringue Tarts are a crowd-pleaser for several reasons:

  • Easy to Make: With simple steps and readily available ingredients, even novice bakers can master this recipe.
  • Perfect Portion Sizes: Individual tarts are ideal for parties, allowing guests to enjoy their own serving without the need for sharing.
  • Beautiful Presentation: The elegant layers of lemon curd and meringue create a visually appealing dessert that looks as good as it tastes.
  • Versatile Flavor Profile: The balance of sweet and tart flavors makes these tarts refreshing and satisfying.
  • Make Ahead Option: These tarts can be prepared in advance, making them a great choice for busy hosts.

Ingredients Needed for Mini Lemon Meringue Tarts

To create these delightful treats, gather the following ingredients:

  • 170 g unsalted butter (softened)
  • 120 g powdered sugar
  • 1/2 teaspoon salt
  • 1 large egg (room temperature)
  • 1 teaspoon vanilla extract
  • 350 g all-purpose flour
  • 3 large whole eggs
  • 3 large egg yolks (save the egg whites for the meringue)
  • 150 g granulated sugar
  • Juice of 2 lemons
  • 100 g unsalted butter (softened & cubed)
  • 3 large egg whites
  • 125 g granulated sugar
  • 1 teaspoon vanilla extract

Consider these substitutions if you want to customize your tarts:

  • Butter alternatives: You can use coconut oil or margarine for a dairy-free version.
  • Sweetener options: Substitute granulated sugar with coconut sugar or a sugar alternative for a healthier option.
  • Fruit variations: Experiment with different citrus juices like lime or orange for a unique twist.

Step-by-Step Instructions

Follow these steps to create your Mini Lemon Meringue Tarts:

1. Prepare the Tart Shells

In a mixing bowl, combine softened butter and powdered sugar until creamy. Add the egg, vanilla extract, and salt, and mix until incorporated. Gradually add the flour, mixing just until combined. Chill the dough for 30 minutes.

2. Bake the Tart Shells

Preheat your oven to 180°C (350°F). Roll out the chilled dough and cut into circles to fit your tartlet pans. Press the dough into the pans and prick the bottoms with a fork. Bake for 15-20 minutes or until golden. Allow to cool completely.

3. Make the Lemon Filling

In a saucepan, combine the lemon juice, granulated sugar, and cubed butter over medium heat. In a separate bowl, whisk together the egg yolks and whole eggs. Slowly add the lemon mixture into the eggs while whisking continuously to prevent curdling. Return to heat and cook until thickened. Remove from heat and let cool.

4. Prepare the Meringue

In a clean bowl, beat the egg whites until soft peaks form. Gradually add the granulated sugar, beating until stiff peaks form and the meringue is glossy. Fold in vanilla extract.

5. Assemble the Tarts

Fill each cooled tart shell with the lemon filling, then top with meringue. Use a spatula to create swirls and peaks. Bake in a preheated oven at 180°C (350°F) for 10-15 minutes or until the meringue is lightly browned.

Pro Tips for Perfect Mini Lemon Meringue Tarts

Juicy Mini Lemon Meringue Tarts with a perfectly browned meringue crust.

Enhance your tart-making skills with these expert insights:

  • Use Fresh Ingredients: Fresh lemons yield the best flavor. Avoid bottled lemon juice for optimal results.
  • Temperature Control: Ensure the butter is at room temperature for a smoother dough consistency.
  • Whip Egg Whites Properly: Make sure your mixing bowl is clean and dry to achieve the best meringue consistency.
  • Don’t Overbake: Keep a close eye on the meringue to prevent it from becoming too dark.
  • Chill Before Serving: Allow the assembled tarts to chill in the fridge for at least an hour before serving for the best texture.

Common Mistakes and Troubleshooting

Even experienced bakers can face challenges. Here’s how to avoid common pitfalls:

  • Runny Lemon Curd: Ensure you cook the filling long enough to thicken. If it’s too runny, it may not set properly.
  • Weeping Meringue: This can happen if the meringue is not baked long enough or if it’s stored in a humid environment.
  • Crumbly Tart Shells: Ensure you don’t overwork the dough and that it’s properly chilled before baking.

Recipe Variations

Get creative with these variations to suit your taste:

  • Chocolate Lemon Meringue Tarts: Add cocoa powder to the tart shell for a delicious chocolate twist.
  • Fruit Tarts: Replace lemon filling with raspberry or passion fruit for a vibrant flavor change.
  • Spiced Meringue: Add a pinch of cinnamon or nutmeg to the meringue for a warm flavor note.
  • Gluten-Free Option: Substitute all-purpose flour with a gluten-free flour blend to make it suitable for gluten-sensitive individuals.

Storage and Make-Ahead Instructions

To maintain the quality of your tarts:

  • Refrigeration: Store assembled tarts in the fridge for up to 3 days, but they’re best enjoyed within 24 hours.
  • Freezing: You can freeze the tart shells unfilled for up to a month. Bake the lemon filling fresh before serving.
  • Assemble Later: Prepare tart shells and lemon filling ahead of time, and assemble with meringue just before serving.

Frequently Asked Questions

Here are common inquiries regarding Mini Lemon Meringue Tarts:

  • Can I make mini lemon meringue tartlets ahead of time? Yes, you can prepare the tart shells and lemon filling in advance.
  • How do I keep the crust crisp? Bake the shells until golden and ensure they cool completely before adding the filling.
  • Can I freeze lemon meringue tartlets? Yes, but it’s best to freeze only the tart shells and fill them fresh.
  • What can I do if my meringue is runny? Ensure it’s whipped to stiff peaks and consider adding a cornstarch stabilizer.
  • Why is my lemon curd too runny? It may need to cook longer to thicken properly.
  • Is Italian meringue necessary for these tarts? While not necessary, it provides extra stability compared to regular meringue.
  • Can I use a store-bought crust? Absolutely! A pre-made crust can save time.
  • What’s the best way to pipe meringue? Use a piping bag fitted with a large star tip for an elegant finish.

Nutrition Tips and Dietary Adaptations

For those looking to adapt the recipe for dietary needs:

  • Lower Sugar: Use natural sweeteners like honey or maple syrup in moderation.
  • Dairy-Free: Use coconut cream for a dairy-free lemon filling.
  • Egg-Free Option: Substitute eggs with flaxseed meal mixed with water for a vegan version.

Equipment Recommendations

To make your baking experience seamless, consider these tools:

  • Tartlet Pans: A set of non-stick tartlet pans ensures easy release and perfect shapes.
  • Mixing Bowls: Use stainless steel or glass bowls for whipping egg whites.
  • Whisk and Spatula: A good whisk is essential for achieving fluffy meringue.

Serving Suggestions

Serve your Mini Lemon Meringue Tarts with:

  • Fresh Berries: Strawberries or blueberries add a colorful touch.
  • Mint Leaves: A sprig of mint adds freshness and elegance.
  • Whipped Cream: A dollop of lightly sweetened whipped cream complements the tartness.

In conclusion, these Mini Lemon Meringue Tarts are not only a feast for the eyes but also a delight for the taste buds. With their effortless elegance, they are sure to become a favorite at your gatherings. Happy baking!

Mini Lemon Meringue Tarts

Prep Time 30 minutes
Cook Time 15 minutes
Total Time 45 minutes
Servings 8 pieces
Calories 250
Delight in these tangy lemon tarts with fluffy meringue topping, perfect for a sweet and citrusy treat.

Ingredients

Dough

  • 170 g unsalted butter (softened)
  • 120 g powdered sugar
  • 0.5 teaspoon salt
  • 1 large egg (room temperature)
  • 1 teaspoon vanilla extract
  • 350 g all-purpose flour

Filling

  • 3 large whole eggs
  • 3 large egg yolks (save the egg whites for the meringue)
  • 150 g granulated sugar
  • juice of 2 lemons lemon juice
  • 100 g unsalted butter (softened & cubed)

Meringue

  • 3 large egg whites
  • 125 g granulated sugar
  • 1 teaspoon vanilla extract

Instructions 

  • Prepare the tart crust by mixing softened butter, powdered sugar, salt, egg, vanilla, and flour. Press into tart molds and bake at 180°C (350°F) for 15 minutes.
  • Whisk together eggs, egg yolks, sugar, lemon juice, and softened butter to make the lemon filling. Pour into baked crusts.
  • Bake the filled tarts at 180°C (350°F) for 15 minutes until set.
  • Beat egg whites with vanilla and sugar until stiff peaks form. Spread or pipe meringue over the cooled tarts.
  • Broil or torch the meringue until golden brown. Serve immediately.

Notes

Chill the tarts before serving for best flavor and texture.
Calories: 250kcal
Cost: $15
Course: Dessert
Cuisine: American
Keyword: lemon

Welcome to a culinary journey that transforms a handful of simple ingredients into a tropical delight: Mango Coconut Chia Pudding. This recipe not only tantalizes your taste buds but also offers a nutritious boost to your day. In just a few steps, you can create a creamy, satisfying pudding that’s ideal for breakfast, dessert, or a snack—perfect for busy lifestyles. Let’s dive in and discover why this recipe is a must-try!

Why You’ll Love This Recipe

This Mango Coconut Chia Pudding is more than just a dessert; it’s a versatile dish that offers numerous benefits:

  • Quick Preparation: With minimal effort, you can whip up this dish in under 10 minutes, making it a great choice for busy mornings or impromptu gatherings.
  • Nutrient-Dense: Packed with omega-3 fatty acids from chia seeds and vitamins from mango, this pudding supports overall health.
  • Customizable Flavors: Adjust sweetness with honey or maple syrup, and add your favorite toppings for a personal touch.
  • Make-Ahead Convenience: Prepare it the night before for a hassle-free breakfast or snack ready to go!
  • Refreshing Taste: The tropical combination of mango and coconut creates a refreshing flavor that transports you to a sunny beach.

Ingredient Breakdown

To make this delightful pudding, you will need the following ingredients:

  • 1 Tasse Kokosmilch: Use either canned or carton coconut milk for richness. For a lighter option, consider using low-fat coconut milk.
  • 2 Esslöffel Chiasamen: These tiny seeds are packed with nutrients and are crucial for achieving the pudding’s texture.
  • 1 Stück reife Mango: Fresh mango adds natural sweetness and flavor. If unavailable, frozen mango (thawed) works well.
  • 2 Esslöffel Honig oder Ahornsirup: Sweeten to taste. For a vegan option, use maple syrup.
  • 1 Teelöffel Vanilleextrakt: This adds depth to the flavor profile.
  • 1 Prise Salz: Enhances sweetness and balances flavors.
  • Frische Mangoscheiben und geraspelte Kokosnuss zur Dekoration: Optional but recommended for a beautiful presentation.

How to Make Mango Coconut Chia Pudding

Follow these straightforward steps to create your pudding:

  1. In a medium-sized bowl, whisk together the coconut milk, chia seeds, honey or maple syrup, vanilla extract, and a pinch of salt until well combined.
  2. Let the mixture sit for 5-10 minutes, stirring again to break up any clumps of chia seeds.
  3. Cover the bowl with plastic wrap or a lid and refrigerate for at least 4 hours or overnight. This allows the chia seeds to swell and thicken the mixture.
  4. Once ready, stir the chia pudding to achieve a smooth consistency.
  5. Layer the pudding in serving glasses, starting with a layer of chia pudding, followed by a layer of pureed mango, and repeat until the glasses are filled.
  6. Before serving, garnish with fresh mango slices and a sprinkle of shredded coconut.

Pro Tips for the Perfect Pudding

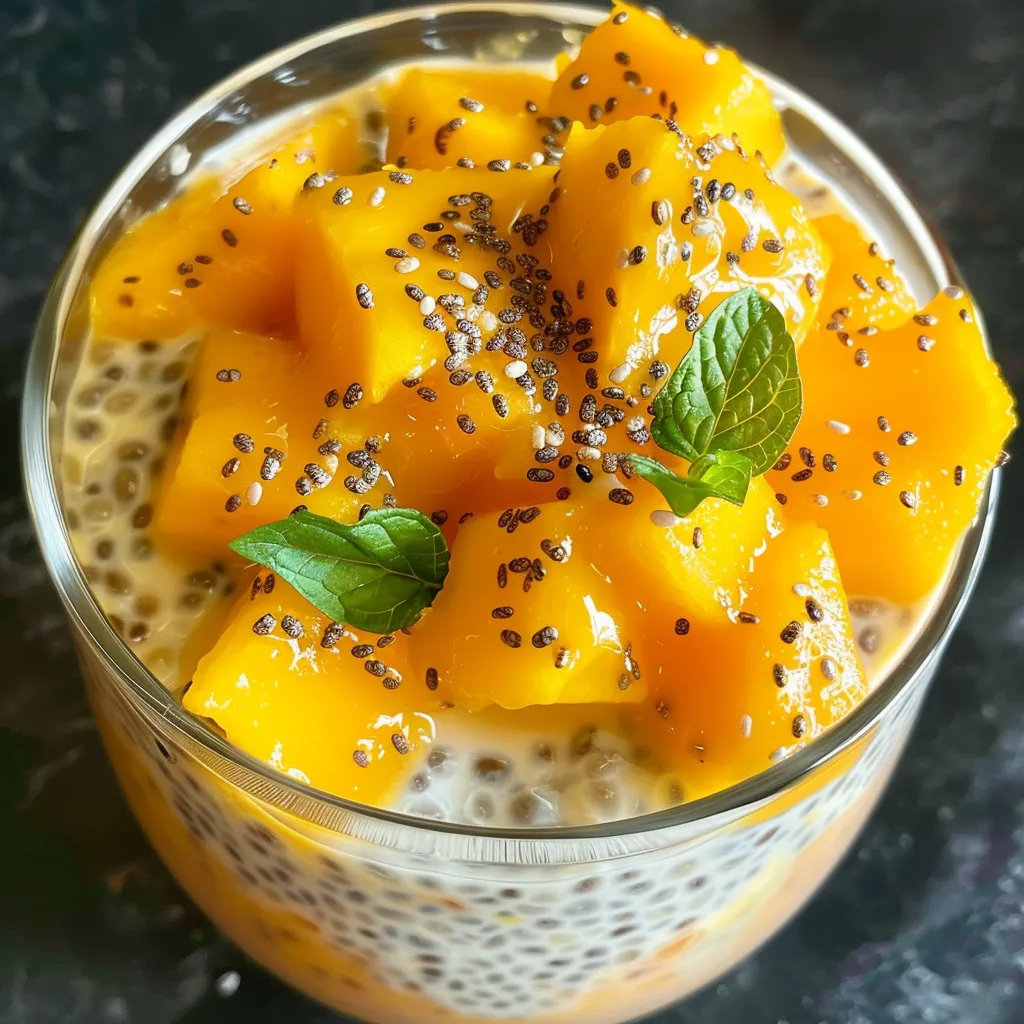
A colorful bowl of mango coconut chia pudding, showcasing its creamy consistency and decorative toppings.

To ensure your Mango Coconut Chia Pudding turns out perfectly every time, consider these expert tips:

  • Quality Ingredients: Always select fresh, ripe mangoes for the best flavor. The quality of your coconut milk also matters—authentic brands make a noticeable difference.
  • Proper Mixing: Whisk the mixture well initially to avoid clumping of chia seeds. A good stir after a few minutes is also crucial.
  • Texture Preference: If you prefer a smoother pudding, blend the coconut milk and chia seeds together before letting it thicken.
  • Sweetness Adjustments: Taste test your mixture before refrigerating to adjust sweetness as desired. Everyone’s taste is different!
  • Layering Techniques: For an attractive presentation, use clear glasses to showcase the layers. You can also use a piping bag for neat layering.
  • Serving Temperature: Serve chilled for the best texture and flavor. If you prefer it slightly warm, allow to sit at room temperature for a few minutes before serving.
  • Experiment with Toppings: Top with nuts, seeds, or granola for added crunch and nutrition.
  • Storage Tips: Store leftovers in an airtight container in the fridge for up to 3 days.

Common Mistakes and Troubleshooting

Even simple recipes can have pitfalls. Here’s how to avoid common mistakes:

  • Clumpy Pudding: If the chia seeds clump together, ensure you mix well and let it sit for the recommended time.
  • Pudding Too Thin: If your pudding doesn’t thicken, add more chia seeds and let it sit longer in the fridge.
  • Pudding Too Thick: Stir in a little extra coconut milk to achieve your desired consistency.
  • Unbalanced Flavor: Adjust sweetness and salt to your preference if the pudding tastes bland.

Variations of Mango Coconut Chia Pudding

Feel free to customize your pudding with these exciting variations:

  • Chocolate Chia Pudding: Add 2 tablespoons of unsweetened cocoa powder for a chocolate twist.
  • Berry Bliss: Layer with mixed berries instead of mango for a different fruity flavor.
  • Coconut-Lime Chia Pudding: Replace half the coconut milk with lime juice for a zesty kick.
  • Nutty Delight: Stir in almond or peanut butter for added creaminess and protein.

Storage and Make-Ahead Instructions

This pudding is perfect for meal prep! Here’s how you can store and prepare it ahead of time:

  • Refrigeration: Store the pudding in airtight containers in the fridge for up to 3 days.
  • Make-Ahead: Prepare the pudding a day in advance for easy serving the next day.
  • Freezing: While not ideal, you can freeze the pudding for up to a month, but the texture may change upon thawing.

Comprehensive FAQ

Here are some frequently asked questions about Mango Coconut Chia Pudding:

  • How long does chia pudding last in the fridge? Chia pudding can be stored in the refrigerator for up to 3 days.
  • Can I use different milk? Yes, almond milk, oat milk, or any other plant-based milk can be used as a substitute.
  • Is chia pudding gluten-free? Yes, chia seeds are naturally gluten-free, making this pudding a great option for gluten-sensitive individuals.
  • What can I substitute for mango? Other fruits like strawberries, blueberries, or peaches can replace mango in the pudding.
  • Can I make this vegan? Yes, simply use maple syrup instead of honey for a completely vegan dessert.
  • What is the nutritional content? Each serving is rich in fiber, protein, and healthy fats, making it a nutritious option for any meal.
  • Can I add protein powder? Absolutely! You can mix in a scoop of protein powder for added nutrition.
  • How do I know if the chia pudding is ready? The pudding is ready when it has thickened to a jelly-like consistency, usually after at least 4 hours of refrigeration.

Nutritional Tips and Dietary Adaptations

This pudding is not only delicious but also adaptable to various dietary needs:

  • Low-Sugar Option: Reduce or eliminate sweeteners for a low-sugar version.
  • High-Protein Variation: Add Greek yogurt to the pudding mixture for a protein boost.
  • Low-Carb Adaptation: Use unsweetened coconut milk and skip the sweeteners for a low-carb friendly dessert.

Equipment Recommendations

To create your Mango Coconut Chia Pudding, you’ll need the following:

  • Mixing Bowl: A medium-sized bowl for mixing ingredients.
  • Whisk: To mix everything thoroughly and avoid clumping.
  • Measuring Cups and Spoons: For accurate ingredient measurements.
  • Serving Glasses: Clear glasses are ideal for showcasing the beautiful layers.

Serving Suggestions

Elevate your Mango Coconut Chia Pudding experience with these serving suggestions:

  • Breakfast Bowl: Serve with a sprinkle of granola and fresh fruit for a nutritious breakfast.
  • Dessert Delight: Pair with a scoop of dairy-free ice cream for a decadent treat.
  • Brunch Centerpiece: Present in individual cups or jars for a stunning brunch display.

In conclusion, this effortless Mango Coconut Chia Pudding is not just a recipe; it’s a celebration of flavors and health. With its simple preparation and endless customization options, it suits every palate and occasion. So why wait? Gather your ingredients, and let’s bring a taste of paradise to your table today!

Mango-Kokos-Chia-Pudding

Prep Time 10 minutes
Total Time 10 minutes
Servings 4 servings
Calories 250
Enjoy a creamy, tropical chia pudding layered with fresh mango and coconut, perfect for a healthy breakfast or dessert.

Ingredients

Dairy & Sweeteners

  • 1 Tasse Kokosmilch (aus der Dose oder aus dem Tetrapack)
  • 2 Esslöffel Chiasamen
  • 2 Esslöffel Honig oder Ahornsirup (nach Geschmack anpassen)
  • 1 Teelöffel Vanilleextrakt
  • 1 Prise Salz

Früchte & Dekoration

  • 1 Stück reife Mango, püriert
  • 1 Stück frische Mangoscheiben zur Dekoration
  • 1 Stück geraspelte Kokosnuss zur Dekoration

Instructions 

  • In einer Schüssel Kokosmilch, Chiasamen, Honig, Vanilleextrakt und Salz gut verrühren.
  • 5-10 Minuten ruhen lassen, dann erneut umrühren.
  • Schüssel abdecken und mindestens 4 Stunden oder über Nacht im Kühlschrank quellen lassen.
  • Chia-Pudding umrühren, in Gläser schichten, abwechselnd Pudding und pürierte Mango.
  • Mit frischen Mangoscheiben und geraspelter Kokosnuss garnieren vor dem Servieren.

Notes

Für eine cremigere Konsistenz kannst du die Mango pürieren und in Schichten verwenden.
Calories: 250kcal
Cost: $12
Course: Dessert
Cuisine: Tropical
Keyword: Mango

Discover the Magic of Coconut Rice Pudding

Welcome to the world of coconut rice pudding, where creamy texture meets delightful flavor in a dish that warms the heart. This coconut rice pudding recipe is not only easy to make but also a wonderful way to indulge your sweet tooth with minimal effort. In just 20 minutes, you can create a rich and satisfying dessert that brings the tropical essence of coconut right to your kitchen. Whether you’re a seasoned chef or a beginner, this recipe is designed to help you succeed every time.

Why You’ll Love This Recipe

  • Effortless Preparation: With just a few simple ingredients, this recipe is perfect for busy schedules. You can whip it up quickly and easily.
  • Rich & Creamy Texture: The use of coconut milk gives the pudding its luxurious creaminess without being overly heavy.
  • Versatile Ingredients: This dish can be customized with various add-ins like raisins, nuts, or spices to suit your taste.
  • Perfect for Any Occasion: Whether it’s a weeknight treat or a special gathering, this pudding fits the bill.
  • Healthier Sweet Option: Made with natural ingredients, it’s a delightful alternative to processed desserts.

Ingredients Breakdown

Here’s what you need to make this delicious coconut rice pudding:

  • 1 cup white rice: Arborio rice is ideal for its creamy consistency, but you can use jasmine or basmati as well.
  • 1 can (13.5 oz) coconut milk: Choose full-fat coconut milk for the richest flavor and texture.
  • 2 cups water: This helps cook the rice to perfection.
  • 1/2 cup sugar: Adjust to taste; you can also substitute with maple syrup or honey for a different flavor profile.
  • 1/4 tsp salt: Enhances the sweetness and flavor.
  • 1 tsp vanilla extract: Adds depth and aromatic qualities.
  • 1/2 tsp cinnamon: A warm spice that complements the coconut beautifully.
  • 1/4 tsp nutmeg: Optional, for an added layer of flavor.
  • 1/4 cup raisins (optional): These add a chewy texture and sweetness.

Step-by-Step Instructions

Rich and smooth coconut rice pudding, highlighting the ingredients' vibrant colors.

Follow these simple steps to create your coconut rice pudding:

  1. Rinse the rice under cold water to remove excess starch, which helps prevent it from becoming gummy.
  2. In a pot, combine the rinsed rice, coconut milk, water, sugar, and salt.
  3. Bring the mixture to a boil, then reduce the heat to low.
  4. Simmer for 20-25 minutes, stirring occasionally until the rice is tender and the mixture thickens.
  5. Add vanilla, cinnamon, nutmeg, and raisins (if using) and cook for another 5 minutes until creamy.
  6. Let cool slightly before serving, allowing the pudding to set up a bit more.

Pro Tips for Perfect Coconut Rice Pudding

  • Use Full-Fat Coconut Milk: For the best creamy texture, always opt for full-fat coconut milk. It’s richer and provides a more satisfying mouthfeel.
  • Stir Frequently: Keep an eye on your pudding as it cooks. Stirring helps prevent sticking and ensures even cooking.
  • Adjust Sweetness: Taste as you go! You can always add more sugar or a natural sweetener to suit your preferences.
  • Experiment with Spices: Feel free to add spices like cardamom or ginger for a unique twist.
  • Serve Warm or Chilled: This pudding is delicious whether served warm or after being chilled in the fridge.
  • Make Ahead: You can prepare this dish ahead of time; it tastes even better the next day!
  • Use Leftovers Creatively: Transform leftover pudding into a parfait with fresh fruits or use it as a filling for pastries.
  • Monitor Cooking Time: Depending on the rice type, cooking times may vary slightly. Keep an eye on it!

Common Mistakes and Troubleshooting

Even the best recipes can encounter a few hiccups. Here’s how to avoid common pitfalls:

  • Pudding Too Watery: If the pudding is too runny, continue to simmer until it thickens further. You can also add a bit more rice to help absorb the liquid.
  • Pudding Too Thick: Stir in a little more coconut milk or water to loosen up the mixture.
  • Burning at the Bottom: If you notice burning, reduce the heat and stir more frequently. A heavy-bottomed pot can help distribute heat evenly.
  • Flavor Lacking: Always taste and adjust spices or sweetness as needed; don’t hesitate to enhance flavors!

Variations to Try

Get creative with your coconut rice pudding by trying these delicious variations:

  • Chocolate Coconut Rice Pudding: Add cocoa powder or chocolate chips for a rich, dessert-like twist.
  • Fruit-Infused Coconut Rice Pudding: Stir in fresh mango, pineapple, or berries for a fruity delight.
  • Nutty Coconut Rice Pudding: Top with toasted almonds or walnuts for added crunch and nutrition.
  • Spiced Coconut Rice Pudding: Experiment with spices like turmeric or cloves for an exotic flavor profile.

Storage and Make-Ahead Instructions

This coconut rice pudding can be prepared in advance and stored for later enjoyment:

  • Refrigeration: Store leftovers in an airtight container in the fridge for up to 3 days. The pudding may thicken as it cools; simply stir in a little water or coconut milk before serving.
  • Freezing: You can freeze this pudding for up to 2 months. Thaw in the fridge overnight and reheat gently on the stove.
  • Make-Ahead: Prepare the pudding a day in advance; it will develop even more flavor after resting overnight.

Frequently Asked Questions

  • Can I use brown rice instead of white? Yes, but it will require a longer cooking time and may alter the texture.
  • Is this recipe gluten-free? Absolutely! All ingredients are naturally gluten-free.
  • Can I substitute the sugar? Yes, feel free to use honey, maple syrup, or a sugar substitute as desired.
  • What can I serve with coconut rice pudding? It pairs well with fresh fruit, whipped cream, or a drizzle of caramel sauce.
  • How do I know when it’s done? The pudding should be thick and the rice tender but not mushy.
  • Can I make this dairy-free? Yes, the recipe is already dairy-free due to the use of coconut milk.
  • Can I double the recipe? Yes, simply double the ingredients and use a larger pot to accommodate.
  • What’s the best way to reheat leftovers? Gently warm on the stove with a splash of coconut milk or water until the desired consistency is reached.

Nutritional Tips and Dietary Adaptations

This coconut rice pudding can be adapted to suit various dietary needs:

  • Low Sugar Option: Reduce sugar to a minimum or use a sugar substitute for a healthier version.
  • Vegan-Friendly: This recipe is already vegan as it contains no animal products.
  • Nut-Free Version: Omit any nuts used in toppings or variations to keep it nut-free.

Equipment Recommendations

To make this coconut rice pudding with ease, consider having the following equipment on hand:

  • Heavy-Bottomed Pot: This will help distribute heat evenly and prevent sticking.
  • Wooden Spoon or Silicone Spatula: Ideal for stirring the pudding as it cooks.
  • Measuring Cups and Spoons: For accurate measurements of the ingredients.

Serving Suggestions

Serve your coconut rice pudding warm or chilled with a variety of toppings:

  • Fresh Fruits: Top with sliced bananas, berries, or mango for a refreshing contrast.
  • Whipped Cream: A dollop of whipped cream adds an indulgent touch.
  • Nuts and Seeds: Sprinkle with toasted almonds or sunflower seeds for crunch.
  • Drizzle of Honey or Maple Syrup: For extra sweetness, drizzle on some honey or syrup before serving.

In conclusion, this coconut rice pudding is not just a dessert; it’s a warm memory in a bowl. It encapsulates comfort and satisfaction, perfect for any occasion. With its effortless preparation and delightful flavors, you can trust this recipe to deliver every time. Enjoy your cooking journey and savor each delicious bite!

Creamy Caribbean Coconut Rice Pudding Recipe That Steals Hearts in 20 Minutes

Prep Time 5 minutes
Cook Time 20 minutes
Total Time 25 minutes
Servings 4 servings
Calories 250
Enjoy a quick and delicious Caribbean-inspired coconut rice pudding that's creamy, flavorful, and perfect for satisfying your sweet tooth in just 20 minutes.

Ingredients

Main

  • 1 cup white rice
  • 1.5 cups coconut milk
  • 2 cups water
  • 0.5 cup sugar
  • 0.25 tsp salt
  • 1 tsp vanilla extract
  • 0.5 tsp cinnamon
  • 0.25 tsp nutmeg
  • 0.25 cup raisins (optional) (optional)

Instructions 

  • Rinse the rice under cold water.
  • Combine rice, coconut milk, water, sugar, and salt in a pot and bring to a boil.
  • Reduce heat and simmer for 20 minutes, stirring occasionally.
  • Add vanilla, cinnamon, nutmeg, and raisins (if using), then cook for 5 more minutes.
  • Let cool slightly before serving.

Notes

This pudding is best enjoyed warm or chilled, and you can add more raisins or spices to suit your taste.
Calories: 250kcal
Cost: $8
Course: Dessert
Cuisine: Caribbean
Keyword: coconut, rice pudding

Welcome to the ultimate guide on making coconut rice pudding, a dessert that brings together simplicity, flavor, and creaminess in a bowl. If you’re looking for a dish that’s not only easy to prepare but also bursts with tropical flavor, you’ve landed in the right place. This recipe is designed for busy schedules and minimal ingredients, showcasing how you can create a delightful pudding in under 30 minutes. Let’s dive into the world of coconut rice pudding and discover why it’s a must-try.

Why You’ll Love This Recipe

  • Quick to Make: This pudding takes only about 30 minutes from start to finish, making it an ideal dessert for last-minute cravings.
  • Versatile Flavor: The rich coconut flavor pairs beautifully with various toppings, allowing you to customize it to your taste.
  • Minimal Ingredients: With just a few staple ingredients, you can whip up this dessert without a trip to the grocery store.
  • Gluten-Free Option: This recipe is naturally gluten-free, making it suitable for those with dietary restrictions.
  • Perfect for Any Occasion: Whether it’s a weeknight treat or a special gathering, this pudding fits every setting.

Ingredients You’ll Need

To create the perfect coconut rice pudding, gather the following ingredients:

  • 1 cup (200 g) long-grain white rice: Use Basmati for its fluffiness and aromatic quality. Do not wash or soak to retain starch for creaminess.
  • 2 cups (500 ml) water: This is essential for cooking the rice to tender perfection.
  • 2 cups (500 ml) canned coconut milk: Choose a high-quality brand like Goya or Arroy-D to enhance the pudding’s flavor.
  • 2 cups (200 g) coconut flakes or shredded coconut: Adjust to taste for added texture and coconut flavor.
  • 1/3 cup (60 g) white granulated sugar: Sweetens the pudding beautifully.
  • 2 tbsp coconut flakes (for toasting): Optional, but adds a delightful crunch and visual appeal.

How to Make Coconut Rice Pudding

Follow these simple steps to create your creamy delight:

  • Step 1: Cook the Rice: In a medium pot over medium heat, combine the rice and water. Bring to a boil, then cover and reduce the heat to low. Cook until the water is fully absorbed and the rice is tender, about 5 to 15 minutes depending on the rice variety.
  • Step 2: Combine Ingredients: Stir in the canned coconut milk, sugar, and shredded coconut to the cooked rice. Cook over medium heat, stirring constantly to prevent sticking, until the mixture comes to a gentle boil and thickens, about 5 to 10 minutes.
  • Step 3: Toast Coconut Flakes (Optional): In a dry pan over medium-high heat, toast 2 tablespoons of coconut flakes, stirring frequently until golden brown, approximately 2 to 4 minutes. Remove from heat and set aside.
  • Step 4: Serve: Enjoy the coconut rice pudding warm immediately or let it cool to room temperature and refrigerate for a chilled version. Before serving, sprinkle the toasted coconut flakes on top if desired.

Variations of Coconut Rice Pudding

A detailed close-up of Coconut Rice Pudding, highlighting its smooth consistency and coconut flakes.

Put your own spin on this classic recipe with these delicious variations:

  • Chocolate Coconut Rice Pudding: Stir in 2 tablespoons of cocoa powder when adding coconut milk for a chocolatey twist.
  • Fruit-Infused Pudding: Add diced mango or pineapple during the cooking process for a fruity flavor.
  • Maple Coconut Rice Pudding: Substitute sugar with maple syrup for a unique sweetness.
  • Spiced Coconut Rice Pudding: Add a pinch of cinnamon or nutmeg for warming spices that complement the coconut flavor.

Pro Tips for Perfect Coconut Rice Pudding

  • Use Quality Ingredients: The quality of your coconut milk can make a significant difference in flavor.
  • Stir Constantly: To prevent sticking, stir frequently during the thickening process.
  • Check Consistency: If the pudding is too thick, add a splash of coconut milk to loosen it.
  • Experiment with Sweetness: Taste the mixture before serving to adjust the sweetness to your liking.
  • Cool Completely: For a chilled dessert, ensure it’s cooled completely in the fridge before serving.
  • Leftover Magic: The pudding can be used as a filling for pastries or served alongside fresh fruits.
  • Pairing Options: Serve with whipped cream or a scoop of vanilla ice cream for added indulgence.
  • Store Properly: Keep leftovers in an airtight container in the fridge for up to 3 days.

Storage and Make-Ahead Instructions

If you’re planning ahead, here’s how to store your coconut rice pudding:

  • Refrigeration: Store in an airtight container in the fridge for up to 3 days.
  • Freezing: You can freeze the pudding for up to 2 months. Defrost in the refrigerator overnight before serving.

Common Mistakes and Troubleshooting

Here are some common pitfalls to avoid when making coconut rice pudding:

  • Cooking Too Quickly: Cooking on high heat can cause the rice to burn. Always use low heat once boiling.
  • Too Much Water: Ensure the water-to-rice ratio is correct; excess water can lead to a soupy texture.
  • Overcooking: Keep an eye on the pudding as it thickens to avoid overcooking, which can lead to a gummy texture.

Frequently Asked Questions (FAQ)

  • How long does coconut rice pudding last? Typically, it lasts up to 3 days in the fridge and can be frozen for 2 months.
  • Can I use different types of rice? Yes, while long-grain rice is preferred, medium-grain or even sticky rice can work well.
  • Is this recipe vegan? Yes, as it contains no animal products, making it suitable for a vegan diet.
  • Can I add spices? Absolutely! Cinnamon or vanilla extract can enhance the flavor profile.
  • What can I serve with coconut rice pudding? Fresh fruits, nuts, or a drizzle of honey complement the pudding beautifully.
  • Can I make this ahead of time? Yes, you can prepare it a day in advance and store it in the fridge until serving.
  • How do I adjust the sweetness? Taste the pudding before serving and add sugar or sweetener as needed.
  • Is it possible to make this gluten-free? Yes, the recipe is naturally gluten-free as all ingredients are gluten-free.

Nutrition Tips and Dietary Adaptations

This coconut rice pudding can be adapted to fit various dietary needs:

  • Low Sugar Option: Use a sugar substitute or reduce the amount of sugar for a lighter version.
  • Dairy-Free: The recipe is naturally dairy-free, making it suitable for lactose intolerant individuals.
  • Nut-Free: This pudding is free from nuts, making it safe for those with nut allergies.

Equipment Recommendations

For this recipe, you will need:

  • Medium Pot: To cook the rice and combine the ingredients.
  • Wooden Spoon: Ideal for stirring without scratching your pot.
  • Airtight Container: For storing leftovers in the fridge or freezer.

Serving Suggestions

Elevate your presentation with these serving ideas:

  • Garnish with Fresh Fruits: Add sliced mango, berries, or banana for a colorful touch.
  • Drizzle with Honey: A touch of honey adds sweetness and richness.
  • Serve with Whipped Cream: For an indulgent treat, top with freshly whipped cream.

In conclusion, this coconut rice pudding recipe offers a delightful dessert that’s both simple and satisfying. With its creamy texture and rich flavor, it’s a favorite for all ages. Whether enjoyed warm or chilled, this pudding is sure to impress. Happy cooking!

Coconut Rice Pudding Recipe

Prep Time 5 minutes
Cook Time 20 minutes
Total Time 25 minutes
Servings 4 servings
Calories 350
A creamy and fragrant coconut rice pudding that's easy to make and perfect for a comforting dessert or snack.

Ingredients

Main

  • 1 cup long-grain white rice such as Basmati (do not wash or soak)
  • 2 cups water
  • 2 cups canned coconut milk (such as Goya or Arroy-D)
  • 2 cups coconut flakes or shredded coconut (or to taste)
  • 1/3 cup white granulated sugar
  • 2 tbsp coconut flakes (for toasting)

Instructions 

  • Combine rice and water in a medium pot, bring to a boil, then cover and simmer until water is absorbed and rice is tender, about 5-15 minutes.
  • Stir in coconut milk, sugar, and shredded coconut. Cook over medium heat, stirring until mixture boils and thickens, about 5-10 minutes.
  • Optional: toast coconut flakes in a dry pan over medium-high heat until golden, about 2-4 minutes.
  • Serve warm or chilled, topping with toasted coconut flakes if desired.

Notes

Stir frequently to prevent sticking and ensure even cooking.
Calories: 350kcal
Cost: $10
Course: Dessert
Cuisine: fusion
Keyword: coconut, rice pudding