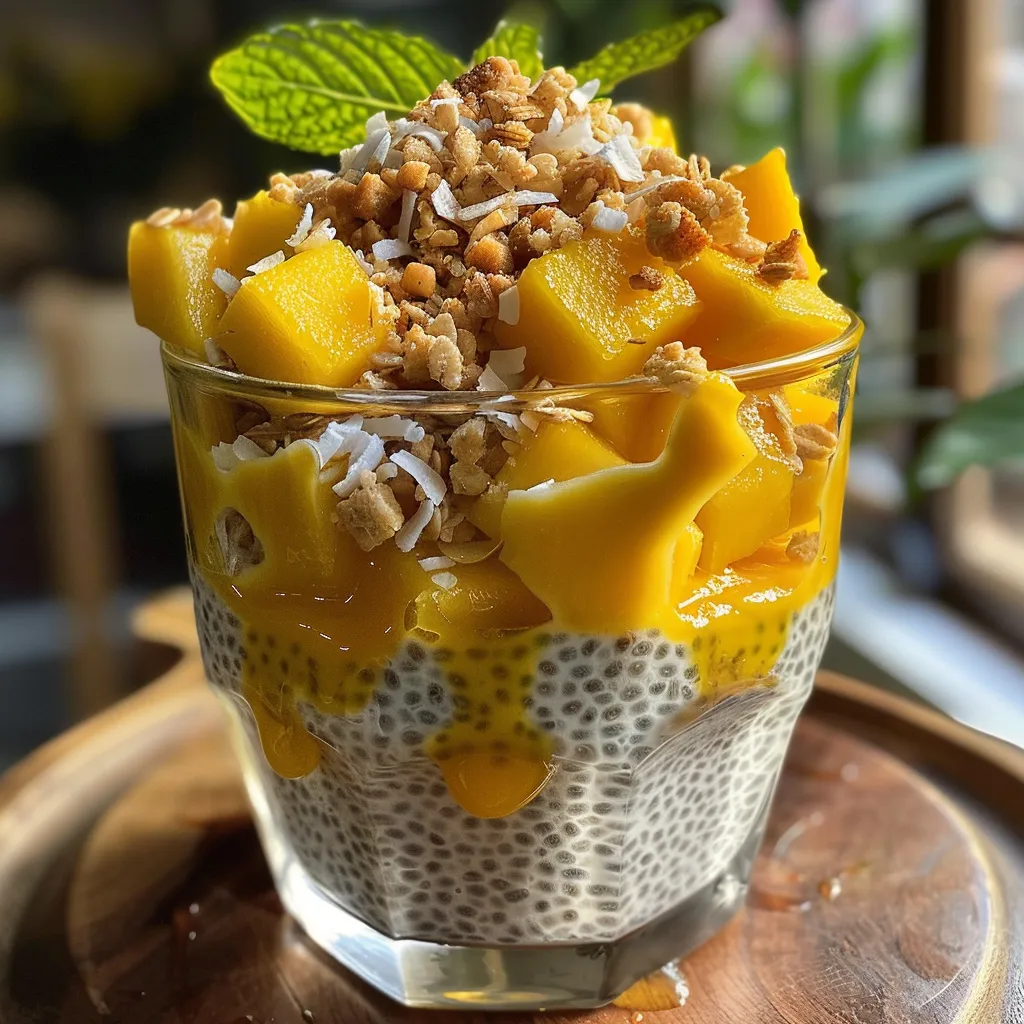
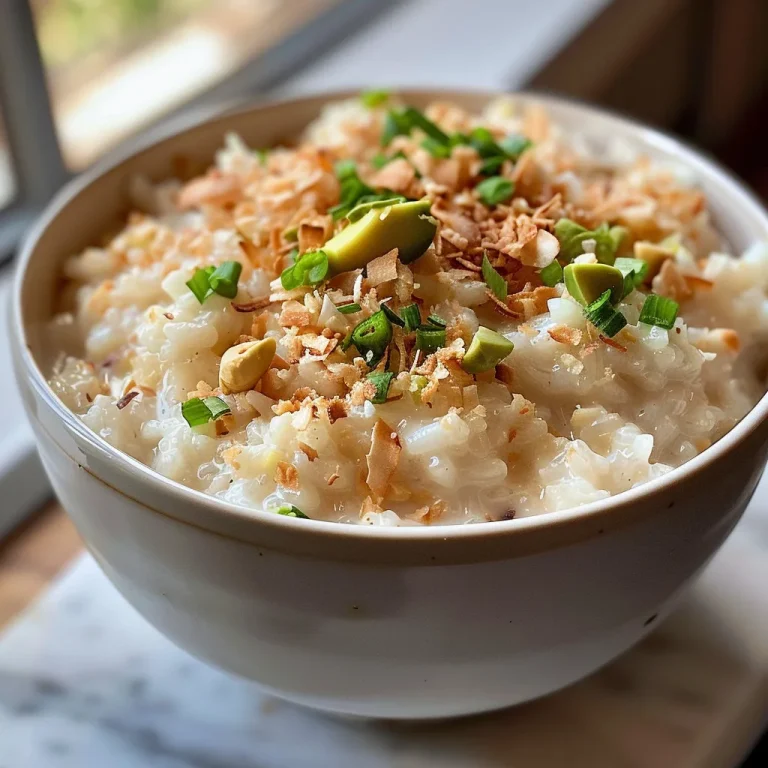
Author

robert

Browsing

Elevate Your Dessert Game with Coconut Rice Pudding

If you’re looking for a dessert that combines simplicity with a delightful tropical twist, look no further than coconut rice pudding. This creamy, comforting dish is not just a treat; it’s an experience that brings warmth and satisfaction to any occasion. In this guide, we will walk you through everything you need to know about making the perfect coconut rice pudding, including ingredient breakdowns, variations, and essential tips for success.

Why You’ll Love This Recipe

This coconut rice pudding recipe is more than just a delicious dessert. Here are five reasons to fall in love with it:

  • Easy Preparation: With minimal ingredients and straightforward steps, you can whip up this dessert in no time, making it perfect for busy weeknights or spontaneous guests.
  • Creamy Texture: The combination of coconut milk and whole milk gives this pudding a rich, velvety mouthfeel that feels indulgent without being overly complicated.
  • Versatile Servings: Enjoy it warm as a comforting treat or chill it in the fridge for a refreshing dessert. You can even customize the toppings to suit your mood!
  • Healthy Ingredients: Made with whole food ingredients like rice and coconut milk, this pudding can be a healthier alternative to store-bought desserts.
  • Endless Variations: Whether you want to add fruits, spices, or different types of milk, this recipe provides a solid base for creativity in the kitchen.

Ingredient Breakdown

Understanding the components of this dish is key to making it a success. Here’s what you’ll need:

  • 1 cup cooked white rice: Short grain or jasmine rice works best for a creamy texture. If you have leftover rice, it can be used here without any issues.
  • 1 ½ cups coconut milk: Use full-fat coconut milk for the richest flavor. Light coconut milk can be used for a lighter version, but it may not yield the same creaminess.
  • ½ cup whole milk: This adds extra creaminess. For a dairy-free option, consider using almond or oat milk.
  • ¼ cup sugar: Adjust to taste. You can use brown sugar for a deeper flavor or a sugar substitute for a low-calorie option.
  • ¼ tsp salt: Enhances the flavors, balancing the sweetness.
  • ½ tsp vanilla extract: A must for flavor depth.
  • ¼ tsp ground cinnamon: Optional, but highly recommended for a warm note.
  • Pinch of nutmeg: An optional addition that can elevate the flavor profile.
  • Optional toppings: Toasted coconut flakes, chopped mango, sliced banana, crushed pistachios, or a drizzle of maple syrup are great choices for added texture and flavor.

Step-by-Step Instructions
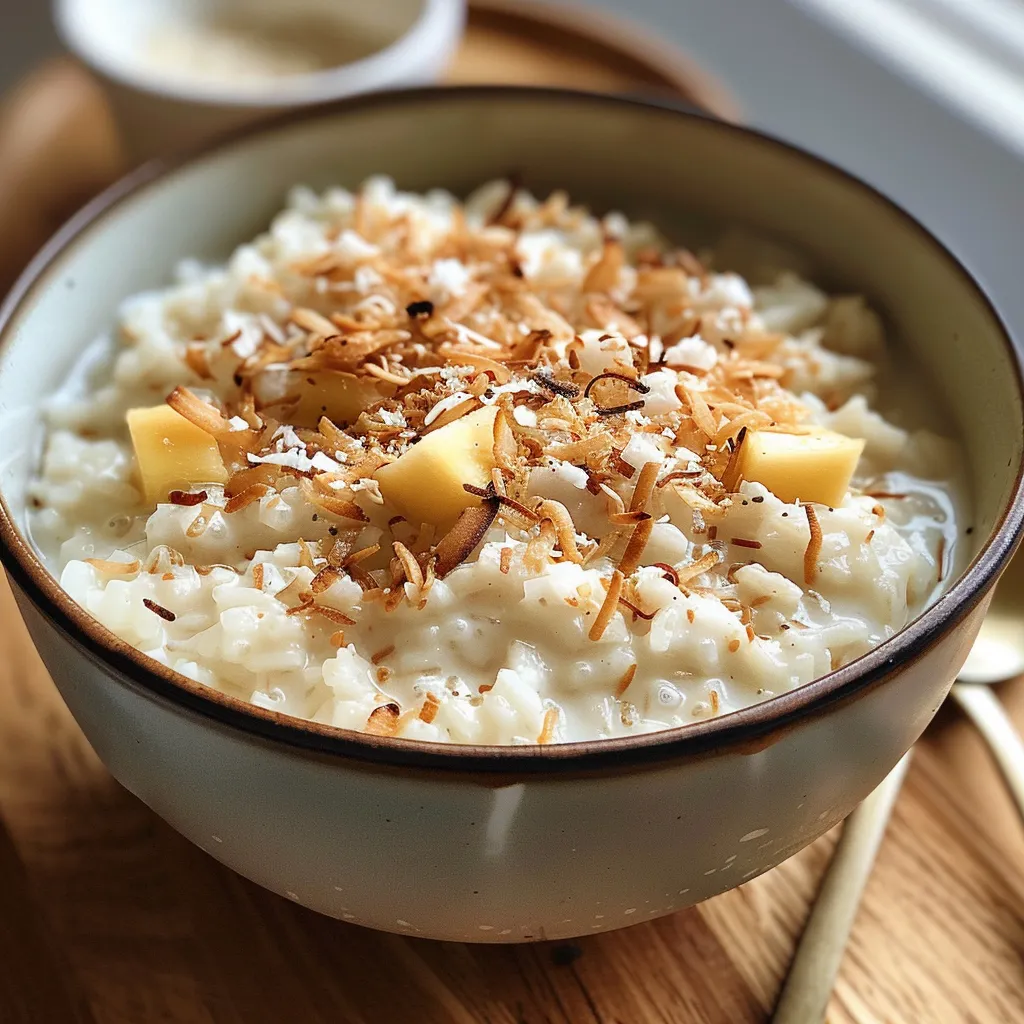
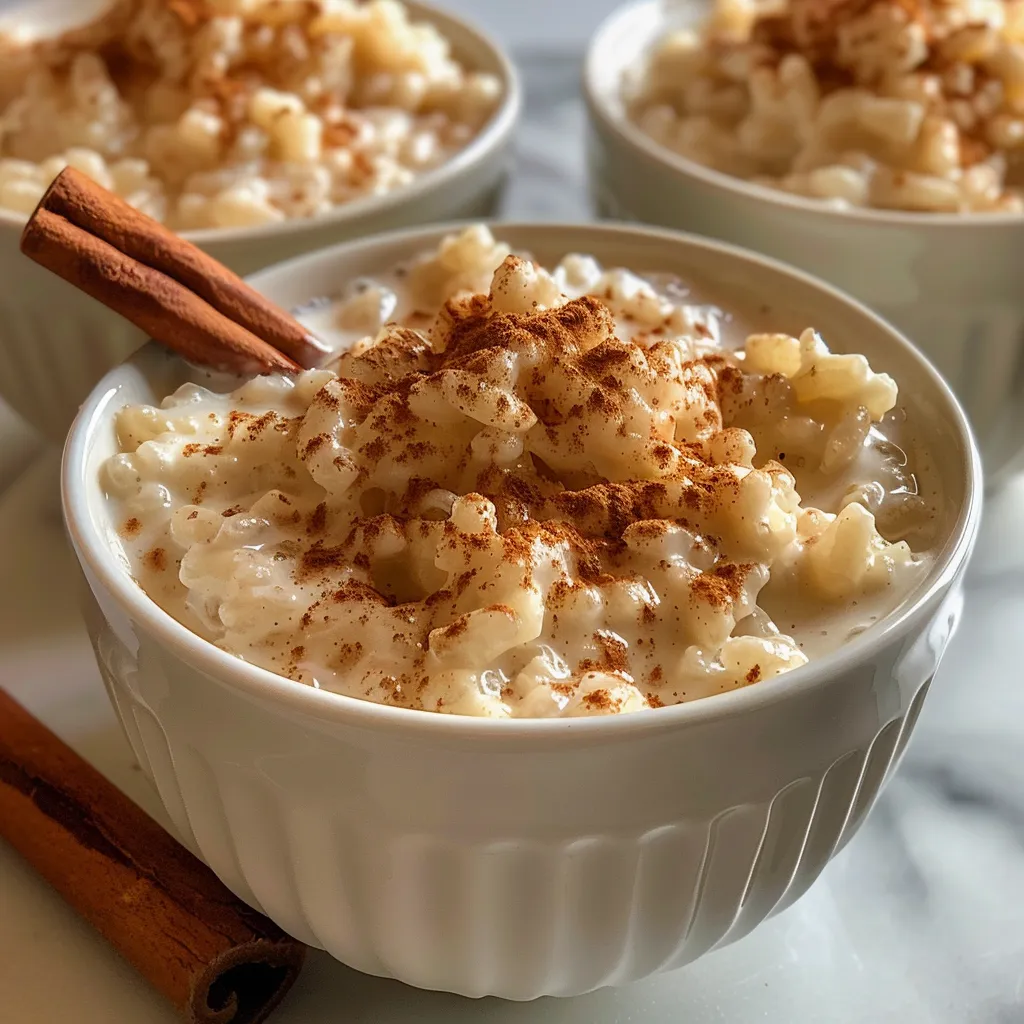
Detailed view of coconut rice pudding in a white bowl, showcasing its smooth texture and vibrant toppings.

Follow these simple steps to create your coconut rice pudding:

  • Combine milks and sweetener: In a medium saucepan, combine the coconut milk, whole milk, sugar, and salt. Stir over medium heat until the mixture begins to steam, about 2 to 3 minutes.
  • Add rice: Stir in the cooked rice, breaking up any clumps gently with a spoon or spatula.
  • Simmer until thickened: Keep the mixture at a gentle simmer for 15 to 20 minutes, stirring often to prevent the rice from sticking. The pudding will gradually thicken as the rice absorbs the liquid.
  • Stir in flavorings: Once the pudding reaches your desired thickness, add the vanilla extract, cinnamon, and nutmeg (if using). Stir well and simmer for an additional 2 minutes to blend the flavors.
  • Let it rest: Remove the pan from heat and allow the pudding to sit for 5 minutes. It will continue to thicken slightly as it cools.
  • Serve: Spoon the warm pudding into bowls and top with your favorite toppings like toasted coconut, fresh fruit, or a drizzle of syrup. Alternatively, chill in the refrigerator and serve cold.

Pro Tips for Perfect Coconut Rice Pudding

To ensure your pudding turns out perfectly every time, consider these expert insights:

  • Use leftover rice: If you have leftover rice, it can be added directly. This saves time and ensures a creamy texture.
  • Watch the simmer: Keep the heat low to prevent the rice from sticking or burning.
  • Thicken to preference: Adjust the cooking time based on how thick you like your pudding. A longer simmer will yield a thicker pudding.
  • Experiment with spices: Don’t hesitate to try different spices like cardamom or cloves for a unique flavor twist.
  • Storage matters: Store any leftovers in an airtight container in the refrigerator to maintain freshness.
  • Layer flavors: Consider toasting the coconut flakes before adding them as a topping for an extra crunch and flavor boost.
  • Make it vegan: Substitute the whole milk with almond or oat milk and use a vegan sweetener for a completely plant-based version.
  • Double the recipe: If you’re serving a crowd, this recipe can easily be doubled without any issues.

Common Mistakes and Troubleshooting

Even the best recipes can hit a snag. Here’s how to avoid common pitfalls:

  • Too watery: If your pudding ends up too watery, continue simmering until it thickens to your liking. Stir frequently to prevent sticking.
  • Overcooking the rice: Make sure to monitor the cooking time to avoid mushy rice. Perfect rice should be tender yet still retain its shape.
  • Not enough sweetness: If you find it lacking in sweetness, add a bit more sugar gradually, tasting as you go.

Variations to Try

Customize your coconut rice pudding with these delicious variations:

  • Chocolate Coconut Rice Pudding: Stir in cocoa powder or melted dark chocolate for a rich chocolate twist.
  • Mango Coconut Rice Pudding: Add diced fresh mango during the cooking process for a fruity infusion.
  • Matcha Coconut Rice Pudding: Blend in some matcha powder for a vibrant green color and earthy flavor.
  • Chai Coconut Rice Pudding: Infuse with chai spices (cinnamon, cardamom, ginger) for a spiced variation.

Storage and Make-Ahead Instructions

This coconut rice pudding is great for meal prep. Here’s how to store it:

  • Refrigeration: Store in an airtight container in the refrigerator for up to 4 days.
  • Freezing: While it’s best enjoyed fresh, you can freeze it for up to 2 months. Thaw in the refrigerator overnight before serving.
  • Make-ahead: Prepare the pudding a day in advance and store it in the refrigerator. It can be served chilled or reheated on the stove or microwave.

Frequently Asked Questions

Here are some common questions regarding coconut rice pudding:

  • Can I use brown rice?: Yes, but brown rice will require a longer cooking time and may alter the texture.
  • Is it gluten-free?: Absolutely! This recipe is naturally gluten-free as it uses rice.
  • How do I make it dairy-free?: Substitute whole milk with almond or oat milk and ensure your sugar is vegan.
  • Can I make it in advance?: Yes, it stores well in the fridge for a couple of days.
  • What toppings can I use?: Popular toppings include toasted coconut, fresh fruits, nuts, or a drizzle of honey or maple syrup.
  • How long does coconut rice pudding last?: It can be stored in the refrigerator for up to 4 days in an airtight container.
  • Can I reheat it?: Yes, you can reheat the pudding on the stove over low heat or in the microwave.
  • What’s the best way to serve it?: It’s delicious both warm and chilled, so serve it based on your preference or the occasion.

Nutrition Tips and Dietary Adaptations

This recipe can be adapted for various dietary needs:

  • Low-Calorie Option: Use low-calorie sweeteners to reduce sugar content.
  • Vegan Diet: Ensure all ingredients are plant-based, especially the sweeteners.
  • High-Protein Version: Add a scoop of protein powder for an extra boost.

Recommended Equipment

For this recipe, you will need:

  • Medium saucepan: Essential for cooking and combining ingredients.
  • Spoon or spatula: Useful for stirring and breaking up rice clumps.
  • Measuring cups and spoons: For accurate ingredient measurements.

Serving Suggestions

Pair your coconut rice pudding with these delightful accompaniments:

  • Fresh fruit: Sliced bananas, berries, or tropical fruits like mango or pineapple.
  • Nuts: Crushed pistachios or almonds add crunch.
  • Sweet drizzles: A drizzle of honey or maple syrup can enhance sweetness.

With this comprehensive guide, you’re well-equipped to create an unforgettable coconut rice pudding that will impress your family and friends. Enjoy the process of cooking, experimenting, and savoring this delightful dish!

Coconut Rice Pudding Recipe

Prep Time 5 minutes
Cook Time 20 minutes
Total Time 25 minutes
Servings 4 servings
Calories 250
A creamy and comforting rice pudding infused with coconut flavor, perfect for a cozy dessert or snack.

Ingredients

Main ingredients

  • 1 cup cooked white rice (short grain or jasmine)
  • 1.5 cups coconut milk (full-fat)
  • 0.5 cup whole milk (or plant-based milk)
  • 0.25 cup sugar
  • 0.25 tsp salt
  • 0.5 tsp vanilla extract
  • 0.25 tsp ground cinnamon (optional)
  • pinch nutmeg (optional)
  • to taste optional toppings (toasted coconut flakes, chopped mango, sliced banana, crushed pistachios, maple syrup)

Instructions 

  • Combine coconut milk, whole milk, sugar, and salt in a saucepan; heat until steaming (~3 min).
  • Add cooked rice; stir gently to break up clumps.
  • Simmer for 15-20 min, stirring often until thickened.
  • Stir in vanilla, cinnamon, and nutmeg; cook 2 min to blend flavors.
  • Remove from heat; let sit for 5 min to thicken. Serve warm or chilled with toppings.
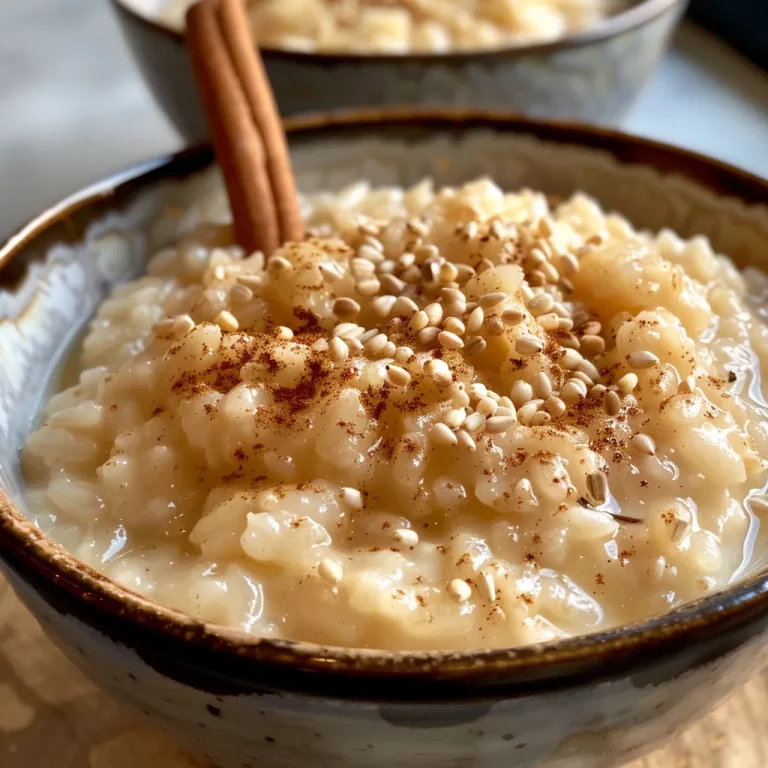
Notes

For a dairy-free version, use plant-based milk and adjust toppings accordingly.
Calories: 250kcal
Cost: $10
Course: Dessert
Cuisine: fusion
Keyword: coconut, rice pudding

Welcome to your ultimate guide for making a rich and creamy dairy-free rice pudding using your Instant Pot. If you want a dessert that’s not only delectable but also simple and quick to prepare, this recipe is for you. In just a few steps and with minimal ingredients, you can create an indulgent pudding that will delight your taste buds and impress your guests.

This recipe combines coconut milk, dairy-free milk, and arborio rice to create a velvety texture and rich flavor, making it the perfect treat for those following a dairy-free or vegan diet. Let’s dive into why this recipe is a must-try, along with essential tips, variations, and much more!

Why You’ll Love This Recipe

  • Quick Preparation: Prepare a creamy rice pudding in just 15 minutes of cooking time with your Instant Pot, saving you time without sacrificing taste.
  • Dairy-Free Delight: Enjoy a luscious dessert that’s completely free from dairy, perfect for those with lactose intolerance or anyone following a vegan lifestyle.
  • Versatile Ingredients: This recipe can be customized to suit your preferences, allowing you to experiment with different dairy-free milk options and sweeteners.
  • One-Pot Wonder: The Instant Pot makes cleanup a breeze, as everything is cooked in one container, minimizing the mess in your kitchen.
  • Perfect for Meal Prep: Rice pudding stores well in the fridge, making it an excellent option for batch cooking and enjoying throughout the week.

Key Ingredients for Your Rice Pudding

Understanding the components of your dish is crucial for achieving the perfect rice pudding. Here’s a breakdown of the ingredients you’ll need along with potential substitutions:

  • Coconut Milk (1 can, 14 oz): Provides a creamy base. For a lighter version, use light coconut milk or substitute with cashew cream.
  • Dairy-Free Milk (1 ½ cups): I recommend soy, almond, or oat milk. Choose a plain, unsweetened variety to maintain the pudding’s flavor balance.
  • Water (1 cup): Helps achieve the right consistency when combined with the milk.
  • Sugar (¼ cup): Granulated sugar is traditional, but you can also use maple syrup or agave for a natural sweetener.
  • Salt (pinch): Enhances the overall flavor; I suggest 1/8 tsp for the best results.
  • Vanilla Extract (1 tsp): Adds a depth of flavor; feel free to use vanilla bean paste for a gourmet touch.
  • Arborio Rice (1 cup, uncooked): The star of the dish! This short-grain rice is perfect for a creamy texture, but you could substitute with sushi rice if necessary.
  • Cinnamon Stick (1): Infuses the pudding with warm spice; you can also use ground cinnamon if preferred.

How to Make Rice Pudding in Your Instant Pot

Follow these simple steps to create your Instant Pot rice pudding:

  • Shake the can of coconut milk well to combine before opening. Pour it into the Instant Pot.
  • Add the dairy-free milk, water, sugar, and salt. Stir well to evenly dissolve the sugar.
  • Incorporate the vanilla extract into the mixture.
  • Rinse the arborio rice in a mesh strainer until the water runs clear, then add it to the milk mixture and stir to combine.
  • Place the cinnamon stick on top of the rice pudding mixture.
  • Seal the electric pressure cooker and cook for 3 minutes on high pressure.
  • Once the cooking cycle ends, allow a natural release for 10 minutes, then turn off the pot.
  • Release the remaining pressure carefully and open the Instant Pot. Remove the cinnamon stick and stir the rice pudding. The mixture may seem runny but will thicken as it cools.
  • Serve warm or chilled, adding your favorite toppings before serving.

Pro Tips for Perfect Rice Pudding

Instant Pot rice pudding with a creamy texture and a hint of vanilla.
  • Rinse Your Rice: Always rinse arborio rice thoroughly to remove excess starch, ensuring a smoother pudding texture.
  • Choose the Right Pot: Use a reliable Instant Pot to avoid cooking inconsistencies; ensure the sealing ring is properly placed.
  • Don’t Rush the Release: Allow for a natural pressure release to achieve the best texture; this helps the pudding set perfectly.
  • Adjust Sweetness: Taste before serving! Depending on your preference, you might want to add more sweetener after cooking.
  • Add Toppings: Consider fresh fruits, nuts, or shredded coconut for extra texture and flavor.
  • Experiment with Spices: Try adding a pinch of nutmeg or cardamom for a unique twist on flavor.
  • Make Ahead: This pudding keeps well in the fridge for up to 5 days, making it ideal for meal prep.
  • Reheat Gently: When reheating, add a splash of dairy-free milk to restore creaminess.
  • Storage Tips: Store in an airtight container to maintain freshness and flavor.

Common Mistakes and Troubleshooting

Even with a simple recipe, mistakes can happen. Here are common pitfalls and how to avoid them:

  • Too Runny: If your pudding is too watery, it may need more time to cool down—or you may not have used enough rice. Adjusting the cooking time slightly can help.
  • Burning at the Bottom: Ensure your cooking pot is clean and that you’re not overfilling your Instant Pot beyond the recommended limit.
  • Texture Issues: If the pudding is chunky or clumpy, it might be due to inadequate stirring or improper rinsing of the rice.
  • Too Sweet or Not Sweet Enough: Always taste your pudding before serving and adjust sweetness accordingly.

Delicious Variations to Try

Feeling adventurous? Here are some delightful variations to elevate your rice pudding experience:

  • Chocolate Rice Pudding: Add cocoa powder (2-3 tablespoons) to the mixture for a rich, chocolatey twist.
  • Fruit-Infused Pudding: Incorporate fresh or dried fruits like raisins, berries, or mango into the mix for natural sweetness and added flavor.
  • Nutty Delight: Stir in chopped nuts, such as almonds or pistachios, for a crunchy texture.
  • Matcha Rice Pudding: Mix in 1-2 teaspoons of matcha powder for a vibrant, antioxidant-rich twist.

Storage and Make-Ahead Instructions

This pudding is excellent for make-ahead meals. Here’s how to store it:

  • Allow the pudding to cool completely before transferring it to an airtight container.
  • Store in the fridge for up to 5 days. If you want to freeze it, place it in a freezer-safe container, leaving some space for expansion.
  • When ready to eat, thaw overnight in the fridge and reheat gently on the stovetop or in the microwave, adding a splash of dairy-free milk to restore its creaminess.

Frequently Asked Questions (FAQs)

  • Can I use brown rice instead of arborio rice? Yes, but be aware that cooking times and liquid ratios may vary.
  • What’s the best way to serve rice pudding? Serve warm or chilled, topped with cinnamon, nutmeg, or fresh fruits for added flavor.
  • Is this recipe gluten-free? Absolutely! All ingredients used are naturally gluten-free.
  • Can I use sweetened dairy-free milk? Yes, but adjust the amount of sugar in the recipe to avoid over-sweetening.
  • What if I don’t have an Instant Pot? You can make this pudding on the stovetop as well; just simmer slowly until the rice is tender.
  • How can I make this recipe sugar-free? Substitute sugar with your favorite sugar alternative, such as stevia or erythritol.
  • Can I add spices to this pudding? Yes! Feel free to incorporate spices like nutmeg, ginger, or even cardamom for extra flavor.
  • How can I make my pudding richer? Add more coconut milk or a splash of coconut cream for a decadent finish.

Nutrition Tips and Dietary Adaptations

This creamy rice pudding can be tailored to meet various dietary needs:

  • Low-Calorie Option: Use unsweetened almond milk and reduce the sugar to cut calories.
  • High-Protein Version: Add a scoop of protein powder or use soy milk, which is higher in protein than other dairy-free milks.
  • Nut-Free Adaptation: Substitute almond milk with oat or rice milk to keep it nut-free.

Recommended Equipment

To make this recipe easier, here’s a list of recommended equipment:

  • Instant Pot: A reliable electric pressure cooker is essential for this recipe.
  • Mesh Strainer: For rinsing rice effectively.
  • Airtight Containers: For storing leftovers or meal-prepping.

Serving Suggestions

Enhance your rice pudding with these serving suggestions:

  • Top with Fresh Fruits: Berries, mango slices, or bananas add freshness and flavor.
  • Sprinkle with Nuts: Chopped almonds or walnuts provide a nice crunch.
  • Drizzle with Honey or Maple Syrup: For a touch of extra sweetness.

In conclusion, this effortless creamy dairy-free rice pudding is not just a recipe; it’s an experience filled with flavors, textures, and endless possibilities. Whether you enjoy it plain, with toppings, or as part of a larger dessert spread, it’s bound to become a favorite in your home. Happy cooking!

Creamy, Dairy-Free Instant Pot Rice Pudding

Prep Time 10 minutes
Cook Time 3 minutes
Total Time 13 minutes
Servings 4 servings
Calories 250
A rich and comforting rice pudding made dairy-free using coconut milk, perfect for a cozy dessert or snack.

Ingredients

Coconut Milk

  • 1 can 14 oz can coconut milk
  • 1.5 cups dairy-free milk (soy, almond, or oat milk)
  • 1 cup water
  • 0.25 cup granulated sugar (organic preferred)
  • 1/8 tsp salt (or 1/8 tsp)
  • 1 tsp vanilla extract
  • 1 cup uncooked arborio rice (or another short-grain rice)
  • 1 stick cinnamon stick

Instructions 

  • Shake the coconut milk can well, then pour into the Instant Pot.
  • Add the dairy-free milk, water, sugar, and salt. Stir to dissolve.
  • Stir in vanilla extract and rinsed rice. Place the cinnamon stick on top.
  • Seal the lid and cook on high pressure for 3 minutes. Let natural release for 10 minutes.
  • Open the lid, remove cinnamon stick, and stir. Serve warm or chilled.

Notes

Thicken the pudding by letting it sit for a few minutes after cooking.
Calories: 250kcal
Cost: $15
Course: Dessert
Cuisine: fusion
Keyword: rice pudding

Welcome to the delightful world of cinnamon fried apples, where simplicity meets flavor in every bite. This classic dessert is not only an easy way to transform fresh apples into a sweet treat but also a versatile dish that can complement various meals. Whether you’re serving it as a comforting dessert or a delicious side, this recipe is sure to become a family favorite. In just a few simple steps, you’ll learn how to make these fried apples that are perfectly caramelized and infused with warm spices, making them an irresistible addition to your culinary repertoire.

Why You’ll Love This Recipe

  • Quick and Easy: This recipe takes less than 30 minutes from start to finish, making it perfect for busy weeknights or unexpected guests.
  • Minimal Ingredients: With just a handful of pantry staples like apples, butter, and brown sugar, you can whip up this dish with little effort.
  • Versatile Serving Options: These delicious cinnamon fried apples can be served on their own, over ice cream, or as a topping for pancakes and waffles.
  • Comforting Flavors: The warm spices of cinnamon and nutmeg combined with sweet caramelized apples evoke feelings of nostalgia and warmth.
  • Healthier Dessert Option: Using fresh apples and minimizing added sugars makes this a guilt-free dessert choice that’s still satisfying.

Ingredients for Cinnamon Fried Apples

To create the perfect batch of cinnamon fried apples, you’ll need the following ingredients:

  • Apples: 4 medium-sized apples (such as Granny Smith or Honeycrisp) for a balanced sweet-tart flavor.
  • Butter: 4 tablespoons of unsalted butter for rich flavor.
  • Brown Sugar: 1/2 cup, packed, to create a sweet caramelization.
  • Ground Cinnamon: 2 teaspoons for that classic cinnamon flavor.
  • Nutmeg: 1/4 teaspoon (optional) for a warm spice kick.
  • Vanilla Extract: 1 teaspoon to enhance the overall sweetness.
  • Salt: A pinch to balance the flavors.
  • Lemon Juice: 1 tablespoon to prevent browning and add a touch of acidity.

How to Make Cinnamon Fried Apples

Follow these straightforward steps to create your own batch of cooked apples with cinnamon:

  • Step 1: Prepare the Apples – Start by washing and peeling the apples. Core and slice them into thin wedges. A mandoline slicer works great for uniform slices, ensuring even cooking.
  • Step 2: Sauté the Apples – In a large skillet, melt the butter over medium heat. Once melted, add the apple slices and sauté for about 5 minutes until they start to soften.
  • Step 3: Add Sugar and Spices – Sprinkle the brown sugar, cinnamon, nutmeg (if using), and a pinch of salt over the apples. Stir well to combine. The sugar will begin to caramelize, creating a delicious glaze.
  • Step 4: Finish Cooking – Continue to cook for an additional 5-10 minutes, stirring occasionally, until the apples are tender and coated in the syrupy mixture. Remove from heat and stir in the vanilla extract and lemon juice.
  • Step 5: Serve Warm – Serve your cinnamon fried apples warm, either on their own or over ice cream for an indulgent dessert experience.

Pro Tips for Making Cinnamon Fried Apples

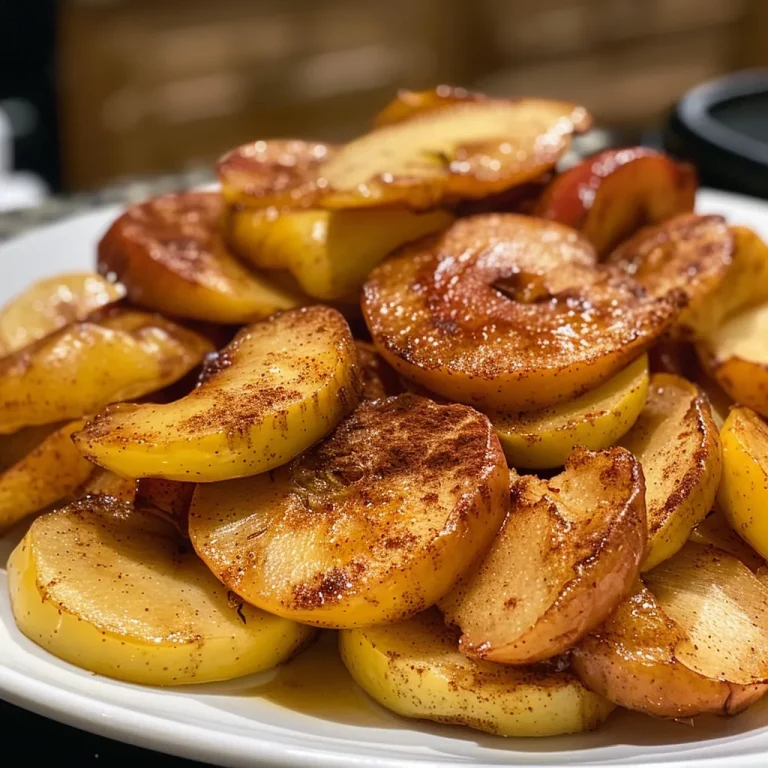
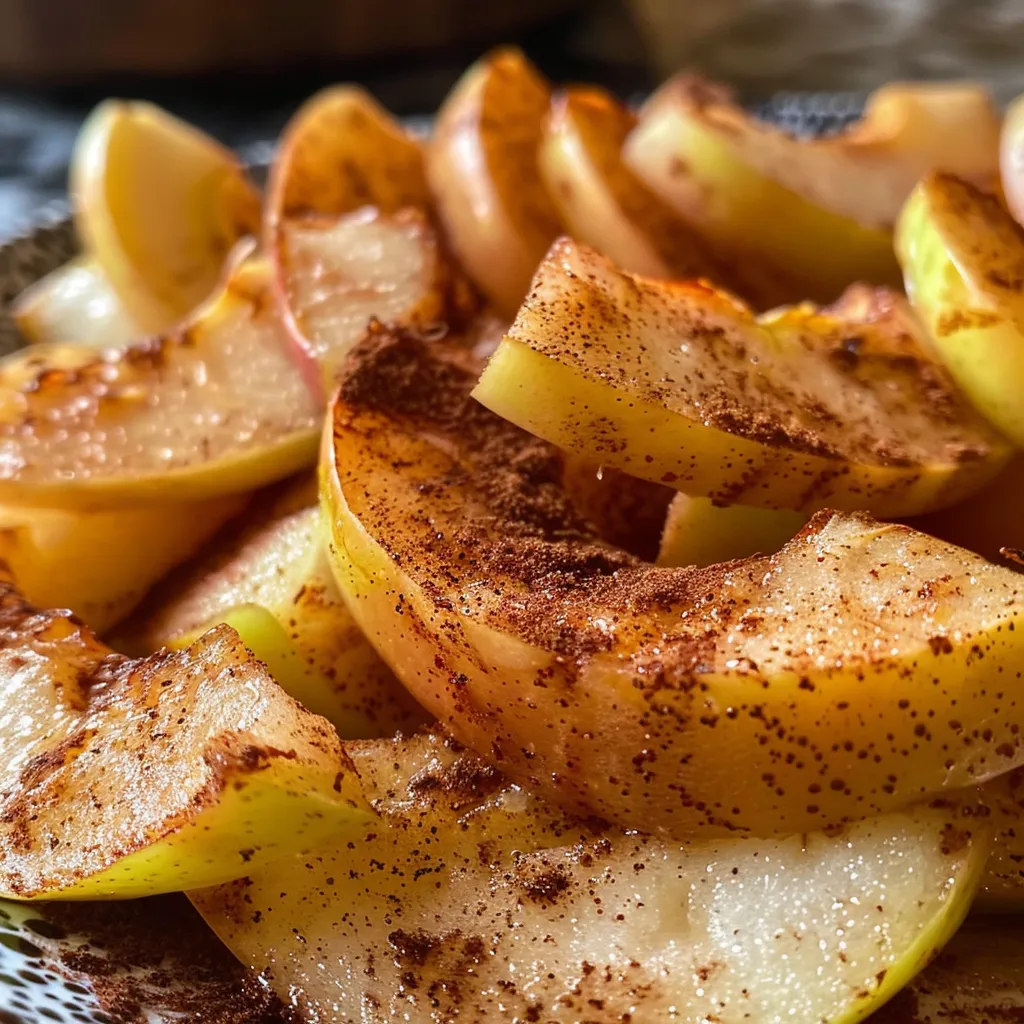
A mouthwatering display of warm, cinnamon fried apples with a golden hue.
  • Choose the Right Apples: Select firm, tart apples like Granny Smith for the best flavor and texture.
  • Cut Uniformly: Ensure apple slices are even in thickness (about 1/2 inch) for consistent cooking.
  • Adjust Sweetness: Feel free to modify the amount of brown sugar based on your preference for sweetness.
  • Experiment with Spices: Try adding cardamom or ginger for a unique flavor twist.
  • Don’t Overcook: Keep an eye on the cooking time; overcooked apples can turn mushy.
  • Use Fresh Lemon Juice: This not only prevents browning but also brightens the flavors.
  • Garnish Creatively: Top with chopped nuts or whipped cream for added texture and flavor.
  • Storage Tips: Store leftovers in an airtight container for up to 3 days in the refrigerator.

Common Mistakes and Troubleshooting

Even the simplest recipes can go awry. Here are common pitfalls and how to avoid them:

  • Apples are too mushy: Reduce cooking time and monitor closely to ensure they remain tender but not overcooked.
  • Not enough sweetness: Adjust by adding more brown sugar or a drizzle of honey after cooking.
  • Burning the butter: Cook on medium heat to prevent the butter from browning too quickly; if it starts to brown, lower the heat.

Variations on Cinnamon Fried Apples

Mix things up with these variations:

  • Cranberry Cinnamon Fried Apples: Add dried cranberries for a tart contrast.
  • Maple Cinnamon Fried Apples: Substitute brown sugar with pure maple syrup for a unique flavor.
  • Spiced Rum Fried Apples: Stir in a splash of spiced rum for an adult twist.
  • Nutty Cinnamon Fried Apples: Toss in chopped pecans or walnuts for added crunch.

Storage and Make-Ahead Instructions

These fried apples are best enjoyed fresh, but you can make them ahead of time:

  • Refrigeration: Store any leftovers in an airtight container in the fridge for up to 3 days.
  • Reheating: Gently reheat in the microwave or on the stovetop over low heat.
  • Make-Ahead: Prepare the apples and sauté them, then cool and store. Reheat gently before serving.

Frequently Asked Questions

  • Can I use different types of apples? Absolutely! Experiment with your favorites, but firmer varieties work best.
  • Can I freeze cinnamon fried apples? Yes, but they may lose some texture. Freeze in an airtight container for up to 3 months.
  • What can I serve with cinnamon fried apples? They pair wonderfully with vanilla ice cream, pancakes, or as a topping for oatmeal.
  • Are cinnamon fried apples healthy? They can be a healthier dessert option, especially when using less sugar and fresh fruits.
  • Can I make this recipe vegan? Yes, substitute butter with coconut oil or a vegan butter alternative.
  • How do I thicken the sauce? If the sauce is too thin, continue cooking until it reduces, or add a cornstarch slurry.
  • What spices can I add? Besides cinnamon and nutmeg, consider adding allspice or ginger for more depth.
  • How long will these keep? Properly stored, they can last in the refrigerator for up to 3 days.

Nutritional Tips and Dietary Adaptations

For those interested in health-conscious cooking, here are some tips:

  • Reduce Sugar: Use less brown sugar or try a sugar substitute if you’re watching your intake.
  • Gluten-Free: This recipe is naturally gluten-free, making it suitable for those with dietary restrictions.
  • Incorporate Fiber: Serve with whole grain pancakes or oatmeal to increase the fiber content of the meal.

Equipment Recommendations

To make the process smoother, consider these essential tools:

  • Non-Stick Skillet: A good-quality non-stick skillet ensures easy cooking and cleanup.
  • Mandoline Slicer: For perfectly uniform apple slices, a mandoline slicer is invaluable.
  • Wooden Spoon: A sturdy spoon helps you stir without scratching your skillet.

Serving Suggestions

Enjoy your cinnamon fried apples in various delightful ways:

  • As a Dessert: Serve warm with a scoop of vanilla ice cream for a comforting treat.
  • As a Breakfast Topping: Use them as a topping for pancakes or waffles to elevate your breakfast experience.
  • In Salads: Add to mixed greens with nuts and cheese for a sweet and savory salad.
  • With Savory Dishes: Pair with pork chops or roasted chicken for a balanced meal.

In conclusion, this effortless cinnamon fried apples recipe is not just a dish; it’s an experience filled with warmth, nostalgia, and comfort. By following this comprehensive guide, you can master the art of cooking fried apples and enjoy them in countless ways. So, gather your ingredients, heat up your skillet, and let the delightful aroma of cinnamon fill your kitchen. Happy cooking!

Classic Cinnamon Fried Apples: A Sweet Delight for Every Occasion

Prep Time 10 minutes
Cook Time 15 minutes
Total Time 25 minutes
Servings 4 servings
Calories 150
Enjoy these warm, caramelized cinnamon apples, perfect as a dessert or a cozy snack.

Ingredients

Fruits

  • 4 medium Apples (e.g., Granny Smith or Honeycrisp) (washed, peeled, cored, and sliced)
  • 4 tablespoons Butter (unsalted)
  • 1/2 cup Brown sugar (packed)
  • 2 teaspoons Ground cinnamon
  • 1/4 teaspoon Nutmeg (optional)
  • 1 teaspoon Vanilla extract
  • a pinch Salt
  • 1 tablespoon Lemon juice (to prevent browning)

Instructions 

  • Wash, peel, core, and slice the apples into thin wedges.
  • Melt butter in a skillet over medium heat, then add apple slices and sauté for 5 minutes.
  • Sprinkle sugar, cinnamon, nutmeg (if using), and salt over apples; stir to combine and cook for 5-10 minutes until tender and glazed.
  • Remove from heat, then stir in vanilla extract and lemon juice.
  • Serve warm, on its own or over ice cream.

Notes

Using a variety of apples can enhance flavor and texture.
Calories: 150kcal
Cost: $10
Course: Dessert
Cuisine: American
Keyword: apples

Unlock the Delight of Coconut Lime Rice Pudding

Coconut Lime Rice Pudding is a delightful tropical dessert that strikes the perfect balance between creamy and zesty. This recipe is not just easy to prepare; it transforms simple ingredients into a taste of paradise, making it an ideal treat for any occasion. Whether you’re looking for a quick dessert to impress guests or a comforting sweet to enjoy at home, this Coconut Lime Rice Pudding recipe is guaranteed to please. Let’s dive into why you’ll love this recipe and how you can make it effortlessly!

Why You’ll Love This Recipe

This Coconut Lime Rice Pudding is more than just a dessert; it’s an experience. Here are five compelling reasons why this recipe deserves a spot in your kitchen:

  • Quick and Easy: With just a few key ingredients, you can create a creamy, satisfying dessert in under 30 minutes.
  • Rich Flavor: The combination of creamy coconut milk and zesty lime gives this pudding a unique flavor profile that is both refreshing and indulgent.
  • Versatile: This recipe can be adapted for different tastes and dietary preferences, making it a perfect fit for everyone.
  • Dairy-Free Option: For those who are lactose intolerant or vegan, this recipe is naturally dairy-free due to the use of coconut milk.
  • Make-Ahead Friendly: You can prepare this pudding in advance, making it a stress-free dessert option for gatherings.

Ingredient Breakdown

Before we begin cooking, let’s explore the ingredients you’ll need:

  • 1 cup Arborio Rice: This type of rice is essential for creating the creamy texture of the pudding. Arborio is high in starch, which helps thicken the pudding.
  • 4 cups Coconut Milk (Full-fat): For a rich and creamy pudding, full-fat coconut milk is recommended. If you’re looking for a lighter version, you can use light coconut milk.
  • 0.5 cup Sugar: Adjust this to your taste; you can also substitute with honey or maple syrup for a natural sweetener.
  • 1 teaspoon Lime Zest: Fresh lime zest adds a burst of citrus flavor that elevates the dish.
  • 0.25 cup Lime Juice (Freshly squeezed): Fresh lime juice is crucial for that zesty punch.
  • 0.25 teaspoon Salt: A pinch of salt balances the sweetness and enhances the flavors.

Pro Tips for Perfect Pudding

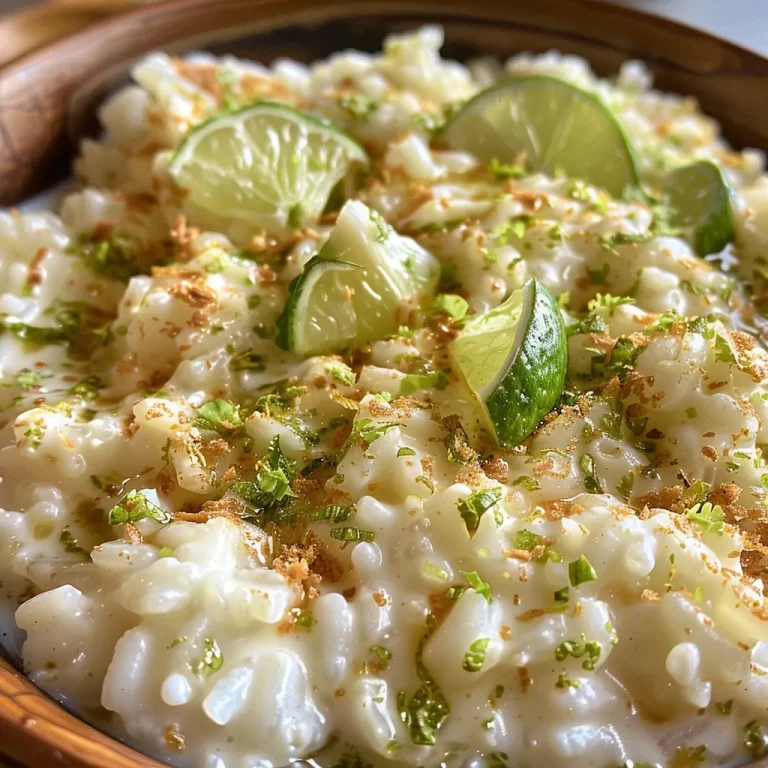
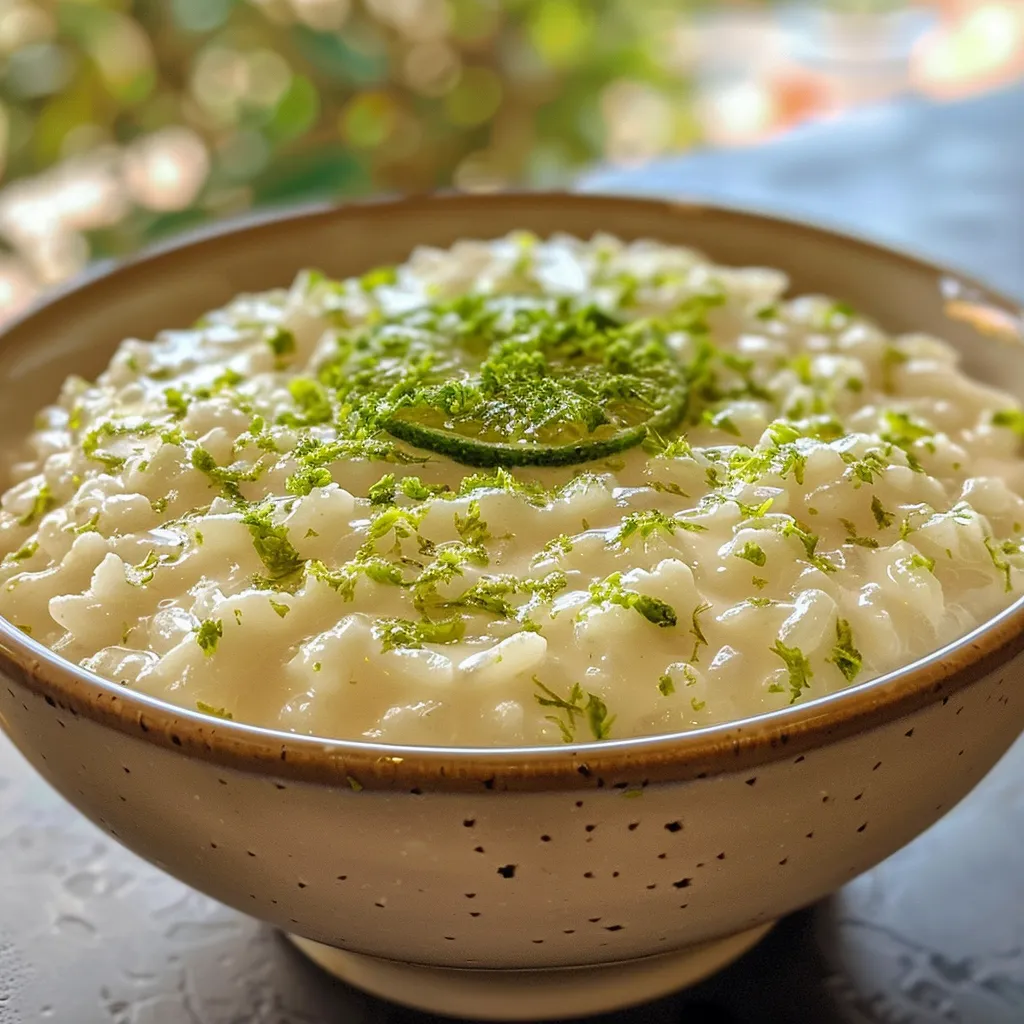
Detailed shot of Coconut Lime Rice Pudding, featuring a spoon and lime zest on top.

To ensure your Coconut Lime Rice Pudding turns out perfectly every time, consider these expert tips:

  • Rinse the Rice: Rinse Arborio rice under cold water before cooking to remove excess starch. This helps achieve the right consistency.
  • Simmer Slowly: Cook the rice on low heat. A gentle simmer ensures even cooking and prevents the rice from sticking.
  • Stir Frequently: Regular stirring helps release starch, resulting in a creamier pudding. Make sure to scrape the sides and bottom of the pot.
  • Adjust Sweetness: Taste as you go! You can always add more sugar or sweetener to achieve your desired sweetness level.
  • Chill Before Serving: For the best flavor and texture, chill the pudding in the refrigerator for at least an hour before serving.
  • Garnish Creatively: Top with toasted coconut flakes, fresh fruits, or a dollop of whipped cream for added flair.
  • Substitute Wisely: Experiment with different citrus fruits like lemon or orange for a twist on flavor.
  • Texture Matters: If the pudding thickens too much, stir in a bit more coconut milk to achieve your preferred consistency before serving.

Common Mistakes and Troubleshooting

Here are some common pitfalls and how to avoid them:

  • Too Thick: If your pudding is thicker than desired, stir in additional coconut milk until the desired consistency is reached.
  • Overcooked Rice: Cooking the rice on too high of heat can lead to mushy pudding. Always keep the heat low and stir frequently.
  • Not Sweet Enough: If the pudding isn’t sweet enough, add more sugar gradually until it meets your taste.
  • Flavor Lacks Depth: If you find the flavor lacking, consider adding a splash of vanilla extract or a pinch of cinnamon for warmth.

Delicious Variations

This recipe is versatile and can be modified in numerous ways:

  • Mango Coconut Lime Rice Pudding: Add diced fresh mango or mango puree for a tropical twist.
  • Chocolate Coconut Lime Rice Pudding: Stir in cocoa powder or melted chocolate for a rich chocolate flavor.
  • Matcha Coconut Lime Rice Pudding: Incorporate matcha powder for a unique flavor and stunning color.
  • Nutty Coconut Lime Rice Pudding: Top with chopped nuts like almonds or pistachios for added crunch and nutrition.

Storage and Make-Ahead Instructions

This Coconut Lime Rice Pudding can be stored in an airtight container in the refrigerator for up to 5 days. For best results, reheat gently on the stove, adding a splash of coconut milk to restore its creamy texture. You can also prepare the pudding ahead of time and keep it chilled until ready to serve.

Frequently Asked Questions

Here are some common questions about Coconut Lime Rice Pudding:

  • Can I make this recipe vegan? Yes, this recipe is naturally vegan since it uses coconut milk instead of dairy.
  • Can I use other types of rice? Arborio rice is recommended for creaminess, but you can experiment with jasmine or basmati rice.
  • How can I make this dessert gluten-free? This recipe is naturally gluten-free as it does not contain any gluten ingredients.
  • Is it possible to freeze Coconut Lime Rice Pudding? Freezing is not recommended as it may alter the texture. However, it can be stored in the fridge for a few days.
  • What can I serve with Coconut Lime Rice Pudding? Pair it with fresh fruit, whipped cream, or even a scoop of sorbet for a refreshing dessert experience.
  • How do I adjust the sweetness? Taste the pudding before serving and add more sugar or sweetener as needed.
  • What’s the best way to reheat leftovers? Reheat gently on the stove, adding a splash of coconut milk to maintain creaminess.
  • Can I use canned coconut milk? Yes, canned coconut milk works perfectly for this recipe and is often creamier than carton versions.

Nutritional Tips and Dietary Adaptations

This Coconut Lime Rice Pudding is not only delicious but can also be a part of a balanced diet. Here are some tips to maximize its nutritional value:

  • Use Less Sugar: Reduce the sugar amount or substitute with natural sweeteners like agave or stevia.
  • Add Fruits: Incorporate fresh fruits like berries or bananas to increase fiber and vitamins.
  • Go Nutty: Add nuts or seeds for healthy fats and protein.
  • Choose Light Coconut Milk: For a lower-calorie option, opt for light coconut milk.

Essential Equipment

To make Coconut Lime Rice Pudding, you will need:

  • Medium Saucepan: For cooking the rice and pudding mixture.
  • Wooden Spoon: Ideal for stirring to prevent sticking.
  • Measuring Cups and Spoons: Accurate measurements ensure consistent results.
  • Serving Bowls: For an elegant presentation.

Serving Suggestions

Presentation is key! Serve your Coconut Lime Rice Pudding in individual bowls or glasses. Consider garnishing with:

  • Toasted Coconut Flakes: For added texture and flavor.
  • Fresh Berries: Such as raspberries or strawberries for a pop of color.
  • Mint Leaves: A sprig of mint adds a refreshing touch.
  • Drizzle of Honey: For a touch of extra sweetness.

Final Thoughts

In conclusion, Coconut Lime Rice Pudding is an effortlessly indulgent dessert that combines the creaminess of coconut milk with the refreshing zing of lime. With its easy preparation and delightful flavor, it’s sure to become a favorite in your home. Whether served at a dinner party or enjoyed as a cozy night-in treat, this pudding offers both simplicity and sophistication. Try it today and savor the taste of the tropics!

Coconut Lime Rice Pudding

Prep Time 10 minutes
Cook Time 30 minutes
Total Time 40 minutes
Servings 4 servings
Calories 250
A creamy and tangy rice pudding infused with coconut and lime, perfect for a refreshing dessert.

Ingredients

Main

  • 1 cup Arborio Rice
  • 4 cups Coconut Milk (Full-fat)
  • 0.5 cup Sugar
  • 1 teaspoon Lime Zest
  • 0.25 cup Lime Juice (Freshly squeezed)
  • 0.25 teaspoon Salt

Instructions 

  • Combine rice, coconut milk, sugar, and salt in a saucepan and bring to a boil.
  • Reduce heat and simmer, stirring occasionally, until rice is tender and mixture thickens, about 25 minutes.
  • Remove from heat and stir in lime zest and lime juice.
  • Let cool slightly before serving or chill for later.

Notes

For extra flavor, garnish with additional lime zest or toasted coconut.
Calories: 250kcal
Cost: $12
Course: Dessert
Cuisine: Tropical
Keyword: coconut, lime, Rice

Elevate Your Breakfast: Unveiling the Secrets of Creamy Mango Matcha Chia Pudding

Welcome to a delightful culinary journey where we explore the vibrant world of mango matcha chia pudding. This nutritious and flavorful dish is not only a feast for the eyes but also a powerhouse of health benefits. With its creamy texture and the unique blend of sweet mango and earthy matcha, this pudding is perfect for breakfast or as a quick snack.

In this guide, you’ll discover how to create this delicious chia pudding with just a few ingredients, ensuring that it’s both simple and satisfying. Let’s dive into why you’ll love this recipe and how you can make it a staple in your kitchen.

Why You’ll Love This Recipe

This mango matcha chia pudding is more than just a pretty dish; it comes with a plethora of benefits that make it a must-try:

  • Nutrient-Rich: Packed with vitamins, antioxidants, and healthy fats from chia seeds, this pudding supports overall health.
  • High in Fiber: Chia seeds are an excellent source of fiber, promoting digestive health and keeping you fuller for longer.
  • Quick and Easy: With minimal prep time, you can whip this pudding up in minutes, making it perfect for busy mornings.
  • Customizable: Adjust the sweetness or add your favorite toppings to suit your taste buds.
  • Vegan and Dairy-Free: Made with plant-based ingredients, this pudding is suitable for various dietary preferences.

Ingredients Breakdown

Let’s take a closer look at the ingredients you’ll need to create this matcha chia pudding, along with some helpful substitutions:

  • 1 cup coconut milk: For a lighter option, you can use almond milk. Ensure it’s unsweetened for the best flavor.
  • 1/4 cup chia seeds: These tiny powerhouses will thicken the pudding and provide a satisfying texture.
  • 2-3 tablespoons maple syrup or honey: Adjust sweetness to taste. Agave syrup or stevia can be used as alternatives.
  • 1 teaspoon matcha powder: Opt for culinary grade for the best flavor and health benefits.
  • 1/2 teaspoon vanilla extract: This adds a lovely depth to the pudding.
  • 1 ripe mango, diced: Reserve some for topping. Fresh mango adds natural sweetness and a vibrant color.

How to Make Mango Matcha Chia Pudding

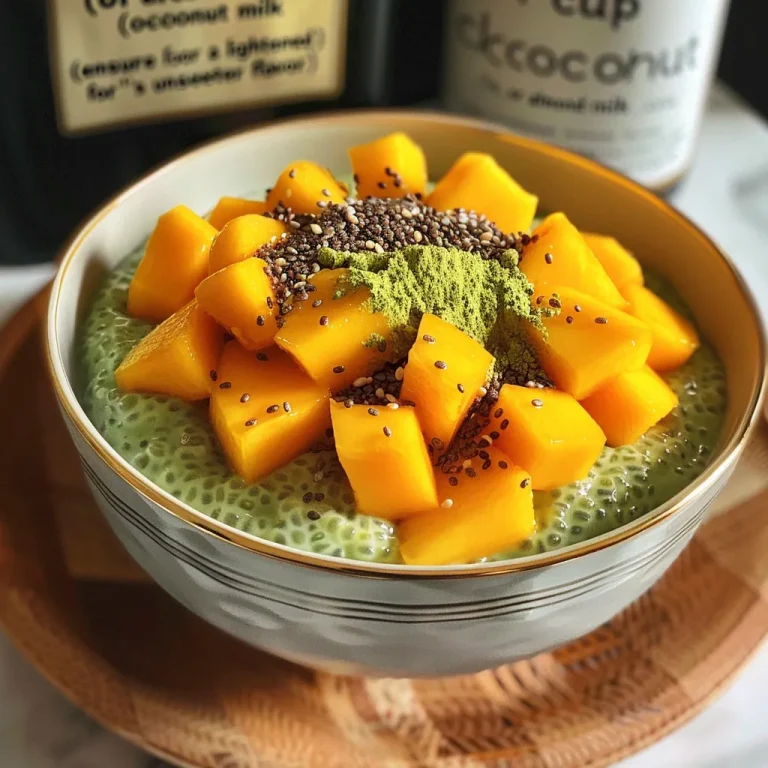
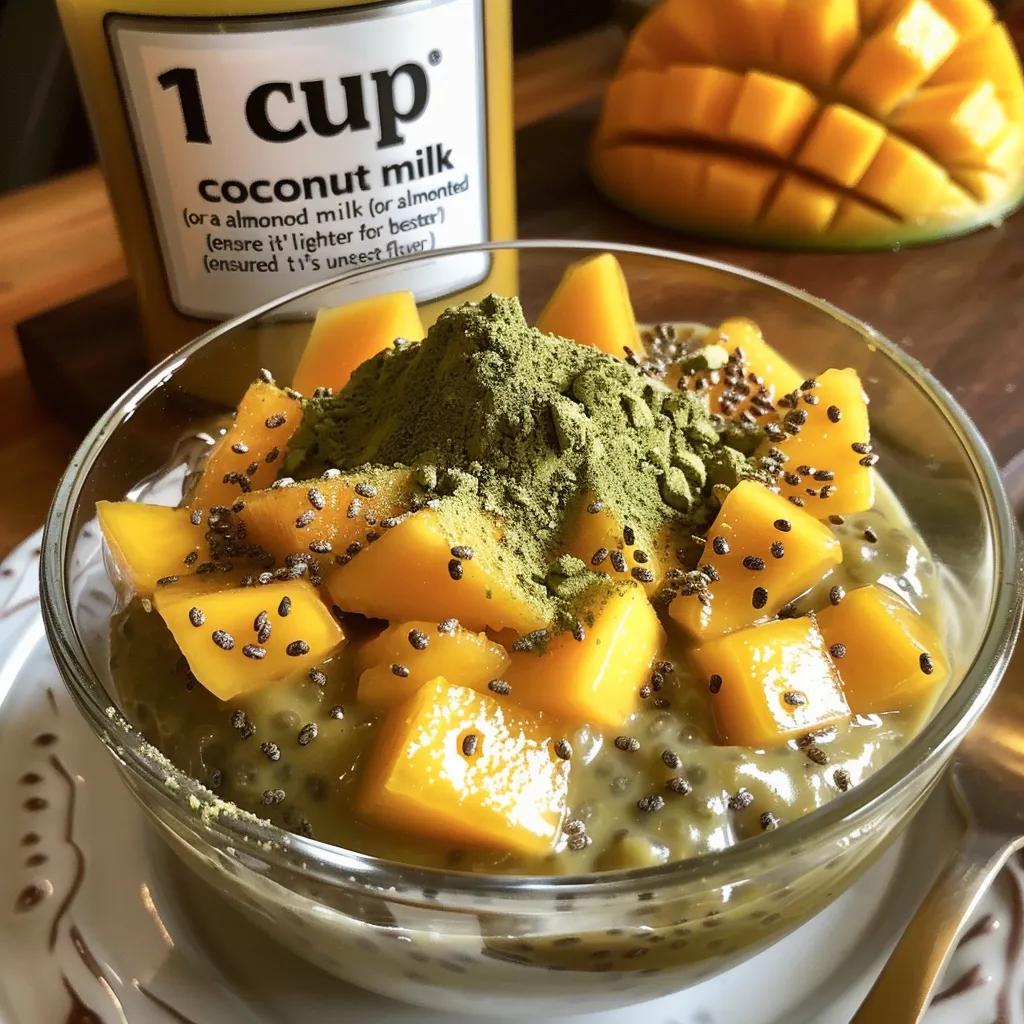
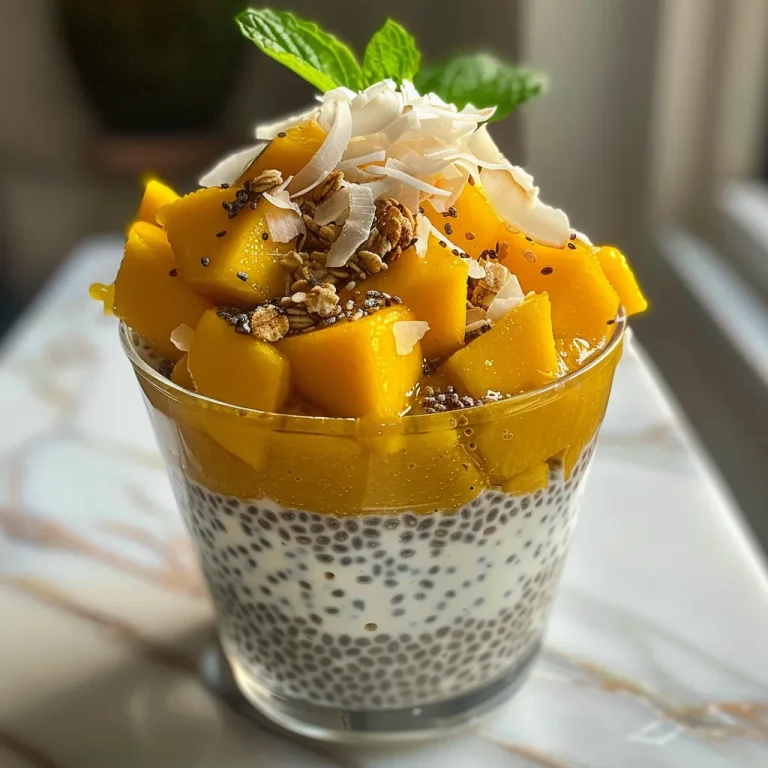
A rich, thick Mango Matcha Chia Pudding served in a clear glass, garnished with mango.

Creating your mango matcha chia pudding is a straightforward process. Follow these step-by-step instructions for a perfect result:

  1. In a mixing bowl, combine the coconut milk, chia seeds, maple syrup, matcha powder, and vanilla extract.
  2. Whisk the mixture thoroughly until the matcha is fully dissolved and there are no clumps.
  3. Cover the bowl and refrigerate for at least 2 hours or overnight to allow the chia seeds to absorb the liquid and thicken.
  4. Before serving, stir the pudding again. If it’s too thick, add a splash of coconut milk to reach your desired consistency.
  5. Top with diced mango and any additional toppings you prefer, such as nuts, seeds, or granola.

Expert Tips for Perfecting Your Pudding

To ensure your mango matcha chia pudding turns out perfectly every time, here are some expert tips:

  • Use Fresh Ingredients: The quality of your fruits and matcha will significantly affect the flavor.
  • Adjust Sweetness: Everyone’s taste buds are different; start with less sweetener and add more if needed.
  • Texture Matters: For a creamier pudding, blend the mixture slightly before refrigerating.
  • Chill Time: Allowing the pudding to sit overnight enhances the flavors and texture.
  • Layering: For an aesthetically pleasing presentation, layer the pudding and mango in clear cups.
  • Garnish Wisely: Fresh mint or toasted coconut can elevate the visual appeal and flavor.

Common Mistakes and Troubleshooting

Even the best can make mistakes. Here’s how to troubleshoot common issues:

  • Pudding Too Runny: If your pudding is too thin, add more chia seeds and let it sit longer.
  • Clumpy Matcha: Ensure you whisk the matcha thoroughly in the liquid to avoid clumping.
  • Flavor Too Strong: If the matcha flavor is overpowering, reduce the amount used next time.
  • Inconsistent Texture: For a smoother texture, blend the ingredients before refrigerating.

Variations to Try

This recipe is highly versatile. Here are some delicious variations you can try:

  • Mango Coconut Layered Pudding: Layer the pudding with coconut yogurt for added creaminess.
  • Berry Bliss: Substitute mango with mixed berries for a different flavor profile.
  • Chocolate Matcha: Add a tablespoon of cocoa powder for a chocolate twist.
  • Nutty Delight: Stir in almond butter or peanut butter for added richness and protein.

Storage and Make-Ahead Instructions

This matcha chia pudding is perfect for meal prep. Here’s how to store it:

  • Refrigeration: Store the pudding in an airtight container in the fridge for up to 5 days.
  • Make-Ahead: Prepare it the night before, so it’s ready for a quick breakfast or snack.
  • Freezing: While not ideal for texture, you can freeze the pudding in ice cube trays for smoothies.

Comprehensive FAQ

Here are answers to some of the most common questions about mango matcha chia pudding:

  • Can I use other types of milk? Yes, almond, oat, or soy milk work well as alternatives.
  • Is matcha safe for everyone? Most people can enjoy matcha, but consult a doctor if you have concerns.
  • How long does it take to thicken? Generally, it takes about 2 hours but overnight is best.
  • What can I use instead of chia seeds? Flax seeds can be a substitute, but the texture will differ.
  • Can I make this pudding without sweetener? Yes, ripe mango adds natural sweetness, making additional sweetener optional.
  • How do I know if my chia seeds are fresh? Check for a clean smell and firm texture; they should not be stale or soft.
  • Can I add protein powder? Absolutely! Just mix it in with the other ingredients.
  • How can I enhance the flavor? Experiment with spices like cinnamon or nutmeg for a flavor boost.

Nutrition Tips and Dietary Adaptations

This mango matcha chia pudding is inherently healthy, but you can adapt it further:

  • Gluten-Free: All ingredients are naturally gluten-free, making it suitable for those with gluten sensitivities.
  • Low-Carb: Use a sugar substitute to lower the carb count.
  • High-Protein: Add Greek yogurt or a scoop of protein powder for a protein boost.

Equipment Recommendations

To make your cooking experience smoother, here are some recommended tools:

  • Mixing Bowl: A medium-sized bowl for mixing your ingredients.
  • Whisk: An essential tool for ensuring the matcha is well incorporated.
  • Airtight Containers: For storing your pudding in the fridge.
  • Measuring Cups and Spoons: Precision is key in achieving the perfect texture and flavor.

Serving Suggestions

When it comes to serving your mango matcha chia pudding, consider these ideas:

  • Breakfast Bowl: Serve it in a bowl with assorted toppings for a hearty breakfast.
  • Snack Option: Pack it in a jar for a nutritious on-the-go snack.
  • Brunch Delight: Pair with fresh fruit and nuts for a delightful brunch dish.

In conclusion, this mango matcha chia pudding is not only a delicious treat but also a nutritious choice that fits seamlessly into your busy lifestyle. Experiment with different variations, and enjoy the health benefits this pudding brings. Happy cooking!

Mango Matcha Chia Pudding

Prep Time 10 minutes
Total Time 10 minutes
Servings 2 servings
Calories 250
Enjoy a vibrant and nutritious vegan pudding combining the tropical sweetness of mango with the earthy flavor of matcha, perfect for a healthy breakfast or snack.

Ingredients

Liquid

  • 1 cup coconut milk (or almond milk for a lighter option) (Ensure it's unsweetened for best flavor.)
  • 1/4 cup chia seeds (These will thicken the pudding.)
  • 2-3 tablespoons maple syrup or honey (Adjust sweetness to taste.)
  • 1 teaspoon matcha powder (Use culinary grade for the best flavor.)
  • 1/2 teaspoon vanilla extract (Halal certified.)
  • 1 ripe mango diced mango (Reserve some for topping.)

Instructions 

  • In a bowl, whisk together coconut milk, chia seeds, matcha powder, vanilla extract, and sweetener until well combined.
  • Let the mixture sit for 5 minutes, then whisk again to prevent clumping.
  • Cover and refrigerate for at least 4 hours or overnight until thickened.
  • Blend half of the diced mango until smooth.
  • Layer the pudding with the remaining mango and top with reserved mango pieces before serving.

Notes

You can substitute honey for maple syrup for a different flavor.
Calories: 250kcal
Cost: $10
Course: Breakfast, Dessert
Cuisine: fusion
Keyword: chia, Mango, matcha

Welcome to this comprehensive guide on making baked apple slices that are not only easy but also incredibly delicious! This recipe features firm apples, warm spices, and just the right touch of sweetness, making it perfect for a cozy dessert or a nutritious snack. In this article, we will delve into the details of how to create baked apple slices that will impress your family and friends, while also providing you with tips, variations, and answers to common questions.

Why You’ll Love This Recipe

  • Quick and Easy: With just a few ingredients and minimal prep time, this recipe is perfect for busy schedules.
  • Customizable: You can easily adapt this recipe based on your taste preferences and dietary needs.
  • Nutritious Treat: Apples are packed with vitamins and fiber, making these slices a healthy dessert option.
  • Deliciously Aromatic: The warm spices create an inviting aroma in your kitchen that will make everyone’s mouth water.
  • Perfect for Any Season: Whether it’s fall or summer, baked apple slices are a delightful treat year-round.

Ingredients Breakdown

Here’s what you need to create these delightful baked apple slices:

  • 4 large baking apples (about 2 pounds): Firm varieties like Honeycrisp, Granny Smith, Braeburn, or Gala work best as they hold their shape beautifully when baked.
  • 2 tablespoons unsalted butter, melted: This adds richness and helps the apples caramelize, creating a luscious sauce. For a dairy-free option, use coconut oil.
  • 3 tablespoons maple syrup: Provides a gentle sweetness that enhances the natural flavors of the apples. You can substitute with brown sugar or coconut sugar.
  • 1 ½ teaspoons ground cinnamon: Adds the essential warm spice that gives this dish its cozy aroma and flavor.
  • ¼ teaspoon ground nutmeg: A supporting spice that adds depth and classic warmth to the cinnamon.
  • Pinch of salt: Enhances all the flavors and balances the sweetness.
  • 1 tablespoon lemon juice (optional): Prevents the apples from browning and adds brightness to the dish.

Step-by-Step Instructions

Follow these simple steps to create your baked apple slices:

  • Prepare Your Oven and Baking Dish: Preheat your oven to 400°F (200°C). Lightly grease a 9×13 inch baking dish with butter or cooking spray to prevent sticking.
  • Wash and Core the Apples: Wash and dry the apples thoroughly. Use an apple corer or paring knife to remove the core, leaving the skin on for added nutrients.
  • Slice the Apples: Cut the apples into uniform slices, about ¼ to ½ inch thick. Consistency is key for even cooking. Toss with lemon juice if needed.
  • Mix the Flavorful Coating: In a small bowl, combine melted butter (or coconut oil), maple syrup, cinnamon, nutmeg, and a pinch of salt. Whisk until smooth.
  • Coat the Apples Thoroughly: Pour the mixture over the apple slices and toss to ensure every slice is evenly coated. Spread them out in a single layer in the baking dish.
  • Bake to Perfection: Bake for 20-25 minutes, stirring halfway through. The apples should be tender yet maintain their shape.
  • Check for Doneness: The apples are ready when they can be easily pierced with a fork but still hold their shape. The sauce should be bubbly and slightly thickened.
  • Rest and Serve: Allow the baked apple slices to cool for a few minutes before serving. Enjoy the incredible aroma and flavor!

Pro Tips for Perfect Baked Apple Slices

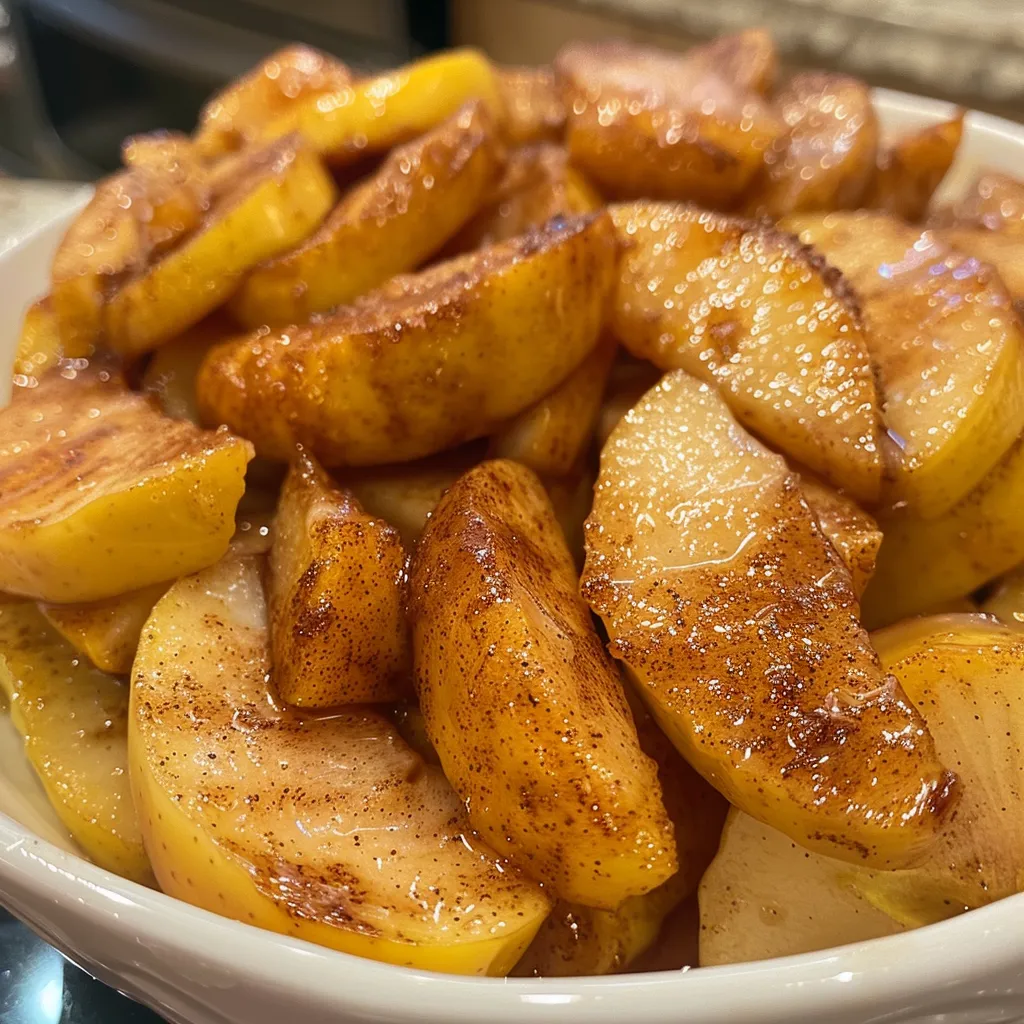
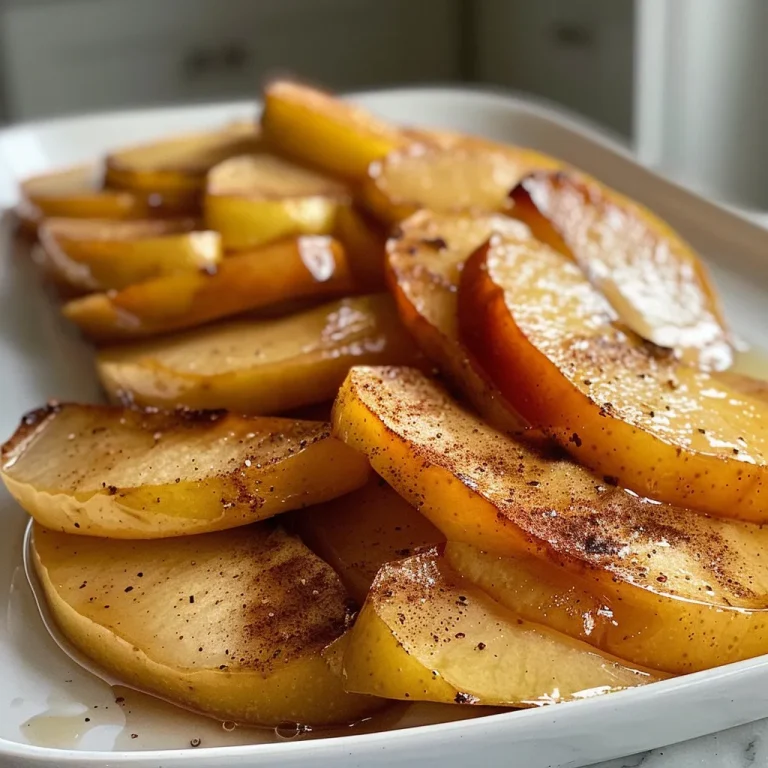
Delicious, golden-brown baked apple slices, showing their juicy texture and cinnamon topping.
  • Choose the Right Apples: Opt for apples that are firm and crisp to ensure they hold their shape during baking.
  • Uniform Slices: Aim for consistent thickness in your apple slices to ensure even cooking.
  • Experiment with Spices: Feel free to add spices like allspice or ginger for a unique flavor twist.
  • Use Fresh Ingredients: Ensure your spices are fresh for the best flavor.
  • Adjust Sweetness: Taste the apples before baking; you can always add more sweetener if needed.
  • Serve Warm: These slices are best enjoyed warm, fresh from the oven.
  • Pair with Ice Cream: For an indulgent treat, serve your baked apple slices with a scoop of vanilla ice cream.
  • Make Ahead: You can prepare the apples and coating in advance; just bake them when you’re ready to serve.

Common Mistakes and Troubleshooting

Here are some common issues you might encounter and how to avoid them:

  • Apples Turning Mushy: Ensure your slices are not too thin and avoid over-baking.
  • Too Much Sweetness: Taste your apple mixture before baking and adjust the sweetener as needed.
  • Not Enough Flavor: Make sure to use fresh spices and the right amount of seasoning.

Variations on Baked Apple Slices

Here are a few delicious variations you can try:

  • Nutty Crunch: Add chopped walnuts or pecans for a crunchy texture.
  • Caramel Drizzle: Drizzle caramel sauce over the baked apples for an indulgent treat.
  • Spiced Apple Cider: Substitute half of the butter with apple cider for an extra layer of flavor.
  • Berry Blend: Mix in some fresh or frozen berries for a fruity twist.

Storage and Make-Ahead Instructions

To keep your baked apple slices fresh:

  • Refrigeration: Store in an airtight container in the refrigerator for up to 5 days.
  • Freezing: Baked apple slices can be frozen for up to 3 months. Reheat in the oven.
  • Make-Ahead: Prepare the apples and coating a day in advance; just bake when ready to serve.

Frequently Asked Questions

Here are some common questions regarding baked apple slices:

  • Can I use different types of apples? Yes, feel free to mix different varieties for a unique flavor.
  • How do I prevent the apples from browning? Toss with lemon juice immediately after slicing.
  • Can I make these in an air fryer? Absolutely! Set your air fryer to 350°F for about 10-15 minutes.
  • What spices can I add? Consider adding ginger or cloves for additional warmth.
  • Can I make this vegan? Yes, substitute butter with coconut oil and use a vegan sweetener.
  • How do I know when they are done? They should be tender but still hold their shape.
  • Can I serve these cold? While they are best warm, you can enjoy them cold as well.
  • What can I serve with baked apple slices? They pair well with yogurt, ice cream, or even pancakes.

Nutrition Tips and Dietary Adaptations

Baked apple slices are not only delicious but also nutritious. Here are a few tips:

  • Fiber-Rich: Apples are a great source of dietary fiber, aiding digestion and helping you feel full.
  • Low in Calories: This dessert is relatively low in calories, especially if you reduce the sweetener.
  • Gluten-Free: Naturally gluten-free, making it suitable for those with gluten intolerance.

Equipment Recommendations

To successfully create these baked apple slices, you will need:

  • Baking Dish: A 9×13 inch baking dish works perfectly.
  • Apple Corer: This tool makes coring your apples quick and easy.
  • Whisk: For mixing the coating ingredients smoothly.
  • Sharp Knife: A good knife is essential for slicing apples evenly.

Serving Suggestions

Here are a few ideas for serving your baked apple slices:

  • Warm with Ice Cream: A scoop of vanilla ice cream on top makes for a delightful dessert.
  • With Yogurt: Serve over Greek yogurt for a healthy breakfast option.
  • On Pancakes: Use as a topping for pancakes or waffles for a delicious brunch treat.
  • As a Snack: Enjoy them plain for a quick and healthy snack option.

In conclusion, this easy baked apple slices recipe is a wonderful way to enjoy the flavors of fall any time of the year. With the right ingredients, simple steps, and a few expert tips, you can create a dish that is not only delicious but also versatile and easy to adapt to your preferences. So preheat your oven, gather your ingredients, and enjoy the cozy delight of homemade baked apple slices!

Easy Baked Apple Slices with Cinnamon

Prep Time 10 minutes
Cook Time 25 minutes
Total Time 35 minutes
Servings 4 servings
Calories 150
Enjoy warm, tender apple slices infused with cinnamon and a touch of sweetness, perfect for a cozy dessert or snack.

Ingredients

Apples

  • 4 large baking apples (Firm, crisp apples like Honeycrisp, Granny Smith, Braeburn, or Gala)
  • 2 tablespoons unsalted butter (or coconut oil for dairy-free)
  • 3 tablespoons maple syrup (or brown sugar/coconut sugar)
  • 1 ½ teaspoons ground cinnamon (essential warm spice)
  • ¼ teaspoon ground nutmeg (adds depth and warmth)
  • Pinch salt (to enhance flavors)
  • 1 tablespoon lemon juice (optional, prevents browning)

Instructions 

  • Preheat oven to 400°F (200°C) and grease a 9×13 inch baking dish.
  • Wash, core, and slice apples into ¼-½ inch thick slices; toss with lemon juice if desired.
  • Mix melted butter, maple syrup, cinnamon, nutmeg, and salt in a bowl.
  • Pour the mixture over apple slices, toss to coat evenly, and spread in a single layer.
  • Bake for 20-25 minutes, stirring halfway through, until apples are tender and caramelized.

Notes

Serve warm for the best flavor and aroma.
Calories: 150kcal
Cost: $15
Course: Dessert
Cuisine: American
Keyword: Apple, Cinnamon

Are you looking for a quick and delightful dessert that brings warmth and nostalgia to your kitchen? This recipe for Baked Cinnamon Apples is your answer. With just a few ingredients, you can create a comforting treat that’s perfect for a cozy evening or an impressive side dish for gatherings. In under an hour, these baked cinnamon apples transform simple ingredients into a sweet, aromatic dish that’s hard to resist.

In this guide, we will dive deep into the world of baked apples, sharing not only the basic recipe but also tips, variations, and everything you need to know to master this comforting classic. By the end, you’ll feel empowered to make this delicious dessert with confidence, ensuring it becomes a staple in your culinary repertoire.

Why You’ll Love This Recipe

This recipe for baked cinnamon apples isn’t just about taste—it’s about the experience. Here are several reasons why you’ll adore making and sharing this delightful dish:

  • Simple Ingredients: With just six basic ingredients, you can whip up this dessert without a trip to the grocery store. Apples, brown sugar, cinnamon, and a few other pantry staples are all you need.
  • Quick Preparation: This recipe requires minimal prep time. You can have everything ready for the oven in about 10 minutes, making it a perfect last-minute dessert option.
  • Versatile Serving Options: Whether you serve them warm with a scoop of vanilla ice cream or as a topping for pancakes or oatmeal, these baked cinnamon apples are incredibly versatile.
  • Healthy Comfort Food: Made from fresh apples, this dish is a healthier indulgence compared to many traditional desserts. It’s a sweet treat that doesn’t compromise on nutrition.
  • Delicious Aroma: The smell of cinnamon and baked apples wafting through your kitchen is enough to make anyone feel at home. This dish doesn’t just taste good—it makes your space feel inviting.

Ingredients Breakdown

Before we get started, let’s look closely at the ingredients you’ll need for this delicious recipe:

  • Apples: 3 large apples (peeled, cored, and sliced, about 4-5 cups). Good choices include Granny Smith for tartness and Honeycrisp for sweetness. You can also mix varieties for a more complex flavor.
  • Brown Sugar: ¼ cup. This adds sweetness and a hint of caramel flavor. For a healthier alternative, consider using honey or maple syrup.
  • Cornstarch: 1 teaspoon. This helps thicken the juices released by the apples during baking, preventing them from becoming overly watery.
  • Cinnamon: 1 ½ tablespoons. The star of the show! Use freshly ground cinnamon if possible for the best flavor.
  • Nutmeg: ½ teaspoon (optional but recommended). Adds a warm, slightly spicy note that complements the cinnamon beautifully.
  • Lemon Juice: 1 ½ tablespoons. This brightens the flavor and prevents browning of the apples.
  • Butter: 3 tablespoons, cut into small cubes (use vegan butter if desired). This enriches the flavor and adds a lovely richness to the dish.

How to Make Baked Cinnamon Apples

Now that you have your ingredients ready, let’s get into the step-by-step process:

  1. Preheat your oven to 400 degrees F (200 degrees C) and grease a medium baking dish with cooking spray (a 2-quart, 8×6 inch dish works perfectly).
  2. In a large bowl, combine the apple slices with brown sugar, cornstarch, cinnamon, nutmeg, and lemon juice. Toss until the apples are evenly coated with the mixture.
  3. Pour the apple mixture into the prepared baking dish. Evenly distribute the butter cubes over the top.
  4. Cover the dish with foil and bake in the preheated oven for 30-40 minutes, or until the apples are tender and the juices are bubbling.
  5. Once out of the oven, stir gently to coat the apples in the flavorful juices. Serve warm and enjoy!

Pro Tips for Perfect Baked Cinnamon Apples

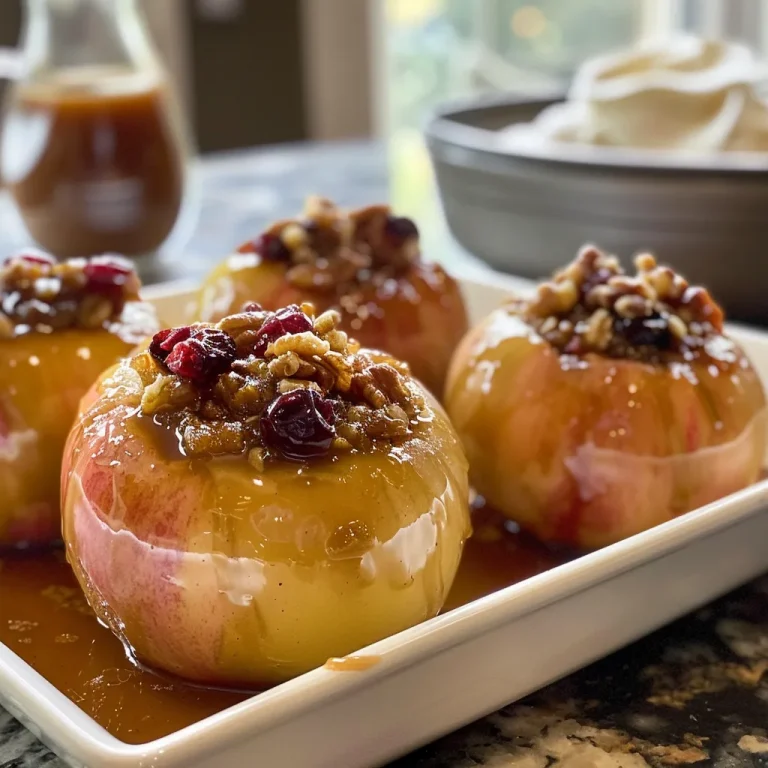
A serving of baked cinnamon apples, showcasing their golden color and buttery texture.

To ensure your baked cinnamon apples turn out perfectly every time, consider these expert tips:

  • Mix Apple Varieties: Combining sweet and tart apples enhances the flavor profile. Experiment with different varieties to find your perfect match.
  • Don’t Overbake: Keep an eye on the apples while they bake. You want them tender but not mushy. A gentle press with a fork should indicate doneness.
  • Use Fresh Spices: Fresh cinnamon and nutmeg provide the best flavor. If your spices have been sitting for a while, it might be time to replace them.
  • Serving Temperature: Baked apples are best served warm, but they can also be enjoyed cold. Reheat in the microwave if needed.
  • Customize Sweetness: Adjust the amount of brown sugar based on the sweetness of your apples. Taste the mixture before baking and modify if necessary.
  • Make Ahead: You can prepare the apple mixture a few hours in advance and store it in the fridge. Just add the butter and bake when ready!
  • Garnish for Extra Flair: Top with chopped nuts, whipped cream, or a drizzle of caramel for an extra decadent touch.
  • Pairing Suggestions: Serve with a scoop of vanilla ice cream or a dollop of whipped cream for a delightful contrast in temperature and texture.

Common Mistakes and Troubleshooting

Even the best of us can make mistakes in the kitchen. Here are common pitfalls to avoid when making baked cinnamon apples:

  • Using the Wrong Apples: Not all apples hold up well in baking. Choose firm varieties that won’t turn to mush.
  • Skipping the Lemon Juice: This ingredient not only enhances flavor but also prevents the apples from browning.
  • Overcrowding the Dish: Give your apples room to cook evenly. If the dish is too full, they’ll steam instead of bake.
  • Not Covering the Dish: Covering while baking helps to retain moisture, but remember to uncover for the last 10 minutes for a nice top layer.
  • Ignoring Texture: The goal is tender apples with a bit of bite. If they’re too mushy, reduce baking time next time.

Variations to Try

If you’re feeling adventurous, here are some creative variations to keep your baked cinnamon apples exciting:

  • Maple Cinnamon Apples: Substitute brown sugar with maple syrup for a unique sweetness.
  • Nutty Cinnamon Apples: Add chopped walnuts or pecans to the apple mixture for an added crunch.
  • Spiced Up Apples: Incorporate a pinch of allspice or cloves for a different spice profile.
  • Caramelized Cinnamon Apples: Drizzle caramel sauce over the top just before serving for an indulgent treat.

Storage and Make-Ahead Instructions

Planning ahead can save you time in the kitchen. Here’s how to properly store and prepare your baked cinnamon apples:

  • Storing Leftovers: Keep any leftovers in an airtight container in the refrigerator for up to 3 days.
  • Reheating: Warm in the microwave for about 30 seconds or until heated through. You can also reheat in the oven at 350 degrees F for about 10 minutes.
  • Make Ahead: Prepare the apple mixture and store it in the fridge for up to 4 hours before baking. Add butter right before baking.

Frequently Asked Questions

Here are answers to some common questions about baked cinnamon apples:

  • Can I use frozen apples? Yes, but fresh apples yield the best results. If using frozen, adjust the baking time as they may release more moisture.
  • What can I serve with baked cinnamon apples? They pair beautifully with vanilla ice cream, yogurt, or even pancakes.
  • Can I make this vegan? Absolutely! Use vegan butter and ensure any sweeteners are plant-based.
  • How do I prevent apples from browning? Tossing them in lemon juice helps prevent browning and enhances flavor.
  • Is it necessary to peel the apples? Peeling is optional, but it helps achieve a tender texture.
  • Can I double the recipe? Yes, just ensure your baking dish is large enough to accommodate the increased volume.
  • What other spices can I use? Feel free to experiment with ginger, cardamom, or even pumpkin spice for a seasonal twist.
  • How long do baked apples last? They can be stored in the refrigerator for up to 3 days.

Nutritional Information and Dietary Adaptations

This recipe is not only delicious but can also be adapted for various dietary preferences:

  • Gluten-Free: Naturally gluten-free as it contains no flour.
  • Low-Sugar: Substitute brown sugar with a low-calorie sweetener to reduce sugar content.
  • High-Fiber: Apples are a great source of fiber, making this dessert a nutritious choice.
  • Paleo-Friendly: Use natural sweeteners like honey or maple syrup instead of refined sugars.

Equipment Recommendations

For the best results, here are some tools that can make your baking experience smoother:

  • Sharp Knife: For peeling and slicing apples efficiently.
  • Cutting Board: A sturdy surface for prepping your ingredients.
  • Baking Dish: A 2-quart baking dish is ideal for this recipe.
  • Mixing Bowl: A large bowl for mixing the apple slices with sugar and spices.

Serving Suggestions

To elevate your baked cinnamon apples, consider these serving suggestions:

  • With Ice Cream: Serve warm apples over a scoop of vanilla ice cream for a delightful contrast.
  • On Pancakes: Use as a topping for pancakes or waffles for a delicious breakfast treat.
  • As a Yogurt Parfait: Layer with Greek yogurt and granola for a nutritious snack.
  • In a Tart: Use as a filling for a tart or pie for a more elaborate dessert.

With this comprehensive guide, you’re set to create the most delicious baked cinnamon apples that will wow your family and friends. Embrace the warmth of this classic dish and enjoy the journey of cooking it. Remember, every time you make this recipe, you’re not just baking—you’re creating memories. Happy cooking!

Baked Cinnamon Apples

Prep Time 10 minutes
Cook Time 35 minutes
Total Time 45 minutes
Servings 4 servings
Calories 220
A warm and comforting dessert featuring tender baked apples infused with cinnamon and nutmeg, topped with buttery cubes.

Ingredients

Fruits

  • 3 large apples (peeled, cored, and sliced) (about 4-5 cups)
  • 0.25 cup brown sugar
  • 1 teaspoon cornstarch
  • 1.5 tablespoons cinnamon
  • 0.5 teaspoon nutmeg (optional, but recommended)
  • 1.5 tablespoons lemon juice
  • 3 tablespoons butter (cut into small cubes) (vegan, as desired)

Instructions 

  • Preheat oven to 400°F (200°C). Grease a baking dish.
  • Mix apple slices with sugar, cornstarch, cinnamon, nutmeg, and lemon juice.
  • Transfer apples to dish, top with butter cubes, cover with foil, and bake for 30-40 minutes.
  • Remove from oven, stir to coat in juices, and serve.

Notes

Serve warm with a scoop of ice cream or a dollop of whipped cream for extra indulgence.
Calories: 220kcal
Cost: $10
Course: Dessert
Keyword: apples

Welcome to the world of delicious desserts, where making baked apples is not only simple but incredibly satisfying. In this guide, we’ll explore how to create easy baked apples that are the perfect blend of sweetness and warmth. Whether you’re preparing a quick treat for yourself or hosting guests, this recipe will ensure you impress with minimal effort. Let’s dive into the joys of preparing these delightful treats!

Why You’ll Love This Recipe

This recipe for baked apples is specially designed for those who appreciate simplicity without compromising flavor. Here’s why you’ll adore it:

  • Quick and Easy: With just a few ingredients and less than an hour, you can have a delicious dessert ready to serve.
  • Customizable: Feel free to experiment with different toppings and flavors to create your own twist on this classic dish.
  • Healthier Dessert Option: Naturally sweetened with apples and brown sugar, it’s a guilt-free indulgence.
  • Perfect for Any Occasion: Whether it’s a family dinner or a cozy night in, baked apples fit seamlessly into any scenario.
  • Great for Meal Prep: Make a batch ahead of time and enjoy them throughout the week—just pop them in the microwave or oven to reheat!

Ingredients Breakdown

Understanding the ingredients is crucial for mastering this recipe. Here’s what you’ll need:

  • 3 medium firm, sweet apples: Honeycrisp or Fuji are excellent choices for their sweetness and texture.
  • 1/2 teaspoon ground cinnamon: Adds a warm, aromatic flavor that complements the apples beautifully.
  • 1/2 cup (100g) brown sugar: A natural sweetener that enhances the caramelization process during baking.
  • 8 tablespoons (113g) unsalted butter: Provides richness and helps create a delicious crumb topping.
  • 3/4 cup (98g) all-purpose flour: Essential for the crumb topping structure.
  • 3/4 cup (84g) old-fashioned rolled oats: Adds texture and a wholesome element to the topping.
  • 1/8 teaspoon fine sea salt: Balances the sweetness of the dish.
  • Vanilla ice cream and homemade caramel sauce (optional): Perfect for serving, but entirely optional if you prefer a lighter dish.

How to Make the Best Baked Apples

Creating these delicious baked apples is straightforward. Follow these steps closely for perfect results:

  1. Preheat the oven to 375°F (190°C). Butter or spray a baking dish large enough to fit 6 apple halves with non-stick cooking spray.
  2. Cut each apple in half from stem to end and use a spoon to scoop out the core, seeds, and stem.
  3. Arrange the apple halves in the baking dish with the flesh facing up.
  4. Scatter over 1 tablespoon of brown sugar and 1/4 teaspoon of cinnamon over the apples.
  5. Make the topping. Melt the butter in a pan over medium heat. Remove the pan from the heat, then stir the flour, oats, brown sugar, remaining 1/4 teaspoon of cinnamon, and salt into the melted butter.
  6. Divide the topping between the apples, lightly pressing it down onto the apples.
  7. Cover with aluminum foil and bake for 25 minutes. Uncover the apples, then bake for another 20 to 30 minutes until the apples are soft and the topping has browned.
  8. Serve with a scoop of ice cream, a drizzle of caramel sauce, or leave them plain.

Pro Tips for Perfect Baked Apples

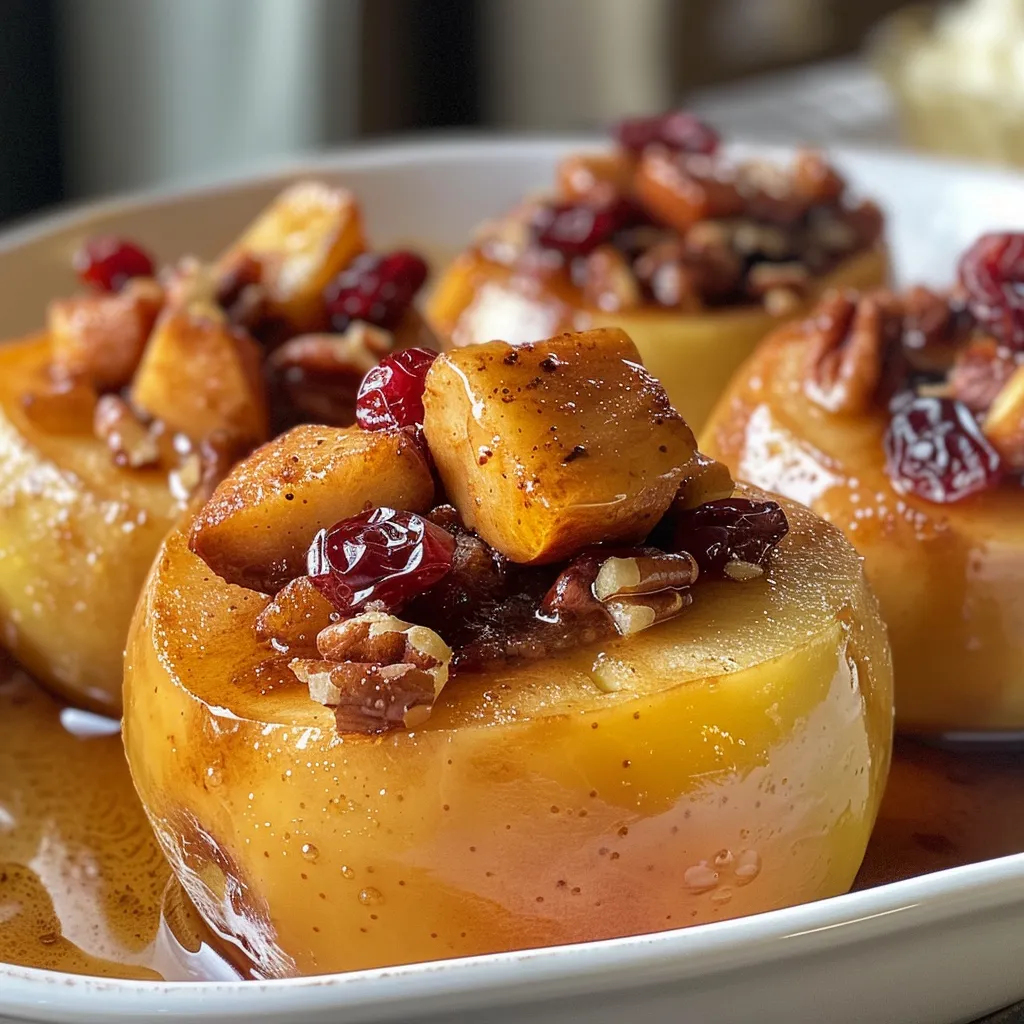
Freshly baked apples with a golden crust, served in a dish.

To elevate your baked apples, consider these expert insights:

  • Choose the Right Apples: Opt for firmer varieties like Granny Smith or Gala for the best texture.
  • Topping Variations: Experiment with nuts, raisins, or even a splash of bourbon for added complexity.
  • Use Fresh Ingredients: Fresh spices and quality butter will significantly enhance the flavor.
  • Check for Doneness: Apples should be tender but not mushy; keep an eye on them during the last baking phase.
  • Make Ahead: Prepare the apples a day in advance; just bake them when you’re ready to serve.
  • Presentation Matters: Serve in individual ramekins for an elegant touch during gatherings.
  • Garnish Creatively: A sprinkle of chopped nuts or a drizzle of honey can elevate the dish visually and flavor-wise.
  • Serving Temperature: Baked apples are delightful warm but can also be enjoyed at room temperature.

Common Mistakes and Troubleshooting

Even the best cooks can face issues. Here’s how to avoid common pitfalls:

  • Apples are too hard: Ensure they are fully baked by extending the time if needed.
  • Too much topping: Adjust the topping quantity based on your apple size; not all apples are created equal.
  • Burnt topping: If the topping is browning too quickly, cover with foil midway through baking.
  • Too sweet: Reduce the sugar based on the sweetness of your apples; taste first!

Variations to Try

Here are some creative twists on the classic baked apple recipe:

  • Nutty Crumble: Add chopped pecans or walnuts to the topping for an extra crunch.
  • Spiced Apples: Incorporate nutmeg or ginger for a spicier flavor profile.
  • Chocolate Lovers: Sprinkle chocolate chips over the apples before baking for a decadent treat.
  • Maple Syrup Drizzle: Replace brown sugar with maple syrup for a unique sweetness.

Storage and Make-Ahead Instructions

Want to prepare your baked apples in advance? Here’s how:

  • Refrigeration: Store leftovers in an airtight container in the fridge for up to 5 days.
  • Freezing: Freeze unbaked apples for up to 3 months. Just thaw and bake when ready.
  • Reheating: Warm in the oven or microwave until heated through, about 10 minutes at 350°F (175°C).

Comprehensive FAQ

Here are some frequently asked questions about baked apples:

  • Can I use different types of apples? Yes! Different varieties will yield varying sweetness and textures.
  • What if I don’t have brown sugar? You can substitute with white sugar or coconut sugar, though the flavor will differ slightly.
  • Are baked apples gluten-free? If you need a gluten-free option, replace all-purpose flour with almond flour or a gluten-free blend.
  • Can I add nuts to the filling? Absolutely! Chopped nuts can add a delightful crunch.
  • How do I know when the apples are done? Apples should be tender yet hold their shape; test with a fork.
  • Can I serve them cold? Yes, they can be served warm or cold, depending on your preference.
  • What can I serve with baked apples? They pair beautifully with vanilla ice cream, whipped cream, or a drizzle of caramel sauce.
  • Can I make them vegan? Substitute the butter with coconut oil or a vegan butter alternative.

Nutrition Tips and Dietary Adaptations

Here are some considerations for keeping your baked apples healthy:

  • Lower Sugar: Use less brown sugar or substitute with a sugar alternative like stevia.
  • Incorporate Fiber: Add chia seeds to the topping for extra fiber and nutrients.
  • Use Whole Grains: Opt for whole wheat flour instead of all-purpose for added health benefits.

Equipment Recommendations

To ensure success with this recipe, here’s what you’ll need:

  • Baking Dish: A sturdy glass or ceramic dish will help retain heat.
  • Mixing Bowls: Use various sizes for mixing ingredients smoothly.
  • Measuring Cups and Spoons: Accurate measurements are key to consistent results.
  • Apple Corer: Makes removing the core quick and easy.

Serving Suggestions

Here are some ideas to enhance your baked apple experience:

  • With Ice Cream: Serve with a scoop of vanilla ice cream for a delightful contrast in temperatures.
  • With Whipped Cream: A dollop of whipped cream can add a lightness to the dish.
  • Drizzled with Caramel Sauce: For a rich finish, drizzle warm caramel over the top.
  • As Part of a Dessert Bar: Serve alongside other desserts for a fun, shared experience.

Conclusion

Now that you have all the tools, tips, and insights to create the most delicious baked apples, it’s time to get cooking! With their incredible flavor and versatility, these baked apples will surely become a favorite in your household. Remember, the beauty of this recipe lies in its simplicity and adaptability; don’t hesitate to experiment and make it your own. Happy baking!

Easy Baked Apples

Prep Time 10 minutes
Cook Time 45 minutes
Total Time 55 minutes
Servings 6 servings
Calories 250
Delight in these warm, tender baked apples topped with a sweet cinnamon-oat crumble, perfect for a cozy dessert.

Ingredients

Apples

  • 3 medium firm, sweet apples (like Honeycrisp or Fuji)
  • 1/2 teaspoon ground cinnamon, divided
  • 1/2 cup brown sugar (plus 1 tablespoon for apples)
  • 8 tablespoons unsalted butter
  • 3/4 cup all-purpose flour
  • 3/4 cup old-fashioned rolled oats
  • 1/8 teaspoon fine sea salt
  • to taste vanilla ice cream and homemade caramel sauce (optional for serving)

Instructions 

  • Preheat oven to 375°F (190°C). Prepare a baking dish with non-stick spray.
  • Cut apples in half, core, and arrange in dish flesh side up.
  • Sprinkle 1 tablespoon brown sugar and 1/4 teaspoon cinnamon over apples.
  • Melt butter, then stir in flour, oats, remaining cinnamon, salt, and brown sugar to make topping.
  • Divide topping over apples, press lightly, cover with foil, and bake 25 minutes. Uncover and bake 20-30 minutes until tender and browned.

Notes

For extra flavor, serve with vanilla ice cream and caramel sauce.
Calories: 250kcal
Cost: $12
Course: Dessert
Keyword: apples

Effortless Elegance Awaits: Mastering Mini Lemon Meringue Tarts

Welcome to a delightful culinary adventure where you’ll learn how to create mini lemon meringue tarts that are not only visually stunning but also bursting with flavor. This recipe is designed for anyone who appreciates the perfect balance between zesty lemon curd and fluffy meringue, making it an ideal choice for gatherings or special occasions. With straightforward steps and practical tips, you’ll be able to impress your guests with these elegant treats. Let’s dive into the world of lemon meringue!

Why You’ll Love This Recipe

These mini lemon meringue tarts are a crowd favorite for several reasons:

  • Perfectly Balanced Flavors: The tartness of the lemon curd is beautifully complemented by the sweetness of the meringue, creating a harmonious dessert experience.
  • Elegant Presentation: Individual portions make these tarts not only easy to serve but also visually appealing, ideal for parties and gatherings.
  • Versatile Ingredients: The recipe incorporates common pantry staples, and substitutions can easily be made without compromising flavor.
  • Quick Prep Time: With straightforward steps, you can whip these up in under two hours, making them perfect for last-minute entertaining.
  • Make-Ahead Friendly: Prepare components in advance, so you can assemble and serve fresh tarts when it’s time to impress your guests.

Ingredients You’ll Need for Mini Lemon Meringue Tarts

Let’s break down the key ingredients for this delightful recipe, along with some helpful substitutions:

  • Unsalted Butter (200 g): Adds richness and flavor. You can substitute with coconut oil for a dairy-free option.
  • Superfine Sugar (100 g): This dissolves easily, ensuring a smooth tart crust. Regular granulated sugar can be used in a pinch.
  • Eggs (4 extra large): Essential for the tart filling and meringue. You can try flax eggs for a vegan version.
  • Lemon Juice (80 ml): Freshly squeezed is best for vibrant flavor. Bottled lemon juice works, but may be less aromatic.
  • Lemon Zest (1 tbsp): Adds a burst of flavor. Use a microplane for fine zesting.
  • Cake Flour (350 g): Provides a tender crust. All-purpose flour can be substituted, though the texture may vary slightly.
  • Condensed Milk (2 tins, 385 g each): Forms the base of the lemon curd. Use evaporated milk for a lighter option.
  • Salt (½ tsp): Enhances the flavors. A pinch of sea salt works perfectly.
  • Melted Butter (20 g, for brushing tart tins): Prevents sticking. You can use a non-stick spray if preferred.

How to Make Mini Lemon Meringue Tarts

Close-up of a Mini Lemon Meringue Tart with a contrasting texture of soft meringue and smooth lemon filling.

Follow these steps to create your mini lemon meringue tarts:

Step 1: Prepare the Tart Shells

1. Preheat your oven to 180°C (350°F).
2. In a mixing bowl, combine the butter and superfine sugar until creamy.
3. Add the egg and vanilla extract, mixing well.
4. Gradually add the cake flour and salt until a dough forms. Wrap in plastic wrap and chill for 30 minutes.

Step 2: Blind Bake the Shells

1. Roll out the chilled dough and cut into circles to fit your tart tins.
2. Press the dough into the tins and brush with melted butter.
3. Use parchment paper and baking weights to blind bake for 15 minutes. Remove weights and bake for an additional 5 minutes until golden.

Step 3: Prepare the Lemon Curd

1. In a saucepan, whisk together the condensed milk, lemon juice, and lemon zest.
2. In another bowl, whisk the egg yolks and then incorporate them into the lemon mixture.
3. Cook over medium heat, stirring constantly, until thickened (about 10 minutes). Pour into cooled tart shells and chill.

Step 4: Make the Meringue Topping

1. In a clean bowl, beat the egg whites until soft peaks form.
2. Gradually add the superfine sugar, whisking until glossy and stiff peaks form.
3. Spread or pipe the meringue over the lemon curd, ensuring it touches the crust edges to prevent shrinkage.

Step 5: Final Bake

1. Bake the assembled tarts at 180°C (350°F) for 10 minutes or until the meringue is golden brown. Let cool before serving.

Pro Tips for Perfect Mini Lemon Meringue Tarts

Here are some expert insights to ensure your tarts turn out perfectly:

  • Chill the Dough: Allowing the pastry to rest prevents shrinkage during baking.
  • Use Fresh Ingredients: Fresh lemon juice and zest enhance the overall flavor significantly.
  • Do Not Overbeat the Egg Whites: Beat until just stiff; overbeating can cause the meringue to become dry.
  • Keep Ingredients at Room Temperature: This helps in creating a smoother meringue.
  • Ensure Meringue Touches the Edges: This prevents the meringue from shrinking away from the filling.
  • Check for Doneness: Meringue should be golden and slightly firm to the touch.
  • Serve Fresh: These tarts are best enjoyed the same day they are made.
  • Experiment with Flavors: Try incorporating other citrus, like lime or orange, for a twist on the classic.

Common Mistakes and Troubleshooting

Even the best bakers can face challenges. Here’s how to troubleshoot common issues:

  • Runny Lemon Curd: Ensure you cook it long enough to thicken; it should coat the back of a spoon.
  • Crust Shrinkage: Chill the dough thoroughly before baking and avoid stretching it when placing in tins.
  • Meringue Weeping: Ensure there is no moisture in the meringue, and it touches the crust edges.
  • Overcooked Meringue: Keep an eye on it during the baking; it can go from perfectly golden to burnt quickly.

Delicious Variations

Feel free to customize your tarts! Here are four delightful variations:

  • Chocolate Lemon Meringue Tarts: Add melted dark chocolate to the lemon filling for a rich twist.
  • Berry Lemon Meringue Tarts: Layer fresh berries on top of the lemon curd before adding meringue.
  • Herb-Infused Lemon Curd: Infuse your lemon curd with herbs like thyme or basil for an aromatic kick.
  • Mini Key Lime Meringue Tarts: Substitute key lime juice for lemon juice for a tropical flavor.

Storage and Make-Ahead Instructions

To keep your mini lemon meringue tarts fresh:

  • Store assembled tarts in the refrigerator for up to 2 days. Best enjoyed within 24 hours for optimal texture.
  • The tart shells can be made ahead and stored in an airtight container for up to a week.
  • The lemon curd can be prepared in advance and refrigerated for up to 5 days. Just rewhisk before using.

Frequently Asked Questions

Here are answers to some common queries about mini lemon meringue tarts:

  • Can I make these tarts dairy-free? Yes, use coconut oil instead of butter and a dairy-free condensed milk alternative.
  • How do I prevent my meringue from weeping? Ensure it is properly cooked and that it touches the crust edges.
  • Can I freeze these tarts? It’s best to freeze the tart shells only; freeze unassembled for best results.
  • What if my meringue shrinks? Ensure it touches the edges of the tart shell and is baked properly.
  • How do I know when my lemon curd is done? It should coat the back of a spoon and not run off easily.
  • Can I use store-bought tart shells? Absolutely! For a quicker version, this is a great time-saver.
  • What’s the best way to serve these tarts? Serve chilled with a sprinkle of lemon zest or fresh berries on top.
  • How do I ensure my tarts are the right size? Use a standard muffin tin for consistent size and shape.

Nutrition Tips and Dietary Adaptations

Keep your tarts balanced with these tips:

  • Portion Control: Enjoy one small tart as a treat, keeping portion sizes in check.
  • Ingredient Quality: Use organic eggs and lemons for the best taste and nutrition.
  • Lower Sugar Options: Substitute sugar with natural sweeteners like honey or agave, keeping in mind the impact on texture.

Equipment Recommendations

Here’s a list of useful tools for making mini lemon meringue tarts:

  • Mixing Bowls: A set of varying sizes is essential for mixing ingredients.
  • Electric Mixer: For whipping egg whites to perfection.
  • Tartlet Tins: Non-stick tins ensure easy removal of your tarts.
  • Whisk: A good whisk is vital for combining ingredients smoothly.
  • Microplane: For zesting lemons finely and effortlessly.

Serving Suggestions

These mini lemon meringue tarts can be served in various delightful ways:

  • Garnish with Fresh Berries: Strawberries, raspberries, or blueberries add a colorful touch.
  • Drizzle with Passion Fruit: A drizzle of passion fruit puree enhances the tropical flavors.
  • Pair with Tea: These tarts are perfect for an afternoon tea setting.
  • Top with Edible Flowers: For a visually stunning presentation at special events.

In conclusion, mastering these mini lemon meringue tarts will not only elevate your baking skills but also leave a lasting impression on your guests. With a perfect balance of flavors, a beautiful presentation, and the ability to customize, this recipe is a must-try for every home cook. So roll up your sleeves, gather your ingredients, and enjoy creating these little bites of sunshine!

Mini Lemon Meringue Tarts

Prep Time 30 minutes
Cook Time 15 minutes
Total Time 45 minutes
Servings 12 pieces
Calories 350
Delight in these tangy lemon tarts with fluffy meringue topping, perfect for a sweet and citrusy treat.

Ingredients

Dough

  • 200 g unsalted butter (cold, for pastry)
  • 100 g superfine sugar
  • 1 egg extra large egg
  • 1 egg yolk extra large egg yolk
  • 1 tsp vanilla extract
  • 0.5 tsp salt

Filling

  • 350 g cake flour
  • 20 g unsalted butter (melted, for brushing tart tins)
  • 770 g condensed milk (2 tins (385g each))
  • 3 egg yolks extra large egg yolks
  • 80 ml lemon juice
  • 1 tbsp lemon zest

Meringue

  • 4 egg whites extra large egg whites
  • 200 g superfine sugar

Instructions 

  • Prepare tart shells by mixing butter, sugar, egg, egg yolk, vanilla, salt, and flour; chill and bake.
  • Mix condensed milk, egg yolks, lemon juice, and zest; pour into baked tart shells.
  • Bake until filling is set, then cool.
  • Whip egg whites and sugar to stiff peaks; spread or pipe onto cooled tarts.
  • Brown meringue lightly with a torch or under a broiler before serving.

Notes

Ensure tart shells are baked until golden for best flavor and texture.
Calories: 350kcal
Cost: $15
Course: Dessert
Cuisine: Western
Keyword: lemon

Elevate Your Morning Routine: Chia Pudding Parfait with Mango and Coconut

Welcome to a delightful culinary journey that combines nutrition and flavor in one stunning dish. The Chia Pudding Parfait with Mango and Coconut is not just a treat for the taste buds; it’s a powerhouse of health benefits that fits seamlessly into your busy lifestyle. In this article, we’ll explore everything you need to know about making the perfect chia pudding parfait, ensuring you have a delicious and nutritious start to your day.

This parfait is quick to prepare, visually appealing, and versatile enough to be enjoyed any time of the day. Ready to learn more? Let’s dive in!

Why You’ll Love This Recipe

This chia pudding parfait is more than just a breakfast option; it’s a delightful experience. Here are five reasons why you’ll fall in love with this recipe:

  • Nutrient-Rich: Packed with chia seeds, coconut milk, and fresh mango, this parfait delivers a wealth of vitamins, minerals, and healthy fats.
  • Quick and Easy: With minimal prep time, this recipe allows you to whip up a delicious meal or snack in no time.
  • Customizable: Feel free to experiment with different fruits, toppings, and sweeteners to make it your own.
  • Meal Prep Friendly: Perfect for making ahead, this parfait can be stored in the refrigerator for easy access throughout the week.
  • Guilt-Free Indulgence: Enjoy a dessert-like experience that’s both healthy and satisfying, allowing you to indulge without the guilt.

Essential Ingredients for Your Parfait

To create your Chia Pudding Parfait with Mango and Coconut, you’ll need the following ingredients:

  • Chia Seeds (1/2 cup): These tiny superfoods are the star of the show, providing fiber, protein, and healthy omega-3 fatty acids.
  • Coconut Milk (2 cups): Choose unsweetened coconut milk for a creamy texture without added sugars. You can also substitute with almond or oat milk for a different flavor.
  • Honey or Maple Syrup (2 tablespoons): For a touch of natural sweetness; feel free to adjust to your taste.
  • Vanilla Extract (1/2 teaspoon): Adds depth and richness to the pudding.
  • Mango (1 ripe): Fresh and ripe mango is essential for sweetness and flavor—feel free to substitute with berries or bananas.
  • Shredded Coconut (1/4 cup): Unsweetened coconut adds texture and enhances the tropical vibe of the parfait.
  • Optional Toppings: Granola, fresh berries, or mint leaves for garnish can elevate your parfait.

Step-by-Step Instructions for Perfect Chia Pudding

A colorful chia pudding dessert with mango chunks and coconut flakes, captured in natural light.

Follow these simple steps to create a delicious chia pudding parfait that is sure to impress:

  1. In a medium bowl, whisk together the chia seeds, coconut milk, honey, and vanilla extract.
  2. Let the mixture sit for 5 minutes, whisking again to prevent clumps from forming.
  3. Cover the bowl and refrigerate for 2–4 hours or overnight, allowing it to thicken.
  4. Once thickened, peel and dice the mango into small cubes.
  5. In clear cups or jars, start layering the chia pudding, followed by diced mango and shredded coconut.
  6. Repeat the layering process until the cups are filled, finishing with a layer of mango and coconut on top.
  7. Optional: Top with granola, fresh berries, or mint for extra flavor and texture.
  8. Serve chilled and enjoy your delightful creation!

Pro Tips for Maximizing Flavor and Texture

Here are some expert insights to help you achieve the best results:

  • Overnight Setting: For optimal thickness, allow the chia pudding to set overnight. This enhances the texture significantly.
  • Whisking Technique: Whisk the mixture thoroughly to ensure even distribution of the chia seeds, preventing clumping.
  • Adjust Sweetness: Taste the pudding before serving and adjust the sweetness by adding more honey or maple syrup as desired.
  • Mixing Flavors: Experiment with adding spices like cinnamon or nutmeg for a unique flavor twist.
  • Layering: For a stunning presentation, layer the pudding and toppings in clear glass cups.
  • Chill Thoroughly: Ensure your parfait is well-chilled before serving for the best taste and texture.
  • Use Ripe Fruit: Always opt for ripe mangoes for the sweetest flavor; if unavailable, frozen mango can be a great alternative.
  • Incorporate Crunch: Adding granola or nuts on top not only enhances texture but also adds a satisfying crunch.

Common Mistakes and Troubleshooting

Here are some potential pitfalls and how to avoid them:

  • Too Runny: If your pudding is too runny, try adding a little more chia seeds and letting it sit longer.
  • Clumpy Texture: To prevent clumps, whisk well while mixing and ensure adequate time for the seeds to absorb liquid.
  • Overly Sweet: If you find the pudding too sweet, balance it by adding more coconut milk or a dash of salt.
  • Flavorless Pudding: Enhance the flavor by ensuring you use pure vanilla extract and ripe, fresh mango.

Delicious Variations to Try

Feel free to mix things up with these exciting variations:

  • Pineapple Coconut Chia Pudding: Substitute mango with fresh pineapple for a tropical twist.
  • Chocolate Chia Pudding: Stir in cocoa powder for a chocolatey version that’s sure to satisfy sweet cravings.
  • Berry Blast: Use mixed berries instead of mango for a burst of color and antioxidants.
  • Nutty Delight: Incorporate nut butter into the pudding mix for added creaminess and flavor.

Storage and Make-Ahead Instructions

This chia pudding parfait is perfect for meal prep! Here’s how to store it:

  • Refrigeration: Store the prepared chia pudding in airtight containers in the refrigerator for up to 5 days.
  • Layering Tips: If preparing in advance, layer the parfait just before serving to keep the toppings fresh and crunchy.
  • Freezing: While the pudding can be frozen, it may alter the texture; it’s best enjoyed fresh.

Frequently Asked Questions

Here are some common questions about chia pudding parfaits:

  • Can I use other types of milk? Yes, you can substitute coconut milk with almond, oat, or soy milk.
  • How long does chia pudding last? Properly stored, chia pudding can last in the refrigerator for up to 5 days.
  • Is chia pudding good for you? Absolutely! It’s rich in fiber, protein, and omega-3 fatty acids, making it a nutritious choice.
  • Can I use frozen mango? Yes, frozen mango works well; just let it thaw a bit before using.
  • How can I make it vegan? Simply use maple syrup as a sweetener and ensure your milk choice is plant-based.
  • Is chia pudding safe for kids? Yes, chia pudding is safe and can be a fun way to introduce healthy ingredients to children.
  • Can I add protein powder? Yes, you can mix in protein powder for an extra boost of nutrition.
  • What if I don’t like coconut? You can easily substitute the coconut milk with any other milk you prefer.

Nutrition Tips and Dietary Adaptations

To ensure your chia pudding is as nutritious as possible, consider these tips:

  • Fiber Boost: Chia seeds are an excellent source of fiber, helping to promote digestive health.
  • Low-Calorie Option: Use unsweetened coconut milk and limit sweeteners to keep the calorie count low.
  • Protein Power: Add a scoop of your favorite protein powder for an additional protein boost, ideal for post-workout recovery.

Essential Equipment for Success

Having the right tools can streamline your chia pudding preparation:

  • Mixing Bowl: A medium-sized bowl for mixing your ingredients.
  • Whisk: To ensure the chia seeds are evenly distributed and prevent clumping.
  • Measuring Cups and Spoons: For accurate ingredient measurements.
  • Clear Cups or Jars: For layering and serving your parfait, making it visually appealing.

Serving Suggestions to Enhance Your Dish

Make your parfait even more delightful with these serving suggestions:

  • Fresh Berries: Add a variety of fresh berries on top for color and additional nutrients.
  • Mint Leaves: Garnish with fresh mint leaves for a refreshing touch.
  • Granola: Sprinkle granola on top for added crunch and texture.
  • Coconut Flakes: Enhance the coconut flavor by adding more shredded coconut as a topping.

In conclusion, the Chia Pudding Parfait with Mango and Coconut is not just a meal; it’s a celebration of flavors and nutrients that can be enjoyed any time. With its ease of preparation, nutritional benefits, and endless possibilities for customization, this parfait is destined to become a staple in your kitchen. Whether you’re looking for a quick breakfast or a sweet snack, this recipe has you covered. So grab your ingredients, and let’s make some magic in the kitchen!

Chia Pudding Parfait with Mango and Coconut

Prep Time 10 minutes
Total Time 2 hours 30 minutes
Servings 2 servings
Calories 250
A delicious and healthy layered parfait combining creamy chia pudding, fresh mango, and shredded coconut for a tropical treat.

Ingredients

For the Chia Pudding

  • 0.5 cup chia seeds
  • 2 cups unsweetened coconut milk ((or milk of choice))
  • 2 tablespoons honey or maple syrup
  • 0.5 teaspoon vanilla extract

For the Parfait Layers

  • 1 ripe mango mango (peeled and diced)
  • 0.25 cup shredded coconut (unsweetened)
  • Optional granola, fresh berries, or mint (for garnish)

Instructions 

  • Mix chia seeds, coconut milk, honey, and vanilla in a bowl. Let sit for 5 minutes, then stir again.
  • Refrigerate for 2–4 hours or overnight until thickened.
  • Dice the mango into small cubes.
  • Layer chia pudding, mango, and shredded coconut in cups. Repeat layers and top with mango and coconut.
  • Optional: Garnish with granola, berries, or mint. Serve chilled.

Notes

For extra flavor, add a drizzle of honey or a few mint leaves on top.
Calories: 250kcal
Cost: $10
Course: Breakfast, Dessert
Cuisine: Tropical
Keyword: Chia Seeds, coconut, Mango