Author

robert

Browsing

Elevate Your Mornings with the Ultimate Berry Smoothie Bowl

Are you ready to transform your breakfast game? This Berry Smoothie Bowl is not just a meal; it’s a delicious experience that combines flavor, nutrition, and creativity. Imagine starting your day with a bowl filled with vibrant colors and textures that not only satisfies your taste buds but also fuels your body with essential nutrients. Perfect for busy mornings or a post-workout snack, this recipe is designed for those who want something quick yet fulfilling. Let’s dive into why you’ll love this Berry Smoothie Bowl and how to make it effortlessly!

Why You’ll Love This Berry Smoothie Bowl

This recipe offers more than just a tasty breakfast option. Here are five compelling reasons to make it your go-to:

  • Quick Preparation: In just 5 minutes, you can whip up a nutritious meal that keeps you energized throughout the day.
  • Customizable Ingredients: Adjust the toppings and ingredients to suit your taste or dietary needs, creating a unique bowl every time.
  • Nutrient-Packed: Packed with antioxidants from berries, fiber from oats, and healthy fats from nut butter, this bowl covers all your nutritional bases.
  • Perfect Texture: Achieve a creamy, soft-serve ice cream consistency that makes every bite feel indulgent.
  • Visual Appeal: The vibrant colors of the berries and toppings make this bowl not just food, but a feast for the eyes, perfect for sharing on social media.

Ingredients for Your Berry Smoothie Bowl

To craft the perfect Berry Smoothie Bowl, gather the following ingredients:

  • 1 cup frozen mixed berries: A combination of strawberries, blueberries, and raspberries for a burst of flavor.
  • 1 frozen banana: Adds natural sweetness and creaminess to the mixture.
  • 3 tbsp rolled oats: Provides fiber and helps thicken the smoothie.
  • 1 tbsp ground flaxseed: A great source of omega-3 fatty acids and adds a nutty flavor.
  • 1 pinch cinnamon: Enhances flavor and adds warmth to the bowl.
  • 1/4 cup unsweetened plant-based milk: Use almond, coconut, or oat milk to blend the ingredients smoothly.
  • Optional toppings: Sliced almonds, sprouted buckwheat, fresh berries, nut butter, chia seeds, or cacao nibs.

For substitutions, consider the following:

  • Flaxseed: Chia seeds can be used as a direct substitute for added texture and nutrition.
  • Oats: Use gluten-free oats if you have dietary restrictions.
  • Nut Butter: Almond butter, peanut butter, or sunflower seed butter can replace each other based on preference.
  • Milk: Any dairy or non-dairy milk can work; just ensure it’s unsweetened for a healthier option.

How to Make Your Berry Smoothie Bowl

Side view of a berry smoothie bowl filled with mixed berries, nuts, and chia seeds on top.

Follow these simple steps to create your Berry Smoothie Bowl:

  1. Add all smoothie bowl base ingredients—frozen mixed berries, frozen banana, rolled oats, ground flaxseed, cinnamon, and plant-based milk—to a high-speed blender.
  2. Blend on high speed, using your tamper to push ingredients toward the blades. Stop once the mixture reaches a thick, almost smooth texture resembling soft-serve ice cream.
  3. Pour the thick smoothie mixture into a serving bowl.
  4. Artfully arrange your chosen toppings—sliced almonds, sprouted buckwheat, fresh berries, a drizzle of nut butter, chia seeds, or cacao nibs—over the smoothie base.
  5. Enjoy immediately with a spoon while it’s cold and creamy!

Expert Tips for Perfecting Your Smoothie Bowl

To ensure your smoothie bowl turns out perfectly each time, consider these pro tips:

  • Use Frozen Fruits: Always opt for frozen berries and bananas. They contribute to the thick, creamy texture that makes the bowl satisfying.
  • Blend in Stages: Start blending at a low speed and gradually increase to avoid splattering and ensure an even mix.
  • Adjust Consistency: If your mixture is too thick, add a splash more plant-based milk. If it’s too thin, add more frozen fruits or oats.
  • Layer Strategically: When adding toppings, layer them with a mix of textures and flavors for a more enjoyable eating experience.
  • Chill Your Bowl: For an extra-cold experience, chill your serving bowl in the freezer for a few minutes before adding the smoothie.
  • Experiment with Flavors: Feel free to add a scoop of protein powder or spinach for an extra nutrient boost without sacrificing taste.
  • Mind Your Portions: A smoothie bowl is filling, so adjust your toppings and base ingredients to match your hunger levels.
  • Store Leftovers Wisely: If you have leftovers, store them in an airtight container in the fridge for up to 24 hours. Blend again before serving.

Common Mistakes and Troubleshooting

Even the best of us can make mistakes in the kitchen. Here are a few common pitfalls and how to avoid them:

  • Too Thin Consistency: If your smoothie is too runny, add more frozen fruit or oats and blend again until thick.
  • Too Thick Mixture: If it becomes too thick to blend, add a tablespoon of plant-based milk until the desired consistency is reached.
  • Flavor Imbalance: If it’s too sweet or bland, adjust with a pinch of salt, additional cinnamon, or a squeeze of lemon juice for brightness.
  • Unappealing Texture: Ensure your blender is powerful enough to handle frozen ingredients; consider blending in stages.

Variations to Try

Make this recipe your own with these creative variations:

  • Green Berry Bowl: Add a handful of spinach or kale for a nutrient boost without altering the taste.
  • Chocolate Berry Bowl: Mix in a tablespoon of cocoa powder for a chocolatey twist that pairs beautifully with berries.
  • Tropical Berry Bowl: Substitute frozen mixed berries with frozen mango or pineapple for a tropical vibe.
  • Protein-Packed Bowl: Add a scoop of your favorite protein powder to the base for an extra boost post-workout.

Storage & Make-Ahead Instructions

If you’re short on time, consider preparing your ingredients ahead:

  • Prepare and portion out the frozen fruits, oats, and flaxseed in individual bags to make blending easier in the morning.
  • Store any leftover smoothie in an airtight container and blend again before serving. Consume within 24 hours for the best texture and taste.

Frequently Asked Questions

Here are some common questions about smoothie bowls:

  • Can I use fresh fruit instead of frozen? Fresh fruit can be used, but the texture will be thinner. Frozen fruit is preferred for thickness.
  • Is this smoothie bowl suitable for meal prep? Yes! You can prepare the base ingredients in advance and blend them fresh in the morning.
  • How can I make this smoothie bowl vegan? This recipe is already vegan by using plant-based milk and ingredients.
  • Can I make it nut-free? Absolutely! Substitute nut butter with sunflower seed butter or omit it altogether.
  • What are the health benefits of this smoothie bowl? It’s high in fiber, antioxidants, and healthy fats, making it a nutritious option for breakfast or a snack.
  • How can I increase the protein content? Add Greek yogurt or plant-based protein powder to the mix.
  • What toppings do you recommend? Fresh fruits, nuts, seeds, and granola add texture and flavor. Get creative!
  • Can I use a different type of milk? Yes! Any non-dairy or dairy milk works; choose one that aligns with your dietary needs.

Nutrition Tips and Dietary Adaptations

To enhance the nutritional value of your smoothie bowl:

  • Add Fiber: Incorporate more fruits and whole grains, like oats, to keep you fuller for longer.
  • Incorporate Healthy Fats: Use avocado or nut butters to add creaminess and healthy fats that support brain health.
  • Watch the Sweeteners: Ensure you’re not adding too many sweeteners to keep sugar levels balanced.
  • Include Protein: Balance your meal with protein sources to maintain energy and satiety.

Equipment Recommendations

For the best smoothie bowl experience, consider these tools:

  • High-Speed Blender: A powerful blender is essential for achieving that creamy consistency.
  • Measuring Cups and Spoons: Accurate measurements ensure consistent results each time.
  • Wide Bowls: Use a shallow, wide bowl to make arranging toppings easy and visually appealing.

Serving Suggestions

Pair your Berry Smoothie Bowl with:

  • Granola: Adds crunch and flavor, making your bowl more satisfying.
  • Herbal Tea or Coffee: A warm drink complements the coolness of the smoothie bowl.
  • Fresh Fruits: Serve with a side of fresh fruits for additional vitamins and a refreshing touch.
  • Protein Bar: For a protein boost, pair this bowl with a healthy protein bar post-workout.

Concluding, this Berry Smoothie Bowl is a versatile, nutritious, and visually stunning dish that is perfect for anyone looking to elevate their breakfast. With simple ingredients and easy steps, you can enjoy a gourmet experience at home. Experiment with your favorite flavors, and let this recipe inspire your culinary creativity. Enjoy your delicious, healthy journey with this smoothie bowl!

Berry Smoothie Bowl Recipe

Prep Time 10 minutes
Total Time 10 minutes
Servings 2 servings
Calories 250
A vibrant and nutritious smoothie bowl perfect for a quick breakfast or snack, packed with berries, oats, and healthy toppings.

Ingredients

Base ingredients

  • 1 cup frozen mixed berries
  • 1 frozen banana frozen banana
  • 3 tbsp rolled oats
  • 1 tbsp ground flaxseed
  • 1 pinch cinnamon
  • 1/4 cup unsweetened plant-based milk

Toppings

  • sliced almonds
  • sprouted buckwheat
  • fresh berries
  • nut butter
  • chia seeds
  • cacao nibs

Instructions 

  • Add all smoothie bowl base ingredients to a high-speed blender and blend until thick and smooth.
  • Pour the mixture into a bowl and arrange toppings like sliced almonds, sprouted buckwheat, fresh berries, nut butter, chia seeds, and cacao nibs on top.
  • Enjoy immediately with a spoon while cold and creamy.

Notes

Feel free to customize toppings for added flavor and texture.
Calories: 250kcal
Cost: $10
Course: Breakfast
Keyword: Berry, Healthy, Smoothie

When the sun is blazing and the heat is relentless, there’s nothing quite like a chilled, refreshing treat to help you cool down. Enter these effortless fresh fruit popsicles, a delightful way to enjoy the vibrant flavors of summer. In this guide, we’ll explore how to make these delicious popsicles with just five simple ingredients. Perfect for hot days, they’re not only easy to prepare but also a healthy indulgence for everyone in the family.

Whether you’re looking for a quick snack, a fun dessert for kids, or a healthy treat to curb your sweet tooth, these fresh fruit popsicles deliver on taste and nutrition. Let’s dive into the benefits and the step-by-step process of making these colorful delights!

Why You’ll Love This Recipe

  • Quick and Easy: With minimal prep time, these popsicles can be whipped up in just a few minutes, making them a perfect last-minute treat.
  • Five Ingredients: You only need five simple ingredients—perfect for those busy days when you want something refreshing without the fuss.
  • Healthy and Nutritious: Packed with vitamins from fresh fruits, these popsicles are a guilt-free way to satisfy your sweet cravings.
  • Customizable: You can easily swap ingredients based on what you have on hand or your personal preferences, offering endless flavor possibilities.
  • Fun for All Ages: Making popsicles can be a fun activity for kids, teaching them about healthy eating while allowing them to customize their own treats.

Ingredients You’ll Need

Here’s what you’ll need to create your own easy fresh fruit popsicles:

  • 1/4 cup blueberries: These little berries are packed with antioxidants and add a burst of sweetness.
  • 1/4 cup chopped mangoes: Known for their tropical flavor, mangoes provide a creamy texture when frozen.
  • 1/2 cup sliced strawberries: Sweet and juicy, strawberries are a classic popsicle flavor that everyone loves.
  • 1/4 cup sliced kiwi: Kiwi adds a tangy kick and a beautiful green color to your popsicles.
  • 1 cup clear Premier protein drink or coconut water: This acts as the base for your popsicles, adding hydration and flavor. You can also use lemonade, apple juice, or grape juice for different tastes.

If you have any allergies or dietary restrictions, here are some suggested substitutions:

  • For dairy-free: Use coconut water or any clear fruit juice instead of the protein drink.
  • For lower sugar: Opt for unsweetened coconut water or water with a squeeze of lime for added flavor.
  • For extra nutrition: You can add a scoop of your favorite protein powder or greens powder to the clear protein drink.

Step-by-Step Instructions

Follow these simple steps to make your refreshing popsicles:

  1. Peel the mangoes and kiwi fruit. Chop the kiwi, mangoes, and strawberries into small pieces.
  2. Fit the fruit into the popsicle makers, making sure they are tucked in snuggly.
  3. Top with a clear protein drink or clear juice of your choice, filling the molds nearly to the top.
  4. Insert sticks into the molds and freeze overnight.
  5. When ready to enjoy, run the molds under warm water for a few seconds to help release the popsicles.

Pro Tips for Perfect Popsicles

Side view of layered fruit popsicles featuring vibrant slices of strawberries, mango, kiwi, and blueberries.

To ensure your popsicles turn out perfectly every time, keep these expert tips in mind:

  • Choose ripe fruits: For the best flavor, use fruits that are at their peak ripeness.
  • Layer flavors: Consider layering different fruits for beautiful stripes and varied flavors in each bite.
  • Experiment with herbs: Add fresh mint or basil for an herbal twist that elevates the flavor profile.
  • Make ahead: These popsicles can be made days in advance, making them a convenient snack option.
  • Don’t overfill: Leave a little space at the top of each mold to allow for expansion as the liquid freezes.
  • Use the right molds: Silicone molds can make it easier to release the popsicles once frozen.
  • Try different liquids: Use flavored teas or flavored sparkling water for a unique twist.
  • Keep it colorful: Mix and match fruits to create a visually appealing treat that kids will love.

Common Mistakes and Troubleshooting

Even experienced cooks can run into issues. Here’s how to avoid common pitfalls:

  • Too icy: If your popsicles are too hard, try adding a bit more liquid or making sure the fruits are well blended.
  • Sticks won’t stay upright: If the sticks fall over, freeze the popsicles for about an hour before inserting the sticks.
  • Fruit floating to the top: To keep fruit suspended, freeze the mixture for a short time before adding the fruit pieces.

Variations to Try

Get creative with your popsicle flavors! Here are some fun variations:

  • Tropical Paradise: Use pineapple and coconut milk for a sunny, tropical treat.
  • Berry Blast: Combine blueberries, raspberries, and blackberries for a mixed berry sensation.
  • Creamy Banana: Blend ripe bananas with yogurt and a splash of vanilla for a creamy popsicle.
  • Green Goodness: Blend spinach with apple juice and kiwi for a nutrient-packed green popsicle.

Storage and Make-Ahead Instructions

Your homemade popsicles can be stored in the freezer for up to 3 months. Here’s how to keep them fresh:

  • Wrap tightly: Use plastic wrap or store in an airtight container to prevent freezer burn.
  • Label and date: Keep track of when you made them to ensure freshness.

Comprehensive FAQ

Here are some frequently asked questions about making fresh fruit popsicles:

  • Can I use frozen fruit? Yes, frozen fruits work well; just let them thaw slightly before blending.
  • Is it okay to use flavored juices? Absolutely! Flavored juices can enhance the taste of your popsicles.
  • Can I make popsicles without molds? Yes, use small cups or ice trays instead.
  • How do I know when they’re ready? They should be solid all the way through after freezing overnight.
  • Can I add sweeteners? If you prefer sweeter popsicles, try adding honey or agave syrup.
  • Are these gluten-free? Yes, these popsicles are naturally gluten-free.
  • Can I add alcohol for an adult version? Yes, consider adding a splash of your favorite liqueur for a grown-up treat.
  • How do I serve them? Run the molds under warm water for a few seconds to release the popsicles easily.

Nutritional Tips and Dietary Adaptations

These popsicles can be customized further to fit various dietary needs:

  • Low-Calorie Option: Use water or unsweetened coconut water as the base.
  • High-Protein Version: Stick with Premier protein drinks or add protein powder to your mix.
  • Vegan-Friendly: Substitute the protein drink with plant-based milk or juice.

Equipment Recommendations

For the best popsicle-making experience, consider investing in:

  • Popsicle molds: Silicone molds are easier to work with than plastic ones.
  • Blender: A high-quality blender is essential for achieving a smooth consistency.
  • Measuring cups: Accurate measurements ensure consistent results.

Serving Suggestions

To elevate your popsicle experience:

  • Serve with fresh fruit: Pair your popsicles with a side of fresh fruit salad for a colorful plate.
  • Add a dipping sauce: Melted dark chocolate or yogurt can make for a fun dipping experience.
  • Host a popsicle party: Set up a DIY popsicle bar where guests can mix and match their favorite fruits and bases.

As we wrap up this guide, I hope you feel inspired and ready to make your own batch of effortless fresh fruit popsicles. The possibilities are endless, and with just a few ingredients, you can create a refreshing treat that everyone will love. Enjoy your popsicle-making adventure, and savor the delicious results!

Easy Fresh Fruit Popsicles

Prep Time 10 minutes
Total Time 10 minutes
Servings 4 popsicles
Calories 50
Enjoy a refreshing and healthy treat with these easy-to-make fresh fruit popsicles, perfect for hot days or a quick snack.

Ingredients

Fruits

  • 0.25 cup blueberries
  • 0.25 cup chopped mangoes
  • 0.5 cup sliced strawberries
  • 0.25 cup sliced kiwi
  • 1 cup clear Premier protein or coconut water lemonade, apple juice, or grape juice

Instructions 

  • Peel the mangoes and kiwi, then chop the kiwi, mangoes, and strawberries.
  • Fill the popsicle molds with the chopped fruit, making sure they are snugly packed.
  • Pour the clear juice or protein drink over the fruit in each mold.
  • Insert sticks and freeze overnight.

Notes

Use ripe, fresh fruit for the best flavor and texture.
Calories: 50kcal
Cost: $10
Course: Dessert
Keyword: Fruit, popsicles

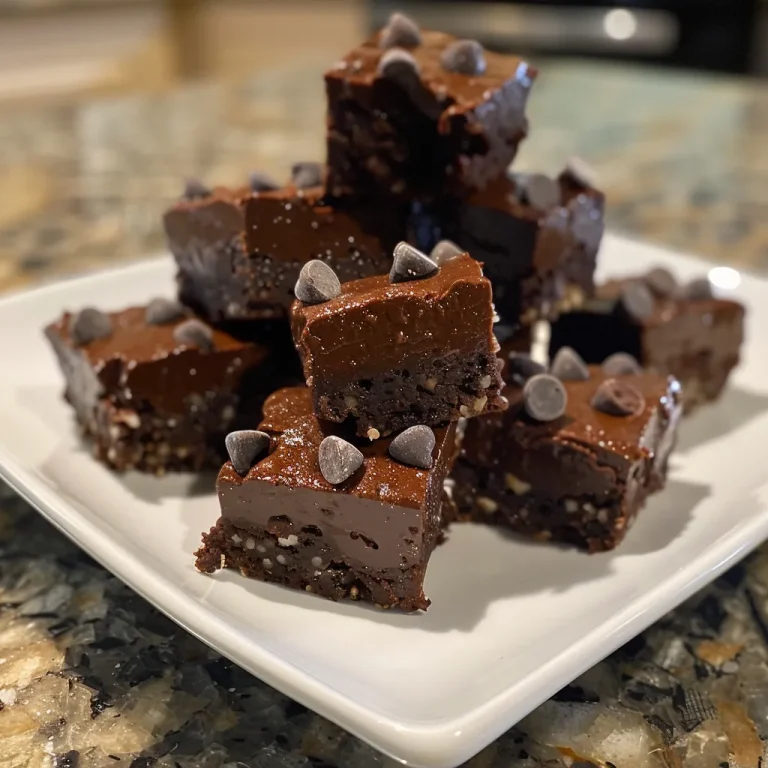
Satisfy your sweet tooth with these easy No Bake Brownie Bites. Quick to prepare and irresistibly delicious, these bites are perfect for any occasion. With a rich chocolate flavor and a fudgy texture, they’re the ideal treat when you want something special without the fuss of baking. If you’re looking for a dessert that’s both satisfying and simple, this recipe is for you. Let’s dive into how to make these delightful bites and why you’ll love them!

Why You’ll Love This Recipe

  • Quick and Easy: With simple ingredients and no baking required, these brownie bites come together in just 30 minutes, making them perfect for last-minute gatherings or cravings.
  • Deliciously Indulgent: Each bite is packed with rich chocolate flavor, ensuring that your sweet tooth is satisfied with every mouthful.
  • Customizable: The recipe is flexible, allowing you to swap out ingredients or add your favorite toppings for a personal touch.
  • No Special Equipment Needed: You can prepare these bites using basic kitchen tools like a mixing bowl and a microwave, making this recipe accessible to everyone.
  • Perfect for Sharing: With around 35 bites, they make an excellent treat for parties, picnics, or just a sweet snack at home.

Ingredients Breakdown

Before we get started, let’s look at the ingredients you’ll need and some potential substitutions. This will help you gather everything you need to make these brownie bites a reality.

  • 1 cup all-purpose flour (heat-treated): Essential for structure; heat treating ensures safety. You can substitute with almond flour for a gluten-free version.
  • 1/4 cup Dutch process cocoa powder: This gives the bites a deep chocolate flavor. For a different taste, try using unsweetened cocoa powder.
  • 1/2 teaspoon salt: Enhances sweetness and balances flavors.
  • 1 cup semi-sweet chocolate chips: The main source of chocolate flavor. Feel free to use dark or milk chocolate chips based on your preference.
  • 6 tablespoons unsalted butter: Adds richness. Coconut oil can be a dairy-free substitute.
  • 1/2 cup granulated sugar: Sweetens the bites; you can use coconut sugar for a more natural option.
  • 3/4 cup light brown sugar: Adds moisture and a hint of caramel flavor. Dark brown sugar can be used for a deeper taste.
  • 1/4 cup heavy cream: Contributes to the fudgy texture; use coconut cream for a dairy-free alternative.
  • 1 teaspoon vanilla extract: Enhances flavor; you might also try almond extract for a twist.
  • 1/2 cup mini chocolate chips: Folded into the mixture for extra chocolatey goodness.
  • 2 cups milk chocolate chips (or semi-sweet/dark): For dipping the brownie bites; choose your favorite type of chocolate.
  • 2 teaspoons coconut oil (or shortening): Helps to thin the chocolate for dipping, ensuring a smooth coating.

How to Make No Bake Brownie Bites

Now that we have our ingredients ready, let’s walk through the steps of making these delicious no-bake brownie bites.

Step 1: Heat-Treat the Flour

Heat treat your flour to eliminate any risk of foodborne illness. You can do this in the microwave or oven:

  • In the Microwave: Spread the flour on a microwave-safe plate. Microwave in 30-second intervals, stirring in between, until it reaches 165°F. Allow it to cool completely before using.
  • In the Oven: Spread the flour on a baking sheet and bake at 350°F for about 5-10 minutes, ensuring it reaches 165°F. Let it cool.

Step 2: Combine Dry Ingredients

In a medium bowl, mix the cooled heat-treated flour, cocoa powder, and salt. Stir until well combined and set aside.

Step 3: Melt Chocolate and Butter

In a microwave-safe bowl, combine the semi-sweet chocolate chips and butter (cut into 1 tablespoon pieces). Microwave in 30-second increments, stirring every 15 seconds until fully melted and smooth. This should take about 1.5 minutes total.

Step 4: Mix Wet Ingredients

Using a stand mixer or hand mixer, combine the melted chocolate-butter mixture with granulated sugar and brown sugar. Beat on medium speed for about 2 minutes until completely smooth. Add the heavy cream and vanilla extract, mixing until light and creamy.

Step 5: Combine Dry and Wet Mixtures

Gradually add the dry mixture to the wet mixture and beat until just combined. Avoid overmixing, as this could affect the texture of your bites.

Step 6: Fold in Mini Chocolate Chips

Gently fold the mini chocolate chips into the batter using a spatula. If the dough appears too wet, add an additional 1-2 tablespoons of heat-treated flour. If it’s too dry, add a touch more heavy cream.

Step 7: Shape the Dough

Using a 1-tablespoon measuring spoon, portion out the brownie batter into balls. You should yield approximately 35 bites. Roll them into even-sized balls and chill them in the fridge for about 15 minutes.

Step 8: Prepare for Dipping

Line a large sheet pan with parchment paper or a silicone liner. In a separate microwave-safe bowl, combine the chocolate chips and coconut oil for dipping. Heat in bursts of 20 seconds, stirring between each burst until smooth.

Step 9: Dip the Brownie Bites

To dip, use a fork to lift each brownie bite and immerse it in the melted chocolate. Tap the fork gently against the bowl to remove excess chocolate and place the coated bite back on the parchment-lined pan.

Step 10: Let Set

Allow the chocolate to set at room temperature. While these bites are best enjoyed the same day, they can be stored in the fridge for 3-4 days. For longer storage, consider freezing them uncoated.

Pro Tips for Perfect Brownie Bites

Side view of delectable no-bake brownie bites, showcasing their fudgy texture.

Enhance your brownie bite-making experience with these expert insights:

  • Temperature Matters: Ensure your chocolate is not too hot when dipping, as it can cause the brownie bites to melt. Let it cool slightly if needed.
  • Chill for Better Coating: Chilling the brownie bites before dipping helps the chocolate coating solidify faster and prevents melting.
  • Experiment with Flavors: Add a pinch of espresso powder to the batter for a mocha flavor or use flavored extracts for a unique twist.
  • Make Ahead: These bites can be made a day in advance, making them a fantastic option for parties or busy weeks.
  • Use High-Quality Chocolate: The type of chocolate you use greatly affects the flavor; choose a brand you love.
  • Don’t Rush Cooling: Allow the heat-treated flour to cool completely before mixing to avoid clumping.
  • Keep It Clean: Use a clean fork for each brownie bite to maintain the chocolate coating’s smoothness.
  • Fun Add-Ins: Consider adding nuts, dried fruit, or even crushed cookies into the batter for added texture and flavor.

Common Mistakes and Troubleshooting

If you encounter issues while making your brownie bites, here are some common mistakes to watch out for:

  • Overmixing the Batter: This can lead to tough bites. Mix only until combined.
  • Too Wet or Dry Dough: Adjust with heat-treated flour or cream as needed to get the right consistency.
  • Chocolate Not Melting Smoothly: Stir well in between heating intervals to ensure even melting and prevent burning.
  • Chocolates Not Coating Properly: If the chocolate is too thick, thin it with a little more coconut oil.
  • Storing Incorrectly: Store in an airtight container in the fridge to keep them fresh longer.

Variations to Try

Want to switch things up? Here are some tasty variations you can experiment with:

  • Peanut Butter Brownie Bites: Replace half of the butter with creamy peanut butter for a nutty twist.
  • Mint Chocolate Brownie Bites: Add peppermint extract to the batter for a refreshing minty flavor.
  • Nutty Brownie Bites: Incorporate chopped walnuts or pecans into the batter for added crunch.
  • Chocolate Chip Cookie Brownie Bites: Layer a cookie dough layer on top of the brownie batter before chilling for a delicious two-in-one treat.

Storage and Make-Ahead Instructions

These brownie bites are perfect for make-ahead treats! Here’s how to store them:

  • Refrigerator: Store in an airtight container in the fridge for 3-4 days. Enjoy them chilled for the best texture!
  • Freezer: For longer storage, freeze the uncoated brownie bites. When ready to enjoy, thaw in the fridge and coat with chocolate before serving.
  • Make Ahead: You can prepare the mixture up to a day in advance, just roll into balls and chill before dipping.

Frequently Asked Questions

Got questions? Here are some common inquiries about these no-bake brownie bites:

  • Can I use whole wheat flour instead of all-purpose? Yes, but it may change the texture slightly. Be sure to heat treat it first.
  • How do I know if the flour is heat-treated correctly? Use a food thermometer to ensure it reaches 165°F.
  • What can I use instead of heavy cream? Coconut cream or a non-dairy alternative will work well.
  • Can I add more chocolate chips? Absolutely! Feel free to double the mini chocolate chips for an extra chocolatey bite.
  • Are these brownie bites gluten-free? Yes, if you use gluten-free flour, these bites can be made gluten-free!
  • How long do these last in the fridge? They can last up to 4 days if stored properly in an airtight container.
  • Can I substitute the sugars? Yes, you can use coconut sugar, but it may alter the flavor slightly.
  • What if my mixture is too crumbly? Add a bit more heavy cream to moisten it until it holds together.

Nutrition Tips and Dietary Adaptations

These brownie bites can be made to suit various dietary needs:

  • Vegan: Substitute butter with coconut oil and heavy cream with coconut cream.
  • Gluten-Free: Use certified gluten-free flour to ensure safety.
  • Lower Sugar: Reduce the sugar content or use a sugar substitute.
  • Nut-Free: Ensure your chocolate chips are nut-free and avoid adding nuts to the recipe.

Equipment Recommendations

Here’s a quick list of tools that will make your brownie bite-making process seamless:

  • Mixing Bowls: A medium bowl for combining dry ingredients and a microwave-safe bowl for melting chocolate.
  • Measuring Spoons: Essential for accurate ingredient measurements.
  • Spatula: For folding in ingredients gently without overmixing.
  • Microwave or Oven: Needed for heat-treating the flour.
  • Parchment Paper: To line your baking sheet for easy cleanup.

Serving Suggestions

Serve your no bake brownie bites in a variety of ways:

  • On a Platter: Arrange them on a serving platter for a beautiful presentation at parties.
  • With Dipping Sauces: Serve alongside caramel or chocolate sauce for a fun dipping experience.
  • Garnished: Top with a sprinkle of sea salt or dusting of powdered sugar for an elegant touch.
  • In a Dessert Bar: Include them in a dessert bar with other treats like cookies and bars for variety.

With these decadent no bake brownie bites, you can indulge in a delicious treat without the hassle of baking. Whether you’re making them for a special occasion or simply to satisfy your sweet tooth, this recipe is sure to become a favorite in your kitchen. Enjoy every fudgy bite and feel free to experiment with flavors and add-ins!

No Bake Brownie Bites

Prep Time 20 minutes
Cook Time 10 minutes
Total Time 30 minutes
Servings 35 pieces
Calories 150
Delight in these rich, fudgy brownie bites that require no baking—perfect for a quick, satisfying treat.

Ingredients

Dry Ingredients

  • 1 cup all-purpose flour (heat treated (see note 1))
  • 0.25 cup Dutch process cocoa powder (see note 2)
  • 0.5 teaspoon salt
  • 1 cup semi-sweet chocolate chips
  • 6 tablespoons unsalted butter
  • 0.5 cup granulated sugar
  • 0.75 cup light brown sugar
  • 0.25 cup heavy cream
  • 1 teaspoon vanilla extract
  • 0.5 cup mini chocolate chips

Additional Chocolate Coating

  • 2 cups milk chocolate chips or semi-sweet or dark (see note 3)
  • 2 teaspoons coconut oil or shortening

Instructions 

  • Heat treat the flour by microwaving or oven, then cool completely. Mix cooled flour, cocoa powder, and salt in a bowl.
  • Melt chocolate chips and butter in 30-second microwave bursts, stirring until smooth. Beat with sugars, heavy cream, and vanilla until smooth and light.
  • Add dry ingredients to wet, mix until just combined, then fold in mini chocolate chips. Adjust dough consistency with additional flour or cream if needed.
  • Portion batter into 1-tablespoon balls, chill for 15 minutes. Melt chocolate coating with coconut oil, then dip each ball to coat.
  • Set coated truffles at room temperature until firm. Enjoy immediately or store for up to 3-4 days.

Notes

Chilling the truffles makes them extra fudgy and delicious.
Calories: 150kcal
Cost: $15
Course: Dessert
Cuisine: American
Keyword: brownie

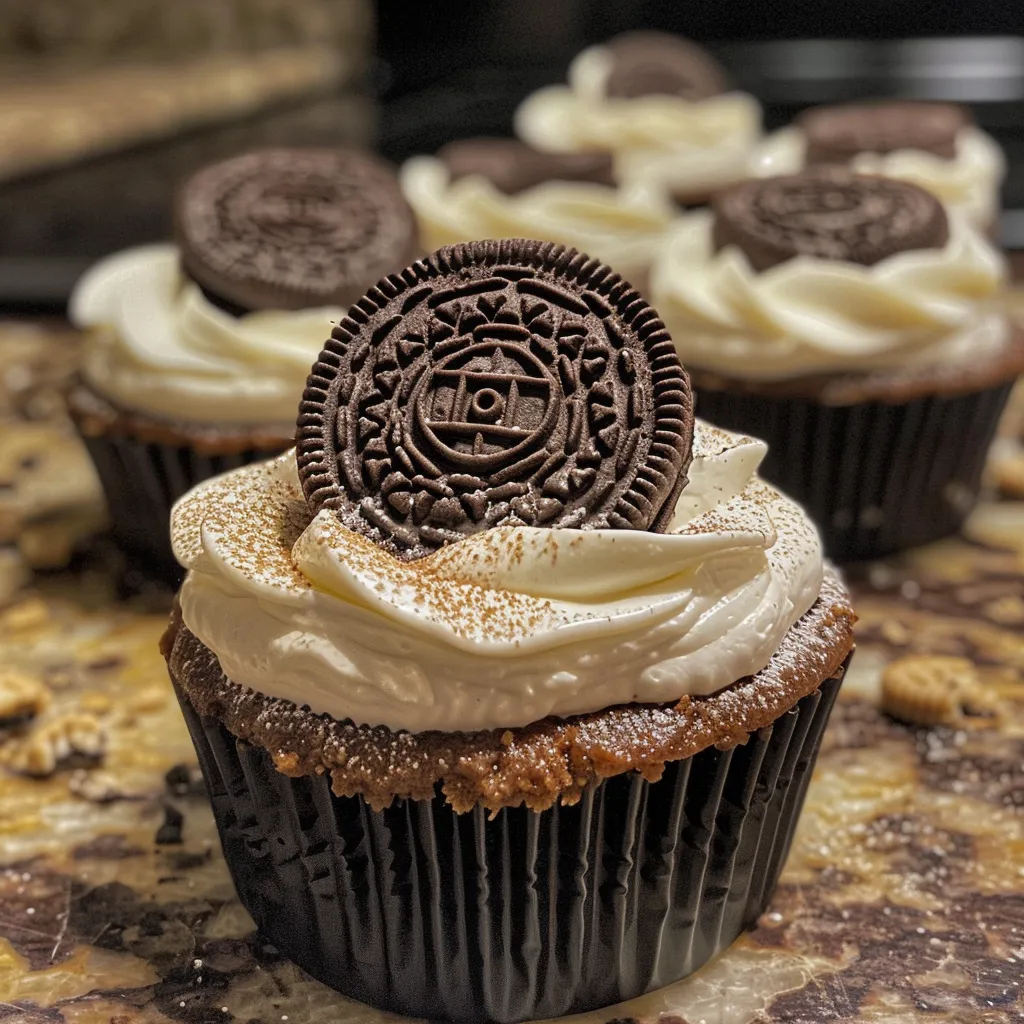
Welcome to your go-to guide for creating Oreo No-Bake Cheesecake Cups that are not only easy to prepare but also irresistibly delicious! This simple yet satisfying dessert combines rich cream cheese, fluffy Cool Whip, and crunchy Oreos, making it the perfect treat for any occasion. Whether you’re hosting a dinner party or simply satisfying a sweet tooth, these cheesecake cups deliver an indulgent experience without the hassle of baking. Dive in to discover how to make this recipe effortlessly while impressing your family and friends!

Why You’ll Love This Recipe

  • Quick and Easy: With no baking required, you can whip these cheesecake cups together in under 30 minutes, perfect for busy schedules.
  • Minimal Ingredients: This recipe uses just a handful of common ingredients, making it budget-friendly and accessible.
  • Customizable: Feel free to experiment with different toppings and mix-ins, allowing you to personalize each cup to your taste.
  • Perfect Portions: Individual servings mean no fuss over slicing, and everyone gets their own little dessert to enjoy.
  • Make Ahead: These cheesecake cups can be prepared in advance, making them a great choice for parties or gatherings.

Detailed Ingredient Breakdown

Let’s dive into the ingredients required for these delightful cheesecake cups:

  • 8 oz block of cream cheese: Make sure it’s softened to room temperature for easy mixing.
  • 8 oz Cool Whip or whipped topping: This adds lightness and creaminess to the dessert. You can substitute with homemade whipped cream if preferred.
  • 2 3/4 cups powdered sugar: This sweetens the cheesecake filling without the graininess of granulated sugar.
  • 1 tsp vanilla extract: For added depth of flavor.
  • 24-26 Oreo cookies: The star ingredient! Feel free to crush more for topping or adjust the quantity based on your serving size.

**Substitutions**: If you’re looking for alternatives, consider using NeufchĂ¢tel cheese instead of cream cheese for a lighter version, or opt for gluten-free Oreos to make this dessert gluten-free.

How to Make Oreo No-Bake Cheesecake Cups

Step-by-Step Instructions

Follow these simple steps to create your cheesecake cups:

  1. Place the Oreos in a plastic bag and seal. Using a rolling pin or a sturdy wooden spoon, crush the Oreos into fine crumbs.
  2. Spoon 1.5 to 2 tablespoons of the crushed Oreos into the bottom of six small dessert dishes (ensure they are at least 3/4 cup to 1 cup in size). Set aside.
  3. In a large mixing bowl, use a hand or stand mixer to whip the softened cream cheese and powdered sugar until creamy and smooth.
  4. Add in the vanilla extract and mix until fully incorporated.
  5. Gently fold in the Cool Whip until well combined, then fold in the remaining crushed Oreos.
  6. Divide the cheesecake filling evenly across the dishes, gently pressing it onto the crushed Oreos.
  7. Chill in the refrigerator for about 1 hour or until ready to serve.
  8. Before serving, top with additional whipped cream and crushed Oreos for an extra touch. Enjoy!

Pro Tips for Making No-Bake Cheesecake Cups

Side profile of layered Oreo No-Bake Cheesecake Cups featuring chocolate cookie crumbles.
  • Room Temperature Ingredients: Ensure cream cheese is at room temperature to avoid lumps in the filling.
  • Chill Time: Don’t skip the chilling step! This helps the cheesecake set properly.
  • Flavor Boost: Experiment with flavored extracts like almond or coconut for a unique twist.
  • Presentation: Use clear cups or jars to showcase the layered beauty of your cheesecake cups.
  • Double the Recipe: Planning for a crowd? Simply double the ingredients for larger gatherings.
  • Storage: These cheesecake cups can be stored in an airtight container in the fridge for up to 3 days.
  • Use Fresh Ingredients: For the best flavor, ensure your ingredients, especially the cream cheese, are fresh.
  • Don’t Overmix: When folding in the whipped cream, be gentle to maintain the light texture.

Common Mistakes and Troubleshooting

Here are some common pitfalls and how to avoid them:

  • Lumpy Filling: Ensure your cream cheese is fully softened and mix well before adding other ingredients.
  • Too Sweet: Adjust powdered sugar based on your taste; you can always add more but can’t take it out once mixed.
  • Oreo Crust Too Gritty: Crush Oreos finely to avoid a crunchy texture that doesn’t blend well with the cheesecake filling.
  • Filling Too Runny: If your filling doesn’t set, ensure it’s chilled long enough and consider adding more cream cheese next time.

Delicious Variations

Want to mix things up? Here are some fun variations to try:

  • Chocolate Lovers: Replace some of the Oreos with chocolate sandwich cookies for an extra chocolatey flavor.
  • Fruit-Filled: Add a layer of your favorite fruit puree or fresh berries between the cheesecake layers.
  • Nutty Crunch: Incorporate crushed nuts like pecans or almonds into the crust for added texture.
  • Minty Fresh: Use mint Oreos instead of regular Oreos for a refreshing twist on the classic flavor.

Storage and Make-Ahead Instructions

These cheesecake cups can be prepared in advance, making them perfect for parties or gatherings. Here’s how to store them:

  • Refrigerator: Keep the cheesecake cups covered in the fridge for up to 3 days.
  • Freezer: You can freeze the cheesecake filling (without the toppings) for up to 2 months. Just thaw in the fridge overnight before serving.
  • Make-Ahead: Assemble the cups a day in advance for best results, allowing the flavors to meld beautifully.

Frequently Asked Questions

Here are some common questions about making Oreo No-Bake Cheesecake Cups:

  • Can I use low-fat cream cheese? Yes, low-fat cream cheese can be used, but it may alter the texture slightly.
  • How long do these cheesecake cups need to chill? Chill for at least 1 hour, but overnight is best for optimal texture.
  • Can I use a different cookie for the crust? Absolutely! Any cookie can work, such as graham crackers or chocolate cookies.
  • What can I use instead of Cool Whip? Homemade whipped cream is a great substitute if you prefer a more natural option.
  • How do I make these gluten-free? Use gluten-free Oreos and ensure all other ingredients are gluten-free as well.
  • Can I add chocolate chips? Yes, fold in mini chocolate chips for added flavor and texture!
  • What if I want to make a larger batch? Simply double or triple the recipe, adjusting the ingredient quantities accordingly.
  • How do I store leftovers? Keep them covered in the refrigerator for up to 3 days or freeze for longer storage.

Nutritional Tips and Dietary Adaptations

Want to make these cheesecake cups a bit healthier? Consider these adaptations:

  • Reduced Sugar: Use less powdered sugar or a sugar substitute to lower the sweetness.
  • Dairy-Free Option: Substitute cream cheese with a dairy-free alternative and use coconut whipped cream.
  • Lower-Calorie Version: Use light cream cheese and Cool Whip to cut down on calories without sacrificing flavor.

Equipment Recommendations

Here’s a quick list of equipment that will make your cheesecake cup-making experience smoother:

  • Mixing Bowls: A set of various-sized mixing bowls for easy ingredient preparation.
  • Hand Mixer: A hand mixer makes whipping cream cheese and Cool Whip a breeze.
  • Plastic Bags: For crushing Oreos without the mess.
  • Dessert Dishes or Cups: Choose clear cups for beautiful presentation.

Serving Suggestions

When it comes to serving your Oreo No-Bake Cheesecake Cups, consider these ideas:

  • Garnishing: Top with fresh berries, chocolate shavings, or a drizzle of chocolate sauce for extra flair.
  • Pairing: Serve with a side of fresh fruit or a scoop of ice cream for a complete dessert experience.
  • Presentation: Use decorative spoons or mini dessert forks for a fancy touch at gatherings.

In conclusion, the Oreo No-Bake Cheesecake Cups are an effortless way to indulge your sweet cravings while impressing your guests. With its delightful combination of flavors and textures, this recipe is sure to become a favorite in your dessert repertoire. Happy cooking, and enjoy every creamy, crunchy, delightful bite!

Oreo No-Bake Cheesecake Cups

Prep Time 15 minutes
Total Time 15 minutes
Servings 6 cups
Calories 350
Enjoy these creamy, no-bake cheesecake cups with crunchy Oreo crusts, perfect for a quick and delicious dessert.

Ingredients

Crust and Filling

  • 1 8 oz block of cream cheese (softened)
  • 1 8 oz Cool Whip or whipped topping
  • 2 3/4 cups powdered sugar
  • 1 tsp vanilla
  • 24-26 cookies Oreo cookies (more as desired)

Instructions 

  • Place Oreos in a plastic bag, crush them, and set aside 1 1/2 to 2 tablespoons for topping.
  • Mix cream cheese and powdered sugar until smooth, then add vanilla and fold in Cool Whip and crushed Oreos.
  • Divide the filling into small dishes over the crushed Oreos and chill for 1 hour.
  • Top with whipped cream and remaining crushed Oreos before serving.

Notes

Keep refrigerated until ready to serve for best results.
Calories: 350kcal
Cost: $10
Course: Dessert
Keyword: cheesecake, no bake, Oreo

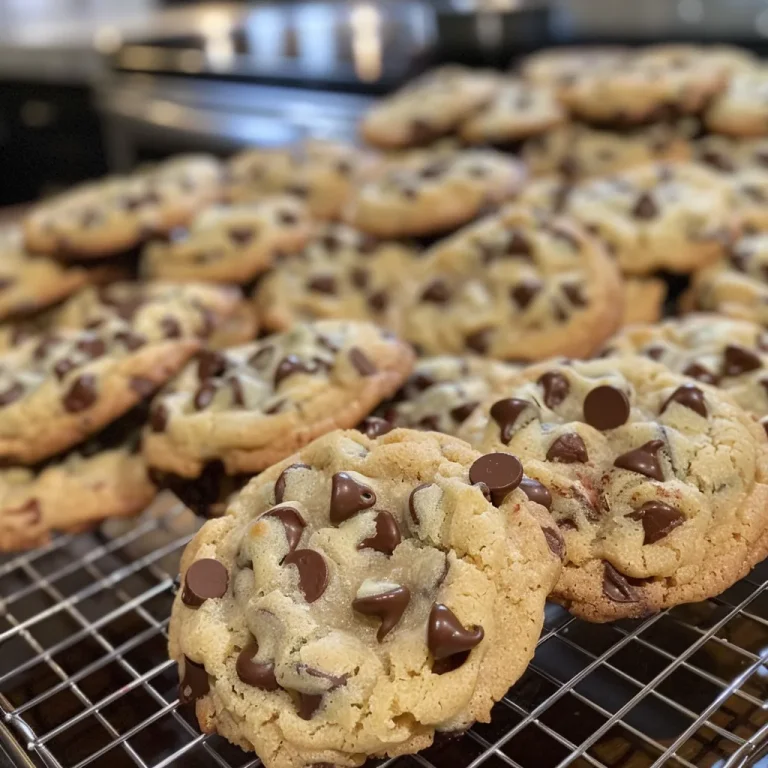
Welcome to the definitive guide to creating the best chocolate chip cookies! Whether you’re a novice baker or a seasoned pro, this recipe will guarantee delicious results every time. With step-by-step instructions, expert tips, and variations, you’ll master the art of baking chocolate chip cookies that are soft, chewy, and bursting with flavor. Let’s dive into why this recipe stands out and how you can create cookie perfection!

Why You’ll Love This Recipe

  • Consistent Results: This recipe has been tested and refined to ensure that every batch of cookies turns out perfectly, regardless of your baking experience.
  • Simple Ingredients: Made with common pantry staples, you won’t need to hunt for specialty items to achieve cookie greatness.
  • Flexible Timing: With options to chill the dough for as little as 30 minutes or up to 24 hours, you can fit baking into your busy schedule.
  • Customizable Flavors: Not only does this recipe provide a fantastic base, but it also allows for creative variations to suit your taste.
  • Perfect for Sharing: Whether for a gathering or a sweet treat at home, these cookies are sure to impress friends and family alike!

Ingredients Breakdown

To create the ultimate chocolate chip cookies, gather the following ingredients:

  • 1 cup (2 sticks) unsalted butter, softened: Provides rich flavor and a tender texture. You can substitute with vegan butter for a dairy-free option.
  • ¾ cup granulated sugar: Adds sweetness and helps achieve a crisp exterior.
  • ¾ cup packed light brown sugar: Enhances moisture and provides a deeper flavor. Dark brown sugar can be used for a more robust taste.
  • 2 large eggs: Essential for binding the ingredients together. If you’re looking for an egg substitute, consider using 1/4 cup unsweetened applesauce per egg.
  • 1 tablespoon pure vanilla extract: Elevates the overall flavor profile. A quality vanilla extract makes a noticeable difference.
  • 2 ¼ cups all-purpose flour: The backbone of the cookie dough. For a gluten-free option, use a 1:1 gluten-free flour blend.
  • 1 teaspoon baking soda: A leavening agent that helps the cookies rise.
  • ½ teaspoon salt: Balances sweetness and enhances flavor.
  • 2 cups semi-sweet chocolate chips: The star of the show! Feel free to mix in dark chocolate or milk chocolate chips for variety.

Step-by-Step Instructions

Follow these detailed steps to bake your chocolate chip cookies:

  • Step 1: Cream the Butter and Sugars: In a large bowl, or the bowl of a stand mixer, cream together the softened butter, granulated sugar, and light brown sugar until the mixture is light and fluffy (2-3 minutes).
  • Step 2: Add Eggs and Vanilla: Beat in the eggs one at a time, mixing well after each addition. Stir in the vanilla extract.
  • Step 3: Combine Dry Ingredients: In a separate medium bowl, whisk together the all-purpose flour, baking soda, and salt.
  • Step 4: Mix Wet and Dry Ingredients: Gradually add the dry ingredients to the wet ingredients, mixing on low speed until just combined.
  • Step 5: Fold in Chocolate Chips: Gently fold in the semi-sweet chocolate chips using a spatula or wooden spoon.
  • Step 6: Chill the Dough: Cover the bowl with plastic wrap and refrigerate the dough for at least 30 minutes, or up to 24 hours.
  • Step 7: Preheat Oven and Prepare Baking Sheets: Preheat your oven to 375°F (190°C). Line two large baking sheets with parchment paper.
  • Step 8: Scoop and Bake: Scoop rounded tablespoons of the chilled dough onto the prepared baking sheets, placing them about 2 inches apart. Bake for 10-12 minutes.
  • Step 9: Cool and Enjoy: Let the cookies cool on the baking sheets for a few minutes before transferring them to a wire rack to cool completely.

Pro Tips for Cookie Success

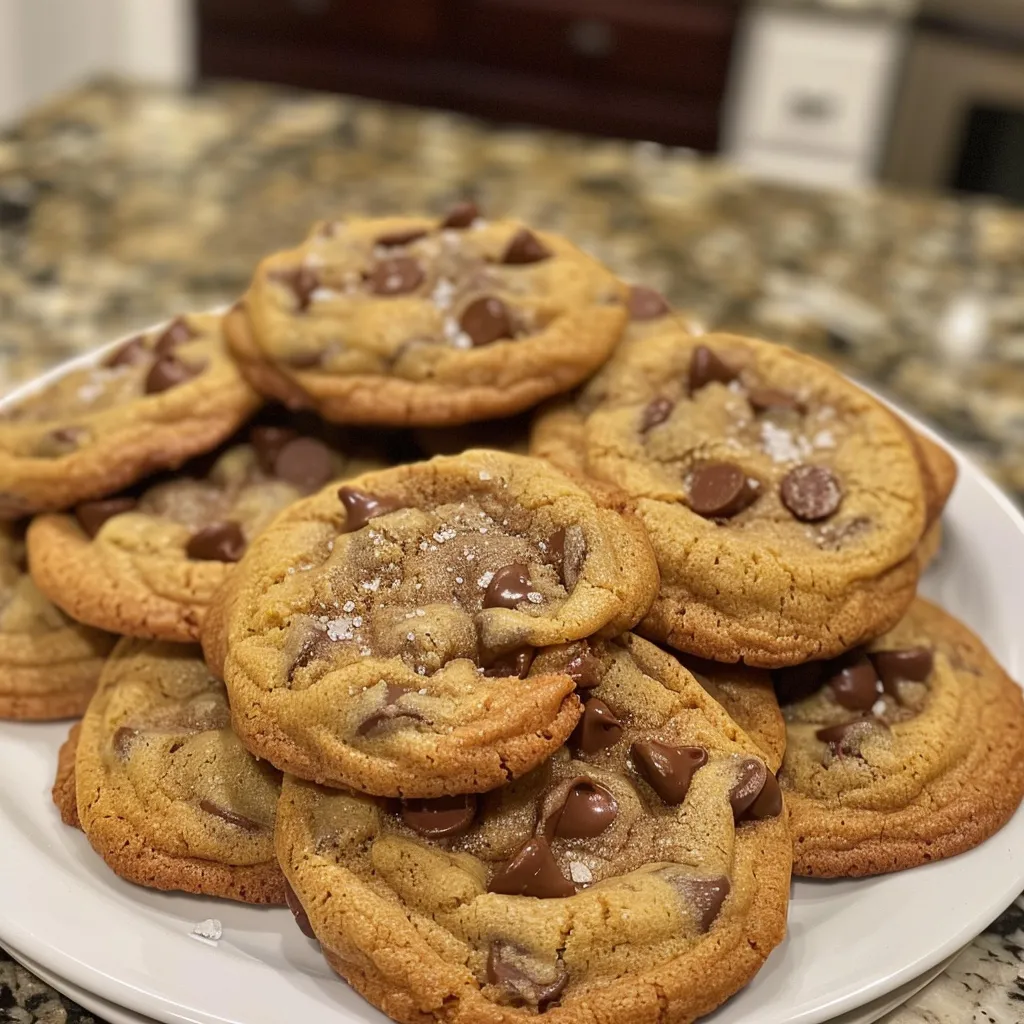
Side view of freshly baked chocolate chip cookies with melting chocolate chips.
  • Chill Your Dough: This step is crucial for achieving the perfect texture. Chilling helps the cookies maintain their shape and prevents excessive spreading.
  • Use Quality Chocolate Chips: Opt for high-quality chocolate chips for the best flavor. Consider using a mix of chocolate chips for added complexity.
  • Don’t Overmix: Once you combine the wet and dry ingredients, mix until just combined to avoid tough cookies.
  • Bake Until Just Golden: Remove cookies from the oven when they are lightly golden around the edges but still soft in the center. They will continue to cook on the baking sheets.
  • Experiment with Add-ins: Try adding nuts, dried fruit, or different types of chocolate chips to customize your cookies.
  • Use Room Temperature Ingredients: Ensure your butter and eggs are at room temperature for better mixing and texture.
  • Store Properly: Store cookies in an airtight container to keep them fresh for longer; they can last up to a week!
  • Use Parchment Paper: This prevents cookies from sticking and promotes even baking.
  • Test a Small Batch: If you’re unsure about variations, bake a small batch first to test flavors and textures.
  • Keep an Eye on the Oven: Ovens can vary, so start checking cookies a minute or two before the recommended baking time.

Common Mistakes and Troubleshooting

Even the best bakers can encounter hiccups. Here are some common issues and how to fix them:

  • Cookies Spread Too Much: This could be due to warm dough or not enough flour. Ensure the dough is chilled and measure flour accurately.
  • Cookies Are Too Dry: Overbaking can cause dryness. Keep an eye on them, and if they look done, take them out!
  • Flavor Is Off: If your cookies taste bland, ensure your ingredients are fresh, and don’t skimp on salt—it enhances flavor.
  • Cookies Are Too Hard: If they’re crunchy instead of chewy, consider reducing baking time or adding an extra egg yolk next time.
  • Chocolate Chips Didn’t Melt: Make sure to use good quality chips that are designed for baking; some chips are formulated to hold their shape.

Delicious Variations

Once you’ve mastered the classic chocolate chip cookie, try these fun variations:

  • Nutty Chocolate Chip Cookies: Add 1 cup of chopped nuts (walnuts, pecans, or macadamia nuts) for added crunch and flavor.
  • Oatmeal Chocolate Chip Cookies: Substitute 1 cup of flour with rolled oats for a chewy texture.
  • Double Chocolate Chip Cookies: Replace 1/2 cup of flour with cocoa powder for a rich chocolate flavor.
  • Peanut Butter Chocolate Chip Cookies: Add 1/2 cup of creamy peanut butter to the wet ingredients for a nutty twist.

Storage and Make-Ahead Instructions

These cookies can be made ahead and stored for future enjoyment:

  • Storing Baked Cookies: Keep baked cookies in an airtight container at room temperature for up to a week. You can also freeze them for up to 3 months.
  • Freezing Cookie Dough: Portion out the dough into balls and freeze them on a baking sheet. Once frozen, transfer to a freezer bag for up to 3 months. When ready to bake, just pop them in the oven straight from the freezer—add a couple of extra minutes to the baking time.

FAQ about Chocolate Chip Cookies

  • Can I use margarine instead of butter? Yes, but the flavor and texture may differ. Unsalted butter is recommended for the best taste.
  • What’s the best way to measure flour? Use the spoon and level method to avoid packing flour into your measuring cup, which can lead to dry cookies.
  • How do I know when my cookies are done? Look for lightly golden edges and a soft center. They will continue to bake on the sheet after being removed from the oven.
  • Can I make these cookies without eggs? Yes, you can substitute with applesauce or a store-bought egg replacer.
  • What if my dough is too sticky? If the dough feels too sticky to handle, chill it in the refrigerator for 30 minutes.
  • How long should I chill the dough? Chill for at least 30 minutes, but longer (up to 24 hours) develops better flavor and texture.
  • Can I add spices like cinnamon? Absolutely! A teaspoon of cinnamon can add a nice flavor boost.
  • Why are my cookies flat? This could be due to too much butter or not enough flour. Ensure accurate measurements and try chilling the dough.

Nutritional Tips and Dietary Adaptations

For those mindful of dietary needs, consider these adaptations:

  • Lower Sugar: Use sugar substitutes like erythritol or monk fruit sweetener for a lower-calorie option.
  • Gluten-Free: Substitute all-purpose flour with a gluten-free flour blend.
  • Vegan: Use plant-based butter and egg substitutes like flax eggs.
  • Low-Fat: Replace half the butter with unsweetened applesauce to reduce fat content.

Equipment Recommendations

To make your baking experience smooth, here are some essential tools:

  • Mixing Bowls: A set of mixing bowls in various sizes will help you efficiently combine ingredients.
  • Stand Mixer or Hand Mixer: A stand mixer can save time and effort in creaming the butter and sugars.
  • Baking Sheets: Invest in heavy-duty baking sheets to ensure even baking.
  • Parchment Paper: This makes for easy cleanup and prevents sticking.
  • Cookie Scoop: A cookie scoop helps portion dough evenly for uniform baking.

Serving Suggestions

These chocolate chip cookies can be enjoyed in many delightful ways:

  • With Milk: Pair warm cookies with a glass of cold milk for a classic treat.
  • Ice Cream Sandwiches: Sandwich your favorite ice cream between two cookies for a decadent dessert.
  • Cookie Crumble: Crumble cookies over yogurt or ice cream for added texture and flavor.
  • Gift Ideas: Pack cookies in a decorative box or jar for a thoughtful homemade gift.

In conclusion, mastering the art of baking chocolate chip cookies is not only rewarding but also a fun and delicious endeavor. With this comprehensive guide, you have all the tools, techniques, and tips to bake cookies that are sure to impress. So, roll up your sleeves, gather your ingredients, and start creating cookie magic!

The Best Chocolate Chip Cookies You ll Ever Bake

Prep Time 15 minutes
Cook Time 12 minutes
Total Time 27 minutes
Servings 24 cookies
Calories 150
Enjoy irresistibly soft and chewy chocolate chip cookies with this classic recipe that yields perfect treats every time.

Ingredients

Dough

  • 1 cup unsalted butter, softened
  • ¾ cup granulated sugar
  • ¾ cup packed light brown sugar
  • 2 large eggs
  • 1 tablespoon pure vanilla extract
  • 2 ¼ cups all-purpose flour
  • 1 teaspoon baking soda
  • ½ teaspoon salt
  • 2 cups semi-sweet chocolate chips

Instructions 

  • Cream together softened butter, granulated sugar, and light brown sugar until light and fluffy, about 2-3 minutes.
  • Beat in eggs one at a time, then stir in vanilla extract.
  • Whisk together flour, baking soda, and salt in a separate bowl.
  • Gradually add dry ingredients to wet, mixing on low until just combined, then fold in chocolate chips.
  • Chill dough for at least 30 minutes, then scoop onto parchment-lined baking sheets and bake at 375°F (190°C) for 10-12 minutes.
  • Cool cookies on sheets briefly, then transfer to wire racks to cool completely.

Notes

For softer cookies, slightly underbake by a minute.
Calories: 150kcal
Cost: $15
Course: Dessert
Cuisine: American
Keyword: chocolate, cookies

Unleashing the Full Flavor of Caesar Salad

Welcome to a culinary journey where we master the classic Caesar salad, a dish that combines crisp romaine lettuce, savory croutons, and a creamy dressing that’s as timeless as it is delicious. This article will guide you through the art of crafting a Caesar salad that not only satisfies your taste buds but also elevates your cooking skills. Whether you’re preparing this for a simple weeknight meal or a gathering with friends, you’ll discover the secrets to achieving restaurant-quality flavor effortlessly.

In this comprehensive guide, we’ll delve deeply into the ingredients, preparation methods, and personalization options that make this Caesar salad a versatile favorite. So, let’s get started on creating a Caesar salad that you’ll be proud to serve at any occasion!

Why You’ll Love This Recipe

This Caesar salad recipe stands out for several compelling reasons:

  • Quick and Easy: With minimal prep time and simple ingredients, this recipe can be on your table in under 30 minutes.
  • Homemade Croutons: Say goodbye to store-bought croutons! These homemade versions are golden, crispy, and bursting with flavor.
  • Customizable Dressing: The dressing can be tailored to your taste, whether you prefer it rich and creamy or light and tangy.
  • Healthier Option: With fresh ingredients and the ability to control the amount of oil and salt, this recipe can be a healthier alternative to restaurant versions.
  • Perfect for Any Occasion: Whether it’s a casual lunch, a picnic, or a dinner party, this Caesar salad fits seamlessly into any menu.

Ingredient Breakdown

Before you start, let’s take a closer look at the essential ingredients for this classic Caesar salad and explore potential substitutions.

For the Dressing

  • 1 garlic clove, minced: Fresh garlic adds a punch of flavor.
  • 1 teaspoon Dijon mustard: For a hint of spice and depth.
  • 2 teaspoons Worcestershire sauce: This ingredient brings a savory umami flavor.
  • 2 tablespoons lemon juice, freshly squeezed: Adds brightness and acidity.
  • 1 teaspoon anchovy paste (optional): Traditional in Caesar dressing, it enhances the umami flavor.
  • ½ cup mayonnaise: Provides creaminess and richness.
  • ¼ cup grated Parmesan cheese: Essential for that cheesy flavor.
  • Salt and freshly cracked black pepper, to taste: Enhances all the flavors.

For the Croutons

  • 2 cups cubed bread: Day-old bread works best for optimal texture.
  • 2 tablespoons olive oil: For crisping up the bread.
  • 1 teaspoon garlic powder: Adds extra flavor.
  • Pinch of salt: To season the croutons.

For the Salad

  • 1 large head of romaine lettuce, washed and chopped: The star of the salad.
  • Shaved or grated Parmesan cheese, for garnish: Enhances presentation and flavor.
  • Freshly ground black pepper, for serving: To taste, for finishing touches.

Step-by-Step Instructions

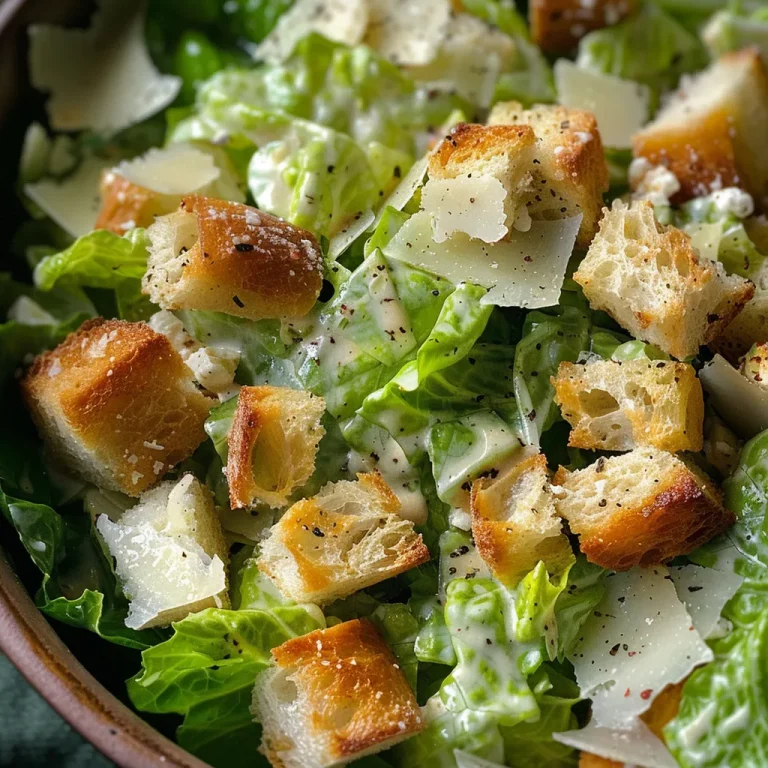
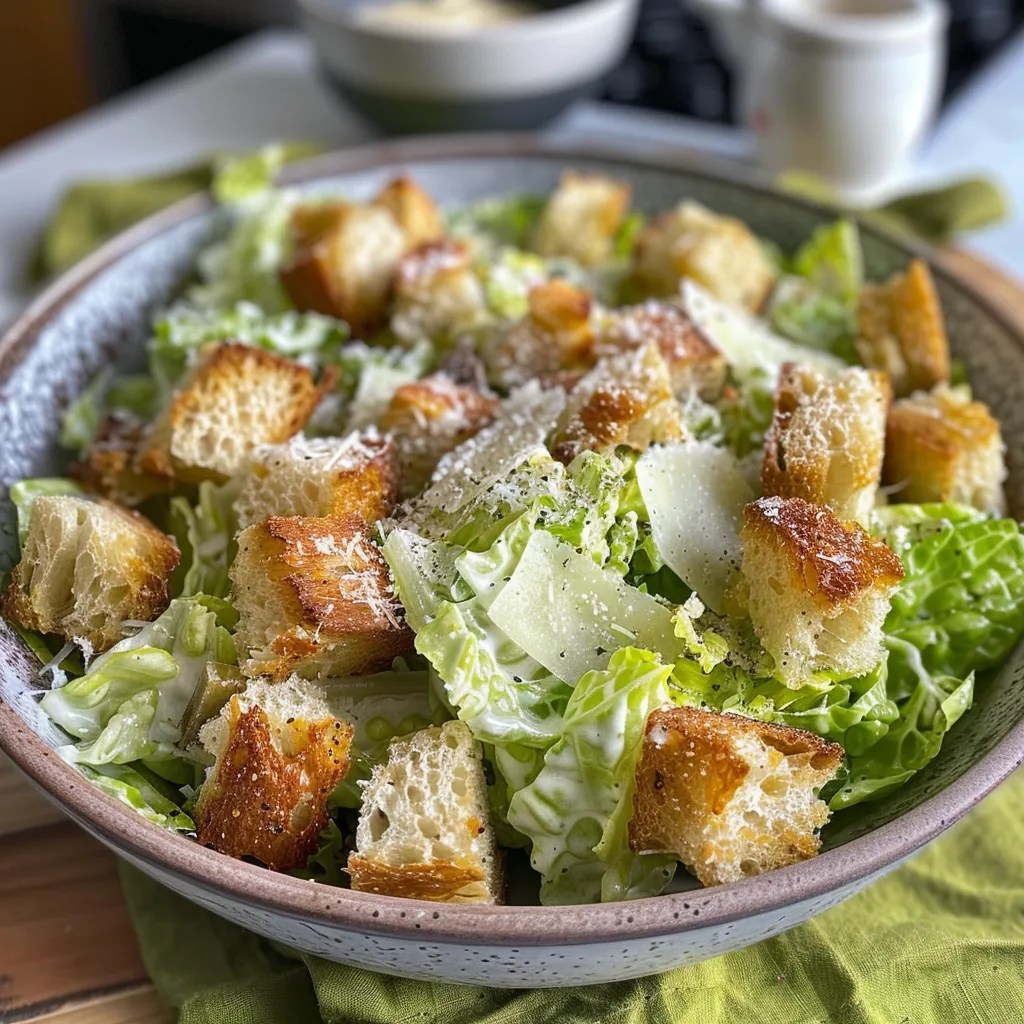
Side view of a delicious Caesar salad with a creamy dressing and fresh lettuce.

Now that we have our ingredients ready, let’s walk through the steps to create this delicious Caesar salad.

1. Make the Croutons

Start by preheating your oven to 375°F (190°C). In a mixing bowl, toss your cubed bread with olive oil, garlic powder, and a pinch of salt until evenly coated. Spread the bread cubes on a baking sheet and bake for 10-12 minutes, flipping halfway through, until they are golden and crisp. Allow them to cool while preparing the salad.

2. Prepare the Dressing

In a medium bowl, whisk together the minced garlic, Dijon mustard, Worcestershire sauce, lemon juice, and anchovy paste (if using). Then, add the mayonnaise and grated Parmesan cheese, whisking until smooth and creamy. Season with salt and freshly cracked black pepper to taste.

3. Assemble the Salad

In a large salad bowl, add the chopped romaine lettuce. Drizzle over the dressing and toss to coat every leaf evenly. Add the cooled croutons and a generous sprinkle of shaved Parmesan cheese.

4. Serve

Finish with an extra crack of black pepper and a squeeze of lemon juice if desired. Serve immediately to enjoy the best texture and flavor.

Pro Tips for Perfecting Your Caesar Salad

To elevate your Caesar salad experience, consider these expert insights:

  • Use Fresh Ingredients: Fresh romaine and high-quality Parmesan make a significant difference in flavor.
  • Don’t Skip the Croutons: Homemade croutons are easy to make and enhance the dish immensely.
  • Adjust to Taste: Feel free to modify the amount of garlic or lemon juice based on your preference.
  • Make Ahead: Prepare the dressing and croutons in advance for a quicker assembly.
  • Experiment with Greens: Try mixing in kale or arugula for a twist on the classic Caesar.
  • Balance the Flavors: Taste as you go to ensure the dressing has the right balance of tanginess and creaminess.
  • Use a Wide Bowl: A larger bowl allows for better tossing and distribution of the dressing.
  • Garnish Creatively: Add cherry tomatoes or grilled chicken for more color and flavor.

Common Mistakes and Troubleshooting

Even the best cooks can run into issues. Here are some common mistakes and how to avoid them:

  • Overdressing the Salad: Start with a small amount of dressing and add more as needed to avoid sogginess.
  • Using Stale Bread for Croutons: Fresh bread is essential for great texture; day-old bread is ideal.
  • Skipping the Garlic: Fresh garlic is key for authentic flavor; don’t omit it!
  • Rushing the Croutons: Ensure they are baked until golden for the best crunch.

Variations on the Classic Caesar Salad

Here are some creative variations to keep your Caesar salad exciting:

  • Chicken Caesar Salad: Add grilled chicken for a protein-packed meal.
  • Seafood Caesar: Incorporate shrimp or crab for a luxurious twist.
  • Vegan Caesar Salad: Substitute mayonnaise with a plant-based alternative and skip the anchovy paste.
  • Caesar Pasta Salad: Toss cooked pasta with the salad ingredients for a filling side dish.

Storage Tips and Make-Ahead Instructions

If you have leftovers, here’s how to store them properly:

  • For the Salad: Store any leftover salad in an airtight container without the croutons to prevent sogginess. Consume within 1-2 days.
  • For the Dressing: Store the Caesar dressing in the refrigerator for up to a week. Shake well before using.
  • For the Croutons: Keep homemade croutons in an airtight container at room temperature for up to a week.

Frequently Asked Questions (FAQs)

  1. Can I make Caesar salad without anchovies? Yes, you can omit the anchovy paste, but it adds traditional depth of flavor.
  2. How do I keep romaine lettuce crisp? Wash and dry the lettuce thoroughly, and store it in a container with a paper towel to absorb moisture.
  3. Can I use store-bought dressing? Absolutely, but homemade dressing offers a fresher taste and more control over ingredients.
  4. What type of bread is best for croutons? Day-old French or Italian bread works best for croutons due to its sturdiness.
  5. Is Caesar salad healthy? It can be healthy if made with fresh ingredients and controlled portions of dressing.
  6. Can I add other vegetables? Yes, adding cherry tomatoes or cucumbers can provide extra freshness and color.
  7. How do I make the salad gluten-free? Use gluten-free bread for croutons, and ensure all dressing ingredients are gluten-free.
  8. Can I prepare the salad in advance? You can prepare the dressing and croutons ahead of time but add the lettuce and dressing just before serving.

Nutrition Tips and Dietary Adaptations

For a healthier Caesar salad, consider the following adjustments:

  • Low-Fat Dressing: Substitute mayonnaise with Greek yogurt to reduce calories.
  • Whole Grain Bread: Use whole grain or multi-grain bread for croutons for added fiber.
  • Romaine Alternatives: Mix in other leafy greens like spinach or kale for a nutrient boost.
  • Reduce Salt: Limit the amount of salt in both the dressing and croutons for a lower sodium option.

Recommended Equipment

To make this Caesar salad successfully, you’ll need:

  • Baking Sheet: For toasting the croutons.
  • Mixing Bowls: For preparing the dressing and tossing the salad.
  • Whisk: Essential for mixing the dressing smoothly.
  • Salad Tongs: To serve and toss the salad evenly.

Serving Suggestions

Pair your Caesar salad with a variety of dishes:

  • Grilled Steak: The richness of steak complements the tangy flavors of Caesar salad.
  • Roasted Vegetables: Add a side of seasonal roasted veggies for a wholesome meal.
  • Crusty Bread: Serve with a loaf of fresh bread for a satisfying dining experience.
  • Wine Pairing: A crisp white wine like Sauvignon Blanc pairs beautifully with the flavors of the salad.

Conclusion

Now you’re equipped with everything needed to create a stunning Caesar salad that resonates with flavor and elegance. This timeless dish is versatile, allowing for customization and experimentation while remaining a beloved classic. With your newfound knowledge, you can prepare a Caesar salad that not only meets but exceeds expectations, impressing family and friends alike. So, roll up your sleeves and enjoy the process of cooking this delightful dish!

Caesar Salad

Prep Time 15 minutes
Cook Time 12 minutes
Total Time 27 minutes
Servings 4 servings
Calories 350
A classic Caesar Salad with homemade croutons and creamy dressing, perfect for a fresh and flavorful meal.

Ingredients

For the Dressing

  • 1 clove garlic (minced)
  • 1 teaspoon Dijon mustard
  • 2 teaspoons Worcestershire sauce
  • 2 tablespoons lemon juice (freshly squeezed)
  • 1 teaspoon anchovy paste (optional, but authentic)
  • ½ cup mayonnaise
  • ¼ cup grated Parmesan cheese
  • to taste Salt and freshly cracked black pepper

For the Croutons

  • 2 cups cubed bread (day-old works best)
  • 2 tablespoons olive oil
  • 1 teaspoon garlic powder
  • Pinch salt

For the Salad

  • 1 large head romaine lettuce (washed and chopped)
  • Shaved or grated Parmesan cheese (for garnish)
  • for serving Freshly ground black pepper

Instructions 

  • Preheat oven to 375°F (190°C). Toss bread cubes with olive oil, garlic powder, and salt; bake for 10-12 minutes until golden. Cool.
  • In a large bowl, toss chopped lettuce with dressing. Add croutons and Parmesan, then toss gently.
  • Finish with black pepper and lemon juice if desired. Serve immediately.

Notes

For extra crunch, serve immediately after assembling.
Calories: 350kcal
Cost: $12
Course: Salad
Cuisine: American
Keyword: Caesar, Croutons, Salad

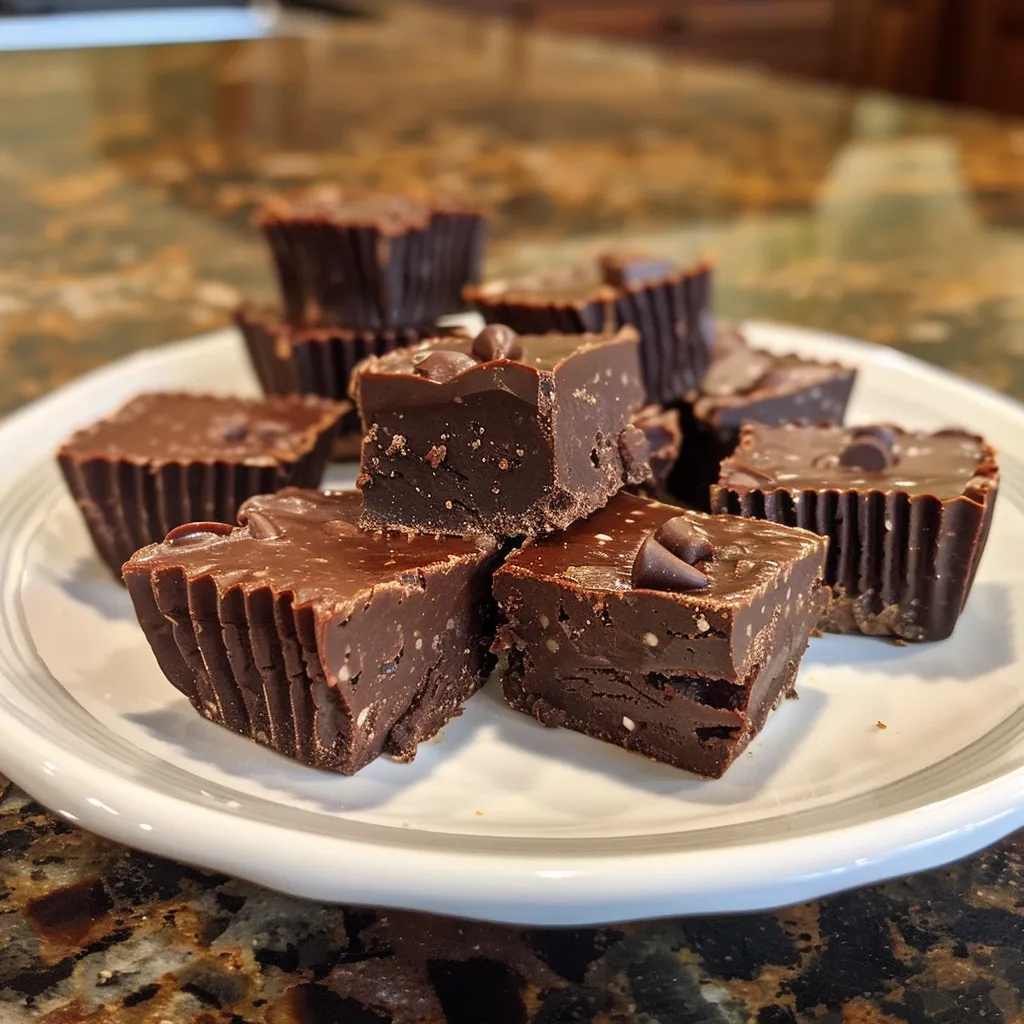
Effortless Indulgence: Discover the Magic of No Bake Brownie Balls

Welcome to the world of no bake brownie balls, where indulgence meets simplicity. These delightful treats are not only quick to prepare but also incredibly satisfying, making them the perfect choice for a healthy snack or a delicious dessert. In this guide, we will walk you through everything you need to know to create these rich, chocolatey bites with just three simple ingredients. Whether you’re a busy parent, a health-conscious individual, or simply someone who loves chocolate, these brownie balls are sure to become a staple in your kitchen.

Why You’ll Love This Recipe

  • Minimal Ingredients: With only three ingredients, you can whip up a batch of delicious brownie balls in no time. No complicated shopping lists required!
  • Healthy and Guilt-Free: Made with dairy-free and refined sugar-free ingredients, these brownie balls fit perfectly into a healthy lifestyle.
  • Customizable: Feel free to experiment with different nuts, spices, or toppings to make these brownie balls your own.
  • Easy to Make: The straightforward preparation process means that even novice cooks can achieve delicious results.
  • Perfect for Meal Prep: These brownie balls store well, making them an excellent option for quick snacks or dessert on-the-go.

Ingredient Breakdown

Let’s take a detailed look at the ingredients you’ll need for this simple recipe:

  • Medjool Dates: 1.5 cups (222g), pitted. These dates provide natural sweetness and a chewy texture. If your dates are dry, soak them in water for about 10 minutes before using.
  • Cocoa Powder: 3/4 cup (72g) of unsweetened Dutch process cocoa powder gives these brownie balls their rich chocolate flavor. You can substitute with natural cocoa powder if needed, but the taste will slightly differ.
  • Dark Chocolate Chips: 2 cups (316g) for coating. Choose a high-quality dark chocolate for the best results. You can use dairy-free chocolate chips to keep it vegan.

How to Make No Bake Brownie Balls

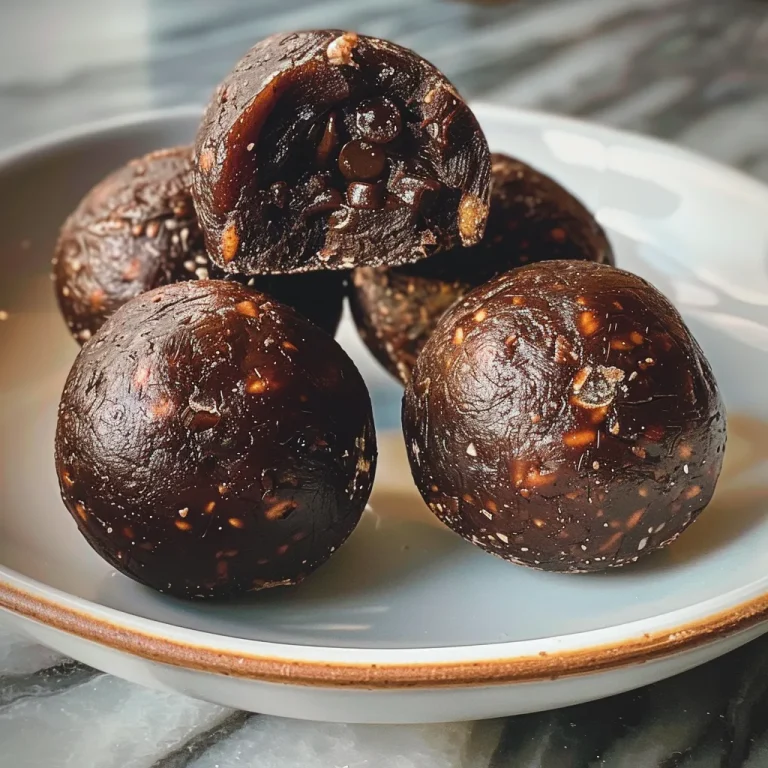
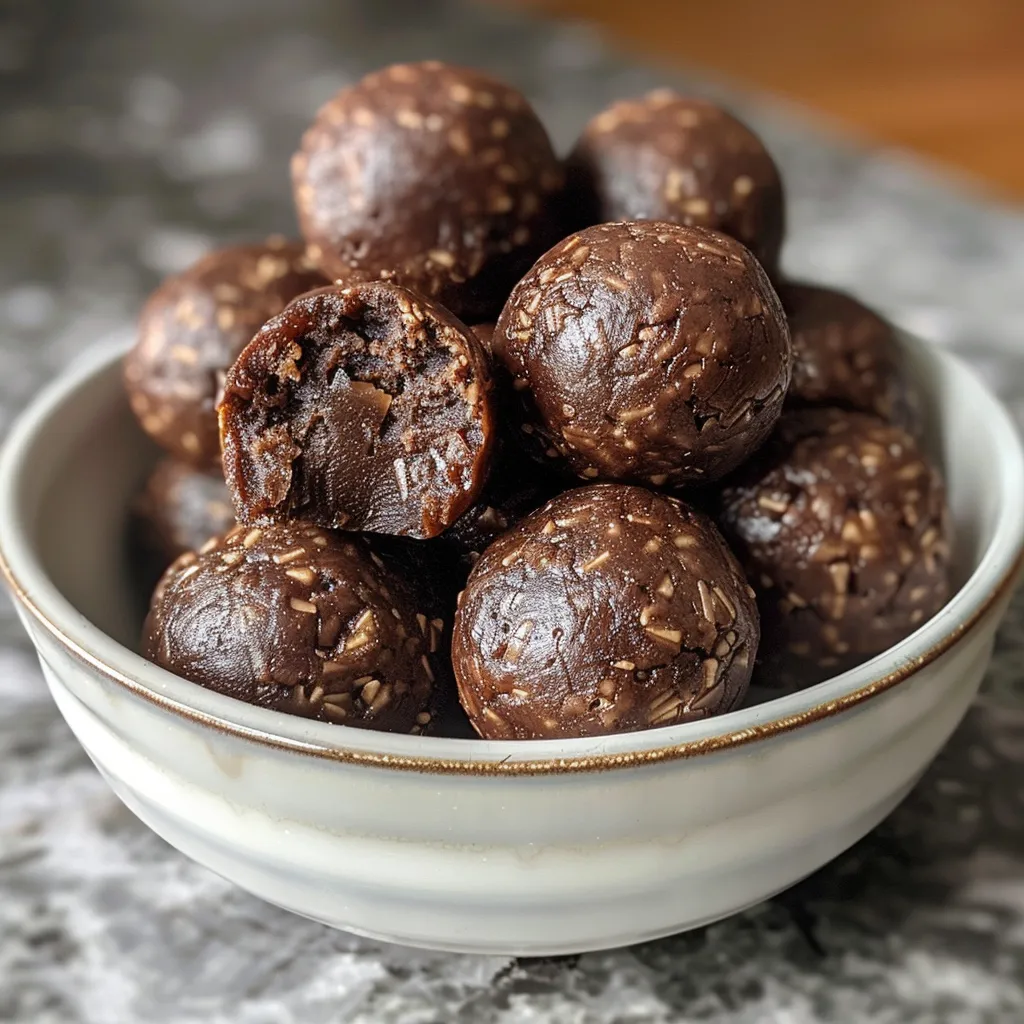
Side view of luscious No Bake Brownie Balls, highlighting their dark, cocoa-covered exterior.

Follow these simple steps to create your no bake brownie balls:

  1. Add the pitted dates to a food processor and blend until a mostly smooth paste forms. Scrape the sides with a spatula as needed.
  2. If your dates are dry, soak them first to ensure a smooth blend. If they are soft, no soaking is necessary.
  3. Once you have a smooth date paste, add in 1/2 cup of cocoa powder, reserving the rest for later. Blend until uniform, adding more cocoa if the mixture is too sticky.
  4. Scoop 1 tablespoon of the mixture and roll it into a ball. Repeat until all the mixture is used, placing the balls on a parchment-lined baking sheet.
  5. Freeze the balls for 15-30 minutes until solid.
  6. Meanwhile, melt 2 cups of dark chocolate in a microwave-safe bowl, heating in 15-30 second intervals. Stir until smooth. If too thick, add melted coconut oil 1 teaspoon at a time.
  7. Dip each frozen ball into the melted chocolate, allowing excess chocolate to drip off, and return to the baking sheet.
  8. Store in an airtight container in the fridge or freezer once the chocolate has set.

Pro Tips for Perfect No Bake Brownie Balls

  • Texture Matters: Adjust the cocoa powder to achieve the right consistency for rolling. The mixture should be sticky but manageable.
  • Chocolate Quality: Use high-quality chocolate for coating; it makes a significant difference in flavor.
  • Chilling Time: Don’t skip the freezing step; it helps the balls hold their shape and improves the chocolate coating.
  • Flavor Boosters: Consider adding a pinch of sea salt or a splash of vanilla extract for enhanced flavor.
  • Nut Butters: For added richness, incorporate a spoonful of nut butter into the mixture.
  • Protein Boost: Mix in a scoop of your favorite protein powder for a nutritious snack.
  • Keep it Clean: Use a small cookie scoop for even, mess-free portions.
  • Experiment: Feel free to add different mix-ins like nuts, seeds, or dried fruit for variety.

Common Mistakes and Troubleshooting

Even the best chefs encounter hiccups! Here are a few common issues and their solutions:

  • Too Sticky: If the mixture is too sticky to roll, add more cocoa powder a tablespoon at a time until it firms up.
  • Chocolate Not Setting: Ensure the chocolate is melted to the right consistency; if it’s too thick, add coconut oil.
  • Flavor Lacking: If the brownie balls taste bland, try adding a bit more cocoa powder or a pinch of salt to enhance the flavor.
  • Dry Texture: If your balls are too dry, this can be due to using old dates. Always check your dates before starting!

Variations to Try

These no bake brownie balls are incredibly versatile. Here are some delicious variations to try:

  • Peanut Butter Swirl: Add 1/4 cup of creamy peanut butter to the mixture for a rich flavor.
  • Coconut Crunch: Mix in unsweetened shredded coconut before rolling for added texture.
  • Mint Chocolate: Incorporate a few drops of peppermint extract into the chocolate coating for a refreshing twist.
  • Protein Packed: Use chocolate protein powder instead of cocoa to create a protein-rich snack.

Storage and Make-Ahead Instructions

These brownie balls can be made ahead of time and stored for later enjoyment:

  • Refrigerator: Store in an airtight container in the fridge for up to 5 days.
  • Freezer: These brownie balls freeze beautifully. Store in a freezer-safe container for up to 3 months.
  • Make Ahead: Prepare a batch over the weekend to have a quick snack ready throughout the week.

Comprehensive FAQ

Here are answers to some common questions about making no bake brownie balls:

  • Can I use other types of dates? Yes, you can use any variety of soft dates, but Medjool dates are preferred for their sweetness and texture.
  • Are these brownie balls gluten-free? Yes, this recipe is naturally gluten-free as it contains no flour.
  • Can I substitute the cocoa powder? While Dutch process cocoa gives a richer flavor, you can use natural cocoa as an alternative.
  • How can I make these vegan? Simply ensure you use dairy-free chocolate chips and avoid any non-vegan additions.
  • What if I don’t have a food processor? You can use a blender, but it may require more effort to achieve a smooth paste.
  • How do I know when the brownie balls are done? They should hold their shape when rolled and have a firm yet sticky texture.
  • Can I add protein powder? Yes, adding protein powder is a great way to boost the nutritional value of these treats.
  • Do I need to refrigerate these? While refrigeration is recommended, they can be stored at room temperature for a short period.

Nutrition Tips and Dietary Adaptations

For those mindful of their diet, here are some tips:

  • Lower Sugar: Use less chocolate or substitute with a sugar-free chocolate alternative.
  • Healthy Fats: Incorporate nut butters to add healthy fats and protein.
  • Balanced Snack: Pair these brownie balls with a source of protein, such as yogurt or a protein shake, for a balanced snack.

Equipment Recommendations

To make this recipe, you’ll need:

  • Food Processor: Essential for blending dates into a smooth paste.
  • Baking Sheet: For freezing the brownie balls.
  • Parchment Paper: To line the baking sheet and prevent sticking.
  • Microwave-Safe Bowl: For melting chocolate.

Serving Suggestions

Enjoy your no bake brownie balls in various ways:

  • As a Snack: Perfect for a quick energy boost during the day.
  • On Top of Yogurt: Crumble over yogurt for added texture and flavor.
  • With Coffee: A delightful pairing with your morning brew.
  • As Party Treats: Serve these at gatherings as a healthier dessert option.

With this comprehensive guide, you’re all set to create your own batch of no bake brownie balls. Remember, cooking is about creativity and enjoyment. So, gather your ingredients, follow the steps, and indulge in the deliciousness of these brownie balls. Happy cooking!

3 Ingredient No Bake Brownie Balls

Prep Time 10 minutes
Total Time 10 minutes
Servings 12 pieces
Calories 150
Delight in these easy, no-bake brownie balls made with just three simple ingredients. Perfect for a quick, healthy treat that satisfies your chocolate cravings.

Ingredients

Dried Fruits

  • 1.5 cups pitted Medjool dates (weight is 222g)
  • 3/4 cup unsweetened Dutch process cocoa powder (72g)

Chocolate Chips

  • 2 cups dark chocolate chips (316g)

Instructions 

  • Add dates to a food processor and blend until a smooth paste forms. Scrape sides as needed.
  • Mix in 1/2 cup of cocoa powder until combined into a soft dough.
  • Test the mixture; add more cocoa if too sticky, blending until workable.
  • Scoop 1 tbsp portions, roll into balls, and freeze for 15-30 minutes.
  • Melt dark chocolate chips in microwave or double boiler until smooth. Stir in coconut oil if needed.
  • Dip each frozen ball into melted chocolate, place on parchment, and let set. Store in fridge or freezer.

Notes

Ensure dates are soft for easier blending, or soak dry dates beforehand.
Calories: 150kcal
Cost: $10
Course: Dessert
Cuisine: American
Keyword: brownie, chocolate, no bake

Discover the Art of Homemade Croissants

Welcome to your complete guide on mastering homemade croissants! If you’ve ever dreamed of baking flaky, buttery croissants in your own kitchen, you’re in the right place. This detailed recipe will walk you through every step, ensuring that you can achieve that perfect, layered pastry without the fuss. With a little patience and the right techniques, you can elevate your baking skills and impress your friends and family.

In this guide, you’ll learn not just how to make croissants but why the techniques we use are crucial to achieving that sought-after flaky texture. Let’s dive in!

Why You’ll Love This Recipe

  • Flaky Layers: The lamination process creates multiple layers of dough and butter, resulting in a wonderfully flaky texture that melts in your mouth.
  • Authentic Flavor: Using high-quality ingredients, especially the butter, enhances the flavor profile, giving you that classic French bakery taste at home.
  • Customizable: Once you master the basic recipe, you can easily experiment with fillings and flavors, from chocolate to almond paste.
  • Impressive Presentation: The crescent shape of croissants makes them not only delicious but also visually appealing for any occasion.
  • Perfect for Any Meal: Enjoy them for breakfast, brunch, or an elegant snack paired with coffee or tea.

Ingredients Breakdown

Let’s gather our ingredients! Here’s what you’ll need to create delicious homemade croissants:

  • 4 cups (500g) all-purpose flour: The base of the dough. For a gluten-free version, consider using a gluten-free all-purpose blend.
  • 1/4 cup (50g) granulated sugar: Adds a hint of sweetness. You can substitute with brown sugar for a richer flavor.
  • 1 tablespoon (10g) salt: Essential for enhancing flavor. Use kosher salt for a cleaner taste.
  • 1 tablespoon (10g) active dry yeast: The leavening agent that helps the dough rise. Ensure your yeast is fresh for optimal results.
  • 1 1/4 cups (300ml) warm milk: Activates the yeast. Make sure it’s warm but not hot to avoid killing the yeast.
  • 2 tablespoons unsalted butter, melted: Adds richness to the dough.
  • 1 cup (225g) unsalted butter, cold: This is for lamination. Use European-style butter for better flavor and texture.
  • 1 egg: For egg wash, giving the croissants a beautiful golden finish.
  • 1 tablespoon milk: Mix with the egg for the wash.

Step-by-Step Instructions

Side view of delicious homemade croissants, showcasing their layered texture.

Step 1: Mix and Chill the Dough

In a large bowl or stand mixer, combine the flour, sugar, and salt. In a separate bowl, dissolve the yeast in warm milk and let it sit until foamy, about 5-10 minutes. Add the milk-yeast mixture and melted butter to the dry ingredients. Knead until smooth, about 3-5 minutes. Shape the dough into a rectangle, wrap in plastic wrap, and refrigerate for 1 hour.

Step 2: Prepare the Butter Block

Place the cold butter between two sheets of parchment paper. Use a rolling pin to shape it into a 6-inch square. If it’s too soft, chill it for a few minutes before proceeding.

Step 3: Laminate the Dough Like a Pro

Roll the chilled dough into a 12-inch square. Position the butter block diagonally in the center, like a diamond. Fold the corners of the dough over the butter to enclose it completely.

Step 4: Roll and Fold

Roll the dough into a long rectangle, about 8-20 inches. Fold it into thirds, like a letter. This is your first turn. Wrap it up and chill for 30 minutes. Repeat this rolling, folding, and chilling process two more times for a total of three turns. Remember, cold dough and butter are crucial for flaky layers!

Step 5: Shape the Croissants

After the final rest, roll the dough out into a large rectangle, about 1/4-inch thick. Trim the edges and cut triangles roughly 5 inches wide at the base. Starting at the wide end, gently stretch and roll each triangle toward the tip to form the classic crescent shape.

Step 6: Proof and Bake

Cover the shaped croissants loosely and let them rise at room temperature for 1.5 to 2 hours. Preheat your oven to 400°F (200°C). Mix the egg with milk and gently brush over each croissant for that glossy finish. Bake for 18-22 minutes until puffed and deep golden brown, rotating the pan halfway through for even browning. Let them cool on a wire rack for at least 10 minutes before enjoying!

Pro Tips for Perfect Croissants

  • Keep Everything Cold: The key to flaky layers is keeping the dough and butter cold throughout the process. If the butter starts to melt, chill the dough again.
  • Use Quality Ingredients: Invest in high-quality flour and butter. The flavor and texture of your croissants will greatly benefit.
  • Don’t Rush the Process: Each step builds on the last. Allow sufficient time for chilling and proofing for the best results.
  • Practice Makes Perfect: Your first batch may not be perfect, but don’t be discouraged! Each attempt will improve your skills.
  • Experiment with Fillings: Once you master the basic recipe, try adding fillings like chocolate, cheese, or ham to create variations.
  • Room Temperature Ingredients: Ensure that ingredients like milk and eggs are at room temperature for better incorporation.
  • Egg Wash Technique: Apply the egg wash gently to avoid deflating the dough.
  • Monitor Baking Time: Keep an eye on your croissants while baking to prevent over-browning.

Common Mistakes and Troubleshooting

Even seasoned bakers can encounter issues. Here are some common mistakes and how to avoid them:

  • Butter Melting into Dough: If this happens, chill the dough before rolling it out again to maintain the separation of layers.
  • Dense Croissants: This can occur from not kneading the dough enough or insufficient proofing time. Ensure you knead until smooth and give the dough time to rise.
  • Uneven Layers: Ensure even rolling and folding to create consistent layers. Use a ruler if necessary to measure.
  • Burnt Croissants: Baking too long or at too high a temperature can lead to burnt croissants. Always use an oven thermometer to check your oven’s accuracy.

Delicious Variations

Once you have mastered the classic croissant, try these variations:

  • Chocolate Croissants: Add chocolate pieces or a chocolate spread inside before rolling.
  • Almond Croissants: Fill with almond paste and top with sliced almonds before baking.
  • Ham and Cheese: Layer thin slices of ham and cheese inside for a savory twist.
  • Herb-Infused: Add fresh herbs like rosemary or thyme into the dough for an aromatic flavor.

Storage and Make-Ahead Instructions

Croissants are best enjoyed fresh, but here’s how to store them:

  • Room Temperature: Store in an airtight container at room temperature for up to 2 days.
  • Freezing: Freeze unbaked croissants after shaping. When ready to bake, let them proof in the refrigerator overnight and then bake as directed.
  • Reheating: To enjoy leftover croissants, reheat in the oven at 350°F (175°C) for a few minutes to restore crispiness.

FAQs About Croissants

  • Can I use whole wheat flour? Yes, but the texture will differ. Combine with all-purpose flour for better results.
  • How do I know when my croissants are proofed? They should double in size and look puffy. A gentle poke should leave a slight indentation.
  • What is the best temperature for proofing? A warm, draft-free place, around 75-80°F (24-27°C), is ideal for proofing.
  • Can I make croissant dough in advance? Absolutely! You can refrigerate the dough for up to 2 days before laminating.
  • What if my dough is too sticky? Lightly flour your work surface and hands when rolling out the dough to manage stickiness.
  • Can I use margarine instead of butter? While you can, the flavor and texture will not be as rich. Always opt for good quality butter for the best results.
  • Why did my croissants not rise? This could be due to inactive yeast. Make sure your yeast is fresh and properly activated.
  • How do I achieve a golden color? The egg wash is key! Be generous with it before baking to achieve that beautiful golden finish.

Nutrition Tips and Dietary Adaptations

If you’re looking to make healthier adaptations, consider these options:

  • Whole Grain: Use whole wheat flour for a more nutritious option, though it will yield a denser croissant.
  • Reduced Sugar: You can reduce the sugar slightly without impacting the texture.
  • Dairy-Free Version: Substitute with plant-based butter and non-dairy milk.

Equipment Recommendations

To achieve the best results, having the right tools is essential:

  • Stand Mixer: A stand mixer makes kneading easy, but you can also knead by hand.
  • Rolling Pin: A good quality rolling pin helps in evenly rolling the dough.
  • Parchment Paper: Use it to prevent sticking during the butter block preparation.
  • Baking Sheet: Ensure you have a sturdy baking sheet that can withstand high temperatures.
  • Thermometer: An oven thermometer ensures your oven is at the correct temperature for baking.

Serving Suggestions

Enjoy your croissants fresh out of the oven with:

  • Butter and Jam: Spread a little butter and your favorite jam for a classic breakfast.
  • Coffee or Tea: Pair your croissants with a warm beverage for the ultimate cafĂ© experience at home.
  • Cheese and Charcuterie: Serve with cheeses and meats for an elegant brunch spread.

Conclusion

Now that you have the complete guide to making homemade croissants, it’s time to roll up your sleeves and get baking! Remember, the key to perfect croissants is patience and practice. Don’t be discouraged if your first batch isn’t perfect; enjoy the journey of creating delicious pastries. With every attempt, you’ll get closer to mastering this wonderful skill. Happy baking!

Homemade French Croissant Recipe

Prep Time 30 minutes
Cook Time 20 minutes
Total Time 50 minutes
Servings 12 pieces
Calories 250
Enjoy flaky, buttery homemade croissants with this step-by-step recipe that yields delicious, golden pastries.

Ingredients

Dough

  • 4 cups all-purpose flour
  • 0.25 cup granulated sugar
  • 1 tablespoon salt
  • 1 tablespoon active dry yeast
  • 1.25 cups warm milk
  • 2 tablespoons unsalted butter, melted

Butter block

  • 1 cup unsalted butter, cold and shaped into a flat square
  • 1 egg egg
  • 1 tablespoon milk

Instructions 

  • Mix flour, sugar, and salt. Dissolve yeast in warm milk and let sit until foamy (5-10 min). Add milk-yeast mixture and melted butter to dry ingredients; knead until smooth (~3-5 min). Shape into rectangle, wrap, and refrigerate 1 hour.
  • Place cold butter between parchment sheets; roll into 6-inch square. Chill if too soft. Roll dough into 12-inch square; place butter diagonally, fold corners to enclose. Roll into 8-20 inch rectangle, fold into thirds, chill 30 min. Repeat rolling, folding, and chilling two more times.
  • After final chill, roll dough into large rectangle (~1/4 inch thick). Trim edges, cut into 5-inch wide triangles. Gently stretch and roll each triangle from wide end to tip to form crescents.
  • Loosely cover croissants; let rise at room temperature for 1.5-2 hours. Preheat oven to 400°F (200°C). Mix egg with milk; brush over croissants for a glossy finish. Bake 18-22 min until golden brown. Cool on wire rack for at least 10 min.

Notes

Ensure cold butter and dough layers for optimal flakiness.
Calories: 250kcal
Cost: $15
Course: Breakfast
Cuisine: French
Keyword: Croissant

Have you ever craved a meal that’s not only quick to prepare but also packed with flavor and nutrition? Look no further than the egg wrap. This versatile dish is ideal for breakfast, lunch, or even a light dinner. In this comprehensive guide, we will explore everything you need to know about making delicious egg wraps at home. From ingredients to variations, pro tips, and nutritional insights, you’ll find all the information you need to master the art of egg wraps.

Egg wraps are more than just a meal; they are an opportunity to enjoy a high-protein, gluten-free dish that can be tailored to your taste. With endless possibilities for fillings, you can create a meal that suits your dietary preferences, whether you’re looking for a low-carb option or a vegetarian delight. Let’s dive into the world of egg wraps and uncover why they should be a staple in your kitchen.

Why You’ll Love This Recipe

Here are five compelling reasons to add egg wraps to your meal rotation:

  • Quick and Easy: With a preparation time of just under 10 minutes, you can whip up a nutritious meal even on your busiest days.
  • Customizable Ingredients: Use whatever fresh ingredients you have on hand, from vegetables to proteins, ensuring every wrap is unique.
  • Healthy & Nutritious: Packed with protein from eggs and filled with vitamins from vegetables, they make for a wholesome meal.
  • Low Carbohydrate: Replace traditional wraps with egg wraps for a low-carb alternative that keeps you feeling full longer.
  • Family-Friendly: Kids and adults alike will enjoy this fun, interactive meal that can be tailored to individual preferences.

Detailed Ingredient Breakdown

To create the perfect egg wrap, you’ll need a few simple ingredients. Here’s a closer look along with some substitution options:

  • Eggs: The base of your wrap. For a lighter version, consider using egg whites or a combination of whole eggs and egg whites.
  • Water: A teaspoon of water helps create a fluffier texture. If you prefer, you can use milk for added richness.
  • All-Purpose Flour: This helps bind the egg mixture. For a gluten-free option, substitute with gluten-free flour or omit it altogether for a pure egg wrap.
  • Olive Oil: For cooking the wraps, olive oil adds flavor and prevents sticking. You can also use coconut oil or butter.
  • Fillings: Avocado, arugula, tomatoes, and feta cheese are just a few options. Feel free to get creative with your favorite vegetables, cheeses, or proteins.

How to Make Egg Wraps

Follow these simple steps to create your egg wraps:

  1. In a medium bowl, whisk together 2 eggs, 1 teaspoon water, 1 teaspoon all-purpose flour, and a pinch of salt and pepper until well combined.
  2. Heat 2 teaspoons olive oil in a nonstick frying pan over medium heat. Once hot, pour in the egg mixture, spreading it evenly across the pan.
  3. Cook for about 3 minutes until the egg mixture is fully set. Use a spatula to gently lift the edges and flip the wrap, cooking for an additional minute if necessary.
  4. Once cooked, slide the egg wrap onto a plate and allow it to cool slightly.
  5. Prepare the filling by mashing ½ avocado with 1 teaspoon lemon juice, ¼ teaspoon garlic powder, and season with salt and pepper.
  6. Spread the mashed avocado over the egg wrap, layer it with 1 cup arugula, add sliced tomatoes, and sprinkle with 1 tablespoon feta cheese.
  7. Roll the wrap tightly and slice in half. Enjoy immediately!

Pro Tips for Perfect Egg Wraps

Side view of delicious egg wraps filled with fresh ingredients.

To ensure your egg wraps turn out perfectly every time, consider these expert insights:

  • Use Room Temperature Eggs: For a fluffier texture, let your eggs sit at room temperature for about 30 minutes before cooking.
  • Don’t Overcook: Keep an eye on the cooking time. Overcooked eggs can become rubbery and dry.
  • Experiment with Seasonings: Beyond salt and pepper, try adding spices like paprika, cumin, or fresh herbs to elevate the flavor.
  • Keep the Heat Moderate: Cooking on medium heat prevents the eggs from browning too quickly and allows for even cooking.
  • Grease the Pan Well: A well-greased pan ensures the wrap slides out easily without tearing.
  • Cool Before Filling: Allow the egg wrap to cool slightly before adding the filling; this helps prevent sogginess.
  • Practice Rolling: Rolling takes practice. Start tight but not too tight to prevent the filling from spilling out.
  • Make Ahead: Prepare the egg wraps in advance and store them in the fridge. Reheat them gently when ready to use.

Common Mistakes and Troubleshooting

Even the best cooks can encounter challenges. Here are some common mistakes and how to avoid them:

  • Wraps Sticking to the Pan: Ensure your pan is adequately greased and preheated before pouring in the egg mixture.
  • Eggs Not Set Properly: If the mixture is too thin, it may not cook through. Adjust the amount of flour or use a non-stick pan.
  • Filling Overflows: Be cautious with portion sizes. Less is often more when it comes to filling your wraps.
  • Dry Wraps: If you find your wraps are too dry, add a bit more water or milk to the egg mixture before cooking.

Variations of Egg Wraps

One of the best things about egg wraps is their versatility. Here are four delicious variations you can try:

  • Classic Breakfast Wrap: Fill your egg wrap with scrambled eggs, crispy bacon, and shredded cheddar cheese for a hearty breakfast.
  • Mediterranean Veggie Wrap: Stuff with spinach, cherry tomatoes, olives, and crumbled feta for a fresh, flavorful option.
  • Southwest Style Wrap: Combine black beans, diced avocado, corn, and pepper jack cheese for a zesty kick.
  • Smoked Salmon Wrap: Layer smoked salmon, cream cheese, capers, and arugula for an elegant twist.

Storage and Make-Ahead Instructions

Egg wraps are perfect for meal prep. Here’s how to store and reheat them:

  • Refrigeration: Store cooked egg wraps wrapped in plastic wrap or in an airtight container in the fridge for up to 3-4 days.
  • Freezing: For longer storage, freeze the cooked wraps between layers of parchment paper. They can last for up to a month. Thaw in the fridge overnight before reheating.
  • Reheating: Gently reheat wraps in a microwave or on a skillet over low heat to avoid drying them out.

Comprehensive FAQ

Here are some frequently asked questions about egg wraps:

  • Can I make egg wraps ahead of time? Yes, you can prepare them and store them in the fridge or freezer for quick meals.
  • What fillings work best? Almost anything goes! Vegetables, meats, cheeses, and spreads can all be delicious.
  • Are egg wraps gluten-free? They can be if you use gluten-free flour or omit it altogether.
  • How do I prevent my egg wrap from breaking? Make sure to cook the wrap until it’s fully set and allow it to cool slightly before filling and rolling.
  • Can I use egg substitutes? Yes, you can use egg substitutes, but the texture and flavor may vary slightly.
  • What is the best way to reheat egg wraps? Reheat gently in a microwave or skillet to maintain their texture.
  • Can I use non-dairy milk in the mixture? Absolutely! Non-dairy milk can replace water or dairy milk without affecting the outcome significantly.
  • How do I add flavor to my egg wrap? Incorporate herbs, spices, or flavored oils to enhance the overall taste.

Nutritional Tips and Dietary Adaptations

Egg wraps can fit various dietary needs. Here are some tips:

  • High Protein: Eggs are a great source of protein. Adding ingredients like turkey or chicken can boost the protein content even more.
  • Low Carb: Skip the flour and add more vegetables to keep your meal low in carbs.
  • Vegetarian Option: Fill with a variety of vegetables and cheeses for a satisfying vegetarian meal.
  • Dairy-Free: Opt for dairy-free cheese or skip cheese altogether for a lighter wrap.

Equipment Recommendations

To make your egg wraps, here’s what you’ll need:

  • Nonstick Frying Pan: Essential for easy cooking and preventing the wraps from sticking.
  • Whisk: For mixing the egg and other ingredients thoroughly.
  • Spatula: Helps in flipping and transferring the wraps without breaking them.
  • Measuring Spoons: For precise measurements of ingredients.

Serving Suggestions

Egg wraps can be served in many delightful ways:

  • As Part of a Brunch Spread: Serve alongside fresh fruit and yogurt for a balanced meal.
  • With Dipping Sauces: Provide options like salsa, hot sauce, or a yogurt dip for added flavor.
  • On a Bed of Greens: Serve the egg wrap sliced over a bed of mixed greens for a larger meal.
  • As a Snack: Cut into smaller pieces for a quick, protein-packed snack.

In conclusion, egg wraps are a fantastic addition to your culinary repertoire. They are quick, versatile, and can be tailored to suit any taste. With this comprehensive guide, you now have all the tools and knowledge to create the perfect egg wraps every time. So grab your ingredients and start wrapping your way to deliciousness!

Egg Wraps

Prep Time 10 minutes
Cook Time 5 minutes
Total Time 15 minutes
Servings 2 servings
Calories 350
Enjoy a nutritious and delicious egg wrap filled with fresh avocado, arugula, and feta cheese for a quick meal.

Ingredients

Eggs and Batter

  • 2 pieces eggs
  • 1 teaspoon water
  • 1 teaspoon all-purpose flour
  • Salt and pepper to taste Salt and pepper
  • 2 teaspoons olive oil
  • ½ avocado avocado
  • 1 teaspoon lemon juice
  • ¼ teaspoon garlic powder
  • 1 cup arugula
  • 1 small tomato sliced
  • 1 tablespoon feta cheese

Instructions 

  • Whisk eggs, water, flour, salt, and pepper until smooth.
  • Heat olive oil in a pan, pour egg mixture, cook until set, then flip and cool.
  • Mash avocado with garlic, lemon juice, salt, and pepper to make spread.
  • Spread avocado on egg wrap, top with arugula, tomato slices, and feta, then roll and slice.

Notes

Use fresh ingredients for best flavor.
Calories: 350kcal
Cost: $8
Course: Breakfast
Cuisine: American
Keyword: Egg, Healthy, Wrap

Welcome to your ultimate guide on crafting the perfect chocolate tart. This chocolate tart recipe is not only a feast for the eyes but also a delight for the palate, promising rich flavors and a melt-in-your-mouth experience. Whether you’re hosting a gathering or simply craving a sweet treat, this recipe is designed for both novice and experienced bakers. Let’s dive in!

Why You’ll Love This Recipe

This howl chocolate tart is more than just a dessert; it’s an experience. Here’s why you’ll adore it:

  • Decadent Flavor: The rich combination of dark chocolate and creamy ganache creates an indulgent taste that satisfies any chocolate lover.
  • Easy to Prepare: With straightforward steps and minimal ingredients, you can whip up this impressive tart without stress.
  • Versatile Variations: Whether you prefer a classic chocolate flavor or want to experiment with unique twists, this recipe can adapt to your preferences.
  • Perfect for Any Occasion: From dinner parties to cozy nights in, this tart is sure to impress your guests and elevate any setting.
  • Make-Ahead Friendly: Prepare it a day in advance, allowing you to spend more time with loved ones and less time in the kitchen.

Ingredient Breakdown

To create this luscious howl chocolate tart, you’ll need the following ingredients:

  • 1 1/2 cups all-purpose flour: The base for your crust, can be substituted with gluten-free flour if needed.
  • 1/3 cup high-quality cocoa powder: This adds depth to the crust; Dutch-processed cocoa can also be used for a smoother flavor.
  • 1/2 cup granulated sugar: Sweetens the crust; you may opt for brown sugar for a hint of caramel flavor.
  • 1/2 cup cold unsalted butter, cubed: Essential for the tart’s flakiness; vegan butter is a suitable alternative.
  • 1 large egg yolk: Helps bind the dough; for a vegan option, use a flax egg.
  • 2 tablespoons ice water: To bring the dough together; adjust the amount as needed.
  • 12 oz dark chocolate (70% cacao), finely chopped: The star of our filling; feel free to use semi-sweet chocolate for a sweeter result.
  • 1 1/4 cups heavy cream: Creates the silky ganache; coconut cream works for a dairy-free version.
  • 1/2 teaspoon sea salt: Enhances the chocolate flavor; opt for flaky sea salt for topping.
  • 1 teaspoon vanilla extract: Adds warmth and richness; use pure vanilla for the best flavor.

Step-by-Step Instructions

Follow these simple steps to create your magnificent howl chocolate tart:

  1. Prepare the Dough: In a food processor, pulse the flour, cocoa powder, and sugar together. Add the cold butter and pulse until the mixture resembles coarse crumbs.
  2. Add the Egg and Water: Incorporate the egg yolk and ice water, pulsing until the dough begins to come together.
  3. Chill the Dough: Turn the dough onto a floured surface, form it into a disc, wrap in plastic, and chill for at least 1 hour.
  4. Shape the Dough: Roll out the dough and fit it into a 9-inch tart pan. Prick the bottom with a fork and freeze for 15 minutes.
  5. Parbake the Crust: Line the tart with parchment paper and pie weights. Bake at 375°F (190°C) for 15 minutes, then remove weights and bake for an additional 5 minutes. Let cool completely.
  6. Prepare the Ganache: Place the chopped chocolate in a heat-proof bowl. Heat the heavy cream in a small saucepan until it simmers.
  7. Combine and Whisk: Pour the hot cream over the chocolate and let sit for 5 minutes. Add salt and vanilla, then whisk until smooth.
  8. Fill the Tart: Pour the chocolate ganache into the cooled tart shell, smoothing the top. Refrigerate for at least 4 hours, or until set.
  9. Serve and Enjoy: Before serving, decorate with a wolf stencil or sprinkle with sea salt flakes for an extra touch.

Pro Tips for Success

Detailed shot of a chocolate tart showcasing its shiny surface and flaky pastry.

Enhance your chocolate tart-making experience with these expert insights:

  • Use High-Quality Chocolate: The better the chocolate, the richer your ganache will taste.
  • Chill the Crust: Ensure the dough is well-chilled to prevent shrinkage while baking.
  • Finely Chop Chocolate: This helps it melt evenly and creates a smoother ganache.
  • Control Your Oven Temperature: An oven thermometer can ensure your baking temperature is accurate, preventing overbaking.
  • Experiment with Flavors: Add a splash of espresso or orange zest to your ganache for a unique twist.
  • Use a Hot Knife for Slicing: Dip your knife in hot water for clean cuts, especially for the smooth ganache.
  • Let it Set Properly: Ensure your tart is adequately chilled to achieve the perfect slice.
  • Presentation Matters: A simple sprinkle of cocoa powder or a dollop of whipped cream can elevate your tart’s look.

Common Mistakes and Troubleshooting

Here are a few common pitfalls and how to avoid them:

  • Crust Shrinking: Always chill your dough before baking and avoid overworking it.
  • Ganache Seizing: Ensure your cream is hot but not boiling when added to the chocolate.
  • Overbaking: Keep a close eye on your tart during the final minutes of baking to ensure the crust remains tender.
  • Too Sweet or Bitter: Balance the flavors by adjusting the type of chocolate used.
  • Crust Being Too Hard: Consider adding a bit more butter or cream to your dough for a tender bite.

Variations to Try

Feel free to customize your howl chocolate tart with these delightful variations:

  • Mint Chocolate Tart: Add peppermint extract to the ganache for a refreshing twist.
  • Nutty Chocolate Tart: Incorporate chopped nuts into the crust or sprinkle atop the ganache.
  • Fruit-Infused Chocolate Tart: Layer fresh raspberries or strawberries on top before serving.
  • Spicy Chocolate Tart: Add a pinch of cayenne or chili powder to the ganache for a spicy kick.

Storage and Make-Ahead Instructions

Your chocolate tart can be made in advance and stored:

  • Refrigerator: Keep it in an airtight container for up to 5 days.
  • Freezer: Wrap it tightly in plastic wrap and store in the freezer for up to 1 month. Thaw overnight in the fridge before serving.

FAQs

Here are some frequently asked questions about the howl chocolate tart recipe:

  • Can I use milk chocolate instead of dark chocolate? Yes, but it will result in a sweeter tart.
  • How do I prevent the tart crust from shrinking? Ensure the dough is well-chilled before baking and avoid overworking it.
  • How long does the tart stay fresh? It can last up to 5 days in the refrigerator.
  • Can I make the crust gluten-free? Absolutely! Substitute all-purpose flour with a gluten-free blend.
  • Is this recipe suitable for vegan diets? Yes, with substitutions like vegan butter and flax egg.
  • Can I add other flavors to the ganache? Yes, feel free to experiment with spices or extracts.
  • What’s the best way to slice the tart? Use a hot knife to achieve clean, smooth slices.
  • Can I serve this tart warm? While it’s best served chilled, you can serve it slightly warmed for a different texture.

Nutritional Tips and Dietary Adaptations

This tart can fit into various dietary preferences:

  • Low-Carb Option: Use almond flour for the crust and a sugar substitute in the filling.
  • Dairy-Free Option: Substitute cream with coconut cream and butter with a plant-based alternative.
  • Reduced Sugar Option: Use dark chocolate with stevia or monk fruit to lower sugar content.

Recommended Equipment

For the best results, consider using:

  • Food Processor: For quick and efficient dough preparation.
  • Tart Pan: A removable-bottom tart pan makes it easy to serve.
  • Silicone Spatula: Perfect for smoothing the ganache.
  • Whisk: Essential for achieving a smooth chocolate mixture.

Serving Suggestions

To elevate your howl chocolate tart, try these serving ideas:

  • Pair with Ice Cream: A scoop of vanilla or mint ice cream complements the rich chocolate beautifully.
  • Fresh Berries: Serve with a side of raspberries or strawberries for a tart contrast.
  • Whipped Cream: A dollop of lightly sweetened whipped cream adds a creamy texture.
  • Chocolate Shavings: Garnish with dark chocolate shavings for an elegant finish.

In conclusion, mastering the art of the howl chocolate tart is a rewarding endeavor that brings joy to both the baker and the taster. With this comprehensive guide, you have all the tools and knowledge needed to create a stunning dessert that will impress everyone. Remember, cooking is about finding joy in the process, so relax, have fun, and indulge in the delicious results!

Howl Chocolate Tart

Prep Time 30 minutes
Cook Time 20 minutes
Total Time 50 minutes
Servings 8 pieces
Calories 550
A rich and decadent chocolate tart with a crisp crust and smooth ganache, perfect for special occasions or indulgent treats.

Ingredients

Crust

  • 2 cups all-purpose flour
  • 0.75 cup high-quality cocoa powder
  • 0.5 cup granulated sugar
  • 0.5 cup cold unsalted butter, cubed
  • 1 large egg yolk
  • 2 tablespoons ice water

Chocolate Ganache

  • 12 oz dark chocolate 70% cacao, finely chopped
  • 1.25 cups heavy cream
  • 0.5 teaspoon sea salt
  • 1 teaspoon vanilla extract

Instructions 

  • Pulse flour, cocoa powder, and sugar in a food processor. Add butter and pulse until coarse crumbs.
  • Add egg yolk and ice water, pulsing until dough begins to come together. Turn onto surface, form into disc, wrap, and chill for 1 hour.
  • Roll out dough, fit into 9-inch tart pan, prick bottom, and freeze for 15 minutes. Bake at 375°F (190°C) for 15 minutes, then remove weights and bake 5 more minutes. Cool completely.
  • Heat heavy cream until simmering. Pour over chopped chocolate, let sit 5 minutes, then whisk until smooth. Add salt and vanilla.
  • Pour ganache into cooled tart shell, smooth top, and refrigerate at least 4 hours until set. Decorate as desired before serving.

Notes

Ensure the tart is fully cooled before adding ganache for a clean finish.
Calories: 550kcal
Cost: $15
Course: Dessert
Keyword: chocolate