Author

robert

Browsing

Why You’ll Love These Effortless Fruit and Yogurt Parfaits

Fruit and yogurt parfaits are a fantastic way to enjoy a delicious and nutritious meal without the fuss. Perfect for breakfast or as a snack, these parfaits combine the rich creaminess of Greek yogurt with the natural sweetness of fresh fruits. Here’s why you’ll love this recipe:

  • Quick and Simple: With just a few fresh ingredients, you can whip up these parfaits in under 15 minutes.
  • Customizable: Use your favorite fruits and yogurt types, making it versatile for any palate.
  • Nutrient-Dense: Packed with vitamins, protein, and fiber, these parfaits are a health-conscious choice.
  • Visually Appealing: Layering the ingredients creates a stunning presentation, perfect for serving guests.
  • Make-Ahead Friendly: Prepare components in advance for an easy grab-and-go breakfast or snack.

Essential Ingredients for Your Fruit and Yogurt Parfaits

To craft these delightful parfaits, you’ll need the following key ingredients:

  • 1 cup strawberries: Sliced, these berries add a juicy, sweet flavor.
  • ¼ cup granulated sugar: To macerate the strawberries and enhance their sweetness.
  • 1 cup full-fat Greek yogurt: This provides a creamy texture and a protein boost.
  • ½ cup blueberries: These tiny berries contribute antioxidants and vibrant color.
  • ½ cup granola: Adds a satisfying crunch and fiber to your parfait.

Feel free to substitute ingredients according to your preferences:

  • Yogurt Alternatives: You can use non-dairy yogurt or low-fat options if preferred.
  • Fruit Variations: Swap strawberries and blueberries for bananas, peaches, or seasonal berries.
  • Granola Choices: Use any granola, nuts, or seeds for added texture.

Step-by-Step Guide to Making Fruit and Yogurt Parfaits

Creating your parfaits is straightforward. Follow these steps for layered perfection:

  1. Add the strawberries and sugar in a medium bowl and stir to combine. Cover and refrigerate for 30 minutes or overnight.
  2. Divide half the strawberries into two clear glasses.
  3. Add half the Greek yogurt on top of the strawberries.
  4. Add half the blueberries on top of the yogurt.
  5. Add all the granola on top.
  6. Repeat with one more layer of strawberries, one more layer of Greek yogurt, and one more layer of blueberries.
  7. Serve immediately for the best consistency.

Pro Tips for the Perfect Parfait
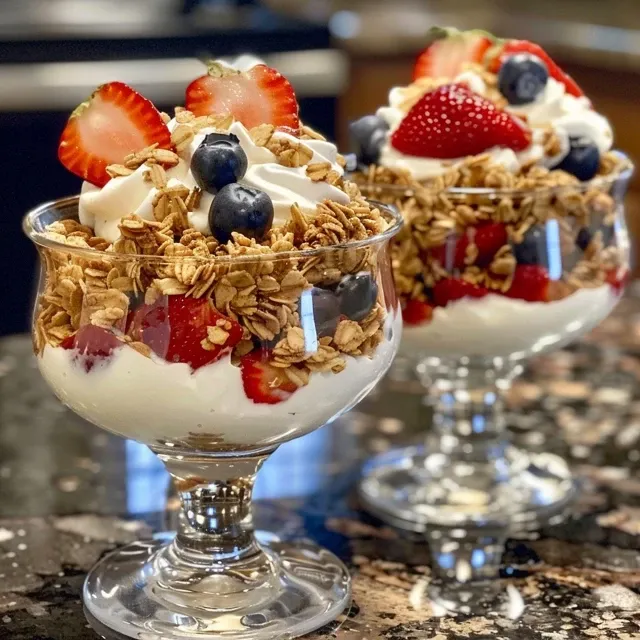
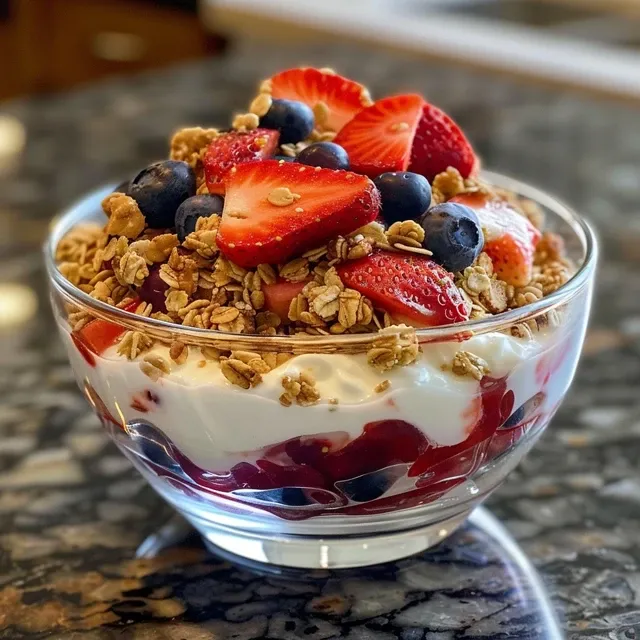
Detailed shot of a delicious yogurt parfait featuring fresh strawberries, blueberries, and granola on the side.

To elevate your parfait-making skills, consider these expert insights:

  • Use clear glasses: This enhances the visual presentation, allowing the beautiful layers to shine.
  • Keep yogurt cold: This prevents it from bleeding into other layers, maintaining a clean look.
  • Pre-macerate fruits: Letting fruits sit with sugar enhances their flavor and creates a syrup.
  • Experiment with textures: Add nuts or seeds for crunch along with granola for variety.
  • Balance flavors: Use sweet fruits with tangy yogurt for an enjoyable flavor contrast.
  • Portion control: Make smaller servings for a lighter snack, or larger portions for a meal.
  • Layer thoughtfully: Alternate colors for a visually appealing effect.
  • Keep it fresh: Use seasonal fruits for the best flavor and nutrition.

Common Mistakes and Troubleshooting

Even though this recipe is simple, avoid these common pitfalls:

  • Too much sugar: Adjust the sugar according to your taste and the sweetness of your fruits.
  • Overmixing yogurt: Gently layer yogurt to keep it fluffy and rich.
  • Skipping the chilling step: Refrigerating fruits enhances their flavor and texture.
  • Neglecting presentation: Take time to layer beautifully for a more enticing parfait.

Delicious Variations to Try

These parfaits are highly customizable. Here are some fun variations to consider:

  • Tropical Twist: Substitute strawberries with mango and add shredded coconut.
  • Nutty Delight: Mix in almond butter between layers for added flavor and creaminess.
  • Chocolate Layer: Add a layer of cocoa powder mixed with yogurt for a chocolatey version.
  • Spiced Pumpkin: In fall, use pumpkin puree mixed with yogurt and pumpkin spice for a seasonal treat.

Make-Ahead and Storage Instructions

Fruit and yogurt parfaits can be made ahead of time. Here’s how:

  • Storage: Store prepared parfaits in the refrigerator for up to 24 hours.
  • Keep components separate: For optimal texture, store granola separately until serving.
  • Make-ahead fruits: You can macerate fruits a day in advance to save time.

Frequently Asked Questions

Here are some common questions about fruit and yogurt parfaits:

  • Can I make fruit and yogurt parfaits ahead of time? Yes, they can be made a day in advance for convenience.
  • Can I use frozen fruit in a fruit and yogurt parfait? Yes, but thaw it first to avoid excess moisture.
  • What type of yogurt is best? Full-fat Greek yogurt offers the best creaminess, but feel free to use any preferred type.
  • How can I make this dairy-free? Substitute Greek yogurt with a dairy-free alternative like almond or coconut yogurt.
  • Can I add protein powder? Yes, adding a scoop of protein powder to the yogurt boosts the nutritional profile.
  • What’s the best way to store leftovers? Keep them in airtight containers in the fridge, but consume within a day for the best quality.
  • How do I prevent yogurt from bleeding into the layers? Chill yogurt and assemble parfaits just before serving.
  • Can I use flavored yogurt? Absolutely! It adds an extra flavor dimension but may require less sugar.

Nutritional Tips and Dietary Adaptations

These parfaits can be adapted for various dietary preferences:

  • Low-sugar option: Use unsweetened yogurt and fresh fruits, skipping the additional sugar.
  • High-protein option: Incorporate cottage cheese for an additional protein boost.
  • Gluten-free: Ensure your granola is certified gluten-free if needed.
  • Vegan: Substitute Greek yogurt with a plant-based yogurt and use maple syrup instead of sugar.

Essential Equipment for Making Parfaits

Here’s what you’ll need to create perfect parfaits:

  • Mixing bowl: For macerating fruits.
  • Measuring cups and spoons: For precise ingredient measurements.
  • Clear glasses or bowls: For layering and serving the parfaits.
  • Spatula: For gentle mixing and layering of yogurt.

Serving Suggestions

Serve your fruit and yogurt parfaits with:

  • Fresh mint leaves: For a touch of color and freshness.
  • Honey drizzle: A splash of honey can enhance sweetness.
  • Extra granola: Serve alongside for additional crunch.

With these tips and variations, you’re all set to create the ultimate fruit and yogurt parfaits that will impress anyone. Enjoy the process, experiment with flavors, and relish in the delicious results!

Fruit and Yogurt Parfaits

Prep Time 10 minutes
Total Time 10 minutes
Servings 2 servings
Calories 350
A delicious and healthy layered dessert perfect for breakfast or a snack, combining fresh fruits, yogurt, and granola.

Ingredients

Fruits

  • 1 cup strawberries, sliced
  • ½ cup blueberries

Dairy

  • 1 cup full fat Greek yogurt

Other

  • ½ cup granola
  • ¼ cup granulated sugar

Instructions 

  • Mix strawberries and sugar; refrigerate for 30 minutes.
  • Divide half the strawberries into two glasses.
  • Add half the yogurt and blueberries on top.
  • Top with all the granola.
  • Repeat layers with remaining ingredients.
  • Serve immediately.

Notes

For best results, serve immediately after assembling.
Calories: 350kcal
Cost: $10
Course: Breakfast, Snack
Cuisine: American
Keyword: Fruit, Yogurt

Effortlessly Indulgent Mini Oreo Dessert Cups

Welcome to the delicious world of Mini Oreo Dessert Cups, a mouthwatering treat that combines the best of cookies and cream with a creamy whipped cream cheese filling. This no-bake recipe is perfect for parties, potlucks, or even a simple weeknight indulgence. In under 30 minutes of active preparation, you can create these delightful dessert cups that are guaranteed to impress your guests. With layers of crushed Oreos and a luscious filling, these cups are not only visually appealing but also incredibly satisfying. Let’s dive into why this recipe should be your go-to for any gathering!

Why You’ll Love This Recipe

  • Quick to Prepare: With minimal cooking time, you can whip up these dessert cups in no time, making them an ideal choice for busy schedules.
  • No Baking Required: Perfect for warm days or when you want to avoid the oven, these mini cups are assembled rather than baked.
  • Customizable Filling: The cream cheese filling can be easily adapted with various flavorings, allowing you to personalize each batch.
  • Perfect for Sharing: Each cup is a single-serving, making it easy for guests to grab and enjoy without any mess.
  • Deliciously Indulgent: The combination of rich cream cheese and whipped cream creates a light yet decadent dessert that everyone will love.

Ingredients Breakdown

Let’s take a closer look at the ingredients you’ll need to create these Mini Oreo Dessert Cups:

  • 14 oz Oreo Cookies: The base of our dessert. You can substitute with any chocolate sandwich cookies if preferred.
  • 8 oz Cream Cheese: Use full-fat brick-style cream cheese for the best texture. It creates a rich, creamy filling.
  • 1 cup Powdered Sugar: This sweetens the filling and gives it a smooth consistency. Adjust based on your taste preference.
  • 2 tsp Vanilla Extract: Adds depth and enhances the flavor of the cream cheese filling.
  • 2 cups Heavy Whipping Cream: Cold whipping cream is essential for achieving stiff peaks that add lightness to the filling.
  • ¼ tsp Salt: A pinch enhances the flavors and balances the sweetness.
  • 24 Mini Plastic Cups: Use 2 oz cups for perfect portion sizes that are easy to serve and transport.

How to Make Mini Oreo Dessert Cups

Deliciously layered mini dessert cups filled with whipped cream cheese and Oreo crumbs.

Follow these simple steps to create your dessert cups:

  1. Finely crush the Oreo cookies (excluding the mini Oreos for topping) in a food processor or seal them in a plastic bag and crush with a rolling pin. Set aside.
  2. In a mixing bowl, beat the softened cream cheese until smooth.
  3. Add the powdered sugar, salt, and vanilla extract to the cream cheese and beat until well combined.
  4. In a separate chilled bowl, whip the heavy cream until stiff peaks form.
  5. Gently fold the whipped cream into the cream cheese mixture in batches until the mixture is light and fluffy.
  6. Fold in the crushed Oreo cookies until evenly distributed.
  7. Spoon or pipe the mixture evenly into the mini dessert cups.
  8. Top each dessert cup with one mini Oreo.
  9. Cover with lids and refrigerate for at least 2 hours, or until ready to serve.

Pro Tips for Perfect Mini Oreo Dessert Cups

  • Chill Your Equipment: For the best results, chill your mixing bowls and beaters before whipping the cream to ensure it reaches stiff peaks.
  • Quality Ingredients Matter: Using high-quality ingredients, especially the cream cheese and whipping cream, will make a noticeable difference in flavor and texture.
  • Adjust Sweetness: Taste the filling before adding all the powdered sugar, adjusting to your preference for sweetness.
  • Use a Piping Bag: For a professional look, consider using a piping bag to distribute the filling into the cups.
  • Layering Technique: For added aesthetics, layer the filling and crushed cookies in each cup.
  • Experiment with Flavors: Consider adding a bit of chocolate syrup or crushed candies into the filling for a twist.
  • Make Ahead: These dessert cups can be made a day in advance, perfect for planning ahead for gatherings.
  • Storage Tips: Keep the dessert cups covered in the refrigerator until serving for best results.

Common Mistakes and Troubleshooting

Even the best of us can encounter issues while preparing these dessert cups. Here are common mistakes and how to avoid them:

  • Overwhipping the Cream: Watch closely while whipping the cream to avoid turning it into butter. Stop when stiff peaks form.
  • Not Chilling the Cream: Ensure your heavy cream is very cold before whipping; this aids in achieving the right texture.
  • Skipping the Refrigeration Step: Allowing the cups to chill in the fridge is crucial for the flavors to meld and the filling to set.
  • Using Low-Fat Cream Cheese: For the best flavor and texture, avoid low-fat versions which can lead to a less creamy filling.

Variations & Substitutions

Feel free to customize your Mini Oreo Dessert Cups with these variations:

  • Peanut Butter Delight: Mix in ½ cup of creamy peanut butter into the filling for a nutty twist.
  • Minty Fresh: Add a few drops of mint extract to the cream cheese mixture for a refreshing flavor.
  • Chocolate Lovers: Incorporate chocolate pudding mix into the cream cheese for a richer chocolate flavor.
  • Fruit Toppings: Top with fresh berries or banana slices for a fruity contrast.

Storage and Make-Ahead Instructions

To keep your Mini Oreo Dessert Cups fresh:

  • Refrigeration: Store in the refrigerator for up to 3 days. Make sure they are covered to prevent drying out.
  • Freezing: While not ideal for the cream filling, you can freeze the crust. Assemble the cups fresh when ready to serve.
  • Prepare Ahead: You can prepare the filling and crust a day in advance and assemble them on the day of serving for optimal freshness.

Frequently Asked Questions

  • Can I use store-brand cookies instead of Oreos? Absolutely! Any chocolate sandwich cookie will work.
  • How far in advance can I make these? You can prepare them up to 2 days ahead of time, storing them in the refrigerator until serving.
  • Can I double the recipe? Yes! Just ensure you have enough cups and adjust the mixing bowls accordingly.
  • Can I use whipped topping instead of whipping cream? Yes, but the texture may be less airy and creamy.
  • What’s the best way to crush the Oreos? A food processor is the quickest method; otherwise, a rolling pin works well.
  • Can I make these gluten-free? Yes! Use gluten-free chocolate sandwich cookies for a gluten-free version.
  • How can I make these dairy-free? Substitute the cream cheese with a dairy-free alternative and use coconut cream instead of heavy whipping cream.
  • What’s the nutritional information for these cups? Each cup will vary based on servings and ingredient choices. Use a nutrition calculator for precise information.

Serving Suggestions

These Mini Oreo Dessert Cups can stand alone as a delightful treat, but here are some serving suggestions to elevate your dessert table:

  • Pair with Coffee or Tea: The rich flavors of coffee or tea complement the dessert beautifully.
  • Mix with Fresh Fruit: Serve alongside fresh strawberries or raspberries for a colorful, refreshing contrast.
  • Add Whipped Cream: Top with extra whipped cream for an indulgent finish.
  • Presentation Matters: Consider garnishing with chocolate shavings or sprinkles for a festive touch.

Conclusion

These Mini Oreo Dessert Cups with Whipped Cream Cheese Filling are not just a treat; they’re a celebration of flavor and simplicity. Easy to prepare and endlessly customizable, they are sure to be a hit at your next gathering. Whether you’re making them for a birthday party, holiday celebration, or just because, these dessert cups are a delightful way to satisfy your sweet tooth. So grab your ingredients, and let’s get mixing—your dessert awaits!

Mini Oreo Dessert Cups with Whipped Cream Cheese Filling

Prep Time 20 minutes
Total Time 20 minutes
Servings 24 cups
Calories 250
Delight in these easy-to-make mini dessert cups featuring a creamy Oreo filling topped with mini Oreos, perfect for any occasion.

Ingredients

Cookies

  • 1 package 14 oz Oreo cookies (reserve 24 mini Oreos for topping)
  • 8 oz cream cheese (softened)
  • 1 cup powdered sugar
  • 2 tsp vanilla extract
  • 2 cups heavy whipping cream (cold)
  • ¼ tsp salt
  • 24 mini plastic cups with lids 2 oz size

Mini Oreos for topping

Instructions 

  • Crush the Oreo cookies (excluding mini Oreos) into fine crumbs and set aside.
  • Beat softened cream cheese until smooth, then mix in powdered sugar, salt, and vanilla extract.
  • Whip the heavy cream until stiff peaks form, then fold into the cream cheese mixture until fluffy.
  • Gently fold in crushed Oreo cookies, then spoon or pipe into mini cups and top each with a mini Oreo.
  • Cover and refrigerate for at least 2 hours before serving.

Notes

Keep the dessert chilled until ready to serve for best freshness.
Calories: 250kcal
Cost: $15
Course: Dessert
Keyword: dessert, Oreo, whipped cream

Are you ready to elevate your baking game with light and fluffy vanilla cupcakes? This foolproof recipe is designed for effortless success, making it perfect for any occasion. In just a few simple steps, you can create cupcakes that are not only delicious but also visually enticing. With our expert tips and techniques, you’ll achieve bakery-quality results right in your own kitchen. Let’s dive into the wonderful world of baking with these irresistible vanilla cupcakes!

Why You’ll Love This Recipe

This vanilla cupcake recipe is a game-changer. Here are five compelling reasons to make it:

  • Fluffy Texture: Each cupcake is light and airy, thanks to the perfect balance of ingredients and technique.
  • Rich Flavor: Infused with pure vanilla extract, these cupcakes pack a delightful taste that will impress everyone.
  • Versatile Base: Use this recipe as a foundation for various flavors and frostings, from chocolate to red velvet.
  • Easy to Make: With minimal effort and straightforward steps, even beginner bakers will succeed.
  • Perfect for Any Occasion: Whether it’s a birthday, wedding, or just a cozy night in, these cupcakes fit any celebration.

Ingredients: A Detailed Breakdown

Understanding your ingredients is crucial for baking success. Let’s take a closer look at what you’ll need:

  • 1 1/4 cups all-purpose flour: This forms the base structure of your cupcakes. You can substitute with cake flour for a softer texture.
  • 1 teaspoon baking powder: Essential for leavening, giving your cupcakes that perfect rise.
  • 1/4 teaspoon baking soda: Works in conjunction with baking powder to ensure a light and airy cupcake.
  • 1/4 teaspoon salt: Enhances the sweetness and balances flavors.
  • 1/3 cup unsalted butter, softened: Adds richness and moisture. Ensure it’s at room temperature for easy mixing.
  • 3/4 cup granulated sugar: Sweetens the batter and contributes to the cupcake’s tender crumb.
  • 1 tablespoon sunflower oil: Keeps the cupcakes moist without altering the flavor.
  • 2 teaspoons pure vanilla extract: The star flavor of your cupcakes—opt for high-quality extract.
  • 1 large egg, at room temperature: Provides structure and stability to the batter.
  • 1/4 cup full-fat sour cream, at room temperature: Adds moisture and a slight tang, enhancing flavor.
  • 1/2 cup whole milk, at room temperature: Ensures a smooth batter and contributes to the cupcakes’ richness.
  • For the frosting: 1 cup unsalted butter, 4 1/2 cups powdered sugar, 1 tablespoon pure vanilla extract, and 4-5 tablespoons heavy cream or whole milk, plus a pinch of salt.

Pro Tips for Perfect Vanilla Cupcakes

Follow these expert tips to ensure your vanilla cupcakes turn out perfectly every time:

  • Use Room Temperature Ingredients: Allow your butter, eggs, and milk to come to room temperature for an even batter and better rise.
  • Don’t Overmix the Batter: Mix just until combined to avoid dense cupcakes. Overmixing can lead to a tough texture.
  • Fill Cupcake Liners to the Right Level: Aim for about 2/3 full. Overfilling can lead to overflowing and messy results.
  • Rotate Your Baking Pan: Halfway through baking, rotate the pan to ensure even cooking, especially if your oven has hot spots.
  • Check for Doneness: Use a toothpick inserted in the center. If it comes out clean or with a few crumbs, they’re done!
  • Cool Completely Before Frosting: Allow your cupcakes to cool on a wire rack to prevent melting your frosting.
  • Experiment with Flavors: Feel free to add lemon zest, almond extract, or even a splash of coffee to customize your cupcakes.
  • Make-ahead Option: Cupcakes can be made ahead and stored in the fridge for up to 3 days, making them perfect for busy schedules.

Common Mistakes and Troubleshooting

Side view of a fluffy vanilla cupcake topped with white buttercream icing.

Even seasoned bakers can run into issues. Here’s how to troubleshoot common problems:

  • If Your Cupcakes are Dense: This often means you overmixed the batter or used too much flour. Ensure accurate measurements and gentle mixing.
  • If They Sink in the Middle: This could be due to underbaking. Ensure your oven is calibrated correctly and check for doneness.
  • If They Stick to the Liners: Make sure the liners are properly greased or use quality liners to prevent sticking.
  • If the Flavor is Off: Always use fresh ingredients, especially your leavening agents and vanilla extract.

Variations: Customize Your Cupcakes

Want to switch things up? Here are four delicious variations to try:

  • Chocolate Vanilla Cupcakes: Substitute 1/3 cup of flour with cocoa powder for a delightful chocolate twist.
  • Funfetti Cupcakes: Fold in 1/2 cup of colorful sprinkles into the batter for a festive look.
  • Lemon Vanilla Cupcakes: Add the zest of one lemon and a tablespoon of lemon juice for a refreshing citrus flavor.
  • Almond Vanilla Cupcakes: Swap half of the vanilla extract for almond extract for a nutty flavor profile.

Storage and Make-Ahead Instructions

Proper storage is key to maintaining the freshness of your cupcakes:

  • Room Temperature: Cupcakes can be stored in an airtight container at room temperature for up to 3 days.
  • Refrigeration: If you live in a warmer climate, keep them in the fridge for up to a week. Bring to room temperature before serving.
  • Freezing: Freeze unfrosted cupcakes in an airtight container for up to 3 months. Thaw in the fridge overnight before frosting.

Frequently Asked Questions

Got questions? We’ve got answers! Here are some common queries about vanilla cupcakes:

  • Can I use a different type of flour? Yes, you can use cake flour for a softer cupcake or gluten-free flour blends, but results may vary.
  • What can I use instead of sour cream? Greek yogurt is a great substitute for sour cream in terms of moisture and tang.
  • How do I make my cupcakes more flavorful? Experiment with extracts, spices, and citrus zest to enhance flavor.
  • Can I make this as a layered cake? Absolutely! Just adjust the baking time according to the size of your cake pans.
  • What’s the best way to frost my cupcakes? Use a piping bag for a professional look or simply spread with a knife for a rustic feel.
  • Can I use this recipe for mini cupcakes? Yes, just reduce the baking time to about 10-12 minutes.
  • What if I don’t have baking powder? You can substitute with 1/4 teaspoon baking soda and 1/2 teaspoon cream of tartar.
  • How can I make these dairy-free? Substitute with plant-based butter and non-dairy milk or yogurt alternatives.

Nutrition Tips and Dietary Adaptations

For those mindful of dietary needs, here are some tips:

  • Lower Sugar Version: Reduce the sugar by 1/4 cup without significantly affecting texture.
  • Gluten-Free Option: Use a 1:1 gluten-free flour blend for a suitable alternative.
  • Vegan Adaptation: Substitute butter with vegan butter, and replace the egg with a flax egg (1 tablespoon flaxseed meal + 2.5 tablespoons water).
  • Healthier Frosting: Consider a whipped coconut cream topping for a lighter alternative to traditional buttercream.

Equipment Recommendations

Having the right tools makes all the difference. Here’s what you’ll need:

  • Stand Mixer: Ideal for whipping batter to the perfect fluffiness.
  • Measuring Cups and Spoons: Accurate measurements are key in baking.
  • Spatula: For folding ingredients gently without deflating the batter.
  • Cooling Rack: Allows cupcakes to cool evenly, preventing sogginess.
  • Ice Cream Scoop: Perfect for portioning batter into cupcake liners.

Serving Suggestions

Serve your vanilla cupcakes with a variety of accompaniments:

  • Classic Buttercream Frosting: A staple for a reason—rich and sweet, it pairs beautifully with vanilla.
  • Fresh Berries: Top with strawberries or raspberries for a burst of freshness and color.
  • Chocolate Ganache: Drizzle over for a decadent finish that elevates your cupcakes.
  • Sprinkles: Add a playful touch, especially for celebrations or kids’ parties.

With this comprehensive guide, you’re well on your way to mastering the art of vanilla cupcakes. Remember, practice makes perfect, and with each batch, you’ll refine your skills. Happy baking!

Vanilla Cupcakes

Prep Time 20 minutes
Cook Time 15 minutes
Total Time 35 minutes
Servings 12 cupcakes
Calories 250
Delicious and moist vanilla cupcakes perfect for any occasion. Easy to make with simple ingredients and a creamy vanilla frosting.

Ingredients

Dry ingredients

  • 1.25 cups all-purpose flour
  • 1 teaspoon baking powder
  • 0.25 teaspoon baking soda
  • 0.25 teaspoon salt

Wet ingredients

  • 113 grams unsalted butter, softened
  • 150 grams granulated sugar
  • 1 tablespoon sunflower oil
  • 2 teaspoons pure vanilla extract
  • 1 large egg (at room temperature)
  • 0.25 cup full fat sour cream (at room temperature)
  • 0.5 cup whole milk (at room temperature)

Frosting ingredients

  • 1 cup unsalted butter, softened
  • 4.5 cups powdered sugar
  • 1 tablespoon pure vanilla extract
  • 4 tablespoons heavy cream or whole milk

Instructions 

  • Preheat oven to 350°F (175°C). Line cupcake tins with paper liners.
  • Mix dry ingredients in a bowl. In another bowl, beat butter and sugar until fluffy. Add eggs and vanilla, then sour cream and milk. Combine wet and dry ingredients.
  • Divide batter into liners and bake for 15 minutes. Cool completely.
  • Prepare frosting by beating butter, powdered sugar, vanilla, and cream until smooth. Frost cooled cupcakes.

Notes

Ensure ingredients are at room temperature for best results.
Calories: 250kcal
Cost: $12
Course: Dessert
Cuisine: American
Keyword: cupcakes, vanilla

Indulge in a rich Chocolate Chip Mug Cake that’s ready in minutes. This simple recipe combines buttery goodness and chocolatey bliss, perfect for a quick dessert fix. Whether you’re craving something sweet after a long day or need a last-minute treat for guests, this mug cake is your answer. It’s not just about speed; it’s about creating a delicious experience right in your kitchen.

Why You’ll Love This Recipe

This chocolate chip mug cake is more than just a quick dessert option. Here are five compelling reasons to embrace this recipe:

  • Quick Preparation: Ready in under 5 minutes, this treat is perfect for those late-night cravings or unexpected guests.
  • Minimal Ingredients: You likely have all the ingredients on hand, making it an easy go-to dessert without a grocery run.
  • Customizable: Add your favorite mix-ins or toppings, making it versatile for different taste preferences.
  • Single Serving: No need for leftovers; this recipe is portion-controlled, ideal for solo indulgence.
  • Kid-Friendly: A fun activity for kids to make their own dessert, fostering culinary creativity in the kitchen.

Ingredients Breakdown: Your Chocolate Chip Mug Cake Essentials

Let’s dive into the ingredients that make this cake a standout. Here’s what you’ll need:

  • 2 tablespoons unsalted butter: This is the foundation for a rich, moist cake.
  • 2 tablespoons light brown sugar: Adds a hint of caramel flavor, enhancing the overall taste.
  • 1 tablespoon granulated sugar: Balances the sweetness and provides structure.
  • 3 tablespoons milk: Essential for moisture, you can substitute with almond or oat milk for non-dairy options.
  • ½ teaspoon vanilla extract: Elevates the flavor profile with a warm, inviting aroma.
  • ¼ cup all-purpose flour: The main ingredient that gives body to your cake. You can use gluten-free flour if needed.
  • Pinch of salt: Enhances the sweetness and balances flavors.
  • 2 tablespoons semisweet chocolate chips: The star of the show, providing delightful pockets of melted chocolate.

Step-by-Step Instructions

Follow these simple steps to create your mug cake masterpiece:

  • Step 1: In a microwave-safe mug, melt the butter using 15-second intervals until completely liquid.
  • Step 2: Add both brown and white sugars to the melted butter, along with the milk and vanilla. Stir until well combined and slightly thickened.
  • Step 3: Gently incorporate the flour and salt, mixing just until no dry spots remain.
  • Step 4: Fold in most of the chocolate chips, reserving a few for the top.
  • Step 5: Sprinkle the remaining chocolate chips over the surface of the batter.
  • Step 6: Cook on high power for 60 seconds, then let stand for 2-3 minutes before enjoying.

Pro Tips for the Perfect Mug Cake

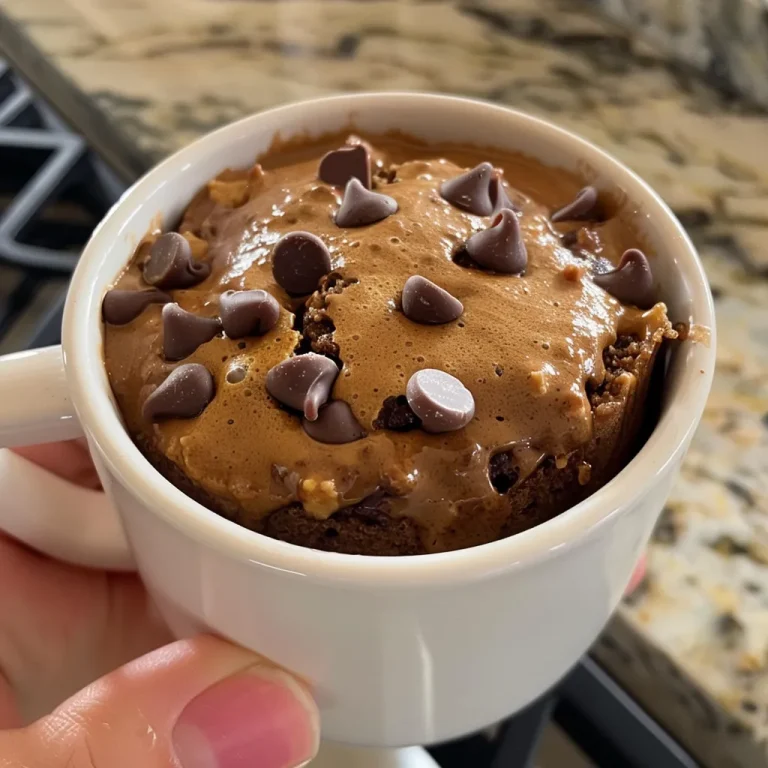
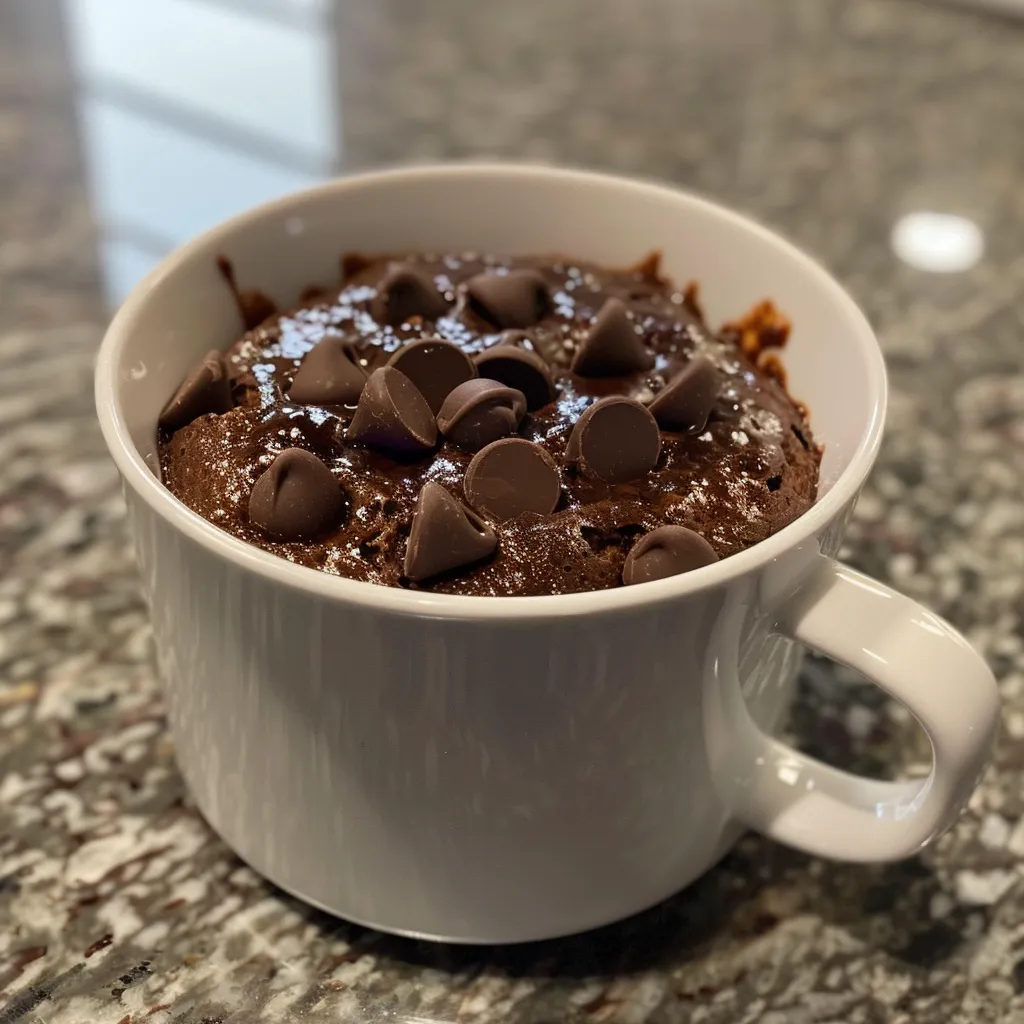
Side view of a delicious chocolate chip mug cake served in a white mug.

For the ultimate chocolate chip mug cake experience, consider these expert tips:

  • Monitor Cooking Time: Microwave wattages vary; start with 60 seconds, then check for doneness. The cake should be set but still moist.
  • Don’t Overmix: Stir just until combined to avoid a dense texture.
  • Experiment with Flavors: Add a dash of cinnamon or a splash of espresso to elevate the flavor.
  • Use a Large Mug: Ensure your mug is big enough to prevent overflow during cooking.
  • Microwave in Intervals: If the cake isn’t fully cooked, microwave in 10-second bursts to avoid overcooking.

Common Mistakes & Troubleshooting

Even the best bakers can encounter hiccups. Here’s how to troubleshoot:

  • Too Dry: If your cake turns out dry, you may have overcooked it. Try a shorter cooking time next time.
  • Dense Texture: This can happen if you overmix the batter. Mix just until combined.
  • Not Rising: Ensure your baking powder is fresh; it’s crucial for the cake to rise properly.

Variations to Try

Want to mix things up? Here are four delicious variations:

  • Peanut Butter Chip Mug Cake: Substitute chocolate chips with peanut butter chips for a nutty twist.
  • Double Chocolate Mug Cake: Add cocoa powder to the batter for an extra chocolate punch.
  • Gluten-Free Version: Use almond flour or a gluten-free flour blend to make this treat suitable for everyone.
  • Vegan Mug Cake: Replace the butter with coconut oil and use a flax egg instead of the regular egg.

Storage & Make-Ahead Instructions

This mug cake is best enjoyed fresh, but if you want to prepare ahead:

  • Storage: Store any leftovers in an airtight container in the fridge for up to 2 days. Reheat in the microwave.
  • Make-Ahead Option: Prepare the dry ingredients in advance, keeping them in a sealed container. When ready to bake, just add the wet ingredients and microwave.

FAQs: Your Questions Answered

Here are some frequently asked questions about chocolate chip mug cakes:

  • Can I make this without an egg?: Yes! This recipe is naturally eggless, but you can add a flax egg if desired.
  • What if I don’t have a microwave?: You can bake this in a conventional oven at 350°F for about 10-15 minutes.
  • Can I use other types of flour?: Absolutely! Almond flour or coconut flour can work, but may alter the texture slightly.
  • How do I know when it’s done?: The cake should look set and spring back slightly when touched. It will continue to cook a bit after removing from the microwave.
  • Can I add fruit?: Yes! Blueberries or sliced bananas can be delicious additions.
  • Is this recipe suitable for kids?: Definitely! It’s a fun, easy recipe for kids to make with supervision.
  • Can I double the recipe?: It’s best to make them one at a time to prevent overflow and uneven cooking.
  • Can I freeze the mug cake?: This cake is best enjoyed fresh. Freezing is not recommended as it may alter the texture.

Nutrition Tips & Dietary Adaptations

This mug cake is not only delicious but can be adapted to fit various dietary needs:

  • Low Sugar: Reduce the sugar by half or use a sugar alternative like stevia or erythritol.
  • Higher Protein: Add a scoop of protein powder to the batter for a nutritious boost.
  • Dairy-Free: Substitute the butter and milk with coconut oil and almond milk respectively.

Equipment Recommendations

To successfully create your chocolate chip mug cake, you’ll need:

  • Microwave-Safe Mug: Choose a mug that holds at least 12 ounces to avoid overflow.
  • Spoon: For mixing your ingredients thoroughly.
  • Measuring Cups and Spoons: Accurate measurements are key to perfecting your mug cake.

Serving Suggestions

For an indulgent experience, consider these serving ideas:

  • Whipped Cream: A dollop of whipped cream on top adds a luxurious touch.
  • Ice Cream: Serve warm with a scoop of vanilla ice cream for a delightful contrast.
  • Chocolate Drizzle: Drizzle melted chocolate over the top for extra decadence.

Conclusion

Your journey to creating the perfect chocolate chip mug cake is just a few simple steps away. With its quick preparation, customizable options, and delicious flavor, this recipe is a must-have in your dessert arsenal. Enjoy the joy of baking without the hassle, and treat yourself to a delightful dessert that satisfies your sweet tooth in no time!

Chocolate Chip Mug Cake

Prep Time 2 minutes
Cook Time 1 minute
Total Time 3 minutes
Servings 1 serving
Calories 350
A quick and indulgent chocolate chip mug cake perfect for satisfying sweet cravings in minutes.

Ingredients

Butter

  • 2 tablespoons unsalted butter

Sugar

  • 2 tablespoons light brown sugar
  • 1 tablespoon granulated sugar

Milk

  • 3 tablespoons milk
  • ½ teaspoon vanilla extract

Flour

  • ¼ cup all-purpose flour (spooned and leveled)
  • Pinch salt

Chocolate Chips

  • 2 tablespoons semisweet chocolate chips

Instructions 

  • Melt the butter in a microwave-safe mug using 15-second intervals.
  • Add sugars, milk, and vanilla to the melted butter; stir until combined and slightly thickened.
  • Mix in the flour and salt just until no dry spots remain.
  • Fold in most of the chocolate chips, reserving a few for topping.
  • Sprinkle remaining chocolate chips on top and microwave on high for 60 seconds. Let stand for 2-3 minutes before eating.

Notes

Enjoy immediately for the best experience.
Calories: 350kcal
Cost: $3
Course: Dessert
Keyword: chocolate, mug cake

Baking a delightful vanilla sponge cake can seem daunting, but with the right guidance, it becomes a straightforward and rewarding experience. This recipe is not only reliable but ensures you achieve a cake that is light, fluffy, and bursting with flavor. Whether you’re preparing for a special occasion or simply indulging in a sweet treat, this cake is perfect for any situation.

In the following sections, you’ll discover the secrets to crafting the ideal vanilla sponge cake, along with tips, variations, and troubleshooting advice to ensure your baking journey is enjoyable and successful.

Why You’ll Love This Recipe

  • Quick and Easy: This vanilla sponge cake recipe requires minimal ingredients and straightforward steps, perfect for both novice and experienced bakers.
  • Versatile: You can pair this cake with a variety of fillings and frostings, making it suitable for any occasion.
  • Light and Fluffy: Achieve a delightful texture that melts in your mouth, thanks to the careful mixing and baking techniques.
  • Make-Ahead Friendly: Prepare the cake in advance, allowing for stress-free serving later on.
  • Customizable: With easy substitutions and variations, you can adapt this recipe to fit your dietary needs and flavor preferences.

Ingredients for Vanilla Sponge Cake

Here’s what you will need:

  • 125 g Maida (Plain Flour): The foundation of your cake, providing structure and texture.
  • 125 g Butter: Adds richness; you can substitute with margarine if needed.
  • 125 g Powdered Sugar: Sweetens the cake while helping to achieve a fluffy texture.
  • 2 Eggs: Provides moisture and acts as a binder for the ingredients.
  • 1/2 tsp Baking Powder: Helps the cake rise and achieve a light texture.
  • 1/4 tsp Baking Soda: Enhances the leavening effect alongside the baking powder.
  • 1/3 tsp Vanilla Essence: Infuses the cake with a rich vanilla flavor; consider using vanilla bean paste for a more intense taste.
  • Salt (a small pinch): Balances the sweetness and enhances flavor.

Pro Tips for Baking Success

  • Room Temperature Ingredients: Ensure that your butter and eggs are at room temperature for optimal mixing.
  • Proper Mixing Technique: Beat the butter and sugar until light and fluffy; this incorporates air for a better rise.
  • Folding vs. Stirring: When adding dry ingredients to the wet mixture, carefully fold to maintain the airiness of the batter.
  • Preheat Your Oven: Always preheat your oven to the correct temperature to ensure even baking.
  • Don’t Open the Oven Door: Avoid opening the oven door during baking to prevent the cake from collapsing.
  • Cool Completely: Allow the cake to cool in the pan for a few minutes before transferring it to a wire rack.
  • Use Parchment Paper: Line your baking tin with parchment paper for easy removal and a clean presentation.
  • Check for Doneness: Insert a skewer in the center; it should come out clean when the cake is fully baked.

Common Mistakes and Troubleshooting

A delicious vanilla sponge cake displayed from the side, showcasing its fluffy layers and icing.

Even the best bakers can run into issues. Here are common mistakes and how to fix them:

  • Cake is Dense: This can happen if you overmix the batter. Remember to fold gently to keep the batter airy.
  • Cake is Dry: Overbaking is a common cause. Keep an eye on the baking time and test with a skewer.
  • Cake Sinks in the Middle: Opening the oven door too early can cause this. Ensure the oven temperature is stable.
  • Uneven Rise: Make sure your baking powder and baking soda are fresh, and the oven is properly preheated.

Variations on Your Vanilla Sponge Cake

Here are some exciting variations to try:

  • Chocolate Vanilla Sponge: Add 2 tablespoons of unsweetened cocoa powder to the dry ingredients for a rich chocolate flavor.
  • Lemon Zest Variation: Incorporate the zest of one lemon into the batter for a refreshing citrus twist.
  • Almond Flour Substitute: Replace half of the maida with almond flour for a gluten-free option.
  • Layered Cake: Bake in two round tins and layer with whipped cream and fresh strawberries for a stunning dessert.

Storage and Make-Ahead Instructions

The vanilla sponge cake can be made ahead of time and stored properly. Here’s how:

  • Room Temperature: Store in an airtight container for up to 3 days.
  • Refrigeration: If you need to keep it longer, refrigerate for up to a week. Bring to room temperature before serving.
  • Freezing: Wrap in plastic wrap and then foil; freeze for up to 3 months. Thaw in the refrigerator before serving.

Frequently Asked Questions

  • Is sponge cake the same as vanilla cake? No, sponge cake is lighter and uses whipped eggs for a fluffier texture, while vanilla cake is denser.
  • How do I make my sponge cake fluffy? Use room temperature ingredients and avoid overmixing the batter.
  • Can I add baking powder? Yes, but make sure to balance the leavening agents in the recipe.
  • How do I keep it moist? Store properly and consider brushing with simple syrup before frosting.
  • Can I use whole wheat flour? Yes, but consider a blend with all-purpose flour for the best texture.
  • How do I decorate my sponge cake? Top with whipped cream, fresh fruit, or a simple buttercream frosting.
  • What can I use instead of eggs? For a vegan option, use flaxseed meal or unsweetened applesauce.
  • What equipment do I need? Basic baking tools include mixing bowls, a whisk, measuring cups, and a cake tin.

Nutrition Tips and Dietary Adaptations

This vanilla sponge cake can be adapted to meet various dietary needs:

  • Gluten-Free: Use a gluten-free flour blend in place of maida.
  • Dairy-Free: Substitute butter with coconut oil or dairy-free margarine.
  • Lower Sugar: Reduce sugar by using natural sweeteners like honey or maple syrup.

Serving Suggestions

Pair your vanilla sponge cake with:

  • Fresh Berries: Strawberries, blueberries, or raspberries add a pop of color and flavor.
  • Whipped Cream: Light and airy, it complements the cake perfectly.
  • Ice Cream: Vanilla ice cream provides a delightful contrast to the cake’s texture.

With this comprehensive guide, you’re well-equipped to create the perfect vanilla sponge cake. Remember, baking is as much about enjoying the process as it is about the final product. Happy baking, and may your kitchen be filled with the delightful aroma of your freshly baked vanilla sponge cake!

Vanilla Sponge Cake

Prep Time 15 minutes
Cook Time 45 minutes
Total Time 1 hour
Servings 8 pieces
Calories 350
A light and fluffy vanilla sponge cake perfect for any occasion. Easy to prepare with simple ingredients.

Ingredients

Main Ingredients

  • 125 g Plain Flour (Maida)
  • 125 g Butter
  • 125 g Powdered Sugar
  • 2 pcs Eggs
  • 1.5 tsp Baking Powder
  • 0.25 tsp Baking Soda
  • 0.33 tsp Vanilla Essence
  • a small pinch Salt
  • 25 g Butter (for filling)
  • 25 g Icing Sugar
  • 0.5 tsp Vanilla Essence (for filling)

Instructions 

  • Preheat oven to 180°C. Beat butter and powdered sugar until frothy.
  • Add eggs one at a time and mix well. Stir in vanilla essence.
  • Sieve together flour, salt, baking powder, and baking soda. Fold dry ingredients into wet mixture.
  • Pour batter into a greased and floured cake tin. Bake for 45 minutes until golden and a skewer comes out clean.
  • Cool the cake, then prepare the filling by mixing butter, icing sugar, and vanilla essence. Spread over the cooled cake.

Notes

Ensure not to overmix the batter to keep the cake light and fluffy.
Calories: 350kcal
Cost: $10
Course: Dessert
Cuisine: Western
Keyword: cake

Discover the Ultimate Creamy Chicken Alfredo Pasta Recipe

Welcome to the world of culinary ease where deliciousness meets simplicity! Today, we’re diving into a classic that has become a weeknight staple for many—Chicken Alfredo Pasta. This creamy dish is rich, satisfying, and perfect for those busy evenings when you want to serve something that feels indulgent without spending hours in the kitchen. In this article, you’ll learn how to create a mouthwatering Chicken Alfredo Pasta from scratch, ensuring each bite is a delightful experience. Let’s get started!

Why You’ll Love This Recipe

  • Quick and easy: This Chicken Alfredo Pasta comes together in just 30 minutes, making it ideal for busy weeknights.
  • Rich flavor: The combination of sautéed garlic, creamy sauce, and freshly grated Parmesan offers a flavor profile that’s deeply satisfying.
  • Customizable: You can easily adjust the recipe to include your favorite proteins or veggies, making it versatile for any dietary preference.
  • Perfect for leftovers: This dish tastes even better the next day, allowing you to enjoy a gourmet meal without extra cooking.
  • Kid-approved: With its creamy texture and comforting taste, this recipe is sure to please even the pickiest eaters in your family.

Ingredients You’ll Need

Let’s gather the essentials for this delicious Chicken Alfredo Pasta. Each ingredient plays a crucial role in achieving that creamy, rich flavor.

  • 3 boneless, skinless chicken breasts: Approximately 1.5 pounds, this is the star protein that brings heartiness to the dish.
  • Salt and pepper: Essential for seasoning the chicken and enhancing overall flavor.
  • Olive oil: About 2 tablespoons for cooking the chicken to perfection.
  • 4 cloves fresh garlic, minced: Adds a fragrant, savory punch that elevates the sauce.
  • 2 tablespoons unsalted butter: For richness and depth in the sauce.
  • 1 cup heavy cream: This is what makes the sauce creamy and luscious.
  • 1 cup freshly grated Parmesan cheese: Essential for that authentic Alfredo flavor. Pre-grated cheese can be used, but fresh is best!
  • 8 ounces fettuccine or your favorite pasta: Fettuccine traditionally pairs well, but feel free to use any pasta you prefer.
  • Extra Parmesan cheese: For serving, adds a nice finishing touch.
  • Chopped fresh parsley (optional): For garnish, adds color and freshness to the dish.

**Substitutions**: If you’re looking to make this recipe dairy-free, try using coconut cream and a dairy-free cheese alternative. For a leaner option, you can substitute chicken with turkey or even a plant-based protein.

How to Make Chicken Alfredo Pasta

Side view of Chicken Alfredo pasta, showcasing juicy chicken and a rich Alfredo sauce.

Follow these simple steps to create your Chicken Alfredo Pasta:

Step 1: Prepare the Chicken

Season the chicken breasts on both sides with salt and pepper. In a skillet, heat olive oil over medium heat. Cook the chicken for about 5-7 minutes on each side until golden brown and cooked through. Remove from skillet and let it rest.

Step 2: Sauté the Garlic

In the same skillet, melt the butter over medium heat. Add the minced garlic and sauté for about 1 minute until fragrant but not browned.

Step 3: Create the Alfredo Sauce

Pour in the heavy cream and bring it to a gentle simmer. Whisk in the freshly grated Parmesan cheese until the sauce is smooth and creamy. If it becomes too thick, add a splash of pasta water to loosen it up.

Step 4: Cook the Pasta

While preparing the sauce, cook the fettuccine according to the package instructions until al dente. Reserve about ½ cup of the pasta cooking water before draining.

Step 5: Combine Pasta, Chicken, and Sauce

Slice the rested chicken into strips. Add the drained pasta and sliced chicken to the skillet with the Alfredo sauce. Toss everything together to coat evenly. If the sauce is too thick, gradually add some reserved pasta water until you reach your desired consistency.

Step 6: Serve and Enjoy

Plate the Chicken Alfredo Pasta and garnish with extra Parmesan cheese and chopped parsley if desired. Serve immediately and enjoy your delicious creation!

Pro Tips for Perfect Chicken Alfredo

  • Let the chicken rest: After cooking, allow the chicken to rest for a few minutes before slicing. This helps retain juices, keeping your chicken tender.
  • Use fresh ingredients: Fresh garlic and freshly grated Parmesan make a significant difference in flavor compared to pre-packaged options.
  • Don’t skip the pasta water: Reserved pasta water is a key ingredient in adjusting the sauce’s consistency, ensuring it coats the pasta beautifully.
  • Experiment with flavors: Consider adding a pinch of nutmeg or red pepper flakes for a little extra dimension to your Alfredo sauce.
  • Watch the heat: Keep the heat moderate when making the sauce to prevent the cream from curdling.
  • Keep it creamy: If your sauce thickens too much, whisk in a bit more heavy cream or pasta water to restore its velvety texture.
  • Make it a meal: Add steamed broccoli, peas, or sautéed mushrooms for added nutrition and flavor.
  • Pair wisely: Serve with a side salad or garlic bread for a complete meal that balances flavors and textures.

Common Mistakes and Troubleshooting

Even the best chefs encounter issues, but here are some common mistakes and how to avoid them:

  • Overcooking the chicken: Check for doneness using a meat thermometer (165°F/75°C). Overcooked chicken becomes dry.
  • Thick sauce: If your Alfredo sauce is too thick, remember to add pasta water gradually until it reaches the desired consistency.
  • Clumpy sauce: Ensure the heat is low when adding cheese to prevent clumping. Stir continuously for a smooth finish.
  • Insufficient seasoning: Adjust salt and pepper to taste after combining all ingredients; the flavors should sing!

Variations to Try

Here are some creative twists you can make to keep things exciting:

  • Chicken and Broccoli Alfredo: Add steamed broccoli florets for a nutritious twist.
  • Garlic Shrimp Alfredo: Substitute chicken with shrimp for a seafood version.
  • Mushroom Alfredo: Incorporate sautéed mushrooms for an earthy flavor profile.
  • Pesto Chicken Alfredo: Mix in a spoonful of basil pesto for a herby, fresh taste.

Storage and Make-Ahead Instructions

This Chicken Alfredo Pasta can be made ahead and stored efficiently:

  • Refrigerator: Store leftovers in an airtight container for up to 3 days. Reheat gently on the stove, adding a splash of cream or water to loosen the sauce.
  • Freezer: While it’s best fresh, you can freeze the cooked pasta and sauce together for up to 2 months. Thaw in the refrigerator and reheat on the stovetop.

Frequently Asked Questions

Let’s address some common questions about Chicken Alfredo Pasta:

  • Can I use a different type of pasta? Absolutely! While fettuccine is traditional, any pasta shape you enjoy will work.
  • Is this recipe gluten-free? You can easily make this gluten-free by using gluten-free pasta.
  • How can I make the sauce lighter? Substitute half-and-half for heavy cream or use a combination of cream and chicken broth.
  • Can I add vegetables to the dish? Yes! Sautéed spinach, peas, or roasted red peppers are excellent additions.
  • What can I substitute for Parmesan cheese? Pecorino Romano is a great alternative, or nutritional yeast for a dairy-free option.
  • Can I make this dish vegetarian? Yes! Simply omit the chicken and use vegetable broth in the sauce.
  • How do I prevent the sauce from curdling? Keep the heat low when adding cheese and stir continuously.
  • Can I make Chicken Alfredo Pasta in advance? Yes, you can prepare it ahead of time and reheat gently.

Nutrition Tips and Dietary Adaptations

For those looking to adapt the recipe to fit specific dietary needs:

  • Lower calorie option: Use half-and-half instead of heavy cream and cut back on cheese.
  • Dairy-free: Coconut cream and dairy-free cheese can provide a delicious alternative.
  • Protein-packed: Add chickpeas or lentils for a plant-based protein boost.

Equipment Recommendations

To make this recipe, you’ll need the following kitchen equipment:

  • Skillet: A large skillet is ideal for cooking the chicken and making the sauce.
  • Pot: A pot for boiling the pasta is essential.
  • Whisk: Use a whisk to stir the sauce and combine ingredients smoothly.
  • Meat thermometer: This helps ensure your chicken is cooked perfectly.

Serving Suggestions

To enhance your Chicken Alfredo Pasta experience, consider these serving ideas:

  • Garlic bread: A classic side that pairs beautifully with creamy pasta.
  • Side salad: A fresh green salad with a light vinaigrette balances the richness of the dish.
  • Wine pairing: A glass of Chardonnay or Pinot Grigio complements the creamy flavors well.

Final Thoughts

Now that you have the ultimate guide to making Chicken Alfredo Pasta, you’re equipped to impress your family and friends with this delightful dish. Whether it’s a casual weeknight dinner or a special occasion, this recipe is sure to bring smiles to the table. Remember, cooking is about enjoying the process as much as the final dish, so have fun and feel free to experiment with flavors. Happy cooking!

Chicken Alfredo Pasta Recipe

Prep Time 10 minutes
Cook Time 20 minutes
Total Time 30 minutes
Servings 4 servings
Calories 850
A creamy and flavorful Chicken Alfredo Pasta that's quick to prepare and perfect for a satisfying meal.

Ingredients

Protein

  • 1.5 pounds boneless, skinless chicken breasts
  • 2 tablespoons olive oil (for cooking)
  • 4 cloves fresh garlic (minced)
  • 2 tablespoons unsalted butter
  • 1 cup heavy cream
  • 1 cup freshly grated Parmesan cheese
  • 8 ounces fettuccine or your favorite pasta

Extras

  • Extra Parmesan cheese
  • Chopped fresh parsley (optional)

Instructions 

  • Season chicken with salt and pepper. Cook in olive oil until golden and cooked through, then rest.
  • Melt butter in the same skillet, sauté garlic for 1 minute.
  • Add heavy cream and Parmesan, whisk until smooth and thickened.
  • Cook pasta until al dente, drain, and reserve some pasta water.
  • Slice chicken, add pasta and chicken to sauce, toss, and adjust consistency with reserved water.
  • Serve garnished with extra Parmesan and parsley if desired.

Notes

Use freshly grated Parmesan for the best flavor. Adjust sauce thickness with reserved pasta water.
Calories: 850kcal
Cost: $15
Course: Main Course
Cuisine: Italian
Keyword: Chicken, Creamy, Pasta

Unlock the Refreshing Flavor of an Iced Mango Lassi Smoothie Bowl

Welcome to the vibrant world of the iced mango lassi smoothie bowl, a delightful fusion of tropical flavors that’s not only refreshing but also highly nutritious. This recipe is your gateway to creating a deliciously creamy bowl packed with the goodness of ripe mangoes and the richness of yogurt. If you’re looking for a perfect breakfast option or a revitalizing snack, you’re in the right place. Let’s dive into the world of this creamy concoction, where we’ll explore everything from ingredients to expert tips, ensuring you create a delightful experience each time.

Why You’ll Love This Recipe

This recipe isn’t just about taste; it offers a multitude of benefits:

  • Nutritious Start: Packed with vitamins and minerals, this smoothie bowl is an excellent way to kickstart your day.
  • Quick and Easy: With minimal prep time, you can whip up this lassi smoothie in less than 15 minutes.
  • Customizable: Enjoy the freedom to adjust sweetness and toppings according to your taste preferences.
  • Refreshing Treat: Ideal for hot days, this bowl serves as a cool and satisfying snack.
  • Kid-Friendly: A fun way to incorporate fruits into your child’s diet, making it a hit for the whole family.

Ingredient Breakdown

Creating the perfect iced mango lassi smoothie bowl starts with selecting the right ingredients. Here’s what you’ll need:

  • 2 cups ripe mangoes, diced: About 2 ripe mangoes when diced. Look for mangoes that are slightly soft to the touch and fragrant.
  • 1 cup plain yogurt: Greek or regular, depending on your desired creaminess.
  • 1/2 cup milk: You can use either dairy or your favorite non-dairy alternative for a vegan option.
  • 2 tablespoons honey: Or maple syrup for a vegan alternative.
  • 1/2 teaspoon ground cardamom: This is optional but adds a warm, aromatic flavor.
  • 1/4 teaspoon salt: Enhances sweetness and flavor balance.
  • 1/2 cup granola: For topping, adding crunch and texture.
  • 1/2 cup mixed fresh fruits: Such as berries or banana slices for garnish.
  • Fresh mint leaves: Optional, for a refreshing garnish.

How to Make Your Iced Mango Lassi Smoothie Bowl

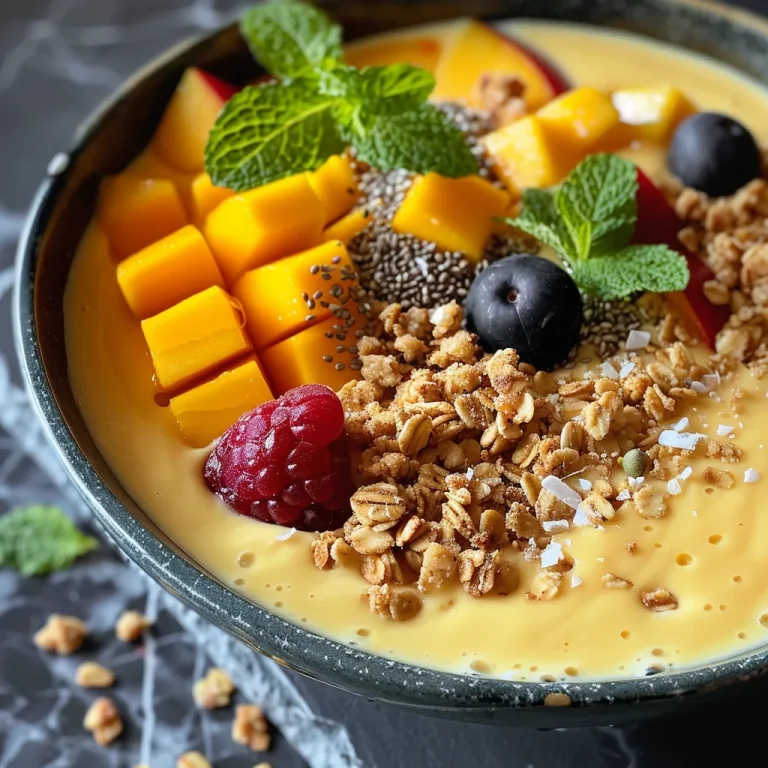
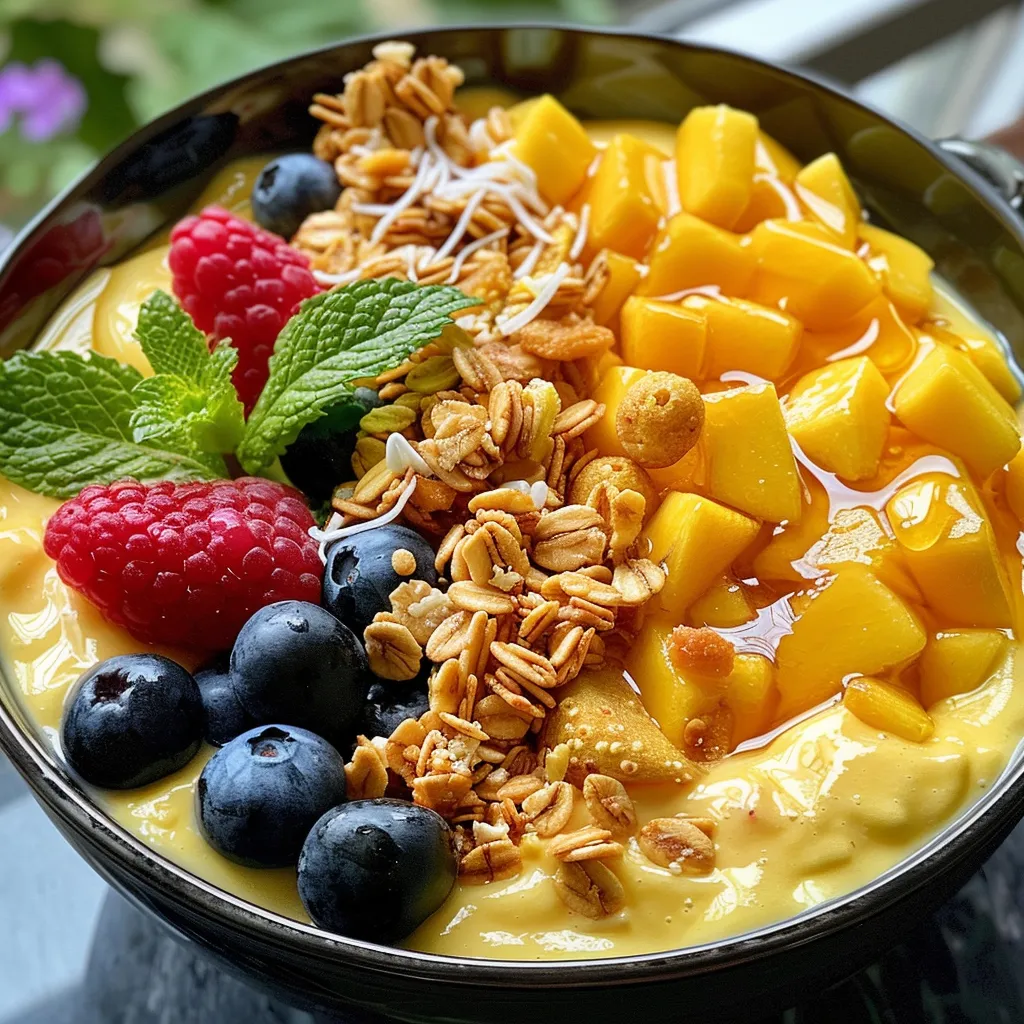
A vibrant Iced Mango Lassi Smoothie Bowl filled with diced mangoes, yogurt, and garnished with mint leaves.

Now that you have your ingredients ready, let’s walk through the steps to create this delicious lassi smoothie bowl:

  1. Peel and dice the ripe mangoes to yield about 2 cups of diced mango.
  2. In a blender, combine the diced mango, plain yogurt, milk, honey (or maple syrup), ground cardamom (if using), and salt.
  3. Blend the mixture on high speed until smooth and creamy. If it’s too thick, add a little more milk to reach your desired consistency.
  4. Pour the mango lassi smoothie into serving bowls.
  5. Top each bowl with granola, mixed fresh fruits, and garnish with fresh mint leaves if desired.
  6. Serve immediately and enjoy this cool, refreshing treat!

Pro Tips for the Perfect Iced Mango Lassi Smoothie Bowl

To ensure your smoothie bowl turns out perfectly every time, consider these expert insights:

  • Use ripe mangoes: The sweeter and more flavorful your mangoes, the better your smoothie will taste.
  • Adjust sweetness: Taste your smoothie before serving and adjust the sweetness by adding more honey or maple syrup as needed.
  • Experiment with toppings: Consider adding coconut flakes, chia seeds, or a variety of fruits for added texture and nutrition.
  • Make it in advance: You can prepare the smoothie base ahead of time and store it in the refrigerator. Just add toppings before serving.
  • Keep it chilled: If you want an extra cold treat, use frozen mangoes or add ice to the blender for a refreshing twist.
  • Blend thoroughly: Ensure the mixture is well-blended to avoid any chunky texture.
  • Try variations: Mix in different spices like cinnamon or nutmeg for a unique flavor.
  • Use high-quality yogurt: A thick, creamy yogurt will enhance the overall texture of your smoothie bowl.

Common Mistakes and Troubleshooting

Even the best chefs make mistakes! Here are some common pitfalls and how to avoid them:

  • Too Thick or Too Thin: If your smoothie is too thick, add more milk; if too thin, add more mango or yogurt.
  • Unbalanced Flavors: If it tastes off, a pinch of salt can enhance sweetness. Adjust honey or maple syrup as needed.
  • Texture Issues: Ensure you blend long enough to achieve a smooth consistency. Stop blending if you notice lumps.

Delicious Variations to Try

Feeling adventurous? Here are some creative twists on the classic mango lassi smoothie bowl:

  • Tropical Twist: Add pineapple chunks for an extra fruity punch.
  • Green Delight: Blend in a handful of spinach or kale for added nutrients without compromising taste.
  • Nutty Flavor: Mix in almond butter or peanut butter for a protein-packed version.
  • Berry Blast: Use mixed berries instead of mango for a different flavor profile and vibrant color.

Storage and Make-Ahead Instructions

Want to enjoy your smoothie bowl later? Here’s how to store it:

The smoothie base can be made in advance and stored in the refrigerator for up to 24 hours. Just keep the toppings separate until you’re ready to serve. If you want to freeze it, pour the smoothie into an airtight container and freeze for up to one month. Thaw it overnight in the refrigerator before serving.

Comprehensive FAQ

Here are some frequently asked questions to help you with your iced mango lassi smoothie bowl:

  • Can I use frozen mangoes? Yes, frozen mangoes can be used. Just blend them directly without thawing for a cooler smoothie.
  • What if I don’t have yogurt? You can substitute yogurt with silken tofu or a non-dairy yogurt alternative.
  • How can I increase the protein content? Add a scoop of protein powder or use Greek yogurt instead of regular yogurt.
  • Can I make it vegan? Absolutely! Use non-dairy yogurt and maple syrup instead of honey.
  • What toppings do you recommend? Granola, coconut flakes, chia seeds, and fresh fruits are all great options.
  • Is it okay to make it the night before? Yes, just prepare the base and store it in the refrigerator. Add toppings before serving.
  • How can I adjust the flavor? Feel free to mix in spices like cinnamon or vanilla for additional flavor.
  • Is it healthy? Yes, this smoothie bowl is rich in vitamins, minerals, and can be customized to fit your dietary needs.

Nutritional Tips and Dietary Adaptations

Looking to enhance the health benefits of your smoothie bowl? Here are a few tips:

  • Use low-fat yogurt: This will reduce calories while still providing protein.
  • Incorporate seeds: Adding flaxseeds or chia seeds boosts fiber and omega-3 fatty acids.
  • Adjust sweeteners: Opt for natural sweeteners like agave syrup or use ripe bananas to enhance sweetness naturally.

Essential Equipment for Smoothie Bowl Success

To make your smoothie bowl, you will need:

  • High-speed blender: Essential for achieving a smooth and creamy texture.
  • Measuring cups and spoons: To ensure accurate ingredient ratios.
  • Bowl and spoons: For serving your delightful creation.

Serving Suggestions

Present your iced mango lassi smoothie bowl beautifully by:

  • Arranging toppings artistically for an appealing visual.
  • Serving with a side of fresh fruits for added nutrition.
  • Pairing with a refreshing drink, like coconut water or iced tea.

In conclusion, the iced mango lassi smoothie bowl is a versatile and delightful dish that combines flavor, nutrition, and creativity. With the right ingredients and a little practice, you can master this recipe to enjoy an easy, healthy meal any time of the day. Remember to embrace your creativity, try different variations, and above all, enjoy the delicious outcomes of your culinary adventures!

Iced Mango Lassi Smoothie Bowl

Prep Time 10 minutes
Total Time 10 minutes
Servings 2 bowl
Calories 250
A vibrant and refreshing smoothie bowl made with ripe mangoes, yogurt, and topped with granola and fresh fruits. Perfect for a quick, healthy treat.

Ingredients

Diced Mangoes

  • 2 cups ripe mangoes, diced (About 2 ripe mangoes)

Yogurt

  • 1 cup plain yogurt (Greek or regular)

Milk

  • 0.5 cup milk (Dairy or non-dairy)

Sweetener

  • 2 tablespoons honey or maple syrup (Vegan option)

Ground Cardamom

  • 0.5 teaspoon ground cardamom (Optional)

Salt

  • 0.25 teaspoon salt

Toppings

  • 0.5 cup granola (For topping)
  • 0.5 cup mixed fresh fruits (E.g., berries, banana slices)
  • to taste fresh mint leaves (For garnish, optional)

Instructions 

  • Peel and dice the mangoes to have about 2 cups of diced mango.
  • Combine mango, yogurt, milk, honey, ground cardamom, and salt in a blender and blend until smooth.
  • If too thick, add more milk and blend again.
  • Pour into bowls and top with granola, fresh fruits, and mint leaves.
  • Serve immediately and enjoy!

Notes

Adjust sweetness with more or less honey and experiment with toppings like coconut flakes or chia seeds.
Calories: 250kcal
Cost: $10
Course: Breakfast, Snack
Cuisine: fusion
Keyword: Healthy, Mango, Smoothie

Mastering the Art of Grilled Cheese: A Gourmet Twist on a Classic

Grilled cheese sandwiches are a beloved classic, cherished by many for their comforting flavors and satisfying textures. In this definitive guide, we’ll explore how to elevate your grilled cheese to a gourmet experience that’s not just delicious but also easy to make. With just a few quality ingredients and simple techniques, you can create a grilled cheese sandwich that stands out. Let’s dive into the world of grilled cheese and discover how to make a grilled cheese sandwich that delights.

Why You’ll Love This Recipe

This gourmet grilled cheese recipe offers several advantages that will make it a staple in your kitchen:

  • Flavor Depth: The combination of sharp cheddar and Gruyère creates a rich, complex flavor profile that elevates the traditional taste.
  • Perfect Texture: This recipe ensures a crispy exterior while the cheese melts perfectly inside, creating a delightful contrast.
  • Simple Ingredients: With just a few high-quality ingredients, you can achieve gourmet results without the fuss.
  • Quick Preparation: This grilled cheese is quick to prepare, making it ideal for busy weeknights or lazy weekends.
  • Versatile Variations: The recipe is easily adaptable with various cheeses and add-ins, allowing you to customize it to your liking.

Ingredients Breakdown

To make this gourmet grilled cheese, you’ll need the following ingredients:

  • Sourdough Bread: This tangy bread adds flavor and texture. You can substitute with other breads like whole grain or ciabatta if desired.
  • Mayonnaise: Used for spreading on the outside, it helps achieve a golden-brown crust. You can also use softened butter for a more traditional approach.
  • Dijon Mustard: Adds a hint of tanginess that complements the cheese. Feel free to omit for a milder flavor.
  • Cheddar Cheese: Use 1 to 2 ounces of grated sharp cheddar for a bold taste.
  • Gruyère or Raclette: Use 1 to 2 ounces of grated Gruyère for its nutty flavor. Raclette can be substituted for a creamier texture.
  • Butter: For frying, it enhances flavor and helps in crisping the bread.

Step-by-Step Instructions

Close-up shot of a golden brown grilled cheese sandwich with crispy edges.

Follow these simple steps to make your gourmet grilled cheese:

  1. Start by spreading a thin layer of mayonnaise on one side of each slice of sourdough bread.
  2. Flip one slice and spread Dijon mustard on the unbuttered side.
  3. Layer the grated sharp cheddar and Gruyère or Raclette cheeses on top of the mustard.
  4. Top with the other slice of bread, mayonnaise side out.
  5. Heat a nonstick or cast-iron skillet over medium-low heat and add butter to coat the pan.
  6. Place the sandwich in the skillet, cover, and cook for 2-3 minutes until the bottom is golden brown.
  7. Carefully flip the sandwich, cover, and cook for another 1-3 minutes until the other side is golden and the cheese is melted.
  8. If the bread is browning too quickly, reduce the heat to low.
  9. Remove from heat, slice, and serve warm.

Pro Tips for Perfect Grilled Cheese

Here are some expert insights to ensure your grilled cheese turns out perfectly every time:

  • Use Fresh Ingredients: Always opt for fresh bread and cheese for the best flavor.
  • Grate Your Cheese: Grated cheese melts more evenly than sliced cheese, ensuring a gooey interior.
  • Cook Low and Slow: This allows the cheese to melt thoroughly without burning the bread.
  • Experiment with Cheeses: Try different cheese blends to find your perfect combination.
  • Add Fillings: Consider adding sautéed onions, garlic, or spinach for an extra layer of flavor.
  • Keep it Covered: Covering the skillet helps trap heat and promotes even melting.
  • Don’t Rush: Take your time cooking to achieve that perfect golden crust.
  • Use a Weight: Placing a heavy skillet on top of the sandwich can help compact it and improve browning.

Common Mistakes and Troubleshooting

Here’s how to avoid common pitfalls in your grilled cheese-making process:

  • Burnt Bread: If the bread burns before the cheese melts, lower the heat for a slower cook.
  • Cheese Not Melting: If your cheese isn’t melting, it may be too thick. Grate it finely or cover the pan.
  • Soggy Sandwich: Avoid using too much mayonnaise or butter; a thin layer is sufficient.
  • Uneven Cooking: Use a heavy skillet to ensure even heat distribution.

Delicious Variations to Try

Here are some tasty variations to personalize your grilled cheese experience:

  • Caprese Grilled Cheese: Add fresh basil and tomato slices for a fresh twist.
  • Spicy Jalapeño Grilled Cheese: Incorporate sliced jalapeños or a dash of hot sauce for heat.
  • Pesto Grilled Cheese: Spread pesto inside for an aromatic flavor boost.
  • Sweet and Savory: Add sliced apples and a sprinkle of cinnamon for a unique contrast.

Storage and Make-Ahead Instructions

To store leftovers or prepare in advance:

  • Refrigerate: Store any leftover grilled cheese in an airtight container for up to 2 days.
  • Reheat: To reheat, place the sandwich in a skillet over medium heat until warmed through.
  • Make Ahead: You can prepare the sandwiches and store them uncooked in the fridge for up to 4 hours before cooking.

Frequently Asked Questions

Here are some common questions about grilled cheese:

  • Can I use different types of bread? Yes! Any sturdy bread will work, but sourdough adds a nice flavor.
  • What cheese is best for grilled cheese? A combination of sharp cheddar and Gruyère works beautifully, but feel free to experiment.
  • How do I prevent my grilled cheese from getting soggy? Use a thin layer of mayonnaise or butter and avoid excessive fillings.
  • Can I make grilled cheese in the oven? Yes! Preheat the oven to 375°F (190°C) and bake the sandwich on a baking sheet for about 10-15 minutes.
  • What can I serve with grilled cheese? Tomato soup is a classic pairing, but pickles or a simple salad work well too.
  • How do I store grilled cheese? Keep it in an airtight container in the refrigerator for up to 2 days.
  • Can I freeze grilled cheese? Yes, you can freeze grilled cheese sandwiches before cooking. Wrap them tightly and store for up to 3 months.
  • What if I don’t have Dijon mustard? You can skip it, or use regular mustard for a different flavor.

Nutrition Tips and Dietary Adaptations

To make this recipe healthier or accommodate dietary needs:

  • Gluten-Free: Use gluten-free bread to cater to gluten sensitivities.
  • Lower-Fat Options: Use reduced-fat cheese and light mayonnaise for fewer calories.
  • Vegan Adaptation: Substitute vegan cheese and plant-based mayonnaise for a dairy-free option.

Essential Equipment for Grilled Cheese

To create your gourmet grilled cheese, you’ll need:

  • Nonstick Skillet: Ideal for even cooking and easy flipping.
  • Spatula: A sturdy spatula helps flip the sandwich without breaking it.
  • Grater: For grating cheese, ensuring it melts evenly.

Serving Suggestions

Serve your grilled cheese with:

  • Tomato Soup: The classic pairing that balances the richness of the sandwich.
  • Pickles: A crunchy, tangy contrast that complements the flavors.
  • Side Salad: A fresh salad adds a light touch to your meal.

Conclusion

With this guide, you’re well-equipped to make a gourmet grilled cheese sandwich that transcends the ordinary. By focusing on quality ingredients and simple techniques, you can enjoy a meal that’s both comforting and sophisticated. So gather your ingredients, follow these steps, and savor every bite of your delicious creation. Happy cooking!

Grilled Cheese

Prep Time 5 minutes
Cook Time 5 minutes
Total Time 10 minutes
Servings 1 serving
Calories 400
A classic comfort food, this grilled cheese combines crispy bread with melted cheeses for a delicious snack or meal.

Ingredients

Bread

  • 2 slices sourdough bread
  • 1 tablespoon Mayonnaise
  • 1 teaspoon Dijon mustard
  • 1 to 2 ounces grated sharp cheddar cheese (depending on bread size)
  • 1 to 2 ounces grated Gruyère or raclette cheese (depending on bread size)
  • as needed Butter for the pan

Instructions 

  • Spread mayonnaise on one side of each bread slice; flip one slice and spread Dijon mustard on the other side.
  • Layer cheeses on the mustard side, then top with the other bread slice, mayo side out.
  • Heat butter in a skillet over medium-low heat; cook the sandwich for 2-3 minutes until golden brown.
  • Flip the sandwich, cover, and cook for another 1-3 minutes until cheese melts and bread is golden.
  • Slice and serve hot.

Notes

Use a lid to help melt the cheese evenly and prevent burning.
Calories: 400kcal
Cost: $8
Course: Lunch, Snack
Cuisine: American
Keyword: Cheese, Sandwich

Elevate Your Breakfast with the Ultimate Vegetarian Omelette

Welcome to your new go-to recipe for a delicious vegetarian omelette! This simple yet flavorful dish is not just a breakfast option; it’s a perfect way to kickstart your day with nutrition and taste. Whether you’re a seasoned chef or a novice in the kitchen, this recipe is designed to deliver a satisfying meal that’s quick to prepare and easy to customize. Let’s dive into why you’ll love this vegetarian omelette and what makes it the best choice for busy mornings.

Why You’ll Love This Recipe

  • Quick and Easy: With just a few minutes of prep and cooking time, you can have a hearty breakfast ready in no time.
  • Customizable: Adjust the ingredients based on what you have on hand or your personal preferences. This omelette is a blank canvas for your culinary creativity.
  • Nutrient-Rich: Packed with fresh vegetables and protein from the eggs, this dish provides a healthy start to your day.
  • Flavorful and Satisfying: The combination of sautéed vegetables and melted cheese creates a delightful flavor profile that will keep you full until lunch.
  • Perfect for Meal Prep: Make multiple omelettes in advance and store them for a quick breakfast option throughout the week.

Ingredients Overview

To make the ultimate vegetarian omelette, you’ll need the following ingredients:

  • 2 large eggs
  • 1/4 red pepper, chopped
  • 1/4 cup Cheddar cheese, grated (30 g)
  • A few leaves of fresh baby spinach
  • 2 cherry tomatoes, chopped
  • Salt and pepper to taste
  • 1 tablespoon butter (15 g)

Each ingredient contributes to the overall flavor and texture of the omelette. Feel free to make substitutions based on your dietary needs or preferences.

Easy Ingredient Swaps

Side view of a delicious vegetarian omelette with red peppers, spinach, and cherry tomatoes.
  • Cheese alternatives: Try feta or a dairy-free cheese for a different flavor profile.
  • Vegetable options: Use mushrooms, zucchini, or any leftover vegetables you have in your fridge.
  • Egg substitutes: For a vegan version, consider using chickpea flour or tofu mixed with turmeric for color.
  • Herbs: Fresh herbs like basil or cilantro can elevate the taste of your omelette.

Step-by-Step Photos and Instructions

Preparation Steps

Follow these simple steps to create your delicious vegetarian omelette:

  1. Start by cutting the cherry tomatoes, red pepper, and spinach leaves.
  2. Melt the butter in a frying pan over medium heat.
  3. In a bowl, beat the eggs with a fork and season with salt and pepper.
  4. Add the egg mixture to the pan and spread it out evenly.
  5. Once the omelette starts to firm up but has a bit of raw egg on top, add the grated cheese, cherry tomatoes, spinach, and red pepper.
  6. Using a spatula, gently ease the edges and flip it quickly onto the other side.
  7. The other side will cook faster, approximately 1-2 minutes.
  8. When done, place a large plate over the pan and flip the omelette onto the plate.
  9. Serve immediately, garnished with additional veggies if desired.

Expert Tips for the Perfect Omelette

  • Use fresh ingredients: Fresh vegetables and eggs make a significant difference in flavor.
  • Don’t overbeat the eggs: Just mix until combined for a fluffier omelette.
  • Low and slow: Cooking on medium-low heat ensures even cooking without burning.
  • Cover the pan: This helps the top of the omelette cook through without flipping.
  • Experiment with spices: Try adding cumin or paprika for an extra kick.
  • Keep it simple: Less is often more; don’t overcrowd your omelette with too many ingredients.
  • Watch the timing: Overcooking can lead to a dry omelette; keep an eye on it!
  • Use a non-stick pan: This makes flipping and serving much easier.

Common Mistakes and Troubleshooting

Even the best chefs can make mistakes. Here are some common pitfalls and how to avoid them:

  • Burnt edges: If the edges are burning, reduce the heat and give the omelette more time to cook through.
  • Dry texture: Overcooking eggs leads to dryness. Aim for a slightly undercooked center as it will continue to cook off the heat.
  • Sticking to the pan: Ensure your pan is adequately greased before adding the eggs.
  • Too many fillings: If your omelette falls apart, it may be overloaded. Stick to a few key ingredients for better structure.

Variations of the Vegetarian Omelette

Here are some unique takes on the classic vegetarian omelette:

  • Mediterranean Omelette: Add olives, feta cheese, and sun-dried tomatoes.
  • Italian Omelette: Incorporate basil, mozzarella, and sautéed mushrooms.
  • Southwestern Omelette: Mix in black beans, corn, and jalapeños for a spicy twist.
  • Herbed Omelette: Use a variety of fresh herbs like dill and chives for a refreshing flavor.

Storage and Make-Ahead Instructions

Want to prepare your vegetarian omelette in advance? Here’s how:

  • Refrigeration: Store cooked omelettes in an airtight container in the fridge for up to 3 days.
  • Freezing: For longer storage, freeze omelettes wrapped in plastic wrap and then in aluminum foil. They can be kept for up to 2 months.
  • Reheating: Reheat in the microwave or a skillet over low heat until warmed through.

Comprehensive FAQ

1. Can I make this omelette without eggs?

Yes! Substitute eggs with a mixture of chickpea flour and water for a vegan option.

2. What can I serve with the omelette?

Toast, avocado, or a side salad complement the omelette perfectly.

3. How do I store leftover omelette?

Store in an airtight container in the fridge for up to 3 days.

4. Can I use frozen vegetables?

Yes, frozen vegetables work well; just ensure they are thawed and drained before adding.

5. What if I overcook the omelette?

If overcooked, it may become dry. Monitor cooking time closely for optimal results.

6. How do I prevent sticking?

Use a non-stick skillet and sufficient butter or oil to prevent sticking.

7. Can I add meat to this omelette?

Absolutely! Add cooked bacon, sausage, or ham for a protein boost.

8. What’s the best way to flip an omelette?

Use a spatula to gently lift the edges, then quickly flip it over or slide it onto a plate and invert.

Nutrition Tips and Dietary Adaptations

This vegetarian omelette is not only delicious but also versatile for various diets:

  • Low-Carb: Stick to vegetables and eggs for a low-carb meal.
  • Gluten-Free: This recipe is naturally gluten-free, making it suitable for those with gluten sensitivities.
  • High-Protein: Eggs provide a great source of protein, perfect for muscle maintenance and energy.
  • Vegetarian: A fulfilling option for vegetarians, packed with nutrients from fresh produce.

Equipment Recommendations

To achieve the best results, consider the following kitchen tools:

  • Non-Stick Skillet: Essential for easy flipping and cooking without sticking.
  • Spatula: A flexible spatula helps in flipping and serving the omelette.
  • Mixing Bowl: For whisking the eggs and combining ingredients.
  • Cutting Board: For chopping your veggies efficiently.

Serving Suggestions

Serve your vegetarian omelette with:

  • Sliced Avocado: Adds creaminess and healthy fats.
  • Fresh Herbs: Sprinkle chopped parsley or cilantro on top for a fresh finish.
  • Hot Sauce: A dash of your favorite hot sauce for those who enjoy some heat.
  • Whole Grain Toast: A slice of whole grain bread on the side makes for a complete meal.

Conclusion

Cooking a fantastic vegetarian omelette is achievable for everyone, regardless of your skill level. With this recipe, you can enjoy a quick, nutritious breakfast that satisfies your taste buds. Remember, the beauty of this dish lies in its versatility—feel free to experiment and make it your own! I hope you enjoy making this omelette as much as I do. Thank you for joining me on this culinary adventure!

Best Vegetarian Omelette Recipe

Prep Time 5 minutes
Cook Time 5 minutes
Total Time 10 minutes
Servings 1 serving
Calories 250
A quick and delicious vegetarian omelette packed with fresh vegetables and cheese, perfect for a nutritious breakfast or snack.

Ingredients

Eggs

  • 2 large eggs

Red pepper

  • 0.25 cup red pepper, chopped

Chopped pepper

  • 2 tbsp chopped pepper

Cheddar cheese

  • 0.25 cup Cheddar cheese, grated

Fresh baby spinach

  • a few leaves fresh baby spinach

Cherry tomatoes

  • 2 pieces cherry tomatoes, chopped

Salt and pepper

  • to taste salt and pepper

Butter

  • 1 tbsp butter

Instructions 

  • Chop cherry tomatoes, red pepper, and spinach leaves.
  • Melt butter in a frying pan.
  • Beat eggs with a fork, season with salt and pepper, then pour into the pan and spread evenly.
  • Add grated cheese, cherry tomatoes, spinach, and red pepper on top. Cook until firm, then fold and flip.
  • Cook for 1-2 minutes, then flip onto a plate and serve immediately.

Notes

Use fresh ingredients for best flavor and texture.
Calories: 250kcal
Cost: $8
Course: Breakfast
Cuisine: international
Keyword: Omelette, vegetarian

Welcome to your new favorite recipe for an easy strawberry smoothie! This delightful concoction is not only quick to make but also packed with flavor and nutrients. Perfect for a busy breakfast, a refreshing snack, or even a post-workout treat, this strawberry smoothie is sure to impress. In just a few minutes, you can create a creamy, dreamy, and utterly satisfying drink that will keep you coming back for more.

In this article, we’ll explore everything you need to know about making the perfect strawberry smoothie, including ingredient substitutions, expert tips, and variations to suit your taste. Whether you’re a seasoned smoothie enthusiast or a beginner in the kitchen, you’re in the right place!

Why You’ll Love This Recipe

This strawberry smoothie is not just any ordinary drink. Here are five compelling reasons to whip one up today:

  • Quick and Easy: With just a handful of ingredients, this recipe takes less than 5 minutes to prepare.
  • Customizable: Adjust the ingredients based on your dietary preferences or what you have on hand.
  • Nutrient-Rich: Packed with vitamins and minerals, this smoothie is a healthy choice for any meal.
  • Kid-Friendly: A delicious way to sneak in some fruits that your kids will love!
  • Perfectly Creamy: The combination of yogurt and banana gives this smoothie a rich texture that is both satisfying and refreshing.

Ingredients for Your Strawberry Smoothie

Here’s what you’ll need to create this delicious strawberry smoothie:

  • 1 cup strawberries: Fresh or frozen, depending on availability.
  • 1 cup milk: Any variety works—almond, coconut, oat, or regular cow’s milk.
  • 1 cup Greek yogurt: Plain or vanilla for added flavor.
  • 1 banana: Can be frozen for an extra creamy texture.
  • 2 tablespoons honey: Adjust to taste for sweetness.

Feel free to experiment with different fruits and add-ins to make this smoothie your own!

Step-by-Step Instructions for Making Your Smoothie

Follow these simple steps to create your strawberry smoothie:

  1. Combine all ingredients in a blender.
  2. Blend on the highest speed until thick, smooth, and creamy.
  3. Taste and adjust sweetness if necessary.
  4. Pour into a glass and enjoy immediately!

Expert Pro Tips for the Best Smoothie

Side view of a creamy strawberry smoothie with a thick texture, appearing refreshing and delicious.

To elevate your smoothie-making game, consider these expert tips:

  • Use frozen fruits: For a thicker and colder smoothie, using frozen strawberries or bananas is ideal.
  • Chill your glass: Place your serving glass in the freezer for a few minutes before pouring in the smoothie to keep it cold longer.
  • Add spinach or kale: For a green boost, add a handful of spinach or kale; it blends in seamlessly without altering the taste.
  • Experiment with nut butters: A tablespoon of almond or peanut butter can add flavor and protein.
  • Adjust consistency: If your smoothie is too thick, add a splash more milk; if it’s too thin, add more yogurt or a bit of ice.
  • Use a high-speed blender: A quality blender ensures a smoother blend and better texture.
  • Prep ahead: Pre-pack your ingredients in ziplock bags and freeze for quick access on busy mornings.
  • Sweeten naturally: Instead of honey, try maple syrup or agave for a vegan option.

Common Mistakes and Troubleshooting

Here are some common smoothie pitfalls and how to avoid them:

  • Too Thick?: Add more liquid gradually until you reach your desired consistency.
  • Too Sweet?: Balance out sweetness with a squeeze of lemon juice or add more yogurt to tone it down.
  • Not Cold Enough?: Ensure your fruits are frozen, or add ice cubes while blending to chill your smoothie.
  • Too Chunky?: Blend for longer to achieve a smoother texture.

Variations to Try

Mix things up with these flavorful variations:

  • Berry Blast: Substitute half the strawberries with blueberries or raspberries.
  • Tropical Twist: Add pineapple and mango for a refreshing tropical flavor.
  • Nutty Delight: Mix in almond butter and top with chopped nuts for added crunch.
  • Chocolate Strawberry: Add a tablespoon of cocoa powder for a chocolatey treat.

Storage and Make-Ahead Instructions

This smoothie is best enjoyed fresh, but you can store leftovers in the refrigerator for up to 24 hours. For make-ahead convenience:

  • Prepare smoothie packs by portioning ingredients into freezer bags. Just blend with liquid when you’re ready to enjoy!
  • For a quick breakfast, blend and store in a thermos to keep it cold until you’re ready to drink.

Frequently Asked Questions

Here are some common questions related to making the perfect strawberry smoothie:

  • Can I use frozen strawberries? Yes, frozen strawberries work beautifully and will create a thicker texture.
  • What milk alternatives can I use? Almond, coconut, oat, and soy milk are all great options!
  • Is this smoothie vegan? Yes, simply use a plant-based yogurt and sweeten with maple syrup instead of honey.
  • How can I increase the protein content? Add protein powder, Greek yogurt, or nut butter.
  • Can I add vegetables? Absolutely! Spinach or kale can be added for extra nutrients without changing the flavor.
  • What if I don’t have honey? You can substitute with agave syrup or omit it entirely for a less sweet smoothie.
  • Can I make this smoothie without a blender? A food processor can work, but a blender is recommended for the best texture.
  • How long does the smoothie last in the fridge? It’s best consumed within 24 hours for optimal freshness and flavor.

Nutritional Benefits and Dietary Adaptations

This strawberry smoothie is not only delicious but also offers numerous health benefits:

  • Rich in Antioxidants: Strawberries are loaded with antioxidants that promote overall health.
  • Calcium and Vitamin D: If using dairy or fortified non-dairy milk, you’ll receive a good dose of calcium.
  • Probiotics: Greek yogurt supports gut health with beneficial bacteria.
  • Energy Boosting: The natural sugars from fruits provide a quick energy boost, making it perfect for breakfast or before workouts.

Equipment Recommendations

To make your smoothie-making experience seamless, consider investing in these tools:

  • High-Speed Blender: Essential for achieving a smooth consistency.
  • Measuring Cups: For precise ingredient measurements.
  • Storage Containers: To store pre-portioned ingredients or leftovers.

Serving Suggestions

Enjoy your strawberry smoothie on its own or pair it with:

  • Granola Bars: For a quick breakfast on the go.
  • Whole Grain Toast: Top with avocado or nut butter for a balanced meal.
  • Fruit Salad: Complement your smoothie with a fresh fruit salad for added texture and flavor.

In conclusion, this easy strawberry smoothie is a versatile and satisfying recipe that can be tailored to suit your preferences. With its rich flavors and health benefits, it’s a go-to choice for anyone looking to enhance their diet with delicious, nutrient-packed options. Try it today and discover why it’s one of my favorites!

Easy Strawberry Smoothie Recipe

Prep Time 5 minutes
Total Time 5 minutes
Servings 2 cups
Calories 250
Enjoy a quick and delicious strawberry smoothie that's perfect for a healthy snack or breakfast.

Ingredients

Fruits

  • 1 cup strawberries (fresh or frozen)
  • 1 cup milk (almond or any variety)
  • 1 cup greek yogurt (plain or vanilla)
  • 1 can frozen banana
  • 2 tablespoons honey

Instructions 

  • Add all ingredients to a blender.
  • Blend on high until smooth and thick.

Notes

You can substitute honey with agave syrup or maple syrup for a different flavor.
Calories: 250kcal
Cost: $8
Course: Breakfast, Snack
Cuisine: American
Keyword: Smoothie, strawberry