Author

robert

Browsing

Are you looking for a dessert that combines elegance with simplicity? This Berry Tiramisu Trifle is the answer! In this guide, I’ll take you through every step to create a stunning dessert that’s perfect for any occasion without the usual fuss. With layers of fluffy mascarpone cheese, fresh berries, and soft ladyfingers, this recipe is sure to impress your guests and satisfy your sweet tooth. Let’s dive into the reasons why you’ll love this recipe and how to make it effortlessly!

Why You’ll Love This Recipe

  • No baking required: This dessert is perfect for those hot summer days when you want something sweet without turning on the oven.
  • Make-ahead friendly: You can prepare your trifle a day before your gathering, allowing the flavors to meld beautifully.
  • Visually stunning: The layers of berries and creamy mascarpone create a beautiful presentation that will wow your guests.
  • Customizable: You can easily swap out ingredients based on what you have on hand, making it versatile for any palate.
  • Easy to serve: Just scoop and serve! No need for complicated plating or serving dishes.

Ingredients You’ll Need

Let’s break down the ingredients for your Berry Tiramisu Trifle. Each component plays a critical role in achieving that perfect balance of flavor and texture.

  • 2 cups mixed berries: Use a combination of strawberries, blueberries, and raspberries for a colorful and flavorful dessert.
  • 1 cup mascarpone cheese: This rich cheese adds creaminess and a hint of sweetness.
  • 1 1/2 cups heavy cream: Whipping the cream achieves a light and airy texture.
  • 1/3 cup sugar: Sweeten the cream to balance the tanginess of the berries.
  • 1 teaspoon vanilla extract: Adds depth and enhances the flavor of the mascarpone.
  • 1 package ladyfinger cookies: These sponge-like cookies soak up flavors beautifully.

Step-by-Step Instructions

Follow these simple steps to create your Berry Tiramisu Trifle:

  1. In a mixing bowl, whip the heavy cream with sugar and vanilla extract until soft peaks form.
  2. Gently fold the mascarpone cheese into the whipped cream until smooth, ensuring not to deflate the mixture.
  3. In a trifle dish, layer the ladyfingers at the bottom, followed by a layer of the mascarpone mixture, and then a layer of berries.
  4. Repeat the layers until all ingredients are used, making sure to finish with a generous layer of berries on top.
  5. Refrigerate for at least 2 hours before serving to allow the flavors to meld and the ladyfingers to soak up the cream.

Pro Tips for Perfecting Your Trifle
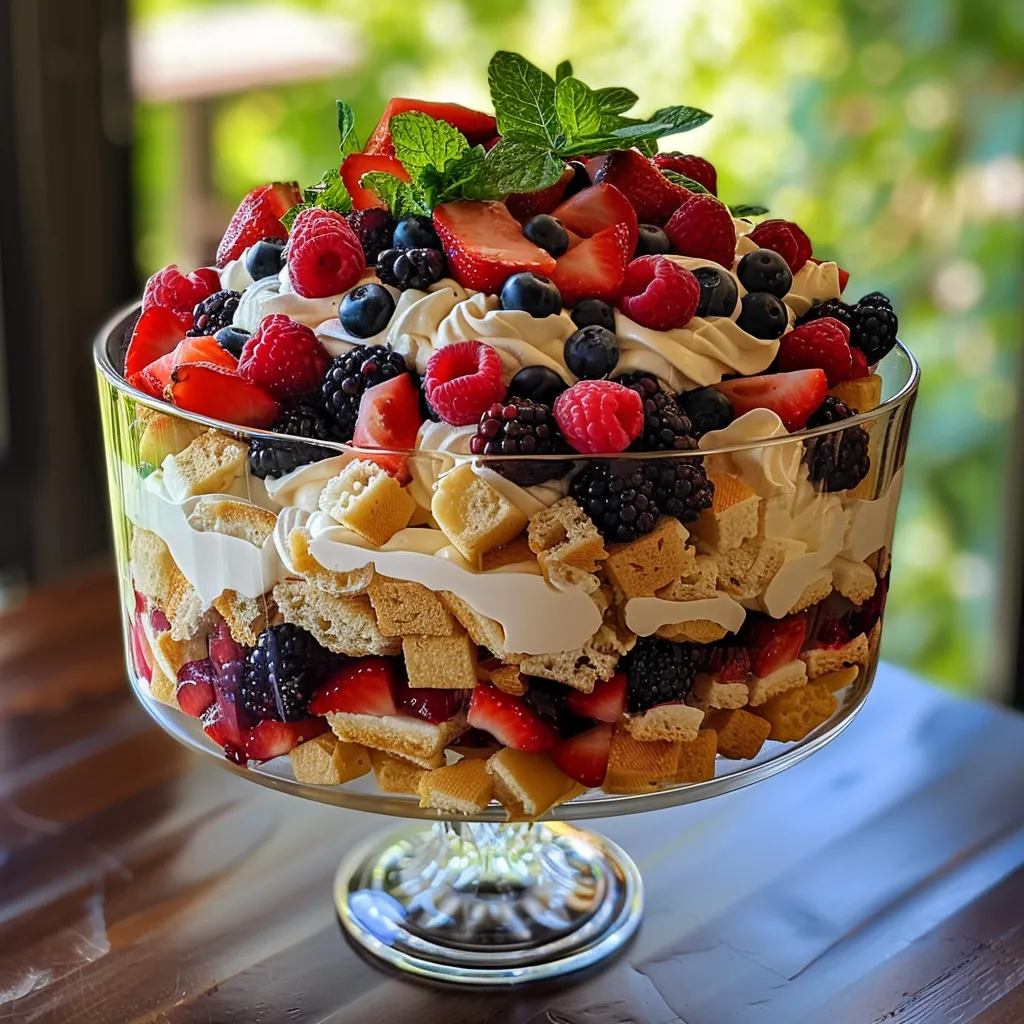
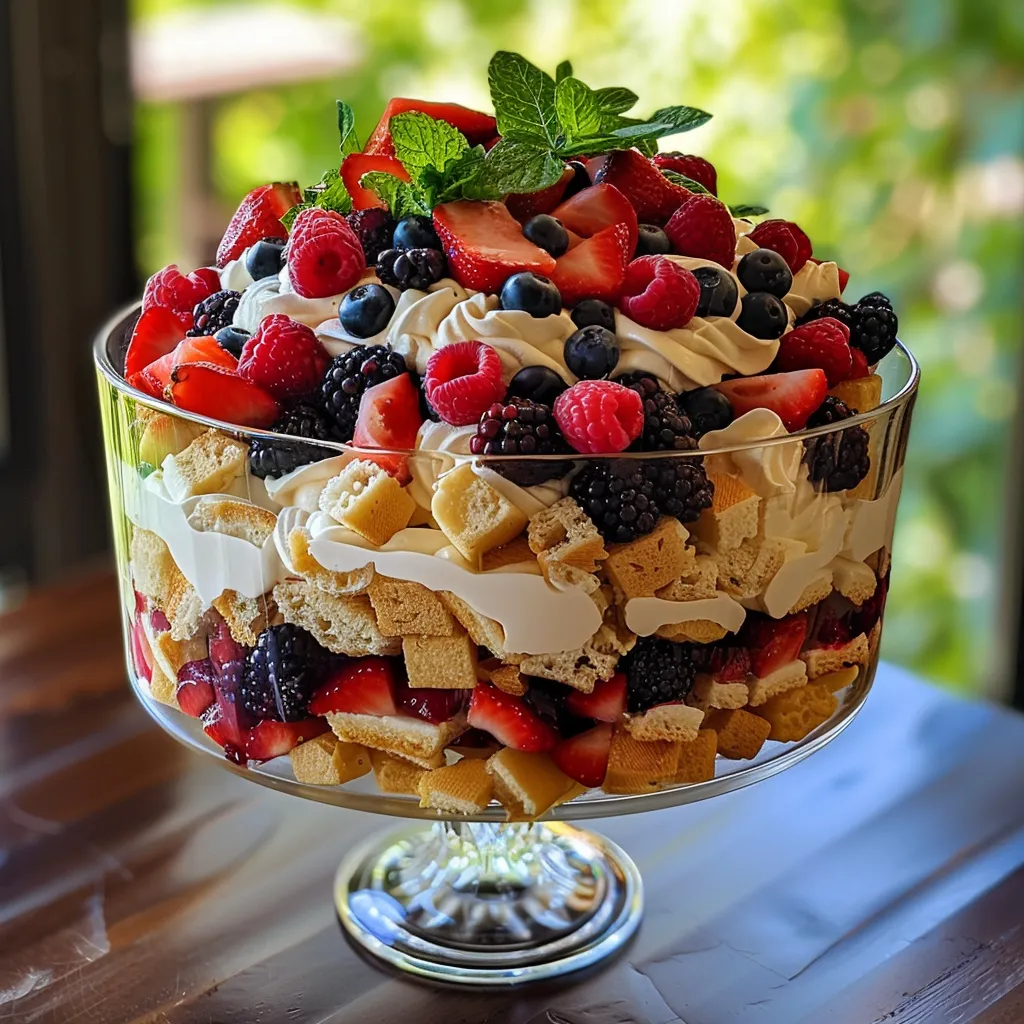
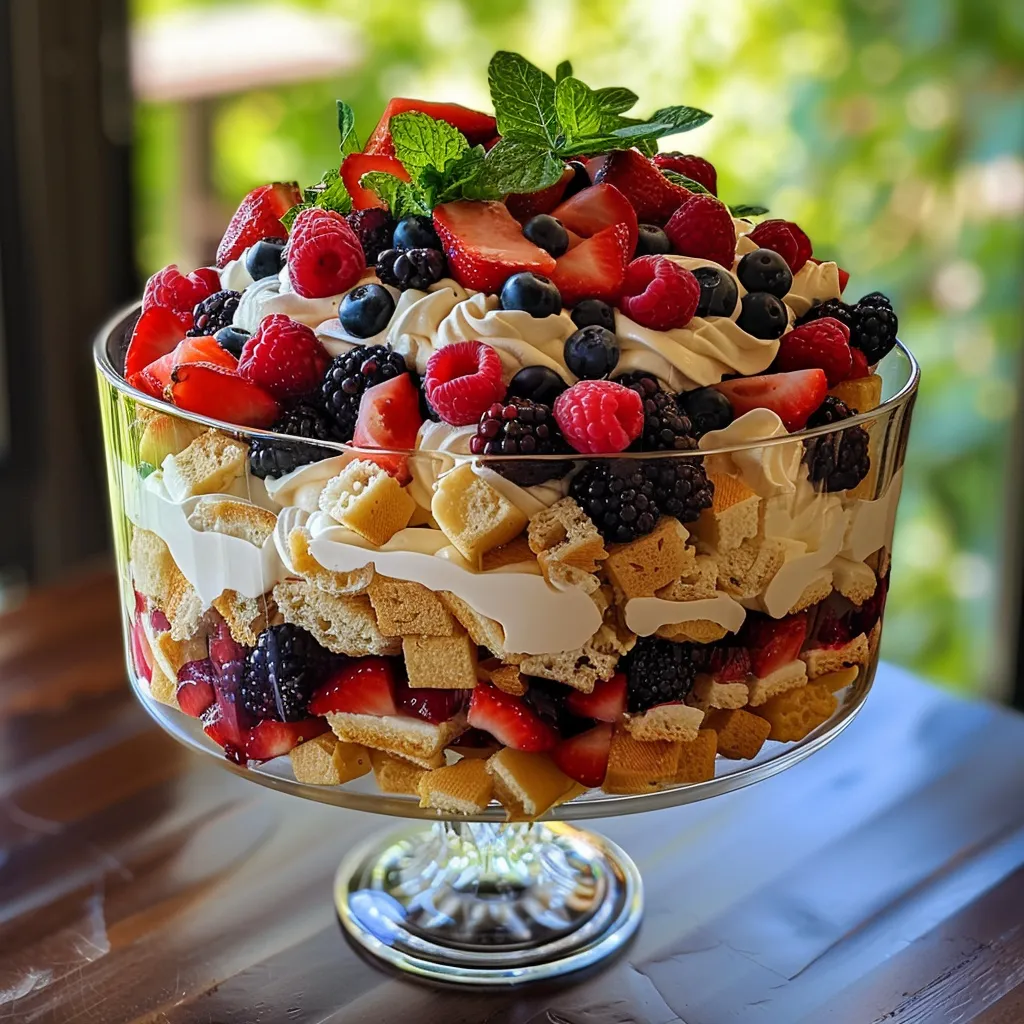
Side view of a delicious berry tiramisu trifle with vibrant layers of mixed berries and mascarpone cream.

To ensure your Berry Tiramisu Trifle turns out perfectly, consider these expert tips:

  • Choose ripe berries: Fresh, ripe berries will enhance the flavor and presentation of your trifle.
  • Don’t oversoak ladyfingers: Quickly dip them in your choice of liquid (coffee or fruit juice) to prevent sogginess.
  • Use a clear trifle dish: This allows the beautiful layers to shine through, adding to the visual appeal.
  • Experiment with flavors: Feel free to add a splash of liqueur or flavored syrup to your whipped cream for an adult twist.
  • Chill before serving: This dessert tastes best when chilled, as it allows the flavors to blend harmoniously.
  • Garnish creatively: Top with additional berries, mint leaves, or a dusting of powdered sugar for an elegant finish.

Common Mistakes to Avoid

While making this Berry Tiramisu Trifle is straightforward, here are some common pitfalls to avoid:

  • Using stale ladyfingers: Fresh ladyfingers are essential for the right texture.
  • Overmixing the mascarpone: Gently fold to maintain the airy texture of the whipped cream.
  • Skipping the chill time: Allowing the trifle to set in the fridge is crucial for flavor development.
  • Neglecting to wash berries: Always rinse your berries to remove any dirt or pesticides.
  • Forgetting about freshness: Use fresh ingredients for the best flavor and texture.

Delicious Variations to Try

Feeling adventurous? Here are some variations to customize your Berry Tiramisu Trifle:

  • Chocolate Berry Tiramisu: Add cocoa powder to the mascarpone mixture or layer chocolate shavings between the layers.
  • Tropical Fruit Trifle: Substitute berries with mangoes and pineapples for a refreshing twist.
  • Nutty Delight: Incorporate chopped nuts like pistachios or almonds for added crunch.
  • Seasonal Flavors: Use seasonal fruits such as peaches in summer or apples in fall for a unique seasonal trifle.

Storing and Make-Ahead Instructions

This Berry Tiramisu Trifle can be made in advance and stored for optimal flavor:

  • Make-ahead tip: Prepare the trifle a day in advance for the best flavor.
  • Storage: Cover tightly with plastic wrap and keep in the refrigerator for up to 3 days.
  • Freezing: While not recommended due to the texture of the ladyfingers, leftover components can be frozen separately if needed.

Nutrition Facts (Per Serving)

Here’s a quick glance at the nutritional content of this delicious dessert:

  • Calories: Approximately 250
  • Fat: 18g
  • Carbohydrates: 20g
  • Protein: 4g

Frequently Asked Questions

If you have any lingering questions, here are some FAQs to help:

  • Can I use frozen berries? Yes, frozen berries work well! Just ensure they are fully thawed and drained before layering.
  • How long does this dessert last? It’s best enjoyed within 3 days when stored in the fridge.
  • Can I make this dessert gluten-free? Yes, use gluten-free ladyfingers or sponge cake to accommodate dietary preferences.
  • What can I substitute for mascarpone cheese? Cream cheese or ricotta cheese can be used as a substitute, but the flavor will differ slightly.
  • Is this dessert suitable for kids? Absolutely! You can make it alcohol-free for a family-friendly version.
  • How do I make it less sweet? Reduce the amount of sugar added to the whipped cream to suit your taste.
  • Can I use other types of cookies? Yes, any soft sponge-like cookie can work well in this trifle.
  • What’s the best way to serve it? Serve in individual cups or glasses for a more personal touch.

Equipment Recommendations

To make preparation seamless, consider these essential tools:

  • Mixing bowls: For whipping cream and mixing ingredients.
  • Electric mixer: Makes whipping the cream easy and efficient.
  • Trifle dish: A clear glass dish allows you to showcase the beautiful layers.
  • Spatula: Useful for folding and layering ingredients without deflation.

Serving Suggestions

When it comes to serving your Berry Tiramisu Trifle, here are some ideas to elevate your presentation:

  • Individual servings: Use small glasses for a cute, personal touch.
  • Garnish: Top with fresh mint or edible flowers for a pop of color.
  • Accompaniments: Serve with a side of whipped cream or a drizzle of chocolate sauce.

In conclusion, the Berry Tiramisu Trifle is a delightful dessert that combines simplicity with elegance. With its rich flavors and beautiful presentation, it’s sure to become a favorite in your dessert repertoire. Enjoy making this easy recipe and let the layers of flavors and textures impress your family and friends!

Berry Tiramisu Trifle Recipe

Prep Time 20 minutes
Total Time 20 minutes
Servings 8 servings
Calories 350
A delightful layered dessert combining fresh berries, mascarpone, and ladyfingers for a quick and elegant treat.

Ingredients

Mixed Berries

  • 2 cups mixed berries

Dairy

  • 1 cup mascarpone cheese
  • 0.5 cup heavy cream
  • 0.33 cup sugar
  • 1 teaspoon vanilla extract

Ladyfingers

  • 1 package ladyfinger cookies

Instructions 

  • Whip heavy cream with sugar and vanilla until soft peaks form.
  • Gently fold mascarpone into whipped cream until smooth.
  • Layer ladyfingers, mascarpone mixture, and berries in a trifle dish.
  • Repeat layers, ending with berries on top.
  • Refrigerate for at least 2 hours before serving.
Notes

For best flavor, prepare a day ahead to allow flavors to meld.
Calories: 350kcal
Cost: $15
Course: Dessert
Cuisine: Italian-American
Keyword: Berries

Indulge in Decadence: Mini Chocolate Lava Cakes for Two

Are you ready to elevate your dessert game? Mini Chocolate Lava Cakes are the epitome of indulgence, offering a luxurious treat that is surprisingly simple to prepare. With a gooey molten center and rich chocolate flavor, these cakes are perfect for a romantic evening or a cozy night in. This recipe is designed for two, making it an ideal choice for special occasions or a sweet surprise. In this comprehensive guide, we will cover everything you need to know to create these delightful desserts.

Why You’ll Love This Recipe

  • Easy to Make: This recipe simplifies the baking process, ensuring that you can whip up these cakes in under an hour.
  • Impressive Presentation: The molten center creates a stunning visual that is sure to impress your guests.
  • Customizable: Add your favorite flavors or toppings to personalize your lava cakes.
  • Perfect Portions: Designed for two, these mini cakes eliminate the temptation of overindulgence.
  • Rich Flavors: Using high-quality ingredients results in a decadent dessert that is deliciously satisfying.

Ingredients You’ll Need

To make your Mini Chocolate Lava Cakes, gather the following ingredients:

  • 1/2 cup unsalted butter: For a rich and buttery flavor.
  • 1 cup semi-sweet chocolate chips: Use high-quality chocolate for the best flavor.
  • 2 large eggs: Essential for structure and moisture.
  • 1/4 cup granulated sugar: To add sweetness and balance the chocolate.
  • 2 tablespoons all-purpose flour: Helps bind the ingredients together.
  • 1/2 teaspoon vanilla extract: Enhances the overall flavor profile.
  • Pinch of salt: Balances sweetness and enhances the chocolate flavor.
  • Powdered sugar for dusting: Optional, for a beautiful finish.

Making Your Mini Chocolate Lava Cakes

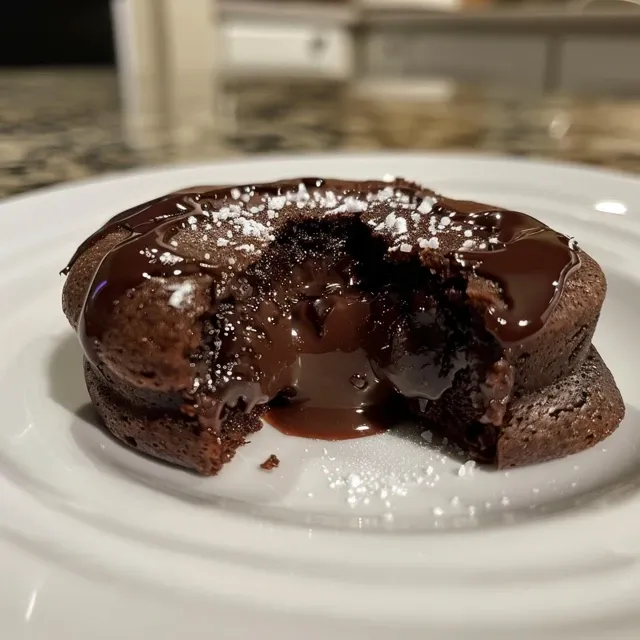
Side angle of Mini Chocolate Lava Cakes, showing the rich chocolate filling and dusted with powdered sugar.

Follow these steps for a foolproof baking experience:

Step 1: Prepare the Baking Dish

Preheat your oven to 425°F (220°C). Grease two ramekins or muffin tins with butter and dust with cocoa powder to prevent sticking.

Step 2: Melt Chocolate and Butter

In a microwave-safe bowl, combine the butter and chocolate chips. Microwave in 30-second intervals, stirring in between, until completely melted and smooth.

Step 3: Mix the Batter

In a separate bowl, whisk together the eggs, granulated sugar, and vanilla extract until well combined. Gradually add the melted chocolate mixture, stirring gently. Finally, fold in the flour and a pinch of salt until just combined.

Step 4: Fill the Ramekins

Pour the batter evenly into the prepared ramekins or muffin tins, filling them about 2/3 full. This allows room for the cakes to rise.

Step 5: Bake to Perfection

Bake in the preheated oven for 12-14 minutes, or until the edges are firm but the center is still soft. The perfect bake will have a slightly jiggly center.

Step 6: Cool and Serve

Let the cakes cool for 1-2 minutes before carefully inverting them onto plates. Dust with powdered sugar if desired and serve immediately for a warm, gooey experience.

Pro Tips for Perfect Lava Cakes

  • Use Quality Ingredients: Opt for high-quality chocolate and fresh eggs for the best flavor.
  • Chill the Batter: If you want to prepare ahead, chill the batter in the ramekins and bake just before serving.
  • Experiment with Flavors: Consider adding a splash of espresso or orange zest for a unique twist.
  • Check for Doneness: The key is to ensure the edges are set while the center remains molten.
  • Let Them Rest: Allowing the cakes to sit for a minute post-baking helps maintain the molten center.
  • Serve Warm: These cakes are best enjoyed straight from the oven for that perfect gooey texture.
  • Pair with Ice Cream: A scoop of vanilla ice cream complements the rich chocolate beautifully.
  • Use a Toothpick Test: Insert a toothpick into the edge and ensure it comes out clean, while the center remains gooey.
  • Don’t Overmix: Gently fold the ingredients together to avoid dense cakes.

Common Mistakes and Troubleshooting

  • Overbaking: Keep a close eye on the baking time; the cakes should be soft in the center.
  • Sticking to the Ramekins: Ensure proper greasing and dusting to avoid this issue.
  • Too Dense: Overmixing can lead to dense cakes; mix just until combined.
  • Cold Centers: Make sure to serve immediately after baking for that beautiful molten center.

Variations to Try

  • Nutty Delight: Add chopped hazelnuts or walnuts for a crunchy texture.
  • Fruit Infusion: Incorporate raspberry or strawberry puree into the batter for a fruity twist.
  • Spicy Chocolate: Mix in a dash of cayenne pepper or chili powder for a chocolate cake with a kick.
  • Gluten-Free Option: Substitute all-purpose flour with almond flour or a gluten-free blend.

Storage and Make-Ahead Instructions

These cakes are best enjoyed fresh, but you can prepare the batter ahead of time:

  • Refrigerate the Batter: Store prepared batter in the fridge for up to 24 hours before baking.
  • Freezing: Freeze the unbaked cakes in their ramekins for up to 2 months. Bake from frozen, adding a few extra minutes to the baking time.

Frequently Asked Questions

  • Can I make these cakes ahead of time?: Yes, you can prepare the batter in advance and bake them just before serving.
  • What if I don’t have ramekins?: Muffin tins work perfectly for individual portions.
  • How can I tell when they are done?: The edges should be set while the center remains slightly jiggly.
  • Can I use different types of chocolate?: Absolutely! Dark, semi-sweet, or even white chocolate can be used for different flavors.
  • Can I add flavorings?: Yes, feel free to add extracts like almond or peppermint for a unique twist.
  • Is this recipe gluten-free?: Substitute with gluten-free flour for a gluten-free version.
  • How do I store leftovers?: Keep in the fridge for up to 3 days, but they are best eaten fresh.
  • Can I serve these with ice cream?: Yes, a scoop of vanilla ice cream pairs wonderfully with the warm cakes.

Nutritional Information and Dietary Adaptations

For a single serving (one cake), the approximate nutritional content is:

  • Calories: 350
  • Fat: 24g
  • Carbohydrates: 30g
  • Protein: 5g

For a healthier twist, consider the following adaptations:

  • Reduce Sugar: Cut the sugar by 1 tablespoon for a less sweet cake.
  • Use Coconut Oil: Substitute butter with coconut oil for a dairy-free option.
  • Swap Flour: Use oat flour for additional fiber and nutrients.

Essential Equipment Recommendations

  • Ramekins: Essential for creating the individual cakes with perfect texture.
  • Mixing Bowls: Use high-quality bowls to prevent heat loss during mixing.
  • Spatula: A flexible spatula ensures you don’t waste any batter while transferring.
  • Whisk: A sturdy whisk is necessary for properly mixing the eggs and sugar.

Serving Suggestions

For an extra touch, consider serving your Mini Chocolate Lava Cakes with:

  • Fresh Berries: Strawberries or raspberries add a tart contrast to the rich chocolate.
  • Whipped Cream: Light and airy whipped cream balances the intense chocolate flavor.
  • Chocolate Sauce: Drizzle extra chocolate sauce over the top for chocolate lovers.

Conclusion: Your Chocolate Adventure Awaits!

Now that you have the ultimate guide to making Mini Chocolate Lava Cakes, it’s time to gather your ingredients and get baking! With their rich flavor and gooey center, these cakes are sure to become a favorite in your dessert repertoire. Don’t forget to share your creations with friends and family; after all, great food is meant to be enjoyed together. Happy baking!

Mini Chocolate Lava Cakes for Two An Amazing Ultimate Recipe

Prep Time 10 minutes
Cook Time 12 minutes
Total Time 22 minutes
Servings 2 servings
Calories 450
Indulge in these rich, gooey mini chocolate lava cakes perfect for a romantic dessert for two.

Ingredients

Dough

  • 0.5 cup unsalted butter
  • 1 cup semi-sweet chocolate chips
  • 2 large eggs
  • 0.25 cup granulated sugar
  • 2 tablespoons all-purpose flour
  • 0.5 teaspoon vanilla extract

Pinch of salt

  • to taste Pinch of salt

For dusting

  • as needed Powdered sugar for dusting, optional

Instructions 

  • Preheat oven to 425°F (220°C). Grease two ramekins.
  • Melt butter and chocolate together until smooth.
  • Whisk eggs, sugar, and vanilla into the chocolate mixture. Stir in flour and salt.
  • Divide batter into ramekins and bake for 12 minutes.
  • Let cool slightly, then invert onto plates. Dust with powdered sugar if desired.

Notes

Serve immediately for the best gooey center.
Calories: 450kcal
Cost: $12
Course: Dessert
Keyword: chocolate

The Ultimate Guide to Effortless Carrot Cake with Cream Cheese Frosting

Carrot cake is a timeless dessert that brings warmth and comfort to any occasion. This recipe not only promises a moist and flavorful cake, but it also features a rich cream cheese frosting that elevates each slice. In this comprehensive guide, we’ll walk you through every step of the process, ensuring great results every time. Whether you’re a seasoned baker or a novice, this recipe is designed to fit seamlessly into your busy life.

Why You’ll Love This Recipe

  • Moist and Flavorful: The combination of fresh grated carrots and a mix of sugars ensures a cake that is bursting with flavor and moisture.
  • Simple Ingredients: Most of the ingredients are pantry staples, making it easy to whip up when the craving strikes.
  • Versatile Frosting: Cream cheese frosting adds a tangy sweetness that perfectly complements the cake’s flavors.
  • Quick Preparation: This recipe can be prepared in under an hour, allowing you to enjoy freshly baked cake with minimal effort.
  • Perfect for Any Occasion: Whether it’s a birthday, holiday gathering, or just a simple dessert, this cake is sure to impress.

Ingredient Breakdown

To create the perfect carrot cake, let’s dive into the ingredients.

  • White Sugar: 200g (1 cup) for sweetness and a light texture.
  • Brown Sugar: 100g (1/2 cup) adds moisture and a hint of caramel flavor.
  • Eggs: 3 large eggs provide structure and richness.
  • Vegetable Oil: 170ml (3/4 cup) ensures a moist crumb. You can substitute with melted coconut oil for added flavor.
  • All-Purpose Flour: 280g (2 cups) forms the base of the cake. For a gluten-free option, use almond flour or a gluten-free blend.
  • Baking Powder and Baking Soda: These leavening agents help the cake rise.
  • Salt: 1/2 tsp enhances the flavors.
  • Cinnamon: 2 tsp adds warmth and spice.
  • Vanilla Extract: 2 tsp for depth of flavor.
  • Shredded Carrots: 5 medium carrots (about 3 cups) provide moisture and sweetness.

Crafting the Cream Cheese Frosting

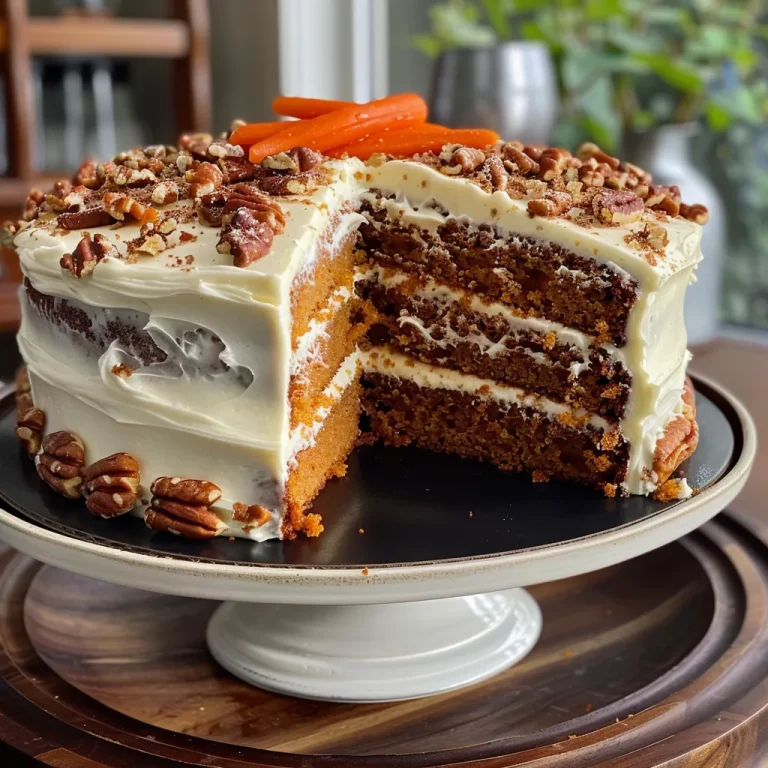
Side view of a slice of carrot cake topped with white cream cheese frosting and walnuts.

The cream cheese frosting is where the magic happens. Here’s what you’ll need:

  • Full-Fat Cream Cheese: 400g (14 oz) for a rich and creamy texture.
  • Double Heavy Whipping Cream: 300ml (1 1/4 cup) gives the frosting a light and airy feel.
  • Powdered Sugar: 65g (1/2 cup) for sweetness and to stabilize the frosting.
  • Vanilla Extract: 2 tsp to enhance flavor.
  • Chopped Nuts: 55g (1/2 cup) of toasted walnuts or pecans for decoration and added crunch.

Step-by-Step Instructions

1. Preheat the Oven

Preheat your oven to 180°C (350°F). Grease two 8-inch round cake pans and dust with flour to prevent sticking.

2. Prepare the Batter

In a mixing bowl, combine the white sugar, brown sugar, eggs, and oil. Mix until well combined, about 1 minute. Then, gradually add in the flour, baking powder, baking soda, salt, cinnamon, and vanilla. Mix gently to avoid overmixing. Finally, fold in the shredded carrots with a spatula.

3. Bake the Cake

Evenly divide the batter between the two prepared pans. Bake in the preheated oven for 30-35 minutes. Check for doneness by inserting a toothpick; it should come out clean.

4. Cool the Cakes

Once baked, cool the cakes in the pans for 30 minutes. Then, turn them out onto a wire rack to cool completely.

5. Toast the Nuts

While the cakes are cooling, toast the chopped nuts in a dry frying pan until they become fragrant and slightly colored. Set aside until needed.

6. Make the Cream Cheese Frosting

In a mixing bowl, combine the cream cheese, heavy whipping cream, powdered sugar, and vanilla. Whip until stiff peaks form. For a fluffier texture, whip the cream separately and then fold it into the cream cheese mixture.

7. Assemble the Cake

Place one cake layer on a cake stand or flat plate. Spread a quarter of the cream cheese frosting on top, then add the second layer. Cover the top and sides with the remaining frosting, reserving some for decoration if desired. Finish with toasted nuts or decorative carrots for a festive touch.

Pro Tips for Success

  • Use Fresh Carrots: Freshly grated carrots add the best flavor and moisture.
  • Room Temperature Ingredients: Ensure your eggs and cream cheese are at room temperature for a smoother batter and frosting.
  • Don’t Overmix: Mix until just combined to keep the cake light and fluffy.
  • Check Oven Temperature: Use an oven thermometer to ensure your oven is baking at the correct temperature.
  • Wrap for Storage: Wrap the cake layers in plastic wrap if not frosting immediately to keep them moist.
  • Experiment with Spices: Feel free to mix in nutmeg or ginger for additional flavor.
  • Chill the Frosting: If the frosting is too soft, refrigerate it briefly to make it easier to spread.
  • Layering: For a more dramatic presentation, slice each cake layer in half horizontally and add frosting between layers.

Common Mistakes and Troubleshooting

Even the best bakers can encounter issues. Here are some common mistakes and how to fix them:

  • Dense Cake: This may occur from overmixing the batter. Mix just until combined.
  • Dry Cake: Overbaking can dry out the cake. Check your cake a few minutes before the suggested time.
  • Runny Frosting: If your frosting is too loose, add more powdered sugar or refrigerate to thicken.

Flavor Variations

Customize your carrot cake to match your taste or the season with these variations:

  • Spiced Carrot Cake: Add ground nutmeg or ginger for a spicier profile.
  • Pineapple Carrot Cake: Incorporate crushed pineapple for added sweetness and moisture.
  • Nutty Delight: Mix in chopped pecans or walnuts for added texture.
  • Coconut Carrot Cake: Add shredded coconut for a tropical twist.

Storage and Make-Ahead Instructions

This carrot cake stores beautifully:

  • Room Temperature: Keep the cake covered at room temperature for up to 2 days.
  • Refrigerator: Store in the fridge for up to 5 days. Make sure to cover it to prevent it from drying out.
  • Freezer: Wrap individual layers in plastic wrap and foil; freeze for up to 3 months. Thaw overnight in the fridge before frosting.

Frequently Asked Questions

  • Can I use whole wheat flour? Yes, for a healthier option, substitute up to half of the all-purpose flour with whole wheat.
  • What can I substitute for eggs? Applesauce or flaxseed meal can be used as egg substitutes.
  • Is cream cheese frosting too sweet? If you find it too sweet, reduce the powdered sugar and add more cream cheese.
  • Can I make this cake vegan? Yes, replace eggs with flax eggs and use a dairy-free cream cheese alternative.
  • How can I make it gluten-free? Substitute all-purpose flour with a gluten-free flour blend.
  • Can I add raisins or coconut? Absolutely! Both add great texture and flavor.
  • How do I know when the cake is done? A toothpick inserted in the center should come out clean or with a few crumbs.
  • What’s the best way to frost the cake? Use an offset spatula for smooth, even frosting.

Nutrition Tips and Dietary Adaptations

This carrot cake can be adapted to fit various dietary needs:

  • Lower Sugar: Substitute sugar with a natural sweetener like stevia or monk fruit.
  • Low-Fat Option: Use reduced-fat cream cheese and substitute some oil with applesauce.
  • Nut-Free: Omit nuts or use sunflower seeds for decoration.

Equipment Recommendations

To create the best carrot cake, the following equipment will help:

  • Electric Mixer: A stand or handheld mixer makes beating the batter and frosting effortless.
  • 8-Inch Cake Pans: Ensure even baking with quality non-stick pans.
  • Spatula: An offset spatula is perfect for spreading frosting smoothly.
  • Cooling Rack: Essential for cooling your cakes evenly after baking.

Serving Suggestions

Serve your carrot cake with a side of fresh fruit or a scoop of vanilla ice cream. For a touch of elegance, sprinkle with additional cinnamon or serve with a drizzle of caramel sauce.

With this definitive guide, you’re now equipped to make an effortless carrot cake that’s sure to satisfy any sweet tooth. Enjoy baking, and remember: great meals are created with love and care. Happy baking!

Carrot Cake with Cream Cheese Frosting

Prep Time 20 minutes
Cook Time 35 minutes
Total Time 55 minutes
Servings 10 slices
Calories 450
A moist and flavorful carrot cake layered with rich cream cheese frosting, perfect for celebrations or a special treat.

Ingredients

Cake Batter

  • 200 g white sugar
  • 100 g brown sugar
  • 3 large eggs
  • 170 ml vegetable oil
  • 280 g all purpose plain flour
  • 2 tsp baking powder
  • 1 tsp baking soda
  • 0.5 tsp salt
  • 2 tsp cinnamon
  • 2 tsp vanilla
  • 5.33 cups shredded carrots (medium carrots)

Cream Cheese Frosting

  • 400 g full fat cream cheese
  • 300 ml double heavy whipping cream (36% fat)
  • 65 g icing sugar (powdered sugar)
  • 2 tsp vanilla
  • 55 g toasted and chopped walnuts or pecans (for decoration)

Decorative Carrots

  • 8 pieces ready made candy or white chocolate decorative carrots

Instructions 

  • Preheat oven to 180°C (350°F). Grease two 8-inch pans and dust with flour.
  • Beat sugars, eggs, and oil until combined. Mix in flour, cinnamon, baking powder, baking soda, vanilla, and salt. Fold in carrots.
  • Divide batter between pans and bake for 30-35 minutes. Cool in pans, then turn out and cool completely.
  • Toast nuts until fragrant, chop roughly, and set aside.
  • Whip cream cheese, cream, icing sugar, and vanilla until stiff. Fold in whipped cream. Frost cooled cakes, decorate with nuts, candies, and optional rosettes.

Notes

Ensure cream cheese is at room temperature for best frosting consistency.
Calories: 450kcal
Cost: $15
Course: Dessert
Cuisine: American
Keyword: cake, Carrot, frosting

Discover how to create a stunning peach cobbler with minimal effort. This recipe combines juicy peaches and a crumbly topping for a timeless dessert that delights with every bite. Whether you’re a seasoned baker or a novice in the kitchen, this homemade cobbler is designed to impress without overwhelming you. Let’s dive into the joy of crafting the perfect peach dessert!

Why You’ll Love This Recipe

This ultimate peach cobbler recipe is not only easy to follow, but it also delivers fantastic results. Here are five specific benefits you’ll enjoy:

  • Quick and Easy Preparation: With minimal ingredients and straightforward steps, you can whip up this dessert in no time, making it perfect for last-minute gatherings.
  • Versatile Ingredients: Utilize canned peaches or fresh ones from your garden. This adaptability ensures you can make this recipe year-round.
  • Comfort Food Classic: This cobbler embodies the essence of comfort food, offering warmth and nostalgia with every bite.
  • Customizable Flavors: Add your favorite spices or fruits to create variations that suit your taste, ensuring everyone enjoys their own take on this classic.
  • Perfect for Any Occasion: Whether it’s a summer BBQ or a cozy winter dinner, this dessert is a hit with guests of all ages.

Ingredients Breakdown

Here’s what you’ll need to make your peach cobbler. Each ingredient plays a crucial role in achieving the perfect flavor and texture.

  • 2 (29 oz) cans of sliced peaches: Provide the juicy base for your cobbler.
  • 1 cup sugar: Balances the flavors and sweetens the topping.
  • 1/3 cup all-purpose flour: Helps thicken the peach filling.
  • 1/4 teaspoon kosher salt: Enhances the overall flavor without overpowering sweetness.
  • 1/4 teaspoon cinnamon: Adds warmth and depth to your cobbler.
  • 1/4 teaspoon nutmeg: Complements cinnamon and enriches the flavor profile.
  • For the cobbler topping:
  • 1 1/4 cups all-purpose flour: Forms the base of the topping.
  • 1 egg yolk: Adds richness and helps bind the ingredients.
  • 3/4 cup granulated sugar: Sweetens the topping.
  • 1/4 cup cold butter (sliced into 1/2 tablespoons): Creates a flaky texture when baked.
  • 1/4 cup buttermilk: Provides moisture and a slight tang.
  • 1 tablespoon sugar: For sprinkling on top before baking.
  • 1/2 teaspoon baking powder: Helps the topping rise.
  • 1/2 teaspoon kosher salt: Balances flavors in the topping.

Pro Tips for Perfect Peach Cobbler

Here are some expert insights to ensure your cobbler turns out perfectly every time:

  • Drain the peaches well: Proper drainage prevents a watery filling that can ruin the texture.
  • Use a pastry cutter: For creating the cobbler topping, a pastry cutter helps achieve the desired crumbly texture.
  • Experiment with spices: Don’t hesitate to try different spice combinations, such as cardamom or ginger, for unique flavor twists.
  • Choose ripe peaches: If using fresh peaches, select ripe, fragrant ones for the best flavor.
  • Let it cool: Allow the cobbler to rest for 10-15 minutes after baking to help it set before serving.
  • Serve warm with ice cream: A scoop of vanilla ice cream or whipped cream elevates your cobbler’s deliciousness.
  • Check for doneness: The topping should be golden brown and the filling bubbly when it’s ready.
  • Use a 9×13 baking dish: This size ensures even cooking and proper browning of the topping.

Common Mistakes and Troubleshooting

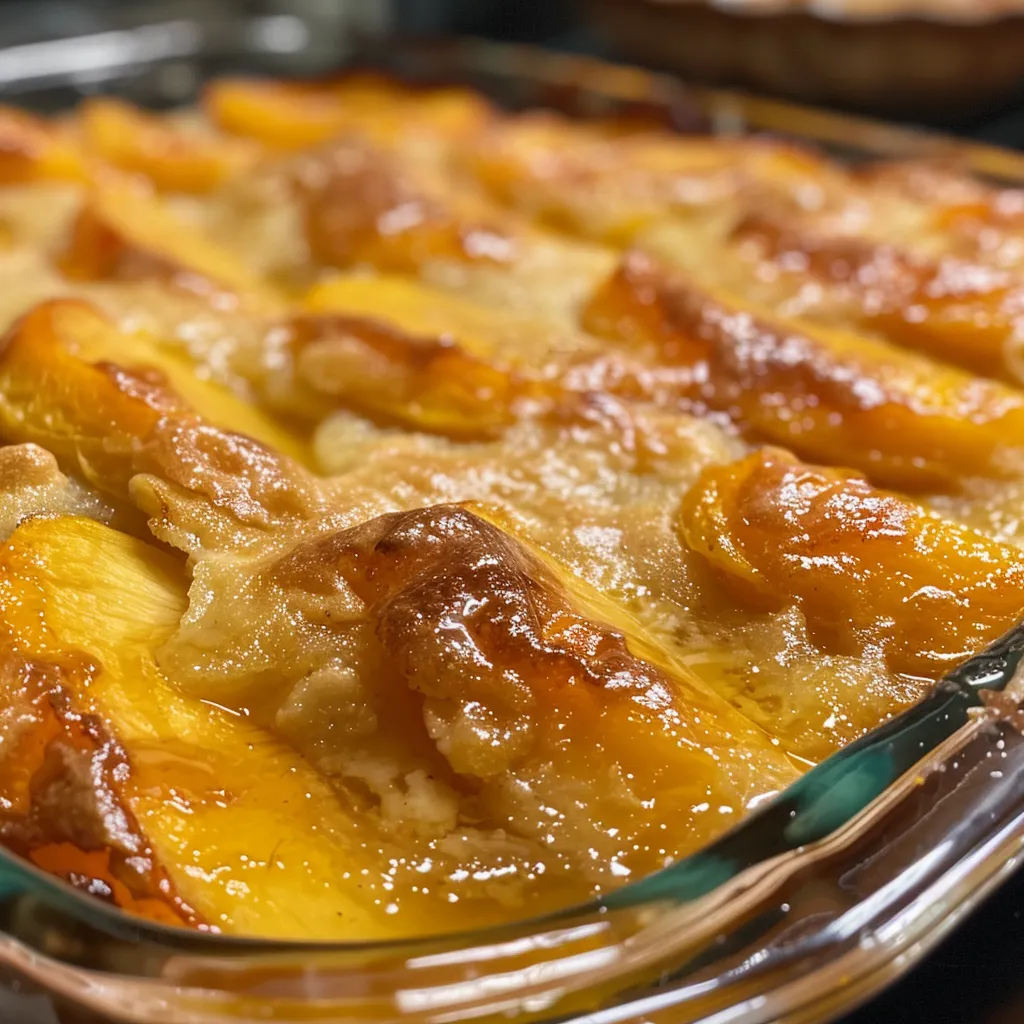
Side angle of a bubbling peach cobbler with a flaky topping.

To help you avoid common pitfalls, here’s what to watch out for:

  • Too much liquid: If your cobbler is too soupy, ensure you drain the peaches thoroughly before adding them to the baking dish.
  • Overbaking: Keep an eye on the cobbler; if the topping is brown but the filling isn’t bubbling, it’s likely done.
  • Undermixing the topping: For the best texture, mix the topping just until combined—don’t overwork the dough.
  • Using cold ingredients: Cold butter and buttermilk are essential for a flaky topping; make sure they’re chilled before use.

Recipe Variations

Feel free to customize your cobbler with these delicious variations:

  • Berry Peach Cobbler: Add 1 cup of blueberries or raspberries to the peach filling for a fruity twist.
  • Peach and Almond Cobbler: Incorporate 1/2 cup of sliced almonds into the topping for added crunch and flavor.
  • Spiced Peach Cobbler: Experiment with different spices like chai spices or pumpkin pie spice for a unique flavor profile.
  • Gluten-Free Option: Substitute all-purpose flour with a gluten-free flour blend to accommodate dietary needs.

Storing and Make-Ahead Instructions

This cobbler can be prepared in advance, making it a convenient choice for busy schedules:

  • Storing leftovers: Keep the cobbler in an airtight container in the refrigerator for up to 3 days.
  • Freezing: You can freeze baked cobbler for up to 3 months. Thaw overnight in the refrigerator before reheating.
  • Make-ahead option: Prepare the filling and topping separately, then assemble and bake when ready to serve.

Frequently Asked Questions

Here are some common queries about making peach cobbler:

  • Can I use fresh peaches instead of canned?: Absolutely! Just peel and slice about 6-8 ripe peaches.
  • Is it necessary to peel the peaches?: For canned peaches, peeling isn’t required. For fresh, peeling is optional based on your preference.
  • Can I make this recipe vegan?: Substitute the egg yolk with a flax egg and use non-dairy milk for buttermilk.
  • How do I know when the cobbler is done?: Look for a golden brown topping and bubbling filling.
  • Can I double the recipe?: Yes! Just use a larger baking dish and adjust baking time as needed.
  • What can I serve with peach cobbler?: Vanilla ice cream, whipped cream, or even yogurt pairs wonderfully.
  • How long can I store leftovers?: In the fridge, leftovers last for up to 3 days.
  • What’s the best way to reheat cobbler?: Warm individual servings in the microwave or reheat the entire dish in the oven at 350°F until heated through.

Nutrition Tips and Dietary Adaptations

When making your peach cobbler, consider these nutrition tips:

  • Reduce sugar: Cut back on sugar by using less or substituting with a natural sweetener.
  • Increase fiber: Use whole wheat flour for added fiber content in the topping.
  • Portion control: Serve smaller portions to manage calorie intake while still enjoying the dessert.
  • Incorporate fruits: Add more fruits to the filling for added nutrients and flavor.

Equipment Recommendations

To make your baking experience seamless, consider these essential tools:

  • 9×13 baking dish: Ideal for even baking and easy serving.
  • Mixing bowls: A set of various sizes for mixing dry and wet ingredients.
  • Measuring cups and spoons: Precision is key in baking; ensure you have reliable measuring tools.
  • Pastry cutter: Great for mixing the topping ingredients without overworking the dough.

Serving Suggestions

Elevate your peach cobbler experience with these serving ideas:

  • À la mode: Serve warm with a scoop of vanilla ice cream on top for the ultimate comfort food experience.
  • With whipped cream: A dollop of whipped cream adds richness and complements the flavors.
  • On its own: Enjoy it straight from the baking dish for a rustic, homey feel.

Conclusion

Creating a delightful peach cobbler doesn’t have to be complicated. With this effortless recipe, you can enjoy the comforting flavors of peaches and a crumbly topping that’s sure to impress. Remember, cooking should be enjoyable, and with the right structure and techniques, anyone can master the art of baking. Gather your ingredients, follow these steps, and savor the joy of sharing your homemade dessert with friends and family!

The Best Peach Cobbler

Prep Time 15 minutes
Cook Time 35 minutes
Total Time 50 minutes
Servings 8 pieces
Calories 350
A delicious and comforting peach cobbler with a sweet, buttery topping, perfect for any occasion.

Ingredients

Peaches

  • 2 29 oz cans sliced peaches
  • 1 cups sugar
  • 1 3/4 cups all purpose flour
  • 1/4 teaspoon kosher salt
  • 1/4 teaspoon cinnamon
  • 1/4 teaspoon nutmeg

Cobbler Topping

  • 1 1/4 cups all purpose flour
  • 1 egg yolk egg yolk
  • 3/4 cups granulated sugar
  • 1/4 cup cold butter sliced in 1/2 tablespoons pieces
  • 1/4 cup buttermilk
  • 1 tablespoon sugar
  • 1/2 teaspoon baking powder
  • 1/2 teaspoon kosher salt

Instructions 

  • Drain peaches and pour into a 9x13 inch baking dish.
  • Sprinkle 1/3 cup flour, cinnamon, nutmeg, and salt on peaches; gently stir. Set aside.
  • Preheat oven to 375°F. Mix dry ingredients; whisk egg yolk and buttermilk; combine into dry ingredients to form shaggy dough. Pour over peaches.
  • Cut butter into 1/2 inch pieces, scatter over mixture, sprinkle with 1 tablespoon sugar. Bake 30-40 minutes until golden and bubbling.

Notes

Serve warm with ice cream for an extra treat.
Calories: 350kcal
Cost: $15
Course: Dessert
Cuisine: American
Keyword: cobbler, Peach

Discover the Indulgent Chicken Alfredo: A Creamy Delight Made Easy

Welcome to the ultimate guide on making the creamiest Chicken Alfredo pasta that your family will love! This dish combines tender chicken, rich cream, and cheesy goodness, making it perfect for busy weeknights or special occasions. In this comprehensive guide, we’ll break down the recipe, share expert tips, and provide insights to ensure your Alfredo turns out perfectly every time.

Why You’ll Love This Recipe

  • Quick and Easy Preparation: With simple steps and minimal ingredients, you can whip up this dish in under 30 minutes, perfect for those hectic weeknights.
  • Rich and Creamy Sauce: This recipe achieves a luxurious texture that coats the pasta beautifully, thanks to the combination of double cream and cheese.
  • Customizable Ingredients: Feel free to swap in your favorite proteins or vegetables, making it a versatile dish suitable for all tastes.
  • Perfect for Meal Prepping: This Chicken Alfredo keeps well in the fridge, making it ideal for meal prep or leftovers.
  • Kid-Friendly: With its cheesy goodness and creamy texture, even picky eaters will ask for seconds!

Ingredient Breakdown

To create this Alfredo masterpiece, you’ll need the following ingredients:

  • 1.5 lbs boneless, skinless chicken breasts: Thinly sliced or cubed for quick cooking.
  • 1 tsp salt: Enhances the flavor of the chicken.
  • 1/2 tsp black pepper: Adds a subtle spice.
  • 1 tsp paprika: Provides a hint of warmth and color.
  • 2 tbsp olive oil: For cooking the chicken and adding flavor.
  • 12 oz fettuccine or tagliatelle pasta: The perfect pasta shape to hold the sauce.
  • 4 tbsp unsalted butter: Adds richness to the sauce.
  • 1 tsp chopped garlic: For aromatic depth.
  • 1 tbsp finely chopped onions or shallots: Enhances the flavor profile.
  • 2 cups double cream or heavy cream: The foundation of a creamy sauce.
  • 1/2 cup freshly grated Parmesan cheese: Adds a salty, nutty flavor.
  • 2 cups shredded low-moisture, part-skim mozzarella cheese: For a gooey, stretchy sauce.
  • 1 tsp fresh parsley, chopped: For garnish and a burst of freshness.
  • 1 cup reserved pasta water: Helps adjust the sauce’s consistency.

Expert Tips for Alfredo Perfection

Side view of a bowl filled with Chicken Alfredo pasta, showcasing its creamy texture.
  • Use Double Cream: It’s essential for achieving that rich, luxurious texture that Alfredo is known for.
  • Don’t Skip the Pasta Water: This starchy water is crucial for binding the sauce to the pasta.
  • Cook the Chicken Properly: Ensure it’s cooked through but still juicy by letting it rest before slicing.
  • Gradual Cheese Addition: Add cheeses little by little to prevent clumping and ensure a smooth sauce.
  • Control the Heat: Always cook the sauce on low heat once the cream is added to prevent it from breaking.
  • Fresh Grated Cheese Only: Pre-grated cheese contains anti-caking agents that prevent smooth melting.
  • Adjust Seasonings Last: Taste before adjusting salt and pepper after adding the pasta and chicken.
  • Let It Rest: Allow the dish to sit for a few minutes before serving to enhance the flavors.

Common Mistakes and Troubleshooting

Even seasoned cooks can make mistakes, but here’s how to avoid them:

  • Overcooking the Cream: If the cream boils, it can separate. Keep it at a gentle simmer.
  • Using Cold Ingredients: Make sure your cream and cheese are at room temperature for better incorporation.
  • Not Reserving Enough Pasta Water: Always save at least one cup to adjust the sauce later.
  • Rushing the Process: Take your time when building the sauce; rushing can lead to clumping.

Delicious Variations to Try

Want to switch things up? Here are some fantastic variations:

  • Vegetable Alfredo: Add steamed broccoli, spinach, or mushrooms for a nutritious twist.
  • Garlic Alfredo: Increase the garlic to 2-3 cloves for a more pronounced flavor.
  • Spicy Alfredo: Add red pepper flakes or a dash of cayenne for heat.
  • Seafood Alfredo: Swap the chicken for shrimp or scallops for a luxurious seafood twist.

Storage and Make-Ahead Instructions

This Chicken Alfredo can be made ahead of time and stored properly:

  • Refrigeration: Store in an airtight container for up to 3 days.
  • Freezing: While not ideal due to the sauce’s texture, it can be frozen for up to a month. Reheat slowly on low heat.
  • Reheating: Warm on the stove with a splash of reserved pasta water to restore creaminess.

Comprehensive FAQ

  • Can I use whole milk instead of cream? While you can, the sauce will be less rich and creamy.
  • Is it necessary to use fresh Parmesan? Yes, freshly grated cheese melts better and tastes superior.
  • How can I make this recipe dairy-free? Substitute the cream with a non-dairy alternative and use nutritional yeast instead of cheese.
  • What pasta works best for Alfredo? Fettuccine and tagliatelle are traditional, but any pasta shape can work.
  • Can I add protein other than chicken? Absolutely! Shrimp, sausage, or even tofu works well.
  • How can I make this dish spicier? Incorporate red pepper flakes or jalapeños for added heat.
  • What should I serve this with? A light salad and garlic bread complement the richness of the dish well.
  • Can I make this gluten-free? Yes, use gluten-free pasta and check your cream and cheese for gluten-free certification.

Nutrition Tips and Dietary Adaptations

For those watching their diet or needing adjustments:

  • Lower-Calorie Option: Substitute heavy cream with half-and-half or a lower-fat cream alternative.
  • Gluten-Free: Use gluten-free pasta to accommodate dietary needs.
  • Vegetarian Adaptation: Omit the chicken and add more vegetables or use plant-based proteins.
  • Heart-Healthy Modifications: Reduce butter and cheese, and add more vegetables to boost nutrition.

Equipment Recommendations

To achieve the best results, consider having the following kitchen equipment:

  • Large Skillet or Dutch Oven: Ideal for cooking everything in one pot.
  • Pot for Pasta: A large pot for boiling pasta ensures even cooking.
  • Whisk: Essential for smoothly incorporating the cheese into the sauce.
  • Measuring Cups and Spoons: For accuracy in ingredient measurements.

Serving Suggestions

Enhance your Chicken Alfredo experience with these serving suggestions:

  • Garnish with Fresh Parsley: Adds color and a hint of freshness.
  • Serve with Garlic Bread: Perfect for dipping into the creamy sauce.
  • Pair with a Light Salad: A simple green salad balances the richness of the dish.
  • Offer Grated Cheese on the Side: Let guests sprinkle extra cheese to their liking.

Conclusion

Now that you have the tools and knowledge to create the creamiest Chicken Alfredo pasta, you can impress your family and friends with this delightful dish. Remember, cooking is about experimenting and enjoying the process. So don’t hesitate to make this recipe your own. Happy cooking!

Creamiest Chicken Alfredo Pasta

Prep Time 10 minutes
Cook Time 20 minutes
Total Time 30 minutes
Servings 4 servings
Calories 850
A rich and creamy Chicken Alfredo Pasta combines tender chicken, silky sauce, and perfectly cooked pasta for a comforting meal.

Ingredients

Protein

  • 1.5 lbs boneless, skinless chicken breasts (thinly sliced or cubed)
  • 1 tsp salt
  • 1.5 tsp black pepper
  • 1 tsp paprika
  • 2 tbsp olive oil

Pasta

  • 12 oz fettuccine or tagliatelle pasta

Dairy & Cheese

  • 4 tbsp unsalted butter (½ stick)
  • 1 tsp chopped garlic (2-3 cloves, minced)
  • 1 tbsp finely chopped onions or shallots
  • 2 cups double cream or heavy cream
  • 0.5 cup freshly grated Parmesan cheese
  • 2 cups shredded low-moisture, part-skim mozzarella cheese
  • 1 tsp fresh parsley (chopped, plus more for garnish)
  • 1 cup reserved pasta water

Instructions 

  • Pat the chicken dry, slice into strips or cubes, and season with salt, pepper, and paprika.
  • Cook chicken in olive oil until golden and cooked through, then set aside. Meanwhile, cook pasta until al dente, reserving 1 cup of pasta water before draining.
  • In the same skillet, melt butter, sauté garlic and onion until fragrant, then add cream and simmer gently. Gradually stir in Parmesan and mozzarella until smooth.
  • Add cooked pasta and chicken to the sauce, tossing to coat. Gradually add reserved pasta water until sauce reaches desired consistency.
  • Stir in parsley, taste, and adjust seasoning. Garnish with more parsley before serving.

Notes

For a richer flavor, use freshly grated cheese and high-quality cream.
Calories: 850kcal
Cost: $15
Course: Main Course
Cuisine: Italian
Keyword: Chicken, Creamy, Pasta

Peach cobbler is a beloved dessert that captures the essence of summer, evoking memories of warm days and family gatherings. This effortless recipe transforms fresh, ripe peaches into a decadent treat, topped with a flaky, buttery crust that is both satisfying and simple to prepare. In this guide, you will discover how to make the perfect peach cobbler, along with tips, variations, and storage methods to ensure you can enjoy this classic dessert any time of year.

Why You’ll Love This Recipe

  • Quick and Easy: With minimal prep time, this recipe is perfect for busy weeknights or last-minute gatherings.
  • Fresh Ingredients: Utilizing ripe peaches ensures a naturally sweet and flavorful filling that shines through.
  • Versatile Serving Options: Enjoy your peach cobbler warm with a scoop of vanilla ice cream or a dollop of whipped cream for a delightful contrast.
  • Customizable: This recipe is adaptable, allowing you to incorporate various spices, fruits, or toppings to suit your taste.
  • Perfect for Any Occasion: Whether it’s a summer barbecue or holiday gathering, this dessert is sure to please everyone.

Ingredients Breakdown

Here’s what you need to make your peach cobbler, along with some helpful substitutions:

  • Fresh Ripe Peaches: 5-6 cups, peeled and sliced. You can substitute with frozen peaches, but ensure they are fully thawed and drained.
  • Granulated Sugar: 1 2 cup, for sweetening the peach filling and the cobbler topping. Consider using brown sugar for a deeper flavor.
  • Ground Cinnamon: 1 teaspoon, adds warmth. Feel free to experiment with nutmeg or cardamom for different flavor profiles.
  • Ground Nutmeg: 1 4 teaspoon, enhances the sweetness of the peaches.
  • Lemon Juice: 1 tablespoon, brightens the flavors; you can substitute with lime juice if desired.
  • All-Purpose Flour: 1 cup, for the cobbler topping. Gluten-free flour blends can be used for a gluten-free version.
  • Baking Powder: 1 teaspoon, helps the topping rise and become fluffy.
  • Salt: 1 4 teaspoon, balances the sweetness.
  • Unsalted Butter: 6 tablespoons, chilled and cubed, for a rich, buttery crust.
  • Boiling Water: 1 4 cup, helps to create the perfect dough consistency.

Step-by-Step Instructions

Now that you have your ingredients ready, follow these simple steps to create your peach cobbler:

  • Prepare the Peaches: Preheat your oven to 375°F (190°C). In a large mixing bowl, gently toss the peeled and sliced peaches with sugar, ground cinnamon, ground nutmeg, and lemon juice. Let the mixture sit for about 15 minutes to allow the flavors to meld.
  • Layer the Peaches: Transfer the peach mixture to a 9×13-inch baking dish or an oven-safe skillet, spreading it out evenly.
  • Prepare the Cobbler Topping: In a separate mixing bowl, whisk together the all-purpose flour, granulated sugar, baking powder, and salt. Add the chilled and cubed butter, using a pastry cutter or your fingertips to work the butter into the dry ingredients until the mixture resembles coarse crumbs.
  • Add Boiling Water: Pour the boiling water over the crumbly mixture and stir until the dough comes together. It should be thick but slightly sticky.
  • Top the Peaches: Drop spoonfuls of the cobbler dough over the peach filling, covering it as evenly as possible.
  • Bake the Cobbler: Place the baking dish or skillet in the preheated oven and bake for approximately 30-35 minutes or until the cobbler topping is golden brown and the peach filling is bubbly.
  • Serve with Enchantment: Allow the Peach Cobbler to cool slightly before serving. Serve warm with a scoop of vanilla ice cream or a dollop of freshly whipped cream, and savor the enchantment of summer in every bite.

Expert Tips for Perfect Peach Cobbler

Side view of peach cobbler in a baking dish, showcasing its flaky crust and peach filling.
  • Use ripe peaches: Choose peaches that are firm but give slightly when pressed for the best flavor and texture.
  • Peel the peaches: Blanch peaches in boiling water for easy peeling; it enhances the texture and appearance of the cobbler.
  • Avoid overmixing: Mix the batter just until combined to keep the topping light and tender.
  • Experiment with spices: Try adding vanilla extract or almond extract for an extra layer of flavor.
  • Serve warm: For the best experience, serve the cobbler warm right out of the oven.
  • Pair wisely: This dessert pairs beautifully with a scoop of vanilla ice cream or fresh whipped cream for added indulgence.
  • Watch the baking time: Keep an eye on the cobbler to avoid overbaking, which can lead to a dry topping.
  • Consider a glaze: A light drizzle of honey or maple syrup over the top can add a delightful finishing touch.

Common Mistakes and Troubleshooting

Even the best recipes can go awry. Here are some common pitfalls and how to avoid them:

  • Too watery filling: If your peaches are very juicy, consider adding a tablespoon of cornstarch to the filling to thicken it.
  • Dry topping: Ensure not to overbake and check the consistency of your dough before adding it to the peaches.
  • Uneven cooking: Make sure to spread the topping evenly over the filling for consistent baking.

Delicious Variations

Feel free to get creative with your peach cobbler! Here are some variations to consider:

  • Bourbon Peach Cobbler: Add a splash of bourbon to the peach filling for an adult twist.
  • Berry Peach Cobbler: Mix in fresh or frozen berries like blueberries or raspberries for a mixed fruit cobbler.
  • Peach Crisp: Substitute the topping with a crumbly oat mixture for a delicious peach crisp.
  • Spiced Peach Cobbler: Incorporate spices like ginger or cardamom into the filling for added warmth and complexity.

Storage and Make-Ahead Instructions

To enjoy your peach cobbler at its best, consider the following storage tips:

  • Room Temperature: Store uneaten cobbler loosely covered at room temperature for up to 2 days.
  • Refrigeration: For longer storage, cover tightly with plastic wrap or aluminum foil and refrigerate for up to 5 days.
  • Freezing: You can freeze the cooled cobbler for up to 3 months. Wrap it tightly in plastic wrap and then in aluminum foil.
  • Reheating: To reheat, bake in a 350°F (175°C) oven until warmed through, about 15-20 minutes.

Frequently Asked Questions

  • Can I use frozen peaches? Yes, just make sure to thaw and drain them before using.
  • How do I know when the cobbler is done? The topping should be golden brown and the filling bubbly.
  • Can I make this ahead of time? Yes, you can prepare the filling and topping separately and assemble them just before baking.
  • What if I don’t have all-purpose flour? You can substitute with a gluten-free flour blend or almond flour.
  • Is this recipe suitable for a potluck? Absolutely! It’s easy to transport and always a crowd-pleaser.
  • Can I add nuts to the topping? Yes, chopped pecans or walnuts can add a nice crunch.
  • What’s the best way to serve cobbler? Serve warm with a scoop of vanilla ice cream or whipped cream for a delightful contrast.
  • How do I store leftovers? Store in the fridge for up to 5 days or freeze for up to 3 months.

Nutrition Tips and Dietary Adaptations

This peach cobbler can be modified to fit various dietary needs:

  • Lower Sugar: Reduce the amount of sugar in the filling or use a sugar substitute.
  • Gluten-Free: Use a gluten-free flour blend for the topping.
  • Dairy-Free: Substitute the butter with a plant-based alternative.

Equipment Recommendations

To ensure your peach cobbler turns out perfectly, consider using the following kitchen tools:

  • Mixing Bowls: A set of mixing bowls in various sizes will help you organize your ingredients.
  • Baking Dish: A 9×13-inch baking dish or an oven-safe skillet works best for this recipe.
  • Pastry Cutter: This tool makes it easy to incorporate butter into the flour for the topping.

Serving Suggestions

Enhance your peach cobbler experience with these serving ideas:

  • Ice Cream: A scoop of vanilla ice cream on top adds a creamy contrast to the warm filling.
  • Whipped Cream: Light, fluffy whipped cream can elevate the dish even further.
  • Cinnamon Sugar: Dust a sprinkle of cinnamon sugar over the top before serving for an extra touch of sweetness.

With this comprehensive guide, you’re now equipped to create the ultimate peach cobbler that will impress friends and family alike. Remember, cooking is about enjoying the process and savoring the results. Happy baking!

Peach Cobbler

Prep Time 20 minutes
Cook Time 35 minutes
Total Time 55 minutes
Servings 8 pieces
Calories 250
A classic summer dessert featuring sweet, ripe peaches topped with a buttery, crumbly cobbler crust.

Ingredients

Peaches

  • 5-6 cups fresh ripe peaches, peeled and sliced
  • 1/2 cup granulated sugar
  • 1 teaspoon ground cinnamon
  • 1/4 teaspoon ground nutmeg
  • 1 tablespoon lemon juice

Cobbler Topping

  • 1 cup all-purpose flour
  • 1/2 cup granulated sugar
  • 1 teaspoon baking powder
  • 1/4 teaspoon salt
  • 6 tablespoons unsalted butter, chilled and cubed
  • 1/4 cup boiling water

Instructions 

  • Preheat oven to 375°F (190°C). Toss peaches with sugar, cinnamon, nutmeg, and lemon juice; let sit 15 minutes.
  • Spread peach mixture in a 9x13-inch baking dish. Mix flour, sugar, baking powder, and salt; cut in butter until crumbly.
  • Pour boiling water into the crumb mixture and stir until combined. Drop spoonfuls over peaches.
  • Bake for 30-35 minutes until topping is golden and filling bubbles. Cool slightly before serving.

Notes

Serve warm with ice cream or whipped cream for extra delight.
Calories: 250kcal
Cost: $15
Course: Dessert
Cuisine: American
Keyword: cobbler, Peach

Welcome to dishlyx, where we believe that creating delicious meals should be straightforward and enjoyable. Today, we’re diving into the world of a timeless dessert: the classic apple crumble. This comforting dish combines tender, spiced apples with a crunchy topping, making it a perfect treat for any occasion. Let’s explore how to make this delightful dessert with minimal effort, ensuring that you achieve perfect results every time.

Why You’ll Love This Recipe

  • Simplicity: The straightforward steps make this apple crumble accessible, even for beginner cooks.
  • Versatility: This recipe allows for various apple types and toppings, so you can customize it to your taste.
  • Comforting flavors: The warm spices combined with sweet apples create a nostalgic and comforting dessert.
  • Quick preparation: With a prep time of just 20 minutes, you can have this dessert ready to bake in no time.
  • Perfect for sharing: This dish serves well at gatherings, making it a crowd-pleaser.

Key Ingredients in Classic Apple Crumble

Understanding your ingredients is crucial for achieving the best flavor and texture in your classic apple crumble. Here’s a detailed breakdown:

  • Apples: Use about 6 medium-sized apples, such as Granny Smith or Honeycrisp, for a balance of tartness and sweetness. These apples hold their shape well when baked.
  • Sugar: Granulated sugar enhances the sweetness of the apples, while light brown sugar in the topping adds a rich flavor.
  • Cinnamon: This spice is essential for creating that warm, comforting aroma associated with apple desserts.
  • Lemon juice: A tablespoon adds brightness and prevents the apples from browning.
  • All-purpose flour: This is the base for your crumble topping, providing structure.
  • Rolled oats: These add texture and chewiness to the topping.
  • Unsalted butter: Chilled and cubed, it creates a flaky texture in the topping.
  • Optional toppings: Consider serving with vanilla ice cream or whipped cream for an indulgent touch.

How to Make Classic Apple Crumble

Now that you have your ingredients ready, let’s walk through the steps to create your classic apple crumble.

Step-by-Step Instructions

  1. Preheat your oven to 350°F (175°C). Grease a 9-inch baking dish with butter to prevent sticking.
  2. Prepare the apple filling: In a large bowl, combine the sliced apples, granulated sugar, ground cinnamon, and lemon juice. Toss until the apples are evenly coated.
  3. Transfer the apple mixture to the greased baking dish, spreading it evenly.
  4. Make the crumble topping: In another bowl, combine the flour, rolled oats, light brown sugar, and salt. Add the cubed butter, using your fingers or a pastry cutter to mix until the mixture resembles coarse crumbs.
  5. Assemble: Evenly sprinkle the crumble topping over the apple mixture in the baking dish.
  6. Bake for 40-45 minutes, or until the topping is golden brown and the apples are tender.
  7. Cool for at least 10 minutes before serving. Enjoy warm with a scoop of vanilla ice cream or a dollop of whipped cream, if desired.

Pro Tips for Perfect Apple Crumble

Side view of a delicious apple crumble showcasing sliced apples and a crumbly topping.
  • Choose the right apples: Mixing sweet and tart apples enhances the flavor complexity.
  • Don’t overmix the topping: Aim for a crumbly texture, not a paste, for the perfect crunch.
  • Let it cool: Allowing the crumble to rest before serving helps the flavors meld and makes it easier to serve.
  • Use parchment paper: Lining your baking dish with parchment can make cleanup a breeze.
  • Experiment with spices: Add nutmeg or allspice for an extra layer of flavor.
  • Make it gluten-free: Substitute all-purpose flour with a gluten-free blend for a suitable option.
  • Adjust sweetness: Taste the apple mixture before baking; you can always adjust the sugar to your liking.
  • Double the recipe: For larger gatherings, simply double the ingredients and bake in a larger dish.

Common Mistakes and Troubleshooting

Even the best recipes can have hiccups. Here are common mistakes and how to avoid them:

  • Apples turned mushy: This can happen if you choose overly soft apples. Stick with firmer varieties for the best texture.
  • Too dry topping: If the topping is too dry, add a tad more butter or a splash of water to achieve the right consistency.
  • Uneven baking: Make sure to spread the apple mixture and crumble topping evenly in the baking dish for consistent baking.

Variations on Classic Apple Crumble

Feel free to get creative with your classic apple crumble. Here are some delicious variations:

  • Berry apple crumble: Add a cup of mixed berries (blueberries or raspberries) to the apple filling for an extra burst of flavor.
  • Nutty topping: Incorporate chopped nuts like pecans or almonds into the crumble for added crunch.
  • Caramel apple crumble: Drizzle caramel sauce over the apples before adding the crumble topping for a decadent twist.
  • Spiced apple crumble: Enhance the flavor with spices like ginger or cardamom for a unique taste profile.

How to Store and Make Ahead

Your apple crumble can be made ahead of time for convenience. Here’s how:

  • Storage: Keep leftovers in an airtight container in the refrigerator for up to 3 days. Reheat in the oven or microwave before serving.
  • Make-ahead option: Assemble the dish but do not bake it. Cover tightly and refrigerate for up to 24 hours before baking.

Frequently Asked Questions

Here are some common questions and answers to help you make the best apple crumble:

  • Can I use frozen apples?: Yes, but thaw and drain excess moisture before using to avoid a soggy filling.
  • What’s the best way to peel apples?: A vegetable peeler or a paring knife works well. Ensure to remove all skin for a smooth texture.
  • How do I know when it’s done baking?: The topping should be golden brown, and the apples should be tender when pierced with a fork.
  • Can I freeze apple crumble?: Absolutely! Freeze before baking for up to 3 months. Bake from frozen, adding an extra 10-15 minutes to the baking time.
  • What can I substitute for butter?: Coconut oil or vegan butter can be used as a dairy-free alternative.
  • How do I reheat leftovers?: Reheat in the oven at 350°F (175°C) until warmed through, about 15-20 minutes.
  • Can I add other fruits?: Yes, consider adding pears or peaches along with the apples for a delicious mix.
  • What’s the secret to a crunchy topping?: Ensure your butter is cold and mix until you achieve a crumbly texture.

Nutritional Tips and Dietary Adaptations

To make your apple crumble more nutritious, consider these adaptations:

  • Reduce sugar: Adjust the sugar to suit your taste or use natural sweeteners like honey or maple syrup.
  • Whole grain options: Use whole wheat flour and oats for added fiber and nutrients.
  • Increase fruit content: Add more fruit to the filling for a healthier dessert.

Equipment Recommendations

To achieve the best results, here are some kitchen tools you’ll need:

  • Mixing bowls: A set of different sizes will help with ingredient mixing and preparation.
  • Measuring cups and spoons: Accurate measurements are essential for baking.
  • 9-inch baking dish: A standard size for this recipe, ensuring even baking.
  • Pastry cutter: Useful for mixing the butter into the crumble topping effectively.

Serving Suggestions

To elevate your classic apple crumble experience, consider these serving ideas:

  • Pair with ice cream: A scoop of vanilla ice cream adds creaminess and balances the warm apples.
  • Top with whipped cream: A dollop of fresh whipped cream enhances the dish’s richness.
  • Garnish with nuts: Sprinkle chopped nuts on top for added texture and flavor.

Conclusion

Making a classic apple crumble is not only a rewarding experience but also a delightful treat that brings warmth and comfort to any gathering. With simple ingredients, easy steps, and endless variations, you can create a dessert that will impress your family and friends. So gather your ingredients, follow these guidelines, and enjoy the process of baking this timeless dish. Remember, cooking is about enjoying the journey as much as the destination. Happy baking!

Classic Apple Crumble

Prep Time 15 minutes
Cook Time 45 minutes
Total Time 1 hour
Servings 8 pieces
Calories 350
A warm, comforting dessert featuring tender apples topped with a crunchy crumble, perfect for cozy evenings.

Ingredients

Filling

  • 6 medium apples such as Granny Smith or Honeycrisp (peeled, cored, and sliced)
  • 2 tablespoons granulated sugar
  • 1 teaspoon ground cinnamon
  • 1 tablespoon lemon juice

Crumble Topping

  • 1 cup all-purpose flour
  • 1 1/2 cups rolled oats
  • 1 1/2 cups light brown sugar, packed
  • 1/2 teaspoon salt
  • 1/2 cup unsalted butter, chilled and cubed

For Serving

  • Vanilla ice cream or whipped cream (optional)

Instructions 

  • Preheat oven to 350°F (175°C). Grease a 9-inch baking dish.
  • Mix sliced apples, sugar, cinnamon, and lemon juice; spread in the dish.
  • Combine flour, oats, brown sugar, and salt; cut in butter until crumbly.
  • Sprinkle crumble over apples and bake for 40-45 minutes until golden.
  • Cool for 10 minutes, then serve warm with ice cream or whipped cream if desired.

Notes

Use cold butter for a crisp topping.
Calories: 350kcal
Cost: $12
Course: Dessert
Cuisine: American
Keyword: Apple

As summer rolls in, there’s nothing quite like a refreshing treat to cool down. Enter fruit smoothie popsicles, the perfect blend of flavor and nutrition. This simple recipe, made with orange juice, Greek yogurt, and organic frozen fruit, delivers a delightful burst of taste while being incredibly easy to prepare. With just a few ingredients, you can create a deliciously creamy and healthy snack that’s ideal for any occasion. Ready to dive into the world of homemade popsicles? Let’s get started!

Why You’ll Love This Recipe

This fruit smoothie popsicle recipe isn’t just about cooling down; it’s packed with benefits:

  • Quick and Easy: With minimal prep time, you can whip these popsicles together in just minutes.
  • Healthy Ingredients: Made with wholesome ingredients like Greek yogurt and frozen fruit, they’re a guilt-free treat.
  • Customizable: Easily adjust the flavors or ingredients according to your taste preferences or dietary needs.
  • Kid-Friendly: These popsicles are a great way to sneak in some nutrition for picky eaters.
  • Perfect for Meal Prepping: Make a batch ahead of time and have a refreshing snack ready whenever you need it.

Ingredients Breakdown

Here’s what you’ll need for the fruit smoothie popsicles:

  • 1 1/2 cups Simple Truth orange juice: This adds a vibrant citrus flavor and natural sweetness.
  • 3/4 cup Simple Truth vanilla Greek yogurt: Provides creaminess and protein, making the popsicles satisfying.
  • 2 1/2 cups Simple Truth Organic frozen fruit: A mix of berries or tropical fruits works beautifully for flavor.

Feel free to make substitutions based on what you have on hand:

  • Juice: Use any 100% fruit juice, like apple or pineapple, for a different flavor profile.
  • Yogurt: Dairy-free yogurt alternatives work for a vegan version.
  • Frozen fruit: Fresh fruit can be used but will require additional ice for the right texture.

Pro Tips for Perfect Popsicles

To ensure your fruit smoothie popsicles turn out perfectly, consider these expert tips:

  • Blend well: Make sure all ingredients are thoroughly combined for a smooth texture.
  • Fill molds properly: Leave a little space at the top of the molds to allow for expansion as they freeze.
  • Use warm water: Run warm water over the outside of the molds for easier removal.
  • Experiment with flavors: Try adding a splash of vanilla extract or honey for extra flavor.
  • Layering: For a colorful effect, layer different fruit purees in the molds before freezing.
  • Don’t rush the freeze: Allow at least 4-6 hours for the popsicles to set completely.
  • Mix textures: Consider adding chia seeds or shredded coconut for added texture and nutrition.
  • Try different molds: Use mini muffin tins or ice cube trays for bite-sized treats.

Common Mistakes and Troubleshooting

Juicy popsicles made from blended fruit, yogurt, and orange juice, displayed in a clear mold.

Here are some common pitfalls to avoid when making fruit smoothie popsicles:

  • Not blending enough: Ensure your mixture is completely smooth to avoid icy chunks.
  • Filling molds too full: Overfilling can lead to messy spills as the mixture expands.
  • Not freezing long enough: Under-frozen popsicles can break easily and won’t hold their shape.
  • Using too much liquid: This can make your popsicles too icy instead of creamy. Stick to the recommended ratios.

Delicious Variations to Try

Once you master the basic recipe, experiment with these variations to keep things exciting:

  • Tropical Twist: Substitute orange juice with coconut water and use tropical frozen fruits like mango and pineapple.
  • Berry Blast: Use a mix of strawberries, blueberries, and raspberries for a fruity explosion.
  • Chocolate Delight: Add a tablespoon of cocoa powder to your yogurt mixture for a chocolaty treat.
  • Nutty Banana: Blend in a ripe banana and a tablespoon of almond butter for a creamy nut-flavored popsicle.

Storage and Make-Ahead Instructions

These fruit smoothie popsicles are great for storing:

  • Freezing: Store popsicles in the molds for up to 6 months. For longer storage, remove them from the molds and place them in a freezer-safe bag.
  • Thawing: If you need to thaw them quickly, run under warm water for a few seconds.
  • Batch-making: Consider doubling the recipe to have a variety of flavors available throughout the week.

Comprehensive FAQ

Got questions about fruit smoothie popsicles? Here are some common inquiries:

  • Can I use fresh fruit instead of frozen? Yes, but you may need to add ice for the right texture.
  • How long do popsicles take to freeze? Typically, they need 4-6 hours to freeze completely.
  • Can I add sweeteners? Absolutely! Honey, agave, or maple syrup can enhance sweetness to your liking.
  • Are these popsicles healthy? Yes! They are made with wholesome ingredients, offering vitamins and protein.
  • Can I make these popsicles without molds? Yes, you can use paper cups or ice cube trays as alternatives.
  • How do I know when they are ready to eat? When they are firm to the touch and easily come out of the molds.
  • What’s the best way to serve them? Serve as a refreshing snack or dessert on a hot day, perfect for kids and adults alike.
  • Can I add vegetables? Yes! Spinach or kale can be blended in for added nutrition without overpowering the taste.

Nutritional Tips and Dietary Adaptations

To cater to various dietary needs, consider these adaptations:

  • Gluten-Free: All ingredients in this recipe are naturally gluten-free, making it suitable for those with gluten sensitivities.
  • Dairy-Free: Use almond milk yogurt or coconut yogurt as a substitute for Greek yogurt.
  • Low-Sugar Option: Choose unsweetened yogurt and limit the amount of juice for a lower sugar version.
  • Protein Boost: Add a scoop of protein powder to the mix for an extra nutritional punch.

Equipment Recommendations

Here’s what you’ll need to make your fruit smoothie popsicles:

  • Popsicle molds: Silicone molds are great for easy removal.
  • Blender: A high-powered blender will ensure a smooth consistency.
  • Measuring cups: For accurate ingredient measurements.
  • Spatula: A silicone spatula can help scrape down the blender for thorough mixing.

Serving Suggestions

These fruit smoothie popsicles can be enjoyed in various ways:

  • As a snack: Perfect for a mid-afternoon refreshment.
  • At parties: Serve them on a platter for a colorful and healthy dessert option.
  • With breakfast: Pair them with a smoothie bowl or yogurt.
  • For kids: A fun way to encourage kids to eat their fruits!

With this comprehensive guide, you’re ready to create your own fruit smoothie popsicles that not only satisfy your sweet tooth but also keep you cool during the summer heat. Enjoy experimenting with flavors and sharing these delightful treats with friends and family!

Fruit Smoothie Popsicles

Prep Time 10 minutes
Total Time 10 minutes
Servings 6 popsicles
Calories 80
Enjoy a refreshing and healthy treat with these homemade fruit smoothie popsicles, perfect for hot days or a quick snack.

Ingredients

Liquid

  • 1.5 cups Simple Truth orange juice
  • 0.75 cups Simple Truth vanilla Greek yogurt
  • 2.5 cups Simple Truth Organic frozen fruit

Instructions 

  • Combine all ingredients in a blender and blend until smooth.
  • Pour the mixture into popsicle molds.
  • Insert sticks and freeze until firm, about 4 hours.

Notes

For a creamier texture, use full-fat Greek yogurt.
Calories: 80kcal
Cost: $10
Course: Dessert
Keyword: Fruit, popsicles, Smoothie

Experience the Bliss of the Ocean Love Colada

Welcome to the ultimate guide for crafting the perfect Ocean Love Colada, a refreshing tropical drink that captures the essence of paradise in a glass. This recipe combines creamy coconut milk, sweet pineapple juice, and fresh banana, making it a delightful beverage for any occasion. Whether you’re lounging by the pool, throwing a summer party, or just seeking a taste of the tropics, this colada will transport you to a sunny beach. With a quick preparation time and minimal ingredients, you’ll be sipping bliss in no time.

Why You’ll Love This Recipe

Here are five compelling reasons that make the Ocean Love Colada a must-try:

  • Quick and Easy: With just a few simple ingredients, you can whip up this cocktail in under 10 minutes, making it perfect for last-minute gatherings.
  • Refreshing Flavor: The combination of coconut milk and pineapple juice creates a tropical taste that is both refreshing and satisfying.
  • Customizable: You can adapt the recipe to suit your taste, whether you prefer it sweeter or lighter.
  • Visually Stunning: The vibrant colors of this drink make it an eye-catching addition to any table, perfect for impressing guests.
  • Healthy Ingredients: This drink is not only delicious but packed with nutrients from the fruits, making it a guilt-free indulgence.

Ingredient Breakdown

To create your Ocean Love Colada, you’ll need the following ingredients:

  • 1 cup Coconut Milk: Adds creaminess and a rich flavor. You can substitute with coconut cream for a thicker consistency.
  • 1 cup Pineapple Juice: Provides a sweet and tangy base. Fresh pineapple juice is best, but store-bought works too.
  • 1 Banana: For natural sweetness and a smooth texture. Frozen bananas can also be used for a chilled drink.
  • 1 cup Ice Cubes: To chill the drink and give it a slushy texture.
  • Splash of Vanilla Extract: Enhances the flavors and adds depth. Feel free to omit for a lighter taste.

Steps to Make the Ocean Love Colada

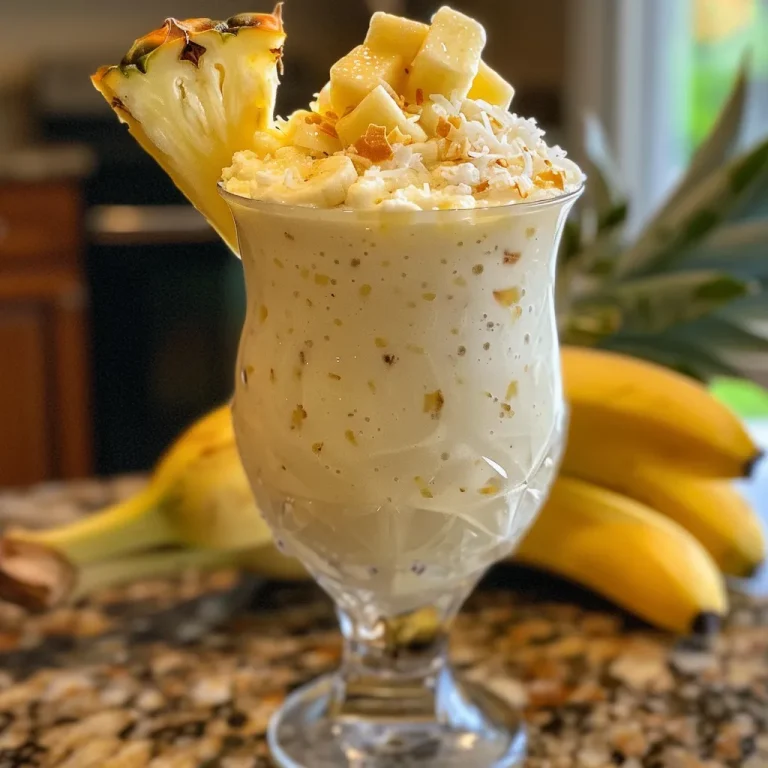
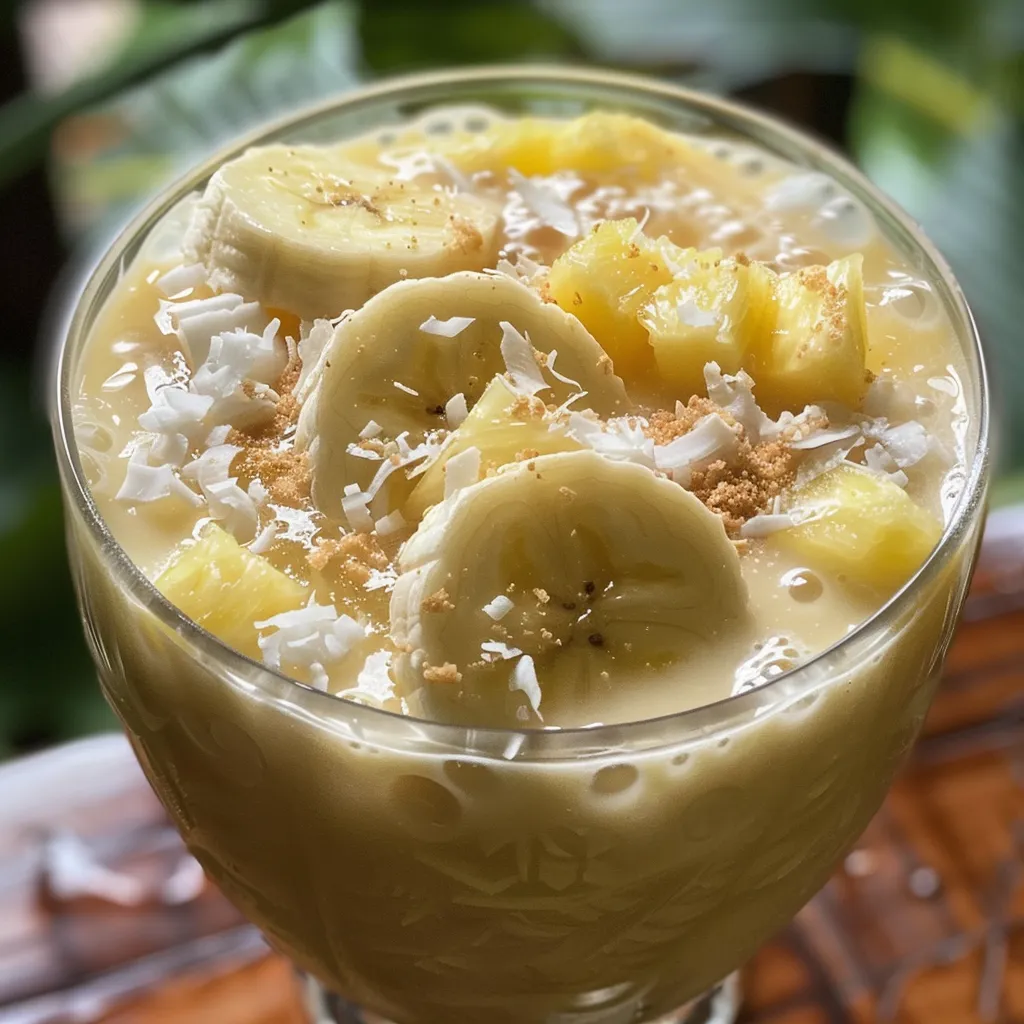
Side angle photo of a creamy Ocean Love Colada with fruit garnish.

Follow these simple steps to blend your Ocean Love Colada:

  • Gather Your Ingredients: Collect all the necessary ingredients listed above.
  • Prepare Your Blender: Ensure your blender is clean and ready for action.
  • Add Ingredients to Blender: Pour in the coconut milk, pineapple juice, banana, and ice. Don’t forget that splash of vanilla extract for extra flavor!
  • Blend Until Smooth: Secure the lid and blend on high until everything is smooth and creamy. You want a luscious texture!
  • Taste and Adjust: Give it a taste! If you prefer it sweeter, add a little honey or agave syrup. Blend again if you add anything.
  • Serve in a Fun Glass: Pour your Ocean Love Colada into a chilled glass. Feel free to use a fancy glass to make it extra special!
  • Garnish and Enjoy: Add a slice of pineapple or a cherry on top for a beautiful garnish. Grab a straw and sip away!

Expert Tips for the Perfect Colada

Enhance your Ocean Love Colada experience with these expert tips:

  • Optimal Blending: Blend for at least 30 seconds to achieve a silky smooth texture.
  • Adjust Sweetness: If your pineapple juice is unsweetened, you may need to add more sweetener.
  • Chill Ingredients: Use chilled coconut milk and pineapple juice for an extra refreshing drink.
  • Use Fresh Fruit: Fresh banana and pineapple provide the best flavor; avoid canned options if possible.
  • Experiment with Flavors: Try adding a splash of mango juice for a different tropical twist.
  • Garnishing: Fresh mint leaves or a lime wedge can elevate the presentation.
  • Alcohol Option: For an adult beverage, add a splash of rum or vodka to the blender.

Common Mistakes and Troubleshooting

Here are some common pitfalls and how to avoid them:

  • Too Thick: If your colada is too thick, add a bit more coconut milk or pineapple juice until you reach your desired consistency.
  • Too Sweet: If the drink is too sweet, balance it out with a splash of lime juice.
  • Pulp Issues: If you dislike pulp, consider straining the pineapple juice or blending for longer.
  • Not Cold Enough: Ensure your ice is fresh and not melted; consider using frozen fruit instead of ice for a colder drink.

Variations of the Ocean Love Colada

Get creative with these variations:

  • Berry Bliss Colada: Replace pineapple juice with mixed berry juice for a fruity twist.
  • Mango Love Colada: Substitute half the pineapple juice with mango puree for a tropical fusion.
  • Green Love Colada: Add a handful of spinach or kale for a nutritious green boost without compromising flavor.
  • Spicy Colada: Add a pinch of cayenne pepper or jalapeño for a spicy kick that complements the sweetness.

Storage and Make-Ahead Instructions

For best results, enjoy your Ocean Love Colada fresh, but here are some storage tips:

  • Refrigeration: Store any leftovers in an airtight container in the fridge for up to 24 hours. Stir before serving.
  • Freezing: You can freeze the blended colada in ice cube trays for future use in smoothies.
  • Make-Ahead: Prepare the ingredients ahead of time and store them separately; blend when ready to serve.

Comprehensive FAQ

Here are the answers to some common questions about the Ocean Love Colada:

  • Can I make this Ocean Love Colada recipe without alcohol? Absolutely! The recipe is delicious without alcohol and perfect for all ages.
  • Why won’t my blue and white layers separate properly in the glass? Ensure to pour gently and use cold ingredients to help maintain the separation.
  • Can I substitute coconut milk for the coconut cream in this recipe? Yes, but the texture will be thinner; consider using both for creaminess.
  • Is it possible to use frozen fruit? Yes! Frozen bananas or pineapple can provide a thicker consistency.
  • How can I make this recipe vegan? The recipe is already vegan-friendly as it contains no animal products.
  • How many servings does this recipe make? This recipe serves approximately two generous portions.
  • Can I add protein powder to this recipe? Yes, adding a scoop of protein powder can be a great way to enhance its nutritional value.
  • What is the best way to garnish this drink? Fresh fruit slices, edible flowers, or a sprig of mint make great garnishes.

Nutritional Tips and Dietary Adaptations

The Ocean Love Colada can be tailored to fit various dietary needs:

  • Low-Calorie Option: Use light coconut milk and reduce the amount of sweetener.
  • High-Protein Version: Add Greek yogurt or protein powder for an extra protein boost.
  • Dairy-Free Option: Ensure to use coconut milk or any other non-dairy milk of choice.
  • Low-Sugar Alternative: Use unsweetened coconut milk and skip the added sugars.

Equipment Recommendations

To make the perfect Ocean Love Colada, here’s what you’ll need:

  • High-Powered Blender: Essential for achieving a smooth and creamy texture.
  • Measuring Cups: For accurate ingredient measurements.
  • Chilled Glasses: Enhance the drinking experience with pre-chilled cups.
  • Straws: For an authentic cocktail feel.

Serving Suggestions

Pair your Ocean Love Colada with these delightful options:

  • Light Appetizers: Serve with shrimp cocktail or tropical fruit skewers for a refreshing combination.
  • Sweet Treats: Pair with coconut macaroons or pineapple upside-down cake for a dessert touch.
  • Summer Salads: A light green salad with citrus vinaigrette complements the drink beautifully.

In conclusion, the Ocean Love Colada is not just a drink; it’s an experience. With its vibrant flavors, beautiful presentation, and the ability to adapt to any preference, it’s bound to become a favorite. So gather your ingredients, follow this guide, and enjoy a taste of the tropics today. Cheers to delicious adventures in your kitchen!

Ocean Love Colada

Prep Time 5 minutes
Total Time 5 minutes
Servings 2 glasses
Calories 250
A refreshing tropical drink blending coconut milk, pineapple juice, and banana for a delicious escape in a glass.

Ingredients

Liquid Ingredients

  • 1 cup Coconut Milk
  • 1 cup Pineapple Juice
  • 1 piece Banana
  • 1 cup Ice Cubes
  • splash Vanilla Extract

Instructions 

  • Gather your ingredients and add coconut milk, pineapple juice, banana, ice, and vanilla extract to the blender.
  • Blend until smooth and creamy.
  • Taste and adjust sweetness if desired, then blend again.
  • Pour into a chilled glass and garnish with a pineapple slice or cherry.
  • Serve immediately with a straw and enjoy!

Notes

For a sweeter taste, add honey or agave syrup before blending.
Calories: 250kcal
Cost: $10
Course: Beverage
Cuisine: Tropical
Keyword: banana, coconut, Pineapple

Unlock the Flavor: Discover the Ultimate Healthy Ranch Chicken Salad

Welcome to a culinary adventure that transforms your lunch into a delightful experience! Our Healthy Ranch Chicken Salad is not just a meal; it’s a celebration of flavors, freshness, and nutrition. Packed with protein, vibrant veggies, and a homemade ranch dressing that elevates every bite, this salad is perfect for busy schedules, meal prep, or a quick dinner option. Let’s dive into why this dish is a must-try and how you can whip it up with ease.

Why You’ll Love This Recipe

  • Flavor Explosion: Each ingredient complements the others, creating a vibrant mix that tantalizes your taste buds.
  • Healthy and Filling: With lean chicken and nutrient-rich veggies, this salad is satisfying and nourishing.
  • Quick and Easy: Prep time is minimal—perfect for those busy weeknights or lunch meal prep.
  • Homemade Goodness: Say goodbye to store-bought dressings; our ranch dressing is fresh, creamy, and full of real flavor.
  • Versatile Ingredients: Customize it with your favorite vegetables or proteins to keep things interesting!

Ingredients Breakdown

To create this delicious ranch chicken salad, gather the following ingredients:

  • 1 pound Chicken Breast: Cut into small bite-sized pieces. You can substitute with chicken thighs or even shrimp if you prefer.
  • 1 tablespoon Olive Oil: For cooking the chicken; feel free to use coconut oil for a different flavor.
  • 4 Cups Packed Greens: Your choice of spinach, romaine, or mixed greens for a fresh base.
  • ¼ Small Red Onion: Thinly sliced for a bit of zing.
  • ¾ Cup Cherry or Grape Tomatoes: Halved for sweetness and color.
  • ½ English Cucumber: Sliced or chopped for crunch.
  • 1 Avocado: Sliced for creaminess and healthy fats.
  • ⅓ Cup Corn: Fresh or canned, adds a pop of sweetness.

Homemade Ranch Dressing Ingredients

A detailed side view of a Healthy Ranch Chicken Salad featuring diced chicken, fresh vegetables, and a creamy dressing.

Your salad isn’t complete without the dressing! Here’s what you’ll need:

  • 1 Cup Plain Non-Fat Greek Yogurt: The base for a creamy dressing.
  • 2-3 Cloves Garlic: Minced for flavor.
  • 2 teaspoons Lemon Juice: For a zesty kick.
  • 2 tablespoons Onion: Finely chopped for extra flavor.
  • 1 tablespoon Dijon Mustard: Adds depth.
  • 2 tablespoons Fresh Chives: Finely chopped for freshness.
  • 1 tablespoon Fresh Parsley: Finely chopped for a burst of color.
  • 1 tablespoon Fresh Dill: Adds an aromatic touch.
  • Sea Salt and Pepper: To taste.

How to Make Your Healthy Ranch Chicken Salad

Let’s get cooking! Follow these simple steps:

  • Step 1: Make the Ranch Dressing: Combine all dressing ingredients in a jar, seal it, and shake until emulsified.
  • Step 2: Marinate the Chicken: Pour about ⅓ of the dressing over the chicken pieces and let it marinate for at least 15 minutes. Refrigerate the leftover dressing.
  • Step 3: Cook the Chicken: Heat olive oil in a large non-stick pan over medium heat. Add the marinated chicken in a single layer. Cook until golden brown and cooked through, about 5-7 minutes.
  • Step 4: Assemble the Salad: In a large bowl, add your greens, red onion, tomatoes, cucumber, avocado, and corn. Top with cooked chicken.
  • Step 5: Toss and Enjoy: Just before serving, drizzle with the remaining dressing and toss gently to combine.

Pro Tips for Perfecting Your Salad

  • Prep Ahead: Make the dressing a day in advance and store it in the fridge for enhanced flavor.
  • Customize Your Veggies: Add bell peppers, carrots, or any seasonal veggies you have on hand.
  • Protein Variations: Substitute chicken with grilled shrimp, tofu, or chickpeas for a vegetarian option.
  • Serve Chilled: For the best experience, let your salad chill in the fridge for 30 minutes before serving.
  • Extra Crunch: Add nuts or seeds like sunflower seeds or walnuts for an added crunch.
  • Flavor Boost: A sprinkle of Parmesan cheese on top can elevate the flavor profile.

Common Mistakes and Troubleshooting

  • Overcooking Chicken: Ensure not to dry out the chicken; cook until just golden and juicy.
  • Too Thick Dressing: If the dressing is too thick, add a splash of milk or water to reach your desired consistency.
  • Balancing Flavors: Taste and adjust salt and lemon juice to achieve the right flavor balance.

Variations to Try

  • Southwestern Twist: Add black beans, corn, and avocado, with a chipotle ranch dressing.
  • Asian-Inspired: Use sesame oil instead of olive oil, and toss in some edamame and sliced almonds.
  • Greek Style: Incorporate feta cheese, Kalamata olives, and a drizzle of balsamic vinegar.
  • Fruit-Infused: Add sliced apples or pears for a sweet contrast to the savory elements.

Storage and Make-Ahead Instructions

This salad can be made ahead of time! Store the salad and dressing separately in airtight containers:

  • In the Fridge: The salad will stay fresh for up to 3 days. Keep the dressing in the fridge for up to a week.
  • Make Ahead: Prepare the chicken and dressing, and assemble the salad just before serving to keep it crisp.

Frequently Asked Questions

  • Can I use frozen chicken? Yes, just ensure to thaw and marinate it properly before cooking.
  • Is this salad suitable for meal prep? Absolutely! It stores well and is great for lunches throughout the week.
  • Can I use a different dressing? Yes! Feel free to substitute with any dressing of your choice.
  • How can I make it dairy-free? Use a dairy-free yogurt alternative for the dressing.
  • What can I add for more protein? Consider adding nuts, seeds, or legumes for an extra protein boost.
  • How do I keep avocados from browning? Squeeze lemon juice on the slices to prevent oxidation.
  • Can I use different greens? Yes, any greens you prefer will work, such as kale or arugula.
  • How do I make it gluten-free? All ingredients listed are gluten-free, so you’re good to go!

Nutrition Tips and Dietary Adaptations

This Healthy Ranch Chicken Salad is not only delicious but also nutritious:

  • Low Calorie: A perfect option for those on a calorie deficit.
  • High Protein: Ideal for muscle recovery post-workout.
  • Gluten-Free: Naturally gluten-free, suitable for various dietary needs.

Essential Equipment

To create this salad, you will need:

  • Large Mixing Bowl: For assembling the salad.
  • Non-Stick Pan: For cooking the chicken without sticking.
  • Jar with Lid: For shaking and storing your homemade ranch dressing.
  • Knife and Cutting Board: To chop up all your fresh ingredients.

Serving Suggestions

This salad can be enjoyed on its own or paired with:

  • Whole Grain Bread: For a complete meal.
  • Quinoa or Brown Rice: For added fiber and nutrients.
  • Smoothie: A refreshing smoothie can complement the meal nicely.

Conclusion

In conclusion, our Ultimate Healthy Ranch Chicken Salad is a versatile, nutrient-packed dish that’s easy to prepare and absolutely delicious. With the ability to customize and make ahead, it fits perfectly into any busy lifestyle. So grab your ingredients and get ready to enjoy a salad that’s both satisfying and full of flavor!

Healthy Ranch Chicken Salad

Prep Time 10 minutes
Cook Time 10 minutes
Total Time 20 minutes
Servings 4 servings
Calories 350
A light and nutritious chicken salad with a homemade ranch dressing, perfect for a healthy meal.

Ingredients

Protein

  • 1 pound Chicken Breast (cut into small bite-sized pieces)
  • 1 tablespoon Olive Oil

Greens

  • 4 cups Packed Greens of choice
  • ¼ small Red Onion (sliced)
  • ¾ cup Cherry or grape tomatoes (halved)
  • ½ English Cucumber sliced or chopped
  • 1 avocado sliced
  • cup Corn (fresh or canned)

Dressing

  • 1 cup Plain non-fat Greek yogurt
  • 2-3 cloves Garlic (minced)
  • 2 teaspoons Lemon Juice
  • 2 tablespoons Onion (finely chopped)
  • 1 tablespoon Dijon Mustard
  • 2 tablespoons Fresh chives (finely chopped)
  • 1 tablespoon Fresh parsley (finely chopped)
  • 1 tablespoon Fresh dill (finely chopped)

Seasoning

  • to taste Sea salt and pepper

Instructions 

  • Make the ranch dressing by adding all dressing ingredients to a jar, shake to emulsify.
  • Marinate 1/3 of the dressing with the chicken for at least 15 minutes.
  • Cook the chicken in a heated oil until golden and cooked through, about 5-7 minutes.
  • Assemble the salad by adding greens to a large bowl, top with remaining ingredients, then toss with the marinated dressing before serving.

Notes

Adjust seasoning to taste and enjoy!
Calories: 350kcal
Cost: $15
Course: Salad
Keyword: Chicken, Healthy, Salad