Author

robert

Browsing

Welcome to the world of delightful desserts! If you’re looking to impress during special occasions or add a touch of elegance to your holiday gatherings, this Red Velvet Wreath Cake is the perfect choice. With its rich flavor, stunning presentation, and creamy frosting, this cake is designed to be both a visual and culinary showstopper. Let’s dive into why this recipe is a must-try and how you can create it effortlessly in your own kitchen.

Why You’ll Love This Recipe

This velvet wreath cake is not just another dessert; it’s an experience. Here are five reasons why you’ll adore making and serving it:

  • Stunning Presentation: The wreath shape and vibrant red color make it a festive centerpiece for any table.
  • Rich Flavor: This cake combines the classic taste of red velvet with a luscious cream cheese frosting that melts in your mouth.
  • Easy to Make: With straightforward steps, even beginner bakers can create a professional-looking cake.
  • Versatile for Any Occasion: Perfect for holidays, birthdays, or any celebration, this cake adapts to your needs.
  • Make-Ahead Friendly: You can bake and frost this cake in advance, saving you time on the day of your event.

Ingredient Breakdown

Understanding the ingredients is crucial for achieving the best results. Here’s what you’ll need:

  • All-Purpose Flour: Provides structure. You can substitute with cake flour for a lighter texture.
  • Unsweetened Cocoa Powder: Adds depth of flavor. Dark cocoa enhances the taste.
  • Baking Soda: A key leavening agent for that perfect rise.
  • Granulated Sugar: Sweetens the batter; brown sugar can add moisture and richness.
  • Vegetable Oil: Keeps the cake moist. You can use melted butter for a richer flavor.
  • Buttermilk: Adds acidity for tenderness. Substitute with milk mixed with vinegar or yogurt.
  • Red Food Coloring: Gives the cake its signature color; you can adjust the amount for a deeper hue.
  • Eggs: Bind the ingredients together, providing structure.
  • Cream Cheese and Butter: Essential for the creamy frosting; ensure both are at room temperature for easy mixing.

Step-by-Step Instructions

Follow these straightforward steps to create your Red Velvet Wreath Cake:

  • Step 1: Preheat the oven to 350°F (175°C) and grease a bundt pan.
  • Step 2: In a medium bowl, sift together 2 1/2 cups all-purpose flour, 1/4 cup cocoa powder, 1 tsp baking soda, and a pinch of salt.
  • Step 3: In a large bowl, mix 1 1/2 cups granulated sugar with 1 cup vegetable oil. Add 2 large eggs, one at a time, mixing well after each addition.
  • Step 4: Stir in 1 cup buttermilk, 1 tsp vanilla extract, 1 tsp white vinegar, and 2 tbsp red food coloring until well combined.
  • Step 5: Gradually add the dry ingredients to the wet mixture until just combined—avoid overmixing.
  • Step 6: Pour the batter into the prepared bundt pan and bake for 45-50 minutes or until a toothpick inserted comes out clean.
  • Step 7: Cool the cake in the pan for 10-15 minutes before inverting it onto a wire rack to cool completely.
  • Step 8: For the frosting, beat 8 oz cream cheese and 1/2 cup softened butter until smooth. Gradually add 3 1/2 cups powdered sugar and mix in 1 tsp vanilla and a pinch of salt.
  • Step 9: Use a piping bag to decorate the cooled cake with frosting, then add fresh cranberries and rosemary for a festive touch. Dust with powdered sugar before serving.

Pro Tips for Success

A side view of a Red Velvet Wreath Cake showcasing its layers and decorative elements.

Here are some expert insights to help you perfect your Red Velvet Wreath Cake:

  • Room Temperature Ingredients: Ensure your cream cheese and butter are at room temperature for a smooth frosting.
  • Don’t Overmix: Overmixing can lead to a dense cake. Mix until just combined.
  • Cool Completely: Allow the cake to cool fully before frosting to prevent melting.
  • Use Quality Ingredients: High-quality cocoa powder and food coloring significantly enhance flavor and appearance.
  • Experiment with Flavor: Add a hint of espresso powder to the batter for an intriguing twist.
  • Texture Check: The cake should spring back when touched; if it leaves an indentation, it needs more baking time.
  • Frosting Variations: Consider mixing in a bit of almond extract for a unique flavor in your cream cheese frosting.
  • Presentation Matters: Place the cake on a decorative platter and garnish creatively for the best visual impact.

Common Mistakes and Troubleshooting

Here are some typical pitfalls to avoid when making this cake:

  • Dry Cake: Overbaking can lead to dryness. Always check for doneness a few minutes before the timer goes off.
  • Dense Texture: Overmixing can cause a heavy cake. Mix until the dry ingredients are just incorporated.
  • Frosting Issues: If your frosting is too thick, add a splash of milk to adjust the consistency.
  • Color Issues: If your red cake isn’t vibrant, consider a higher quality food coloring or adjust the amount used.

Variations to Explore

Get creative with these variations of the classic Red Velvet Wreath Cake:

  • Chocolate Chip Velvet Wreath: Fold in mini chocolate chips to the batter for added texture and sweetness.
  • Layered Cake: Bake in round pans instead of a bundt pan to create a layered cake; stack with frosting in between.
  • Red Velvet Cupcakes: Transform the batter into cupcakes for individual servings topped with cream cheese frosting.
  • Nutty Delight: Incorporate chopped walnuts or pecans into the batter for added crunch.

Storage and Make-Ahead Instructions

This cake can be made ahead of time and stored properly:

  • Storing: Keep any uneaten cake in an airtight container in the refrigerator for up to 5 days.
  • Make Ahead: Bake the cake and store it unfrosted for up to 2 days at room temperature or up to a week in the refrigerator.
  • Frosting Storage: Store leftover frosting in the fridge in an airtight container for up to a week; re-whip before use.

Comprehensive FAQ

Here are some common questions about the Red Velvet Wreath Cake:

  • Can I use whole wheat flour? Yes, but it may alter the texture slightly; consider half all-purpose and half whole wheat for balance.
  • What can I substitute for buttermilk? You can mix 1 cup of milk with 1 tablespoon of vinegar or lemon juice and let it sit for 5 minutes.
  • Can I freeze this cake? Yes, freeze the unfrosted cake wrapped tightly in plastic wrap for up to 3 months.
  • How do I achieve a deeper red color? Use gel food coloring for a more vibrant color than liquid food coloring.
  • Is there a gluten-free option? Yes, use a gluten-free all-purpose flour blend in place of regular flour.
  • Can I add flavors to the frosting? Absolutely! A touch of vanilla, almond, or even orange zest can enhance the frosting.
  • What’s the best way to decorate the cake? Use fresh seasonal fruits and edible flowers for a beautiful and fresh appearance.
  • How long should I let the cake cool? Allow it to cool in the pan for 10-15 minutes, then cool completely on a wire rack before frosting.

Nutrition Tips and Dietary Adaptations

If you’re looking to make this cake healthier or accommodate dietary restrictions, consider these tips:

  • Reduce Sugar: You can cut the granulated sugar by 25% without affecting the taste significantly.
  • Lower-Fat Options: Substitute oil with applesauce for a lighter cake while maintaining moisture.
  • Dairy-Free Versions: Replace butter and cream cheese with vegan alternatives available on the market.
  • Low-Carb Options: Use sugar substitutes like erythritol or monk fruit in place of sugar for a healthier version.

Equipment Recommendations

Here’s what you’ll need to successfully create your Red Velvet Wreath Cake:

  • Bundt Pan: A high-quality bundt pan ensures even baking and easy release.
  • Mixing Bowls: A set of various sizes for mixing wet and dry ingredients.
  • Electric Mixer: For easy and efficient mixing of batter and frosting.
  • Piping Bags: To decorate the cake beautifully with frosting.

Serving Suggestions

Pair your Red Velvet Wreath Cake with these delightful accompaniments:

  • Vanilla Ice Cream: A scoop of vanilla ice cream complements the rich flavors beautifully.
  • Coffee or Tea: Serve with a cup of coffee or tea for a delightful afternoon treat.
  • Fresh Berries: Garnish with fresh berries for a refreshing contrast to the sweet cake.
  • Whipped Cream: A light dollop of whipped cream adds an airy touch to each slice.

In conclusion, the Red Velvet Wreath Cake is not just a dessert; it’s a celebration. With its rich flavors, stunning appearance, and versatility, it is sure to become a favorite in your baking repertoire. Remember, great meals are a result of smart cooking techniques and the right ingredients. Enjoy baking and celebrating with this beautiful cake!

Red Velvet Wreath Cake

Prep Time 30 minutes
Cook Time 50 minutes
Total Time 1 hour 20 minutes
Servings 12 pieces
Calories 450
A stunning red velvet cake decorated with cranberries and rosemary, perfect for festive occasions.

Ingredients

Baking ingredients

  • 0.25 cup unsweetened cocoa powder
  • 1 tsp baking soda
  • 2 large eggs
  • 1 cup buttermilk
  • 1 tsp vanilla extract
  • 1 tsp white vinegar
  • 2.5 cups all-purpose flour
  • 1.5 cups granulated sugar
  • 1 cup vegetable oil
  • 2 tbsp red food coloring

Frosting ingredients

  • 3.5 cups powdered sugar
  • 0.5 cup unsalted butter, softened
  • 8 oz cream cheese, softened
  • Pinch salt

Decorations

  • to taste fresh cranberries (for decoration)
  • to taste rosemary sprigs (for decoration)
  • for dusting powdered sugar (for dusting)

Instructions 

  • Preheat oven to 350°F (175°C), grease and flour a bundt pan.
  • Mix dry ingredients; in another bowl, beat sugar and oil, add eggs, buttermilk, vanilla, vinegar, and food coloring. Combine with dry ingredients.
  • Pour batter into pan and bake for 45-50 minutes. Cool before inverting.
  • Beat cream cheese and butter, add powdered sugar, vanilla, and salt to make frosting.
  • Decorate cooled cake with frosting, cranberries, rosemary, and dust with powdered sugar.

Notes

Ensure the cake is fully cooled before decorating to prevent melting the frosting.
Calories: 450kcal
Cost: $15
Course: Dessert
Cuisine: American
Keyword: red velvet

Unlock the Secrets to Perfect Roasted Vegetables with Creamy Tahini-Yogurt Dressing

Welcome to a culinary adventure where wholesome ingredients meet mouthwatering flavors. In this comprehensive guide, you’ll discover how to create effortless roasted vegetables topped with a luscious creamy tahini-yogurt dressing. This recipe is designed to fit seamlessly into your busy life, delivering not only delicious results but also a nutritious meal that’s perfect for weeknight dinners or meal preps. Let’s dive into the world of roasted vegetables!

Why You’ll Love This Recipe

  • Quick and Easy Prep: With minimal prep time and straightforward instructions, you can have this delicious dish ready in no time.
  • Flavorful and Wholesome: The combination of spices and tahini yogurt dressing enhances the natural sweetness of the vegetables, creating a colorful and vibrant dish.
  • Customizable Ingredients: Whether you have a pantry full of veggies or specific dietary needs, this recipe is adaptable with various ingredient substitutions.
  • Health Benefits: Packed with fiber, vitamins, and healthy fats, roasted vegetables support a balanced diet and promote overall health.
  • Perfect for Meal Prep: Store leftovers in the fridge for easy lunches or quick dinners throughout the week.

What You’ll Need for Roasted Vegetables

Here’s a detailed breakdown of the ingredients you’ll need to create this delicious dish, along with some helpful substitutions:

  • Chickpeas: 400 g (1 can, drained and rinsed) – a great source of protein; you can swap for black beans or lentils.
  • Onion: 1 large, sliced into wedges – adds sweetness; shallots or red onions work well too.
  • Sweet Potatoes: 2 medium, cubed – for a hint of sweetness; regular potatoes or butternut squash can be substituted.
  • Broccoli Florets: 150 g – provides crunch and nutrients; cauliflower or Brussels sprouts are excellent alternatives.
  • Cauliflower Florets: 150 g – adds texture; consider using zucchini or bell peppers for variation.
  • Olive Oil: 2-3 tbsp for roasting (plus 2 tbsp for the dressing) – enhances flavor; avocado oil can be a suitable substitute.
  • Paprika: 2 tsp – adds a smoky flavor; cayenne pepper can give a spicy kick.
  • Cumin: 2 tsp – contributes an earthy note; coriander can be used instead.
  • Salt and Pepper: to taste – essential for enhancing flavors.
  • Chili Flakes: optional, for heat.

Making the Creamy Tahini-Yogurt Dressing

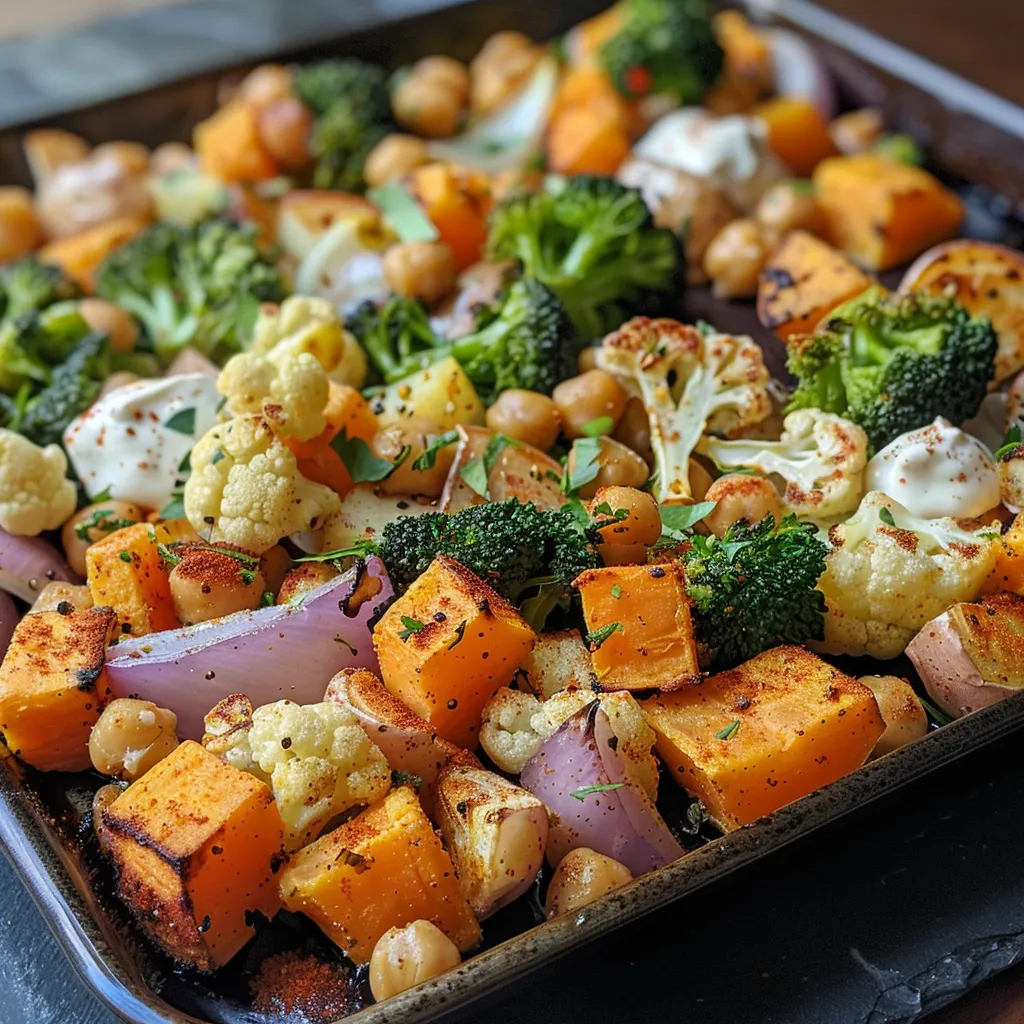
A delicious arrangement of roasted veggies with a smooth dressing, showcasing various textures and colors.

Now, let’s whip up the creamy dressing that will elevate your roasted veggies:

  • Tahini: 2 tbsp – a nutty sesame paste; sunflower seed butter works as a nut-free alternative.
  • Greek or Vegan Yogurt: 120 g – creamy base; coconut yogurt can be a great vegan substitute.
  • Lemon Juice: 2 tbsp – adds brightness; apple cider vinegar can also work.
  • Garlic: 1 clove, minced – for depth of flavor; garlic powder can be a quick alternative.
  • Mustard: 1 tsp – adds tang; use Dijon or yellow mustard as per preference.
  • Agave or Honey: 1 tsp (if not vegan) – for a hint of sweetness; maple syrup is a good vegan option.

How to Prepare Roasted Vegetables

Follow these simple steps to create perfectly roasted vegetables:

  1. Preheat your oven to 220°C (425°F).
  2. In a large bowl, combine all your chopped vegetables with olive oil, paprika, cumin, salt, and pepper. Toss until evenly coated.
  3. Spread the seasoned vegetables in a single layer on a baking sheet lined with parchment paper. This ensures they roast rather than steam.
  4. Roast in the oven for about 25-30 minutes, or until golden brown and tender. Stir halfway through for even cooking.

Pro Tips for Perfect Roasted Vegetables

  • Cut Uniformly: Ensure all vegetables are cut into similar sizes for even cooking.
  • Don’t Overcrowd the Pan: Give your vegetables space to roast properly; overcrowding leads to steaming.
  • Experiment with Spices: Feel free to add your favorite herbs or spices for a personal touch.
  • Use Fresh Ingredients: Fresh vegetables yield better taste and texture than frozen.
  • Try Different Cooking Times: For different vegetables, adjust the roasting times accordingly; softer veggies may need less time.
  • Check for Doneness: Use a fork to test if the veggies are tender; they should caramelize on the edges.
  • Season After Roasting: Add a sprinkle of salt after roasting for an extra flavor boost.
  • Garnish Smartly: Top with fresh herbs or toasted seeds for added texture and flavor.

Common Mistakes and Troubleshooting

Here are some pitfalls to avoid when making your roasted vegetables:

  • Too Much Oil: While oil adds flavor, too much can make vegetables soggy instead of crispy.
  • Not Preheating the Oven: Always preheat to ensure immediate roasting; this creates a better texture.
  • Skipping the Toss: Not tossing the veggies halfway through can lead to uneven cooking.
  • Ignoring the Sizing: If pieces are too large or small, they will cook at different rates.

Delicious Variations to Try

Switch up the flavor profile of your dish with these creative variations:

  • Mexican-Inspired: Add corn, bell peppers, and use taco seasoning for a fiesta twist.
  • Italian Style: Mix in zucchini, eggplant, and season with Italian herbs like oregano and basil.
  • Middle Eastern Flair: Incorporate eggplant and serve with a sprinkle of sumac for a unique flavor.
  • Asian Fusion: Use bok choy, snap peas, and season with soy sauce and ginger for a savory touch.

Storage and Make-Ahead Instructions

Want to save time? Here’s how to store and reheat your roasted vegetables:

  • Refrigeration: Store leftovers in an airtight container in the fridge for up to 3 days.
  • Freezing: Allow the vegetables to cool completely, then freeze in a single layer, followed by transferring to a freezer bag.
  • Reheating: To reheat, pop them back in the oven at 180°C (350°F) for about 10-15 minutes until warmed through.

Comprehensive FAQ

Here are some frequently asked questions that can help you perfect this recipe:

  • Can I use any type of yogurt for the dressing?
    Yes, both Greek yogurt and dairy-free options like coconut yogurt work well.
  • How do I make this dish gluten-free?
    Ensure your tahini and yogurt are gluten-free; this recipe is naturally gluten-free.
  • Can I roast vegetables ahead of time?
    Absolutely! Roast and store them in the fridge for easy reheating.
  • What’s the best way to serve this dish?
    Serve warm or at room temperature, topped with the tahini-yogurt dressing and fresh herbs.
  • Can I add protein to this dish?
    Yes, consider adding grilled chicken, shrimp, or tofu for a complete meal.
  • How do I keep leftovers fresh?
    Store in airtight containers and consume within three days for best quality.
  • What if my vegetables are soggy?
    Make sure they are spaced out on the baking sheet and check your oven temperature.
  • Can I substitute tahini?
    Yes, sunflower seed butter or almond butter can be used as a substitute.

Nutritional Insights and Dietary Adaptations

This recipe is not only delicious but also offers several health benefits:

  • High in Fiber: The combination of vegetables and chickpeas provides a good source of dietary fiber.
  • Rich in Vitamins: Roasted vegetables deliver essential vitamins and minerals, promoting overall health.
  • Protein-Packed: Chickpeas offer a plant-based protein source, making this meal satisfying.
  • Low in Calories: This dish is low in calories, making it suitable for weight management.

Essential Equipment for Success

To make the most of this recipe, consider having the following equipment:

  • Sheet Pan: A sturdy, non-stick baking sheet is essential for even roasting.
  • Parchment Paper: Line your baking sheet to prevent sticking and make cleanup easier.
  • Mixing Bowls: Use large bowls for tossing your vegetables and dressing.
  • Measuring Cups and Spoons: Accurate measurements ensure consistent flavor in your dish.

Serving Suggestions

To make your meal even more delightful, consider serving:

  • With Quinoa: Serve over a bed of fluffy quinoa for added protein.
  • With Grains: Pair with farro, rice, or couscous for a hearty meal.
  • As a Side Dish: This dish complements grilled meats or fish beautifully.
  • In Wraps: Use roasted vegetables as a filling in wraps or pita for a portable meal.

Final Thoughts

Creating effortless roasted vegetables with a creamy tahini-yogurt dressing is not just about following a recipe; it’s about embracing the joy of cooking with simple, wholesome ingredients. This adaptable dish allows you to experiment with flavors while ensuring a nutritious meal every time. So gather your ingredients, preheat your oven, and enjoy the delightful flavors of this vibrant meal!

Roasted Vegetables with Creamy Tahini-Yogurt Dressing

Prep Time 15 minutes
Cook Time 30 minutes
Total Time 45 minutes
Servings 4 servings
Calories 450
A flavorful and nutritious roasted vegetable dish topped with a creamy tahini-yogurt dressing, perfect for a wholesome meal.

Ingredients

Vegetables

  • 400 g Chickpeas (1 can, drained and rinsed)
  • 1 large Onion (sliced into wedges)
  • 2 medium Sweet Potatoes (cubed)
  • 150 g Broccoli Florets
  • 150 g Cauliflower Florets
  • 2 tsp Paprika
  • 2 tsp Cumin
  • to taste Salt and Pepper
  • to taste Chili Flakes (as desired)
  • 2-3 tbsp Olive Oil (for roasting, plus 2 tbsp for the dressing)
  • 2 tbsp Tahini
  • 120 g Vegan or Greek Yogurt
  • 2 tbsp Lemon Juice
  • 1 clove Garlic (minced or grated)
  • 1 tsp Mustard
  • 1 tsp Agave or Honey (if not vegan)

Instructions 

  • Toss vegetables and chickpeas with olive oil, paprika, cumin, salt, pepper, and chili flakes. Roast at 400°F (200°C) for 30 minutes.
  • Meanwhile, prepare the dressing by whisking together tahini, yogurt, lemon juice, garlic, mustard, and agave or honey.
  • Serve roasted vegetables topped with the creamy tahini-yogurt dressing.

Notes

Feel free to add chili flakes for extra heat or adjust seasoning to taste.
Calories: 450kcal
Cost: $15
Course: Main Course
Cuisine: Mediterranean
Keyword: Vegetables

Welcome to the world of strawberry truffles—a delightful fusion of flavors that turns any occasion into a celebration! In this guide, we’ll explore how to create these easy strawberry truffles using minimal ingredients while ensuring they are packed with flavor and elegance. Whether you’re preparing for a special event or simply treating yourself, this recipe will not only satisfy your sweet tooth but also impress your guests.

Why You’ll Love This Recipe

  • Simple Ingredients: This recipe requires only a handful of basic ingredients, making it perfect for busy cooks.
  • Effortless Preparation: With straightforward steps, you can whip up these truffles in no time—ideal for last-minute gatherings!
  • Versatile Flavor: The combination of white chocolate and freeze-dried strawberries offers a unique taste that pairs beautifully with various occasions.
  • Gift-Worthy Treats: These truffles can be beautifully packaged and make for a thoughtful homemade gift.
  • Customizable Variations: Feel free to experiment with different types of chocolate or fillings, allowing for a personal touch!

Ingredients and Substitutions

To create these indulgent strawberry truffles, you will need the following ingredients:

  • 12 ounces white chocolate chips (340 grams): You can substitute with milk chocolate if preferred.
  • 1/4 cup heavy cream: For a lighter version, use half-and-half or coconut cream.
  • 1 cup freeze-dried strawberries, finely crushed, divided: Fresh strawberries can be used, but they will alter the texture.
  • 1/2 teaspoon vanilla extract: A splash of almond extract can enhance the flavor.
  • 8 ounces dark chocolate (226 grams), chopped: You can opt for semi-sweet or even white chocolate for coating.

How to Make Strawberry Truffles

This recipe is designed to be straightforward and enjoyable. Follow these simple steps:

1. Prepare the Strawberry Mixture

Place the white chocolate chips in a medium heat-proof bowl.

2. Heat the Cream

In a small saucepan, bring the heavy cream to a simmer over medium heat. Pour the hot cream over the white chocolate chips and let sit for 2-3 minutes to allow the chocolate to melt.

3. Add Strawberries and Vanilla

Add 3/4 cup of the crushed freeze-dried strawberries and the vanilla extract to the mixture. Stir until smooth and well combined. Cover the bowl with plastic wrap and refrigerate for about 2 hours or until firm enough to scoop.

4. Shape the Truffles

Line a baking sheet with parchment paper. Using a small cookie scoop or spoon, scoop out the strawberry mixture and roll it into 1-inch balls. Place them on the prepared baking sheet and freeze for 30 minutes.

5. Melt the Dark Chocolate

Melt the dark chocolate in the microwave in 30-second intervals, stirring between each until smooth.

6. Dip the Truffles

Using a fork, dip each frozen truffle into the melted dark chocolate, tapping off any excess. Place back on the baking sheet and immediately sprinkle with the remaining crushed freeze-dried strawberries.

7. Chill and Serve

Refrigerate the truffles for at least 15 minutes or until the chocolate is set. Store them in an air-tight container in the refrigerator for up to 2 weeks. Enjoy!

Pro Tips for Perfect Strawberry Truffles

Detailed look at a Strawberry Truffle, featuring the pink strawberry center and white chocolate exterior glistening.
  • Use Quality Chocolate: The better the chocolate, the better the truffles will taste. Invest in high-quality chocolate for a gourmet finish.
  • Don’t Overheat the Cream: Simmer the cream just until it bubbles to avoid scorching it, which can affect the chocolate’s texture.
  • Chill Thoroughly: Ensure the mixture is firm enough before scooping to shape the truffles easily.
  • Customize Coatings: Experiment with toppings like crushed nuts, coconut flakes, or colored sprinkles for added flair.
  • Maintain Room Temperature: When working with chocolate, keep your kitchen cool to prevent melting during the dipping process.
  • Use a Double Boiler: For a more controlled melting process, consider using a double boiler instead of a microwave.
  • Add a Pinch of Salt: A touch of salt can elevate the flavor of the chocolate and balance the sweetness.
  • Make Ahead: These truffles are perfect for making in advance; they taste even better after a day in the fridge.

Common Mistakes and Troubleshooting

Even the best home cooks can run into snags. Here’s how to avoid common pitfalls:

  • Truffles Falling Apart: If your mixture is too soft, refrigerate it longer before scooping.
  • Chocolate Not Setting: Ensure you refrigerate the truffles long enough after dipping for them to harden properly.
  • Uneven Coating: Use a fork to dip and ensure an even coat of chocolate on each truffle.
  • Clumpy Chocolate: If your chocolate seizes, add a teaspoon of oil to help smooth it out.

Variations to Try

Feel free to mix things up! Here are some delicious variations:

  • Nutty Delight: Add finely chopped nuts to the truffle mixture for added crunch.
  • Mint Chocolate: Incorporate peppermint extract into the chocolate for a refreshing twist.
  • Fruit Fusion: Substitute freeze-dried strawberries with other freeze-dried fruits like raspberries or mango for unique flavors.
  • Spicy Kick: Mix in a pinch of cayenne pepper for a surprising heat that complements the sweetness.

Storage and Make-Ahead Instructions

These truffles can be prepared in advance and stored for later enjoyment. Here’s how:

  • Refrigeration: Store in an air-tight container in the refrigerator for up to 2 weeks.
  • Freezing: For longer storage, freeze the truffles for up to 3 months. Thaw them in the fridge before serving.

Frequently Asked Questions

  • Can I use fresh strawberries instead of freeze-dried? Yes, but fresh strawberries will change the texture and may require adjustments in the recipe.
  • How do I know when the truffles are set? They should feel firm to the touch and not stick to your fingers.
  • Can I use a different type of chocolate? Absolutely! Feel free to experiment with milk or dark chocolate based on your preference.
  • What should I do if my chocolate seizes? Add a teaspoon of vegetable oil or coconut oil to help smooth it out again.
  • How can I make these truffles vegan? Use non-dairy chocolate and coconut cream as a substitute for heavy cream.
  • What’s the best way to gift these truffles? Package them in a decorative box or jar, and consider adding a personalized note!
  • Can I add alcohol to the truffles? Yes, a splash of liqueur like raspberry or chocolate can enhance flavor—just adjust the cream accordingly.
  • How do I know if I’ve melted the chocolate correctly? It should be smooth and glossy, without any lumps.

Nutrition Tips and Dietary Adaptations

These truffles can be enjoyed as part of a balanced diet. Consider these tips:

  • Portion Control: Enjoy in moderation to satisfy your sweet cravings without overindulging.
  • Opt for Dark Chocolate: Choose dark chocolate for added health benefits, including antioxidants.
  • Experiment with Sweeteners: For a lower-sugar option, try using sugar alternatives in the chocolate coating.

Equipment Recommendations

Having the right tools can make a significant difference:

  • Heat-Proof Bowl: Essential for melting chocolate without risk of burning.
  • Parchment Paper: Perfect for lining baking sheets and preventing sticking.
  • Cookie Scoop: Helps create uniform truffle sizes for a professional look.
  • Microwave-Safe Container: For easy melting of chocolate.

Serving Suggestions

These strawberry truffles can be served in various delightful ways:

  • On a Dessert Platter: Arrange them alongside other desserts for a stunning presentation.
  • With Fresh Berries: Serve with fresh strawberries or raspberries for a beautiful color contrast.
  • Accompanied by Tea or Coffee: Pair them with your favorite hot beverage for a cozy treat.

In conclusion, making these strawberry truffles is not just about the end product; it’s about the experience of creating something beautiful and delicious. With this comprehensive guide, you’re equipped to make these truffles effortlessly, impressing everyone around you. Whether it’s a gift, a treat for yourself, or a centerpiece at a gathering, these truffles will surely delight. Happy cooking!

Strawberry Truffles

Prep Time 20 minutes
Cook Time 15 minutes
Total Time 35 minutes
Servings 24 pieces
Calories 150
Delight in these rich and fruity strawberry truffles, perfect for a sweet treat or gift.

Ingredients

White Chocolate

  • 12 ounces white chocolate chips ((340 grams))
  • 0.25 cup heavy cream
  • 1 cup freeze-dried strawberries, finely crushed, divided
  • 0.5 teaspoon vanilla extract
  • 8 ounces dark chocolate, chopped ((226 grams))

Instructions 

  • Heat heavy cream until simmering, pour over white chocolate, and let sit 2-3 minutes.
  • Add 3/4 cup crushed strawberries and vanilla; stir until smooth. Chill for 2 hours.
  • Form mixture into 1-inch balls, freeze 30 minutes.
  • Melt dark chocolate until smooth. Dip frozen truffles in chocolate, then sprinkle with remaining strawberries.
  • Refrigerate until set, about 15 minutes. Store in airtight container.

Notes

Keep refrigerated for best freshness.
Calories: 150kcal
Cost: $15
Course: Dessert
Keyword: strawberries

Effortlessly Indulgent: Your Guide to Perfect Mini Chocolate Cakes

Welcome to the world of mini chocolate cakes, where indulgence meets simplicity! If you’re looking to impress your guests or simply treat yourself, these delightful cakes are the answer. With a moist texture, rich chocolate flavor, and a luscious ganache topping, you can create a dessert that’s not only visually stunning but incredibly easy to make. In this comprehensive guide, we will explore every aspect of crafting the perfect mini chocolate cakes, ensuring your success in the kitchen.

Why You’ll Love This Recipe

These mini chocolate cakes are not just another dessert option; they offer a range of benefits that make them a favorite among home bakers:

  • Quick and Easy Preparation: With straightforward steps and minimal ingredients, you can whip these up in no time.
  • Perfect for Any Occasion: Whether it’s a birthday party, anniversary, or a simple family gathering, these mini cakes are versatile and appealing.
  • Portion Control: Individual servings mean everyone can enjoy their own cake without the fuss of slicing a larger one.
  • Customization Potential: From toppings to fillings, you can easily adapt these cakes to suit your taste.
  • Impressive Presentation: With their charming size and beautiful ganache drizzle, these cakes look as good as they taste.

Essential Ingredients

Let’s dive into the ingredients needed to make these delectable mini chocolate cakes. Understanding the role of each ingredient can help you achieve the best results:

  • 1 tsp Vanilla: Adds a rich, warm flavor that complements the chocolate.
  • 2 Large Eggs: Essential for structure and moisture; you can substitute with flax eggs for a vegan option.
  • 1 ½ Cups Plain Flour: All-purpose flour works best for a balanced texture.
  • 1 tsp Baking Powder: Helps the cake rise, ensuring a fluffy interior.
  • ½ tsp Baking Soda: Used in conjunction with acidic ingredients like buttermilk for optimal leavening.
  • ¼ tsp Salt: Enhances flavor and balances sweetness.
  • 1 Cup White Sugar: Sweetens the cake; consider using coconut sugar for a healthier option.
  • ¾ Cup Cocoa Powder (Unsweetened): Provides the rich chocolate flavor; use high-quality cocoa for better results.
  • 1 Cup Buttermilk: Adds moisture and tenderness; substitute with yogurt or milk mixed with vinegar if unavailable.
  • ½ Cup Melted Unsalted Butter: Contributes to the cake’s richness; you can replace it with coconut oil for a dairy-free version.
  • ½ Cup Hot Water: Enhances the cocoa powder, intensifying the chocolate flavor.
  • 1 Cup Cream (Heavy Variety): For the ganache, ensuring a rich and creamy finish.
  • 8 oz Chopped Dark Chocolate: The star of the ganache, providing depth and richness.
  • 2 tbsp Softened Butter: Adds shine and smoothness to the ganache.
  • 1 Cup Chilled Heavy Cream: For whipping, creating a fluffy filling.
  • 2 tbsp Confectioner’s Sugar: Sweetens the whipped cream without grittiness.
  • 1 tsp Pure Vanilla: Enhances the flavor of the whipped cream.

Step-by-Step Instructions

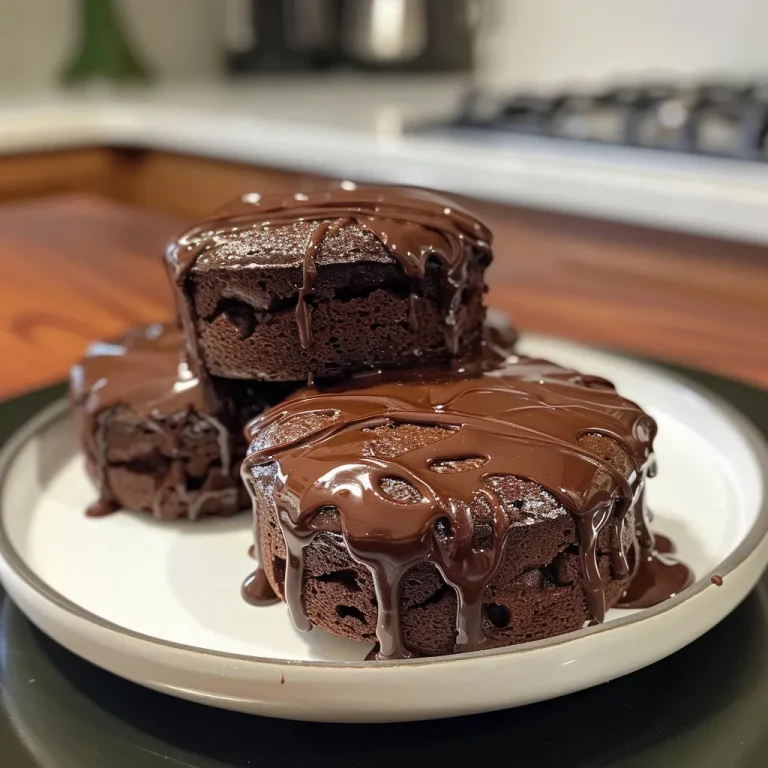
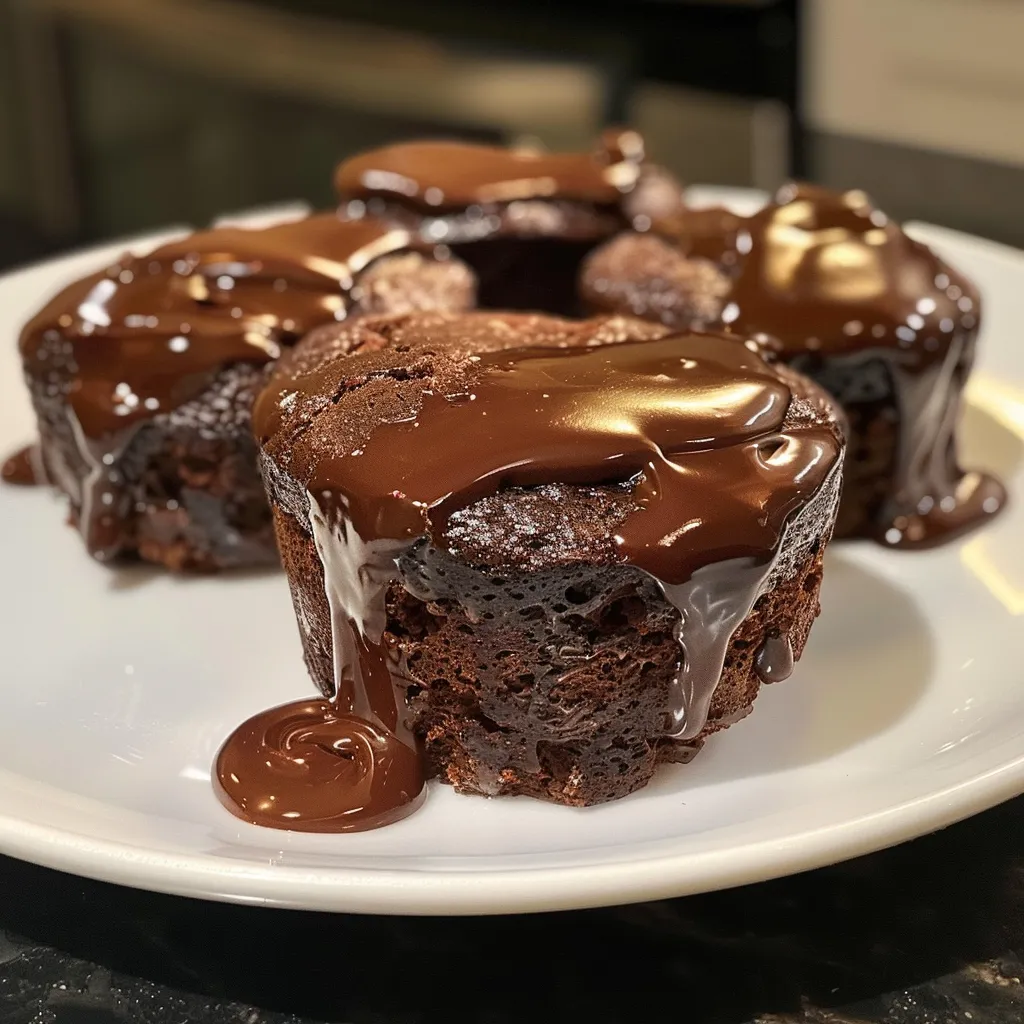
Close-up shot of decadent mini chocolate cakes adorned with chocolate shavings and a smooth surface.

Now that you have your ingredients ready, let’s walk through the steps to create these mini chocolate cakes:

  1. Preheat your oven to 175°C (350°F). Prepare a mini cake tray by greasing and flouring it or lining it with parchment paper.
  2. In a large mixing bowl, combine the dry ingredients: flour, sugar, cocoa powder, salt, baking powder, and baking soda, whisking until well blended.
  3. In a separate bowl, mix together the wet ingredients: buttermilk, eggs, melted butter, and vanilla. Gradually incorporate the wet mixture into the dry ingredients, stirring until just combined. Slowly add the hot water and mix until smooth.
  4. Pour the batter into the prepared mini cake trays, filling each about 2/3 full. Bake for 18-20 minutes, or until a toothpick inserted into the center comes out clean. Allow the cakes to cool completely in the pan.
  5. For the ganache, heat the heavy cream in a small saucepan over medium heat until it simmers. Pour it over the chopped dark chocolate, letting it sit for a minute before stirring until smooth. Allow it to cool slightly until it thickens.
  6. In a chilled bowl, whip the heavy cream with confectioner’s sugar and vanilla until soft peaks form.
  7. Once the mini cakes are cooled, carefully slice them in half horizontally. Spread a layer of whipped cream on the bottom half, place the top layer back on, and generously spoon the ganache over the tops, letting it cascade down the sides.

Pro Tips for Success

To ensure your mini chocolate cakes turn out perfectly, consider these expert insights:

  • Use Room Temperature Ingredients: Allow your eggs and buttermilk to sit at room temperature for optimal mixing.
  • Don’t Overmix the Batter: Mix just until combined to avoid dense cakes.
  • Check Oven Temperature: Use an oven thermometer to ensure accuracy, as oven temperatures can vary.
  • Cool Completely: Allow cakes to cool fully before frosting; this prevents melting and sogginess.
  • Make Ahead: You can prepare the cakes a day in advance; just keep them covered to maintain moisture.
  • Customize the Ganache: Experiment with flavored extracts or add a splash of espresso to enhance the chocolate flavor.
  • Presentation Matters: Consider garnishing with chocolate shavings or fresh berries for a stunning finish.
  • Store Properly: Keep any leftover cakes in an airtight container in the fridge for up to a week.

Common Mistakes and Troubleshooting

Even the best bakers can run into issues. Here’s how to tackle common problems:

  • Cakes Sticking to the Pan: Ensure proper greasing or use parchment paper to prevent sticking.
  • Overbaking: Keep an eye on your cakes during the last few minutes of baking to avoid dryness.
  • Ganache Not Setting: Allow it to cool longer; if it’s too thin, refrigerate briefly to thicken.
  • Whipped Cream Deflating: Ensure your bowl and beaters are cold; don’t over-whip, as it can turn to butter.

Delicious Variations

These mini chocolate cakes are a blank canvas for creativity. Try these variations to switch things up:

  • Peanut Butter Cream Filling: Add a layer of peanut butter whipped cream for a nutty twist.
  • Fruit-Filled Layers: Incorporate fresh raspberries or strawberries between the cake layers for a fruity contrast.
  • Mint Chocolate Version: Mix mint extract into the ganache for a refreshing flavor.
  • Spicy Chocolate Cakes: Add a pinch of cayenne pepper to the batter for a warm, spicy kick.

Storage and Make-Ahead Instructions

These mini cakes can be made ahead of time and stored to save you effort on the day of your event:

  • Room Temperature: If you plan to eat them within a day, store in an airtight container at room temperature.
  • Refrigerator: For longer storage, place in the fridge for up to a week; this keeps the cakes moist.
  • Freezing: You can freeze the unfilled cakes for up to three months. Wrap them well in plastic wrap and foil.

Frequently Asked Questions

Here are some common questions regarding mini chocolate cakes:

  • Can I use a different type of flour? Yes, but keep in mind that gluten-free flour may yield different results.
  • What can I substitute for buttermilk? You can mix milk with vinegar or yogurt for a similar effect.
  • How do I know when my cakes are done? A toothpick inserted into the center should come out clean or with a few moist crumbs.
  • Can I make these cakes in advance? Absolutely! Just store them properly as mentioned above.
  • Why is my ganache too thin? It may need more chocolate or more time to cool; refrigerating can help.
  • Is there a vegan version of this recipe? Yes, use flax eggs, coconut oil, and dairy-free chocolate for a vegan adaptation.
  • Can I use milk chocolate instead of dark chocolate? Yes, but it will yield a sweeter ganache.
  • What toppings work best? Fresh berries, chocolate shavings, or crushed nuts make excellent toppings.

Nutrition Tips and Dietary Adaptations

For those watching their diet, here are some tips:

  • Reduce Sugar: You can use less sugar or substitute with a natural sweetener like stevia.
  • Add Fiber: Consider adding ground flaxseed or chia seeds to the batter for extra nutrients.
  • Gluten-Free Option: Use a gluten-free flour blend for a safe alternative.

Recommended Equipment

To achieve the best results, consider investing in the following tools:

  • Mini Cake Pans: Essential for baking individual cakes.
  • Whisk: A good whisk is crucial for mixing ingredients evenly.
  • Electric Mixer: For whipping cream and mixing batter efficiently.
  • Baking Thermometer: Ensure your oven temperature is accurate for perfect baking.

Serving Suggestions

When it’s time to serve, make these mini chocolate cakes shine:

  • Plating: Use colorful plates or cake stands to enhance presentation.
  • Garnishes: Fresh mint leaves or edible flowers can elevate the visual appeal.
  • Accompaniments: Serve with a scoop of vanilla ice cream or a dollop of extra whipped cream.

Conclusion

With this definitive guide, you now have all the tools and knowledge needed to create perfect mini chocolate cakes that impress and delight. Remember, cooking should be enjoyable and rewarding—embrace the process, experiment, and most importantly, savor the results. Happy baking!

Mini Chocolate Cakes

Prep Time 20 minutes
Cook Time 20 minutes
Total Time 40 minutes
Servings 12 pieces
Calories 350
Delight in these rich, moist mini chocolate cakes topped with luscious ganache and whipped cream, perfect for any occasion.

Ingredients

Baking ingredients

  • 1 tsp vanilla
  • 2 large eggs
  • 1.5 cups plain flour
  • 1 tsp baking powder
  • 0.5 tsp baking soda
  • 0.25 tsp salt
  • 1 cup white sugar
  • 0.75 cup cocoa powder (unsweetened)
  • 1 cup buttermilk
  • 0.5 cup melted unsalted butter
  • 0.5 cup hot water

Chocolate ganache

  • 8 oz chopped dark chocolate
  • 2 tbsp softened butter
  • 1 cup chilled heavy cream
  • 2 tbsp confectioner’s sugar

Whipped cream

  • 1 cup chilled heavy cream
  • 2 tbsp confectioner’s sugar
  • 1 tsp pure vanilla

Instructions 

  • Preheat oven to 175°C (350°F). Prepare mini cake tray.
  • Mix dry ingredients; beat wet ingredients; combine and add hot water.
  • Fill trays 2/3 full; bake 18-20 mins; cool completely.
  • Heat cream, pour over chocolate; stir until smooth; cool slightly.
  • Whip chilled cream with sugar and vanilla until peaks form. Assemble cakes, top with ganache and whipped cream.

Notes

Ensure cakes are fully cooled before frosting for best results.
Calories: 350kcal
Cost: $15
Course: Dessert
Cuisine: international
Keyword: chocolate

Effortless Holiday Treats: Unleashing the Magic of Chocolate-Dipped Wafer Reindeer Bars

As the holiday season approaches, nothing brings joy quite like crafting delightful treats with your loved ones. Chocolate-Dipped Wafer Reindeer Bars are not only simple to make but also visually stunning and delicious. With their crunchy texture and chocolatey goodness, these festive treats are perfect for holiday gatherings and will surely impress your friends and family. In this definitive guide, we’ll explore everything you need to know to make these festive bars, ensuring you create a memorable experience in your kitchen.

Why You’ll Love This Recipe

This recipe stands out for several reasons:

  • Quick and Easy Preparation: With just a few simple steps, you can create these delightful treats in under 30 minutes, making them ideal for busy schedules.
  • Minimal Ingredients: You only need five key ingredients, many of which you may already have in your pantry, reducing the need for extra grocery shopping.
  • Customizable Designs: Personalize each reindeer bar with unique decorations, allowing you to unleash your creativity and adapt to your guests’ preferences.
  • Kid-Friendly Fun: This recipe is perfect for involving children in the kitchen, providing an enjoyable bonding activity during the holidays.
  • Perfect for Gifting: These treats make excellent gifts for friends, neighbors, or coworkers, wrapped beautifully in festive packaging.

Ingredient Breakdown

Let’s take a closer look at the ingredients needed to create these delightful Chocolate-Dipped Wafer Reindeer Bars, along with possible substitutions:

  • Vanilla sugar wafer cookies: The foundation of your reindeer bars. You can substitute with chocolate wafers for a different flavor.
  • Milk chocolate melting wafers: Essential for dipping. Dark chocolate can be used for a richer taste, or you can try white chocolate for a fun twist.
  • Mini pretzels: These serve as the reindeer’s antlers. You can use regular pretzels or even chocolate-covered pretzels for an added layer of flavor.
  • Candy eyes: These give your reindeer character! If unavailable, small chocolate chips can be used as a substitute.
  • Red chocolate candies: A must for the reindeer’s nose. Red M&M’s or any red candy will work beautifully.
  • (Optional) Coconut oil: This helps to thin the chocolate for easier dipping.

Pro Tips for Success

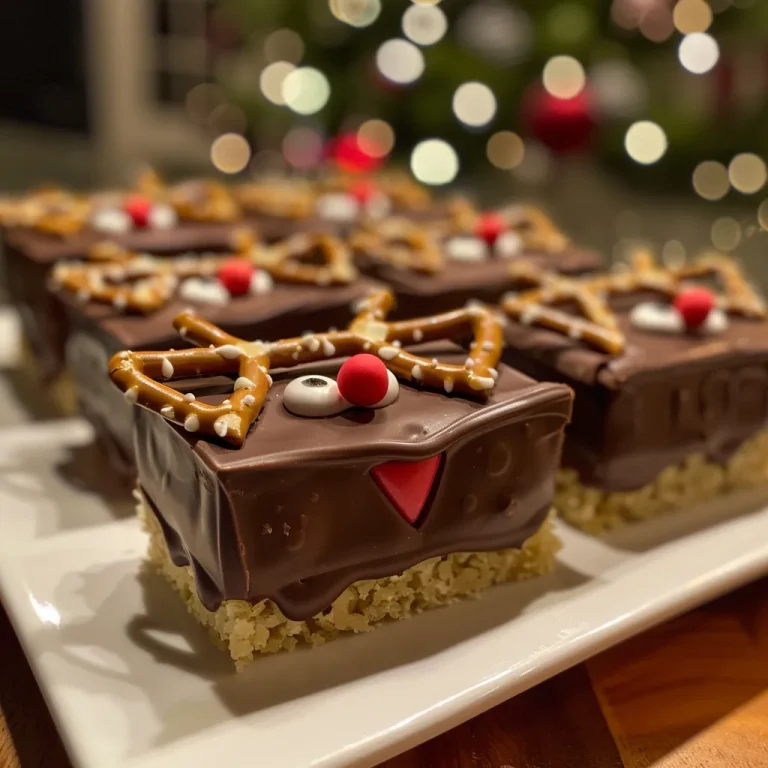
Delicious chocolate-dipped confections styled as reindeer, featuring pretzel antlers.

To ensure your Chocolate-Dipped Wafer Reindeer Bars turn out perfectly, consider these expert insights:

  • Use a microwave-safe bowl: When melting chocolate, ensure that the bowl is suitable for the microwave to prevent any damage.
  • Stir frequently: Melt the chocolate in short bursts (20 seconds) and stir in between to avoid overheating and burning.
  • Chill the bars: After assembling, chill the bars for at least 10 minutes to allow the chocolate to set properly.
  • Experiment with decorations: Use sprinkles or edible glitter to add a festive touch to your reindeer bars.
  • Double the recipe: If you’re expecting a crowd, consider doubling the ingredients to ensure everyone gets a taste.
  • Use fresh ingredients: Ensure your chocolate and candies are fresh for the best flavor and presentation.
  • Position the pretzels carefully: When pressing the pretzels into the wet chocolate, make sure they are secure to avoid them falling off later.
  • Have fun with it: Encourage creativity; let kids design their reindeer with various candies.

Common Mistakes and Troubleshooting

Here are some common pitfalls and how to avoid them:

  • Chocolate too thick: If your melted chocolate is too thick, add a little coconut oil to achieve a smoother consistency.
  • Pretzels falling off: Make sure to press the pretzels into the chocolate while it’s still wet; otherwise, they won’t adhere properly.
  • Not enough cooling time: Allow sufficient time for the chocolate to set; impatience can lead to a messy presentation.
  • Overheating chocolate: Always melt chocolate in short bursts and stir frequently to prevent it from burning.

Variations to Try

Here are some fun variations to customize your Chocolate-Dipped Wafer Reindeer Bars:

  • Peanut Butter Twist: Spread a thin layer of peanut butter on the wafer cookies before dipping in chocolate for added flavor.
  • Minty Delight: Use peppermint chocolate melting wafers for a refreshing holiday twist.
  • Nutty Reindeer: Add crushed nuts or toffee bits into the melted chocolate for an extra crunch.
  • Colorful Reindeer: Use a mix of colored candies for the eyes and nose to create a vibrant assortment.

Storage and Make-Ahead Instructions

To keep your Chocolate-Dipped Wafer Reindeer Bars fresh and delicious:

  • Storage: Store the bars in an airtight container at room temperature for up to one week.
  • Make-Ahead: These bars can be made in advance and stored until you’re ready to serve them, making them a convenient holiday treat.

Frequently Asked Questions

Here are some common questions about making Chocolate-Dipped Wafer Reindeer Bars:

  • Can I use dark chocolate instead of milk chocolate? Yes, dark chocolate can be used for a richer flavor.
  • What can I use instead of candy eyes? Small chocolate chips or a dot of icing can work well in place of candy eyes.
  • How long do these treats last? If stored properly, they can last up to one week at room temperature.
  • Can I freeze these bars? It’s best not to freeze them as the texture may change. They are best enjoyed fresh.
  • What if the chocolate hardens too quickly? You can reheat it gently in the microwave to soften it again.
  • Can I use other types of cookies? Yes, any sturdy cookie can work as a replacement for vanilla wafers.
  • What is the best way to wrap them for gifts? Use clear cellophane bags tied with festive ribbon for a beautiful presentation.
  • Are these suitable for dietary restrictions? You can adapt the recipe using gluten-free wafers and dairy-free chocolate for a vegan option.

Nutrition Tips and Dietary Adaptations

For those mindful of nutrition:

  • Portion Control: These treats are delicious but can be rich; enjoy them in moderation.
  • Healthier Substitutes: Consider using dark chocolate for lower sugar options, or whole grain wafers for added fiber.

Equipment Recommendations

Here are some essential tools to help you create these festive treats:

  • Microwave-safe bowl: For melting chocolate.
  • Parchment paper: To line your baking sheet for easy cleanup.
  • Spatula: For spreading and dipping.
  • Measuring cups and spoons: For accurate ingredient measurements.

Serving Suggestions

These Chocolate-Dipped Wafer Reindeer Bars can be enjoyed in various ways:

  • Holiday Gatherings: Perfect for dessert tables or as a festive treat during holiday parties.
  • Gift Giving: Package them in gift boxes or jars for thoughtful homemade gifts.
  • Movie Nights: Serve these alongside your favorite holiday films for a cozy family experience.

In conclusion, Chocolate-Dipped Wafer Reindeer Bars are a delightful addition to your holiday festivities. They are easy to make, customizable, and sure to bring smiles to all who enjoy them. With this comprehensive guide, you can confidently whip up these treats and create lasting memories in the kitchen. So gather your ingredients, invite your loved ones, and start crafting these magical holiday delights today!

Chocolate-Dipped Wafer Reindeer Bars

Prep Time 10 minutes
Cook Time 5 minutes
Total Time 15 minutes
Servings 12 pieces
Calories 150
Create adorable reindeer treats by dipping wafer cookies in chocolate and decorating with pretzels and candies.

Ingredients

Cookies

  • 12 pieces Vanilla sugar wafer cookies

Chocolate

  • 1 cup grams Milk chocolate melting wafers

Decorations

  • 8 pieces Mini pretzels (for antlers)
  • 12 pieces Candy eyes
  • 12 pieces Red chocolate candies (for noses)

Optional ingredients

  • 1 tablespoon Coconut oil (for thinning chocolate)

Instructions 

  • Melt chocolate wafers in 20-second microwave bursts, stirring until smooth; add coconut oil if needed.
  • Dip the tops of wafer cookies in melted chocolate and place on parchment-lined sheet.
  • While wet, press mini pretzels for antlers, add candy eyes, and a red candy for the nose.
  • Chill for 10 minutes until set.

Notes

Use high-quality chocolate for best results and ensure candies are securely attached before chilling.
Calories: 150kcal
Cost: $10
Course: Dessert
Keyword: chocolate, cookies, festive

Why Slow Cooker Lava Cake is a Game Changer

Indulging in a rich, molten chocolate dessert has never been easier with the Slow Cooker Lava Cake. This recipe marries convenience with decadence, allowing you to create a dessert that is not only delicious but also requires minimal effort. Perfect for any occasion, this cake offers a beautifully gooey center that will impress your guests and satisfy your sweet tooth.

As you embark on this culinary journey, you’ll discover the magic of the slow cooker, which transforms simple ingredients into a luscious lava cake. Let’s dive into why this recipe is a must-try!

Why You’ll Love This Recipe

  • Effortless Preparation: With just a few simple steps, you can set your slow cooker and forget about it while it works its magic.
  • Decadent Flavor: The combination of chocolate cake and molten chocolate makes every bite a heavenly experience.
  • Perfect for Gatherings: This dessert is an impressive centerpiece for dinner parties and family gatherings, sure to be a crowd-pleaser.
  • Customizable Options: Easily adapt the recipe to suit your preferences, whether that means adding peanut butter chips or trying different cake mixes.
  • Minimal Cleanup: Cooking in the slow cooker means fewer dishes to wash, making clean-up a breeze!

Ingredient Breakdown

Here’s what you’ll need for this slow cooker lava cake:

  • 1 box Devil’s food cake mix: Any brand will work, but choose one that you enjoy.
  • 3 Large Eggs: Ensure they are at room temperature for the best texture.
  • ½ cup Vegetable oil: You can substitute with melted butter for a richer flavor.
  • 1 ¼ cups Whole milk: Dairy-free alternatives can be used without compromising taste.
  • 1 tsp Vanilla extract: Opt for pure vanilla for the best flavor.
  • 1 cup Semisweet chocolate chips: Dark or milk chocolate can be used based on your preference.
  • ½ cup Brown sugar: Packed tightly for sweetness.
  • ¼ cup Granulated sugar: White sugar adds a light texture.
  • ¼ cup Unsweetened cocoa powder: Dutch-process works well for a deeper flavor.
  • 1 ½ cups Strong hot coffee: This enhances the chocolate flavor (hot water with espresso powder is a great alternative).
  • 4 tbsp Salted butter: Melted for added richness.
  • As needed Vanilla ice cream: Optional, but highly recommended for serving.
  • As needed Fresh berries: Optional, for a fresh contrast.
  • As needed Mint sprigs: Optional, for garnish.

How to Make Your Lava Cake

A decadent slice of lava cake topped with a scoop of vanilla ice cream and garnished with fresh berries.

Follow these simple steps to create your cooker lava cake:

  1. Lightly coat the slow cooker with cooking spray or line it with parchment strips for easy removal.
  2. In a large bowl, mix the cake mix, eggs, oil, milk, and vanilla until just combined.
  3. Fold in the chocolate chips, then pour the batter into the slow cooker and spread it evenly.
  4. In a separate bowl, whisk together the brown sugar, granulated sugar, and cocoa powder.
  5. Sprinkle the sugar-cocoa mixture over the batter; do not stir.
  6. Gently pour the hot coffee around the edges and over the top; do not stir.
  7. Cover and cook on High for 2-3 hours or Low for 4-5 hours.
  8. Check for doneness; the edges should be set while the center remains slightly soft. Turn off heat.
  9. Let it stand for 30 minutes with the lid slightly ajar to allow the cake to set.
  10. Serve warm with vanilla ice cream and your choice of optional toppings.

Expert Tips for the Best Lava Cake

  • Monitor Cooking Time: Every slow cooker is different; check your cake a bit earlier than recommended to avoid overcooking.
  • Use Quality Chocolate: The better the chocolate, the richer the flavor of your lava cake.
  • Let It Rest: Allowing the cake to rest before serving helps perfect the lava effect.
  • Don’t Overmix: Mix until just combined to keep the cake light and fluffy.
  • Experiment with Flavors: Try adding extracts like almond or hazelnut for unique twists.
  • Pair with Ice Cream: The contrast of warm cake and cold ice cream is a match made in heaven.
  • Check for Doneness: Use a toothpick to test; it should come out with moist crumbs, not wet batter.
  • Keep the Lid On: Avoid lifting the lid during cooking to maintain the temperature and steam.
  • Use a Non-Stick Spray: This helps with easy removal and cleanup.
  • Try Different Cake Mixes: Funfetti or red velvet can add a creative twist!

Common Mistakes & Troubleshooting

Even the best recipes can have hiccups. Here are some common mistakes and how to avoid them:

  • Overcooking: If the cake is dry, it’s likely been in the slow cooker too long. Adjust cooking times based on your specific slow cooker.
  • No Lava Effect: Ensure you didn’t stir the coffee into the batter; it’s crucial for the gooey center.
  • Sticking to the Pot: Make sure to properly grease or line your slow cooker before pouring in the batter.
  • Too Dense: Overmixing can lead to a dense cake. Mix just until combined.
  • Not Sweet Enough: Taste the batter before adding the cocoa mixture; adjust sugar to your preference.

Delicious Variations

Make this lava cake your own with these creative variations:

  • Peanut Butter Lava Cake: Add 1/2 cup of peanut butter chips to the batter for a nutty twist.
  • Mint Chocolate Lava Cake: Incorporate mint extract into the batter for a refreshing flavor.
  • Caramel Lava Cake: Swirl in caramel sauce before cooking for a rich addition.
  • Fruit-Infused Lava Cake: Add fresh raspberries or strawberries to the batter for a fruity surprise.

Storage & Make-Ahead Instructions

Want to prepare ahead? Here’s how to store and enjoy your lava cake later:

  • Refrigeration: Store leftovers in an airtight container in the fridge for up to 3 days.
  • Freezing: Allow the cake to cool completely, then slice and freeze individual portions for up to 3 months.
  • Reheating: Microwave individual portions for 20-30 seconds or until warmed through.
  • Make-Ahead Option: Prepare the batter the night before and refrigerate. Pour into the slow cooker in the morning and cook as directed.

FAQs About Slow Cooker Lava Cake

  • Can I use a different type of cake mix? Yes, you can experiment with various flavors like red velvet or funfetti!
  • Is it necessary to use coffee? No, hot water with espresso powder or just plain hot water can work too.
  • How do I know when it’s done? The edges should be set, and the center should be soft and slightly jiggly.
  • Can I make this gluten-free? Yes, use a gluten-free cake mix and ensure all other ingredients are gluten-free.
  • What can I serve with lava cake? Vanilla ice cream, fresh berries, or whipped cream work beautifully!
  • Can I add nuts to the recipe? Absolutely! Chopped nuts can add a delightful crunch.
  • How long does it take to cook? Depending on your slow cooker, it typically takes 2-3 hours on High or 4-5 hours on Low.
  • Can I leave leftovers out? For food safety, refrigerate any leftovers promptly.

Nutritional Information & Dietary Adaptations

This recipe can be adjusted to meet various dietary needs:

  • Low-Sugar Option: Substitute sugars with a low-calorie sweetener of your choice.
  • Dairy-Free Version: Use dairy-free milk and butter substitutes.
  • Gluten-Free Option: Choose a gluten-free cake mix and ensure all ingredients are gluten-free.

Essential Equipment for Success

  • Slow Cooker: A reliable slow cooker is essential for even cooking.
  • Mixing Bowls: Use large bowls for mixing ingredients without making a mess.
  • Whisk: A good whisk helps incorporate ingredients smoothly.
  • Spatula: For folding in chocolate chips and spreading batter evenly.

Serving Suggestions

To elevate your serving experience:

  • Classic Ice Cream Scoop: Serve with a generous scoop of vanilla ice cream on top.
  • Fresh Berries: Scatter berries around the plate for a pop of color and flavor.
  • Chocolate Drizzle: Drizzle melted chocolate over the top for an indulgent touch.
  • Mint Garnish: Add fresh mint sprigs for a beautiful finish.

In conclusion, this slow cooker lava cake is not just a dessert; it’s an experience. With its rich flavors, easy preparation, and endless variations, it’s sure to become a favorite in your home. Get ready to impress your family and friends with this delightful treat!

Slow Cooker Lava Cake

Prep Time 15 minutes
Cook Time 3 hours
Total Time 3 hours 15 minutes
Servings 8 pieces
Calories 420
A rich and gooey chocolate lava cake made effortlessly in your slow cooker, perfect for a decadent dessert.

Ingredients

Cake Mix

  • 1 box Devil’s food cake mix (Any brand)
  • 3 large Eggs (Room temperature)
  • 0.5 cup Vegetable oil (Can use melted butter)
  • 1.25 cups Whole milk (Can use dairy-free alternatives)
  • 1 tsp Vanilla extract (Pure not imitation)
  • 1 cup Semisweet chocolate chips (Can use dark or milk chocolate)
  • 0.5 cup Brown sugar (Packed)
  • 0.25 cup Granulated sugar (White sugar)
  • 0.25 cup Unsweetened cocoa powder (Dutch-process or regular)
  • 1.5 cups Strong hot coffee (Or hot water with espresso powder)
  • 4 tbsp Salted butter (Melted)
  • as needed Vanilla ice cream (Optional but recommended)
  • as needed Fresh berries (Optional)
  • as needed Mint sprigs (Optional for garnish)

Instructions 

  • Spray slow cooker with cooking spray or line with parchment.
  • Mix cake mix, eggs, oil, milk, and vanilla until combined; fold in chocolate chips.
  • Pour batter into slow cooker, then sprinkle sugar-cocoa mixture on top without stirring.
  • Gently pour hot coffee over the mixture; do not stir.
  • Cover and cook on High for 2-3 hours or Low for 4-5 hours; check for doneness.
  • Let stand 30 minutes, then serve warm with ice cream and optional toppings.

Notes

Ensure not to stir after adding coffee and sugar mixture for the best lava effect.
Calories: 420kcal
Cost: $15
Course: Dessert
Cuisine: American
Keyword: chocolate, slow cooker

Effortless Date Energy Balls: A Nutritious Snack for Busy Lives

Are you looking for a quick, delicious, and nutritious snack to fuel your busy day? Look no further than these date energy balls. Made primarily from Medjool dates, nuts, and oats, these delightful energy bites are perfect for a post-workout boost, a midday pick-me-up, or even a guilt-free dessert. Not only are they easy to make, but they also provide a wholesome blend of nutrients that can fit seamlessly into any diet. In this comprehensive guide, we’ll walk you through everything you need to know to create the ultimate date energy balls.

Why You’ll Love This Recipe

  • Quick and Easy: With no baking required, you can whip up these date energy balls in under 15 minutes!
  • Nutrient-Packed: Each ball is filled with fiber, healthy fats, and natural sugars, making them a perfect energy boost.
  • Customizable: You can easily modify the recipe with various nuts, seeds, or add-ins to suit your taste preferences.
  • Convenient Snack: These energy balls are portable and can be stored in the fridge or freezer for on-the-go snacking.
  • Kid-Friendly: A great way to introduce healthy snacks to children, they’ll love the sweet flavor without all the added sugar.

Gather Your Ingredients

Let’s take a closer look at the ingredients that make these date energy balls so special:

  • 1 cup Medjool dates, pitted: The star ingredient! They provide natural sweetness and help bind the energy balls.
  • 1 cup nuts: Choose from almonds, walnuts, or cashews. Aim for raw or lightly roasted without added oils for the best flavor.
  • 1/2 cup rolled oats: Adds texture and a wholesome base to the mixture; gluten-free options are available.
  • 2 tablespoons nut butter: Almond or peanut butter enhances flavor and binds the mixture together.
  • 1/4 cup cocoa powder (optional): For a chocolatey twist that elevates the flavor profile.
  • 1/4 cup shredded coconut (optional): Adds a delightful chewiness and tropical flair.
  • Pinch of salt: Balances the sweetness and enhances the overall flavor.

How to Make Date Energy Balls

Nutty and chewy Date Energy Balls arranged on a plate.

Creating these energy balls is as simple as combining the ingredients in a food processor. Here’s how:

  1. Start by placing the pitted Medjool dates in your food processor. Pulse until they form a sticky paste.
  2. Add the nuts and rolled oats to the processor. Pulse until the mixture is well combined but still has some texture.
  3. Include the nut butter, cocoa powder, shredded coconut, and salt. Blend until everything is fully incorporated.
  4. Using your hands, scoop out portions of the mixture and roll them into small balls (about 1 inch in diameter).
  5. Place the formed balls on a parchment-lined tray and refrigerate for at least 30 minutes to firm up.

Pro Tips for Perfect Energy Balls

  • Use fresh dates: Ensure your Medjool dates are soft and fresh for the best texture. If they’re hard, soak them in warm water for 10 minutes before using.
  • Experiment with flavors: Try adding spices like cinnamon or vanilla extract for an extra flavor boost.
  • Adjust the texture: If the mixture is too dry, add a bit more nut butter or a splash of water; if too wet, add more oats.
  • Make them bite-sized: Smaller balls are easier to snack on and portion control is simpler.
  • Keep them chilled: Store your energy balls in the refrigerator to maintain freshness and texture.
  • Use a vacuum sealer: If you plan to store them for an extended period, consider vacuum sealing to prevent freezer burn.
  • Try different nuts: Each nut brings a unique flavor and texture; feel free to mix and match!
  • Roll in toppings: For added visual appeal, roll your energy balls in crushed nuts, seeds, or cocoa powder.

Common Mistakes and Troubleshooting

Even simple recipes can have their hiccups. Here are some common issues and how to solve them:

  • Too crumbly: If your energy balls are falling apart, add more nut butter or a splash of water to help them bind.
  • Too sticky: If they’re too sticky, chill them for a bit longer in the refrigerator, or add a touch more oats.
  • Flavor not strong enough: Adjust the sweetness by adding a drizzle of honey or maple syrup if desired.
  • Not holding shape: Ensure you’re rolling them tightly; if they’re still falling apart, the mixture may need more binding ingredients.

Delicious Variations on Date Energy Balls

Feeling adventurous? Try these variations to change up your energy ball game:

  • Chocolate Chip: Add dark chocolate chips for a sweet treat that feels indulgent.
  • Matcha Bliss: Incorporate matcha powder for a boost of antioxidants and a unique flavor.
  • Tropical Paradise: Mix in dried pineapple or mango and a touch of lime zest for a tropical twist.
  • Nut-Free: Replace nuts with seeds like sunflower or pumpkin to make a nut-free version.

Storage and Make-Ahead Instructions

These energy balls are perfect for meal prep! Here’s how to store them:

  • Refrigerator: Store in an airtight container for up to one week.
  • Freezer: For longer storage, freeze in a single layer on a baking sheet, then transfer to a zip-top bag for up to three months.

Frequently Asked Questions (FAQ)

  • Can I make these energy balls vegan? Yes, all ingredients are plant-based!
  • How many energy balls should I eat? It depends on your dietary needs; 1-2 is typically a good snack portion.
  • Can I use other types of dates? Yes, you can use other varieties; just ensure they are soft and sticky.
  • What can I use instead of nuts? Try seeds like chia, hemp, or sunflower seeds for a nut-free option.
  • Can I use a blender instead of a food processor? Yes, but a food processor typically does a better job of blending the mixture smoothly.
  • What if my mixture is too dry? Add a bit more nut butter or a splash of water to help bind the mixture.
  • Are these energy balls gluten-free? Yes, as long as you use gluten-free oats.
  • Can I add protein powder? Absolutely! Incorporate a scoop to boost the protein content.

Nutrition Tips and Dietary Adaptations

These date energy balls are not only delicious but can also fit into various dietary needs:

  • For a higher protein snack: Add a scoop of protein powder or extra nut butter.
  • For lower sugar options: Reduce the number of dates or use unsweetened nut butter.
  • For a keto adaptation: Substitute nuts for seeds and omit oats.

Essential Equipment Recommendations

To make your date energy balls, you’ll need:

  • Food Processor: A high-quality processor ensures a smooth blend of ingredients.
  • Measuring Cups: Precise measurements lead to consistent results every time.
  • Parchment Paper: Useful for lining trays when chilling the energy balls.

Serving Suggestions

These energy balls can be enjoyed in various ways:

  • Post-Workout Snack: Perfect for replenishing energy after exercise.
  • On-the-Go Treat: Toss a few in your bag for a quick snack during busy days.
  • Pair with Yogurt: Serve alongside yogurt for a balanced breakfast or snack.
  • At Parties: Present them as a healthy snack option at gatherings.

In conclusion, these date energy balls are not just a snack; they’re a versatile addition to your culinary repertoire. With a blend of wholesome ingredients and endless customization options, you can enjoy these bites as a quick energy boost any time of day. So gather your ingredients and get ready to create a treat that’s both nourishing and delicious!

Date Energy Balls

Prep Time 10 minutes
Total Time 10 minutes
Servings 12 pieces
Calories 150
These delicious and nutritious Date Energy Balls are perfect for a quick snack or a healthy treat, packed with natural sweetness and wholesome ingredients.

Ingredients

Main

  • 1 cup Medjool dates, pitted
  • 1 cup nuts (e.g., almonds, walnuts, cashews) (Aim for raw or lightly roasted without added oils)
  • 0.5 cup rolled oats
  • 2 tablespoons nut butter (e.g., almond or peanut butter)
  • 0.25 cup cocoa powder (optional)
  • 0.25 cup shredded coconut (optional)
  • pinch salt pinch salt

Instructions 

  • Blend dates and nuts until finely chopped.
  • Add oats, nut butter, cocoa powder, shredded coconut, and salt; mix until well combined.
  • Form mixture into 12 small balls and place on a tray.
  • Optional: Roll balls in shredded coconut for extra flavor.
  • Refrigerate for 30 minutes before serving.

Notes

Store in an airtight container in the fridge for up to a week.
Calories: 150kcal
Cost: $10
Course: Snack
Cuisine: Healthy
Keyword: Dates

Indulge in Effortless Elegance with No Bake Chocolate Cheesecake

If you’re in search of a dessert that balances rich flavors with simplicity, look no further than this No Bake Chocolate Cheesecake. This recipe combines easy techniques with delightful ingredients, making it perfect for any occasion. Whether you’re hosting a dinner party or treating yourself on a quiet evening, this cheesecake is your ticket to effortless indulgence.

In this comprehensive guide, we’ll explore everything you need to know to create a **delicious no bake chocolate cheesecake** that will impress your guests and satisfy your cravings. With a smooth, creamy texture and a decadent chocolate flavor, you’re going to love every slice!

Why You’ll Love This Recipe

  • Quick and easy: This cheesecake requires no baking, allowing you to whip it up in under an hour, plus chilling time!
  • Versatile flavors: Customize your cheesecake with various toppings or by using different types of chocolate.
  • Impressive presentation: The glossy ganache and fluffy whipped cream topping make for a stunning dessert.
  • Perfect for any occasion: Whether it’s a birthday, holiday, or just a casual get-together, this cheesecake is sure to please.
  • Make-ahead option: Prepare it the night before to save time and ensure a perfectly set cheesecake.

Ingredients Breakdown

Here’s what you’ll need to create this delightful cheesecake:

  • 25 Oreos or chocolate creme cookies: These will form the base; feel free to substitute with any chocolate cookie of your choice.
  • 5 tbsp unsalted butter, melted: This helps bind the crust together.
  • 250g dark chocolate: Use high-quality chocolate for a richer flavor.
  • 1 1/2 cup heavy cream, chilled: Divided into two portions for the ganache and whipped cream.
  • 24 oz cream cheese, room temperature: Ensures a creamy texture; allow it to sit out for about 30 minutes before mixing.
  • 1 cup granulated sugar: Balances the rich chocolate flavor.
  • 1/2 tsp salt: Enhances the overall flavor.
  • Optional: 1 tsp instant coffee: Adds depth to the chocolate flavor.
  • 100g chocolate (for ganache): Choose dark, semi-sweet, or milk chocolate based on your preference.
  • 3 tbsp cocoa powder, sifted: For an extra chocolatey kick to the whipped cream.

Step-by-Step Instructions

Mouth-watering no-bake chocolate cheesecake on a plate, highlighting its smooth texture and chocolate drizzle.

Follow these easy steps to create your no bake chocolate cheesecake:

  1. Prepare a 9″ springform pan by lightly brushing butter on the bottom and edges, or line the bottom with parchment paper.
  2. In a food processor, grind the Oreos with melted butter until they form a fine crumb. Transfer to the pan and press down tightly to form the crust. Place in the fridge while you prepare the filling.
  3. For the ganache, combine the dark chocolate and 3/4 cup heavy cream in a heat-safe bowl. If using, add the instant coffee. Create a double boiler by placing the bowl over a saucepan of simmering water and stir until the chocolate melts. Remove from heat and let cool for 5 minutes.
  4. In another bowl, whisk the cream cheese, sugar, and salt on medium speed until creamy, about 2-3 minutes. Scrape down the sides to ensure even mixing.
  5. Pour the cooled ganache into the cream cheese mixture and mix until just combined.
  6. In a separate bowl, whip the remaining 3/4 cup heavy cream until stiff peaks form. Gently fold it into the cheesecake mixture until fully combined.
  7. Transfer the filling into the springform pan on top of the crust, spreading it evenly. Refrigerate for at least 6 hours or overnight to set.
  8. Once set, carefully remove the cheesecake from the pan. Prepare the optional ganache topping by melting the cream and 100g chocolate over a double boiler, then let it cool slightly before pouring over the cheesecake.
  9. Top with chocolate whipped cream made by whipping together heavy cream, sugar, and cocoa powder until stiff peaks form.
  10. Slice, serve, and enjoy your delicious creation!

Pro Tips for Perfection

  • Chill your ingredients: Ensure your cream cheese and heavy cream are at room temperature for easier mixing.
  • Don’t rush the ganache: Allow the chocolate to cool slightly before mixing it into the cream cheese for a smooth texture.
  • Perfect your whipped cream: Avoid overmixing to keep it light and fluffy.
  • Use high-quality chocolate: The better the chocolate, the richer and more flavorful your cheesecake will be.
  • Let it set: For the best texture and flavor, refrigerate overnight if possible.
  • Experiment with flavors: Try adding different extracts or flavored liqueurs for a unique twist.
  • Garnish creatively: Use fresh berries, shaved chocolate, or nuts to elevate the presentation.
  • Don’t skip the salt: A small amount enhances the sweetness and balances flavors.

Common Mistakes and Troubleshooting

Even seasoned bakers can encounter a few hiccups. Here’s how to troubleshoot:

  • Cheesecake is too runny: Ensure your cream cheese is fully combined and your heavy cream is whipped to stiff peaks before folding in.
  • Crust is too crumbly: If the crust doesn’t hold together, add more melted butter to help bind it.
  • Ganache is too thick: If your ganache cools too much, gently reheat it in a double boiler to achieve a pourable consistency.
  • Cheesecake doesn’t set: Make sure to chill it for the recommended time; overnight chilling is best for optimal texture.

Variations to Try

Want to switch it up? Here are some variations to consider:

  • Mint Chocolate Cheesecake: Add peppermint extract to the filling for a refreshing twist.
  • Peanut Butter Swirl: Mix in creamy peanut butter into the cheesecake filling for a rich flavor.
  • Chocolate Hazelnut Cheesecake: Use chocolate hazelnut spread in place of some ganache for added depth.
  • Fruit Topped Cheesecake: Top with fresh strawberries, raspberries, or a berry compote for a fruity finish.

Storage and Make-Ahead Instructions

This cheesecake is perfect for preparing in advance:

  • Storage: Keep the cheesecake covered in the fridge for up to 5 days for best quality.
  • Freezing: You can freeze the cheesecake for up to 2 months. Thaw in the fridge before serving.
  • Make-ahead: Perfect for parties, you can prepare it up to 2 days in advance.

Frequently Asked Questions

  • Can I use low-fat cream cheese? Using low-fat options may affect the creaminess and overall texture of the cheesecake.
  • Is there a way to make this sugar-free? Yes, substitute sugar with a sugar-free alternative like stevia or erythritol.
  • Can I use different types of chocolate? Absolutely! Semi-sweet or milk chocolate can be used based on your preference.
  • How long does it take to set? It needs at least 6 hours in the fridge; overnight is recommended for the best results.
  • Can I make this dairy-free? Use dairy-free cream cheese and coconut cream for the whipped topping.
  • What’s the best way to slice the cheesecake? Use a hot knife for clean slices, wiping the blade between cuts for neat servings.
  • How do I prevent cracks in the cheesecake? Proper chilling and avoiding overmixing will help maintain a smooth surface.
  • Can I add toppings later? Yes, feel free to add ganache, whipped cream, or fruit just before serving.

Nutrition Tips and Dietary Adaptations

This No Bake Chocolate Cheesecake can be adapted to fit various dietary needs:

  • Gluten-free: Use gluten-free cookies for the crust.
  • Vegan: Substitute cream cheese with vegan alternatives and use coconut cream.
  • Low-carb: Opt for low-carb sweeteners and a nut-based crust.

Equipment Recommendations

To make the process seamless, gather the following equipment:

  • 9″ springform pan: Essential for easy removal and serving.
  • Food processor: For quickly grinding your cookie crust.
  • Mixing bowls: A set of various sizes will help in preparing different components.
  • Electric mixer: For whipping cream and mixing the filling.
  • Double boiler: To melt chocolate gently without burning it.

Serving Suggestions

Enhance your cheesecake experience with these serving ideas:

  • Pair with fresh fruit: Serve with strawberries or raspberries for a tart contrast to the sweetness.
  • Garnish creatively: Use chocolate shavings, whipped cream, or a drizzle of caramel sauce.
  • Serve with coffee: Complement the dessert with a cup of coffee or espresso for a delightful pairing.

In conclusion, this No Bake Chocolate Cheesecake is not just a dessert; it’s an experience. With rich flavors, an easy-to-follow recipe, and room for creativity, you can impress anyone at your next gathering. Enjoy the journey of creating this masterpiece, and remember, the best moments are often shared over a slice of cheesecake!

BEST NO BAKE CHOCOLATE CHEESECAKE RECIPE

Prep Time 30 minutes
Total Time 30 minutes
Servings 12 pieces
Calories 550
A rich and creamy no-bake chocolate cheesecake that combines a chocolate cookie crust with a luscious chocolate filling, topped with ganache and whipped cream.

Ingredients

Crust

  • 285 g Oreos or chocolate creme cookies (crushed for crust)
  • 70 g unsalted butter (melted)

Filling

  • 250 g dark chocolate
  • 180 g heavy cream (divided into 3/4 cup portions)
  • 680 g cream cheese (room temperature)
  • 200 g granulated sugar
  • 0.5 tsp salt
  • 1 tsp instant coffee (optional)
  • 120 g heavy cream (for ganache)
  • 100 g chocolate (dark, semi-sweet or milk)
  • 240 g heavy cream (chilled for whipping)
  • 50 g granulated sugar (for whipped cream)
  • 25 g cocoa powder (sifted)

Instructions 

  • Prepare a 9" springform pan by greasing the bottom and sides or lining with parchment.
  • Mix crushed cookies with melted butter, press into the pan to form the crust, and chill.
  • Heat chocolate with 3/4 cup heavy cream until melted and shiny; cool slightly.
  • Whisk cream cheese, sugar, salt, and optional coffee until smooth. Fold in cooled ganache and whipped cream.
  • Pour filling over crust, smooth, and refrigerate at least 6 hours or overnight.
  • Optional: Make ganache with remaining cream and chocolate, cool slightly, then pour over chilled cheesecake. Top with whipped cream and serve.

Notes

Ensure the cheesecake is fully chilled before adding toppings for best results.
Calories: 550kcal
Cost: $15
Course: Dessert
Cuisine: American
Keyword: cheesecake, chocolate, no bake

Your Ultimate Guide to Energizing Date Protein Balls

Are you searching for a delicious way to fuel your day? Look no further than these energizing date protein balls. Packed with wholesome ingredients and bursting with flavor, these bite-sized snacks offer the perfect balance of nutrition and convenience. Whether you need a quick breakfast, a post-workout boost, or a satisfying afternoon pick-me-up, this recipe is designed to keep you energized throughout your day.

Why You’ll Love This Recipe

These protein balls are not just another snack; they are a powerhouse of health benefits. Here are five compelling reasons to add them to your meal prep:

  • Easy to Make: With minimal ingredients and no baking required, you can whip these up in just 15 minutes.
  • Nutritious Ingredients: Made with medjool dates, nuts, and oats, they’re rich in fiber and healthy fats.
  • Customizable: Tailor the recipe to your taste with various add-ins, like seeds or dried fruits.
  • Perfect for Meal Prep: These protein balls can be stored for up to a week, making them a great grab-and-go option.
  • Satisfying and Delicious: With a sweet and nutty flavor, these protein balls are a treat you’ll look forward to!

Ingredient Breakdown

To make these easy date protein balls, you’ll need the following ingredients:

  • 1 cup pitted dates: Naturally sweet and sticky, they act as a binder and provide energy.
  • 1 cup nuts: Choose almonds or walnuts for added crunch and healthy fats.
  • 1/2 cup rolled oats: For fiber and texture, oats contribute to the overall health benefits.
  • 1/4 cup nut butter: Peanut or almond butter adds creaminess and protein.
  • 1/4 cup protein powder (optional): Boost your protein intake with your favorite powder.
  • 0.5 teaspoon vanilla extract: Enhances flavor with a hint of sweetness.
  • Pinch of salt: Balances sweetness and enhances flavor.
  • Coconut flakes or cocoa powder: Optional for rolling, these add visual appeal and flavor.

How to Make Energizing Date Protein Balls

Healthy Date Protein Balls on a plate, showcasing their rich texture.

Follow these simple steps to create your protein balls:

  1. Combine dates and nuts: In a food processor, blend the pitted dates and nuts until finely chopped.
  2. Add remaining ingredients: Include oats, nut butter, protein powder, vanilla, and salt; process until a sticky dough forms.
  3. Shape into balls: Roll the mixture into 1-inch balls, optionally coating them in coconut flakes or cocoa powder.
  4. Chill to set: Refrigerate for at least 30 minutes to firm up the balls.
  5. Store for later: Keep them in an airtight container in the fridge for up to one week.

Pro Tips for Best Results

To ensure your date protein balls turn out perfectly every time, consider these expert insights:

  • Use fresh ingredients: Fresh dates yield the best texture and flavor.
  • Adjust sweetness: If your mixture is too dry, add a teaspoon of honey or maple syrup.
  • Experiment with flavors: Consider adding spices like cinnamon or nutmeg for an extra flavor kick.
  • Enhance nutrition: Add chia seeds, flaxseeds, or hemp seeds for additional health benefits.
  • Chill longer if needed: If your balls aren’t firm enough, allow them to chill longer in the fridge.
  • Keep it clean: Use damp hands when rolling to prevent sticking.
  • Batch it up: Make a double batch to have a healthy snack ready for the week.
  • Consider dietary needs: Use nut-free butter for nut allergies or gluten-free oats for gluten sensitivity.

Common Mistakes and Troubleshooting

Even the best cooks can run into issues. Here’s how to avoid common pitfalls:

  • Too crumbly: If the mixture is falling apart, add a bit more nut butter or a splash of water.
  • Too sticky: If the dough is overly sticky, add more oats or protein powder until manageable.
  • Flavor lacking: Adjust the flavor by adding a touch more vanilla or a sprinkle of sea salt.
  • Not rolling well: If the mixture is too dry, ensure you’ve processed the dates well enough to create a sticky base.

Variations to Try

Looking to mix things up? Here are four tasty variations:

  • Chocolate Chip Delight: Add mini chocolate chips to the mixture for a sweet treat.
  • Fruit & Nut Medley: Incorporate dried cranberries or apricots for a fruity twist.
  • Spicy Pumpkin: Add pumpkin spice and use pumpkin puree instead of nut butter for a fall-inspired version.
  • Matcha Green Tea: Mix in matcha powder for an antioxidant boost and a unique flavor.

Storage and Make-Ahead Instructions

These protein balls are perfect for meal prep:

  • Storage: Keep them in an airtight container in the fridge for up to one week.
  • Freezing: For longer storage, freeze the protein balls for up to three months. Thaw in the fridge overnight before enjoying.
  • Make-ahead: Prepare a batch on the weekend to ensure you have healthy snacks ready during the week.

Frequently Asked Questions

Here are some common queries about date protein balls:

  • Can I use other types of nuts? Yes, feel free to substitute with your favorite nuts or seeds.
  • Are these protein balls vegan? Yes, they’re completely plant-based!
  • How do I know if they’re done? They should hold their shape and feel firm after chilling.
  • Can I add protein powder? Absolutely! It’s a great way to boost protein content.
  • What if I don’t have a food processor? You can chop everything finely by hand, but it may take longer.
  • How many protein balls can I eat? Enjoy 2-3 balls for a healthy snack, depending on your dietary needs.
  • Are these gluten-free? Yes, if using gluten-free oats.
  • Can I make them nut-free? Yes, substitute nut butter with sunflower seed butter or tahini.

Nutrition Tips and Dietary Adaptations

These energizing date protein balls can fit into various dietary needs:

  • For weight management: Monitor portion sizes and enjoy them as part of a balanced diet.
  • For athletes: Pair with a protein shake for an effective post-workout recovery.
  • For kids: A great after-school snack that’s healthy and satisfying!
  • For low-carb diets: Reduce the number of oats and increase nuts or seeds.

Equipment Recommendations

To make the process smooth, here are some essential tools:

  • Food Processor: A high-quality food processor is crucial for achieving the right texture.
  • Measuring Cups: Ensure accuracy for consistent results.
  • Spatula: Use a rubber spatula to scrape down the sides of the food processor.
  • Storage Containers: Airtight containers are essential for keeping your snacks fresh.

Serving Suggestions

Enjoy your date protein balls in various ways:

  • As a snack: Perfect for on-the-go munching or as a midday pick-me-up.
  • As a topping: Crumble over yogurt or oatmeal for added texture and flavor.
  • As a gift: Package them in a jar for a thoughtful homemade gift.

By following this guide, you can create the best date protein balls that are not only easy to make but also delicious and nutritious. Enjoy the journey of cooking, and remember: great meals happen with smart choices and a little creativity!

Date Protein Balls for Healthy Snacking and Energy Boosts Throughout Your Day

Prep Time 10 minutes
Total Time 10 minutes
Servings 12 pieces
Calories 150
Enjoy these easy, nutritious protein balls that provide a quick energy boost and satisfy your sweet tooth naturally.

Ingredients

Main Ingredients

  • 1 cup pitted dates
  • 1 cup nuts (almonds or walnuts)
  • 0.5 cup rolled oats
  • 0.25 cup nut butter (peanut or almond)
  • 0.25 cup protein powder (optional)
  • 0.5 teaspoon vanilla extract
  • pinch salt
  • optional coconut flakes or cocoa powder for rolling (for coating)

Instructions 

  • Combine dates and nuts in a food processor; process until finely chopped.
  • Add oats, nut butter, protein powder, vanilla, and salt; process until a sticky dough forms.
  • Roll mixture into 1-inch balls; optionally coat with coconut flakes or cocoa powder.
  • Refrigerate for at least 30 minutes to set.
  • Store in an airtight container in the fridge for up to one week.

Notes

For best results, keep the balls refrigerated and enjoy within a week.
Calories: 150kcal
Cost: $15
Course: Snack
Cuisine: Healthy
Keyword: protein balls

Discover the Joy of Hearty Cheesy Veggie Egg Muffins

Welcome to the world of Hearty Cheesy Veggie Egg Muffins, where convenience meets nutrition in the most delicious way. These muffins are not just your average breakfast option; they are a smart, efficient solution for busy mornings or meal prep days. Packed with vibrant vegetables, gooey cheese, and protein-rich eggs, this recipe is designed to make your mornings easier while ensuring you enjoy a fulfilling and satisfying meal. In this guide, we will explore everything you need to know about making these delightful muffins, from ingredients to cooking methods and storage tips.

Whether you are a busy professional, a parent, or simply someone who values quick and nutritious meals, you’ll find that these muffins check all the boxes. Let’s dive into why you’ll love this recipe and how you can customize it to fit your needs!

Why You’ll Love This Recipe

  • Quick and Easy: With a prep time of just 10 minutes and cooking time of 20 minutes, these muffins can be on your table in no time.
  • Meal Prep Friendly: Make a batch ahead of time and store them for an easy grab-and-go breakfast during the week.
  • Customizable: Use your favorite vegetables and cheeses to make each batch unique and tailored to your taste.
  • Nutritious: Packed with protein, vitamins, and minerals, these muffins are a healthy start to your day.
  • Kid-Friendly: With their cheesy goodness and colorful veggies, children will love these muffins just as much as adults!

Ingredient Breakdown for Hearty Cheesy Veggie Egg Muffins

To craft these delightful muffins, you’ll need the following ingredients:

  • 12 large eggs: The base of the recipe, eggs provide essential proteins and nutrients.
  • 1/4 cup milk: Any kind (dairy or non-dairy) will work; this adds a fluffy texture to the muffins.
  • 1/2 teaspoon salt: Enhances flavor; adjust according to your palate.
  • 1/4 teaspoon black pepper: Adds a subtle kick to the muffins.
  • 1/2 cup bell pepper: Finely diced, any color; contributes a sweet crunch.
  • 1/4 cup red onion: Finely diced; adds depth of flavor.
  • 1 cup fresh spinach: Chopped and packed; brings freshness and nutrients.
  • 1/2 cup shredded cheddar cheese: Feel free to substitute with your favorite cheese like Monterey Jack for a unique twist.

Expert Tips for Perfect Muffins

Appetizing shot of egg muffins highlighting their cheese and veggie fillings.
  • Use Silicone Liners: For easy cleanup and to prevent sticking, silicone muffin liners are a great choice.
  • Don’t Overmix: Gently combine ingredients to maintain a light texture in your muffins.
  • Let Them Cool: Allow muffins to cool in the pan for a few minutes before transferring them to a wire rack.
  • Experiment with Herbs: Fresh herbs like basil or parsley can elevate the flavor profile of your muffins.
  • Check for Doneness: Insert a toothpick into the center; it should come out clean when muffins are done.
  • Adjust Cooking Time: Ovens vary, so keep an eye on your muffins, especially during the last few minutes.
  • Keep Ingredients Fresh: Use fresh vegetables for the best flavor and texture.
  • Batch Cooking: Double the recipe for a larger batch and freeze extras for later.

Common Mistakes and Troubleshooting

Even seasoned cooks can make mistakes. Here are some common pitfalls and how to avoid them:

  • Overcooking: Watch the time closely to prevent dry muffins; they should be slightly firm but not hard.
  • Skipping the Milk: Omitting milk can result in denser muffins; always include it for a fluffier texture.
  • Too Many Fillings: While adding extras is tempting, overstuffing can lead to uneven cooking; stick to the recommended amounts.
  • Ignoring the Cooling Period: Cutting into muffins too early can lead to a crumbly texture; allow them to cool first.

Creative Variations to Try

These muffins are incredibly versatile. Here are some exciting variations to consider:

  • Southwestern Twist: Add black beans, corn, and jalapeños for a spicy kick.
  • Mediterranean Style: Incorporate feta cheese, sun-dried tomatoes, and olives for a tangy flavor.
  • Herbed Mushroom: Sauté mushrooms and fresh herbs like thyme or rosemary for an earthy muffin.
  • Sweet Potato Delight: Mash cooked sweet potatoes into the batter for added sweetness and nutrition.

Storage and Make-Ahead Instructions

To keep your muffins fresh and tasty:

  • Refrigerate: Store in an airtight container in the fridge for up to 5 days.
  • Freeze: Place muffins in a zip-top bag and freeze for up to 3 months; reheat in the microwave or oven.
  • Make-Ahead: Prepare the batter the night before and bake in the morning for a hassle-free breakfast.

Comprehensive FAQ

  • Can I use egg substitutes? Yes, you can use flaxseed meal or commercial egg replacers for a vegan option.
  • What vegetables can I use? Feel free to experiment with zucchini, broccoli, or even kale.
  • How do I reheat frozen muffins? Microwave for 30-60 seconds or bake at 350°F (175°C) for 10-12 minutes.
  • Can I double the recipe? Absolutely! Just ensure you have a large enough muffin tin.
  • What if I don’t have a muffin tin? You can use a baking dish and cut the baked mixture into squares.
  • Are these muffins gluten-free? They can be made gluten-free by using gluten-free flour or omitting the flour altogether.
  • How do I prevent sticking? Use muffin liners or grease the tin well to ensure easy release.
  • Can I add meats? Yes, cooked bacon or sausage can be added for extra protein.

Nutritional Tips and Dietary Adaptations

For those conscious of their nutritional intake:

  • Low-Calorie Option: Use egg whites instead of whole eggs to reduce calories and fat.
  • Dairy-Free Variation: Use non-dairy milk and vegan cheese for a fully plant-based muffin.
  • Boost Fiber: Add a tablespoon of chia seeds or oats to increase fiber content.

Essential Equipment Recommendations

To make the most of this recipe, consider the following equipment:

  • Muffin Tin: A standard 12-cup muffin tin is essential; silicone ones work best for easy removal.
  • Mixing Bowls: Having both large and medium-sized bowls will make your prep easier.
  • Whisk: A whisk helps in mixing the eggs and other ingredients thoroughly.
  • Measuring Cups and Spoons: Accurate measurements are key to a successful recipe.

Serving Suggestions

These muffins are delicious on their own but can be paired with:

  • Fresh Fruit: Serve with a side of berries or sliced apples for a refreshing contrast.
  • Yogurt: A dollop of Greek yogurt adds creaminess and protein.
  • Salsa: A spoonful of salsa on top adds a zesty kick that’s hard to resist.

In conclusion, Hearty Cheesy Veggie Egg Muffins are more than just a breakfast option; they are a culinary solution for anyone looking to enjoy a nutritious meal without the fuss. With an easy recipe and endless possibilities for customization, you’ll find yourself returning to this dish again and again. Remember, cooking is about experimentation and joy—so feel free to make this recipe your own. Happy cooking!

Hearty Cheesy Veggie Egg Muffins

Prep Time 10 minutes
Cook Time 20 minutes
Total Time 30 minutes
Servings 6 muffins
Calories 150
These delicious and nutritious egg muffins are packed with colorful vegetables and melted cheese, perfect for a quick breakfast or snack.

Ingredients

Eggs

  • 12 large eggs
  • 0.25 cup milk (any kind (dairy or non-dairy))
  • 0.5 teaspoon salt
  • 0.25 teaspoon black pepper
  • 0.5 cup bell pepper (finely diced, any color)
  • 0.25 cup red onion (finely diced)
  • 1 cup fresh spinach (chopped, packed)
  • 0.5 cup shredded cheddar cheese (or your favorite cheese like Monterey Jack)

Instructions 

  • Preheat oven to 375°F (190°C). Grease a muffin tin.
  • In a large bowl, whisk together eggs, milk, salt, and pepper.
  • Stir in diced bell peppers, red onion, spinach, and shredded cheese.
  • Pour mixture evenly into muffin cups and bake for 20 minutes until set and golden.
  • Let cool slightly before removing from tin. Serve warm.

Notes

For extra flavor, add herbs or spices of your choice.
Calories: 150kcal
Cost: $10
Course: Breakfast
Cuisine: American
Keyword: Eggs