Author

robert

Browsing

Discover Guilt-Free Indulgence with Keto Peanut Butter Hearts

If you’re on the keto diet and craving something sweet, you’ve landed in the right place! These Keto Peanut Butter Hearts provide the perfect solution for satisfying your sweet tooth without derailing your low-carb lifestyle. Made with creamy peanut butter and sugar-free chocolate, these low-carb treats are not only delicious but incredibly easy to make. Let’s dive into why this recipe will become a staple in your kitchen!

Why You’ll Love This Recipe

  • Quick and Easy: With just a handful of ingredients and minimal prep time, you can whip up these delightful treats in no time.
  • Low-Carb Perfection: Each serving is designed to fit seamlessly into your keto diet, making indulgence guilt-free.
  • Customizable Flavors: You can easily adjust the sweetness or add flavors like vanilla to suit your palate.
  • Healthy Fats: The use of peanut butter and coconut oil means you’re getting healthy fats that are essential for a balanced keto diet.
  • Great for Sharing: Perfect for parties, gifts, or just treating yourself, these hearts are sure to impress!

Ingredient Breakdown

Let’s take a closer look at the ingredients you’ll need to create these delicious Keto Peanut Butter Hearts, along with some handy substitutions.

  • 1 cup natural peanut butter (unsweetened, creamy): Use any unsweetened nut butter if you’re allergic to peanuts.
  • ½ cup almond flour: For a nut-free option, coconut flour can be used, but be sure to adjust the quantity as it’s more absorbent.
  • 2–3 tbsp powdered erythritol (to taste): You can substitute with your favorite keto-friendly sweetener like monk fruit or stevia.
  • 1 tsp vanilla extract (optional): This adds a lovely flavor, but feel free to omit it if you prefer.
  • 1 cup sugar-free chocolate chips: Look for brands sweetened with erythritol or stevia to keep it low-carb.
  • 1 tbsp coconut oil (for melting chocolate): This helps the chocolate dip set nicely; you can also use avocado oil if desired.

Step-by-Step Instructions

Natural peanut butter chocolates presented on a wooden surface.

Creating these Keto Peanut Butter Hearts is straightforward. Follow these simple steps to enjoy your homemade treats:

  • Make the Filling: In a mixing bowl, combine the peanut butter, almond flour, powdered erythritol, and vanilla extract. Stir until a thick dough forms.
  • Shape: Press the mixture into silicone heart molds or shape the dough by hand into small hearts. Place in the freezer for 20-30 minutes until firm.
  • Melt Chocolate: In a microwave-safe bowl, combine the sugar-free chocolate chips and coconut oil. Melt in 30-second intervals, stirring until the mixture is smooth.
  • Dip & Set: Remove the hearts from the molds and dip each one into the melted chocolate. Place them on parchment paper and refrigerate until the chocolate sets.

Pro Tips for Success

  • Texture Check: Ensure the peanut butter is creamy and free of added sugars. This ensures a smooth filling.
  • Chilling Time: Don’t rush the chilling process. Allow the hearts to set completely for the best texture when biting into them.
  • Chocolate Quality: Use high-quality sugar-free chocolate for the best flavor and texture.
  • Experiment with Sweetness: Adjust the sweetness according to your taste preference; start with less and add more if needed.
  • Storage Tips: Store in an airtight container in the fridge for up to two weeks, or freeze for longer storage.
  • Filling Variations: Try adding a tablespoon of cocoa powder to the filling for a chocolate-peanut butter twist!
  • Nut-Free Option: Use sunflower seed butter in place of peanut butter for a nut-free version.
  • Flavor Boost: Add a pinch of sea salt to enhance the flavors even more!

Common Mistakes and Troubleshooting

Even the most experienced cooks can run into issues. Here are some common pitfalls and how to avoid them:

  • Too Crumbly: If your dough is too crumbly, add a bit more peanut butter until you reach the desired consistency.
  • Chocolate Not Setting: Ensure your chocolate mixture is cool before dipping; hot chocolate can melt the filling.
  • Sticky Hearts: If the hearts are sticking to the molds, try using a silicone mold or lightly oiling the molds before pressing in the dough.

Variations to Try

These Keto Peanut Butter Hearts are versatile! Here are some exciting variations you can experiment with:

  • Chocolate-Coconut Hearts: Add unsweetened shredded coconut to the filling for a tropical twist.
  • Peanut Butter Cups: Layer the chocolate and filling to create a mini peanut butter cup.
  • Mint Chocolate Hearts: Add a drop of peppermint extract to the melted chocolate for a refreshing flavor.
  • Nutty Crunch: Fold in chopped nuts or seeds into the filling for added texture.

Storage and Make-Ahead Instructions

These treats can be prepared in advance, making them perfect for meal prepping:

  • Refrigerator: Store in an airtight container for up to two weeks.
  • Freezer: For longer storage, freeze in a single layer, then transfer to a sealed container for up to three months.
  • Make-Ahead: Prepare the filling and chocolate separately and combine them just before serving for the freshest taste.

Comprehensive FAQ

  • Can I use regular peanut butter? It’s best to use natural peanut butter without added sugars for this recipe to keep it keto-friendly.
  • How do I know when the chocolate is melted? Stir the chocolate every 30 seconds; it should be smooth and pourable.
  • Can I use another sweetener besides erythritol? Yes! Other keto-friendly sweeteners like stevia or monk fruit can also work.
  • What if my hearts are too soft? Make sure they are fully chilled before dipping in chocolate; if they remain soft, freeze for a bit longer.
  • Can I make these without molds? Absolutely! Shape the dough into hearts by hand or use any cookie cutter.
  • Is there a vegan version? Yes, use a plant-based butter alternative and ensure your chocolate is dairy-free.
  • What’s the best way to store leftovers? Store them in an airtight container in the refrigerator or freezer as mentioned earlier.
  • Can I add protein powder? Yes, feel free to fold in a scoop of your favorite protein powder for an added nutritional boost.

Nutritional Tips and Dietary Adaptations

These Keto Peanut Butter Hearts not only satisfy your sweet cravings but also provide healthy fats and protein. Here’s how to ensure they fit into your dietary needs:

  • Low-Calorie Option: Reduce the amount of chocolate used for a lower-calorie treat.
  • Nut-Free: Substitute peanut butter with sunflower seed butter for those with nut allergies.
  • Protein Boost: Add a scoop of protein powder to the filling to increase the protein content.

Essential Equipment Recommendations

To make your preparation smoother, here’s a list of equipment that will be helpful:

  • Silicone Molds: Ideal for shaping the hearts easily.
  • Microwave-Safe Bowl: For melting chocolate without hassle.
  • Mixing Bowls: Use sturdy bowls for mixing the filling ingredients.
  • Spatula: Helpful for scraping the filling into molds and mixing ingredients thoroughly.

Serving Suggestions

Serve your Keto Peanut Butter Hearts in a variety of ways to impress your guests:

  • On a Dessert Platter: Arrange them beautifully with fresh berries or whipped cream.
  • Gift-Worthy: Package them in a decorative box for a thoughtful, homemade gift.
  • As Party Favors: These hearts make great party favors at gatherings and celebrations.

In conclusion, Keto Peanut Butter Hearts are the perfect blend of taste and nutrition, allowing you to indulge without guilt. This recipe is not just about satisfying cravings but also about enjoying the process of creating something delicious. Whether you’re sharing them with friends or enjoying them solo, you can feel confident in treating yourself. Happy cooking!

Keto Peanut Butter Hearts : Low-Carb Chocolate Treats You’ll Love

Prep Time 10 minutes
Cook Time 10 minutes
Total Time 20 minutes
Servings 12 pieces
Calories 150
These delicious keto-friendly peanut butter hearts are coated in smooth sugar-free chocolate, making for a perfect low-carb treat.

Ingredients

Filling

  • 1 cup natural peanut butter (unsweetened, creamy)
  • 0.5 cup almond flour
  • 2-3 tbsp powdered erythritol (to taste)
  • 1 tsp vanilla extract (optional)
  • 1 cup sugar-free chocolate chips
  • 1 tbsp coconut oil (for melting chocolate)

Instructions 

  • Mix peanut butter, almond flour, erythritol, and vanilla until a thick dough forms.
  • Shape the mixture into hearts and freeze for 20–30 minutes.
  • Melt chocolate chips with coconut oil in 30-second bursts, stirring until smooth.
  • Dip the frozen hearts into melted chocolate and place on parchment paper.
  • Refrigerate until chocolate is set before serving.

Notes

Store in the refrigerator for best results.
Calories: 150kcal
Cost: $15
Course: Dessert
Keyword: chocolate, keto, Peanut Butter

Indulge in the Ultimate Chocolate Lava Cake Experience

If you’re searching for a dessert that will leave a lasting impression, look no further than the irresistible **chocolate lava cake**. This decadent treat, also known as molten chocolate cake, combines a rich, gooey center with a delicate outer layer, making it the perfect ending to any meal. Whether you’re planning a romantic dinner or simply want to satisfy your sweet tooth, this streamlined recipe is here to guide you through every step, ensuring delicious results every time.

Why You’ll Love This Recipe

This chocolate lava cake recipe is not just another dessert; it’s a culinary experience. Here’s what makes it so special:

  • Quick Preparation: With minimal ingredients and straightforward steps, you can whip up this dessert in under 30 minutes.
  • Versatile Cooking Methods: Whether you’re using an air fryer, Instant Pot, or traditional oven, this recipe adapts to your kitchen setup.
  • Impressive Presentation: Serve it warm with a scoop of vanilla ice cream, and watch your guests’ faces light up with delight.
  • Customizable Ingredients: Easily swap ingredients to suit dietary preferences—whether gluten-free or dairy-free.
  • Perfect for Any Occasion: From casual family dinners to upscale gatherings, this dessert fits right in.

Ingredient Breakdown

To create these luscious **molten chocolate lava cakes**, gather the following ingredients:

  • 1 cup (180g) dark chocolate chips: Use high-quality chocolate for the best flavor. You can also use chopped dark chocolate.
  • ½ cup (113g) unsalted butter: Cut into cubes for even melting.
  • 3 large eggs: Provide structure and richness.
  • 1 tsp vanilla bean paste: For a depth of flavor; vanilla extract works too.
  • 1 ½ cups (180g) powdered sugar: Adds sweetness and contributes to the cake’s texture.
  • 7 tbsp all-purpose flour: This is the base of your cake.
  • 1 tsp instant espresso powder: Optional but enhances the chocolate flavor.
  • 1 tsp ground cinnamon: Adds warmth and complexity.
  • ¼ tsp salt: Balances the sweetness.
  • 4 tsp cocoa powder: Dust the ramekins for an extra chocolatey touch.
  • Melted butter or cake release spray: For greasing the ramekins.
  • 2 tbsp Baileys: Optional addition for an adult twist.
  • Vanilla ice cream: For serving, optional but highly recommended.

Step-by-Step Instructions

A beautifully presented molten chocolate lava cake with chocolate flowing out.

Follow these simple steps to create your perfect chocolate lava cakes:

Preparing the Ramekins

1. Preheat your oven to 425°F (220°C). Grease four ramekins with melted butter or cake release spray and dust with cocoa powder. This ensures easy removal later.

Melting the Chocolate and Butter

2. In a microwave-safe bowl, combine the dark chocolate and cubed butter. Heat in 30-second intervals, stirring in between, until fully melted and smooth.

Mixing the Batter

3. In a separate bowl, whisk together the eggs, vanilla paste, and powdered sugar until well combined. Gradually fold in the melted chocolate mixture.

4. Sift in the flour, espresso powder, cinnamon, and salt. Stir until just incorporated.

Filling the Ramekins

5. Pour the batter evenly into the prepared ramekins, filling them about ¾ full.

Baking the Cakes

6. Bake in the preheated oven for 12-14 minutes or until the edges are firm but the center remains soft. If using an air fryer, cook at 320°F (160°C) for approximately 8-10 minutes.

Serving Suggestion

7. Let the cakes sit for 1 minute before inverting onto plates. Serve warm with a scoop of vanilla ice cream or a drizzle of chocolate sauce.

Pro Tips for Perfect Lava Cakes

  • Timing is Key: Keep a close eye on the baking time. Overbaking will result in a cake that doesn’t ooze.
  • Room Temperature Ingredients: Ensure your eggs and butter are at room temperature for better mixing.
  • Experiment with Chocolate: Try different types of chocolate for varied flavors; dark, semi-sweet, or even milk chocolate can work.
  • Chill Before Baking: If you want to prepare ahead, chill the filled ramekins for up to 24 hours before baking.
  • Garnish Creatively: Consider garnishing with fresh berries or a dusting of powdered sugar for added visual appeal.
  • Use Quality Ingredients: The better the chocolate, the richer the flavor; choose a chocolate you enjoy eating on its own.
  • Check for Doneness: If unsure, gently press on the center of the cake; it should give slightly.
  • Allow Resting Time: Don’t skip the resting time after baking; it helps the cake set a bit more.

Common Mistakes and Troubleshooting

Even the most experienced bakers can run into issues. Here’s how to avoid common pitfalls:

  • Overbaking: Keep an eye on the cakes, as even an extra minute can turn them from molten to solid.
  • Undercooking: If your cakes collapse, they may need a bit more time in the oven.
  • Sticking to the Ramekin: Make sure to grease and dust your ramekins properly to ensure easy release.
  • Uneven Texture: Ensure ingredients are well mixed; lumps can lead to uneven baking.

Variations to Try

Want to mix things up? Here are some delicious variations:

  • Nutty Delight: Add crushed nuts or nut butter for a delightful crunch.
  • Fruit-Filled Center: Place a spoonful of raspberry or cherry jam in the center before baking for a fruity surprise.
  • Spicy Chocolate: Incorporate a pinch of cayenne pepper or chili powder for a spicy kick.
  • Vegan Option: Substitute eggs with flaxseed meal and use vegan butter and chocolate for a plant-based version.

Storage and Make-Ahead Instructions

For any leftovers or meal prep:

  • Refrigerate: Store any leftover lava cakes in the fridge for up to 3 days. Reheat in the microwave for 10-15 seconds before serving.
  • Freeze: You can freeze unbaked ramekins for up to 2 months. Bake from frozen, adding a couple of extra minutes to the baking time.

Frequently Asked Questions

  • Can I use milk chocolate instead of dark chocolate? Yes, but it will result in a sweeter cake.
  • What can I substitute for eggs? Flaxseed meal mixed with water or applesauce can be used as an egg replacement.
  • How do I know when my cakes are done? The edges should be firm, and the center should be soft and jiggly.
  • Can I make these cakes in advance? Yes, you can prepare the batter and refrigerate it until you’re ready to bake.
  • What’s the best way to serve lava cakes? Serve them warm, ideally with ice cream or whipped cream.
  • Can I add flavors to my cake? Absolutely! Experiment with extracts like almond or orange for unique flavors.
  • How can I make these gluten-free? Substitute all-purpose flour with a gluten-free blend.
  • What should I do if my cake doesn’t ooze? It may have been baked too long; next time, reduce the baking time slightly.

Nutrition Tips and Dietary Adaptations

For those mindful of their nutrition:

  • Low Sugar: Reduce the amount of powdered sugar or substitute with a sugar alternative.
  • Gluten-Free: Use a gluten-free flour blend to make this recipe accessible to those with gluten sensitivities.
  • Vegan: Follow the suggested substitutions for a completely plant-based dessert.

Essential Equipment Recommendations

To successfully make these chocolate lava cakes, you’ll need:

  • Ramekins: Four 6-ounce ramekins are ideal for portion control.
  • Microwave-Safe Bowl: For melting chocolate and butter.
  • Mixing Bowls: A medium bowl for mixing batter and a larger bowl for combining ingredients.
  • Whisk: Essential for incorporating air into the batter.

Final Thoughts

Creating the perfect chocolate lava cake is not only about following a recipe, but also about enjoying the process. Embrace the joy of baking and indulge in the satisfaction of serving this delightful dessert. With its rich flavors and molten center, this chocolate lava cake is sure to impress every time. So gather your ingredients, follow the instructions, and prepare to enjoy a dessert that’s as rewarding to create as it is to eat.

Molten chocolate lava cakes

Prep Time 10 minutes
Cook Time 12 minutes
Total Time 22 minutes
Servings 4 pieces
Calories 420
Indulge in rich, gooey chocolate lava cakes with a molten center, perfect for a decadent dessert.

Ingredients

Chocolate and Butter

  • 1 cup dark chocolate chips (or chopped dark chocolate)
  • ½ cup unsalted butter (cubed)

Eggs and Vanilla

  • 3 large eggs
  • 1 tsp vanilla bean paste (or extract)

Dry Ingredients

  • 1 ½ cups powdered sugar (icing sugar)
  • 7 tbsp flour (all purpose / plain)
  • 1 tsp instant Espresso powder (optional)
  • 1 tsp ground cinnamon
  • ¼ tsp salt
  • 4 tsp cocoa powder (or as needed)

Additional

  • melted butter (or cake release spray) butter for greasing
  • 2 tbsp Baileys (optional)
  • vanilla ice cream (optional) for serving

Instructions 

  • Preheat oven to 425°F (220°C) and prepare ramekins with melted butter or spray.
  • In a heatproof bowl, melt chocolate and butter together until smooth.
  • Whisk eggs, vanilla, and sugar until combined, then add melted chocolate mixture.
  • Stir in flour, cocoa powder, cinnamon, salt, and espresso powder if using.
  • Divide batter into ramekins and bake for 12 minutes until edges are set but centers are molten.

Notes

Serve immediately with vanilla ice cream for best results.
Calories: 420kcal
Cost: $15
Course: Dessert
Cuisine: American
Keyword: chocolate

If you’re on the hunt for a vegan gluten free chocolate cake that’s as rich and satisfying as it is easy to make, you’ve arrived at the right place. This indulgent cake is ideal for any occasion, from birthday celebrations to casual family dinners. With a moist texture and deep chocolate flavor, this cake proves that gluten free doesn’t mean sacrificing taste. Let’s dive into why this recipe will become a staple in your baking repertoire.

Why You’ll Love This Recipe

  • Effortless Preparation: With simple, straightforward steps, even novice bakers can whip up this cake without hassle.
  • Rich Flavor: The combination of cocoa powder and brewed coffee enhances the chocolate flavor, making every bite a delight.
  • Allergy-Friendly: This vegan chocolate cake is free from gluten, dairy, and eggs, making it a safe choice for those with common food allergies.
  • Versatile Serving Options: Serve it plain, or elevate it with your favorite frosting or toppings for a special touch.
  • Make-Ahead Friendly: You can prepare this cake in advance, making it perfect for busy schedules.

Ingredients Breakdown

Understanding the ingredients you’ll be using is crucial for achieving the best results. Here’s what you need, along with potential substitutions:

  • Granulated Sugar: 1 3/4 cups. This sweetener is essential for balancing the bitterness of the cocoa. You can substitute with coconut sugar for a lower glycemic option.
  • Dutch Processed Cocoa Powder: 3/4 cup. This type of cocoa powder offers a rich flavor and deep color. If unavailable, regular unsweetened cocoa will work.
  • Gluten Free Flour: 2 cups. We recommend Bob’s 1-1 Gluten Free Baking Flour for its balance of texture and flavor. You may experiment with almond flour for a nutty taste.
  • Baking Soda and Baking Powder: 1 1/2 teaspoons and 2 teaspoons, respectively. These help the cake rise. Ensure they are fresh for optimal results.
  • Salt: 1 teaspoon. Salt enhances the flavors in baked goods, balancing sweetness.
  • Vegetable Oil: 3/4 cup. This adds moisture and richness. Alternatively, you can use melted coconut oil.
  • Vanilla Extract: 2 teaspoons. A must for flavor depth; feel free to use almond extract for a different taste.
  • Flax Eggs: 3 flax eggs (3 Tablespoons flax seed meal + 9 Tablespoons water). This vegan substitute binds the ingredients. Be sure to let it sit for a few minutes until thickened.
  • Oat Milk: 1 cup. Any non-dairy milk works here; almond or soy milk are great alternatives.
  • Brewed Coffee: 1/2 cup. Coffee intensifies the chocolate flavor; you can omit it if preferred.
  • Vegan Butter: 1 cup, room temperature. This gives the cake its creamy texture. Miyoko’s brand is highly recommended.
  • Powdered Sugar: 1 pound (about 3 cups), for the frosting. Use cornstarch-free powdered sugar for best results.
  • Cocoa Powder: 2/3 cup, for frosting. This adds chocolate flavor to your frosting.
  • Oat Milk: 4 Tablespoons, for frosting. Adds moisture to your frosting.
  • Pinch of Salt: Enhances the sweetness of the frosting.

Step-by-Step Instructions

Now that you have your ingredients ready, let’s get into the simple steps to bake the perfect vegan gluten free chocolate cake.

  1. Preheat the Oven: Preheat your oven to 350°F (175°C). Grease and line two 8-inch cake pans with parchment paper to prevent sticking.
  2. Mix Dry Ingredients: In a large bowl, whisk together the granulated sugar, cocoa powder, gluten free flour, baking soda, baking powder, and salt until well combined.
  3. Combine Wet Ingredients: In another bowl, whisk together the vegetable oil, vanilla extract, flax eggs, and oat milk until smooth.
  4. Combine Mixtures: Pour the wet ingredients into the dry mix, stirring gently until no lumps remain. Gradually mix in the brewed coffee until fully incorporated.
  5. Pour and Bake: Divide the batter evenly between the prepared pans. Bake for approximately 30 minutes, or until a toothpick inserted into the center comes out clean. Cool completely on a wire rack.

Frosting Instructions

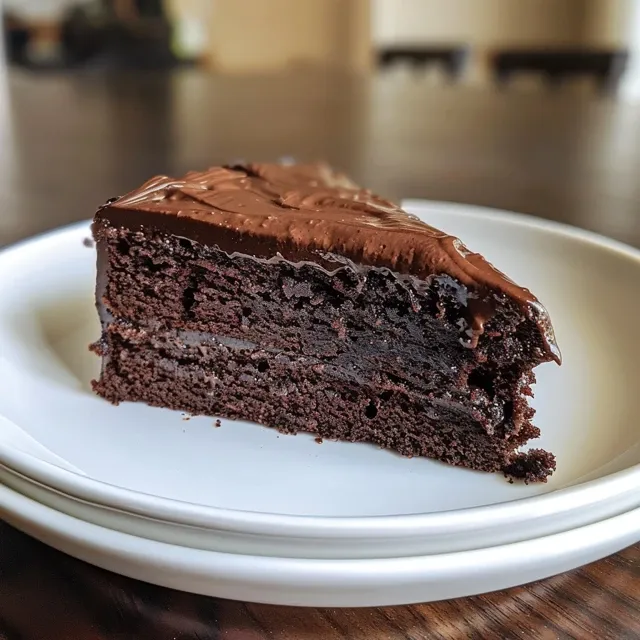
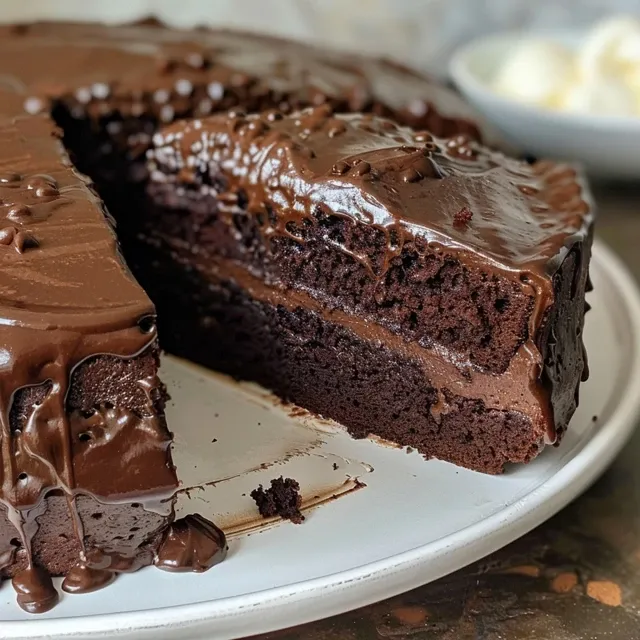
Detailed shot of a luscious vegan chocolate cake, showcasing its layers and frosting.

While the cake cools, let’s prepare the frosting.

  1. Mix Frosting Ingredients: In a stand mixer, combine vegan butter, powdered sugar, cocoa powder, oat milk, and a pinch of salt. Start on low speed, gradually increasing to high.
  2. Whip Until Fluffy: Beat for about 1 minute until the frosting is light and fluffy.
  3. Assemble the Cake: Place the first layer of cake on a serving platter. Spread a generous amount of frosting on top. Add the second layer and frost the top and sides of the cake.
  4. Create Swirls: Use the back of a spoon to create a swirling pattern on the frosting for a decorative finish.

Expert Tips for Success

  • Room Temperature Ingredients: Ensure all your ingredients, especially vegan butter, are at room temperature for easy mixing.
  • Don’t Overmix: Mix until just combined to avoid a dense texture in your cake.
  • Use Fresh Ingredients: Ensure your baking powder and baking soda are not expired for the best rise.
  • Cool Completely: Allow your cake to cool completely before frosting to prevent melting the frosting.
  • Storing Leftovers: Store leftover cake in an airtight container at room temperature for up to 3 days, or refrigerate for up to a week.
  • Freezing Options: Freeze individual slices of the cake wrapped in plastic wrap followed by aluminum foil for up to 2 months.
  • Flavor Variations: Consider adding a teaspoon of espresso powder to the batter for an even more intense chocolate flavor.
  • Frosting Variations: Experiment with different extracts, such as peppermint or orange, to customize your frosting flavor.

Common Mistakes and Troubleshooting

Being aware of common pitfalls can ensure your vegan gluten free chocolate cake is a success every time.

  • Too Dry: If your cake comes out dry, it may be due to overbaking. Always keep an eye on it during the last few minutes of baking.
  • Dense Texture: Overmixing can lead to a dense cake. Mix just until combined for a light texture.
  • Frosting Issues: If your frosting is too thick, add a little more oat milk until you reach the desired consistency.
  • Flavor Balance: If the cake tastes too sweet, adding a pinch more salt can help balance the flavors.

Variations to Try

  • Chocolate Chip Cake: Fold in 1 cup of dairy-free chocolate chips into the batter for added texture and flavor.
  • Layered Cake: Use the same recipe to create a multi-layered cake with different fillings, such as fruit preserves or whipped coconut cream.
  • Spice It Up: Add a teaspoon of cinnamon or chili powder for a unique flavor twist.
  • Nutty Chocolate Cake: Incorporate 1/2 cup of finely chopped nuts, like walnuts or pecans, into the batter for crunch.

Storage and Make-Ahead Instructions

This cake is perfect for making ahead of time. Here’s how to store it:

  • Room Temperature: Store the cake, well-wrapped, at room temperature for up to 3 days.
  • Refrigeration: If you prefer a firmer texture, refrigerate for up to a week.
  • Freezing: Wrap slices in plastic wrap and freeze for up to 2 months. Thaw at room temperature before serving.

FAQs

  • Can I use regular flour instead of gluten free? No, this recipe is specifically designed for gluten free flour; regular flour will change the texture and taste.
  • What can I substitute for flax eggs? You can use 1/4 cup unsweetened applesauce per flax egg as an alternative.
  • Can I make this chocolate cake in advance? Absolutely! This cake stores well and can be made a day ahead of serving.
  • How do I make the frosting vegan? Use plant-based butter and ensure the powdered sugar is free from animal products.
  • What if my cake isn’t rising? Make sure your baking powder and baking soda are fresh; expired leavening agents can cause flat cakes.
  • Can I add flavors to the frosting? Yes! Consider adding vanilla, almond, or even citrus zest for a flavor boost.
  • Is this cake suitable for kids? Absolutely! It’s a fun and delicious treat that kids will love, especially with a playful decoration.
  • How can I make this cake more chocolatey? Increase the cocoa powder in the batter or add chocolate chips for extra chocolate goodness.

Nutritional Tips and Dietary Adaptations

This vegan gluten free chocolate cake can easily be adapted for various dietary needs:

  • Low Sugar Option: Consider reducing the sugar by 1/4 cup for a less sweet cake.
  • Nut-Free Version: Use sunflower oil instead of any nut-based oil and ensure your flour blend is nut-free.
  • Protein Boost: Add a scoop of vegan protein powder to the dry ingredients for added nutrition.

Recommended Equipment

To achieve the best results while making this vegan gluten free chocolate cake, here’s a list of recommended tools:

  • Mixing Bowls: A set of mixing bowls in various sizes is essential for separating dry and wet ingredients.
  • Whisk: A sturdy whisk helps in thoroughly mixing the batter.
  • Measuring Cups and Spoons: Accurate measurements are key to baking success, so have a reliable set handy.
  • Baking Pans: Use two 8-inch round cake pans for even baking and easy layering.
  • Cooling Rack: This allows the cakes to cool evenly, preventing sogginess.
  • Stand Mixer or Hand Mixer: For creamy frosting and smoothly mixed batter.

Serving Suggestions

Serve your vegan gluten free chocolate cake with:

  • Fresh Berries: Add a side of strawberries or raspberries for a fresh contrast.
  • Coconut Whipped Cream: A dairy-free whipped topping enhances the dessert experience.
  • Chocolate Drizzle: Drizzle melted dairy-free chocolate on top for an elegant look.
  • Ice Cream: Pair with vegan ice cream for a delightful dessert.

In conclusion, this vegan gluten free chocolate cake is not just a recipe; it’s a culinary experience that promises satisfaction with every bite. With its rich flavor, moist texture, and easy preparation, it stands out as a must-try for anyone looking to indulge in a delicious dessert without compromising dietary needs. So, roll up your sleeves and get ready to enjoy a slice of decadent goodness!

Vegan Gluten Free Chocolate Cake

Prep Time 20 minutes
Cook Time 30 minutes
Total Time 50 minutes
Servings 8 slices
Calories 450
A rich and moist vegan gluten-free chocolate cake perfect for any celebration or craving. Made with wholesome ingredients and topped with fluffy frosting.

Ingredients

Cake Batter

  • 1 3/4 cups granulated sugar
  • 3/4 cups dutch processed cocoa powder
  • 2 cups gluten free flour (Bob's 1-1 Gluten Free Baking Flour)
  • 1 1/2 teaspoons baking soda
  • 2 teaspoons baking powder
  • 1 teaspoon salt
  • 3/4 cup vegetable oil
  • 2 teaspoons vanilla extract
  • 3 tablespoons flax seed meal (for flax eggs)
  • 9 tablespoons water (for flax eggs)
  • 1 cup oat milk
  • 1/2 cup strongly brewed coffee

Frosting

  • 1 pound powdered sugar (about 3 cups)
  • 2 teaspoons vanilla extract
  • 2/3 cup cocoa powder
  • 4 tablespoons oat milk

Instructions_flat

Notes

Ensure to use gluten-free and vegan ingredients for best results.
Calories: 450kcal
Cost: $15
Course: Dessert
Cuisine: vegan
Keyword: chocolate

Transform Your Dinner with Roasted Vegetables and Creamy Tahini-Yogurt Dressing

Cooking is not just about following a recipe; it’s about crafting experiences that nourish both body and soul. Roasted vegetables paired with a creamy tahini-yogurt dressing offer a splendid balance of flavors and textures, making for a delightful addition to any meal. Whether you’re looking for an easy weeknight dinner or a vibrant side dish for entertaining, this recipe is versatile, packed with nutrients, and incredibly satisfying. In this guide, we will explore the details of this dish, ensuring you have all the tools and knowledge needed to create a stunning roasted vegetable platter that will impress.

Why You’ll Love This Recipe

  • Versatile Meal Prep Option: Perfect for busy weeknights, these roasted vegetables can be easily prepped ahead of time and reheated.
  • Nutritious and Colorful: This dish is not only visually appealing but also loaded with vitamins and minerals from various vegetables.
  • Creamy and Flavorful Dressing: The tahini-yogurt dressing adds a rich, creamy texture that elevates the dish without overwhelming it.
  • Diet-Friendly: Naturally gluten-free and can be adapted for vegan diets simply by using plant-based yogurt.
  • Endless Variations: With countless options for vegetables and seasonings, you can customize this dish to suit your taste preferences.

Ingredient Breakdown

To create this beautiful dish, you’ll need a selection of fresh vegetables and a few pantry staples. Below is the detailed list of ingredients, along with some suggested substitutions to cater to your preferences.

  • Chickpeas (400 g): 1 can, drained and rinsed. Substitution: Use cooked lentils for a different texture.
  • Onion (1 large): Sliced into wedges. Substitution: Shallots or leeks for a milder flavor.
  • Sweet Potatoes (2 medium): Cut into cubes. Substitution: Regular potatoes or butternut squash.
  • Broccoli (150 g): Cut into florets. Substitution: Cauliflower for a similar texture.
  • Cauliflower (150 g): Cut into florets. Substitution: Use zucchini for a lighter option.
  • Seasonings (2 tsp): Paprika, cumin, salt, and pepper to taste. Tip: Add chili flakes for a spicy kick.
  • Olive Oil (2-3 tbsp): For roasting. Substitution: Avocado oil for a higher smoke point.
  • Tahini (2 tbsp): A nutty paste made from sesame seeds.
  • Vegan or Greek Yogurt (120 g): For creaminess. Substitution: Use coconut yogurt for a dairy-free version.
  • Lemon Juice (2 tbsp): Freshly squeezed for brightness.
  • Salt and Pepper: To taste.
  • Garlic (1 clove): Minced or grated for depth of flavor.
  • Mustard (1 tsp): Adds tang. Optional: Use Dijon for a sharper flavor.
  • Agave (1 tsp): For sweetness. Substitution: Honey if not vegan.

Step-by-Step Instructions

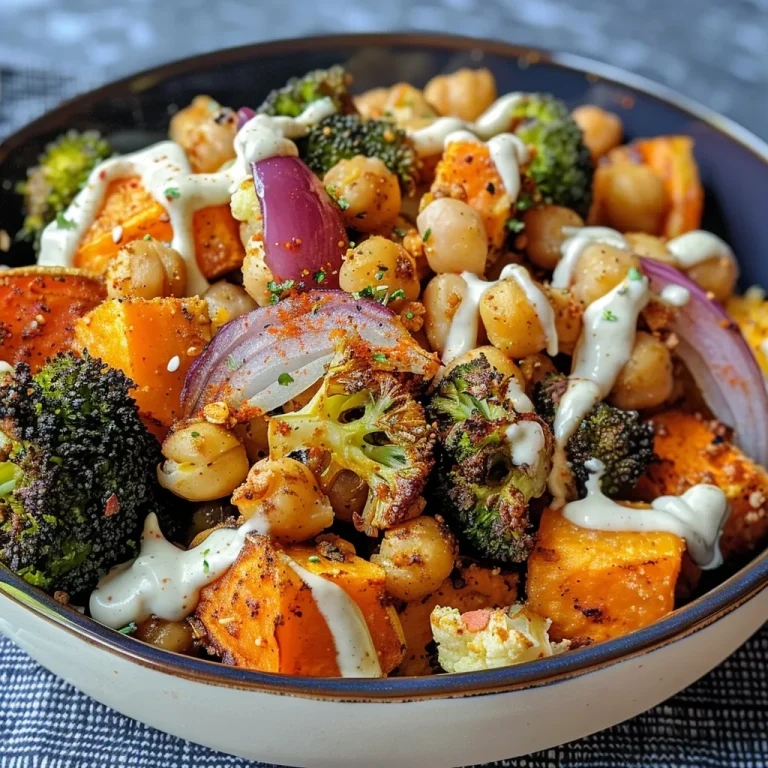
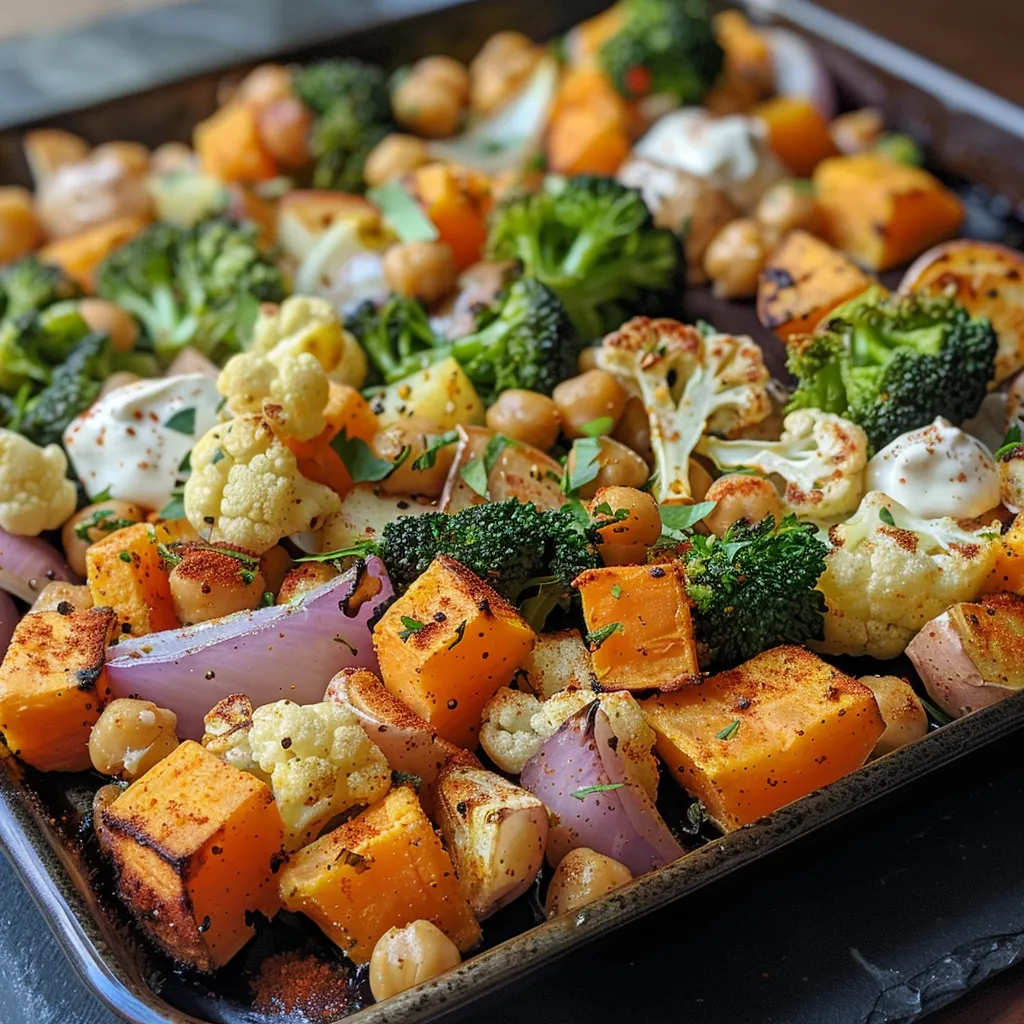
Side view of a dish featuring seasoned roasted vegetables with a drizzle of creamy dressing.

1. Preheat the Oven

Preheat your oven to 400°F (200°C) to ensure even roasting.

2. Prepare the Vegetables

Spread the chickpeas, onion, sweet potato, broccoli, and cauliflower evenly on a large sheet pan. Drizzle with olive oil and sprinkle with the seasoning blend. Toss everything to coat well.

3. Roast the Vegetables

Roast the vegetables in the oven for 25–30 minutes, tossing halfway through, until they are tender and slightly caramelized.

4. Make the Dressing

While the vegetables roast, whisk together the tahini, yogurt, lemon juice, salt, pepper, garlic, olive oil, mustard, and agave in a small bowl. If the dressing is too thick, add a splash of water to reach your desired consistency.

5. Assemble and Serve

Once roasted, remove the vegetables and chickpeas from the oven. Spread a layer of the tahini-yogurt dressing on a serving plate and top with the roasted vegetables. Garnish with optional toppings like fresh parsley, sesame seeds, or chili oil.

Pro Tips for Perfect Roasted Vegetables

  • Uniform Size: Cut your vegetables into similar sizes to ensure even cooking.
  • Avoid Overcrowding: Spread vegetables in a single layer on the sheet pan to achieve that perfect caramelization.
  • Season Generously: Don’t skimp on seasonings; they enhance the natural sweetness of the vegetables.
  • Experiment with Spices: Beyond paprika and cumin, try adding herbs like thyme or rosemary for a different flavor profile.
  • Double the Recipe: Make a larger batch for meal prep; roasted vegetables store well in the fridge.
  • Serve Warm or Cold: This dish is delicious both warm and cold, making it perfect for lunchboxes.
  • Fresh Herbs: Add fresh herbs just before serving to maintain their vibrant flavor.
  • Use High-Quality Oil: A good olive oil can make a big difference in flavor.

Common Mistakes and Troubleshooting

Even the best cooks can encounter issues. Here’s how to troubleshoot common mistakes:

  • Vegetables Not Roasting Properly: Ensure they are cut to a uniform size and spaced out on the pan.
  • Dressing Too Thick: Add a bit of water or extra lemon juice to thin it out.
  • Flavor Lacking: Taste and adjust seasonings before serving; don’t be afraid to add more.
  • Burnt Vegetables: Keep an eye on the oven and reduce cooking time if necessary.

Flavor Variations

Get creative with these variations to elevate your roasted vegetables:

  • Asian-Inspired: Add soy sauce and sesame oil in place of olive oil for a different flavor twist.
  • Southwestern Style: Incorporate corn and black beans, and spice with taco seasoning.
  • Herbaceous Mix: Use fresh herbs like dill and parsley for a refreshing taste.
  • Spicy Kick: Add jalapeños or cayenne pepper to the vegetables before roasting.

Storage and Make-Ahead Instructions

Roasted vegetables are a great meal prep option. Here’s how to store and reheat them:

  • Refrigerate: Store in an airtight container for up to 5 days.
  • Freeze: For longer storage, freeze roasted vegetables in a single layer on a baking sheet, then transfer to a freezer bag.
  • Reheat: Reheat in the oven at 350°F (175°C) for about 10-15 minutes until warmed through.

Frequently Asked Questions

  • Can I use frozen vegetables? Yes, but they may release more moisture and won’t caramelize as well.
  • What can I substitute for tahini? Sunflower seed butter or almond butter can work as alternatives.
  • Is this dish vegan-friendly? Yes, just ensure you use plant-based yogurt.
  • How do I know when the vegetables are done? They should be tender and slightly caramelized, with a golden-brown color.
  • Can I add other vegetables? Absolutely! Feel free to include bell peppers, zucchini, or any of your favorites.
  • How long does this dressing last? The tahini-yogurt dressing can be stored in the fridge for up to one week.
  • What should I serve this with? It pairs wonderfully with grains like quinoa or as a side to grilled meats.
  • Is this dish gluten-free? Yes, all ingredients are naturally gluten-free!

Nutritional Tips and Dietary Adaptations

To make this dish even healthier:

  • Increase Fiber: Add more legumes such as lentils or beans.
  • Lower Calories: Use less oil when roasting and opt for non-fat yogurt.
  • Boost Flavor: Experiment with herbs and spices instead of excess salt.

Essential Equipment Recommendations

Here’s what you’ll need to make this recipe a success:

  • Large Sheet Pan: For even roasting.
  • Mixing Bowls: For preparing your dressing and mixing vegetables.
  • Whisk: Essential for combining dressing ingredients smoothly.
  • Sharp Knife: For cutting vegetables uniformly.
  • Spatula: To toss vegetables while roasting.

Serving Suggestions

Serve your roasted vegetables with:

  • Grains: Quinoa, farro, or brown rice for a full meal.
  • Protein: Grilled chicken, tofu, or chickpeas for added sustenance.
  • Salads: Toss with fresh greens for a vibrant salad.
  • Wraps: Use as a filling for wraps or pita pockets with additional sauce.

Final Thoughts

Roasted vegetables with creamy tahini-yogurt dressing is more than just a dish; it’s a celebration of flavors and nutrition. By following this comprehensive guide, you can craft a masterpiece that not only satisfies your cravings but also nourishes your body. Remember, the beauty of this recipe lies in its flexibility—feel free to experiment with ingredients, seasonings, and serving options. Enjoy your cooking journey, and may every meal be delicious!

Roasted Vegetables with Creamy Tahini-Yogurt Dressing

Prep Time 10 minutes
Cook Time 30 minutes
Total Time 40 minutes
Servings 4 servings
Calories 350
A flavorful and nutritious roasted vegetable dish topped with a creamy tahini-yogurt dressing, perfect for a wholesome meal.

Ingredients

Vegetables and Chickpeas

  • 400 g Chickpeas (1 can, drained and rinsed)
  • 1 large Onion (sliced into wedges)
  • 2 medium Sweet potato (cubed)
  • 150 g Broccoli (florets)
  • 150 g Cauliflower (florets)
  • 2 tsp Seasonings (paprika, cumin, salt, pepper, chili flakes as desired)
  • 2-3 tbsp Olive oil
  • 2 tbsp Tahini
  • 120 g Vegan or Greek yogurt
  • 2 tbsp Lemon juice
  • to taste Salt and pepper
  • 1 clove Garlic (minced or grated)
  • 1 tsp Mustard
  • 1 tsp Agave (or honey if not vegan)

Instructions 

  • Preheat oven to 400°F (200°C).
  • Spread chickpeas, onion, sweet potato, broccoli, and cauliflower on a sheet pan. Drizzle with olive oil, season, and toss to coat.
  • Roast for 25–30 minutes, tossing halfway, until tender and caramelized.
  • Whisk tahini, yogurt, lemon juice, garlic, mustard, agave, salt, and pepper to make the dressing. Add water if needed for desired consistency.
  • Serve roasted vegetables with dressing, garnished as desired.

Notes

Feel free to add fresh herbs or seeds for extra flavor and texture.
Calories: 350kcal
Cost: $15
Course: Main Course
Cuisine: Mediterranean
Keyword: Vegetables

Your Ultimate Guide to Blueberry Baked Oatmeal

Welcome to your new favorite breakfast staple: Blueberry Baked Oatmeal. This effortless recipe is designed for busy mornings, combining nutritious ingredients with unbeatable flavor. Whether you’re gearing up for a hectic week or enjoying a leisurely weekend brunch, this dish is here to elevate your mornings. Packed with wholesome rolled oats and bursting with natural sweetness from fresh or frozen blueberries, it’s not only a satisfying meal but also a nourishing start to your day.

Why You’ll Love This Recipe

Here are some compelling reasons to embrace this delightful dish:

  • Quick Prep Time: With just 10 minutes of prep, you can set this recipe in motion and let the oven do the work.
  • Versatile Ingredients: Customize with ingredients you have on hand. This recipe is flexible enough to accommodate dietary preferences.
  • Healthy and Filling: Rolled oats provide fiber and energy, making it a wholesome choice to fuel your day.
  • Meal Prep Friendly: Make a batch at the beginning of the week for easy breakfasts that save time.
  • Deliciously Satisfying: The combination of blueberries and cinnamon offers a comforting flavor profile that delights every palate.

Ingredient Breakdown

Let’s dive into the ingredients that make this baked oatmeal a morning winner:

  • 2 cups rolled oats: The foundation of this dish, providing texture and heartiness. You can substitute with gluten-free oats if needed.
  • 1 teaspoon baking powder: This helps the oatmeal rise, giving it a fluffy texture.
  • 1/2 teaspoon salt: Balances the sweetness and enhances flavor.
  • 1 cup milk (or dairy-free alternative): Adds moisture. Consider almond, oat, or coconut milk for a vegan option.
  • 1/3 cup maple syrup (or honey): Sweetens naturally, but feel free to adjust based on your preference.
  • 2 large eggs: Binds the ingredients together and provides protein. Use flax eggs for a vegan alternative.
  • 1 teaspoon vanilla extract: Adds a depth of flavor.
  • 1 teaspoon cinnamon: Infuses warmth and spice, complementing the blueberries.
  • 1 1/2 cups blueberries: Fresh or frozen, these add a burst of flavor and antioxidants.

Step-by-Step Instructions

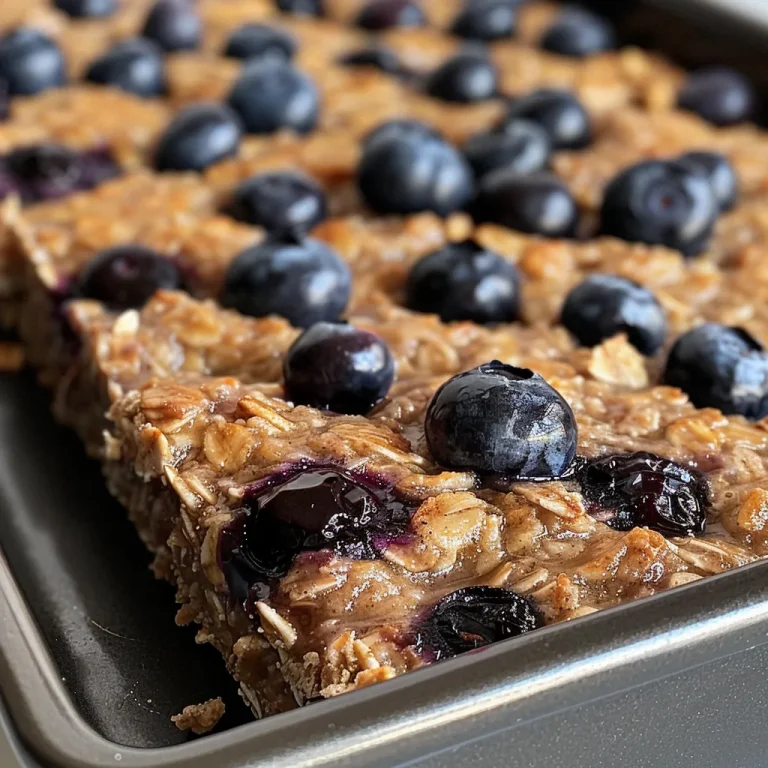
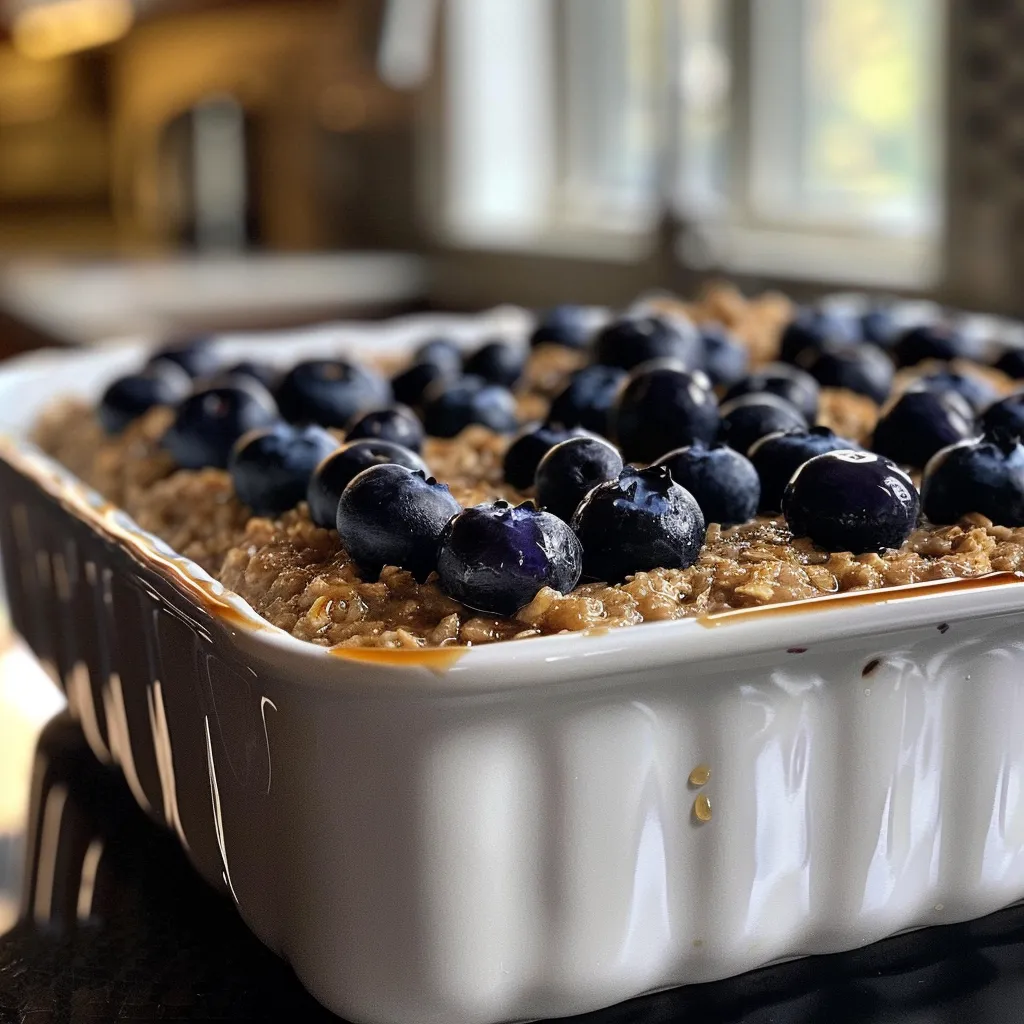
A detailed side shot of Blueberry Baked Oatmeal, featuring its baked surface and vibrant blueberries.

Ready to bake? Follow these simple steps:

  1. Preheat your oven to 350°F (175°C).
  2. In a large bowl, mix together the rolled oats, baking powder, and salt until well combined.
  3. In another bowl, whisk together the milk, maple syrup, eggs, vanilla extract, and cinnamon until smooth.
  4. Pour the wet mixture into the dry ingredients and stir until combined, avoiding overmixing.
  5. Gently fold in the blueberries, being careful not to squish them.
  6. Pour the mixture into a greased baking dish and bake for 30-35 minutes or until the top is golden and set.
  7. Allow to cool slightly before serving.

Expert Pro Tips

To ensure your baked oatmeal turns out perfectly every time, consider these expert tips:

  • Use Old-Fashioned Rolled Oats: For the best texture, opt for rolled oats rather than quick oats.
  • Don’t Overmix: Mixing too much can lead to a dense texture. Stir gently until just combined.
  • Adjust Sweetness: Taste the mixture before baking; you can always add more maple syrup or honey if desired.
  • Experiment with Spices: Consider adding nutmeg or ginger for a different flavor twist.
  • Try Different Fruits: Substitute blueberries with raspberries, chopped apples, or even peaches for seasonal variations.
  • Make it Vegan: Use flax eggs and a plant-based milk to create a vegan-friendly version.
  • Watch the Baking Time: Ovens vary, so check your oatmeal towards the end of the baking time to prevent over-baking.
  • Let it Rest: Allow the oatmeal to cool slightly before slicing; it will firm up as it cools.

Common Mistakes and Troubleshooting

Even the best cooks encounter hiccups. Here’s how to avoid common pitfalls:

  • Too Dry or Too Wet: Adjust the liquid and oats ratio. If it’s dry, add a splash of milk. If too wet, increase oats slightly next time.
  • Burned Edges: If the edges are browning too quickly, cover the dish with foil to prevent burning while it finishes baking.
  • Undercooked Center: If the center isn’t set, check your oven temperature; it may run cooler than indicated.

Variations to Try

Keep your breakfast exciting with these variations:

  • Chocolate Chip Delight: Add 1/2 cup of dark chocolate chips for a decadent treat.
  • Nutty Banana: Layer sliced bananas on top before baking for added flavor.
  • Apple Cinnamon: Swap blueberries with diced apples and increase cinnamon for a classic combo.
  • Peanut Butter Swirl: Stir in 1/4 cup of peanut butter for extra protein and creaminess.

Storage and Make-Ahead Instructions

This baked oatmeal is perfect for meal prep:

  • Refrigeration: Store in an airtight container in the fridge for up to 5 days.
  • Freezing: Cut into portions and freeze for up to 3 months. Thaw overnight in the fridge before reheating.
  • Reheating: Warm individual portions in the microwave or oven until heated through.

FAQ: Your Questions Answered

  • Can I use quick oats? It’s best to use rolled oats for the best texture, but you can experiment with quick oats in a pinch.
  • Is this recipe gluten-free? Yes, as long as you use certified gluten-free rolled oats.
  • Can I substitute the eggs? Yes, use flax eggs (1 tablespoon flaxseed meal + 2.5 tablespoons water per egg) for a vegan option.
  • How can I make this more protein-rich? Add a scoop of protein powder or top with Greek yogurt when serving.
  • What can I add for extra flavor? Consider adding citrus zest like lemon or orange for a refreshing twist.
  • Can I double the recipe? Absolutely! Just use a larger baking dish and adjust baking time as necessary.
  • What’s the best way to serve it? Serve warm topped with yogurt, nuts, or additional fruits for a complete meal.
  • How long does it take to bake? It typically takes 30-35 minutes, but keep an eye on it as oven times may vary.

Nutritional Tips and Dietary Adaptations

This baked oatmeal is not only delicious but can be tailored to fit various dietary needs:

  • Low Sugar: Reduce the amount of maple syrup or honey; consider using a sugar substitute if desired.
  • High Fiber: Add chia seeds or flax seeds for an extra fiber boost.
  • Nut-Free: Omit any nuts and opt for seeds like pumpkin or sunflower for crunch.
  • Dairy-Free: Substitute regular milk with a plant-based alternative like almond or oat milk.

Equipment Recommendations

To make your experience seamless, here are essential tools:

  • Mixing Bowls: Use large, sturdy bowls for mixing dry and wet ingredients.
  • Whisk: A good whisk helps combine ingredients smoothly.
  • Baking Dish: A 9×9 inch square baking dish is ideal for this recipe.
  • Measuring Cups and Spoons: Accurate measurements ensure the best results.

Serving Suggestions

Now that you’ve mastered the recipe, here are some delightful serving ideas:

  • With Yogurt: Top with Greek yogurt for a creamy finish and added protein.
  • Fresh Fruits: Serve with a side of seasonal fruits for a refreshing contrast.
  • Honey Drizzle: A light drizzle of honey on top enhances the sweetness.
  • Nuts or Seeds: Sprinkle with nuts or seeds for added crunch and nutrition.

Conclusion

Blueberry Baked Oatmeal is more than just a recipe; it’s a breakfast revolution that fits seamlessly into your life. With its nutritious profile, customizable ingredients, and straightforward preparation, you can enjoy a warm, satisfying meal that brings joy to your mornings. Remember, the key to mastering this dish is to make it your own—experiment with flavors, toppings, and techniques until you find your perfect version. Happy cooking!

Blueberry Baked Oatmeal

Prep Time 10 minutes
Cook Time 35 minutes
Total Time 45 minutes
Servings 4 servings
Calories 250
A delicious and healthy breakfast option featuring baked oats and fresh blueberries, perfect for a cozy morning.

Ingredients

Dry ingredients

  • 2 cups rolled oats
  • 1 teaspoon baking powder
  • 1/2 teaspoon salt

Wet ingredients

  • 1 cup milk (or dairy-free alternative)
  • 1/3 cup maple syrup (or honey)
  • 2 large eggs
  • 1 teaspoon vanilla extract
  • 1 teaspoon cinnamon
  • 1 1/2 cups blueberries (fresh or frozen)

Instructions 

  • Preheat oven to 350°F (175°C).
  • Mix dry ingredients in a bowl.
  • Whisk wet ingredients in another bowl.
  • Combine wet and dry, then fold in blueberries.
  • Pour into a greased dish and bake for 30-35 minutes.
  • Cool slightly before serving.

Notes

Use fresh or frozen blueberries as preferred.
Calories: 250kcal
Cost: $15
Course: Breakfast
Cuisine: American
Keyword: Oats

Revitalize Your Winter with Wholesome Cabbage Soup

As the winter chill settles in, there’s nothing quite like a warm bowl of soup to nourish your body and soul. This Detox Cabbage Soup is not just a meal; it’s a revitalizing experience that combines fresh ingredients with robust flavors. In under an hour, you can whip up a dish that’s not only healthy but also comforting and delicious. Perfect for busy weeknights, this recipe is designed to fit into your lifestyle seamlessly.

Why You’ll Love This Recipe

This Detox Cabbage Soup stands out for several reasons:

  • Nutritious and Filling: Packed with vitamins and minerals, especially vitamin C from the cabbage, this soup provides a wholesome boost to your immune system.
  • Versatile Ingredients: You can easily substitute or add vegetables based on what you have at home, making it a flexible recipe.
  • Quick Preparation: With a prep and cook time of less than an hour, it’s perfect for those busy weeknights.
  • Low-Calorie Option: Ideal for those looking to maintain a healthy diet without sacrificing flavor.
  • Easy to Store: This soup can be made in bulk and stored for up to a week, making meal prep simple and efficient.

Ingredient Breakdown

Let’s dive into the ingredients that make this soup a winner:

  • 1 medium green cabbage: Shredded, this is the star ingredient, full of fiber and nutrients.
  • 2 large carrots: Sliced into thin rounds; they add sweetness and color.
  • 2 stalks celery: Diced for crunch and depth of flavor.
  • 1 large onion: Finely chopped; it brings a savory base to the soup.
  • 3 cloves garlic: Minced; this ingredient enhances the flavor profile significantly.
  • 1 tablespoon fresh ginger: Grated; it adds warmth and health benefits.
  • 1 teaspoon ground turmeric: This spice not only colors the soup but also offers anti-inflammatory properties.
  • 1 tablespoon olive oil: Used for sautéing; it enhances flavor and promotes heart health.
  • 4 cups low-sodium vegetable broth: The soup base; opt for low sodium to control your salt intake.
  • 2 cups water: Adjusts the consistency to your preference.
  • 2 tablespoons lemon juice: Adds brightness and balances the flavors.
  • 1/2 teaspoon sea salt and 1/4 teaspoon freshly ground black pepper: Essential for seasoning.
  • 2 tablespoons fresh parsley: Chopped; it’s a great garnish that adds freshness.

Feel free to mix and match these ingredients or substitute with seasonal vegetables, such as kale or spinach, to keep things interesting!

Step-by-Step Cooking Process

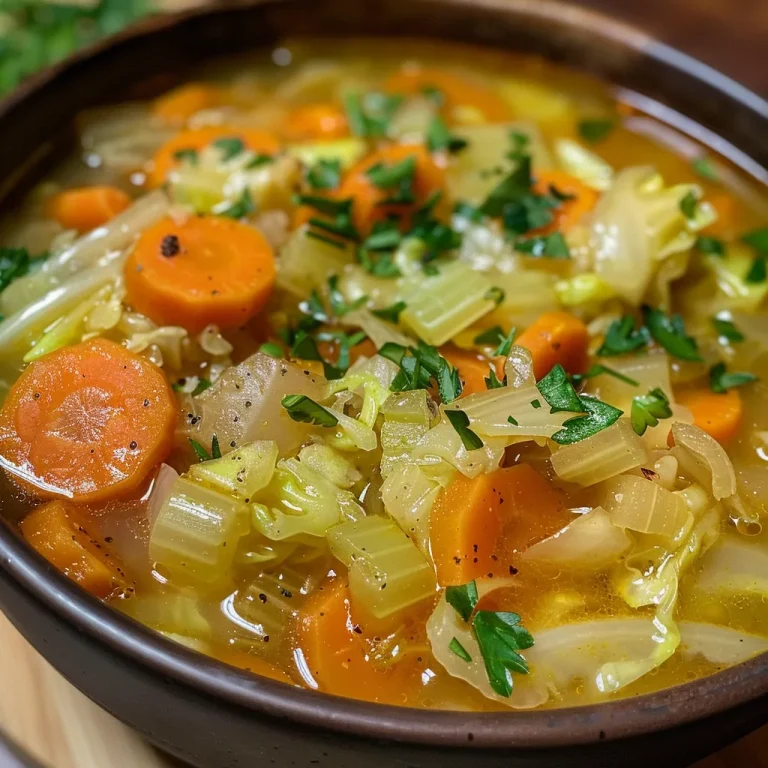
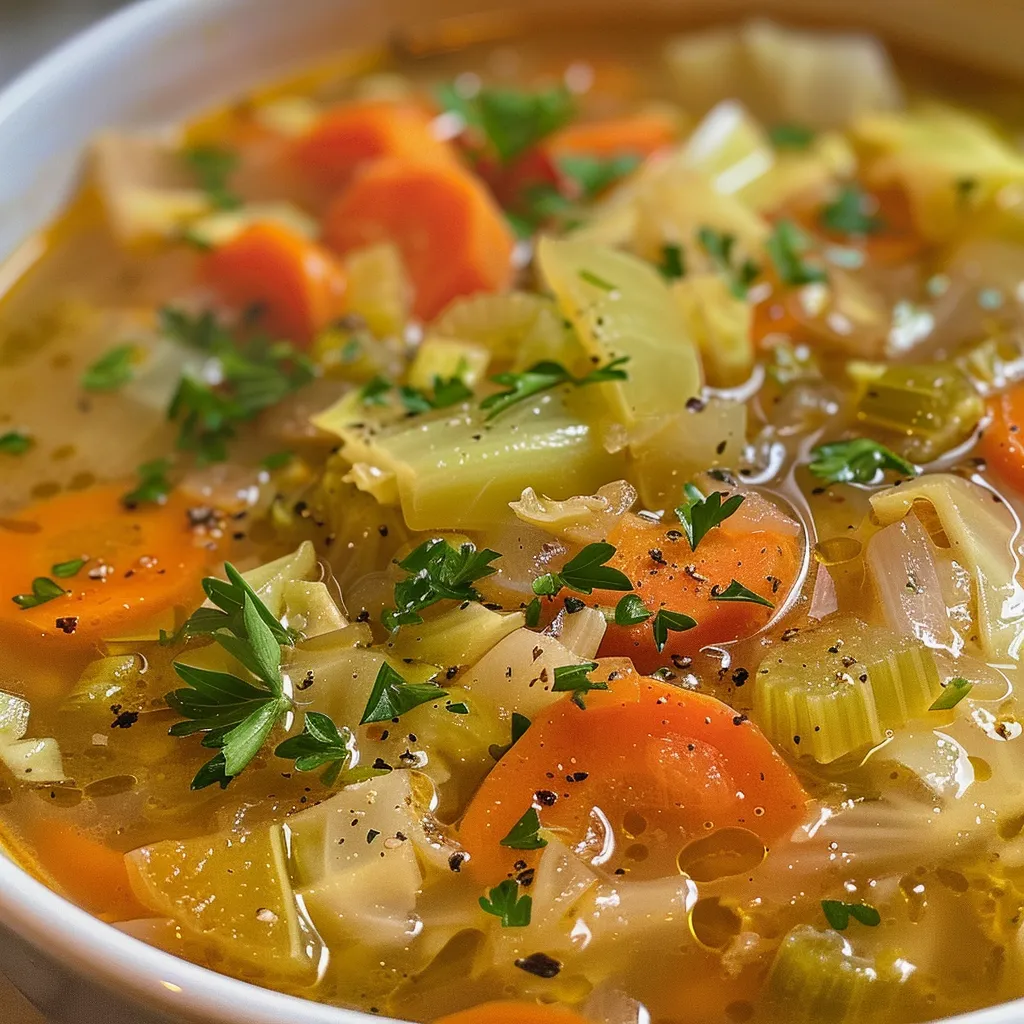
A detailed view of a bowl of cabbage soup featuring fresh ingredients like garlic and ginger.

To create this delightful soup, follow these simple steps:

  1. Heat olive oil in a large pot over medium heat. Add the onion, garlic, ginger, and celery, and sauté for 3-4 minutes until fragrant and the onion becomes translucent.
  2. Stir in the ground turmeric, then add the sliced carrots and shredded cabbage. Cook, stirring occasionally, for another 5 minutes to allow the vegetables to soften slightly.
  3. Pour in the vegetable broth and water, bringing the mixture to a gentle boil. Reduce heat to low, cover, and simmer for 20 minutes, or until the cabbage and carrots are tender.
  4. Once cooked, add lemon juice, sea salt, and black pepper. Taste and adjust seasoning as needed. Remove from heat and stir in fresh parsley.
  5. Ladle the hot soup into bowls and enjoy immediately. Garnish with an extra sprinkle of parsley or a drizzle of olive oil if desired.

Pro Tips for a Perfect Pot of Soup

To elevate your cooking experience, consider these expert insights:

  • Use fresh ingredients: The fresher your vegetables, the more flavor and nutrients your soup will contain.
  • Adjust seasoning wisely: Always taste your soup before serving; you can add more salt, pepper, or lemon juice to enhance flavor.
  • Layer flavors: Sautéing your aromatics first builds a strong flavor base for your soup.
  • Don’t rush the simmer: Allowing the soup to simmer gently develops the flavors beautifully.
  • Experiment with spices: Consider adding spices like cumin or smoked paprika for a unique twist.
  • Blend for variety: For a creamy texture, blend half of the soup and stir it back in.
  • Freeze leftovers: Portion out any leftovers in airtight containers for quick meals later.
  • Garnish creatively: Top with seeds, nuts, or additional herbs for added texture and flavor.

Common Mistakes and Troubleshooting

Here are some common pitfalls to avoid:

  • Overcooking the vegetables: Keep an eye on your cooking time to maintain the texture and nutrients.
  • Not seasoning enough: Under-seasoning can lead to bland soup; always adjust to taste.
  • Using wilted vegetables: Freshness matters; wilted vegetables can impact the flavor and texture.
  • Skipping the simmer: Rushing this step can result in a less flavorful soup.

Variations to Keep It Exciting

Here are some fun variations to experiment with:

  • Protein boost: Add cooked chicken, beans, or lentils for a heartier meal.
  • Spicy kick: Include diced jalapeños or a splash of hot sauce.
  • Creamy version: Stir in coconut milk or a dollop of yogurt before serving.
  • Herb-infused: Experiment with fresh herbs like thyme or dill for added flavor.

Storage and Make-Ahead Instructions

This soup is perfect for meal prep! Here’s how to store it:

  • Refrigeration: Store in an airtight container for up to 4 days.
  • Freezing: Freeze portions in airtight containers for up to 3 months. Thaw overnight in the fridge before reheating.
  • Reheating: Gently reheat on the stovetop or in the microwave, adding a splash of water or broth if the soup thickens too much.

Frequently Asked Questions

Here are some common questions and answers:

  • Can I add protein to this soup? Yes! Consider adding cooked chicken, beans, or lentils for a nutritious boost.
  • How long does this soup last in the fridge? It can be stored in an airtight container for up to 4 days.
  • Is this soup freezable? Absolutely! Portion it out and freeze for up to 3 months.
  • Can I use different vegetables? Yes, feel free to substitute with seasonal vegetables or whatever you have on hand.
  • How can I add more flavor without adding more salt? Use fresh herbs, spices, or a splash of vinegar to enhance the flavor.
  • Is the soup supposed to be really brothy? You can adjust the consistency by adding more or less broth and water.
  • Can I make this soup in a slow cooker? Yes! Add all ingredients to the slow cooker and cook on low for 6-8 hours.
  • What can I serve with this soup? Pair it with whole grain bread or a fresh salad for a complete meal.

Nutritional Tips and Dietary Adaptations

This soup is naturally vegan and gluten-free. To make it more nutrient-dense, consider the following:

  • Add legumes: Beans or lentils can increase protein and fiber content.
  • Use bone broth: If not vegan, bone broth can add extra minerals and flavor.
  • Incorporate superfoods: Consider adding kale, spinach, or quinoa for additional nutrients.

Essential Equipment Recommendations

To successfully make this soup, you’ll need:

  • Large pot: For cooking the soup evenly.
  • Cutting board and knife: For chopping vegetables efficiently.
  • Measuring cups and spoons: To ensure accurate ingredient quantities.
  • Wooden spoon: For stirring and mixing ingredients.

Serving Suggestions

For an elevated dining experience, consider serving your cabbage soup with:

  • Crusty whole grain bread: Perfect for dipping.
  • Avocado slices: Adds creaminess and healthy fats.
  • Fresh herbs: Sprinkle additional parsley or cilantro for a burst of freshness.
  • Chili flakes: For those who enjoy a spicy kick.

In conclusion, this Detox Cabbage Soup is a delightful way to nourish yourself during the colder months. With its health benefits, ease of preparation, and comforting flavors, it’s a recipe you’ll want to keep in your rotation. Feel free to make it your own by experimenting with ingredients and flavors. Enjoy your culinary journey with this revitalizing dish!

winter detox cabbage soup

Prep Time 10 minutes
Cook Time 30 minutes
Total Time 40 minutes
Servings 4 servings
Calories 150
A nourishing and detoxifying cabbage soup perfect for winter, packed with fresh vegetables and spices.

Ingredients

Vegetables

  • 1 medium green cabbage, shredded (about 800g)
  • 2 large carrots, sliced (thin rounds)
  • 2 stalks celery, diced
  • 1 large onion, finely chopped
  • 3 cloves garlic, minced
  • 1 tablespoon fresh ginger, grated
  • 1 teaspoon ground turmeric
  • 1 tablespoon olive oil
  • 4 cups low‑sodium vegetable broth
  • 2 cups water
  • 2 tablespoons lemon juice
  • 1/2 teaspoon sea salt
  • 1/4 teaspoon freshly ground black pepper
  • 2 tablespoons fresh parsley, chopped

Instructions 

  • Heat olive oil and sauté onion, garlic, ginger, and celery for 3-4 minutes.
  • Add turmeric, carrots, and cabbage; cook for 5 minutes.
  • Pour in broth and water; simmer for 20 minutes until vegetables are tender.
  • Stir in lemon juice, salt, pepper, and parsley; serve hot.

Notes

This soup is a great low-calorie, nutrient-dense option to boost your winter wellness.
Calories: 150kcal
Cost: $12
Course: Soup
Cuisine: Healthy
Keyword: cabbage

Start Your Day Right with Effortless Healthy Baked Oatmeal

Breakfast is often dubbed the most important meal of the day, and for good reason. It sets the tone for your morning, fueling your body and mind for whatever lies ahead. If you’re looking for a delicious and nutritious option that doesn’t take hours to prepare, look no further than Healthy Baked Oatmeal with Berries. This recipe combines wholesome ingredients and vibrant flavors to create a breakfast that’s not only satisfying but also flexible enough to cater to your unique tastes.

In this guide, we’ll explore everything you need to know about making the best baked oatmeal, from ingredient details to serving suggestions. Let’s dive in and discover why this baked oatmeal is the perfect addition to your morning routine.

Why You’ll Love This Recipe

This recipe for baked oatmeal is designed with busy mornings in mind. Here are five compelling reasons to give it a try:

  • Quick Preparation: With just a few simple steps, you can have a hearty breakfast ready to bake in under 15 minutes.
  • Customizable Ingredients: Feel free to mix and match your favorite fruits, nuts, and sweeteners to suit your taste and dietary needs.
  • Meal Prep Friendly: This baked oatmeal can be prepared in advance, making it ideal for busy weekdays or meal prepping for the week ahead.
  • Nutritious and Filling: Packed with fiber and antioxidants, this oatmeal will keep you full and satisfied until your next meal.
  • Deliciously Versatile: Enjoy it warm or cold, as a breakfast or snack, or even as a dessert—this recipe adapts beautifully to any occasion.

Gathering Your Sunshine Ingredients

Before you start baking, let’s break down the ingredients you’ll need. Each component plays a vital role in delivering flavor and texture to your baked oatmeal.

  • 2 cups rolled oats: These are the star of the show! Rolled oats provide a hearty texture, perfect for baked oatmeal. Avoid quick oats, as they will yield a mushy result.
  • 1 teaspoon baking powder: This little leavening agent helps the oatmeal rise, giving it a fluffy texture.
  • ½ teaspoon cinnamon: Adds a warm, cozy spice that enhances the flavor profile. Feel free to add nutmeg for extra warmth!
  • ¼ teaspoon salt: Balances the sweetness and enhances overall flavor.
  • 1¾ cups unsweetened almond milk: A dairy-free option that keeps the oatmeal moist. You can substitute with any milk of your choice.
  • 1 large egg: Acts as a binding agent, enhancing the texture. If you want a vegan option, replace it with a flax egg.
  • ¼ cup maple syrup or honey: Natural sweetness that can be adjusted based on your preference.
  • 2 tablespoons coconut oil or melted butter: Adds richness; coconut oil provides a subtle tropical flavor.
  • 1 teaspoon vanilla extract: A hint of sweetness and depth in flavor.
  • 1½ cups mixed berries: Fresh or frozen, these add juiciness and vibrant flavor. You can use any combination of strawberries, blueberries, raspberries, or blackberries.
  • Optional toppings: Consider adding chopped pecans, shredded coconut, or extra berries for added texture and flavor.

Let’s Get Baking! Your Step-by-Step Guide

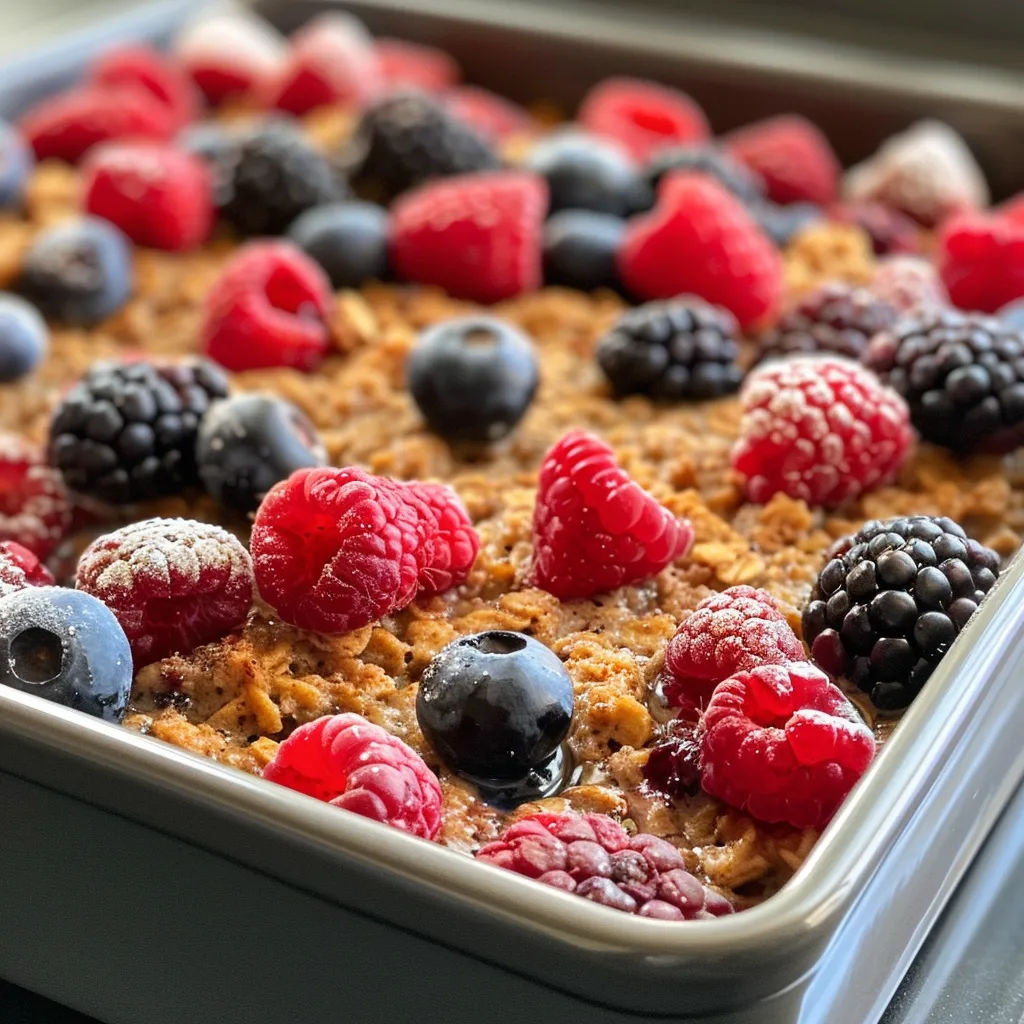
Plate of baked oatmeal with berries, showcasing its moist texture.

Now it’s time to bring everything together and bake your delicious oatmeal. Follow these simple steps:

  1. Preheat your oven to 375°F (190°C) and grease an 8×8-inch baking dish.
  2. In a large mixing bowl, whisk together the rolled oats, baking powder, cinnamon, and salt.
  3. In a separate bowl, combine the egg, almond milk, maple syrup, coconut oil (or melted butter), and vanilla extract. Whisk until smooth.
  4. Pour the wet mixture into the dry ingredients and stir until just combined. Gently fold in the mixed berries.
  5. Pour the batter into the prepared baking dish and spread it into an even layer. Add any optional toppings you desire.
  6. Bake for 35-40 minutes until the top is golden brown and the center is set.
  7. Let it cool for 5-10 minutes before slicing into squares and serving.

Make It Your Own! Fun Recipe Twists

This baked oatmeal is incredibly versatile. Here are some variations to consider:

  • Nutty Banana: Add sliced bananas and chopped walnuts for a delightful twist.
  • Chocolate Chip Delight: Mix in dark chocolate chips for a treat that feels indulgent.
  • Apple Cinnamon: Substitute berries with diced apples and increase cinnamon for a fall-inspired version.
  • Peanut Butter Swirl: Add a dollop of peanut butter before baking for a rich, nutty flavor.

Chef’s Kitchen Notes

Here are some pro tips to ensure your baked oatmeal turns out perfectly every time:

  • Don’t Overmix: Mix just until combined to avoid a dense texture. A few lumps are okay!
  • Check for Doneness: Make sure the center is set by inserting a toothpick; it should come out clean.
  • Adjust Sweetness: Taste the mixture before baking and adjust the sweetness as needed.
  • Experiment with Liquids: You can use different liquids like coconut milk or even yogurt for varying flavors.
  • Let It Rest: Allow the baked oatmeal to cool slightly before slicing for cleaner cuts.
  • Store Properly: Keep leftovers in an airtight container in the fridge for up to 5 days.
  • Reheat for Best Results: Reheat individual portions in the microwave for a quick breakfast.
  • Top It Off: Serve with yogurt or a drizzle of nut butter to elevate the dish.

Common Mistakes and Troubleshooting

Even the best cooks can encounter challenges. Here are some common pitfalls and how to avoid them:

  • Baked Oatmeal is Too Dry: This may happen if you’ve used too much oats or not enough liquid. Ensure you measure accurately and check the consistency before baking.
  • Texture is Too Dense: Overmixing can lead to a dense baked oatmeal. Remember, mix just until incorporated.
  • Not Sweet Enough: If your baked oatmeal lacks sweetness, consider adding more syrup or honey to the wet ingredients.
  • Burnt Edges: If the edges are browning too quickly, cover with foil midway through baking.

Storage and Make-Ahead Instructions

One of the best aspects of this baked oatmeal is how well it stores and reheats. Here’s how to manage your leftovers:

  • Refrigerate: Store any leftover baked oatmeal in an airtight container in the fridge for up to 5 days.
  • Freeze: For longer storage, cut into squares and freeze in a single layer. Once frozen, transfer to a freezer-safe bag for up to 3 months.
  • Reheat: Microwave individual portions for 1-2 minutes or reheat in the oven at 350°F until warmed through.
  • Make Ahead: You can prepare the mixture the night before and bake it in the morning for a quick breakfast.

Comprehensive FAQ

Here are some frequently asked questions to help you master this baked oatmeal:

  • Can I use quick oats instead of rolled oats? No, quick oats won’t provide the same texture for baked oatmeal.
  • What can I substitute for almond milk? Any milk, including cow’s milk, oat milk, or soy milk, works as a substitute.
  • Can I make this recipe vegan? Yes, replace the egg with a flax egg and use maple syrup as your sweetener.
  • How can I add protein to this dish? Consider mixing in protein powder, Greek yogurt, or nuts before baking.
  • Is this recipe gluten-free? Yes, if using certified gluten-free oats, this baked oatmeal is gluten-free.
  • Can I add other fruits? Absolutely! Feel free to experiment with your favorite fruits.
  • How do I know when it’s done baking? The top should be golden brown and a toothpick inserted in the center should come out clean.
  • Can I double the recipe? Yes, simply use a larger baking dish and adjust the baking time as needed.

Nutrition Tips and Dietary Adaptations

To make this recipe fit various dietary needs, consider the following tips:

  • For Lower Sugar: Reduce the amount of maple syrup or honey, or use a sugar substitute.
  • For Higher Fiber: Add chia seeds or flaxseeds to the mixture for an extra fiber boost.
  • For Nut-Free: Substitute coconut oil for butter or a dairy-free spread and omit nuts in toppings.
  • For High-Protein: Add cottage cheese to the mixture or serve with a side of Greek yogurt.

Equipment Recommendations

To make your baking experience smooth, here are some recommended tools:

  • Mixing Bowls: A set of nesting bowls for mixing ingredients easily.
  • Whisk: A sturdy whisk helps combine wet and dry ingredients effectively.
  • 8×8-inch Baking Dish: A square dish is ideal for this recipe, ensuring even cooking.
  • Spatula: Use a rubber spatula to fold ingredients without over-mixing.
  • Measuring Cups and Spoons: Accurate measurements are key to successful baking.

Serving Suggestions

To elevate your baked oatmeal experience, consider these serving suggestions:

  • Fresh Fruits: Top with additional fresh berries or sliced bananas for a burst of flavor.
  • Yogurt: A dollop of Greek yogurt adds creaminess and protein.
  • Nut Butter: Drizzle with almond or peanut butter for added richness.
  • Maple Syrup: A light drizzle of syrup enhances the sweetness.

Final Thoughts from My Kitchen to Yours

Incorporating Healthy Baked Oatmeal with Berries into your morning routine is a game-changer. This dish is not only delicious and nutritious but also adaptable, making it a staple in your kitchen. Whether you’re meal prepping or looking for a quick breakfast option, this recipe will deliver every time. Remember, cooking should be enjoyable and fulfilling—let this baked oatmeal be your guide to starting the day right!

Healthy Baked Oatmeal with Berries

Prep Time 10 minutes
Cook Time 40 minutes
Total Time 50 minutes
Servings 4 servings
Calories 250
A nutritious and delicious baked oatmeal recipe packed with berries, perfect for a wholesome breakfast.

Ingredients

Dry ingredients

  • 2 cups rolled oats
  • 1 teaspoon baking powder
  • ½ teaspoon cinnamon
  • ¼ teaspoon salt

Wet ingredients

  • cups unsweetened almond milk
  • 1 large egg
  • ¼ cup maple syrup or honey
  • 2 tablespoons coconut oil or melted butter
  • 1 teaspoon vanilla extract

Add-ins

  • cups mixed berries
  • Optional toppings: chopped pecans, shredded coconut, extra berries

Instructions 

  • Preheat oven to 375°F (190°C) and grease an 8×8-inch baking dish.
  • Mix dry ingredients in a bowl. Whisk wet ingredients separately.
  • Combine wet and dry, fold in berries, then pour into dish. Add optional toppings.
  • Bake for 35-40 minutes until golden and set. Cool slightly before serving.

Notes

This baked oatmeal is perfect for a healthy breakfast and can be customized with your favorite toppings.
Calories: 250kcal
Cost: $15
Course: Breakfast
Keyword: Berries, Healthy, Oats

Discover the Secrets of Mastering Red Velvet Cake

Welcome to the ultimate guide on baking the perfect Red Velvet Cake! This delightful dessert, characterized by its vibrant color and rich flavor, is a classic favorite for any occasion. In this comprehensive article, we’ll delve into everything you need to know about crafting a moist and decadent Red Velvet Cake, topped with a luscious cream cheese frosting. Whether you’re a seasoned baker or a novice in the kitchen, this step-by-step guide will empower you to create a show-stopping dessert that impresses every time.

With a detailed breakdown of ingredients, troubleshooting tips, and expert advice, you’re just moments away from mastering this iconic cake. Let’s embark on this flavorful journey together!

Why You’ll Love This Recipe

  • Perfectly Balanced Flavor: This recipe combines a subtle cocoa flavor with a touch of tanginess from buttermilk, creating a harmonious taste that pleases the palate.
  • Moist and Tender Texture: The unique blend of ingredients ensures that this cake is incredibly moist, with a tender crumb that melts in your mouth.
  • Stunning Visual Appeal: The vibrant red color of the cake makes it a stunning centerpiece for any celebration, from birthdays to anniversaries.
  • Easy to Follow: With clear step-by-step instructions, even beginner bakers can achieve fantastic results without stress.
  • Versatile and Customizable: This Red Velvet Cake can be adapted to suit various dietary needs and preferences, making it a crowd-pleaser for everyone.

Ingredients Breakdown

Before we dive into the baking process, let’s take a closer look at the ingredients you’ll need to create this delectable Red Velvet Cake.

  • Flour: 2 ¼ cups (338 g) of all-purpose flour is the base of the cake, providing structure and stability.
  • Corn Starch: ¼ cup (35 g) helps to create a lighter texture by reducing the protein content of the flour.
  • Cocoa Powder: 2 tablespoons (16 g) of unsweetened cocoa powder adds a subtle chocolate flavor without overpowering the cake’s signature taste.
  • Baking Soda: 1 teaspoon (5 g) is essential for leavening, helping the cake to rise beautifully.
  • Salt: ½ teaspoon (3 g) enhances flavor and balances sweetness.
  • Canola Oil: 1 cup (250 mL) provides moisture and richness, keeping the cake tender.
  • Unsalted Butter: 125 g (½ cup), melted and cooled, adds flavor and a rich mouthfeel.
  • Sugar: 1 ½ cups (360 g) of caster (superfine) sugar sweetens the cake and helps create a tender crumb.
  • Eggs: 2 large eggs contribute to the cake’s structure and richness.
  • White Vinegar: 1 teaspoon (5 mL) reacts with baking soda to create a lighter texture.
  • Buttermilk: 1 cup (250 mL) is crucial for moisture and flavor; substitutes may not yield the same results.
  • Vanilla Extract: 2 teaspoons (10 g) adds depth to the flavor profile.
  • Food Coloring: 2 tablespoons (40 mL) of red liquid or 1 tablespoon (10 g) of high-quality gel food coloring gives the cake its distinctive color.

How to Make the Perfect Red Velvet Cake

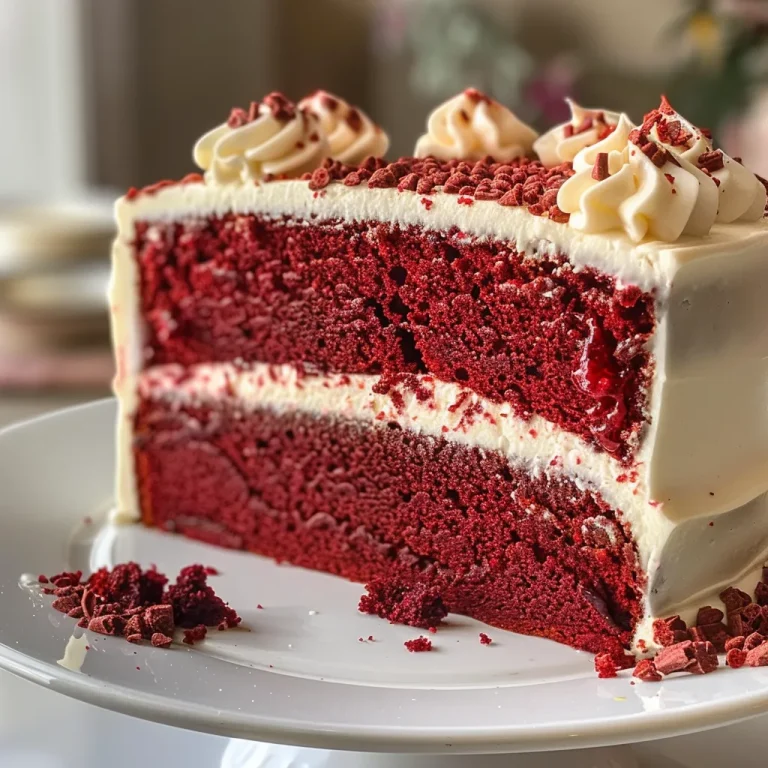
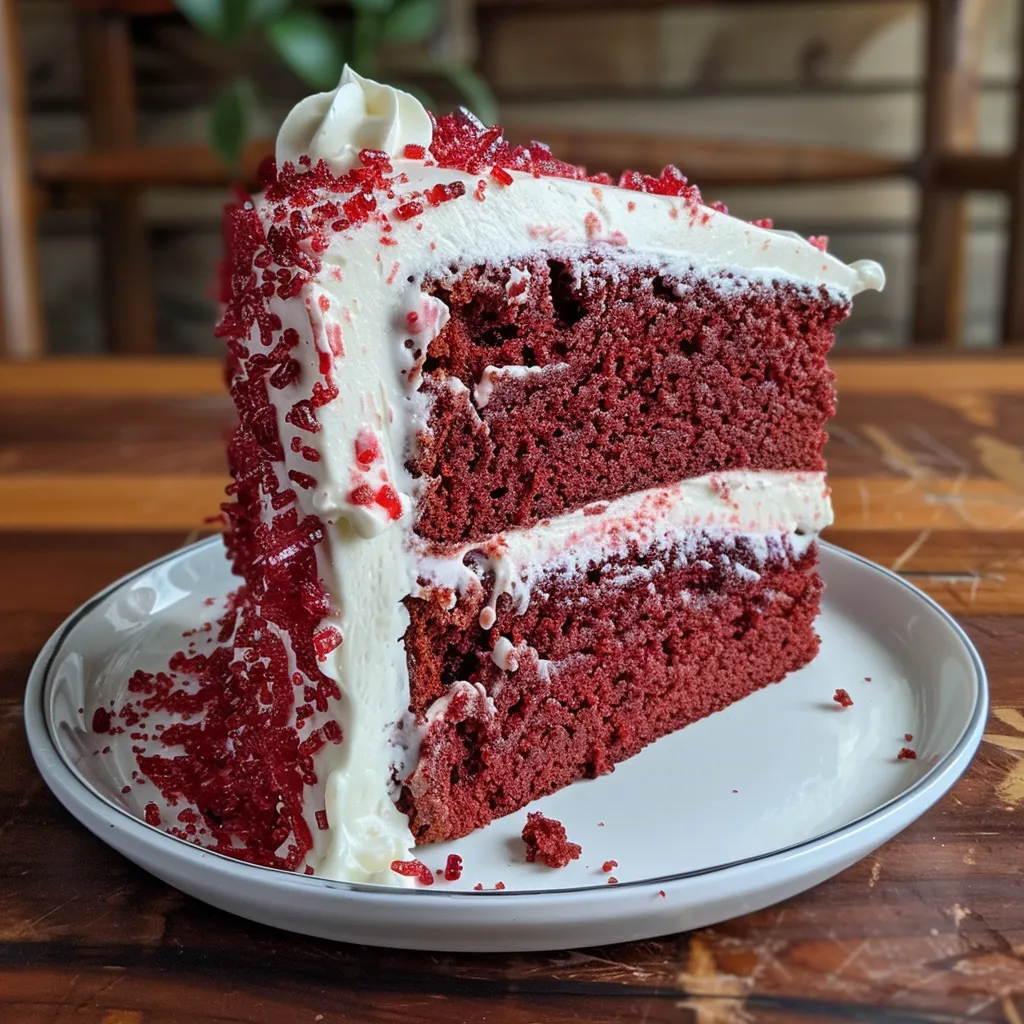
A vibrant red velvet cake adorned with creamy frosting, highlighting its moist texture.

Now that we’ve covered the ingredients, it’s time to put everything together! Follow these detailed steps to create your Red Velvet Cake.

  • Step 1: Preheat and Prepare: Preheat your oven to 160°C/320°F for fan-forced or 180°C/355°F for standard ovens. Grease and line two 20 cm (8 inch) cake pans with baking paper.
  • Step 2: Mix Dry Ingredients: In a large mixing bowl, sift together the flour, corn starch, cocoa powder, baking soda, and salt. Whisk until well combined.
  • Step 3: Combine Wet Ingredients: In a separate large bowl, whisk together the canola oil and melted butter until combined. Add in the caster sugar, eggs, white vinegar, buttermilk, vanilla extract, and food coloring. Whisk until smooth.
  • Step 4: Combine Wet and Dry Ingredients: Pour the wet mixture into the dry ingredients. Gently whisk until just combined—it’s okay if there are a few lumps; avoid overmixing.
  • Step 5: Bake the Cakes: Divide the batter evenly between the prepared pans. Bake for 35-40 minutes or until a skewer inserted into the center comes out clean.
  • Step 6: Cool the Cakes: Allow the cakes to cool in the pans for 10 minutes before transferring them to a wire rack to cool completely.
  • Step 7: Make the Cream Cheese Frosting: In a large bowl, beat together the room temperature butter and cream cheese until creamy and pale (about 3-4 minutes). Gradually add icing sugar, lemon juice, and vanilla extract, beating until thick and smooth.
  • Step 8: Assemble the Cake: If the cakes are domed, level the tops with a serrated knife. Place one cake on a serving plate, spread one quarter of the frosting on top. Place the second cake upside down on top of the first, then spread half of the remaining frosting over the top. Use the rest to frost the sides of the cake.
  • Step 9: Decorative Touches: Optionally, crumble offcuts of the cake and sprinkle them on top and around the sides for added texture.
  • Step 10: Chill and Serve: Refrigerate the cake for 1-2 hours until the frosting is firm. Keep refrigerated until ready to serve.

Pro Tips for Baking Success

  • Use Room Temperature Ingredients: Ensure your eggs, butter, and cream cheese are at room temperature for better incorporation and a smoother batter.
  • Don’t Overmix: Mix just until combined to avoid a dense texture; a few lumps in the batter are perfectly fine.
  • Check for Doneness: Oven temperatures can vary; check your cake a few minutes before the suggested baking time.
  • Cool Completely: Allow the cakes to cool completely before frosting to prevent the cream cheese frosting from melting.
  • Use Quality Ingredients: Opt for high-quality cocoa powder and food coloring for the best flavor and color.
  • Experiment with Flavors: Consider adding a pinch of cinnamon or nutmeg for a unique twist on the traditional recipe.
  • Chill Your Frosting: If the frosting is too soft, refrigerate it for a short while to make it easier to spread.
  • Level Your Cakes: For a professional look, use a serrated knife to level the tops of the cakes before assembling.

Common Mistakes and Troubleshooting

Even experienced bakers can face challenges. Here’s how to troubleshoot common issues:

  • Cake is Dry: Ensure you measure your flour correctly. Too much flour can lead to dryness; spoon the flour into the measuring cup instead of scooping.
  • Cake is Dense: Overmixing can cause the cake to be dense. Mix gently and just until combined.
  • Frosting is Too Soft: If your frosting is too soft, chill it for a bit to firm it up before spreading.
  • Uneven Cakes: If your cakes dome up during baking, try reducing the oven temperature and baking for a longer time.
  • Color is Dull: If the red color isn’t vibrant, consider using gel food coloring instead of liquid for a more intense hue.

Variations on the Classic Red Velvet Cake

While the classic Red Velvet Cake is a showstopper on its own, here are some fun variations to try:

  • Red Velvet Cupcakes: Transform this recipe into individual cupcakes by filling cupcake liners with batter and baking for about 20-25 minutes.
  • Chocolate Red Velvet Cake: Increase the cocoa powder to 4 tablespoons (32 g) for a more chocolatey flavor while maintaining the signature red color.
  • Red Velvet Layer Cake: Bake three layers instead of two for a dramatic layered effect. Just adjust the baking time accordingly.
  • Gluten-Free Red Velvet Cake: Substitute all-purpose flour with a gluten-free flour blend to cater to gluten-sensitive eaters.

Storage and Make-Ahead Instructions

This delightful cake can be made ahead of time and stored properly:

  • Storing the Cake: Keep the baked cake layers wrapped in plastic wrap at room temperature for up to 2 days or refrigerated for up to a week.
  • Frosted Cake Storage: A frosted Red Velvet Cake can be kept in the refrigerator for up to 5 days. Cover it loosely to prevent drying out.
  • Make-Ahead Frosting: The cream cheese frosting can be made ahead and stored in an airtight container in the refrigerator for up to a week. Rewhip before using.

Frequently Asked Questions

Here are some common questions about Red Velvet Cake:

  • Can I use regular milk instead of buttermilk? It’s best to use buttermilk for the right flavor and moisture. If you must substitute, mix regular milk with a bit of vinegar to mimic buttermilk.
  • What kind of food coloring is best? High-quality gel food coloring provides the most vibrant color without altering the cake’s consistency.
  • Can I freeze the cake? Yes! The cake layers can be frozen individually wrapped in plastic wrap for up to 3 months. Thaw them in the refrigerator before frosting.
  • How do I prevent my cake from sticking? Make sure to grease and flour your pans well, or use parchment paper for easy release.
  • What can I use instead of cream cheese in the frosting? You can substitute mascarpone cheese for a different flavor or use a buttercream frosting if you prefer.
  • Why is my cake turning brown? This could be due to baking too long. Ensure you check for doneness a few minutes early.
  • Can I make this cake dairy-free? Yes, use dairy-free butter and a non-dairy milk substitute for the buttermilk.
  • What can I serve with Red Velvet Cake? Lightly sweetened whipped cream or vanilla ice cream pairs beautifully with the richness of the cake.

Nutritional Tips and Dietary Adaptations

For those conscious about nutrition, here are some tips:

  • Reduce Sugar: You can cut down the sugar by using a sugar substitute or reducing the overall amount without sacrificing too much flavor.
  • Use Whole Wheat Flour: Swap half of the all-purpose flour with whole wheat flour for added fiber and nutrients.
  • Vegan Options: Replace eggs with flaxseed meal mixed with water and use non-dairy milk to make it vegan-friendly.

Equipment Recommendations

To achieve the best results, consider having the following tools handy:

  • Mixing Bowls: A set of mixing bowls in various sizes will make your prep easier.
  • Electric Mixer: A stand mixer or hand mixer will save time and effort when mixing the batter and frosting.
  • Cake Pans: Use high-quality non-stick 20 cm (8 inch) round pans for even baking.
  • Offset Spatula: This is ideal for spreading frosting smoothly on the cake.
  • Cooling Rack: Essential for allowing your cakes to cool evenly without condensation.

Serving Suggestions

When you’re ready to serve your masterpiece, consider these ideas:

  • Garnish with Fresh Berries: Top slices with fresh raspberries or strawberries for a pop of color and flavor.
  • Pair with Ice Cream: A scoop of vanilla ice cream on the side adds a delightful contrast to the cake’s richness.
  • Drizzle of Chocolate Sauce: A light drizzle of chocolate sauce elevates the dessert even further.
  • Serve with Coffee: A cup of freshly brewed coffee complements the sweetness of the cake beautifully.

In conclusion, mastering Red Velvet Cake is not just about following a recipe; it’s about understanding the process and embracing the art of baking. With this foolproof guide, you’ll be equipped to create a stunning cake that not only tastes incredible but also looks like a work of art. So gather your ingredients, roll up your sleeves, and get ready to impress with your baking skills!

Red Velvet Cake with Cream Cheese Frosting

Prep Time 30 minutes
Cook Time 40 minutes
Total Time 1 hour 10 minutes
Servings 12 pieces
Calories 450
A vibrant and moist red velvet cake layered with rich cream cheese frosting, perfect for special occasions.

Ingredients

Dry ingredients

  • 2 ¼ cups plain / all-purpose flour
  • ¼ cup corn starch / cornflour
  • 2 tablespoons unsweetened cocoa powder
  • 1 teaspoon baking soda / bicarbonate of soda
  • ½ teaspoon salt

Wet ingredients

  • 1 cup canola oil (or any other flavourless vegetable or cooking oil)
  • 125 g unsalted butter, melted and cooled slightly
  • 1 ½ cups caster / superfine sugar
  • 2 large eggs
  • 1 teaspoon white vinegar
  • 1 cup buttermilk (substitutes do not work well)
  • 2 teaspoons vanilla extract
  • 2 tablespoons red liquid food colouring OR high-quality gel food colouring
  • 125 g unsalted butter, at room temperature
  • 250 g block of cream cheese, at room temperature
  • 4 cups icing / powdered sugar
  • 2 tablespoons lemon juice
  • 1 teaspoon vanilla extract

Instructions 

  • Preheat oven to 160°C/320°F (fan) or 180°C/355°F (standard). Grease and line two 20 cm (8 inch) pans.
  • Sift dry ingredients; whisk until combined. Mix wet ingredients; combine with dry until just mixed.
  • Divide batter into pans; bake for 35-40 mins. Cool completely before frosting.
  • Beat butter and cream cheese until smooth. Add icing sugar, lemon juice, vanilla; beat until fluffy.
  • Level cakes if domed. Layer with frosting, cover sides, and smooth top. Chill for 1-2 hours before serving.

Notes

Ensure ingredients are at room temperature for best results.
Calories: 450kcal
Cost: $15
Course: Dessert
Cuisine: American
Keyword: red velvet

Unlock the Secrets to Perfect Chocolate Covered Strawberries

Chocolate covered strawberries are the epitome of a quick and indulgent treat that can elevate any occasion—from romantic dinners to casual gatherings. With just a few ingredients and straightforward techniques, you can master this delightful dessert. In this comprehensive guide, we’ll ensure you have everything you need to create chocolate covered strawberries that are not only visually stunning but also deliciously satisfying.

Why You’ll Love This Recipe

Here are five reasons this chocolate covered strawberries recipe will become your go-to:

  • Simple Ingredients: With just four main ingredients, you can whip up these treats in no time.
  • Perfect for Any Occasion: Whether it’s a holiday, birthday, or just a Tuesday, these strawberries fit right in.
  • Customizable: Add your favorite toppings or use different types of chocolate for a personal touch.
  • Impressive Presentation: The striking contrast of red strawberries and glossy chocolate will wow your guests.
  • Quick to Make: This recipe takes less than 30 minutes from start to finish, allowing you to satisfy your sweet cravings swiftly.

Ingredients Breakdown

Here’s what you’ll need to make these chocolate covered strawberries:

  • 1 pound fresh strawberries: Ensure they are washed and dried thoroughly to avoid chocolate seizing.
  • 8 ounces semi-sweet chocolate chips: This is the primary coating; you can also use dark or milk chocolate for variation.
  • 2 ounces white chocolate chips (optional): For drizzling, adding a lovely contrast to the dark chocolate.
  • Parchment paper: Essential for lining your baking sheet and preventing sticking.

Preparation and Cooking Times

A tempting display of chocolate dipped strawberries showcasing their vibrant red color.

Knowing the time requirements can make your cooking experience smoother. Here’s a quick overview:

  • Prep Time: 10 minutes
  • Cook Time: 5 minutes
  • Total Time: 15 minutes

Step-by-Step Instructions

Follow these easy steps to create your chocolate covered strawberries:

  1. Line a baking sheet with parchment paper.
  2. In a microwave-safe bowl, add the semi-sweet chocolate chips. Melt them in the microwave in 30-second intervals, stirring in between until smooth.
  3. Grab a strawberry by its stem and dip it into the melted chocolate, covering about ¾ of the berry.
  4. Allow any excess chocolate to drip off and place the dipped strawberry on the lined baking sheet.
  5. If using white chocolate, melt it in another bowl using the same method. Transfer it to a piping bag or zip-top bag for drizzling.
  6. Drizzle the melted white chocolate over the chocolate-covered strawberries.
  7. Let the strawberries sit at room temperature for about 30 minutes to set, or refrigerate to speed up the process.
  8. Serve immediately or store in the refrigerator until ready to enjoy.

Pro Tips for Success

To ensure your chocolate covered strawberries turn out perfectly every time, consider these expert insights:

  • Choose ripe strawberries: The best strawberries for this recipe are firm, ripe, and free from blemishes.
  • Dry thoroughly: Make sure strawberries are completely dry after washing; any moisture can cause the chocolate to seize.
  • Use high-quality chocolate: Investing in good chocolate will enhance the flavor of your treats.
  • Don’t rush the melting process: Slow and steady wins the race—stir frequently to avoid burning the chocolate.
  • Experiment with flavors: Consider adding extracts like vanilla or almond to the chocolate for a unique twist.
  • Chill strawberries beforehand: Cold strawberries can help the chocolate set faster.
  • Use a fork for dipping: This helps achieve an even coat and allows the excess chocolate to drip off easily.
  • Store properly: Avoid stacking the strawberries to prevent them from sticking together.

Common Mistakes to Avoid

Even simple recipes can have pitfalls. Here are some common mistakes and how to troubleshoot them:

  • Chocolate seizing: This happens when water gets into the chocolate. Make sure your bowls and utensils are completely dry.
  • Too thick a coat of chocolate: Dip quickly and let excess chocolate drip off to maintain a delicate finish.
  • Not allowing chocolate to set: Patience is key; letting the chocolate harden at room temperature yields the best results.

Delicious Variations

Feel free to personalize your chocolate covered strawberries with these creative variations:

  • Nutty Delight: Roll the chocolate-dipped strawberries in crushed nuts for added crunch.
  • Sprinkle Fun: Use colorful sprinkles for a festive touch—perfect for parties!
  • Flavor Infusion: Mix in peppermint extract with the melted chocolate for a refreshing flavor.
  • Decadent Drizzle: Mix melted caramel with chocolate for a rich topping.

Storage and Make-Ahead Instructions

If you’re planning to make these strawberries in advance, here’s how to store them:

  • Refrigerate: Store the chocolate covered strawberries in an airtight container in the fridge for up to 48 hours.
  • Freeze: For longer storage, freeze the strawberries on the baking sheet until solid, then transfer them to a freezer-safe container. Consume within two months.
  • Thawing: When ready to enjoy, thaw in the fridge to prevent excess moisture from forming.

FAQs About Chocolate Covered Strawberries

Here are some frequently asked questions that can further assist you:

  • Can I use frozen strawberries? Yes, but they will release moisture as they thaw, which can affect the chocolate’s finish.
  • Can I use chocolate bars instead of chips? Absolutely! Just chop them into small pieces for easier melting.
  • How can I make these gluten-free? This recipe is naturally gluten-free, as none of the ingredients contain gluten.
  • What if the chocolate is too thick? You can add a teaspoon of coconut oil or shortening to thin it out.
  • How long do they last? Chocolate covered strawberries are best enjoyed within two days but can be stored in the fridge for up to 48 hours.
  • Can I make these vegan? Use dairy-free chocolate chips for a vegan-friendly treat.
  • What’s the best way to drizzle chocolate? A piping bag or a zip-top bag with a corner snipped off works perfectly for drizzling.
  • Can I decorate them with other toppings? Yes! Feel free to experiment with coconut flakes, mini chocolate chips, or even edible glitter.

Nutritional Information & Dietary Adaptations

Chocolate covered strawberries can be a delightful treat in moderation. Here’s a quick nutritional overview:

  • Calories: Approximately 60 calories per strawberry (depending on chocolate type)
  • Fat: 3.5g
  • Carbohydrates: 9g
  • Protein: 0.5g

This recipe is adaptable for various dietary needs. Substitute chocolate for sugar-free options or use dairy-free chocolate for a vegan-friendly version.

Essential Equipment You’ll Need

To streamline your cooking process, here’s a quick list of essential equipment:

  • Microwave-safe bowl: For melting the chocolate.
  • Parchment paper: To prevent sticking.
  • Baking sheet: To hold your strawberries while they set.
  • Piping bag or zip-top bag: For drizzling the white chocolate.

Serving Suggestions

For an elegant presentation, consider these serving suggestions:

  • On a platter: Arrange the chocolate covered strawberries on a decorative platter for a stunning centerpiece.
  • Pair with champagne: These treats pair beautifully with sparkling wine, making them perfect for celebrations.
  • Gift them: Package them in a box with some decorative tissue paper for a sweet gift.

Conclusion

Now that you have the ultimate guide to creating chocolate covered strawberries, it’s time to get started. With just a few simple ingredients and these expert tips, you’ll be able to impress your guests and satisfy your sweet tooth. Remember, the joy of cooking comes from experimenting and personalizing recipes, so don’t hesitate to make these treats your own. Enjoy the process and, most importantly, enjoy your delicious creations!

Chocolate Covered Strawberries

Prep Time 15 minutes
Cook Time 10 minutes
Total Time 25 minutes
Servings 8 pieces
Calories 150
Delight in these elegant and easy-to-make chocolate-covered strawberries, perfect for any occasion.

Ingredients

Main

  • 1 pound fresh strawberries, washed and dried
  • 8 ounces semi-sweet chocolate chips
  • 2 ounces white chocolate chips (optional, for drizzling) (Optional)
  • 1 sheet Parchment paper

Instructions 

  • Line a baking sheet with parchment paper.
  • Microwave chocolate chips in 30-second intervals, stirring until smooth.
  • Dip strawberries into melted chocolate, then place on parchment-lined sheet.
  • Melt white chocolate and drizzle over strawberries if desired.
  • Let sit at room temperature for 30 minutes to set or refrigerate.

Notes

Ensure strawberries are completely dry before dipping for best coating.
Calories: 150kcal
Cost: $15
Course: Dessert
Cuisine: American
Keyword: chocolate, strawberries

If you’re on the hunt for a show-stopping dessert that meets gluten-free dietary needs without sacrificing flavor or texture, look no further. This decadent gluten free chocolate cake is not only rich and moist, but it’s also simple to make! In this guide, you’ll discover every detail—from ingredients to expert tips—to ensure your cake turns out perfectly every time. Get ready to impress your family and friends with this delightful treat!

Why You’ll Love This Recipe

This gluten free chocolate cake is a dessert that checks all the boxes. Here are just a few reasons to love it:

  • Rich Flavor: The combination of cocoa powder and espresso enhances the chocolate profile, making every bite a chocolate lover’s dream.
  • Moist Texture: With ingredients like Greek yogurt and fresh coffee, this cake stays incredibly moist, ensuring it won’t dry out.
  • Easy to Make: Simple steps and accessible ingredients mean you can whip this cake up quickly, even on a busy day.
  • Versatile Variations: Customize the cake with various frostings or mix-ins for endless possibilities!
  • Perfect for Any Occasion: Whether it’s a birthday, holiday, or a casual dessert, this cake is sure to impress.

Ingredient Breakdown

Understanding your ingredients is vital for creating the perfect gluten free chocolate cake. Here’s what you’ll need:

  • 2 cups Gluten Free 1:1 Flour: This blend provides structure. If gluten isn’t a concern, you can substitute with all-purpose flour.
  • 3/4 cup Cocoa Powder: Opt for unsweetened for the best taste; this is essential for rich chocolate flavor.
  • 1 cup Sugar: Sweetens the cake beautifully, balancing the chocolate’s richness.
  • 1 teaspoon Baking Powder: Essential for leavening; ensures the cake rises perfectly.
  • 1 teaspoon Baking Soda: Works with acidic ingredients to enhance the cake’s rise.
  • 1 cup Greek Yogurt: Adds moisture; can be switched with sour cream if desired.
  • 1/2 teaspoon Kosher Salt: Balances sweetness and enhances flavor.
  • 1/2 cup Vegetable Oil: Keeps the cake tender; melted coconut oil is a great substitute.
  • 1 tablespoon Espresso Powder: Deepens the chocolate flavor; omit for a milder taste.
  • 1 cup Fresh Brewed Coffee: Adds incredible moisture; warm water is an acceptable alternative.
  • 3 large Eggs: Binds ingredients and adds richness. For a vegan option, substitute with 1/4 cup of applesauce per egg.
  • 1 teaspoon Vanilla Extract: Rounds out the flavors.
  • For the Frosting:
  • 1 cup Butter (Softened): The creamy base of your frosting.
  • 4 cups Powdered Sugar: For sweetness and smooth texture.
  • 1/4 cup Unsweetened Cocoa: To intensify the chocolate flavor in your frosting.
  • 2 tablespoons Milk: To achieve a spreadable consistency; non-dairy options work too.

Pro Tips for Success

To ensure your gluten free chocolate cake turns out perfectly, consider these expert insights:

  • Room Temperature Ingredients: Ensure all your ingredients, especially eggs and butter, are at room temperature for better mixing and texture.
  • Don’t Overmix: Once you combine the wet and dry ingredients, mix just until incorporated to avoid a dense cake.
  • Use a Toothpick Test: Check for doneness by inserting a toothpick into the center; it should come out clean or with just a few crumbs.
  • Let It Cool: Allow the cake to cool in the pan for at least 10 minutes before transferring to a wire rack; this prevents breakage.
  • Frost When Fully Cool: Ensure the cake is completely cooled before frosting to avoid melting.
  • Experiment with Mix-ins: Consider adding chocolate chips or nuts for added texture and flavor.
  • Storage: Store leftovers in an airtight container to maintain freshness.
  • Make Ahead: This cake can be made a day in advance; just wrap it well and store at room temperature.

Common Mistakes and Troubleshooting

A slice of decadent chocolate cake with layers visible, presented from the side.

Even seasoned bakers can run into issues. Here are some common pitfalls and how to avoid them:

  • Cake is Too Dense: This could be due to overmixing the batter. Mix just until combined.
  • Dry Cake: Ensure that you’re measuring your flour correctly. Consider using a kitchen scale for accuracy.
  • Uneven Baking: Rotate the cake halfway through the baking time to ensure even cooking.
  • Frosting Melts Off: Ensure your cake is completely cooled before adding frosting.

Delicious Variations

This recipe is highly adaptable. Here are a few variations to consider:

  • Chocolate Mint Cake: Add a teaspoon of peppermint extract to the batter for a refreshing minty twist.
  • Chocolate Orange Cake: Incorporate orange zest into the batter for a citrusy flavor contrast.
  • Nutty Chocolate Cake: Fold in 1 cup of chopped walnuts or pecans for added crunch.
  • Berry Chocolate Cake: Layer fresh berries between the cake layers for a fruity surprise.

Storage and Make-Ahead Instructions

This decadent cake can be made ahead of time and stored properly:

  • Room Temperature Storage: Keep the cake at room temperature in an airtight container for up to 3 days.
  • Refrigeration: For longer storage, refrigerate the cake, where it can last up to a week. Ensure it’s well-wrapped to prevent drying out.
  • Freezing: This cake freezes beautifully! Wrap it tightly in plastic wrap, then in aluminum foil, and freeze for up to 3 months. Thaw at room temperature before serving.

Frequently Asked Questions

Here are some common queries about making this gluten free chocolate cake:

  • Can I use regular flour? Yes, if gluten is not a concern, you can substitute with all-purpose flour.
  • How can I make this cake vegan? Substitute eggs with applesauce at a 1/4 cup per egg.
  • What’s the best way to frost the cake? Use a spatula for a smooth finish or a piping bag for decorative touches.
  • Can I make cupcakes with this recipe? Absolutely! Adjust the baking time to about 20-25 minutes.
  • What should I serve with this cake? Pair with a scoop of vanilla ice cream or a dollop of whipped cream.
  • How can I enhance the chocolate flavor? Use high-quality cocoa powder and add espresso powder.
  • What if my cake sinks in the middle? This may be due to underbaking or overmixing. Ensure you follow the baking times and testing methods.
  • Can I add frosting flavors? Yes! Try adding different extracts or citrus zest for unique flavors.

Nutritional Tips and Dietary Adaptations

This cake can cater to various dietary needs:

  • Low Sugar Option: Substitute sugar with a sugar alternative suitable for baking.
  • Higher Protein: Consider using Greek yogurt and adding protein powder to the batter.
  • Nut-Free Option: Ensure no nut products are used in the flour or frosting.

Equipment Recommendations

To achieve the best results, here’s what you’ll need:

  • Mixing Bowls: A set of various sizes for mixing dry and wet ingredients.
  • Electric Mixer: For easy and efficient mixing.
  • Measuring Cups and Spoons: Precision is key in baking.
  • 9-inch Round Cake Pans: For the perfect cake shape.
  • Cooling Rack: Essential for proper cooling to prevent sogginess.

Serving Suggestions

Make your cake even more delightful with these serving ideas:

  • With Whipped Cream: A dollop of fresh whipped cream adds a light touch.
  • Chocolate Ganache: Pour over the top for an extra chocolatey experience.
  • Fresh Berries: Garnish with strawberries or raspberries for a fresh contrast.
  • Ice Cream: Serve slices with a scoop of your favorite ice cream for a decadent dessert.

Now that you have all the tools, tips, and techniques, it’s time to create your own decadent gluten free chocolate cake! With its rich flavors and moist texture, this cake is sure to be a hit. Happy baking!

Indulge in Ultimate Decadent Gluten Free Chocolate Cake Today

Prep Time 20 minutes
Cook Time 35 minutes
Total Time 55 minutes
Servings 12 pieces
Calories 450
Experience the rich, moist, and decadent flavor of this gluten-free chocolate cake, perfect for any celebration or indulgence.

Ingredients

Dry Ingredients

  • 2 cups Gluten Free 1:1 Flour (All-purpose flour can be used if gluten is not a concern.)
  • 3/4 cup Cocoa Powder (Opt for unsweetened for best taste.)
  • 1 cup Sugar
  • 1 teaspoon Baking Powder (Vital for leavening.)
  • 1 teaspoon Baking Soda (Vital for leavening.)
  • 1 cup Greek Yogurt (Switch to sour cream if desired.)
  • 1/2 teaspoon Kosher Salt (Balances sweetness.)
  • 1/2 cup Vegetable Oil (Melted coconut oil is a great substitute.)
  • 1 tablespoon Espresso Powder (Omit for milder chocolate.)
  • 1 cup Fresh Brewed Coffee (Warm water can replace it.)
  • 3 large Eggs (For a vegan option, use 1/4 cup of applesauce per egg.)
  • 1 teaspoon Vanilla Extract

Filling & Frosting

  • 1 cup Butter (Softened.)
  • 4 cups Powdered Sugar
  • 1/4 cup Unsweetened Cocoa
  • 1 teaspoon Vanilla Extract
  • 2 tablespoons Milk (Non-dairy options can be used.)

Instructions 

  • Preheat oven to 350°F (175°C). Grease and flour your cake pan.
  • Mix dry ingredients and wet ingredients separately, then combine.
  • Pour batter into prepared pan and bake for 35 minutes.
  • Allow cake to cool, then prepare frosting by beating butter, powdered sugar, cocoa, vanilla, and milk until smooth.
  • Frost the cooled cake and serve.

Notes

For extra richness, add chocolate chips or nuts to the batter.
Calories: 450kcal
Cost: $15
Course: Dessert
Cuisine: American
Keyword: cake, chocolate, gluten free