Author

robert

Browsing

Welcome to your go-to guide for making the ultimate buttermilk pancakes! Whether you’re whipping up a special breakfast for the family or simply enjoying a cozy morning at home, this recipe combines simplicity and flavor to create fluffy, delicious pancakes. With just a few key ingredients, you can transform your mornings into something special. Plus, we’ll explore a fun twist with rainbow colors to make breakfast even more exciting!

Why You’ll Love This Recipe

Here are five compelling reasons to try out this pancake recipe:

  • Quick and Easy: With minimal preparation and cooking time, you can have a batch of pancakes ready in under 20 minutes.
  • Fluffy and Delicious: The combination of buttermilk and the right leavening agents ensures perfectly fluffy pancakes every time.
  • Kid-Friendly: The colorful twist with food coloring makes these pancakes a hit with children, making breakfast a fun event.
  • Customizable: This base recipe allows for plenty of variations, from adding fruits to swapping ingredients for dietary needs.
  • Meal Prep Friendly: You can make the batter ahead of time or even freeze the pancakes for a quick weekday breakfast.

Ingredient Breakdown

To create these delightful pancakes, you’ll need the following ingredients:

  • 1 1/3 cups flour: All-purpose flour is ideal, but you can substitute with whole wheat flour for a healthier option.
  • 1 tbsp sugar: A touch of sweetness enhances the flavor; feel free to use honey or maple syrup as alternatives.
  • 1 tsp baking powder: This is crucial for fluffiness. Double-check the expiration date to ensure effectiveness.
  • 1/2 tsp baking soda: Works in tandem with buttermilk to create that perfect rise.
  • 1/2 tsp salt: Balances the sweetness and enhances the overall flavor.
  • 1 cup buttermilk: For that rich, tangy flavor. If you don’t have buttermilk, you can create a substitute by mixing milk with vinegar or lemon juice.
  • 1 large egg: Adds structure and richness to the batter.
  • 2 tbsp butter, melted: A key ingredient for flavor and moisture. You can also use coconut oil for a dairy-free option.
  • 1/2 tsp pure vanilla extract: Enhances the aroma and taste of the pancakes.
  • 2-3 drops food coloring: Optional, but a fun addition to make rainbow pancakes!

How to Make Buttermilk Pancakes

Follow these simple steps to create your pancakes:

  1. In a large bowl, mix together the flour, sugar, baking powder, baking soda, and salt.
  2. In a separate small bowl, whisk together the buttermilk, egg, melted butter, and vanilla extract. Add this mixture to the dry ingredients, stirring until just combined.
  3. Divide the batter into six bowls and add different colors of food coloring to each, mixing until the desired colors are achieved.
  4. Heat a large skillet over medium heat. Pour about 1/4 cup of pancake batter per pancake onto the skillet. Cook for 1-2 minutes, until the bottom is golden brown and bubbles form on the edges.
  5. Carefully flip the pancakes and cook for another 1-2 minutes until fully cooked through.

Pro Tips for Perfect Pancakes
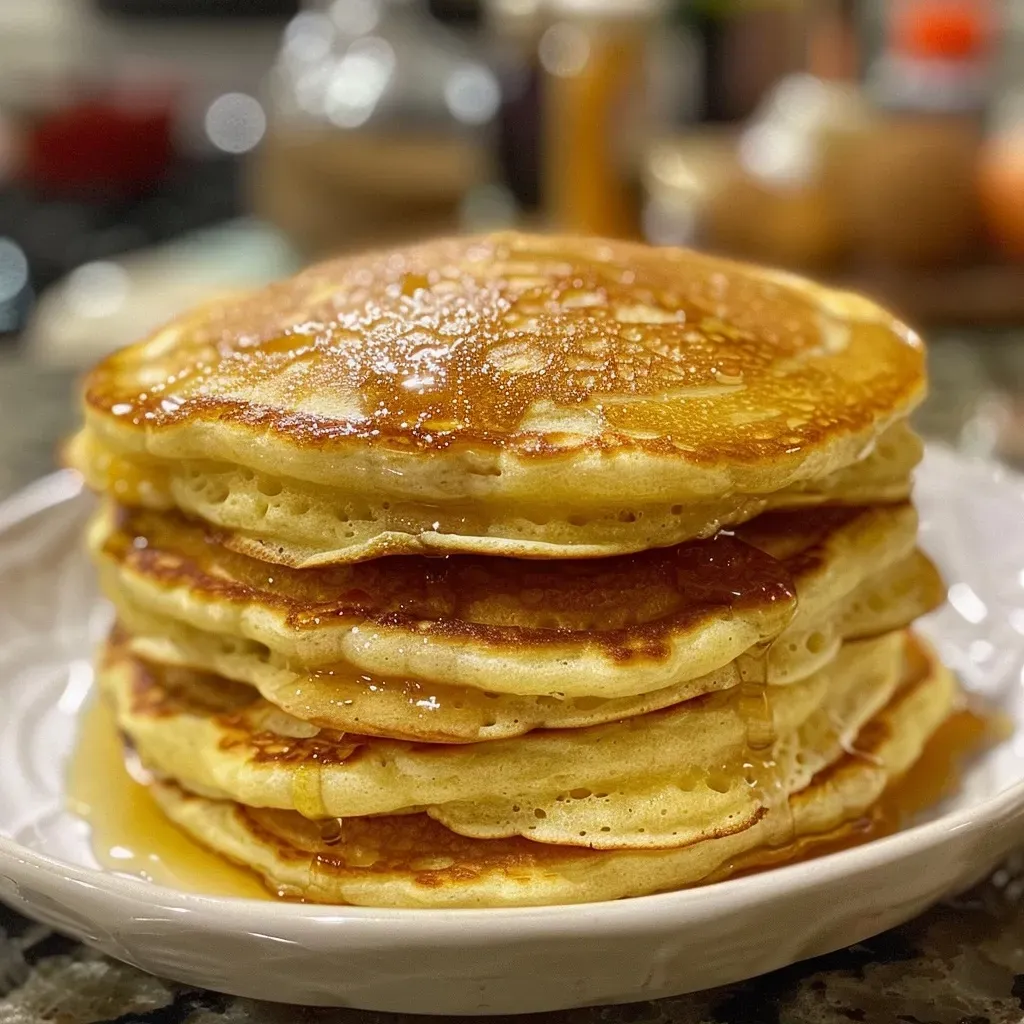
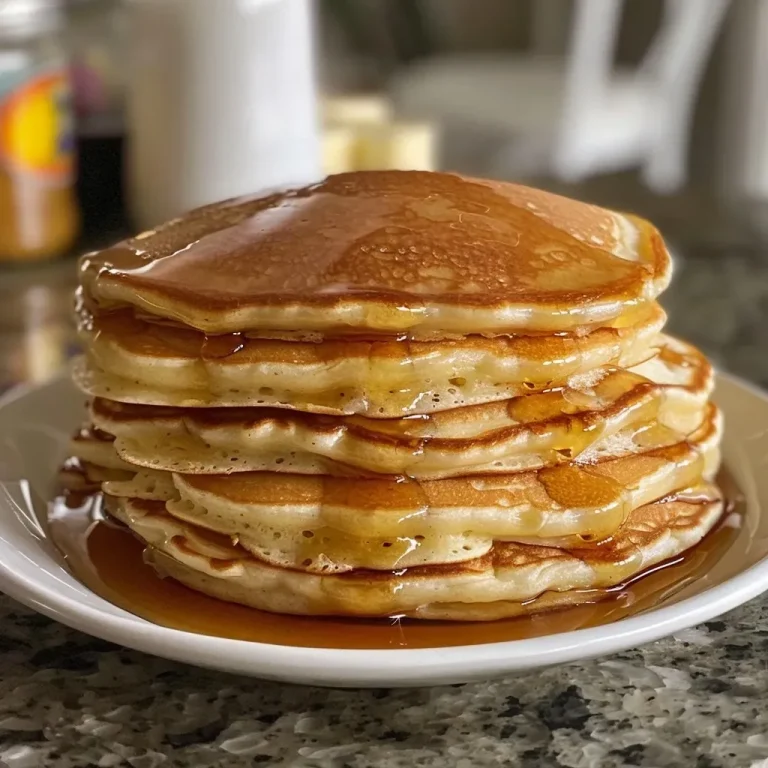
Side view of deliciously golden buttermilk pancakes on a plate.

To ensure your pancakes are the best they can be, consider the following expert insights:

  • Don’t Overmix: A few lumps in the batter are okay—overmixing can lead to dense pancakes.
  • Rest the Batter: Letting the batter sit for 5-10 minutes allows the gluten to relax for lighter pancakes.
  • Temperature Check: Ensure your skillet is at the right temperature; too hot will burn the pancakes, while too cold will lead to soggy results.
  • Use Non-Stick Spray: A light coating of non-stick spray can help achieve that golden exterior without sticking.
  • Keep Warm: Place cooked pancakes on a baking sheet in a warm oven (200°F) to keep them warm while you finish cooking the rest.
  • Flavor Boost: Add chocolate chips, blueberries, or nuts to the batter for added flavor and texture.
  • Test for Doneness: Pancakes should spring back when lightly pressed in the center; if they sink, they need more cooking time.
  • Experiment with Toppings: Serve with maple syrup, fresh fruits, or whipped cream for a delightful finish.

Common Mistakes and Troubleshooting

Here are some common pitfalls and how to avoid them:

  • Dense Pancakes: This usually happens from overmixing or using expired leavening agents. Stir just until combined for the best texture.
  • Uneven Cooking: Ensure your skillet is preheated evenly. If it’s too hot, the pancakes will burn; too cool, and they will cook unevenly.
  • Flavorless Pancakes: Don’t skip the sugar, and be generous with your vanilla extract for richer flavor.

Variations to Try

Here are some creative variations to keep breakfast exciting:

  • Chocolate Chip Pancakes: Fold in semi-sweet chocolate chips for a sweet treat.
  • Blueberry Pancakes: Add fresh or frozen blueberries directly to the batter.
  • Banana Pancakes: Mash ripe bananas and incorporate them into the batter for a fruity twist.
  • Whole Wheat Pancakes: Substitute all-purpose flour with whole wheat flour for a healthier version.

Storage and Make-Ahead Instructions

To make mornings even easier:

  • Refrigerate: Store cooked pancakes in an airtight container in the fridge for up to 3 days.
  • Freeze: Layer pancakes with parchment paper and store in a freezer-safe bag for up to 2 months. Reheat in the toaster or microwave.
  • Make-Ahead Batter: Prepare batter the night before and store in the fridge. Stir before cooking to recombine.

Frequently Asked Questions

Here are some common questions about making buttermilk pancakes:

  • Can I use regular milk instead of buttermilk? Yes, but the pancakes may not be as fluffy. To mimic buttermilk, add a tablespoon of vinegar to regular milk and let sit for 5 minutes.
  • How can I make these pancakes dairy-free? Substitute buttermilk with almond milk and use a dairy-free butter alternative.
  • What can I do with leftover pancake batter? Consider making mini pancakes or waffles. Alternatively, store it in the fridge for later use.
  • How do I reheat frozen pancakes? Reheat in the toaster or microwave until warm. Adding a touch of butter while reheating enhances flavor.
  • Can I make these pancakes ahead of time? Yes! Cook them in advance and store as directed above.
  • What toppings pair well with buttermilk pancakes? Maple syrup, fresh fruit, whipped cream, and yogurt are all excellent choices.
  • Why are my pancakes sticking to the skillet? Ensure the skillet is properly greased and preheated. You may need to adjust your cooking temperature.
  • Can I add protein powder to the batter? Yes, but reduce the flour slightly to maintain the right consistency.

Nutrition Tips and Dietary Adaptations

Here are some nutrition tips to consider:

  • Whole Grain Options: Using whole wheat flour boosts fiber content and adds nutrients.
  • Reducing Sugar: Cut down on sugar if desired, or replace with natural sweeteners like mashed bananas or applesauce.
  • Adding Protein: Incorporate protein powder or Greek yogurt into the batter for added nutrition.

Equipment Recommendations

To make the process smooth, consider these kitchen essentials:

  • Non-Stick Skillet: A good quality non-stick skillet ensures perfect cooking without sticking.
  • Whisk: A sturdy whisk helps blend ingredients efficiently.
  • Measuring Cups and Spoons: Accurate measurements are crucial for consistent results.
  • Spatula: A flexible spatula makes flipping pancakes a breeze.

Serving Suggestions

For a complete breakfast experience:

  • Pair with Fresh Fruits: Serve alongside sliced bananas, strawberries, or blueberries for added nutrition.
  • Add Protein: Consider serving with scrambled eggs or bacon for a hearty meal.
  • Creative Syrups: Try flavored syrups like maple, berry compote, or even chocolate sauce as toppings.

Now that you have all the details, it’s time to gather your ingredients and start cooking! These buttermilk pancakes are perfect for any occasion, and you’ll love experimenting with different flavors and colors. Enjoy your culinary adventure!

Buttermilk Pancakes

Prep Time 10 minutes
Cook Time 10 minutes
Total Time 20 minutes
Servings 6 pancakes
Calories 250
Fluffy, colorful pancakes perfect for a fun breakfast treat that everyone will enjoy.

Ingredients

Dry Ingredients

  • 1 1/3 cups flour
  • 1 tbsp sugar
  • 1 tsp baking powder
  • 1/2 tsp baking soda
  • 1/2 tsp salt

Wet Ingredients

  • 1 cup buttermilk
  • 1 large egg
  • 2 tbsp butter, melted
  • 1/2 tsp pure vanilla extract
  • 2-3 drops food coloring in rainbow colors

Instructions 

  • Mix dry ingredients in a bowl.
  • Whisk wet ingredients together and combine with dry ingredients.
  • Divide batter into 6 bowls and add food coloring to each.
  • Heat skillet and pour 1/4 cup batter for each pancake. Cook until golden, then flip and cook other side.

Notes

Ensure the skillet is properly heated for best results.
Calories: 250kcal
Cost: $10
Course: Breakfast
Cuisine: American
Keyword: Pancakes

Discover the Magic of Hot Honey Chicken Bowls

Hot Honey Chicken Bowls are the epitome of sweet and spicy culinary delight. This dish combines tender chicken, vibrant vegetables, and a sweet heat that transforms any weeknight dinner into a memorable feast. Whether you’re a busy professional, a parent juggling multiple schedules, or someone who simply loves good food, this recipe is designed for you. In less than an hour, you can whip up a meal that’s not only satisfying but also easy to customize. Let’s dive into why you’ll love this recipe and how to make it a staple in your kitchen.

Why You’ll Love This Recipe

  • Quick Preparation: With only a few simple steps, you can have a delicious meal ready in under 30 minutes, making it perfect for busy weeknights.
  • Flavorful Fusion: The combination of sweet honey and spicy chili flakes creates a unique flavor profile that tantalizes your taste buds.
  • Customizable Ingredients: This recipe allows for various substitutions, letting you adjust the spice level or add your favorite vegetables.
  • Healthy and Nutritious: Packed with protein and fiber, this bowl is not just tasty but also nutritious, keeping you full and energized.
  • One-Pan Wonder: Minimal cleanup is required, as you can bake the chicken and sauté the vegetables in one go.

Ingredient Breakdown

To create your Hot Honey Chicken Bowls, you’ll need the following ingredients:

  • 2 Boneless, skinless chicken breasts: The star protein; tender and perfect for soaking up flavors.
  • 2 cloves Fresh garlic, minced: Adds depth and aroma to the dish.
  • 1/4 cup Hot honey sauce: A blend of honey and chili flakes for that signature sweet and spicy kick.
  • 2 cups Mixed vegetables (bell peppers, broccoli): Fresh veggies add color and nutrition; feel free to swap based on seasonality.
  • 2 cups Cooked rice or quinoa: The base of your bowl, providing a hearty foundation.
  • 2 tablespoons Low-sodium soy sauce: Enhances the umami flavor and balances sweetness.

How to Make Hot Honey Chicken Bowls

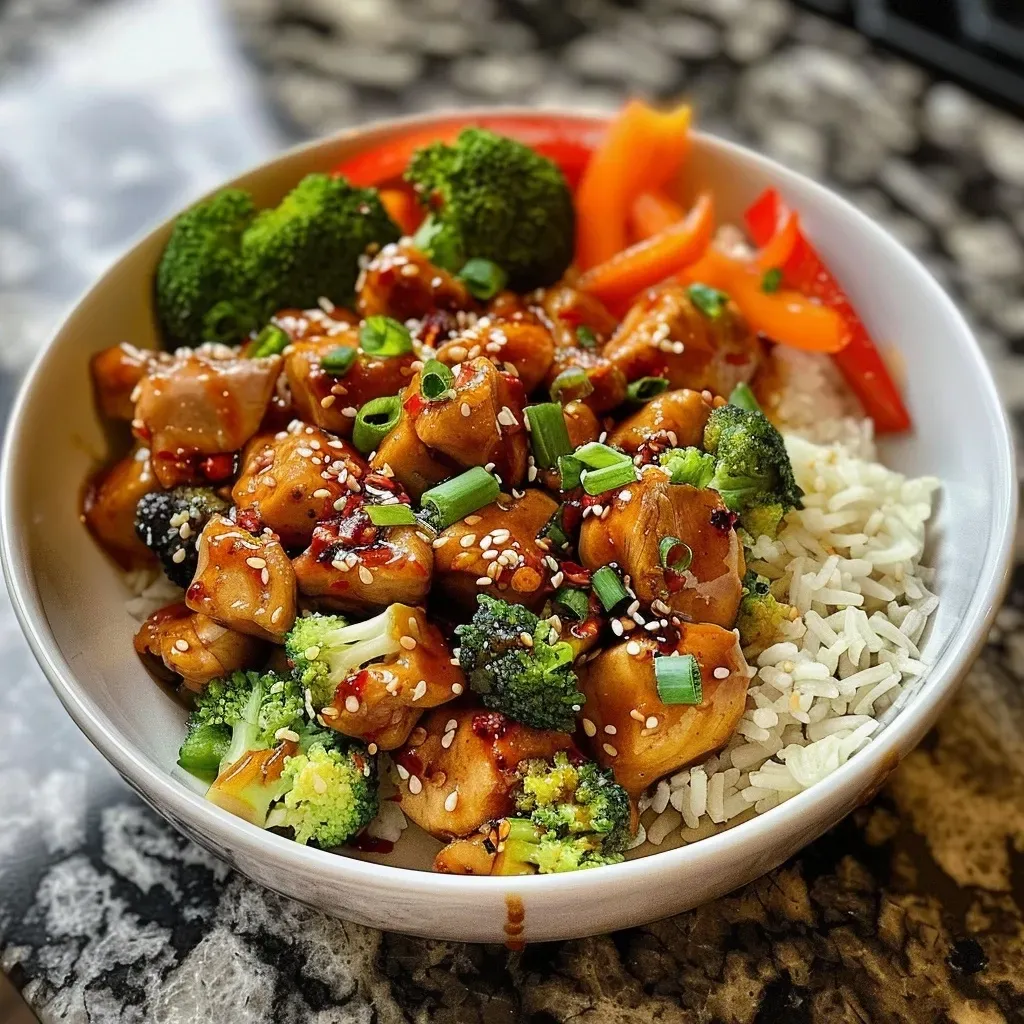
Side view of a delicious Hot Honey Chicken Bowl featuring tender chicken and vibrant veggies.

Follow these simple steps to create your delicious Hot Honey Chicken Bowls:

  1. Preheat the oven to 400°F (200°C) and lightly grease a baking dish.
  2. Season the chicken breasts with salt and pepper; arrange them in the baking dish.
  3. Prepare the hot honey mixture: In a bowl, mix the hot honey sauce with soy sauce and minced garlic.
  4. Coat the chicken: Pour the mixture over the chicken, ensuring an even coating.
  5. Bake the chicken: Cook for 25-30 minutes until the chicken is thoroughly cooked.
  6. Sauté the vegetables: While the chicken bakes, sauté mixed vegetables in a pan until they are tender-crisp.
  7. Assemble the bowls: Serve the chicken over grains, add the vegetables on the side, and drizzle with extra hot honey sauce.

Pro Tips for Best Results

  • Adjust the spice level: Modify the amount of hot honey sauce based on your personal preference for heat.
  • Let it marinate: For deeper flavor, allow the chicken to marinate in the hot honey mixture for at least 30 minutes before baking.
  • Use a meat thermometer: Ensure chicken is cooked to an internal temperature of 165°F (75°C) for perfect doneness.
  • Try different grains: Swap rice for quinoa or even cauliflower rice for a low-carb option.
  • Mix up the veggies: Use seasonal vegetables like zucchini or asparagus for added variety.
  • Pair with sauces: Consider adding a creamy ranch or yogurt drizzle for extra flavor.
  • Meal prep: Make extra chicken and grains for easy lunches throughout the week.
  • Store leftovers: Keep any leftovers in an airtight container in the refrigerator for up to 3 days.

Common Mistakes and Troubleshooting

Avoid these common pitfalls to ensure your Hot Honey Chicken Bowls are a success:

  • Overcooking the chicken: Keep an eye on baking time to prevent dry chicken.
  • Not slicing the chicken: Slice the chicken after resting for better texture and flavor distribution.
  • Skipping the seasoning: Don’t skip salt and pepper; they enhance the overall flavor profile.
  • Using too much sauce: Balance is key; too much sauce can overwhelm the dish.

Variations to Try

Put a twist on your Hot Honey Chicken Bowls with these variations:

  • BBQ Hot Honey Bowls: Substitute BBQ sauce for hot honey for a smoky flavor.
  • Vegetarian Option: Replace chicken with tofu or tempeh, marinated in the same sauce.
  • Asian-Inspired Bowls: Add sesame oil, ginger, and top with sesame seeds for an Asian flair.
  • Southwestern Style: Include black beans, corn, and avocado for a southwestern twist.

Storage and Make-Ahead Instructions

For optimal freshness and flavor, follow these storage tips:

  • Refrigeration: Store leftovers in an airtight container for up to 3 days.
  • Freezing: The chicken can be frozen before cooking for up to 2 months; just thaw in the fridge before baking.
  • Make-ahead option: Prepare the chicken and sauce ahead of time, and simply bake when ready to serve.

Frequently Asked Questions

Here are some common questions about Hot Honey Chicken Bowls:

  • Can I use frozen chicken? Yes, just ensure it’s thawed completely before baking.
  • What can I substitute for hot honey sauce? You can mix regular honey with chili flakes or hot sauce to create a similar flavor.
  • How do I keep the chicken moist? Use a meat thermometer to avoid overcooking.
  • Are these bowls gluten-free? Yes, just use gluten-free soy sauce or tamari.
  • Can I add more vegetables? Absolutely! Feel free to add any vegetables you love.
  • How spicy is this recipe? The spice level can be adjusted based on how much hot honey you use.
  • Can I make this in advance? Yes, you can prepare the components ahead of time and assemble when ready to eat.
  • What sides pair well? Creamy coleslaw, a fresh salad, or garlic bread complement these bowls nicely.

Nutritional Insights and Dietary Adaptations

This dish is nutritious, providing ample protein and fiber. Here’s how you can adapt it for various dietary needs:

  • Low-carb: Substitute rice with cauliflower rice for a lighter option.
  • Dairy-free: The recipe is naturally dairy-free; just ensure your sauce choices align.
  • High-protein: Add more chicken or even chickpeas for extra protein.

Essential Equipment

To make your Hot Honey Chicken Bowls, you will need:

  • Baking dish: For baking the chicken evenly.
  • Non-stick skillet: Ideal for sautéing vegetables without sticking.
  • Mixing bowls: For preparing sauces and seasoning.
  • Meat thermometer: To ensure perfect cooking temperatures.

Serving Suggestions

Enhance your Hot Honey Chicken Bowls with these serving ideas:

  • Garnish: Sprinkle with chopped green onions or cilantro for a fresh touch.
  • Drizzle: Add a drizzle of extra hot honey or a creamy dressing for added flavor.
  • Side Dishes: Pair with a light salad or garlic bread to complete the meal.

In conclusion, Hot Honey Chicken Bowls are a versatile, flavorful, and easy-to-make dish that fits perfectly into your busy lifestyle. With a few simple ingredients and a bit of creativity, you can enjoy a delicious meal that everyone will love. Give this recipe a try—you won’t be disappointed!

Hot Honey Chicken Bowls

Prep Time 10 minutes
Cook Time 30 minutes
Total Time 40 minutes
Servings 4 servings
Calories 550
Enjoy a flavorful and easy-to-make bowl featuring tender chicken glazed with spicy honey, served over rice with colorful vegetables.

Ingredients

Protein

  • 2 pieces Boneless, skinless chicken breasts

Flavorings

  • 2 cloves Fresh garlic, minced
  • 1/4 cup Hot honey sauce (honey mixed with chili flakes)

Vegetables

  • 2 cups Mixed vegetables (bell peppers, broccoli)

Grains

  • 2 cups Cooked rice or quinoa
  • 2 tablespoons Low-sodium soy sauce

Instructions 

  • Preheat oven to 400°F (200°C) and prepare a baking dish.
  • Season chicken with salt and pepper, then bake for 25-30 minutes.
  • Mix hot honey sauce, soy sauce, and minced garlic in a bowl.
  • Pour sauce over chicken and bake until cooked through.
  • Sauté vegetables until tender, then serve chicken over grains with vegetables.

Notes

For extra flavor, drizzle with additional hot honey sauce before serving.
Calories: 550kcal
Cost: $15
Course: Main Course
Cuisine: American
Keyword: Chicken

Transform Your Breakfast: The Ultimate Chocolate Peanut Butter Smoothie Bowl

When it comes to starting your day right, few things rival the indulgence and nutrition of a Chocolate Peanut Butter Smoothie Bowl. This creamy delight is not only a treat for your taste buds but also a powerhouse of nutrients that fuels your morning with energy. With just a handful of ingredients, you can whip up a satisfying breakfast that’s perfect for busy days, lazy weekends, or even as a post-workout snack. Let’s dive into the details of creating this delicious, guilt-free smoothie bowl.

Why You’ll Love This Recipe

  • Quick and Easy: This smoothie bowl can be prepared in just 10 minutes, making it a perfect choice for those busy mornings.
  • Nutritious Ingredients: Packed with healthy fats from peanut butter and potassium from bananas, it’s a wholesome start to your day.
  • Customizable Toppings: Personalize your bowl with a variety of toppings like granola, fruits, and seeds to suit your taste.
  • Delicious Flavor: The combination of rich chocolate and creamy peanut butter creates a flavor profile that feels like a dessert.
  • Vegan and Gluten-Free: This recipe is suitable for various dietary needs, ensuring everyone can enjoy it.

Ingredients Breakdown

Here’s what you’ll need to create this delectable Chocolate Peanut Butter Smoothie Bowl:

  • 2 frozen bananas: These act as a base, providing natural sweetness and creaminess.
  • ⅓ cup almond milk: Use any milk of your choice; oat or coconut milk also work well.
  • 2 tablespoons peanut butter: Opt for natural peanut butter for a healthier option.
  • 2 tablespoons cacao powder: This adds rich chocolate flavor and antioxidants.
  • Optional add-ins: Consider adding 2 scoops of protein powder, 2 teaspoons of maca powder, or 1 tablespoon of chia seeds for extra nutrition.

Feel free to substitute the peanut butter with almond butter or sun butter if you have nut allergies. For a sweeter smoothie, add a drizzle of honey or maple syrup.

How to Make Your Smoothie Bowl

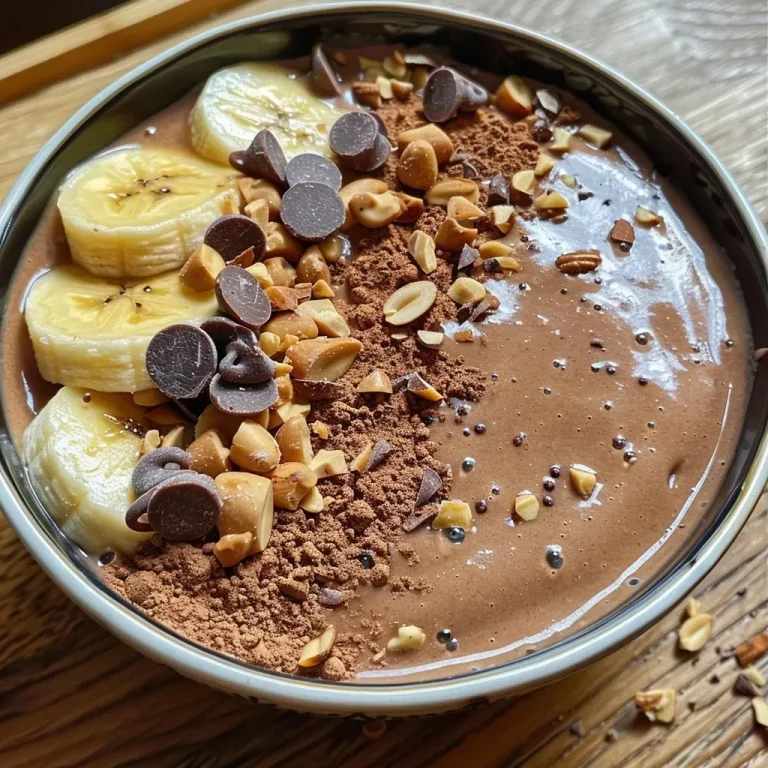
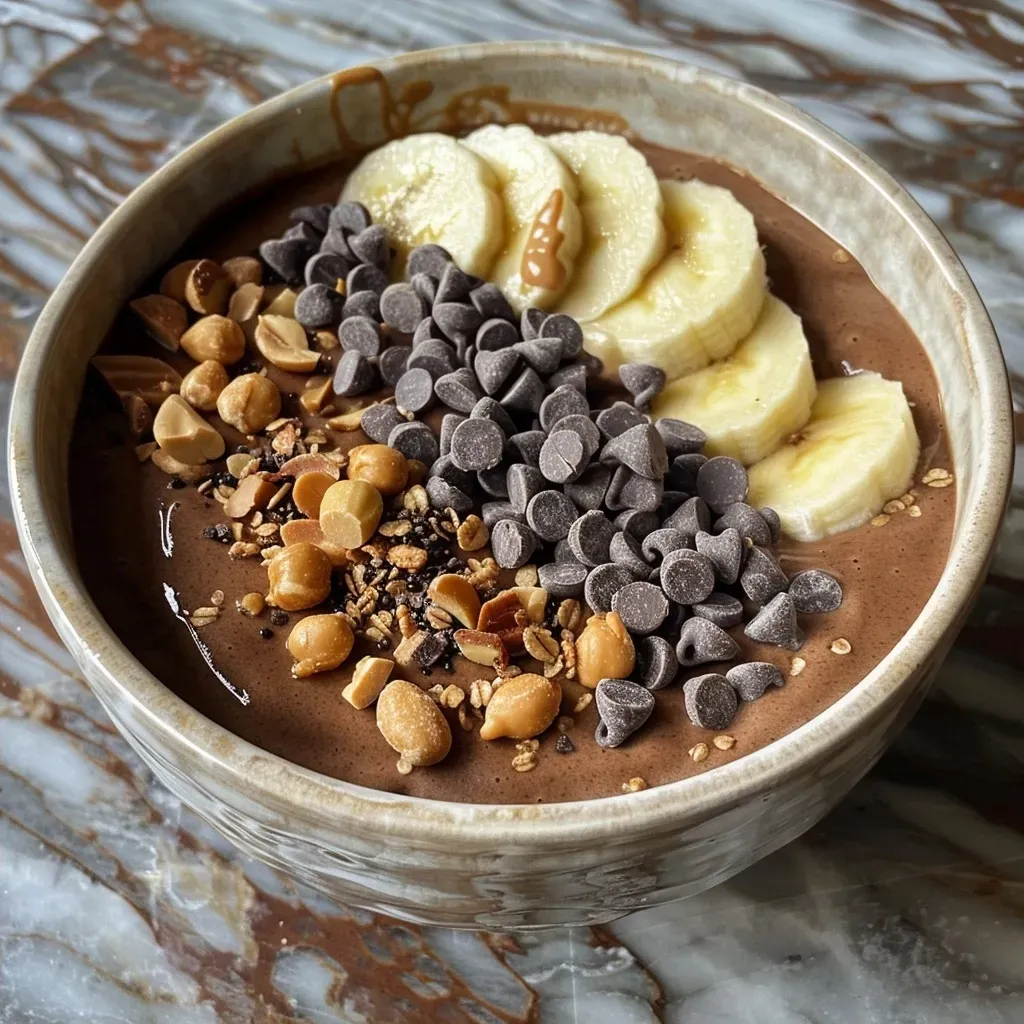
Side view of a delicious smoothie bowl featuring chocolate and peanut butter, garnished with chia seeds and banana slices.

Step 1: Blend the Smoothie Base

Combine the frozen bananas, almond milk, peanut butter, cacao powder, and any optional add-ins in a blender. Blend until completely smooth and thick. If necessary, add a touch more liquid to achieve the desired consistency.

Step 2: Assemble the Smoothie Bowl

Transfer the smoothie mixture into a bowl. This chocolate peanut butter smoothie bowl is meant to be thick enough to hold toppings without sinking.

Step 3: Add Toppings

Top your bowl with half a sliced banana, a sprinkle of chocolate granola, a drizzle of peanut butter, and a few chia seeds for added texture and nutrients.

Step 4: Serve Immediately

Enjoy your delicious smoothie bowl right away for the best taste and texture.

Pro Tips for Perfecting Your Smoothie Bowl

  • Use frozen ingredients: For a thick and creamy texture, always use frozen bananas or other fruits.
  • Experiment with flavors: Try adding a scoop of vanilla extract or a pinch of cinnamon for added depth.
  • Layer your toppings: Create a visually appealing bowl by layering different toppings; this makes it fun and delicious.
  • Blend in batches: If your blender struggles, blend in smaller batches to ensure a smooth consistency.
  • Chill your bowl: For an extra refreshing experience, chill your bowl in the freezer for a few minutes before serving.
  • Don’t skip the base: The base needs to be thick enough to support your toppings, so adjust your liquid accordingly.
  • Get creative: Feel free to use any nut butter or sweetener you prefer.
  • Make it a meal: Add oats or protein powder to make it more filling for a breakfast meal.

Common Mistakes and Troubleshooting

Here are some common pitfalls and how to avoid them:

  • Too runny: If your smoothie bowl is too thin, add more frozen bananas or a scoop of oats to thicken it up.
  • Not sweet enough: Adjust sweetness by adding a natural sweetener like honey or agave.
  • Too thick: If your mixture is too thick to blend, add a little more almond milk gradually until desired consistency is reached.
  • Uneven flavor: Ensure you blend long enough to achieve a uniform taste by mixing thoroughly.

Variations to Try

Get creative with these variations to shake things up:

  • Berry Bliss: Replace half of the bananas with frozen mixed berries for a fruity twist.
  • Nutty Banana: Add chopped walnuts or almond slices as toppings for extra crunch.
  • Green Boost: Blend in a handful of spinach or kale for added nutrients without altering the flavor.
  • Chocolate Mint: Add a few drops of peppermint extract for a refreshing chocolate mint flavor.

Storage and Make-Ahead Instructions

This smoothie bowl is best enjoyed fresh, but if you need to prepare it in advance:

  • Store in the fridge: You can keep the blended smoothie in an airtight container in the refrigerator for up to 24 hours.
  • Freeze for later: Alternatively, you can freeze the smoothie mixture in an ice cube tray and blend with a bit of milk when ready to serve.

Frequently Asked Questions

  • Can I make this smoothie bowl without bananas? Yes! You can substitute with frozen avocado or full-fat coconut cream for creaminess.
  • Is this smoothie bowl healthy? Absolutely! It’s packed with nutrients and can be customized to meet your dietary needs.
  • Can I use a different nut butter? Yes, almond butter, cashew butter, or sun butter are great alternatives.
  • How can I make it sweeter? Consider adding honey, maple syrup, or a ripe date to enhance sweetness.
  • Can I use fresh bananas instead of frozen? Yes, but the texture will be less creamy. Add ice to make it thicker.
  • Is it possible to make it ahead of time? Yes, you can prepare the base and store it in the fridge for up to 24 hours.
  • Can I add protein powder? Definitely! Adding protein powder boosts the nutritional content and keeps you fuller longer.
  • What toppings do you recommend? Fruits, granola, seeds, and nut butter are all fantastic choices!

Nutritional Tips and Dietary Adaptations

This recipe is inherently vegan and gluten-free, making it suitable for a wide range of dietary preferences. Here are some additional tips:

  • Protein Boost: For a post-workout meal, add protein powder for increased protein content.
  • Lowering Sugar: If you’re watching your sugar intake, opt for unsweetened almond milk and skip any added sweeteners.
  • Healthy Fats: To enhance heart health, include chia seeds or flax seeds for added omega-3 fatty acids.

Essential Equipment for Your Smoothie Bowl

To make your Chocolate Peanut Butter Smoothie Bowl, you will need:

  • High-Speed Blender: A powerful blender is key for achieving that smooth and creamy texture.
  • Bowl and Spoon: Serve your smoothie in a bowl for easy enjoyment.
  • Measuring Cups and Spoons: Accurate measurements ensure consistent results every time.

Serving Suggestions

Make your smoothie bowl a complete meal by pairing it with:

  • Whole Grain Toast: Top with avocado or nut butter for added healthy fats.
  • Greek Yogurt: Serve a side of yogurt for extra protein and probiotics.
  • Fresh Fruit: A side of fresh fruit can add more vitamins and minerals to your breakfast.

By following this guide, you’ll be well on your way to mastering the art of creating a Chocolate Peanut Butter Smoothie Bowl that not only delights the palate but also nourishes the body. Get ready to elevate your mornings and enjoy a deliciously healthy start to your day!

Chocolate Peanut Butter Smoothie Bowl

Prep Time 10 minutes
Total Time 10 minutes
Servings 2 servings
Calories 350
A delicious and nutritious smoothie bowl combining bananas, peanut butter, cacao, and superfoods, perfect for a quick breakfast or snack.

Ingredients

Fruits and liquids

  • 2 frozen bananas frozen bananas
  • cup almond milk
  • 2 tablespoons peanut butter
  • 2 tablespoons cacao powder
  • 2 teaspoons maca powder (Optional)
  • 1 tablespoon chia seeds (or flax/hemp seeds)

Toppings

  • ½ banana sliced banana
  • to taste chocolate granola
  • to taste peanut butter (drizzle)
  • as needed chia seeds (for topping)

Instructions 

  • Combine bananas, almond milk, peanut butter, cacao powder, maca powder, and chia seeds in a blender. Puree until smooth.
  • Transfer to a bowl and add toppings like sliced banana, granola, and drizzle with peanut butter.
  • Serve immediately and enjoy!

Notes

Feel free to customize toppings and add extra protein or seeds for more nutrition.
Calories: 350kcal
Cost: $10
Course: Breakfast
Keyword: banana, Healthy, Smoothie

Why You’ll Love Perfectly Fluffy Banana Chocolate Chip Pancakes

Are you looking for a breakfast dish that is not only delicious but also easy to prepare? Look no further than these Perfectly Fluffy Banana Chocolate Chip Pancakes. This recipe combines the natural sweetness of ripe bananas with the rich flavor of chocolate chips, creating a delightful morning treat that will satisfy your cravings and energize your day. Let’s dive into what makes this recipe a must-try.

  • Quick and Easy: With just a few simple ingredients and straightforward steps, you can whip up these pancakes in no time, making them perfect for busy mornings.
  • Flavorful and Versatile: This recipe allows for customization—add nuts, spices, or other fruits to suit your taste.
  • Healthy Boost: Ripe bananas contribute essential vitamins and minerals while providing a natural sweetness that reduces the need for added sugar.
  • Perfect Texture: These pancakes are light and fluffy, thanks to the right mixing techniques and ingredient ratios.
  • Family Favorite: Kids and adults alike will love the combination of banana and chocolate, making it a hit at breakfast or brunch.

Essential Ingredients for Banana Chocolate Chip Pancakes

Gathering the right ingredients is crucial for achieving the perfect banana chocolate chip pancakes. Here’s what you’ll need:

  • 2 ripe bananas: The riper the banana, the sweeter and more flavorful your pancakes will be.
  • 1 cup all-purpose flour: This forms the base of your pancakes.
  • 1 tablespoon baking powder: Essential for achieving that fluffy texture.
  • 2 tablespoons granulated sugar: Adds a touch of sweetness; you can adjust based on banana ripeness.
  • 1 cup milk: Use dairy or non-dairy alternatives based on your preference.
  • 2 large eggs: Provides structure and moisture.
  • 2 tablespoons melted butter: Helps to add richness and flavor.
  • ½ cup chocolate chips: Choose dark, milk, or even vegan chocolate chips for a delightful touch.

Step-by-Step Recipe for Banana Chocolate Chip Pancakes

Now that you have your ingredients ready, let’s walk through the process of making these pancakes. Follow these simple steps:

  1. Mash the ripe bananas in a bowl until smooth.
  2. In a separate bowl, whisk together the flour, baking powder, sugar, and a pinch of salt.
  3. In another bowl, mix the mashed bananas with milk, eggs, and melted butter until combined.
  4. Combine the wet and dry ingredients gently. Remember: do not overmix to keep the pancakes light and fluffy.
  5. Carefully fold in the chocolate chips.
  6. Heat a nonstick skillet over medium heat and pour about a quarter cup of batter for each pancake.
  7. Cook until bubbles form on top (about two minutes), then flip and cook until golden brown (about another minute).
  8. Serve warm with your favorite toppings, such as maple syrup, whipped cream, or fresh fruit.

Pro Tips for Perfect Pancakes Every Time

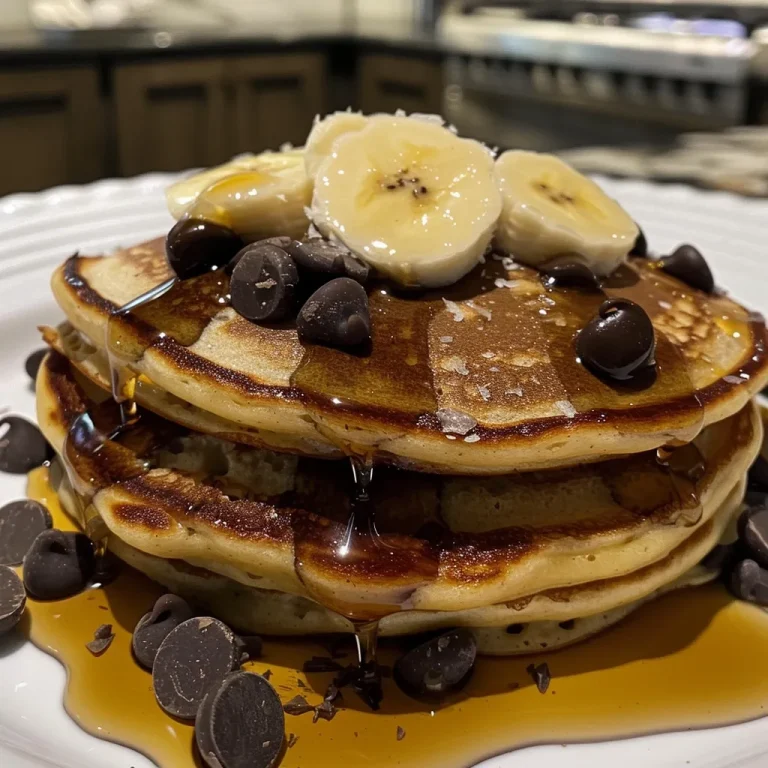
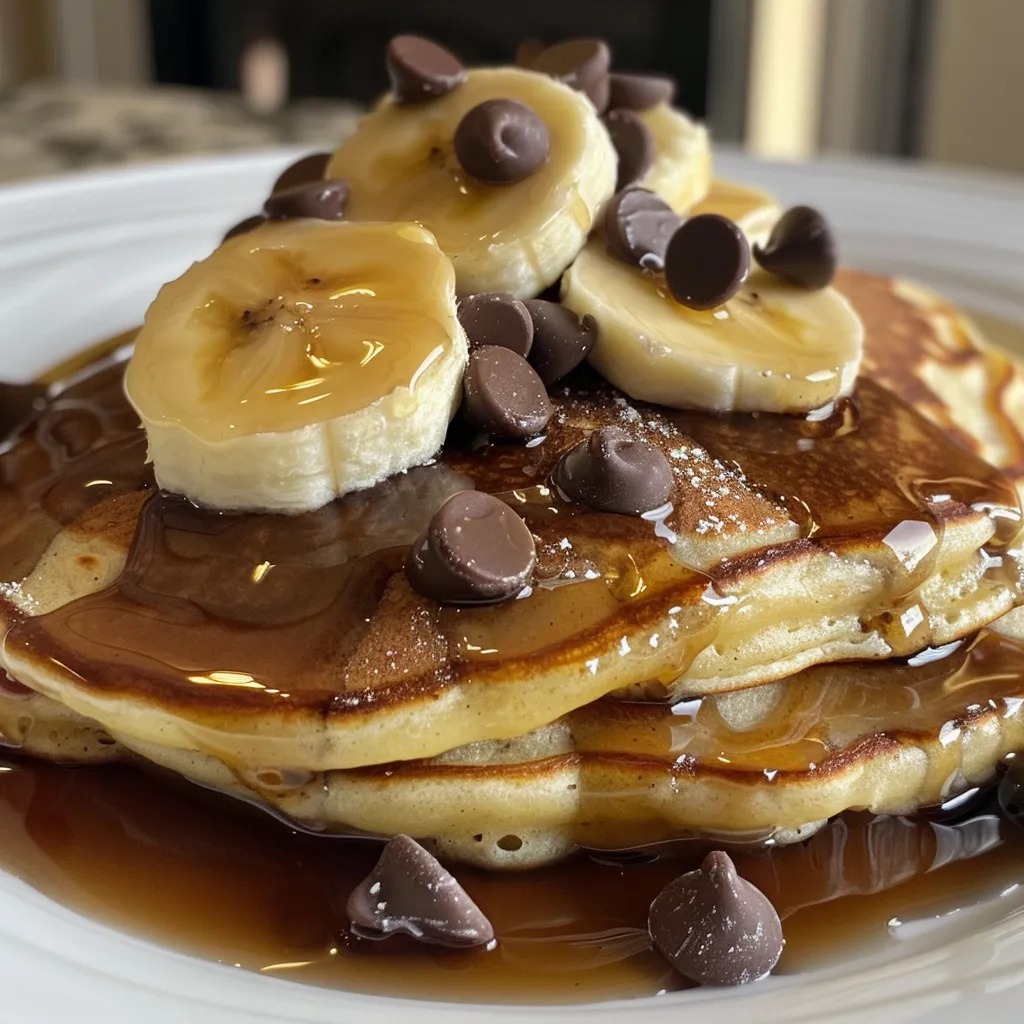
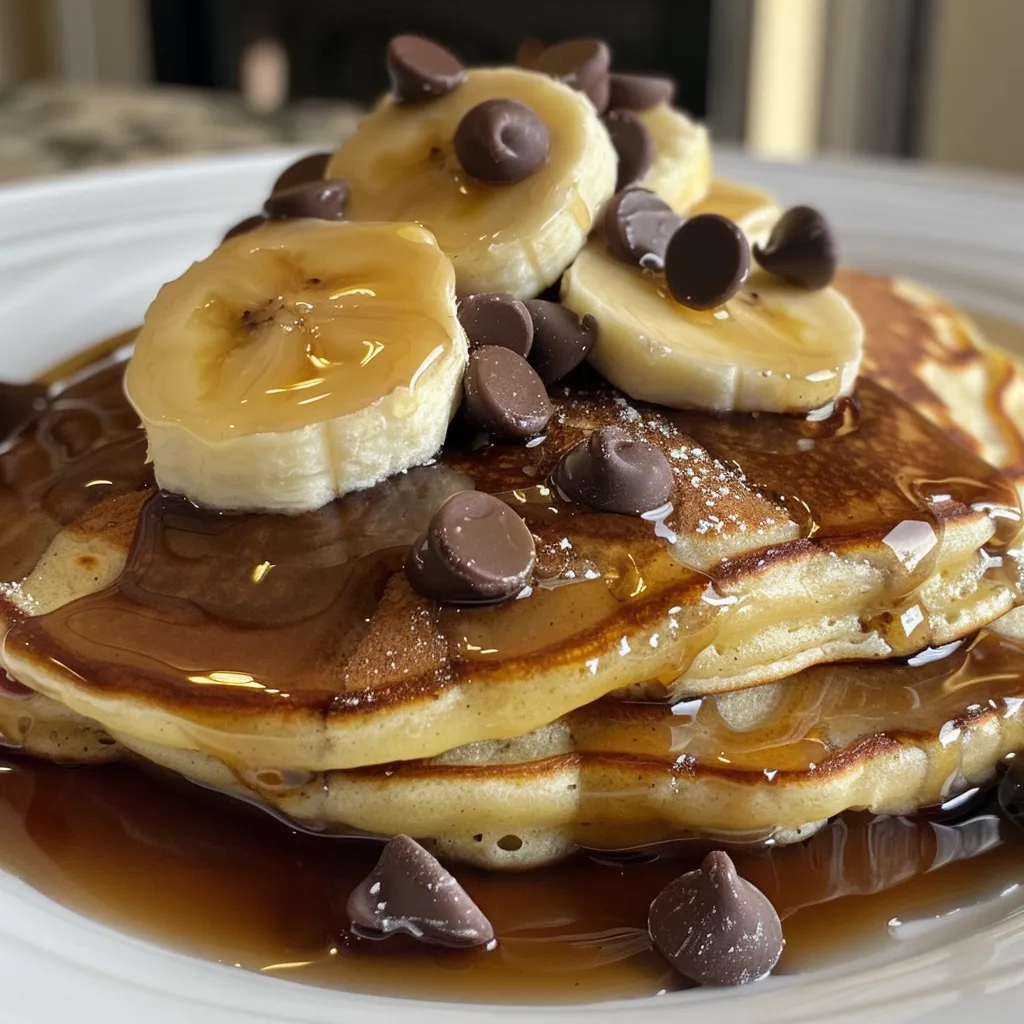
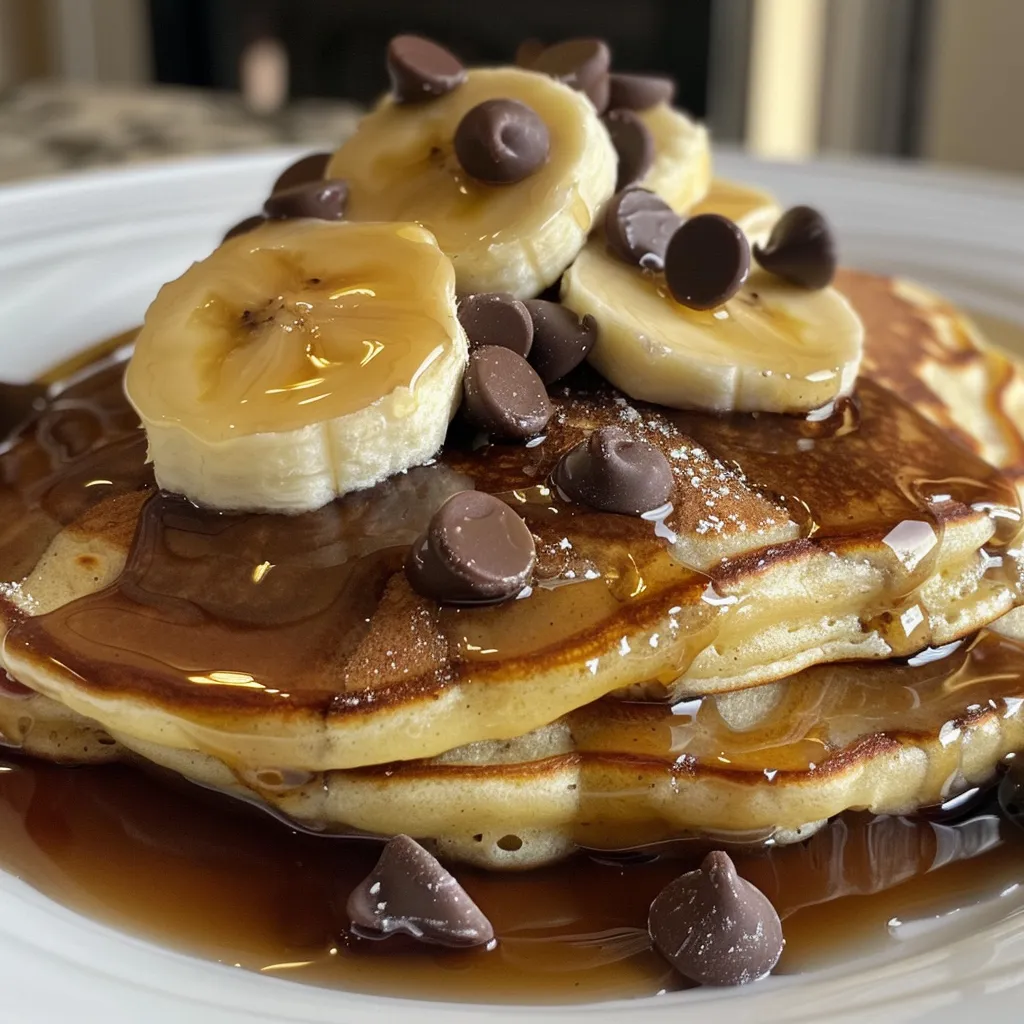
Side view of a stack of banana chocolate chip pancakes topped with melted chocolate chips.

To elevate your pancake game, here are some expert insights:

  • Use Ripe Bananas: The natural sweetness of ripe bananas enhances the flavor of the pancakes.
  • Don’t Overmix the Batter: A few lumps are fine; overmixing can lead to dense pancakes.
  • Adjust Cooking Temperature: If pancakes are browning too quickly, lower the heat to ensure they cook through.
  • Choose Quality Chocolate Chips: Select high-quality chocolate chips for the best flavor.
  • Let the Batter Rest: Allowing the batter to sit for a few minutes before cooking can help achieve a fluffier texture.
  • Experiment with Add-ins: Consider adding nuts or spices like cinnamon for extra flavor.
  • Serving Warm: Keep pancakes in a warm oven while cooking the rest to ensure they stay hot.
  • Presentation Matters: Stack pancakes and drizzle with syrup for an appealing presentation.

Common Mistakes and Troubleshooting

Even the best cooks can run into issues. Here are common mistakes to avoid:

  • Dense Pancakes: This often results from overmixing. Mix only until combined.
  • Burnt Pancakes: Ensure your heat is medium; too high can burn the outside before the inside cooks.
  • Uneven Cooking: Make sure to use a nonstick skillet and check the temperature before adding batter.

Delicious Variations to Try

Looking to mix things up? Here are some tasty variations to consider:

  • Vegan Option: Substitute eggs with flaxseed meal and use plant-based milk and butter.
  • Gluten-Free: Replace all-purpose flour with a gluten-free flour blend.
  • Nutty Banana Chocolate Chip Pancakes: Add chopped walnuts or pecans to the batter for added crunch.
  • Banana Bread Pancakes: Incorporate cinnamon and vanilla extract for a banana bread flavor twist.

Storage and Make-Ahead Instructions

Want to make pancakes ahead of time? Here’s how:

  • Storage: Cooked pancakes can be stored in an airtight container in the refrigerator for up to 3 days.
  • Freezing: For longer storage, freeze pancakes separated by parchment paper in a freezer-safe bag for up to 2 months.
  • Reheating: Reheat in the microwave or toaster for a quick breakfast.

Comprehensive FAQ

Here are some common questions about making banana chocolate chip pancakes:

  • Can I use frozen bananas? Yes, just make sure to thaw and drain excess moisture.
  • How can I make the pancakes fluffier? Ensure your baking powder is fresh and avoid overmixing.
  • Can I substitute other fruits? Absolutely! Blueberries or strawberries can be great alternatives.
  • What should I serve with pancakes? Maple syrup, honey, or yogurt are all excellent choices.
  • Are these pancakes suitable for meal prep? Yes, they can be made ahead and stored or frozen for later use.
  • How do I know when pancakes are done? Look for bubbles forming on the edges and a golden color when flipped.
  • Can I make these pancakes without eggs? Yes, you can use flax or chia seeds as a substitute.
  • What’s the best way to store leftover batter? Store any leftover batter in the refrigerator and use it within 24 hours.

Nutrition Tips and Dietary Adaptations

For those conscious of their dietary needs, here are some tips:

  • Lower Sugar: Reduce the sugar amount or use natural sweeteners like honey or agave.
  • Whole Grain Goodness: Swap all-purpose flour for whole wheat flour for added fiber.
  • Low-Fat Option: Use skim milk and reduce or omit the butter for a lighter version.

Recommended Equipment

To ensure success in making your pancakes, consider having the following tools on hand:

  • Nonstick Skillet: Essential for easy flipping and even cooking.
  • Mixing Bowls: Use multiple sizes for efficient mixing.
  • Whisk: A good whisk is crucial for combining ingredients thoroughly.
  • Measuring Cups and Spoons: Accurate measurements lead to the best results.

Serving Suggestions

Elevate your pancake experience with these serving ideas:

  • Top with Fresh Fruit: Bananas, berries, or sliced apples add color and nutrition.
  • Drizzle with Syrup: A classic maple syrup or flavored syrup enhances sweetness.
  • Add Whipped Cream: For a decadent touch, serve with whipped cream or yogurt.

In conclusion, these Perfectly Fluffy Banana Chocolate Chip Pancakes are not just a recipe; they are an experience tailored for both busy mornings and leisurely brunches. With their delightful flavor and easy preparation, they promise to become a staple in your breakfast repertoire. Enjoy your cooking and the compliments that will surely follow!

Banana Chocolate Chip Pancakes

Prep Time 10 minutes
Cook Time 10 minutes
Total Time 20 minutes
Servings 4 pieces
Calories 250
Delicious fluffy pancakes infused with ripe bananas and chocolate chips, perfect for a quick breakfast or brunch.

Ingredients

Dried ingredients

  • 2 pieces ripe bananas
  • 1 cup all-purpose flour
  • 1 tablespoon baking powder
  • 2 tablespoons granulated sugar
  • 1 cup milk dairy or non-dairy
  • 2 large eggs
  • 2 tablespoons melted butter
  • ½ cup chocolate chips

Instructions 

  • Mash bananas until smooth. Mix with milk, eggs, and melted butter.
  • Combine dry ingredients and fold into wet mixture gently.
  • Fold in chocolate chips.
  • Pour about ¼ cup batter onto a heated skillet; cook until bubbles form, then flip and cook until golden.
  • Serve warm with toppings.

Notes

Use ripe bananas for best flavor and sweetness.
Calories: 250kcal
Cost: $8
Course: Breakfast
Cuisine: American
Keyword: Pancakes

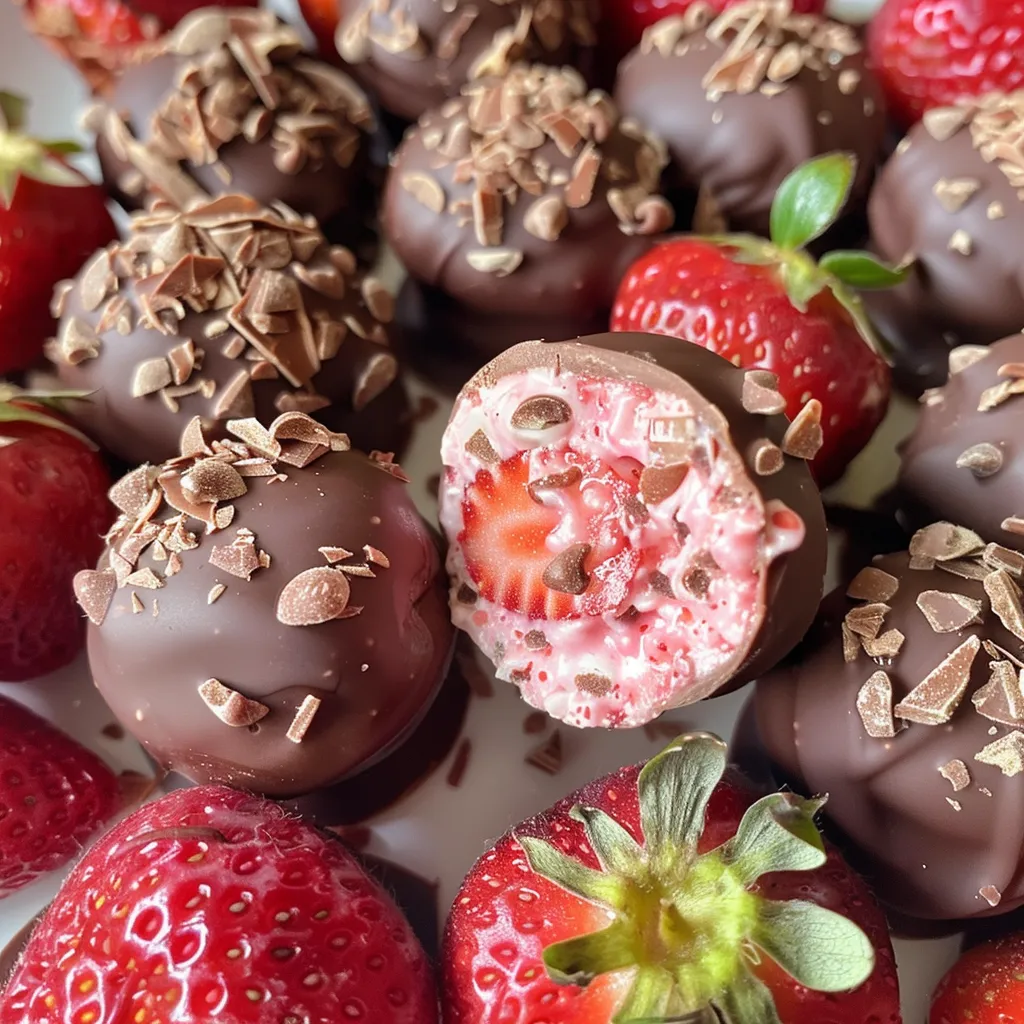
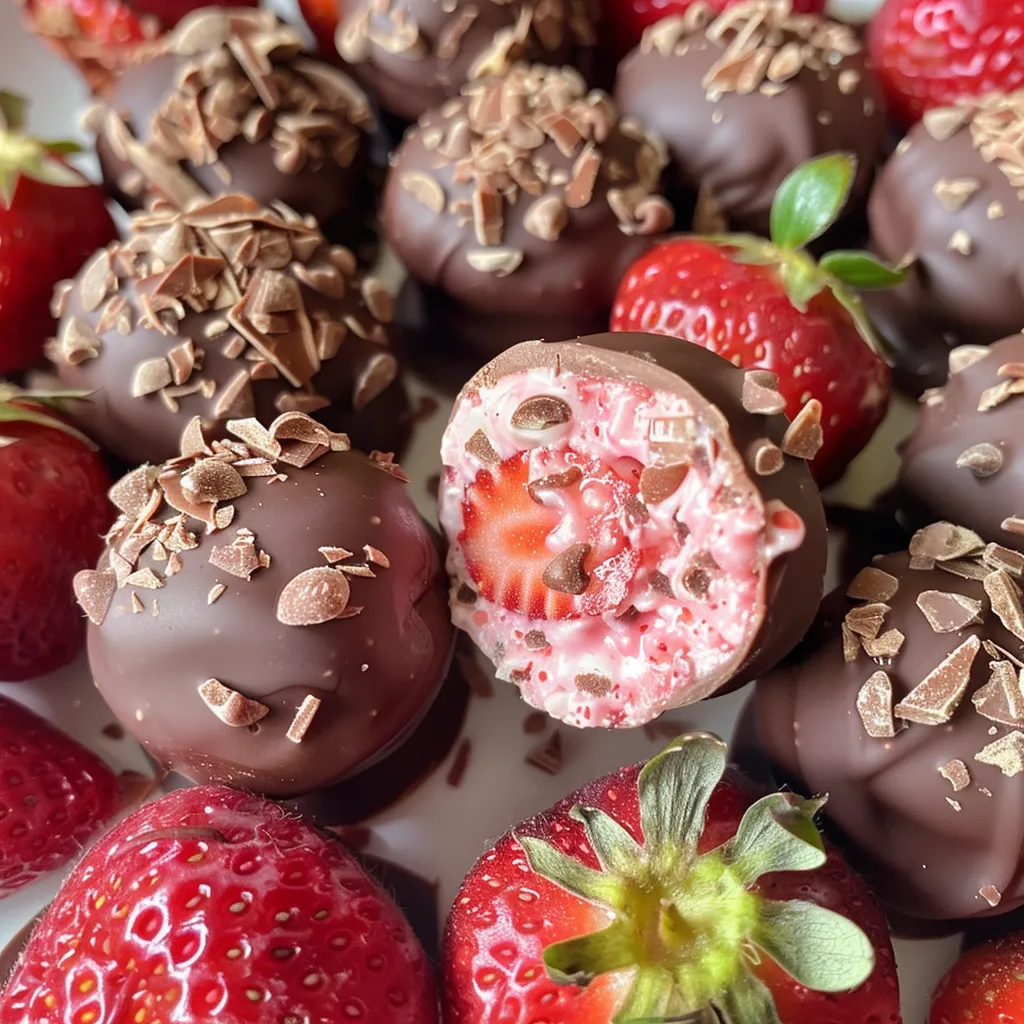
Welcome to your new favorite snack! These Chocolate-Covered Strawberry Yoghurt Bites are not just a delightful treat; they are a testament to how easily you can create something delicious with minimal effort. If you’re looking for a quick dessert or a refreshing snack that combines the sweetness of fresh strawberries with the creaminess of yoghurt and the richness of chocolate, you’ve found it! In this guide, we’ll walk you through every step, ensuring you master this recipe effortlessly.

Made with simple ingredients, this recipe is designed for everyone, whether you’re a seasoned cook or just starting out. With the combination of fresh strawberries and creamy yoghurt, these bites are not only delicious but also healthy, making them perfect for any occasion.

Why You’ll Love This Recipe

  • Quick and Easy: These bites can be prepared in under 15 minutes, plus freezing time. Perfect for busy schedules!
  • Minimal Ingredients: Only a handful of ingredients are needed, making it budget-friendly and accessible.
  • Customizable: You can easily adapt this recipe to suit your dietary needs or preferences with various yoghurt and chocolate options.
  • Kid-Friendly: A fun treat that kids can help make, promoting healthy eating in a delicious way.
  • Perfect for Parties: These bites are ideal for gatherings, offering a sweet treat without the guilt.

Ingredients Breakdown

To create these delightful bites, you’ll need the following ingredients:

  • 250g strawberries: Fresh, washed, and dried. Feel free to use frozen strawberries, but fresh ones provide the best flavor.
  • 200g plain or Greek yoghurt: Use dairy-free or vegan options if needed. Greek yoghurt adds creaminess, while plain is lighter.
  • 300g gluten-free chocolate buttons: Preferably dark chocolate for a richer flavor. Consider dairy-free options if necessary.
  • 1 teaspoon vanilla extract: Optional but enhances the flavor of the yoghurt.
  • 1 tablespoon coconut oil: Optional, especially if using milk or white chocolate. It helps the chocolate coat smoothly.

Substitutions:

  • Yoghurt: You can substitute Greek yoghurt with dairy-free alternatives like coconut or almond yoghurt.
  • Chocolate: Use white chocolate or milk chocolate according to your preference, but ensure it’s gluten-free if needed.
  • Sweetener: If you prefer a sweeter bite, consider adding honey or maple syrup to the yoghurt mixture.
  • Fruit Variations: Use other fruits like bananas or kiwi for a different flavor profile!

Pro Tips for Perfect Bites

Here are some expert insights to ensure your Chocolate-Covered Strawberry Yoghurt Bites turn out perfectly every time:

  • Choose Ripe Strawberries: The flavor and sweetness of your bites depend on the quality of strawberries. Look for vibrant, ripe strawberries.
  • Freeze Thoroughly: Make sure your bites are fully frozen before dipping in chocolate to maintain their shape.
  • Use Quality Chocolate: The better the chocolate, the better the overall flavor. Aim for high-quality dark chocolate.
  • Don’t Rush the Dip: When dipping your bites, ensure they’re well-coated and give them a little shake to remove excess chocolate.
  • Keep Chocolate Warm: If the chocolate begins to harden, place it back on low heat to keep it melted for easier dipping.
  • Experiment with Toppings: After dipping, consider rolling your bites in crushed nuts, coconut flakes, or sprinkles for added texture and flavor.
  • Storage Matters: Store your bites in an airtight container in the freezer to keep them fresh and prevent freezer burn.
  • Serving Size: These bites are great for portion control. Consider serving them in small cups for easy grabbing!

Common Mistakes and Troubleshooting

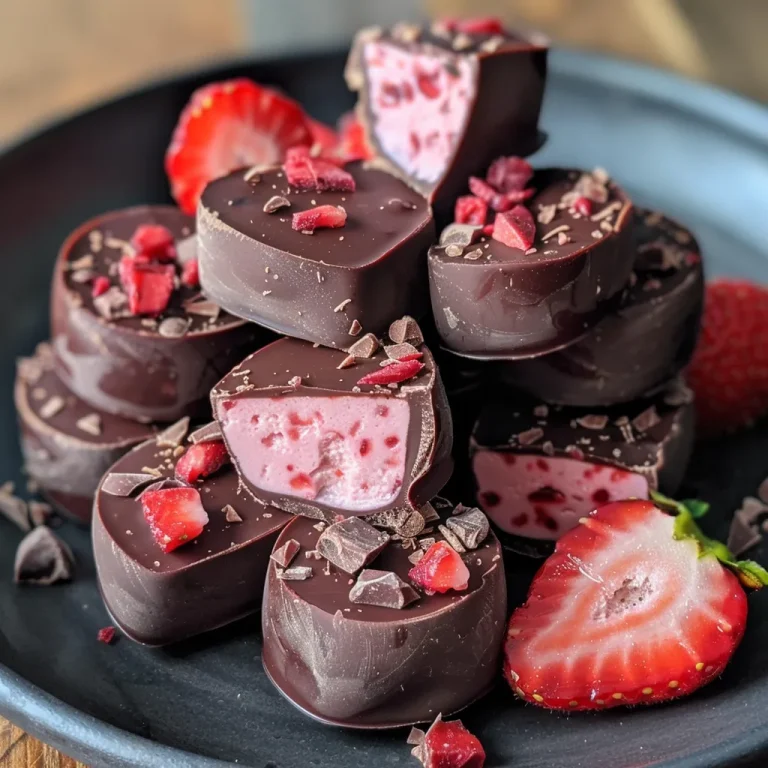
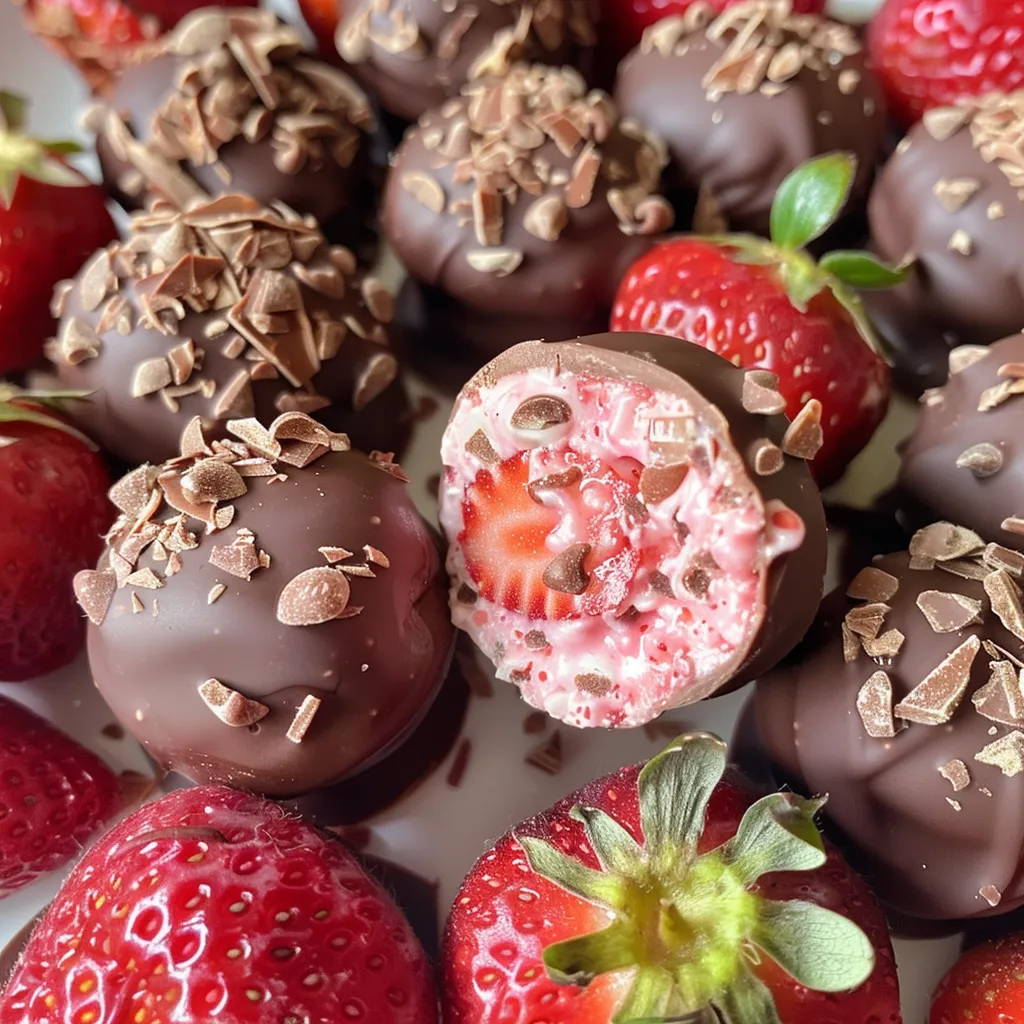
Side view of luscious chocolate-coated yogurt bites with strawberries.

Even the best of us can encounter a few hiccups in the kitchen. Here’s how to avoid common pitfalls:

  • Chocolate Not Coating: Ensure your bites are frozen solid before dipping. If the chocolate is too thick, add a bit more coconut oil to thin it out.
  • Strawberries Too Juicy: Make sure to dry your strawberries thoroughly to prevent excess moisture from affecting the chocolate coating.
  • Yoghurt Mixture Too Runny: If your yoghurt mixture is too thin, consider adding a bit more yoghurt or chilling it slightly before portioning.
  • Chocolate Hardening Too Quickly: Work in small batches to keep the chocolate warm and fluid.

Delicious Variations

Want to try something different? Here are some variations to customize your Chocolate-Covered Strawberry Yoghurt Bites:

  • Pineapple Coconut Bites: Substitute strawberries with pineapple chunks and use coconut yoghurt for a tropical twist.
  • Nutty Banana Bites: Replace strawberries with banana slices and roll in crushed nuts after dipping.
  • Berry Medley: Mix different berries like blueberries and raspberries for a colorful assortment.
  • Mint Chocolate Bites: Add a few drops of mint extract to the chocolate for a refreshing flavor.

Storage and Make-Ahead Instructions

These bites can be made ahead of time and stored for later enjoyment:

  • Freezing: Once fully frozen, transfer your bites to an airtight container or zip-top bag for storage. They will last for up to 2 months in the freezer.
  • Thawing: When ready to enjoy, simply remove the desired number of bites from the freezer and let them sit at room temperature for a few minutes before serving.

Comprehensive FAQ

  • Can I use frozen strawberries? Yes, but fresh strawberries yield the best flavor and texture.
  • How long do these bites last? They can be stored in the freezer for up to 2 months.
  • Can I use flavored yoghurt? Absolutely! Flavored yoghurts can add an interesting twist to your bites.
  • Is this recipe gluten-free? Yes, as long as you use gluten-free chocolate.
  • Can I make these bites dairy-free? Yes, simply use dairy-free chocolate and yoghurt.
  • What’s the best way to melt chocolate? A double boiler or microwave works best; just be careful not to overheat!
  • Can I add sweeteners to the yoghurt? Yes, feel free to mix in honey or maple syrup for added sweetness.
  • How do I serve these bites? They’re great on their own or served with a side of fresh fruit!

Nutritional Tips and Dietary Adaptations

These Chocolate-Covered Strawberry Yoghurt Bites are not only tasty but can be tailored to fit various dietary needs:

  • Low-Calorie Option: Use non-fat Greek yoghurt and limit the amount of chocolate used.
  • Vegan-Friendly: Choose dairy-free chocolate and plant-based yoghurt for a completely vegan treat.
  • Protein Boost: Add protein powder to the yoghurt mixture for an extra nutritional punch.
  • Reduce Sugar: Opt for unsweetened yoghurt and dark chocolate to keep sugar levels down.

Essential Equipment Recommendations

To make your experience seamless, here are a few essential tools you’ll need:

  • Baking Sheet: A sturdy baking sheet lined with baking paper is essential for freezing your bites.
  • Mixing Bowl: A medium-sized bowl for combining your ingredients.
  • Microwave or Double Boiler: For melting chocolate efficiently and safely.
  • Fork or Dipping Tool: To dip your bites into the chocolate easily.
  • Airtight Container: For storing your bites in the freezer.

Serving Suggestions

When it comes to serving your Chocolate-Covered Strawberry Yoghurt Bites, consider these ideas:

  • Garnish: Drizzle melted chocolate on top or sprinkle with crushed nuts for a decorative touch.
  • Pairing: Serve alongside a refreshing fruit salad or a scoop of ice cream for a delightful dessert.
  • Creative Presentation: Arrange them on a platter with fresh mint leaves for an elegant touch.

In Conclusion, Chocolate-Covered Strawberry Yoghurt Bites are a fantastic way to satisfy your sweet tooth while enjoying nutritious ingredients. With this comprehensive guide, you now have all the tools and tips you need to create this delicious treat. So gather your ingredients, follow the steps, and treat yourself and your loved ones to these delightful bites! Happy cooking!

Chocolate-covered Strawberry Yoghurt Bites

Prep Time 10 minutes
Cook Time 30 minutes
Total Time 40 minutes
Servings 8 pieces
Calories 150
Delight in these easy, frozen treats combining fresh strawberries, creamy yoghurt, and rich chocolate for a perfect summer snack.

Ingredients

Fruits and Dairy

  • 250 g strawberries, washed and dried
  • 200 g plain or Greek yoghurt, dairy-free or vegan optional
  • 1 tsp vanilla extract optional
  • 1 tbsp coconut oil if using milk or white chocolate
  • 300 g gluten-free chocolate buttons, preferably dark chocolate dairy-free or vegan optional

Instructions 

  • Wash, dry, and dice strawberries into small pieces.
  • Mix strawberries, yoghurt, and vanilla extract in a bowl.
  • Spoon dollops onto a lined tray and freeze for 1.5-2 hours.
  • Melt chocolate and coconut oil, then dip frozen bites into the chocolate.
  • Place coated bites back on tray and freeze for 30 minutes before serving.

Notes

Use dairy-free yoghurt and chocolate for vegan options.
Calories: 150kcal
Cost: $12
Course: Dessert
Keyword: chocolate, strawberry, yoghurt

Unlock the Secrets to Effortless Indulgence: No-Bake Peanut Butter Cup Bars

Welcome to a world where indulgence meets simplicity! These No-Bake Peanut Butter Cup Bars are not just a treat; they are a solution for busy days when you crave something sweet yet easy to make. With just a handful of ingredients like creamy peanut butter, almond flour, and chocolate, you can whip up a delightful dessert that satisfies your sweet tooth without the fuss. Perfect for any occasion, these bars are designed to be enjoyed by everyone, whether you’re hosting a gathering or just treating yourself.

In this article, we will delve into the specifics of this recipe, exploring why you’ll love it, how to customize it, and tips to ensure your bars come out perfectly every time. So, let’s get started!

Why You’ll Love This Recipe

Here are five compelling reasons to love these No-Bake Peanut Butter Cup Bars:

  • Effortless preparation: With no baking required, you can prepare these bars in just a few minutes, making them a perfect last-minute dessert option.
  • Healthy indulgence: Made with wholesome ingredients, these bars offer a guilt-free way to satisfy your sweet cravings.
  • Customizable flavors: Whether you prefer dark chocolate, milk chocolate, or even white chocolate, you can easily adapt this recipe to suit your taste.
  • Minimal ingredients: With just a few pantry staples, you can create a delicious dessert without the need for complicated ingredients.
  • Perfect for sharing: Cut these bars into bite-sized squares for a delightful treat to share at parties or gatherings.

Ingredient Breakdown

Understanding your ingredients is key to success in any recipe. Here’s a closer look at what you’ll need to make your No-Bake Peanut Butter Cup Bars:

  • Creamy salted peanut butter: Aim for a drippy, natural peanut butter that ideally contains just peanuts and salt. This is the base of your bars, providing rich flavor and texture.
  • Almond flour: A gluten-free alternative to regular flour, almond flour adds a delightful nuttiness to the bars. You can substitute it with oat flour or all-purpose flour if necessary.
  • Maple syrup: This natural sweetener enhances the flavor while keeping the bars refined sugar-free. Honey or agave syrup can also work as substitutes.
  • Sea salt: While optional, a touch of sea salt enhances the flavors, especially if you’re using unsalted peanut butter.
  • Semi-sweet chocolate chips: The chocolate topping adds a decadent layer to your bars. Feel free to use dark chocolate for a richer flavor or milk chocolate for a sweeter taste.
  • Coconut oil: This helps to smooth out the chocolate for easier pouring. If you’re looking for a dairy-free option, you can use cocoa butter instead.
  • Flaky sea salt: A sprinkle on top adds an extra crunch and enhances the chocolate flavor.

Pro Tips for Perfect Bars

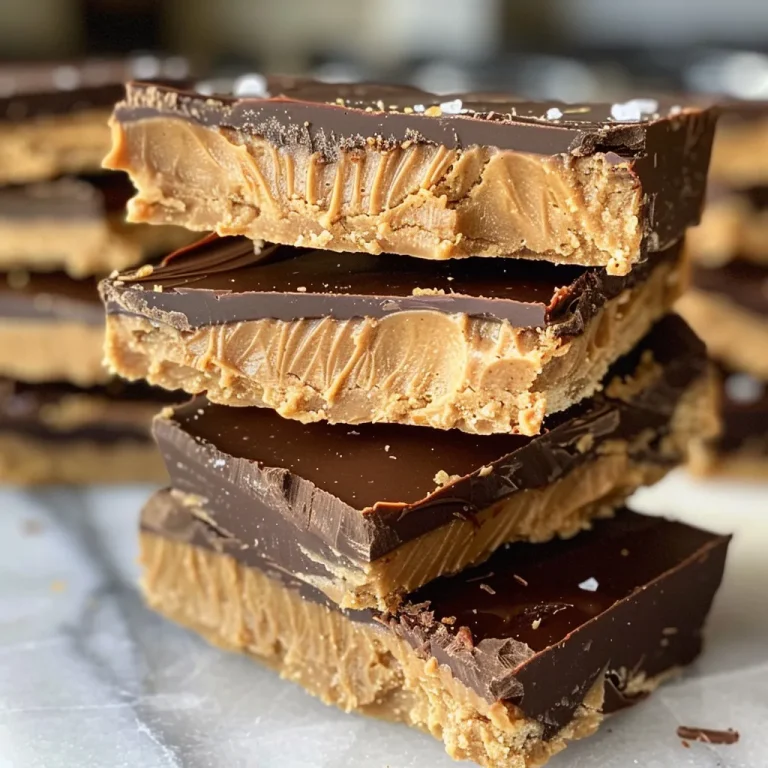
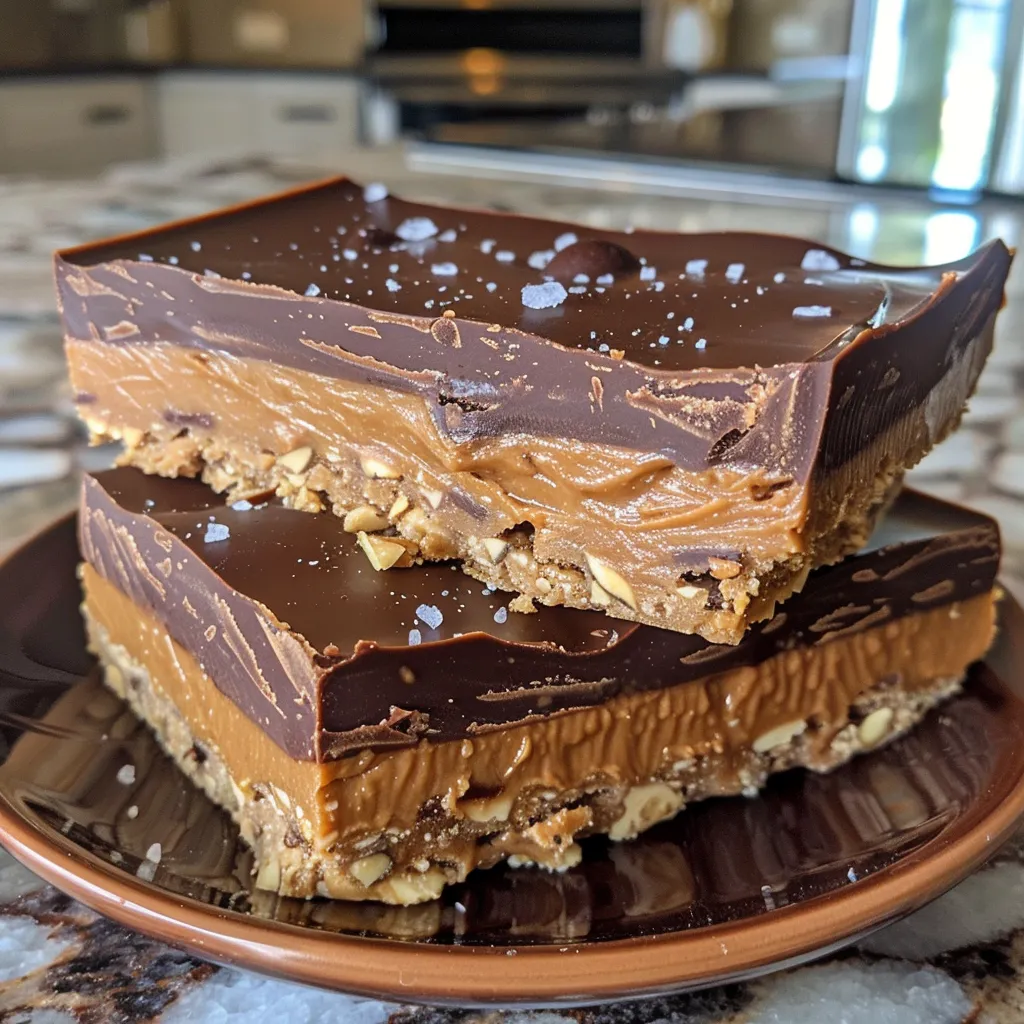
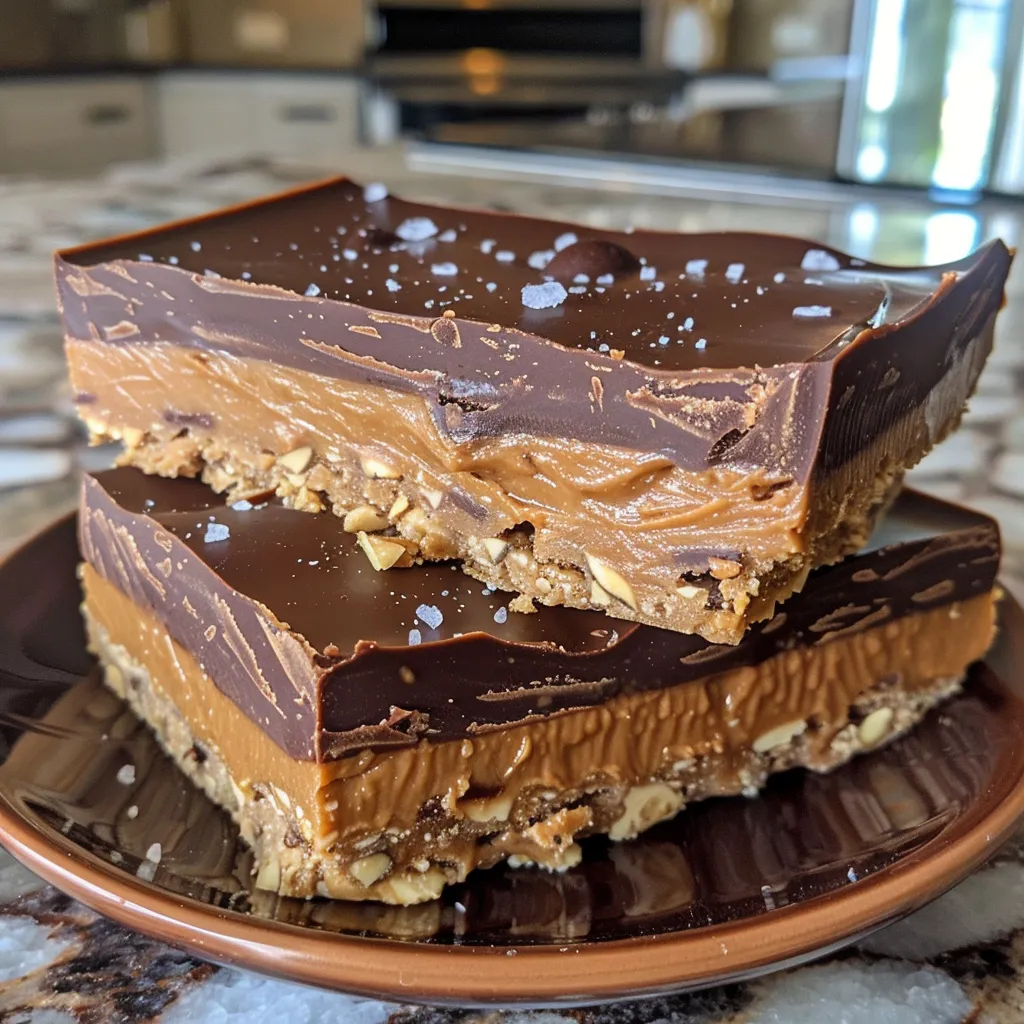
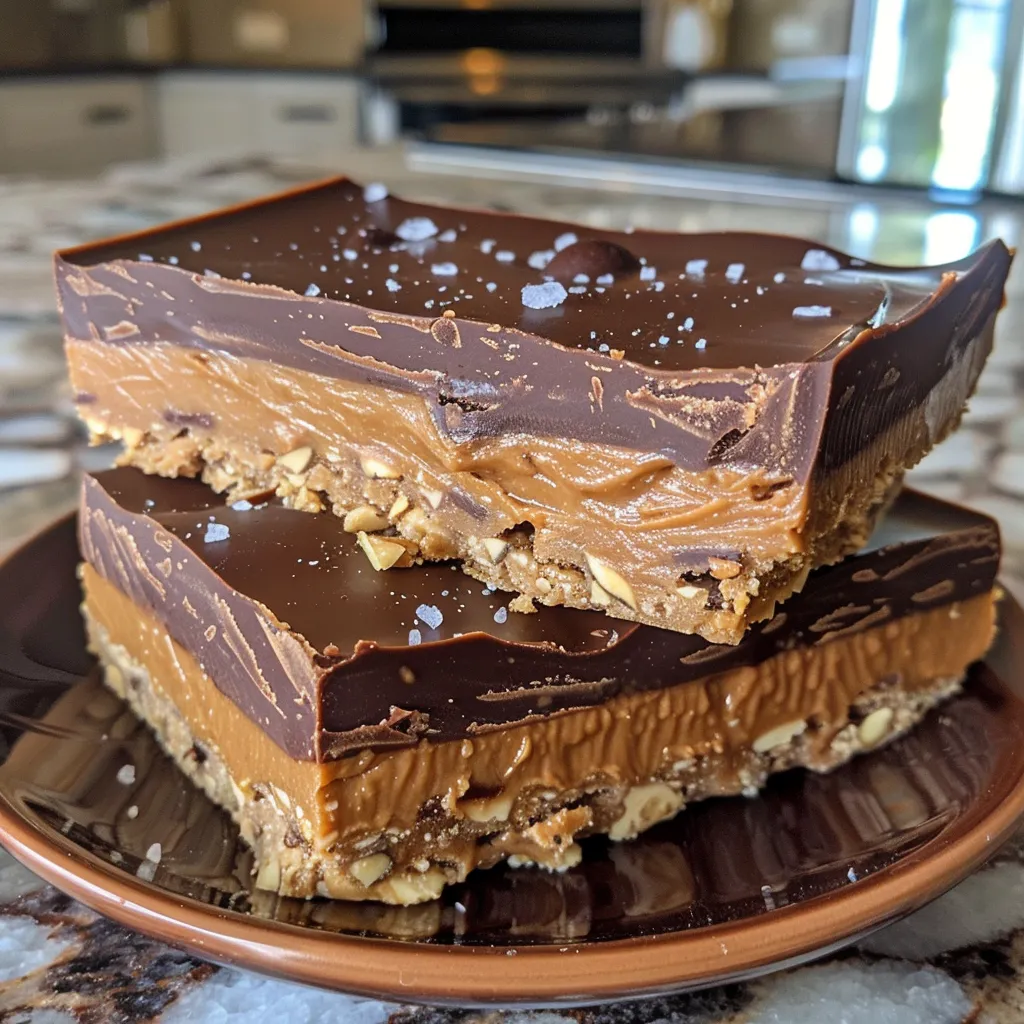
Side view of layered No-Bake Peanut Butter Cup Bars showcasing chocolate and peanut butter layers.

Here are some expert insights to ensure your No-Bake Peanut Butter Cup Bars turn out perfectly every time:

  • Choose the right peanut butter: Opt for a creamy, drippy peanut butter for the best texture; avoid dry or overly chunky varieties.
  • Measure accurately: Use measuring cups for precise ingredient measurements, especially for the peanut butter and almond flour.
  • Soften ingredients: If your peanut butter is too hard, microwave it for a few seconds to soften it before mixing.
  • Use parchment paper: Lining your loaf pan with parchment paper makes it easy to lift out the bars once set.
  • Chill thoroughly: Allow the bars to chill in the freezer for at least 20 minutes to ensure the chocolate topping sets properly.
  • Cut with care: Use a sharp knife to slice the bars for clean edges; a warm knife can help prevent sticking.
  • Experiment with toppings: Try adding crushed nuts or coconut flakes on top for added texture and flavor.
  • Storage matters: Keep your bars in an airtight container in the fridge for optimal freshness.

Common Mistakes and Troubleshooting

Even experienced cooks can run into challenges. Here’s how to avoid common pitfalls:

  • Too crumbly? If your mixture is too dry, add a bit more peanut butter or a splash of milk to achieve a better consistency.
  • Chocolate not melting? If your chocolate isn’t melting smoothly, try microwaving it in shorter intervals and stirring in between to prevent burning.
  • Bars falling apart? Ensure you press the peanut butter base firmly into the pan to help the bars hold their shape.
  • Not enough sweetness? Adjust the sweetness by adding more maple syrup, tasting as you go.

Variations to Try

If you want to mix things up, consider these variations:

  • Nutty Delight: Add chopped nuts like almonds or walnuts to the peanut butter base for added crunch.
  • Chocolate Mint: Incorporate a few drops of peppermint extract into the chocolate topping for a refreshing twist.
  • Protein-Packed: Mix in protein powder into the peanut butter base for an added boost.
  • Fruit Fusion: Layer sliced bananas or strawberries between the peanut butter base and chocolate topping for a fruity flavor.

Storage and Make-Ahead Instructions

These bars are perfect for meal prep and can be stored easily:

  • Refrigeration: Store in an airtight container in the refrigerator for up to 1-2 weeks.
  • Freezing: For longer storage, freeze the bars wrapped in parchment paper and placed in a freezer bag for up to 1 month.
  • Thawing: When ready to enjoy, simply thaw in the fridge for a few hours before serving.

Frequently Asked Questions (FAQs)

Here are some common questions to help you on your baking journey:

  • Can I use crunchy peanut butter? Yes, crunchy peanut butter can be used for added texture, but it may alter the consistency slightly.
  • What can I substitute for almond flour? If you don’t have almond flour, use oat flour or all-purpose flour.
  • How long do these bars last? They can last up to 1-2 weeks in the fridge and up to 1 month in the freezer.
  • Can I use a different sweetener? Absolutely! Honey or agave syrup can be used instead of maple syrup.
  • Is it necessary to add coconut oil? While it helps smooth the chocolate, you can omit it if desired.
  • Can I make these bars vegan? Yes, just ensure to use vegan chocolate and maple syrup.
  • Can I double the recipe? Yes, you can easily double the ingredients and use a larger pan.
  • How do I know when the bars are set? They should be firm to the touch and the chocolate topping should be solid.

Nutritional Tips and Dietary Adaptations

These bars can be tailored to fit various dietary needs:

  • Gluten-Free: Use almond flour or certified gluten-free oats for a gluten-free version.
  • Low-Carb: Substitute sweeteners with erythritol or stevia for a low-carb option.
  • Nut-Free: Replace peanut butter with sun butter or soy nut butter for a nut-free alternative.

Equipment Recommendations

Here’s what you’ll need to create these delicious bars:

  • Loaf Pan: A standard-size loaf pan is ideal for shaping the bars.
  • Microwave-Safe Bowl: For melting chocolate and mixing ingredients.
  • Spatula: To mix and spread the peanut butter base evenly in the pan.
  • Sharp Knife: For cutting the bars cleanly once set.

Serving Suggestions

Elevate your No-Bake Peanut Butter Cup Bars with these serving ideas:

  • Garnish: Drizzle extra melted chocolate on top for an elegant finish.
  • Pairing: Serve with a scoop of vanilla ice cream or Greek yogurt for a delightful dessert.
  • Presentation: Arrange bars on a platter and sprinkle with crushed nuts for an attractive display.

Now that you’re equipped with everything you need, it’s time to get started! These No-Bake Peanut Butter Cup Bars are not only easy to make but also incredibly delicious. Enjoy the process and the results, and remember, cooking is about making memories. Thank you for sharing this delightful recipe with your loved ones. Happy cooking!

No-Bake Peanut Butter Cup Bars

Prep Time 10 minutes
Total Time 10 minutes
Servings 14 bars
Calories 250
Deliciously rich and creamy no-bake bars combining peanut butter and chocolate, perfect for a quick treat.

Ingredients

Base

  • 0.75 cup creamy salted peanut butter (drippy, natural, preferably just 2 ingredients: peanuts and salt)
  • 0.5 cup almond flour
  • 2 Tbsp maple syrup
  • 0.25 tsp sea salt (optional, include for extra saltiness or if using unsalted peanut butter)

Chocolate Topping

  • 0.5 cup semi-sweet chocolate chips or chunks
  • 2 Tbsp creamy salted peanut butter
  • 0.5 tsp coconut oil

Topping

  • Flaky sea salt

Instructions 

  • Line a loaf pan with parchment paper and set aside.
  • Mix peanut butter, almond flour, maple syrup, and optional sea salt in a bowl. Press into the prepared pan.
  • Microwave chocolate chips until smooth, then stir in peanut butter and coconut oil. Pour over the peanut butter base and sprinkle with flaky sea salt.
  • Freeze for about 20 minutes until set. Slice into 14 bars and enjoy.

Notes

Store leftovers in an airtight container in the refrigerator for up to 1-2 weeks or in the freezer for up to 1 month.
Calories: 250kcal
Cost: $15
Course: Dessert
Keyword: chocolate, no bake, Peanut Butter

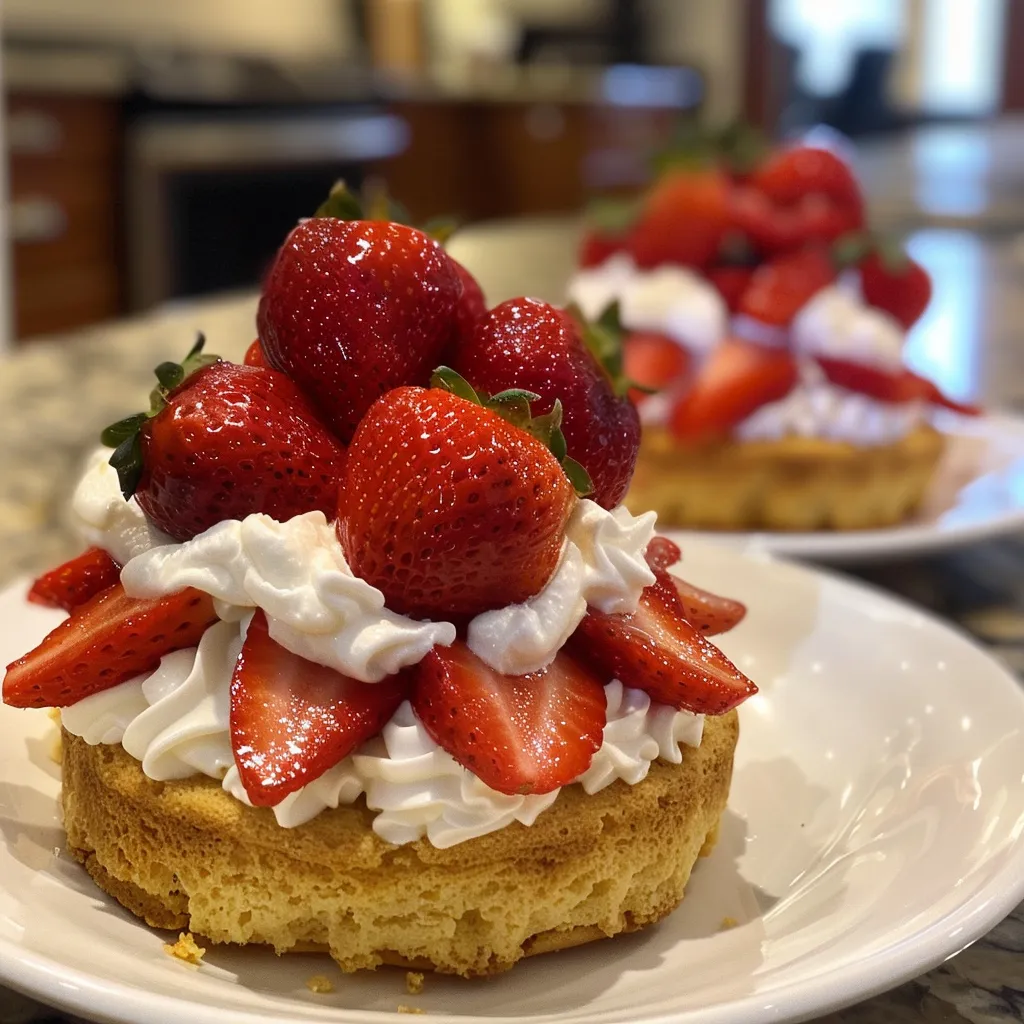
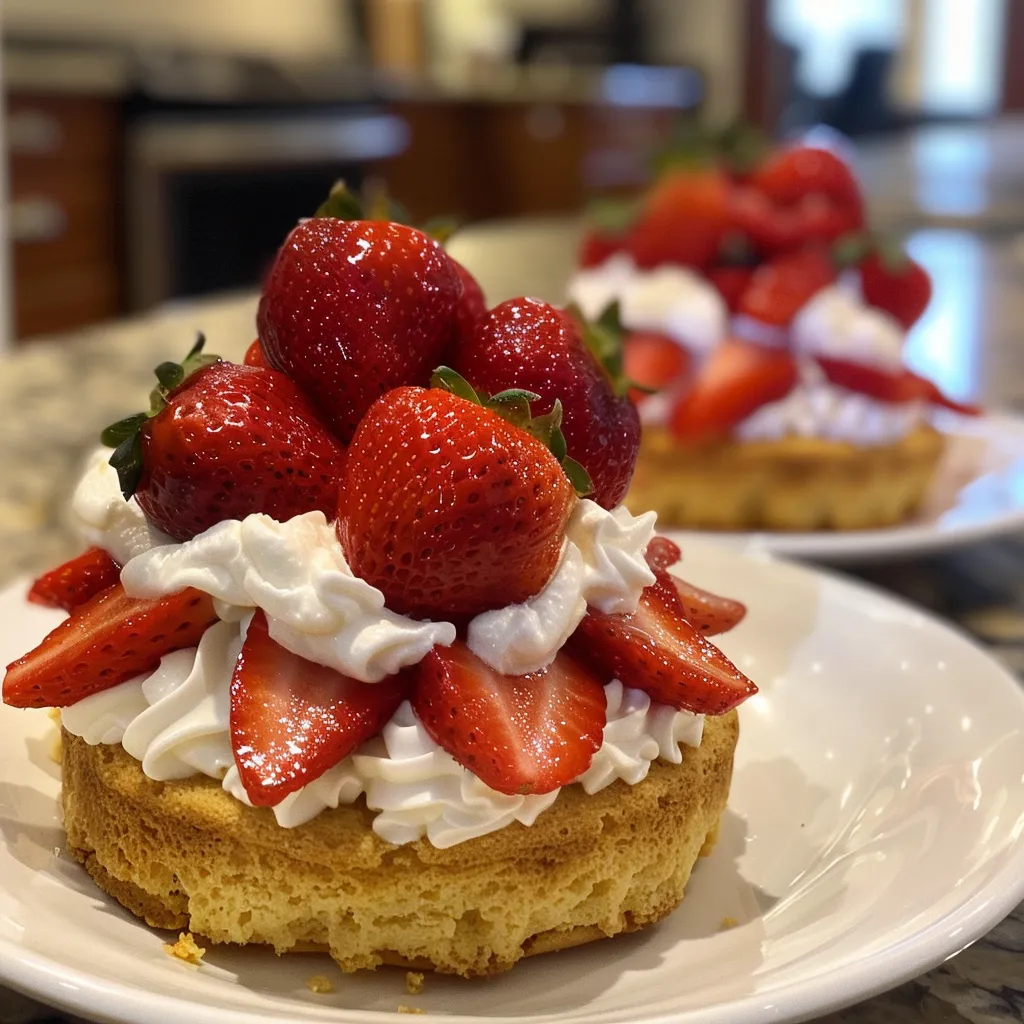
Welcome to your new favorite dessert! In just minutes, you can whip up these delightful strawberry shortcake cups that are perfect for any occasion. This recipe combines fresh strawberries, fluffy whipped cream, and a tender cake base to create a treat that’s not only delicious but also visually stunning. Let’s dive into the details of how to make these scrumptious cups that your family and friends will love!

Why You’ll Love This Recipe

Here are some compelling reasons to make these strawberry shortcake cups:

  • Quick and Easy: With simple ingredients and a straightforward process, you can have these cups ready in under an hour.
  • Customizable: You can easily modify the recipe to suit dietary preferences or use different fruits for variety.
  • Make-Ahead Friendly: Prepare the components in advance for easy assembly later, making it perfect for gatherings.
  • Show-Stopping Presentation: These dessert cups are visually appealing and perfect for impressing guests at parties.
  • Family-Friendly: Everyone loves a good strawberry dessert, making this a great option for family dinners or celebrations.

Ingredients Breakdown

Before we start, let’s take a look at the ingredients needed to create these delightful cups. Here’s everything you’ll need:

  • 1 ½ cups all-purpose flour: The base for our cake; for gluten-free options, use a 1:1 gluten-free flour blend.
  • 1 ½ tsp baking powder: This helps the cake rise and become fluffy.
  • ¼ tsp salt: Enhances the flavors of the cake.
  • ½ cup unsalted butter, softened: Adds richness and moisture; you can substitute with coconut oil for a dairy-free option.
  • 1 cup granulated sugar: Sweetens the cake; can be replaced with coconut sugar for a healthier alternative.
  • 2 large eggs: Binds the ingredients together; for vegan options, substitute with flax eggs.
  • 1 tsp pure vanilla extract: Infuses the cake with delicious flavor.
  • ½ cup buttermilk: Adds moisture and tang; use non-dairy milk mixed with a splash of vinegar as a substitute.
  • 2 lbs fresh strawberries, hulled and sliced: The star ingredient, providing sweetness and color.
  • ¼ cup granulated sugar (for strawberries): Helps macerate the strawberries, enhancing their flavor.
  • 1 cup heavy whipping cream, very cold: Essential for making the whipped topping; can use coconut cream for a dairy-free version.
  • 2 tbsp powdered sugar: Sweetens the whipped cream.
  • 1 tsp vanilla extract (for whipped cream): Adds flavor to the topping.

How to Make Strawberry Shortcake Cups

Now, let’s get to the fun part – making these strawberry shortcake cups!

  • Preheat your oven: Set it to 350°F (175°C). Line a 9×13 inch baking pan with parchment paper or grease it well.
  • Make the cake batter: In a large bowl, beat the softened butter and sugar together until light and fluffy. Add the eggs one at a time, then mix in the vanilla.
  • Combine dry ingredients: In a separate bowl, whisk the flour, baking powder, and salt. Add the dry mixture to the butter mixture in three parts, alternating with the buttermilk, starting and ending with the flour. Mix just until combined.
  • Bake the cake: Pour the batter into the prepared pan and smooth the top. Bake for 18-22 minutes or until a toothpick inserted comes out clean. Let it cool completely in the pan.
  • Macerate the strawberries: While the cake cools, mix the sliced strawberries with ¼ cup of sugar and set aside. This will draw out their juices.
  • Make the whipped cream: In a chilled bowl, whip the cold cream with powdered sugar and vanilla until soft peaks form.
  • Assemble the cups: Once the cake is cool, cut out circles using a small round cookie cutter. Place a cake circle in the bottom of each cup, top with strawberries and their juice, and add a dollop of whipped cream. Repeat the layers as desired.

Pro Tips for Perfect Strawberry Shortcake Cups

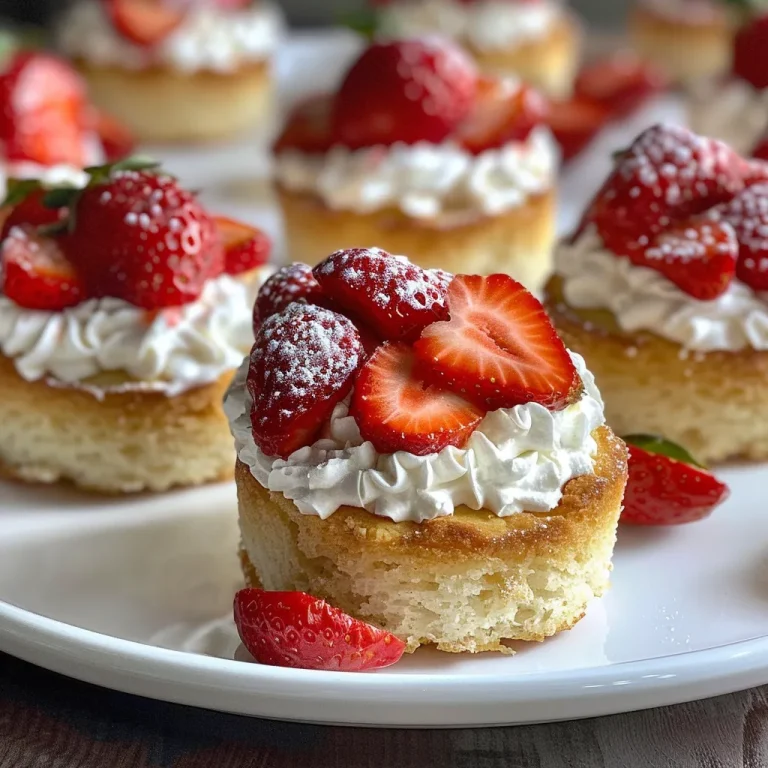
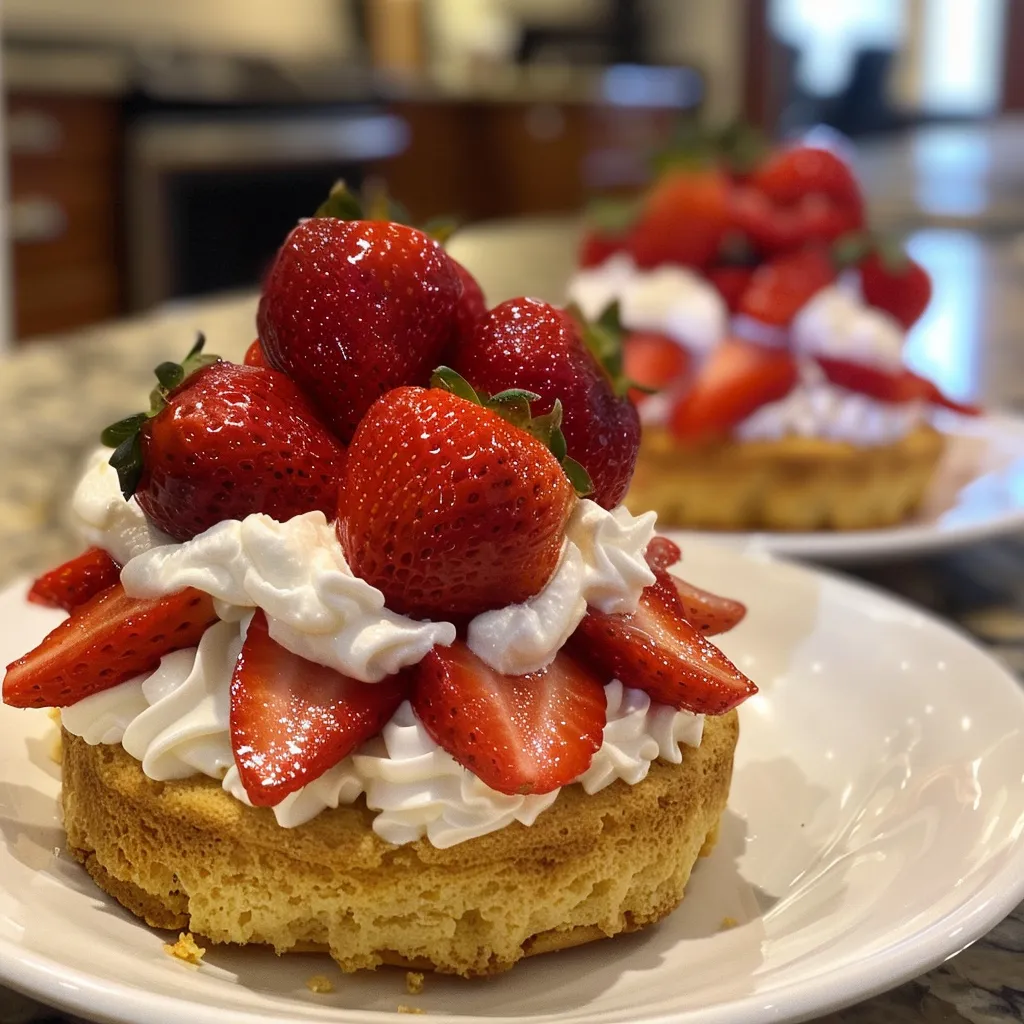
Side perspective of a strawberry shortcake cup showcasing layers of sponge cake and strawberries.

Make your strawberry shortcake cups extraordinary with these expert tips:

  • Chill your tools: For the best whipped cream, ensure your mixing bowl and beaters are cold before whipping.
  • Use fresh strawberries: Make sure your strawberries are ripe for the best flavor. Frozen strawberries can be used in a pinch but will not provide the same texture.
  • Layer creatively: Experiment with different layering methods; try adding granola or nuts for added texture.
  • Don’t rush the cooling: Allow your cake to cool completely before cutting to maintain its structure.
  • Make it a day ahead: For best results, prepare the components a day in advance and assemble just before serving.
  • Substitute with other fruits: Feel free to use blueberries, raspberries, or peaches for a twist on this classic dessert.
  • Adjust sweetness: Customize the sweetness of your whipped cream based on personal preference.
  • Keep it light: Fold the whipped cream into the strawberries gently to keep the mixture light and airy.

Common Mistakes and Troubleshooting

Even experienced bakers can encounter hurdles. Here are some common issues and how to avoid them:

  • Cake is too dense: Ensure you’re not overmixing the batter; mix just until combined for a light texture.
  • Strawberries are mushy: Ensure you’re using fresh strawberries and not letting them sit too long in sugar before assembly.
  • Whipped cream is runny: Make sure your cream is well-chilled, and consider using heavy cream for better stability.

Variations to Try

Here are some fun variations to keep things interesting:

  • Chocolate Strawberry Cups: Add chocolate cake instead of vanilla and layer with chocolate ganache.
  • Lemon Berry Cups: Incorporate lemon zest into the whipped cream for a zesty twist.
  • Gluten-Free Option: Use a gluten-free flour blend for the cake to cater to gluten-sensitive guests.
  • Vegan Strawberry Cups: Substitute eggs with flax eggs and use coconut cream for the whipped topping.

Storage and Make-Ahead Instructions

If you’re planning to serve these later, here’s how to store your strawberry shortcake cups:

  • Refrigeration: Store assembled cups in the fridge for up to 2 hours. After that, the cake may become soggy.
  • Separate Components: For best results, store the cake, strawberries, and whipped cream separately. Assemble just before serving.

Frequently Asked Questions

Here are some common questions about making strawberry shortcake cups:

  • Can I use frozen strawberries? While fresh strawberries are best, you can use frozen ones but expect a different texture.
  • How long do leftovers last? If stored separately, the components can last 2-3 days in the fridge.
  • Can I make this recipe in advance? Yes, prepare the components a day ahead for easy assembly.
  • What can I substitute for heavy cream? Use coconut cream for a dairy-free option or a ready-made whipped topping.
  • Is there a gluten-free version? Yes, just use a gluten-free flour blend.
  • How can I make it more festive? Add sprinkles or edible flowers for a decorative touch.
  • Can I use store-bought cake? Absolutely! Store-bought pound cake or angel food cake works great.
  • How do I prevent soggy layers? Assemble just before serving and avoid over-soaking the cake with strawberry juice.

Nutrition Tips and Dietary Adaptations

To make this dessert healthier or cater to dietary needs, consider these options:

  • Reduce Sugar: Use less sugar in the cake and whipped cream without sacrificing taste.
  • Use Whole Grain Flour: Substitute all-purpose flour with whole wheat flour for added fiber.
  • Low-Fat Options: Use low-fat cream cheese instead of whipped cream for a lighter version.

Equipment Recommendations

Here’s what you’ll need to make these cups:

  • Mixing Bowls: A set of various sizes will help in managing different components.
  • Electric Mixer: For easy whipping of the cream and mixing the batter.
  • Cookie Cutters: A small round cutter for shaping cake layers.
  • Measuring Cups and Spoons: Accurate measurements are key to a successful bake.

Serving Suggestions

To elevate your dessert experience:

  • Garnish: Top with fresh mint leaves or a sprinkle of zest for added flair.
  • Pairing: Serve alongside a scoop of vanilla ice cream or a berry compote.
  • Presentation: Use clear cups to showcase the beautiful layers.

Conclusion

Now that you have all the knowledge to create these effortless strawberry shortcake cups, it’s time to gather your ingredients and start baking! This recipe is not only a delightful treat for your taste buds but also a wonderful way to bring friends and family together. Enjoy every bite and share your creations with the world!

Easy Strawberry Cake Shortcake Cups

Prep Time 20 minutes
Cook Time 20 minutes
Total Time 40 minutes
Servings 8 cups
Calories 350
A delightful dessert featuring layers of moist cake, fresh strawberries, and whipped cream served in individual cups.

Ingredients

Cake

  • 1.5 cups all-purpose flour
  • 1.5 tsp baking powder
  • 0.25 tsp salt
  • 0.5 cup unsalted butter, softened
  • 1 cup granulated sugar
  • 2 large eggs
  • 1 tsp pure vanilla extract
  • 0.5 cup buttermilk

Strawberries

  • 2 lbs fresh strawberries, hulled and sliced
  • 0.25 cup granulated sugar

Whipped Cream

  • 1 cup heavy whipping cream, very cold
  • 2 tbsp powdered sugar
  • 1 tsp vanilla extract

Instructions 

  • Preheat oven to 350°F (175°C). Prepare a 9x13 inch pan.
  • Mix butter and sugar until fluffy, add eggs and vanilla. Combine dry ingredients and alternate adding with buttermilk. Bake for 18-22 minutes.
  • Cool cake, then cut out circles. Mix strawberries with sugar and let sit.
  • Whip cold cream with powdered sugar and vanilla until soft peaks form. Assemble cups with cake, strawberries, and whipped cream.

Notes

Use fresh strawberries for best flavor and texture.
Calories: 350kcal
Cost: $15
Course: Dessert
Keyword: cake, shortcake, strawberry

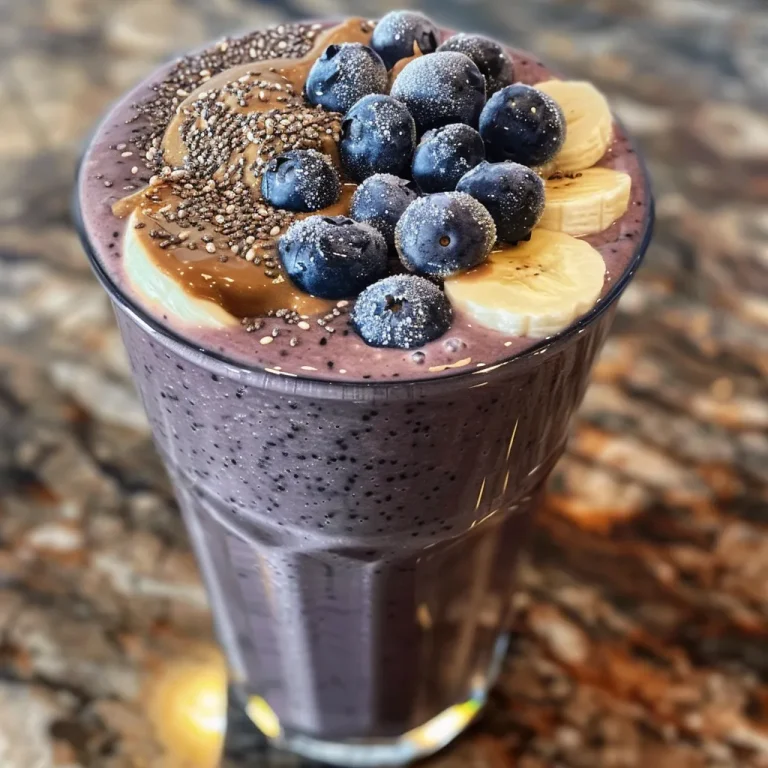
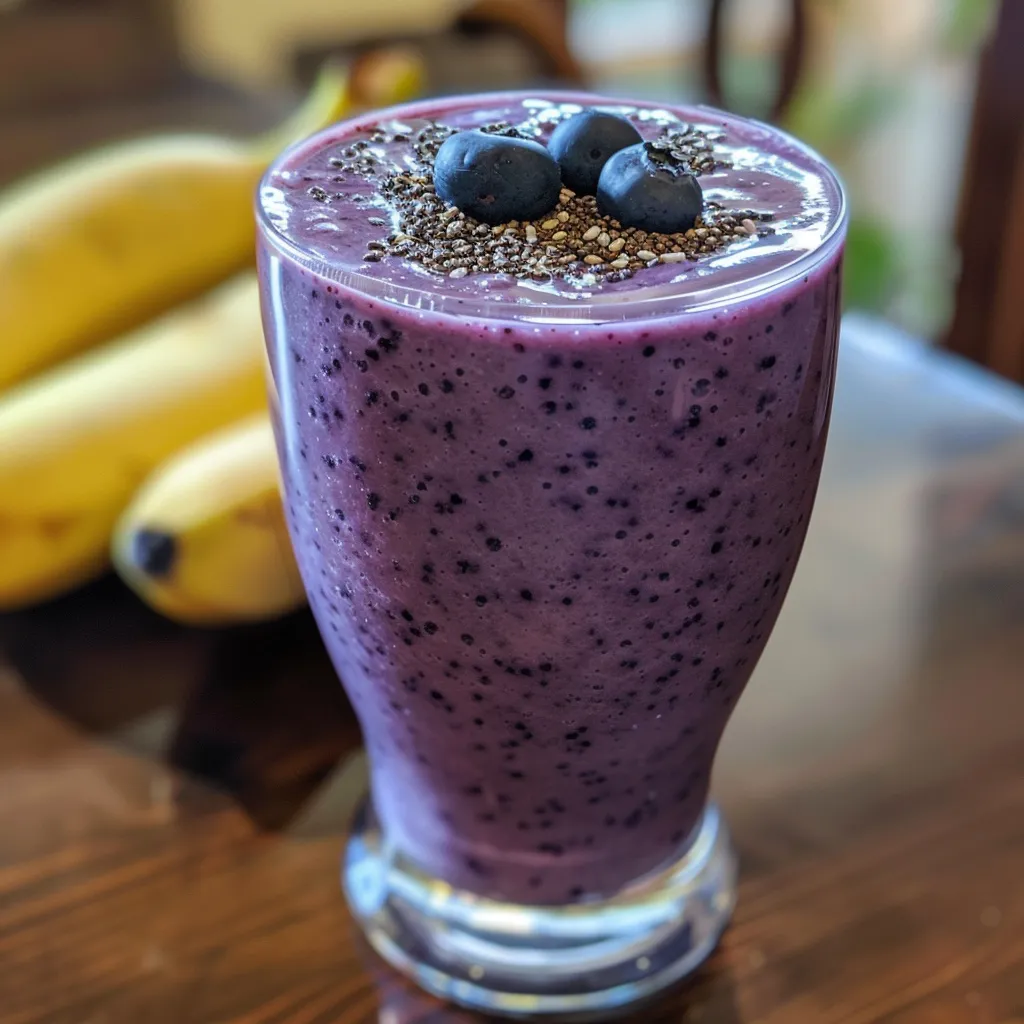
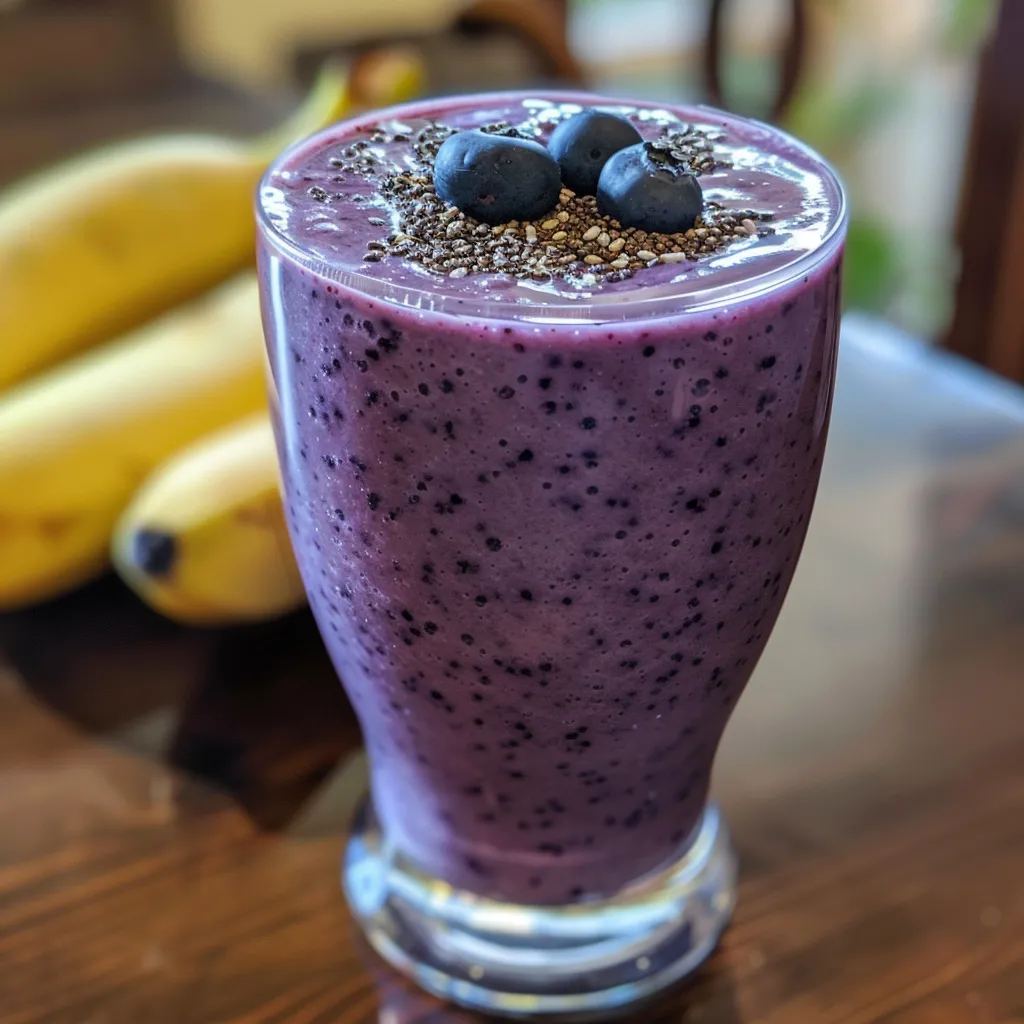
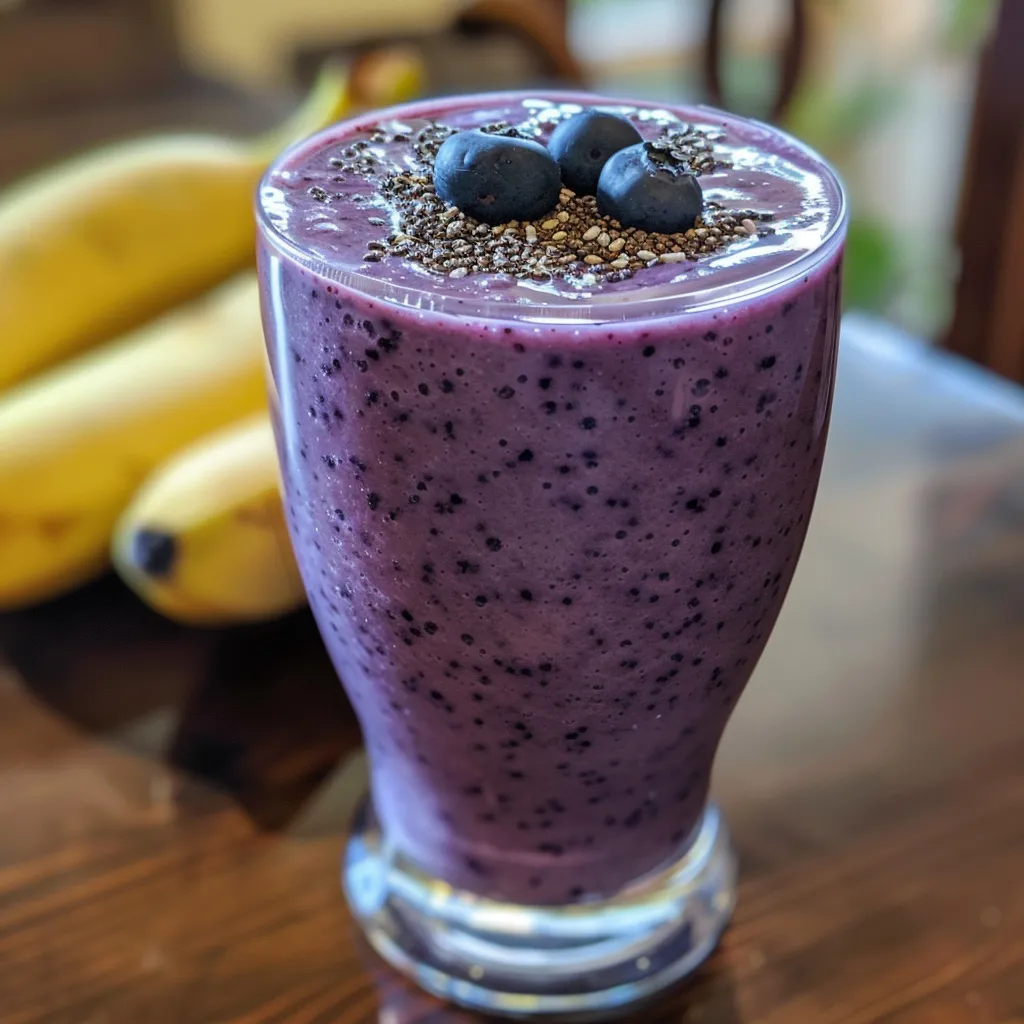
Welcome to the world of smoothies, where flavors collide and nutrition reigns supreme! Our Banana Blueberry Peanut Butter Smoothie is not just a drink; it’s a delightful experience packed with wholesome ingredients designed to energize your day. This smoothie is a perfect blend of sweet bananas, tangy blueberries, and creamy peanut butter, making it an ideal choice for a quick breakfast or a refreshing snack. In this article, we’ll dive deep into everything you need to know about crafting the perfect smoothie, including tips, variations, and nutritional insights.

Why You’ll Love This Recipe

  • Quick and Easy: This smoothie comes together in just minutes, making it perfect for busy mornings or a quick afternoon pick-me-up.
  • Nutritious Ingredients: Packed with vitamins, minerals, and healthy fats, this smoothie is a powerhouse of nutrition.
  • Versatile Flavor Profile: The combination of banana, blueberry, and peanut butter creates a deliciously balanced flavor that appeals to all taste buds.
  • Customizable: Easily adjust the ingredients to meet your dietary preferences or use what you have on hand.
  • Great for Meal Prep: This smoothie can be made ahead of time, stored, and enjoyed later without losing its deliciousness.

Ingredients Breakdown

Let’s take a closer look at the ingredients that make this smoothie a standout:

  • 2 ripe bananas: Choose bananas that are just starting to brown for maximum sweetness and creaminess.
  • 1 cup fresh blueberries: These little berries are loaded with antioxidants and add a beautiful color and flavor.
  • 2 tablespoons smooth peanut butter: Adds healthy fats and protein for a satisfying texture. You can substitute with almond or cashew butter if desired.
  • 1 cup almond milk: A dairy-free option that keeps the smoothie light. Feel free to substitute with any milk of your choice, including oat milk or regular dairy milk.
  • 1 tablespoon chia seeds (optional): These tiny seeds add a nutritional boost and a nice texture. They’re a great source of omega-3 fatty acids.

How to Make Your Smoothie

Follow these simple steps to create your Banana Blueberry Peanut Butter Smoothie:

  1. In a powerful blender, combine the ripe bananas, fresh blueberries, smooth peanut butter, and almond milk.
  2. Blend until all the ingredients are smooth and well combined, with no lumps remaining.
  3. If the smoothie is too thick, gradually add more almond milk until you achieve your desired consistency.
  4. Pour the smoothie into a tall glass and garnish with a sprinkle of chia seeds on top for that extra flair.
  5. Serve immediately and enjoy the tropical delight!

Pro Tips for the Perfect Smoothie

Side view of a vibrant smoothie made with bananas, blueberries, and peanut butter.
  • Frozen Ingredients: For a colder, thicker smoothie, consider using frozen bananas and blueberries instead of fresh.
  • Start Slow: Begin blending at a low speed to prevent splattering, then gradually increase the speed for a smooth consistency.
  • Layering Matters: Add liquids first, then solids, for a smoother blend.
  • Protein Power: Boost your smoothie by adding a scoop of your favorite protein powder or Greek yogurt.
  • Sweetness Adjustment: If you prefer a sweeter smoothie, add a teaspoon of honey or maple syrup.
  • Mix in Greens: For added nutrients, sneak in a handful of fresh spinach or kale without altering the flavor.
  • Storage Tips: If making ahead, store your smoothie in an airtight container in the fridge for up to 24 hours.
  • Get Creative: Experiment with spices like cinnamon or nutmeg for a unique flavor twist.

Common Mistakes and Troubleshooting

Even the best recipes can go awry sometimes! Here are some common pitfalls and how to avoid them:

  • Too Thick: If your smoothie turns out too thick, simply add more liquid a little at a time until it reaches your desired consistency.
  • Too Sweet: Balance out an overly sweet smoothie with a squeeze of lemon or lime juice for a refreshing zing.
  • Unbalanced Flavors: If one flavor overpowers the others, adjust by adding more of the other ingredients until you find your perfect balance.
  • Not Blending Smoothly: If the blender struggles, add more liquid or pause to stir and redistribute the ingredients.

Variations to Try

Your Banana Blueberry Peanut Butter Smoothie can be customized in many delightful ways. Here are some variations to inspire you:

  • Chocolate Peanut Butter Banana Smoothie: Add a tablespoon of cocoa powder for a delicious chocolate twist.
  • Green Power Smoothie: Incorporate a handful of spinach or kale for added nutrients without changing the flavor.
  • Berry Blast Smoothie: Mix in other berries like strawberries or raspberries for a mixed berry experience.
  • Nutty Banana Oat Smoothie: Add a half cup of rolled oats for a heartier version that keeps you full longer.

Storage and Make-Ahead Instructions

For those busy days when you need to plan ahead:

  • Prep Ahead: You can pre-portion your ingredients in a zip-top bag and freeze them. Just blend with milk when you’re ready to enjoy!
  • Refrigeration: If you make your smoothie in advance, store it in an airtight container in the refrigerator for up to 24 hours. Give it a quick shake or stir before drinking.
  • Longer Storage: For longer storage, freeze the smoothie in ice cube trays and blend with fresh milk for a quick treat later.

Frequently Asked Questions

  • Can I use frozen fruit? Yes! Frozen bananas and blueberries work wonderfully and will give your smoothie a thicker texture.
  • Is this smoothie vegan? Absolutely! As long as you use a plant-based milk, this smoothie is fully vegan.
  • Can I make this smoothie without peanut butter? Yes, you can substitute it with any nut or seed butter, or omit it entirely for a lighter version.
  • How can I make this smoothie lower in calories? Use unsweetened almond milk and reduce or omit the peanut butter.
  • What can I add to increase protein? A scoop of protein powder or Greek yogurt are great options for boosting protein content.
  • Can I add greens to my smoothie? Yes, adding spinach or kale is a fantastic way to increase nutrients without altering the flavor.
  • How long does this smoothie last? It’s best enjoyed fresh, but it can be stored in the fridge for up to 24 hours.
  • What’s the best way to serve this smoothie? Serve it in a tall glass and enjoy it immediately for the best taste and texture.

Nutritional Tips and Dietary Adaptations

This smoothie not only tastes great but is also packed with nutritional benefits:

  • Heart Health: The peanut butter provides healthy fats, while blueberries are known for their antioxidant properties.
  • Energy Boost: Bananas are a great source of quick energy, making this smoothie ideal before or after a workout.
  • Fiber-Rich: With the addition of chia seeds or oats, this smoothie can help keep you feeling full longer.
  • Customizable for Diets: This recipe can easily be made gluten-free, dairy-free, or nut-free, depending on your dietary needs.

Equipment Recommendations

To make your smoothie-making experience seamless, consider the following equipment:

  • High-Speed Blender: A powerful blender ensures everything is blended smoothly and efficiently.
  • Measuring Cups: For precise measurements of ingredients to maintain consistency.
  • Storage Containers: Airtight containers for storing prepped ingredients or leftover smoothies.

Serving Suggestions

Enhance your smoothie experience with these serving ideas:

  • Garnish: Top with fresh berries or a dollop of yogurt for visual appeal and added flavor.
  • Pairing: Enjoy with a slice of whole-grain toast topped with avocado for a balanced meal.
  • Presentation: Serve in clear glasses to showcase the beautiful color of your smoothie.

In conclusion, the Banana Blueberry Peanut Butter Smoothie is not just another recipe; it’s a versatile and nutritious option that fits seamlessly into your busy lifestyle. With its rich flavor and health benefits, it’s time to make this smoothie a staple in your kitchen. Remember, cooking should be simple, enjoyable, and full of flavor. So grab your ingredients, blend away, and savor every sip of this delightful smoothie!

Banana Blueberry Peanut Butter Smoothie

Prep Time 5 minutes
Total Time 5 minutes
Servings 2 cups
Calories 250
A delicious and nutritious smoothie combining bananas, blueberries, and peanut butter for a quick, energizing treat.

Ingredients

Fruits

  • 2 pieces ripe bananas
  • 1 cup fresh blueberries

Add-ins

  • 2 tablespoons smooth peanut butter
  • 1 cup almond milk or any milk of your choice
  • 1 tablespoon chia seeds for garnish, optional

Instructions 

  • Combine bananas, blueberries, peanut butter, and almond milk in a blender.
  • Blend until smooth and well combined.
  • If too thick, add more almond milk and blend again.
  • Pour into a glass and garnish with chia seeds if desired.
  • Serve immediately and enjoy!

Notes

For extra creaminess, add a spoonful of Greek yogurt.
Calories: 250kcal
Cost: $8
Course: Breakfast, Snack
Cuisine: American
Keyword: Fruit, Healthy, Smoothie

The Ultimate Guide to Classic Butter Cake: A Timeless Recipe for Every Occasion

When it comes to baking, few desserts are as beloved as the classic butter cake. This rich and moist cake not only satisfies sweet cravings but also serves as a versatile base for various toppings and frostings. In this comprehensive guide, we will explore everything you need to know about making a butter cake that is both light and fluffy, ensuring you can whip it up with confidence, regardless of your baking experience. Ready to impress your friends and family? Let’s dive in!

Why You’ll Love This Recipe

  • Simple Ingredients: This butter cake requires basic pantry staples such as flour, sugar, and butter, making it easy to prepare any time.
  • Perfectly Moist: With the right technique, you’ll create a cake that is incredibly moist and tender, every single time.
  • Versatile Base: Enjoy it plain, or elevate it with your favorite frosting, fresh fruit, or a dusting of powdered sugar.
  • Quick to Prepare: From mixing to baking, this recipe takes less than two hours, perfect for busy schedules.
  • Perfect for Any Occasion: Whether it’s a birthday, a family gathering, or just a sweet treat, this cake is always a hit.

Ingredients You’ll Need

Before you start, gather the following ingredients:

  • 1 cup butter (salted): Room temperature, for a creamy texture.
  • 1 cup caster sugar: Regular white granulated sugar works too.
  • 1 tbsp unflavoured vegetable oil: I recommend canola for its neutral flavor.
  • 5 large eggs: Ensure they’re at room temperature for better emulsification.
  • 1¾ cups all-purpose flour: Cake flour can be used for a lighter texture.
  • 3 tsp baking powder: To help the cake rise beautifully.
  • ½ cup buttermilk: Adds moisture and a slight tang.
  • 1½ tsp vanilla essence/extract: For that classic cake flavor.

Ingredient Substitutions

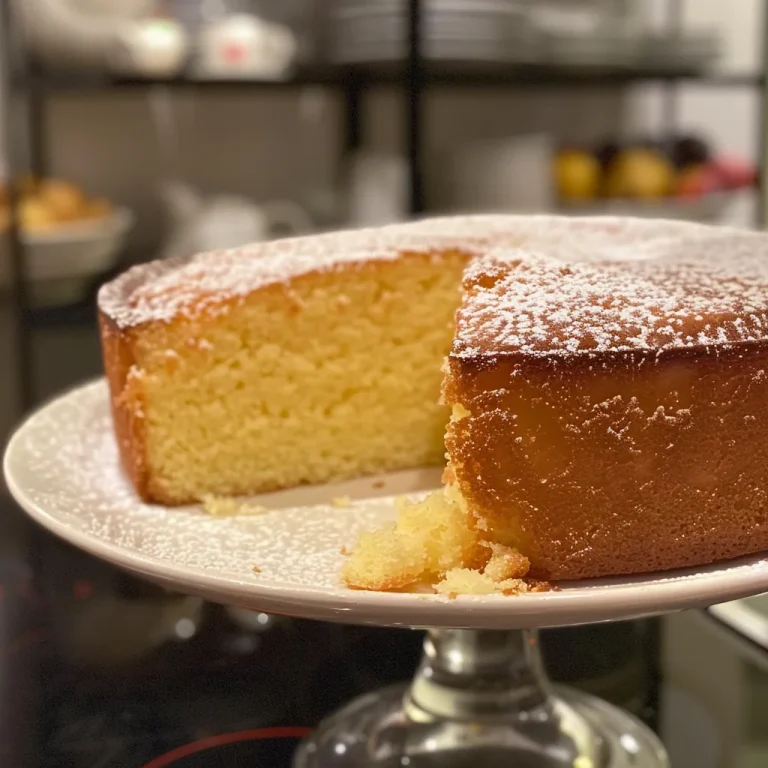
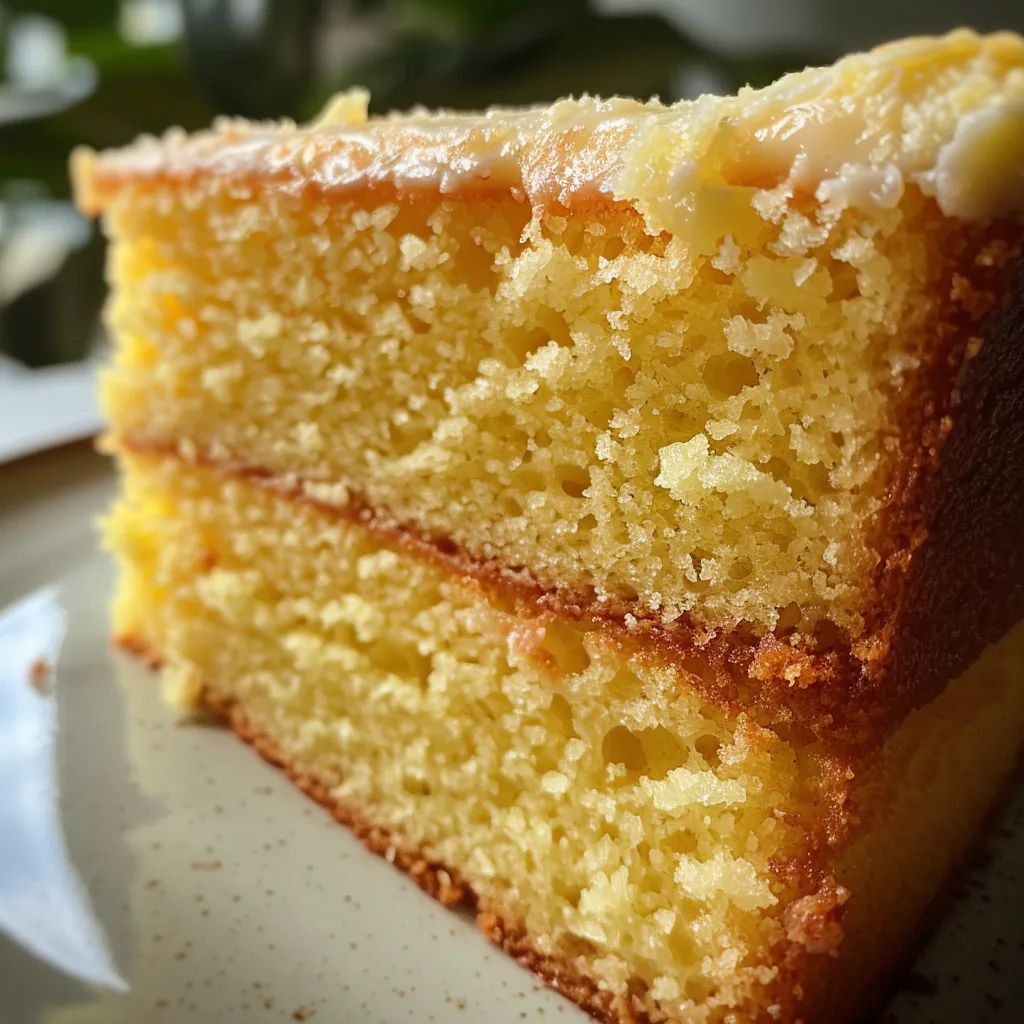
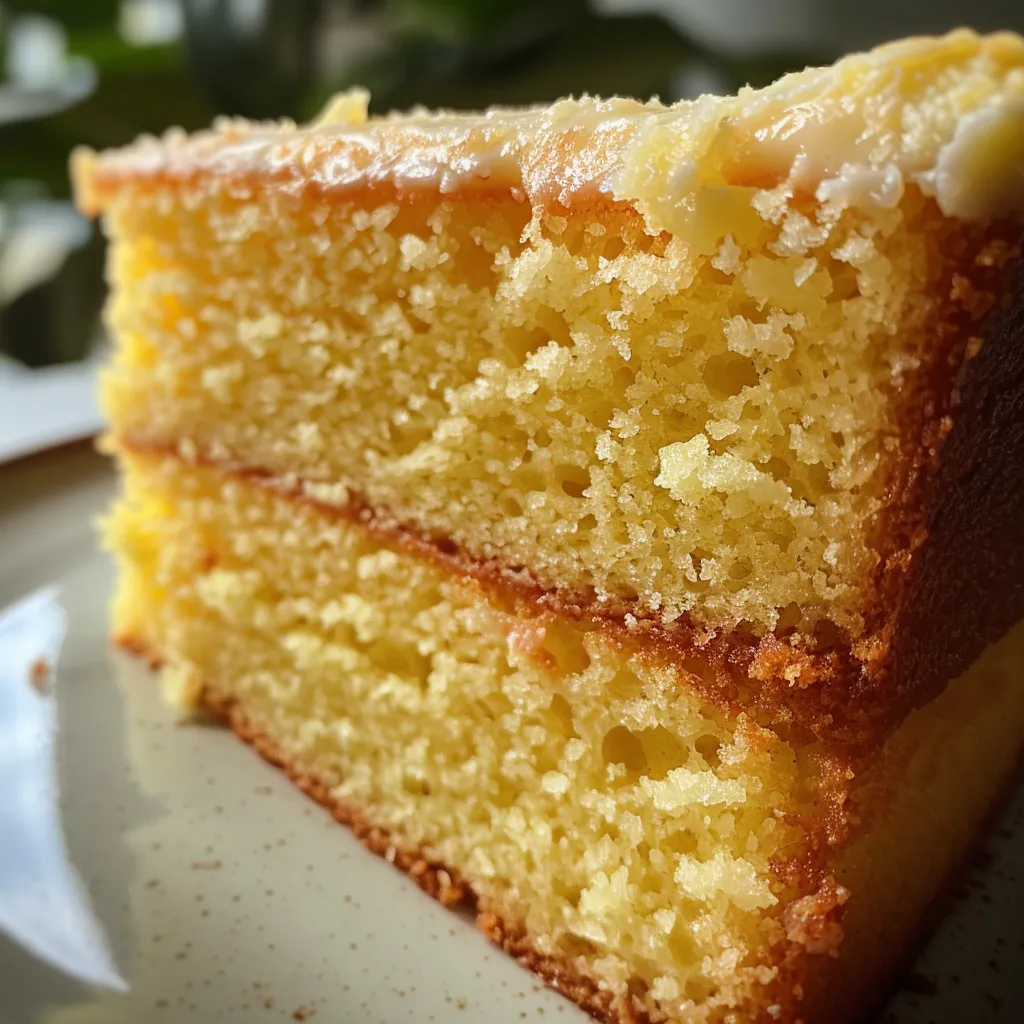
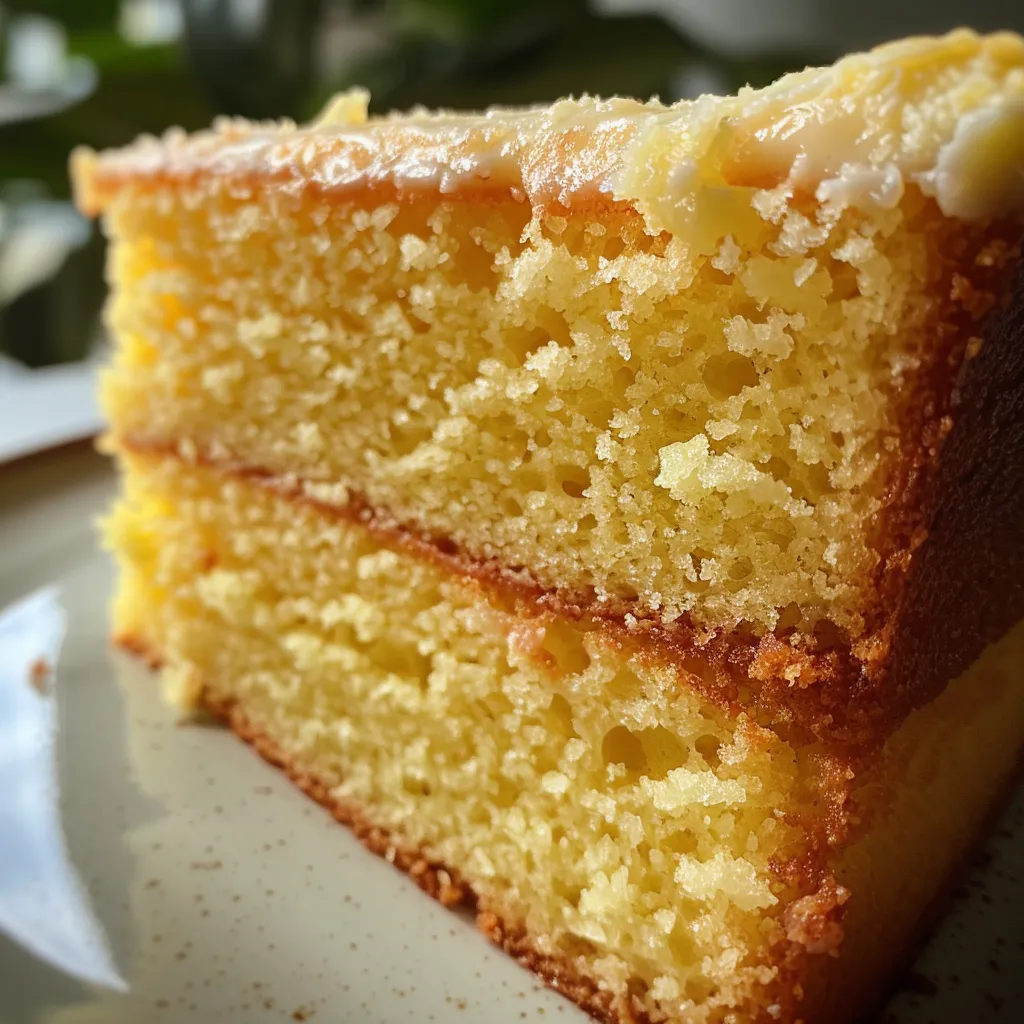
Close-up of a freshly baked Classic Butter Cake showcasing its fluffy texture.
  • Butter: You can substitute with margarine or a dairy-free alternative if needed.
  • Buttermilk: Use a mix of regular milk and vinegar or lemon juice (1 cup milk + 1 tbsp vinegar), let it sit for 5 minutes.
  • Eggs: For a vegan version, substitute with flax eggs (1 tbsp ground flaxseed + 2.5 tbsp water per egg).
  • Flour: Gluten-free flour blends can be used for a gluten-free option.

How to Make Butter Cake Recipe

Now that you have your ingredients ready, follow these step-by-step instructions:

  1. Preheat your oven to 150°C (302°F), with the fan on (if available). Grease and line an 8-inch square (or round) cake tin.
  2. Sift the flour and baking powder together in a bowl and set aside.
  3. In another bowl, combine the buttermilk and vanilla extract. Set aside.
  4. In a large mixing bowl, cream together the butter, caster sugar, and oil for about 5 minutes until the mixture is light and creamy.
  5. Add the eggs one at a time, mixing well after each addition. Scrape down the bowl as needed.
  6. Reduce the mixer speed to low and add half of the dry ingredients until almost combined. Then add the buttermilk mixture and mix until just combined.
  7. Add the remaining dry ingredients and mix until just combined; avoid overmixing.
  8. Pour the batter into the prepared cake tin and bake for 1 hour, or until a toothpick inserted into the center comes out clean.
  9. Allow the cake to cool in the pan for about 15 minutes, then turn it out onto a wire rack to cool completely before frosting.

Expert Tips & Mistakes to Avoid

  • Room Temperature Ingredients: Make sure all your ingredients are at room temperature for better blending.
  • Don’t Overmix: Overmixing can lead to a dense cake. Mix until just combined.
  • Cooling Time: Allow the cake to cool completely before frosting to prevent melting.
  • Use Fresh Ingredients: Always check the expiration dates on your baking powder and vanilla.
  • Check Oven Temperature: Use an oven thermometer to ensure your oven is at the correct temperature.
  • Use a Scale: For precise measurements, especially for flour, using a kitchen scale can make a big difference.
  • Test for Doneness: Use a toothpick to check if the cake is done – it should come out clean.
  • Don’t Rush the Cooling: Let it sit in the pan before transferring to a rack; this prevents breakage.

Variations & Add-Ons

  • Citrus Butter Cake: Add the zest of one lemon or orange to the batter for a refreshing twist.
  • Chocolate Chip Butter Cake: Fold in 1 cup of chocolate chips for a delightful chocolate flavor.
  • Spiced Butter Cake: Add 1 tsp of cinnamon and 1/2 tsp of nutmeg to the dry ingredients for a warm spice flavor.
  • Fruit-Infused Butter Cake: Incorporate 1 cup of fresh berries or chopped fruits into the batter before baking.

Storage and Make-Ahead Instructions

This butter cake can be stored in an airtight container at room temperature for up to 3 days. For longer storage, wrap it tightly in plastic wrap and freeze for up to 3 months. When ready to serve, thaw at room temperature. You can also prepare the batter a day in advance and refrigerate it, then bake fresh when needed.

FAQ

  • Can I bake this cake in advance? Yes, you can bake it a day ahead and keep it wrapped in plastic wrap.
  • How can I make the cake more flavorful? Consider adding vanilla bean paste or almond extract for a unique flavor.
  • Can I use a different type of flour? Yes, but it might change the texture. All-purpose flour works best for this recipe.
  • Is it possible to make this cake vegan? Absolutely! Use flax eggs and a dairy-free butter alternative.
  • How can I tell when the cake is done? A toothpick inserted in the center should come out clean when it’s fully baked.
  • What’s the best way to frost this cake? A simple buttercream or whipped cream is perfect, or enjoy it plain with a dusting of powdered sugar.
  • Can I double the recipe? Yes, you can double the recipe and bake it in a larger pan, just adjust the baking time.
  • What are some common mistakes when baking this cake? Overmixing, using cold ingredients, or not properly measuring flour can lead to issues.

Nutritional Tips and Dietary Adaptations

This butter cake is a delightful treat, but for those watching their diet, consider the following adaptations:

  • Reduce Sugar: You can cut the sugar by 25% without significantly affecting the cake’s texture.
  • Gluten-Free Option: Substitute with a gluten-free flour blend for those with gluten sensitivities.
  • Lower Calorie Frosting: Use Greek yogurt mixed with a bit of honey as a healthier frosting alternative.

Equipment Recommendations

To ensure your baking experience is smooth and successful, consider these essential tools:

  • Stand Mixer: Makes creaming the butter and sugar much easier.
  • 8-Inch Cake Pan: A good quality, non-stick cake pan is crucial for easy release.
  • Oven Thermometer: Ensures your oven is calibrated correctly for perfect baking.
  • Cooling Rack: Allows your cake to cool evenly, preventing sogginess.

Serving Suggestions

This classic butter cake can be served in myriad ways:

  • Warm with Whipped Cream: Serve warm with a dollop of whipped cream for a comforting dessert.
  • Layered with Fresh Fruit: Top with fresh berries or sliced fruits for a refreshing contrast.
  • Chocolate Ganache: Drizzle with chocolate ganache for a rich, decadent treat.
  • Powdered Sugar Dusting: A simple dusting of powdered sugar makes for an elegant presentation.

Conclusion

With this guide, you have all the tools and knowledge needed to create a classic butter cake that is not only delicious but also adaptable to your taste preferences. Remember, each baker has their unique touch, so don’t hesitate to experiment with flavors and decorations. Enjoy the process, and savor the delightful results!

Classic Butter Cake

Prep Time 20 minutes
Cook Time 1 hour
Total Time 1 hour 20 minutes
Servings 8 slices
Calories 350
A moist and buttery cake perfect for any occasion, combining simple ingredients with straightforward steps for delicious results.

Ingredients

Dough

  • 1 cup butter salted
  • 1 cup caster sugar
  • 1 tbsp unflavoured vegetable oil (canola recommended)
  • 5 large eggs
  • 1.75 cups all purpose flour (cake flour okay too)
  • 3 tsp baking powder
  • 0.5 cup buttermilk
  • 1.5 tsp vanilla essence (extract)

Instructions 

  • Preheat oven to 150°C (302°F) with fan on, grease and line an 8-inch square cake tin.
  • Sift flour and baking powder together; set aside. Mix buttermilk and vanilla; set aside.
  • Cream butter, sugar, and oil until light and creamy, about 5 minutes.
  • Add eggs one at a time, mixing well after each addition. Mix in dry ingredients and buttermilk mixture alternately until just combined.
  • Pour batter into prepared tin and bake for 60 minutes, or until a toothpick comes out clean. Cool before serving.

Notes

Ensure ingredients are at room temperature for best results.
Calories: 350kcal
Cost: $15
Course: Dessert
Cuisine: Western
Keyword: butter, cake

Welcome to your new go-to recipe for a healthy and fulfilling meal! This healthy tuna salad is not only quick to prepare but also packed with nutrients that make it perfect for lunch or a light dinner. By using Greek yogurt instead of traditional mayonnaise, you’re not only lightening up the dish, but you’re also adding a creamy texture that’s rich in protein. In this guide, we’ll explore everything you need to know to whip up a fantastic tuna salad that will keep you coming back for more.

Why You’ll Love This Recipe

Here are five compelling reasons why this healthy tuna salad should be on your table:

  • Quick Preparation: With just a few minutes of prep time, you can have a nutritious meal ready to go. Perfect for busy days!
  • High in Protein: This meal provides a whopping 32 grams of protein per serving, making it ideal for muscle recovery and energy.
  • Low in Calories: Each serving is low-calorie, making it a great choice if you’re watching your weight or looking to eat healthier.
  • Versatile Serving Options: You can enjoy this salad on its own, in a sandwich, or on a bed of greens for a refreshing meal.
  • Customizable Ingredients: Adjust the ingredients to your liking! Add your favorite veggies or herbs for a personalized twist.

Detailed Ingredient Breakdown

Let’s dive into the ingredients that make this healthy tuna salad a star of your kitchen:

  • ⅓ cup Greek yogurt: A healthier alternative to mayonnaise that adds creaminess and protein.
  • 2 tablespoons lemon juice: Freshens up the salad and adds zesty flavor.
  • 1 tablespoon Dijon mustard: Enhances the taste with a touch of spiciness and depth.
  • ¼ teaspoon salt: Essential for balancing flavors.
  • ¼ teaspoon black pepper: Adds a bit of heat.
  • 1 tablespoon dill or parsley (chopped): Fresh herbs bring a burst of flavor and nutrition.
  • 2 (5-ounce) white albacore tuna (in water, drained): The star protein that’s both filling and nutritious.
  • 2 celery stalks (minced): Adds crunch and freshness.
  • 2 tablespoons red onion (minced): Provides a mild bite and enhances overall flavor.

How To Make Healthy Tuna Salad

Follow these simple steps to create your healthy tuna salad:

  1. In a mixing bowl, whisk together the Greek yogurt, lemon juice, Dijon mustard, salt, pepper, and dill/parsley until well combined.
  2. Add the drained tuna, minced celery, and red onions on top of the mixture.
  3. Gently stir until all ingredients are well combined.
  4. Serve immediately on its own, in a sandwich, or on toast.

Pro Tips for the Perfect Tuna Salad

Close-up view of a healthy tuna salad showcasing its colorful texture.

Here are some expert insights to elevate your tuna salad game:

  • Fresh Ingredients: Always use fresh herbs and vegetables for the best flavor and nutrition.
  • Tuna Quality: Opt for high-quality albacore tuna for a firmer texture and better taste.
  • Chill Before Serving: Let your salad chill for 30 minutes in the fridge to allow the flavors to meld.
  • Experiment with Spices: Feel free to add spices like paprika or cayenne pepper for an extra kick.
  • Mind the Salt: Adjust the salt according to your taste, especially if using salted tuna.
  • Batch Prep: Make a larger batch to enjoy throughout the week; it keeps well in the fridge.
  • Non-Dairy Option: For a dairy-free version, substitute Greek yogurt with avocado or a vegan yogurt alternative.
  • Flavor Boosters: Consider adding capers or chopped pickles for additional flavor.

Common Mistakes and Troubleshooting

Even the best cooks can make mistakes. Here are some common pitfalls and how to avoid them:

  • Overmixing: Be gentle when mixing to ensure the tuna remains chunky.
  • Too Much Liquid: If your salad is too watery, add more tuna or some diced vegetables to absorb the liquid.
  • Skipping the Chill: Don’t skip chilling the salad; it enhances the flavors!
  • Ignoring Substitutions: Feel free to mix and match ingredients based on your preferences or what’s available.

Variations on the Classic Tuna Salad

Want to shake things up? Here are a few variations to try:

  • Spicy Tuna Salad: Add diced jalapeños or a dash of hot sauce for heat.
  • Avocado Tuna Salad: Mash avocado instead of using Greek yogurt for a creamy texture.
  • Curried Tuna Salad: Mix in curry powder for an exotic twist.
  • Mexican-Style Tuna Salad: Add black beans, corn, and cilantro with a squeeze of lime.

Storage and Make-Ahead Instructions

Planning ahead? Here’s how to store your healthy tuna salad:

  • Refrigeration: Store in an airtight container in the fridge. It lasts 3-5 days.
  • Make-Ahead: Prepare the salad in advance, but add crunchy ingredients like celery just before serving to maintain texture.

Frequently Asked Questions

Got questions? Here are some common queries about tuna salad:

  • How long is tuna salad good for?: When stored properly, it can last 3-5 days in the fridge.
  • Can you freeze tuna salad?: Freezing is not recommended as it can change the texture of the ingredients.
  • What can I mix with tuna instead of mayo?: Greek yogurt, avocado, or hummus are great alternatives.
  • Is tuna salad healthy?: Yes, especially when made with fresh ingredients and healthy substitutes.
  • What kind of tuna is the healthiest?: Look for tuna packed in water for lower fat content.
  • Can I add fruits to tuna salad?: Absolutely! Apples or grapes can add a nice sweetness.
  • How can I make my tuna salad creamier?: Add more Greek yogurt or a splash of olive oil.
  • What vegetables pair well with tuna salad?: Consider bell peppers, cucumbers, or even shredded carrots for added crunch.

Nutritional Tips and Dietary Adaptations

If you’re mindful of specific dietary needs, here are some tips:

  • Low-Carb Option: Serve on lettuce wraps instead of bread for a low-carb meal.
  • Gluten-Free: Ensure all ingredients are certified gluten-free and serve with gluten-free crackers.
  • Low-Fat Version: Use low-fat Greek yogurt and skip any additional oils.
  • Whole30 Approved: Stick to compliant ingredients like avocado instead of yogurt.

Equipment Recommendations

To make your cooking experience seamless, here are some handy tools:

  • Mixing Bowls: Invest in a set of nesting bowls for easy mixing and storage.
  • Measuring Cups and Spoons: Essential for accurate ingredient measurements.
  • Whisk or Fork: For mixing ingredients smoothly.
  • Cutting Board: A sturdy surface for chopping veggies.

Serving Suggestions

Here are some creative ways to enjoy your healthy tuna salad:

  • On a Bed of Greens: Serve over mixed greens for a refreshing salad.
  • In a Sandwich: Use whole grain or gluten-free bread for a satisfying sandwich.
  • With Crackers: Pair with whole grain or veggie crackers for a crunchy snack.
  • Stuffed Avocados: Hollow out an avocado and fill it with the salad for a nutritious twist.

In conclusion, this healthy tuna salad recipe is not just easy but also adaptable, making it perfect for any meal. With the right ingredients and a few simple steps, you can create a dish that’s both delicious and nourishing. So gather your ingredients, and let’s get cooking! Enjoy your meal with confidence and flair!

Healthy Tuna Salad

Prep Time 10 minutes
Total Time 10 minutes
Servings 2 servings
Calories 250
A light and nutritious tuna salad perfect for a quick lunch or snack, packed with fresh herbs and creamy Greek yogurt.

Ingredients

Dressing

  • 0.33 cup greek yogurt
  • 2 tablespoons lemon juice
  • 1 tablespoon Dijon mustard
  • 0.25 teaspoon salt
  • 0.25 teaspoon black pepper
  • 1 tablespoon dill or parsley chopped
  • 2 5-ounce white albacore tuna in water drained
  • 2 stalks celery minced
  • 2 tablespoons red onion minced

Instructions 

  • Whisk together Greek yogurt, lemon juice, mustard, salt, pepper, and dill or parsley.
  • Add drained tuna, celery, and red onion; gently stir to combine.
  • Serve on its own, in a sandwich, or on toast.

Notes

Use fresh herbs for best flavor and adjust seasoning to taste.
Calories: 250kcal
Cost: $8
Course: Salad
Cuisine: American
Keyword: Healthy, Quick, Tuna