Author

robert

Browsing

Start Your Day Right with This Wholesome Breakfast

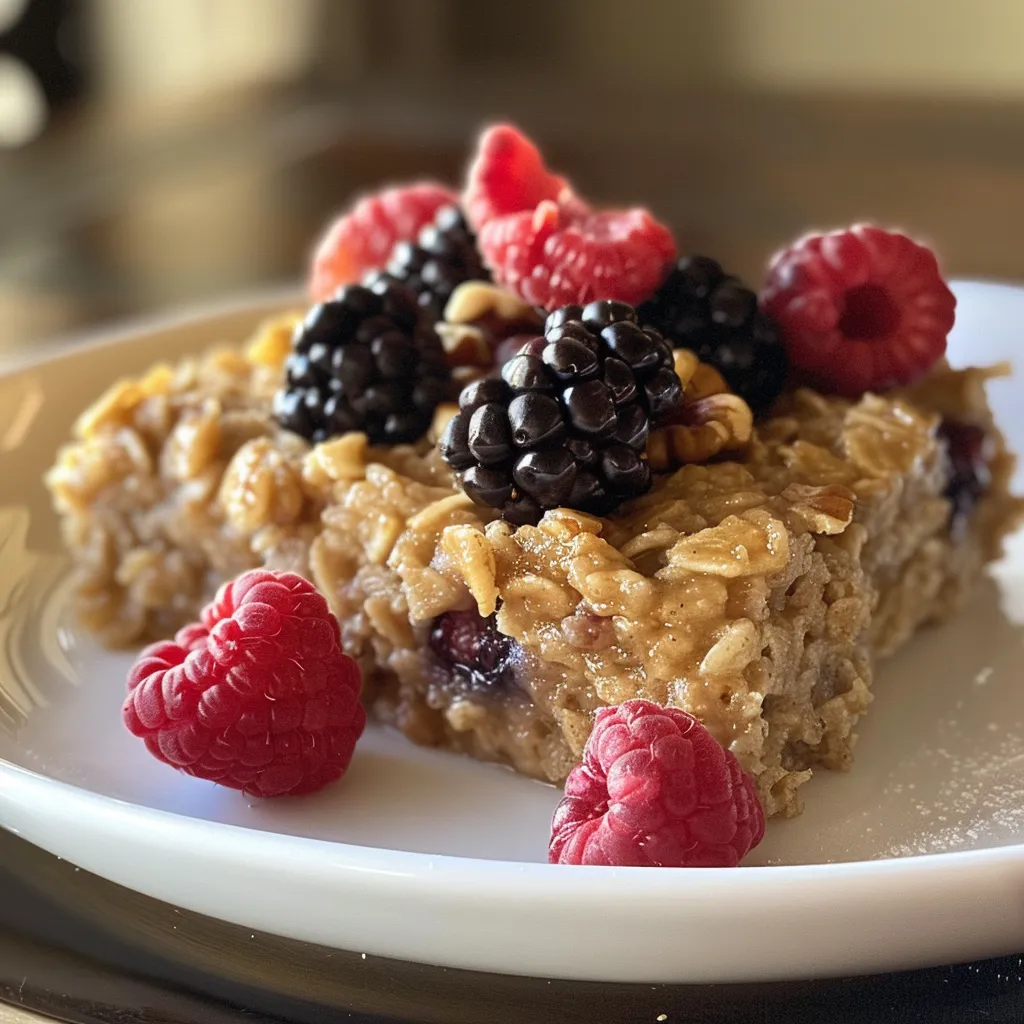
Welcome to a transformative morning experience with our Effortless Berry Oatmeal Bake. This wholesome dish is not just a breakfast; it’s a celebration of flavor and nutrition packed into one delightful bake. Whether you’re rushing out the door or enjoying a leisurely morning, this recipe offers a convenient and delicious way to fuel your day. In under an hour, you can whip up a hearty meal that satisfies your taste buds and keeps you energized. Let’s dive into why this recipe is the perfect addition to your morning routine.

Why You’ll Love This Recipe

  • Quick and Easy Preparation: This oatmeal bake takes just a few minutes to prepare, making it ideal for busy mornings.
  • Nutritious Ingredients: Packed with whole grains and berries, it’s a powerhouse of vitamins and minerals.
  • Versatile Recipe: Customize it with your favorite fruits, nuts, or seeds to match your taste and dietary needs.
  • Meal Prep Friendly: Bake it ahead of time and enjoy it throughout the week for a quick breakfast or snack.
  • Freezes Well: Make a double batch and freeze portions for easy access whenever you need a nutritious meal.

Ingredients Breakdown

Creating your own Berry Oatmeal Bake is simple with these easily accessible ingredients:

  • 2 cups old-fashioned rolled oats: The base of your bake, providing fiber and essential nutrients.
  • 1/2 cup chopped walnuts or pecans (optional): Adds a nice crunch and healthy fats.
  • 1 teaspoon baking powder: Helps the bake rise and achieve a fluffy texture.
  • 1 teaspoon ground cinnamon: Enhances flavor and adds warmth.
  • 1/4 teaspoon salt: Balances sweetness and enhances overall flavor.
  • 2 cups milk: Use any type you prefer, whether dairy or a non-dairy alternative.
  • 1/4 cup pure maple syrup or honey: Sweetens the dish naturally.
  • 2 large eggs: Binds the ingredients together and adds protein.
  • 2 tablespoons melted unsalted butter or coconut oil: Provides moisture and richness.
  • 2 teaspoons pure vanilla extract: Adds depth of flavor.
  • 2 cups mixed fresh or frozen berries: Such as blueberries, raspberries, blackberries, or strawberries; they bring vibrant color and natural sweetness.

Ingredient Substitutions

If you need to make adjustments, consider these substitutions:

  • Oats: Quick oats can be used in a pinch, but they may result in a softer texture.
  • Nuts: Omit them for a nut-free version or substitute with seeds like chia or sunflower seeds.
  • Sweeteners: Agave syrup or coconut sugar are great alternatives to maple syrup or honey.
  • Milk: Almond milk, oat milk, or soy milk work beautifully as dairy alternatives.

Instructions to Create Your Berry Oatmeal Bake

A delicious berry oatmeal bake displaying oats and mixed berries in a cozy kitchen setting.

Follow these simple steps to create your delicious bake:

  1. Preheat your oven to 375°F (190°C). Lightly grease a 9×9-inch baking dish using butter or non-stick spray.
  2. In a large mixing bowl, combine the oats, chopped nuts (if using), baking powder, cinnamon, and salt.
  3. In a separate bowl, thoroughly whisk together the milk, maple syrup or honey, eggs, melted butter or coconut oil, and vanilla extract.
  4. Add the wet ingredients to the dry mixture, stirring gently until evenly incorporated.
  5. Fold the mixed berries into the batter, reserving a small portion for topping.
  6. Transfer the mixture to the prepared baking dish, evenly scatter the reserved berries on top, and bake for 35–40 minutes, until golden and set at the center.
  7. Allow to cool for 5 minutes before serving. Serve warm, optionally topped with extra milk or Greek yogurt.

Pro Tips for the Perfect Bake

  • Don’t Overmix: Gently combine the wet and dry ingredients to avoid a dense texture.
  • Use Fresh Ingredients: Fresh berries provide the best flavor, but frozen berries are convenient and work well too.
  • Let It Cool Slightly: Allow the bake to set before cutting for cleaner slices.
  • Experiment with Spices: Add nutmeg or vanilla bean for an extra flavor boost.
  • Check for Doneness: Use a toothpick to check if the center is set; it should come out clean.
  • Adjust Sweetness: Taste the batter before baking and adjust the sweetener to your preference.
  • Try Different Baking Dishes: You can use a larger dish; just adjust the baking time accordingly.
  • Top It Off: Serve with a splash of milk or a dollop of yogurt for added creaminess.

Common Mistakes and Troubleshooting

To ensure your bake turns out perfectly, avoid these common pitfalls:

  • Overbaking: Keep an eye on the bake as oven temperatures can vary; check a few minutes early.
  • Using Too Much Liquid: Ensure your measurements are accurate; excess liquid can lead to a soggy texture.
  • Not Enough Berries: Don’t be shy with the berries; they add moisture and flavor!
  • Skipping the Rest Period: Letting the bake cool slightly helps it firm up for better serving.

Variations to Try

Mix things up with these delightful variations:

  • Chocolate Chip Berry Oatmeal Bake: Add 1/2 cup of dark chocolate chips for a sweet twist.
  • Banana Nut Oatmeal Bake: Substitute half the berries with sliced bananas and add extra walnuts.
  • Peanut Butter Berry Oatmeal Bake: Stir in 1/4 cup of peanut butter for added richness and protein.
  • Spiced Apple Oatmeal Bake: Replace berries with diced apples and add a teaspoon of apple pie spice.

Storage and Make-Ahead Instructions

For optimal freshness and convenience:

  • Refrigerate: Store leftovers in an airtight container in the fridge for up to 5 days.
  • Freeze: Cut into portions and freeze in freezer-safe bags for up to 3 months.
  • Reheat: Warm individual servings in the microwave or oven until heated through.

Frequently Asked Questions

Here are answers to some common questions about this recipe:

  • Can I use quick oats instead of rolled oats? Yes, but the texture may be softer.
  • Is this recipe gluten-free? Use certified gluten-free oats to make it gluten-free.
  • Can I make it vegan? Substitute the eggs with flax eggs and use a plant-based milk and sweetener.
  • How do I know when it’s done baking? The top should be golden brown and a toothpick inserted in the center should come out clean.
  • Can I add protein powder? Yes, but reduce the amount of oats to maintain the right consistency.
  • What can I serve it with? It pairs well with yogurt, milk, or fresh fruit on top.
  • Is it okay to double the recipe? Absolutely! Just use a larger baking dish and adjust the baking time as needed.
  • Can I skip the nuts? Yes, they can be omitted or replaced with seeds for a nut-free version.

Nutritional Tips and Dietary Adaptations

This recipe can be easily modified to fit various dietary needs:

  • High-Protein Version: Add Greek yogurt on top or mix in protein powder.
  • Low-Sugar Option: Reduce the amount of maple syrup or honey, or use a sugar substitute.
  • For a Fiber Boost: Include chia seeds or flaxseeds in the mix.

Equipment Recommendations

To make your baking experience seamless, consider these essential tools:

  • 9×9-inch Baking Dish: Optimal size for even baking.
  • Mixing Bowls: Use one large bowl for wet ingredients and another for dry.
  • Whisk: For thoroughly combining wet ingredients.
  • Spatula: To fold in the berries gently and transfer the mixture to the baking dish.

Serving Suggestions

For a delightful serving experience:

  • Garnish with Fresh Berries: Top with additional berries for a burst of color and flavor.
  • Drizzle with Honey or Maple Syrup: For added sweetness, drizzle some syrup on top.
  • Pair with Yogurt: A dollop of Greek yogurt adds creaminess and protein.

With this Effortless Berry Oatmeal Bake, your mornings will never be the same. Easy to prepare, delicious, and versatile, it’s a breakfast you can feel good about. Enjoy a slice today and embrace the wholesome goodness!

Berry Oatmeal Bake Breakfast

Prep Time 10 minutes
Cook Time 40 minutes
Total Time 50 minutes
Servings 4 servings
Calories 350
A wholesome and delicious baked oatmeal packed with fresh berries and warm spices, perfect for a nutritious start to your day.

Ingredients

Dry ingredients

  • 2 cups old-fashioned rolled oats
  • 1/2 cup chopped walnuts or pecans (optional) (optional)
  • 1 teaspoon baking powder
  • 1 teaspoon ground cinnamon
  • 1/4 teaspoon salt

Wet ingredients

  • 2 cups milk, dairy or non-dairy alternative
  • 1/4 cup pure maple syrup or honey
  • 2 large eggs
  • 2 tablespoons melted unsalted butter or coconut oil
  • 2 teaspoons pure vanilla extract
  • 2 cups mixed fresh or frozen berries (blueberries, raspberries, blackberries, strawberries), plus extra for topping

Instructions 

  • Preheat oven to 375°F (190°C). Grease a 9x9-inch baking dish.
  • Mix oats, nuts (if using), baking powder, cinnamon, and salt in a bowl.
  • Whisk milk, syrup, eggs, melted butter, and vanilla in a separate bowl.
  • Combine wet and dry ingredients, then fold in berries, reserving some for topping.
  • Pour into dish, top with reserved berries, and bake for 35–40 minutes until golden.
  • Cool for 5 minutes, then serve warm with extra milk or yogurt if desired.

Notes

For added flavor, sprinkle with a little extra cinnamon or drizzle with more maple syrup before serving.
Calories: 350kcal
Cost: $15
Course: Breakfast
Keyword: Berries, Healthy, Oats

Indulge in the Ultimate Chocolate Lava Cake Experience

Chocolate Lava Cake, also known as molten chocolate cake, is a dessert that captivates the senses with its rich, gooey center and decadent flavor. This incredible ultimate recipe is not just a treat; it’s an experience that brings joy to any occasion. Perfect for impressing guests or treating yourself, this dessert is both effortless and elegant, making it a must-try in your kitchen. In this guide, we’ll explore everything you need to know to create the perfect Chocolate Lava Cake, including tips, variations, and troubleshooting advice.

Why You’ll Love This Recipe

  • Quick and Easy: With simple steps and minimal prep time, you can whip this dessert up in under 30 minutes.
  • Decadent Flavor: The combination of semi-sweet chocolate and butter creates a rich, indulgent taste that chocolate lovers crave.
  • Impressive Presentation: Serve it straight from the oven to the plate for a stunning visual and flavor experience.
  • Perfect for Any Occasion: Whether it’s a romantic dinner or a family gathering, this dessert elevates the moment.
  • Customizable: Explore various variations and toppings to make it your own.

Essential Ingredients for Chocolate Lava Cake

To craft the perfect Chocolate Lava Cake, select high-quality ingredients for the best flavor. Here’s what you’ll need:

  • 1 cup semi-sweet chocolate chips: Use high-quality chocolate for the best flavor.
  • ½ cup unsalted butter: This adds richness to the cake.
  • 1 cup powdered sugar: For sweetness and a smooth texture.
  • 2 large eggs & 2 large egg yolks: These provide structure and richness.
  • 1 teaspoon vanilla extract: A must for enhancing flavor.
  • ½ cup all-purpose flour: Just the right amount for a light yet rich cake.
  • Cooking spray or butter: For greasing ramekins to ensure easy removal.

Step-by-Step Guide to Making Chocolate Lava Cake

A delectable chocolate lava cake cut open, revealing its warm, flowing chocolate center.

Follow these steps for an incredible ultimate Chocolate Lava Cake that will impress every time:

  1. Preheat the oven: Set your oven to 425°F (220°C) to create the perfect baking environment.
  2. Prepare the ramekins: Grease four ramekins thoroughly with cooking spray or butter to prevent sticking.
  3. Melt chocolate and butter: In a microwave-safe bowl, combine semi-sweet chocolate chips and unsalted butter. Heat in 30-second intervals, stirring after each, until smooth.
  4. Add powdered sugar: Stir the powdered sugar into the melted mixture until smooth and well combined.
  5. Mix eggs: In a separate bowl, whisk together the eggs, egg yolks, and vanilla. Gradually add to the chocolate mixture, stirring continuously.
  6. Fold in flour: Gently fold in the all-purpose flour until just combined. Avoid overmixing for the perfect lava texture.
  7. Fill ramekins: Evenly distribute the batter into the prepared ramekins, filling each about ¾ full.
  8. Bake: Place the ramekins on a baking tray and bake for 12-15 minutes until the edges are firm and the centers jiggle slightly.
  9. Cool: Let the cakes cool for about 5 minutes before serving.
  10. Serve: Carefully invert the cakes onto plates and serve immediately to enjoy the warm molten center.

Pro Tips for Perfect Chocolate Lava Cake

  • Use quality chocolate: The type of chocolate you choose can make or break the flavor.
  • Don’t over-bake: The key to the lava center is ensuring that the cakes are slightly underbaked.
  • Room temperature ingredients: Ensure your eggs and butter are at room temperature for optimal mixing.
  • Experiment with flavors: Add a pinch of espresso powder or orange zest for a unique twist.
  • Stay prepared: Have all your ingredients measured and ready before you start to streamline the process.
  • Gently fold: When adding flour, fold gently to maintain airiness in the batter.
  • Check doneness visually: The edges should look set while the center should look slightly moist.
  • Use ramekins that are the same size: This ensures even baking.
  • Cool slightly before serving: This helps the cakes set up a bit more for easier removal.

Common Mistakes and Troubleshooting

Even the best recipes can go awry. Here’s how to troubleshoot common issues:

  • Overbaked cakes: If your cakes are dry, reduce the baking time next time.
  • Sticking to ramekins: Ensure they are greased well to avoid sticking.
  • Not enough lava: This usually happens if the cakes are baked too long. Aim for a slightly jiggly center.
  • Chocolate not melting properly: Heat your chocolate in smaller increments and stir well.

Delicious Variations of Chocolate Lava Cake

Personalizing your Chocolate Lava Cake can make it even more delightful. Here are some variations to consider:

  • Nutty Lava Cake: Add chopped nuts like hazelnuts or pecans for extra crunch.
  • Fruit-Infused Lava Cake: Incorporate raspberry or cherry puree into the batter for a fruity twist.
  • Spicy Lava Cake: Add a pinch of cayenne pepper or chili powder for a surprising kick.
  • White Chocolate Lava Cakes: Substitute semi-sweet chocolate with white chocolate for a different flavor profile.

Storage and Make-Ahead Instructions

Want to make this treat ahead of time? Here’s how to store and prepare it in advance:

  • Make-Ahead: Prepare the batter and store it in the fridge for up to 24 hours before baking.
  • Storage: If baked, store leftovers in an airtight container in the fridge for up to 2 days.
  • Reheating: To reheat, microwave for 10-15 seconds to restore its gooey center.

Nutrition Tips and Dietary Adaptations

While Chocolate Lava Cake is a treat, you can make it a bit healthier:

  • Lower Sugar: Reduce the amount of powdered sugar or use a sugar substitute.
  • Gluten-Free Option: Substitute all-purpose flour with almond flour or a gluten-free baking blend.
  • Dairy-Free Option: Use dairy-free chocolate and coconut oil instead of butter.

Equipment Recommendations

Having the right tools can make the process smoother:

  • Ramekins: Choose 6 oz ramekins for the perfect portion size.
  • Microwave-Safe Bowl: For melting chocolate easily.
  • Baking Tray: Use a sturdy tray to hold ramekins while baking.

Serving Suggestions for Your Chocolate Lava Cake

Presentation is key! Here are some serving ideas:

  • With Ice Cream: A scoop of vanilla ice cream complements the warm chocolate beautifully.
  • Garnished with Berries: Fresh raspberries or strawberries add a touch of color and tartness.
  • Drizzled with Sauce: A drizzle of caramel or raspberry sauce enhances flavor and aesthetics.

Frequently Asked Questions (FAQ)

  • Can I use a different type of chocolate? Absolutely! You can experiment with dark or white chocolate.
  • How do I know when the cakes are done? The edges should be firm while the center is still jiggly.
  • Can I make this recipe without ramekins? Yes, you can use muffin tins, but adjust the baking time accordingly.
  • What should I do if my cake doesn’t have a molten center? It may have been overbaked; keep an eye on the time next time.
  • How can I store leftovers? Store in an airtight container in the fridge for up to 2 days.
  • Can I freeze the batter? Yes, you can freeze the batter before baking.
  • What’s the best way to reheat? Microwave for 10-15 seconds to restore its gooey texture.
  • Can I substitute eggs? For vegan options, use flax eggs or commercial egg replacers.

In conclusion, creating an incredible ultimate Chocolate Lava Cake is not only achievable but also a rewarding experience. With this comprehensive guide, you’ll have all the tools, tips, and tricks to make a dessert that will wow your friends and family. Enjoy the journey of mastering this classic dessert and share your delicious results!

Chocolate Lava Cake: An Incredible Ultimate Recipe

Prep Time 10 minutes
Cook Time 15 minutes
Total Time 25 minutes
Servings 4 pieces
Calories 420
Indulge in this rich and gooey chocolate lava cake with a molten center, perfect for special occasions or a decadent treat.

Ingredients

Main Ingredients

  • 1 cup semi-sweet chocolate chips
  • ½ cup unsalted butter
  • 1 cup powdered sugar
  • 2 large eggs
  • 2 large egg yolks
  • 1 teaspoon vanilla extract
  • ½ cup all-purpose flour
  • Cooking spray or butter for greasing ramekins

Instructions 

  • Preheat oven to 425°F (220°C). Grease ramekins thoroughly.
  • Microwave chocolate and butter in 30-second intervals until smooth.
  • Mix in powdered sugar, then add eggs, yolks, and vanilla, stirring well.
  • Fold in flour until just combined, then fill ramekins ¾ full.
  • Bake for 12-15 minutes, then cool for 5 minutes before serving.

Notes

Ensure not to overbake for the perfect molten center.
Calories: 420kcal
Cost: $15
Course: Dessert
Cuisine: American
Keyword: chocolate

Unveiling the Magic of Red Velvet Cake

Welcome to the ultimate guide on crafting the perfect red velvet cake. This classic dessert not only boasts a stunning appearance but also offers a delightful blend of flavors that make it a favorite for celebrations and everyday indulgences alike. In this comprehensive article, we will take you through every step of the process, from selecting ingredients to mastering the baking technique. With our easy-to-follow instructions, you’ll create a show-stopping cake that will impress friends and family, all while enjoying the journey of baking.

Why You’ll Love This Recipe

  • Effortless Baking: This recipe simplifies the process, ensuring you can achieve a moist and flavorful cake without the usual complexities involved in baking.
  • Rich Flavor Profile: The combination of cocoa powder and buttermilk creates a unique flavor that is both rich and tangy, setting this cake apart from typical chocolate cakes.
  • Stunning Presentation: The vibrant red color makes this cake a visual feast, perfect for special occasions like birthdays, anniversaries, or holiday gatherings.
  • Versatile Frosting Options: Pair this cake with a classic cream cheese frosting or explore other delicious frostings that complement the red velvet flavor beautifully.
  • Make-Ahead Friendly: This cake can be prepared in advance and stored, making it ideal for busy schedules or event planning.

Understanding the Key Ingredients

Before diving into the recipe, let’s break down the essential ingredients that contribute to the magic of red velvet cake. Each plays a vital role in achieving the perfect texture and flavor.

  • Cocoa Powder: It provides a subtle chocolate flavor and rich color. Opt for high-quality, unsweetened cocoa powder for the best results.
  • Buttermilk: This ingredient adds moisture and a slight tanginess, crucial for the cake’s unique flavor profile. If you don’t have buttermilk, you can easily make a substitute by mixing milk with a splash of vinegar.
  • Vanilla Extract: A must-have for enhancing the overall flavor, elevating the cake beyond just the chocolate notes.
  • Sugar: It not only sweetens but also contributes to the cake’s moist texture.
  • Butter: Using unsalted butter allows better control over the cake’s saltiness and adds richness. Ensure it’s at room temperature for easier mixing.
  • Eggs: They act as a binder and leavening agent, helping the cake rise and maintain its structure.
  • Flour: All-purpose flour is typically used, but cake flour can also be substituted for a lighter texture.
  • Salt: A necessary component to balance sweetness and enhance flavors.
  • Red Food Coloring: This iconic ingredient is what gives red velvet cake its signature hue. Use gel food coloring for a more vibrant color without altering the cake’s consistency.
  • Cream Cheese: The star of the frosting, offering a creamy, tangy contrast to the cake’s sweetness.
  • Powdered Sugar: Essential for achieving a smooth and sweet frosting.

Step-by-Step Instructions for the Perfect Red Velvet Cake

Juicy piece of red velvet cake showcasing its rich color and creamy texture.

Now that we’ve covered the ingredients, let’s dive into the step-by-step process of making your red velvet cake.

  • Preheat Your Oven: Start by preheating your oven to 350°F (175°C). This ensures even baking.
  • Prepare Your Pans: Grease your cake pans with unsalted butter or cooking spray, then line the bottoms with parchment paper for easy removal.
  • Dust with Flour: Lightly dust the sides of the pans with flour and shake off any excess to prevent sticking.
  • Mix Sugar and Butter: In a large mixing bowl, beat together sugar and butter until fluffy, about 3-4 minutes.
  • Add Eggs: Incorporate the eggs one at a time, mixing well after each addition to ensure they are fully combined.
  • Combine Dry Ingredients: In a separate bowl, whisk together your dry ingredients: flour, cocoa powder, and salt.
  • Mix Wet Ingredients: In another bowl, combine buttermilk, vanilla extract, and red food coloring, stirring until well blended.
  • Combine Mixtures: Gradually add the dry ingredients to the sugar mixture, alternating with the wet ingredients. Start and end with the dry ingredients, mixing until just combined to avoid overmixing.
  • Prepare to Bake: Pour the batter evenly into the prepared pans and smooth the tops for even baking.
  • Bake the Cake: Bake in the preheated oven for about 25-30 minutes, or until a toothpick inserted into the center comes out clean.
  • Cool the Cakes: Allow the cakes to cool in the pans for 10 minutes, then turn them out onto wire racks to cool completely.

Frosting Your Cake: Cream Cheese Delight

While your cakes are cooling, let’s prepare the cream cheese frosting that will perfectly complement your red velvet layers.

  • Beat the Cream Cheese and Butter: In a medium bowl, combine cream cheese and unsalted butter, beating until smooth and creamy.
  • Gradually Add Powdered Sugar: Slowly add powdered sugar while mixing on low speed, increasing to medium once incorporated to avoid a sugar cloud.
  • Add Vanilla: Mix in vanilla extract for an extra layer of flavor.
  • Frost the Cake: Once the cakes are completely cooled, place one layer on a serving plate, spread a generous amount of frosting on top, and layer the second cake. Frost the top and sides of the cake, smoothing it out with a spatula.
  • Chill Before Serving: For the best results, chill the frosted cake in the refrigerator for at least 30 minutes before serving. This helps the frosting set and makes cutting easier.

Pro Tips for Baking Success

To ensure your red velvet cake turns out perfectly, consider these expert tips:

  • Room Temperature Ingredients: Ensure your butter, eggs, and cream cheese are at room temperature for a smoother batter and frosting.
  • Don’t Overmix: Mix your batter just until combined to prevent a dense cake.
  • Check for Doneness: Perform the toothpick test in the center of the cake to check for doneness; it should come out clean or with a few moist crumbs.
  • Flavor Variations: Experiment with different extracts like almond or lemon to add unique flavors to your frosting.
  • Layering Technique: For a more decorative finish, use a cake scraper to create a smooth frosting layer.
  • Decorative Toppings: Consider adding sprinkles, crushed nuts, or edible flowers on top for an extra touch.
  • Store Properly: Keep your cake in an airtight container in the refrigerator to maintain freshness.
  • Use Quality Ingredients: High-quality cocoa powder and food coloring can significantly impact the taste and appearance of your cake.
  • Test Your Oven: Ensure your oven temperature is accurate, as discrepancies can lead to uneven baking.
  • Review Common Mistakes: Familiarize yourself with typical pitfalls, like underbaking or using cold ingredients, to avoid them on baking day.

Common Mistakes and Troubleshooting

Even experienced bakers can encounter issues when making a red velvet cake. Here’s how to troubleshoot some common problems:

  • Dry Cake: If your cake turns out dry, it could be due to overbaking. Ensure you check for doneness a few minutes before the recommended baking time.
  • Dense Texture: Overmixing the batter can lead to a dense cake. Mix just until combined.
  • Uneven Layers: If your layers are uneven, ensure your oven is level and that you’re using the same amount of batter for each pan.
  • Frosting Issues: If your cream cheese frosting is too runny, add more powdered sugar until you achieve the desired consistency.
  • Color Variations: If your cake isn’t as red as you’d like, make sure you’re using gel food coloring and not liquid, as it can dilute the batter.

Delicious Variations to Try

While the classic red velvet cake is a delight on its own, here are some variations to keep things exciting:

  • Red Velvet Cupcakes: Transform your cake batter into cupcakes for individual servings. Adjust the baking time to 18-20 minutes.
  • Red Velvet Layer Cake: Stack multiple layers with cream cheese frosting and fresh fruit for a stunning centerpiece.
  • Chocolate Chip Red Velvet Cake: Fold in mini chocolate chips into the batter for added texture and sweetness.
  • Red Velvet Trifle: Layer cake pieces with cream cheese frosting and berries in a glass for a beautiful presentation.

Storage and Make-Ahead Instructions

Your red velvet cake can be made ahead of time and stored properly for later enjoyment. Here’s how:

  • Room Temperature: The frosted cake can be stored at room temperature for up to two days, covered loosely with foil.
  • Refrigeration: Store in the refrigerator for up to a week. Make sure it’s in an airtight container to prevent drying out.
  • Freezing: You can freeze the unfrosted layers for up to three months. Wrap each layer tightly in plastic wrap, then foil. Thaw completely before frosting.

Frequently Asked Questions (FAQs)

To further assist you in your baking journey, here are some common questions answered:

  • Can I use regular milk instead of buttermilk? Yes, but you should add 1 tablespoon of vinegar or lemon juice to one cup of milk and let it sit for 5-10 minutes to sour.
  • What if I don’t have red food coloring? You can use beet juice as a natural alternative, but it may alter the flavor slightly.
  • How can I make my cake more chocolatey? Increase the cocoa powder by an additional tablespoon for a richer chocolate flavor.
  • Can I make this cake gluten-free? Yes, substitute all-purpose flour with a gluten-free blend designed for baking.
  • How do I know when my cake is done? Use a toothpick inserted in the center; it should come out clean or with a few moist crumbs.
  • Can I use oil instead of butter? Yes, but it may change the texture slightly. Use a neutral oil for best results.
  • How long can I store leftover cake? Leftover cake can be stored in the fridge for up to a week, or frozen for three months.
  • What is the best way to frost a cake? Start with a crumb coat to seal in crumbs, then apply a thicker layer of frosting for a smooth finish.

Nutritional Tips and Dietary Adaptations

If you’re looking to make dietary adjustments, here are some tips:

  • Lower Sugar Options: Substitute granulated sugar with coconut sugar or a sugar alternative to reduce calories.
  • Vegan Version: Replace eggs with flax eggs and use a plant-based butter and cream cheese substitute.
  • Dairy-Free Option: Use almond milk or coconut milk in place of buttermilk and dairy-based frosting.
  • Healthier Frosting: Consider using Greek yogurt mixed with cream cheese for a lighter frosting alternative.

Essential Equipment for Success

Having the right tools can make your baking experience smoother:

  • Mixing Bowls: A set of mixing bowls in various sizes will help you manage your ingredients easily.
  • Electric Mixer: A stand or hand mixer will speed up the process of creaming butter and sugar.
  • Cake Pans: Use 9-inch round cake pans for even layers; consider using non-stick pans for easy release.
  • Spatula: A good offset spatula is essential for spreading frosting evenly.
  • Wire Rack: A cooling rack is vital for ensuring your cakes cool evenly and don’t become soggy.

Serving Suggestions

When it comes to serving your red velvet cake, consider these ideas to elevate the experience:

  • Accompany with Fresh Berries: Fresh strawberries or raspberries add a burst of flavor and color.
  • Pair with Ice Cream: A scoop of vanilla or cream cheese ice cream complements the cake beautifully.
  • Garnish with Nuts: Chopped pecans or walnuts can add a delightful crunch and contrast to the soft cake.

Conclusion: Your Perfect Red Velvet Cake Awaits

Now that you have all the tools and knowledge to create a stunning red velvet cake, it’s time to roll up your sleeves and get baking. Remember, practice makes perfect, and with each attempt, you’ll refine your technique and flavor. Enjoy the process, share your creations, and most importantly, savor every delicious bite. Happy baking!

Easy Homemade Red Velvet Cake

Prep Time 20 minutes
Cook Time 30 minutes
Total Time 50 minutes
Servings 8 pieces
Calories 450
A delicious and moist red velvet cake made from scratch, perfect for celebrations and special occasions.

Ingredients

Dry Ingredients

  • 0.75 cup Cocoa Powder
  • 2.5 cups Flour
  • 1.5 teaspoons Salt

Wet Ingredients

  • 1.75 cups Buttermilk
  • 1.5 teaspoons Vanilla Extract
  • 2 tablespoons Red Food Coloring

Cake Batter

  • 1 cup Sugar
  • 0.5 cup Butter
  • 2 eggs Eggs
  • 1.5 cups FLOUR

Cream Cheese Frosting

  • 8 oz Cream Cheese
  • 0.5 cup Unsalted Butter
  • 2 cups Powdered Sugar

Instructions 

  • Preheat oven to 350°F (175°C). Grease pans and dust with flour.
  • Mix sugar and butter until fluffy, then add eggs one at a time.
  • Combine dry ingredients and wet ingredients separately, then alternate adding to the batter.
  • Pour batter into pans and bake for 30 minutes. Cool before frosting.
  • Mix cream cheese and butter, then add powdered sugar and vanilla. Frost the cake.

Notes

Chill the frosted cake for 30 minutes before serving for best results.
Calories: 450kcal
Cost: $15
Course: Dessert
Cuisine: American
Keyword: red velvet

Unlock the Power of Breakfast with This Wholesome Recipe

Start your day right with a bowl of Mixed Berry Baked Oatmeal, a delightful breakfast that combines nutrition, flavor, and convenience. If you’re looking for an easy way to enjoy a healthy morning meal, this recipe is your answer. With a blend of rolled oats, fresh berries, and wholesome ingredients, this baked oatmeal is not just a dish; it’s a morning boost packed with energy and essential nutrients.

In this article, we will explore the benefits of this recipe, provide detailed ingredient insights, pro tips for perfecting your bake, and much more. Whether you’re a busy parent, a student, or just someone who wants to enjoy a delicious breakfast without the fuss, you’ll find valuable information here.

Why You’ll Love This Recipe

  • Nutritious Start: Packed with fiber, vitamins, and healthy fats, this baked oatmeal fuels your body for the day ahead.
  • Quick and Easy: With minimal prep time, you can assemble this dish in under 15 minutes before popping it in the oven.
  • Versatile Ingredients: Feel free to swap out berries or add other fruits and nuts based on your preference.
  • Make-Ahead Friendly: Prepare it the night before and enjoy a hot breakfast ready to go!
  • Family-Friendly: Kids and adults alike will love the sweet and satisfying taste of this baked oatmeal.

Ingredient Breakdown

This recipe calls for a variety of wholesome ingredients that can easily be customized. Here’s a closer look at what you need:

  • Rolled Oats (2 cups): The foundation of the recipe, providing fiber and energy. You can substitute with quick oats if needed.
  • Baking Powder (1 tsp): Ensures a light and fluffy texture. Baking soda can be used as an alternative.
  • Ground Cinnamon (1 tsp): Adds warmth and flavor; feel free to adjust based on your taste.
  • Ground Ginger (½ tsp): A hint of spice that complements the sweetness of the berries.
  • Large Eggs (2): Acts as a binding agent. For a vegan option, substitute with flax eggs.
  • Maple Syrup (¼ cup): Natural sweetness; you can replace it with honey or agave syrup.
  • Almond Butter (¼ cup): Adds healthy fats and creaminess. Peanut butter is a great alternative.
  • Vanilla Extract (1 tbsp): Enhances flavor; use pure vanilla for the best results.
  • Avocado Oil or Melted Butter (2 tbsp): A healthy fat source; melted coconut oil can also work.
  • Sea Salt (¼ tsp): Balances flavors; don’t skip this step!
  • Milk (2 cups): Use almond milk or any milk of your choice for moisture.
  • Mixed Berries (3 cups total): Fresh or frozen blueberries, raspberries, and strawberries bring vibrant flavor and color.
  • Turbinado Sugar (3 tbsp, optional): Sprinkle on top for a crunchy finish. You can omit this for a healthier option.

Step-by-Step Instructions

A zoomed-in perspective of berry oatmeal, featuring an array of fresh fruits and a golden crust.

Follow these easy steps to create your delicious Mixed Berry Baked Oatmeal:

  1. Preheat your oven to 375°F (190°C) and prepare a 12×8 inch baking dish by greasing it lightly.
  2. In a small bowl, stir together the rolled oats, baking powder, ground cinnamon, and ground ginger. Set aside.
  3. In a large bowl, whisk together eggs, maple syrup, almond butter, vanilla extract, avocado oil, and sea salt until smooth. Then, add the milk and mix again.
  4. Gently fold in the oats, blueberries, raspberries, and strawberries until well combined.
  5. Pour the mixture into your prepared baking dish, smoothing it out evenly.
  6. Top with more blueberries and raspberries and sprinkle with turbinado sugar if desired.
  7. Bake in the oven for 45-50 minutes until golden brown on top. A toothpick inserted in the center should come out clean.
  8. Serve warm with optional toppings like chocolate sauce, more berries, yogurt, or almond butter.

Pro Tips for Perfect Baked Oatmeal

  • Don’t Overmix: Mixing too much can lead to a dense texture. Stir just until combined.
  • Layering Berries: For a beautiful presentation, layer some berries on top before baking.
  • Check for Doneness: Ovens can vary; keep an eye on your bake to avoid overcooking.
  • Cool Before Serving: Allow to cool for a few minutes before slicing; this helps it set.
  • Adjust Sweetness: Taste the mixture before baking; you can always add a bit more sweetness if needed.
  • Experiment with Spices: Add nutmeg or cardamom for a flavor twist!
  • Use Seasonal Fruits: Change the berries based on what’s in season for the freshest taste.
  • Store Leftovers Properly: Keep any leftovers in an airtight container in the fridge for up to 5 days.

Common Mistakes and Troubleshooting

Even the best recipes can go awry. Here are some common issues and how to fix them:

  • Dense Texture: This can happen if the batter is overmixed. Aim for gentle folding.
  • Not Setting Properly: If undercooked, bake a bit longer. If it’s too dry, reduce baking time next time.
  • Too Sweet: If you find it overly sweet, reduce the maple syrup in future batches.

Delicious Variations

Make this recipe your own with these creative variations:

  • Chocolate Chip Delight: Add ½ cup of dark chocolate chips for a sweet twist.
  • Nutty Banana: Replace the berries with sliced bananas and add walnuts for crunch.
  • Peach Paradise: Swap mixed berries for diced peaches and a sprinkle of cinnamon.
  • Apple Cinnamon: Use diced apples and increase the cinnamon for a cozy flavor.

Storage and Make-Ahead Instructions

This Mixed Berry Baked Oatmeal is perfect for meal prep:

  • Refrigeration: Store any leftovers in an airtight container in the fridge for up to 5 days.
  • Freezing: Portion and freeze for up to 3 months. Reheat in the oven or microwave.
  • Make-Ahead: Prepare the mixture the night before, cover, and bake in the morning for a hot breakfast.

Frequently Asked Questions

  • Can I use quick oats instead of rolled oats? Yes, but the texture may differ slightly.
  • What can I substitute for almond milk? Any milk, including cow’s milk, soy milk, or oat milk, works well.
  • Is this recipe vegan-friendly? Yes, simply replace eggs with flax eggs and use maple syrup and non-dairy milk.
  • How do I know when the oatmeal is done baking? It should be golden brown on top and a toothpick should come out clean.
  • Can I add protein powder? Absolutely! Just be mindful of the consistency and adjust liquid accordingly.
  • What are some good toppings? Fresh fruits, yogurt, nut butter, or a drizzle of honey work great!
  • How long will it last in the fridge? It can be stored for up to 5 days in an airtight container.
  • Can I make this gluten-free? Yes, use certified gluten-free oats.

Nutrition Tips and Dietary Adaptations

This recipe is not only delicious but also nutritious. Here are some tips to enhance its health benefits:

  • Fiber Boost: Add chia seeds or flaxseeds for an extra fiber and omega-3 boost.
  • Protein Power: Incorporate Greek yogurt or cottage cheese for added protein.
  • Low Sugar Option: Reduce or omit added sugars for a healthier breakfast option.

Essential Equipment Recommendations

For best results, consider these kitchen tools:

  • Baking Dish: A 12×8 inch baking dish is ideal for even cooking.
  • Mixing Bowls: Use both small and large bowls for mixing ingredients easily.
  • Whisk: A good whisk helps to incorporate ingredients smoothly.
  • Measuring Cups and Spoons: Accurate measurements are key to successful baking.

Serving Suggestions

Enhance your experience with these serving ideas:

  • Top with Fresh Berries: Add a handful of fresh berries for a burst of flavor.
  • Drizzle with Chocolate Sauce: A sweet touch that pairs perfectly with the oatmeal.
  • Accompany with Yogurt: A dollop of yogurt can add creaminess and protein.
  • Enjoy with Coffee or Tea: Pair your oatmeal with a warm beverage for a cozy breakfast.

Conclusion

This Mixed Berry Baked Oatmeal is more than just a breakfast; it’s a versatile dish that can adapt to your tastes and dietary needs. With its rich flavors and health benefits, it’s sure to become a family favorite. Whether you’re preparing for a busy day or enjoying a leisurely weekend brunch, this recipe delivers satisfaction and nutrition. Embrace the joy of cooking with this simple yet delightful dish, and remember, great meals are within your reach—effortlessly!

Mixed Berry Baked Oatmeal

Prep Time 10 minutes
Cook Time 50 minutes
Total Time 1 hour
Servings 4 servings
Calories 350
A delicious and wholesome baked oatmeal packed with fresh berries and warm spices, perfect for a nutritious breakfast or brunch.

Ingredients

Dry ingredients

  • 2 cups rolled oats
  • 1 tsp baking powder
  • 1 tsp ground cinnamon
  • ½ tsp ground ginger

Wet ingredients

  • 2 large eggs
  • ¼ cup maple syrup
  • ¼ cup almond butter
  • 1 tbsp vanilla extract
  • 2 tbsp avocado oil or melted butter
  • ¼ tsp sea salt

Liquid ingredients

  • 2 cups milk (almond milk)

Fruits

  • 1 cup blueberries (fresh or frozen) (plus more for garnish)
  • 1 cup raspberries (fresh or frozen) (plus more for garnish)
  • 1 cup chopped strawberries (fresh or frozen)
  • 3 tbsp turbinado sugar (optional)

For serving

  • chocolate sauce, fresh berries, yogurt, almond butter, or other toppings

Instructions 

  • Preheat oven to 375F (190C) and prepare a 12x8 inch baking dish.
  • Mix oats, baking powder, cinnamon, and ginger. Whisk eggs, maple syrup, almond butter, vanilla, oil, and salt; add milk and combine.
  • Stir in berries and chopped strawberries. Pour into baking dish.
  • Sprinkle with extra berries and turbinado sugar if desired. Bake for 45-50 minutes until golden.
  • Serve with chocolate sauce, additional berries, yogurt, or toppings of choice.

Notes

This baked oatmeal is versatile and can be customized with your favorite toppings or additional fruits.
Calories: 350kcal
Cost: $15
Course: Breakfast
Cuisine: American
Keyword: Oats

Discover the Joy of Baking: Your Ultimate Guide to Chocolate Cake with Strawberry Surprise

If you’re looking to elevate your baking skills and impress your loved ones with a delightful dessert, this Chocolate Cake with Strawberry Filling is the perfect choice. Combining rich chocolate flavor with fresh strawberries, this cake is not only delicious but also easy to make, even for the busiest home cook. In this guide, we’ll walk you through the recipe step-by-step, ensuring that you achieve the best results every time.

Why You’ll Love This Recipe

  • Effortless Preparation: With straightforward steps and common ingredients, you can whip up this cake without any fuss.
  • Perfect for Any Occasion: Whether it’s a birthday, anniversary, or a simple family dinner, this cake fits all celebrations.
  • Rich Flavor Profile: The combination of dark chocolate and fresh strawberries creates a harmonious balance of flavors.
  • Visual Appeal: The beautiful layers and vibrant colors make this cake a showstopper on any dessert table.
  • Customizable: Easily adjust the recipe to cater to dietary preferences or to incorporate different flavors.

Ingredients Breakdown

To make this delicious chocolate cake, gather the following ingredients:

  • 2 large eggs (at room temperature): Essential for binding the cake together.
  • 1 cup sugar: Adds sweetness and moisture.
  • â…“ cup oil (vegetable or sunflower): Contributes to the cake’s moist texture.
  • ½ cup yogurt: Enhances moisture and adds a slight tang.
  • 2 tablespoons milk: Helps achieve the right batter consistency.
  • 1 teaspoon vanilla extract: Infuses aroma and flavor.
  • 1â…• cup all-purpose flour: The backbone of our cake structure.
  • ½ cup unsweetened cocoa powder: Provides rich chocolate flavor.
  • 1 teaspoon baking powder: Acts as a leavening agent.
  • ½ teaspoon baking soda: Works in tandem with the baking powder for a light cake.
  • 1 pinch salt: Enhances flavor.
  • 160 ml heavy cream: Key for making the chocolate ganache.
  • 160 g chocolate chips: The heart of the ganache, providing richness.
  • 1½ cups strawberries: Fresh and vibrant, they add the fruity surprise.
  • 2 sprigs fresh mint: For garnish and added freshness.

Step-by-Step Instructions

A detailed close-up image of chocolate cake revealing its strawberry center, taken with an iPhone.

Follow these detailed steps to create your Chocolate Cake with Strawberry Filling:

  1. Lightly oil two 6” round springform cake pans, line their bottoms with parchment paper, and set aside.
  2. Preheat your oven to 350°F (180°C).
  3. In a mixing bowl, beat the eggs and sugar using an electric mixer or a hand whisk until creamy.
  4. Add the oil, yogurt, milk, and vanilla extract. Mix well until combined.
  5. In another bowl, whisk together the flour, cocoa powder, baking powder, baking soda, and salt.
  6. Gradually pour the dry mixture into the wet mixture in two or three batches. Stir gently with a hand whisk until just combined. Avoid over-mixing.
  7. Divide the batter evenly between the two prepared pans and bake for 25-30 minutes, or until a toothpick inserted into the center comes out clean.
  8. Once baked, remove the cakes from the oven and let them cool in the pans for about 10 minutes. Then, carefully remove them from the pans and allow them to cool completely on a wire rack.
  9. While the cakes cool, prepare the chocolate ganache: Place the chocolate chips in a bowl. Heat the heavy cream until it just boils, then pour it over the chocolate chips. Let it sit for 2 minutes, then stir until smooth. Allow it to cool to room temperature.
  10. Once the cakes are cool, spread about ¼ of your chocolate ganache on top of the first cake layer. Wait for about 10 minutes to let the ganache set slightly.
  11. Thinly slice ½ cup of strawberries lengthwise and arrange them on the ganache-covered first layer.
  12. Carefully place the second cake layer on top of the strawberries, pressing gently to help it set.
  13. Pour the remaining ganache over the top layer. Allow it to sit for about 10 minutes, then arrange the remaining strawberries on top.
  14. Finish by garnishing with a sprig of fresh mint for an elegant touch.

Pro Tips for Success

  • Room Temperature Ingredients: Ensure your eggs and yogurt are at room temperature for a smoother batter.
  • Don’t Overmix: Overmixing can lead to a dense cake. Mix until just combined.
  • Cool Completely: Let the cakes cool completely before frosting to prevent melting the ganache.
  • Use Quality Chocolate: For the ganache, choose high-quality chocolate chips for a richer taste.
  • Variations: Consider adding orange zest to the batter for an additional flavor layer.
  • Fresh Strawberries: Use ripe, fresh strawberries for the best flavor and presentation.
  • Chocolate Buttercream: For a sweeter option, add a layer of chocolate buttercream between the cake and strawberries.
  • Chill Your Ganache: If the ganache is too runny, chill it briefly to achieve the desired consistency.

Common Mistakes and Troubleshooting

Here are solutions to common baking issues you may encounter:

  • Dense Cake: This can happen from overmixing. Always mix just until combined.
  • Dry Cake: Make sure to measure your flour accurately. Too much can lead to dryness.
  • Melting Ganache: Ensure the cakes are completely cooled before assembly.
  • Sticking Cakes: Properly grease and line your pans to avoid sticking.

Storage and Make-Ahead Instructions

You can prepare this cake ahead of time for convenience:

  • Make Ahead: Bake the cakes a day in advance. Wrap them tightly in plastic wrap and refrigerate.
  • Storage: Store leftover cake in an airtight container in the refrigerator for up to 3 days.
  • Freezing: You can freeze the layers for up to 2 months. Wrap each layer individually in plastic wrap and foil.

Frequently Asked Questions (FAQ)

  • Can I use frozen strawberries? Yes, but make sure to thaw and drain them well to avoid excess moisture.
  • What can I substitute for yogurt? Sour cream or buttermilk can work as alternatives.
  • How can I make this cake gluten-free? Substitute all-purpose flour with a gluten-free blend.
  • Can I add nuts to this recipe? Absolutely! Chopped walnuts or pecans can add a delightful crunch.
  • What kind of chocolate is best for the ganache? Use high-quality dark chocolate for the best flavor.
  • How do I know when the cake is done baking? Insert a toothpick in the center; it should come out clean or with a few moist crumbs.
  • Can I decorate the cake differently? Yes! Feel free to add fresh whipped cream or additional fruits for decoration.
  • Is this cake suitable for kids? Yes, it’s a great cake for children, and they will love the fruity surprise!

Nutritional Tips and Dietary Adaptations

To adapt this recipe for different dietary needs:

  • Lower Sugar Option: Substitute sugar with a sugar alternative like stevia or erythritol.
  • Dairy-Free Version: Use almond or coconut yogurt and a dairy-free chocolate for the ganache.
  • Vegan Option: Replace eggs with flax eggs and use plant-based yogurt.

Equipment Recommendations

To ensure a smooth baking process, consider using the following tools:

  • Electric Mixer: For easily mixing the batter to a creamy consistency.
  • Springform Cake Pans: These make for easy removal of the cake layers.
  • Wire Rack: Essential for cooling the cakes evenly.
  • Baking Parchment: Prevents sticking and ensures easy removal from the pans.

Serving Suggestions

When it’s time to serve, consider these ideas:

  • Pair with Ice Cream: Vanilla or strawberry ice cream complements the flavors beautifully.
  • Serve with Whipped Cream: A dollop of whipped cream adds a light and airy contrast to the rich cake.
  • Fresh Fruit Salad: A side of mixed berries enhances the dessert’s freshness.
  • Garnish with Mint: Fresh mint not only looks beautiful but adds a refreshing flavor.

Now that you have the ultimate guide to creating a delicious Chocolate Cake with Strawberry Surprise, gather your ingredients and start baking. With this easy-to-follow recipe and helpful tips, you’ll be well on your way to creating a dessert that’s sure to impress!

Chocolate Cake With Strawberry Filling

Prep Time 30 minutes
Cook Time 30 minutes
Total Time 1 hour
Servings 8 pieces
Calories 450
A rich and moist chocolate cake layered with fresh strawberry filling and topped with chocolate ganache and mint for a delightful treat.

Ingredients

Cake Batter

  • 2 large eggs (at room temperature)
  • 1 cup sugar
  • â…“ cup oil (vegetable or sunflower oil)
  • ½ cup yogurt
  • 2 tablespoons milk
  • 1 teaspoon vanilla extract
  • 1â…• cup all purpose flour
  • ½ cup unsweetened cocoa powder
  • 1 teaspoon baking powder
  • ½ teaspoon baking soda
  • 1 pinch salt

Chocolate Ganache

  • 160 ml heavy cream
  • 160 g chocolate chips

Strawberry Filling

  • 1½ cups strawberries (sliced lengthwise)

Fresh Mint

  • 2 sprigs Fresh mint

Instructions 

  • Prepare two 6'' cake pans with parchment and oil, preheat oven to 350F (180C).
  • Mix eggs and sugar until creamy, then add oil, yogurt, milk, vanilla. Combine dry ingredients separately.
  • Combine wet and dry mixtures, pour into pans, and bake for 25-30 minutes. Cool completely.
  • Heat cream, pour over chocolate chips, stir until smooth, then cool to room temperature.
  • Spread ganache on first cake, add sliced strawberries, top with second cake, pour remaining ganache, and decorate with strawberries and mint.

Notes

Ensure not to over-mix the batter for a light texture.
Calories: 450kcal
Cost: $15
Course: Dessert
Cuisine: international
Keyword: cake, chocolate, strawberry

Mini stuffed mushrooms are the perfect solution for any gathering, combining rich flavors and a delightful texture in a bite-sized package. These little wonders are stuffed with a creamy filling of cream cheese and Parmesan, enhanced with fresh herbs and garlic, making them a surefire hit with guests and family alike. In this comprehensive guide, we will explore how to create these delectable mini stuffed mushrooms, ensuring your entertaining is both easy and impressive.

Why You’ll Love This Recipe

There are countless reasons to fall in love with these mini stuffed mushrooms:

  • Effortless preparation: With straightforward steps, you can whip up these treats in no time.
  • Versatile flavor profile: The combination of cream cheese, Parmesan, and herbs creates a robust flavor that can be customized to your taste.
  • Perfect for any occasion: Whether you’re hosting a party, a casual get-together, or a family dinner, these bite-sized mushrooms fit right in.
  • Minimal ingredients: You likely have most of the ingredients in your pantry, making this recipe both convenient and cost-effective.
  • Impressive presentation: Serve these mushrooms on a platter, and they’ll look as gourmet as they taste!

Ingredients

Here are the ingredients you’ll need to create these irresistible mini stuffed mushrooms:

  • 16 large cremini mushrooms: These mushrooms offer a deep, earthy flavor and a sturdy structure that holds the stuffing well.
  • 1 cup cream cheese: Provides a creamy base that binds the filling together while adding a rich flavor.
  • 1/2 cup grated Parmesan cheese: Enhances the umami flavor and adds a salty kick to the stuffing.
  • 1/4 cup chopped fresh parsley: Adds a burst of freshness and brightens the overall taste.
  • 2 cloves garlic (minced): Infuses the filling with aromatic depth.
  • 1/2 teaspoon salt: Enhances the flavors of all ingredients.
  • 1/4 teaspoon black pepper: Adds a subtle heat and complexity.
  • 1 tablespoon olive oil: Used for sautĂ©ing the garlic and mushroom stems, it adds richness to the filling.

Instructions

Follow these detailed steps to create your mini stuffed mushrooms:

  1. Preheat your oven: Set to 375°F (190°C) to ensure an even bake.
  2. Clean the mushrooms: Rinse gently under cold water and remove the stems carefully.
  3. Chop the stems: Finely chop the removed stems and set aside for the stuffing.
  4. Sauté the filling: Heat olive oil in a skillet over medium heat. Add chopped stems and minced garlic, sautéing for 3-4 minutes until fragrant.
  5. Prepare the stuffing: In a bowl, combine cream cheese, Parmesan, sautéed stems, parsley, salt, and black pepper. Mix until well combined.
  6. Fill the caps: Generously fill each mushroom cap with the stuffing mixture.
  7. Arrange on a baking sheet: Place stuffed mushrooms on a parchment-lined baking sheet to prevent sticking.
  8. Bake: Put in the preheated oven for 20-25 minutes, until the tops are golden and bubbling.
  9. Cool before serving: Remove from the oven and let them cool for a minute before serving to avoid burns.

Pro Tips for Perfect Mini Stuffed Mushrooms

Individual stuffed mushrooms showcasing a creamy filling and fresh herbs.

Consider these expert insights to elevate your stuffed mushrooms:

  • Choose the right mushrooms: Opt for cremini or button mushrooms for a mild flavor, but feel free to use portobello caps for a heartier option.
  • Customize the filling: Swap out the cheeses or add ingredients like cooked sausage, spinach, or sun-dried tomatoes for added flavor.
  • Don’t overstuff: Fill the caps generously but avoid overfilling to ensure even cooking and prevent spills.
  • Let them cool: Allow the mushrooms to cool slightly before serving to let the flavors meld and to make them easier to handle.
  • Make ahead: Prepare the filling a day in advance and assemble the mushrooms just before baking for hassle-free entertaining.
  • Experiment with spices: Add a pinch of red pepper flakes or smoked paprika for a twist.
  • Use fresh herbs: Fresh herbs like thyme or chives can replace parsley for different flavor notes.
  • Engage your guests: Serve with mini skewers for easy eating and a fun presentation.

Common Mistakes to Avoid

To ensure your mini stuffed mushrooms turn out perfectly, watch out for these common pitfalls:

  • Overcooking the mushrooms: Keep a close eye on baking time to prevent rubbery texture.
  • Not seasoning enough: Taste the filling before stuffing to ensure it’s properly seasoned.
  • Ignoring moisture: Avoid washing mushrooms under running water; instead, wipe them with a damp cloth to prevent excess moisture.
  • Not preheating the oven: Always preheat for even cooking throughout.

Variations on Mini Stuffed Mushrooms

Feeling adventurous? Try these variations on the classic recipe:

  • Meat Lover’s Delight: Add cooked ground beef or sausage to the filling for a heartier bite.
  • Vegetarian Spinach Feta: Mix in sautĂ©ed spinach and crumbled feta cheese for a Mediterranean twist.
  • Buffalo Style: Incorporate buffalo sauce and blue cheese into the filling for a zesty kick.
  • Cheesy Jalapeño: Add diced jalapeños and pepper jack cheese for a spicy, cheesy version.

Storage and Make-Ahead Instructions

Here’s how to store and prepare your stuffed mushrooms in advance:

  • Refrigeration: Store leftover stuffed mushrooms in an airtight container in the refrigerator for up to 3 days.
  • Freezing: Freeze unbaked stuffed mushrooms by placing them on a baking sheet until firm, then transfer to a freezer bag for up to 2 months. Bake from frozen, adding an extra 5-10 minutes to the baking time.
  • Make-Ahead: Prepare the filling and stuff the mushrooms a day ahead. Cover and refrigerate, then bake when ready to serve.

Nutritional Information

Understanding the nutritional aspects of your dish can enhance your cooking experience:

  • Caloric content: Each stuffed mushroom contains approximately 70 calories, making them a relatively low-calorie snack.
  • High in protein: The combination of cheese and mushrooms provides a good source of protein.
  • Dietary adaptations: For gluten-free options, ensure your breadcrumbs are gluten-free or substitute with crushed nuts.

Equipment Recommendations

To make your cooking process easier, here are some essential tools:

  • Baking sheet: A sturdy baking sheet lined with parchment paper ensures ease of cleanup and prevents sticking.
  • Skillet: A non-stick skillet helps in sautĂ©ing the filling without sticking.
  • Mixing bowl: A medium-sized mixing bowl for combining your stuffing ingredients.
  • Measuring cups and spoons: Precision can enhance the flavors and texture of your filling.

Serving Suggestions

Here are a few ideas to serve your mini stuffed mushrooms:

  • As an appetizer: Serve warm with a dipping sauce like marinara or ranch for added flavor.
  • On a platter: Present on a beautiful serving platter with fresh herbs for garnish.
  • Alongside drinks: Pair with wine or cocktails for a sophisticated touch.

FAQs About Mini Stuffed Mushrooms

Here are some frequently asked questions to help you master your recipe:

  • Can I use other types of mushrooms? Absolutely! Portobello and button mushrooms also work well.
  • How do I prevent soggy mushrooms? Avoid washing them under water. Instead, wipe with a damp cloth and sautĂ© the filling to reduce moisture.
  • Can I make them vegan? Yes! Substitute cream cheese with a vegan alternative and use nutritional yeast instead of Parmesan.
  • What can I serve with stuffed mushrooms? They pair wonderfully with salads, soups, and various dipping sauces.
  • How long can I store leftovers? Keep them in the fridge for up to 3 days in an airtight container.
  • Can I prepare them in advance? Yes! Assemble the mushrooms ahead and bake when ready to serve.
  • Are they gluten-free? Ensure you use gluten-free breadcrumbs or nuts for a gluten-free option.
  • How do I know when they’re done baking? They should be golden brown and bubbling on top.

By following this comprehensive guide, you’ll not only master the art of making mini stuffed mushrooms but also impress your guests with your culinary skills. Enjoy the process and the delightful results!

Delicious Mini Stuffed Mushrooms for Entertaining

Prep Time 15 minutes
Cook Time 20 minutes
Total Time 35 minutes
Servings 16 pieces
Calories 150
These savory stuffed mushrooms are perfect for entertaining, combining creamy cheese with fresh herbs in a bite-sized treat.

Ingredients

Main

  • 16 large cremini mushrooms
  • 1 cup cream cheese
  • 1/2 cup grated Parmesan cheese
  • 1/4 cup chopped fresh parsley
  • 2 cloves garlic (minced)
  • 1/2 teaspoon salt
  • 1/4 teaspoon black pepper
  • 1 tablespoon olive oil

Instructions 

  • Preheat oven to 375°F (190°C).
  • Clean mushrooms, remove stems, and chop stems finely.
  • SautĂ© stems and garlic in olive oil for 3-4 minutes.
  • Mix cream cheese, Parmesan, stems, parsley, salt, and pepper.
  • Stuff mushroom caps and bake 20-25 minutes until golden.

Notes

Ensure not to overfill the mushrooms for even baking.
Calories: 150kcal
Cost: $15
Course: Appetizer
Cuisine: American
Keyword: Mushrooms

Effortless Baked Oatmeal: Your New Breakfast Staple

Baked oatmeal is a delicious and nutritious way to start your day, and this one-bowl wonder is perfect for busy mornings. In under an hour, you can have a warm, comforting dish that not only satisfies your hunger but also nourishes your body. As you dive into this recipe, you’ll discover how easy it is to prepare a healthy breakfast that the whole family will love.

Great for meal prep, baked oatmeal is versatile, allowing you to customize ingredients to suit your taste and dietary needs. Now let’s explore why this recipe should be your go-to breakfast option.

Why You’ll Love This Recipe

  • One-bowl convenience: Less cleanup means more time to enjoy your meal.
  • Customizable ingredients: Swap in your favorite fruits and nuts for a personalized touch.
  • Meal prep friendly: Make a batch ahead of time and enjoy it throughout the week.
  • Healthy and filling: Packed with wholesome oats and fruits, this dish provides lasting energy.
  • Kid-approved: Even the pickiest eaters will enjoy this tasty and nutritious breakfast.

Ingredient Breakdown

Let’s take a closer look at the ingredients that make this baked oatmeal both delicious and nutritious.

  • Oats: Use old-fashioned rolled oats for the best texture. If you prefer a gluten-free option, ensure your oats are certified gluten-free.
  • Milk: Any milk works—dairy or non-dairy like almond or oat milk. This adds moisture and creaminess.
  • Eggs: Eggs help bind the ingredients together and provide protein. If avoiding eggs, consider using flax eggs (1 tablespoon ground flaxseed mixed with 2.5 tablespoons water per egg).
  • Maple syrup: A natural sweetener that enhances the flavor without overpowering the dish.
  • Unsalted butter: Adds richness and moisture. Substitute with coconut oil or applesauce for a dairy-free version.
  • Applesauce or mashed banana: These act as natural sweeteners and moisture enhancers. You can mix and match based on your preference.
  • Fresh or frozen berries: Not only do they add flavor, but they also provide antioxidants. Use your favorites—blueberries, strawberries, or raspberries work well.
  • Baking powder: A key leavening agent that helps the oatmeal rise and become fluffy.
  • Ground cinnamon: This spice elevates flavor and provides health benefits.
  • Salt: A pinch enhances all the flavors in the dish.

Preparation Steps

Detailed view of baked oatmeal displaying its creamy texture and berry toppings.

Follow these simple steps to create your baked oatmeal masterpiece:

  1. Preheat your oven to 350°F (177°C). Prepare a 9×9 inch or 11×7 inch baking pan by spraying it with nonstick spray.
  2. In a large bowl, whisk together all the ingredients until well combined. Pour the mixture into your prepared baking pan.
  3. Bake for 35 minutes or until the center is set to your liking. For a softer texture, pull it out a bit earlier.
  4. Allow it to cool for 5 minutes before serving. Slice and enjoy with yogurt, honey, or a sprinkle of nuts on top if desired.

Pro Tips for the Best Baked Oatmeal

  • Mix-ins: Feel free to add in extras like chocolate chips, nut butter, or shredded coconut for added flavor.
  • Texture preference: If you prefer a drier baked oatmeal, bake it a bit longer until the center is fully set.
  • Fresh vs. frozen berries: If using frozen berries, there’s no need to thaw—just toss them directly into the mixture.
  • Serving suggestion: Serve warm with a drizzle of maple syrup or a dollop of Greek yogurt for extra creaminess.
  • Storage: Store leftovers in an airtight container in the fridge for up to 1 week or freeze for longer storage.

Common Mistakes and Troubleshooting

To ensure your baked oatmeal turns out perfect every time, avoid these common pitfalls:

  • Overmixing: Mix just until combined to keep the texture light and fluffy.
  • Incorrect oven temperature: Make sure your oven is at the right temperature; an oven thermometer can help if you’re unsure.
  • Not greasing the pan: This can lead to sticking, making it difficult to slice and serve.

Variations to Try

Get creative with these delicious variations:

  • Chocolate Chip Banana Baked Oatmeal: Add chocolate chips and use mashed bananas for sweetness.
  • Apple Cinnamon Baked Oatmeal: Incorporate diced apples and increase the cinnamon for a fall-inspired flavor.
  • Peanut Butter and Jelly Baked Oatmeal: Swirl in peanut butter and top with sliced strawberries or a berry jam.
  • Pumpkin Spice Baked Oatmeal: Add pumpkin puree and pumpkin spice for a cozy autumn dish.

Storage and Make-Ahead Instructions

Baked oatmeal is perfect for meal prep. Here’s how to store and reheat:

  • Refrigerator: Store in an airtight container for up to 1 week. Reheat individual portions in the microwave for about 30-60 seconds.
  • Freezer: Freeze slices in a single layer, then transfer to a freezer-safe container. They can be reheated directly from frozen.

Frequently Asked Questions

  • Can I use steel-cut oats? While steel-cut oats can be used, they will require additional liquid and longer baking time.
  • How do I reheat baked oatmeal? Simply microwave individual portions for about 30 seconds or until warmed through.
  • Can I make this gluten-free? Yes, use certified gluten-free oats and ensure all other ingredients are gluten-free.
  • What is the best way to serve baked oatmeal? Serve warm with yogurt, fresh fruit, or a drizzle of honey.
  • Can I make it dairy-free? Absolutely! Substitute dairy milk with almond, soy, or oat milk.
  • How long does baked oatmeal last? It can last up to a week in the refrigerator or several months in the freezer.
  • Can I add protein powder? Yes, adding protein powder can enhance the nutritional value.
  • What toppings work best? Nuts, seeds, yogurt, or a sprinkle of cinnamon are all excellent choices.

Nutrition Tips and Dietary Adaptations

This baked oatmeal is not only tasty but also nutritious. Here are some tips to enhance its health benefits:

  • Reduce sugar: Use less maple syrup or opt for a sugar substitute if you’re monitoring sugar intake.
  • Add seeds: Chia seeds or flaxseeds can boost omega-3 fatty acids and fiber.
  • Increase protein: Incorporate Greek yogurt as a topping for added protein.

Equipment Recommendations

To make your baked oatmeal, you’ll need:

  • Mixing bowls: A large mixing bowl to combine ingredients.
  • Measuring cups and spoons: For accurate ingredient measurements.
  • Baking pan: A 9×9 inch or similar-sized pan works best.
  • Whisk: To thoroughly mix the ingredients.

Serving Suggestions

Baked oatmeal can be enjoyed in various ways:

  • With yogurt: A dollop of Greek yogurt adds creaminess and protein.
  • Fresh fruit: Top with seasonal fruits like bananas, berries, or peaches for added freshness.
  • Nut butter: A swirl of almond or peanut butter enhances flavor and adds healthy fats.

In conclusion, this one-bowl baked oatmeal is a game-changer for your breakfast routine. With its simple preparation, customizable ingredients, and delicious results, it’s time to elevate your mornings. Whether you’re feeding a family or just yourself, this recipe is a surefire way to stay satisfied and energized throughout the day. Thank you for choosing this recipe, and enjoy your delicious baked oatmeal creation!

1 Bowl Baked Oatmeal

Prep Time 10 minutes
Cook Time 35 minutes
Total Time 45 minutes
Servings 4 servings
Calories 250
A cozy and nutritious baked oatmeal recipe perfect for a quick breakfast or snack, easily customizable with berries and nuts.

Ingredients

Dairy or nondairy milk

  • 1 and 3/4 cups cups milk (dairy or nondairy)
  • 2 large eggs
  • 1/2 cup pure maple syrup
  • 1/4 cup unsalted butter, melted and slightly cooled
  • 1/4 cup unsweetened applesauce or mashed banana
  • 3 cups old-fashioned whole rolled oats
  • 1 teaspoon baking powder
  • 1 teaspoon ground cinnamon
  • 1 teaspoon pure vanilla extract
  • 1/4 teaspoon salt
  • 1 and 1/2 cups mixed berries, fresh or frozen (do not thaw)

optional topping

  • 1/2 cup chopped walnuts or pecans

Instructions 

  • Preheat oven to 350°F (177°C) and prepare a 9x9 inch or similar baking dish.
  • Whisk all ingredients (except berries and nuts) in a large bowl, then pour into the prepared dish. Top with berries and nuts, if desired.
  • Bake for 35 minutes until the center is almost set.
  • Cool for 5 minutes, then serve with yogurt if desired. Store leftovers in the refrigerator for up to 1 week.

Notes

You can customize toppings or add extra spices for more flavor.
Calories: 250kcal
Cost: $10
Course: Breakfast
Keyword: Oatmeal

Creating stunning puff pastry hearts has never been easier. This recipe combines flaky layers with delightful fillings, perfect for celebrations, casual snacks, or a romantic gesture. With minimal effort, you can impress your guests and enjoy these treats anytime. Let’s delve into how to make these delightful pastries!

Why You’ll Love This Recipe

Here are five compelling reasons to try this puff pastry hearts recipe:

  • Quick and Easy: With just a few ingredients and straightforward steps, you can create gourmet pastries in under 30 minutes.
  • Versatile Fillings: Customize your puff pastry hearts with sweet jams, creamy cheeses, or savory spreads to suit any occasion.
  • Impressive Presentation: The heart shapes make these pastries perfect for Valentine’s Day, anniversaries, or any gathering.
  • Family-Friendly: Ideal for kids and adults alike, these pastries are a fun way to get everyone involved in the kitchen.
  • Make-Ahead Convenience: Prepare them in advance and bake just before serving for a warm, fresh treat.

Ingredients Breakdown

Here’s what you’ll need to create these delightful puff pastry hearts:

  • 2 sheets of puff pastry: Use store-bought or homemade. If using frozen, ensure they are completely thawed.
  • 1/4 cup granulated sugar: For sprinkling on top, giving a lovely sweet crunch.
  • 1/2 cup filling: Choose from options like fruit preserves, chocolate spread, or cheese. Experiment with flavors such as raspberry and rose water for a unique twist.
  • 1 egg: Beaten with 1 tablespoon of water, this will serve as your egg wash for a beautiful golden finish.

Pro Tips for Perfect Puff Pastry Hearts

Follow these expert insights to elevate your puff pastry game:

  • Keep it Cold: Ensure your puff pastry remains cold during preparation. This helps maintain its flakiness while baking.
  • Don’t Overfill: Use just enough filling to avoid leaks; about 1 tablespoon per heart is ideal.
  • Seal Properly: Press edges firmly to prevent any filling from escaping during baking.
  • Egg Wash: For a shiny finish, brush the tops of your pastries generously with the egg wash before baking.
  • Watch the Bake Time: Keep an eye on your pastries toward the end of the baking time to achieve that perfect golden brown.
  • Experiment with Shapes: While hearts are festive, try other shapes for different occasions.
  • Chill Before Baking: If you have time, chill your assembled pastries for about 15 minutes before baking to help them hold their shape.
  • Flavor Infusions: Add spices or zest to your filling for an extra flavor kick.

Avoiding Common Mistakes

Delicious puff pastry hearts with a shiny glaze, displayed on a rustic table.

Even the best chefs can encounter challenges; here are some common mistakes and how to troubleshoot them:

  • Leaking Filling: Ensure you are sealing the edges properly. If needed, use a fork to crimp the edges tightly.
  • Puff Pastry Doesn’t Rise: Ensure your oven is fully preheated and avoid opening the door during baking.
  • Overbaking: Keep a close watch on your pastries; they can go from golden to burnt quickly!
  • Filling Too Runny: If using wet ingredients, consider using a thickener like cornstarch to stabilize your filling.

Variations to Try

Feel free to get creative with your puff pastry hearts! Here are some delicious variations:

  • Sweet Raspberry and Cream Cheese: Mix cream cheese with raspberry jam for a fruity filling.
  • Chocolate Hazelnut Delight: Use chocolate spread and sprinkle chopped hazelnuts for added texture.
  • Savory Spinach and Feta: Combine sautĂ©ed spinach with crumbled feta for a delightful savory option.
  • Apple Cinnamon Delight: Fill with diced apples mixed with cinnamon and sugar for a classic dessert.

Storage and Make-Ahead Instructions

These pastries can be made in advance to save time:

  • Make Ahead: Assemble the pastries and freeze them before baking. They can be stored in the freezer for up to 1 month.
  • Storage: Baked pastries can be kept at room temperature for up to 2 days. For longer storage, refrigerate for up to a week.
  • Reheating: To refresh baked pastries, reheat in a preheated oven at 350°F (175°C) for about 10 minutes.

Frequently Asked Questions

Here are some common questions about this recipe:

  • Can I use other types of pastry dough? Yes, you can use phyllo or shortcrust pastry, but note that the texture will differ.
  • How do I keep the filling from leaking out during baking? Ensure a tight seal around the edges and avoid overfilling.
  • Can I make these without a cookie cutter? Absolutely! Use a knife to cut out heart shapes if necessary.
  • What can I substitute for rose water? If you don’t have rose water, consider using vanilla extract or almond extract for different flavor profiles.
  • What if my puff pastry cracks? If it cracks, it may be too warm. Work with it on a cold surface and keep it chilled.
  • Can I use non-dairy cream cheese? Yes, non-dairy options work well in this recipe.
  • How do I know when they are done? They should be golden brown and puffed up in the center.
  • What is the best way to serve these? Serve warm, dusted with powdered sugar or drizzled with chocolate sauce for an extra touch.

Nutritional Tips and Dietary Adaptations

This recipe can easily adapt to various dietary needs:

  • Gluten-Free: Use gluten-free puff pastry to cater to gluten intolerances.
  • Low-Sugar Options: Substitute sugar with a low-calorie sweetener to reduce sugar intake.
  • Dairy-Free: Use non-dairy alternatives for fillings and the egg wash.
  • Vegan: Substitute the egg wash with a plant-based alternative like almond milk or soy milk.

Essential Equipment

To create your puff pastry hearts, ensure you have these kitchen essentials:

  • Baking Sheet: A sturdy baking sheet is crucial for even baking.
  • Parchment Paper: This prevents sticking and makes cleanup a breeze.
  • Rolling Pin: For rolling out your puff pastry evenly.
  • Heart Cookie Cutter: While optional, it helps achieve perfect shapes.

Serving Suggestions

These puff pastry hearts can shine in various settings:

  • As a Dessert: Serve with a scoop of vanilla ice cream and a drizzle of chocolate sauce.
  • For Brunch: Pair with coffee or mimosas for a delightful brunch experience.
  • At Parties: Arrange on a platter with a selection of fillings for a fun interactive treat.
  • For Romantic Dinners: Present with fresh flowers and candles for an elegant touch.

Final Thoughts

With this comprehensive guide, you’re well on your way to mastering the art of creating puff pastry hearts. Whether it’s a special occasion or a simple treat, these pastries are sure to impress. Remember, cooking is about exploring flavors, so don’t hesitate to experiment with fillings and shapes. Enjoy your culinary adventure!

Easy Puff Pastry Hearts Recipe for Any Occasion

Prep Time 15 minutes
Cook Time 20 minutes
Total Time 35 minutes
Servings 8 pieces
Calories 150
Delight in these adorable puff pastry hearts filled with your favorite sweet or savory fillings, perfect for any celebration or snack.

Ingredients

Dough

  • 2 sheets puff pastry (thawed)
  • 0.25 cup granulated sugar
  • 0.5 cup filling (jam, chocolate spread, cheese)
  • 1 egg egg (beaten with 1 tablespoon water for egg wash)

Instructions 

  • Preheat oven to 400°F (200°C).
  • Roll out the puff pastry and cut into heart shapes.
  • Place hearts on a baking sheet, add filling, and seal with another heart.
  • Brush with egg wash and sprinkle sugar.
  • Bake for 15-20 minutes until golden.

Notes

Ensure the edges are well sealed to prevent filling from leaking during baking.
Calories: 150kcal
Cost: $10
Course: Dessert
Cuisine: international
Keyword: puff pastry

Unlocking the Secrets of the Perfect Red Velvet Cake

Welcome to your ultimate guide for mastering the art of red velvet cake. This iconic dessert has captured the hearts of many with its stunning color and mouthwatering flavor. In this comprehensive article, we will explore everything you need to know to create a delectable red velvet cake with cream cheese frosting. From detailed ingredient breakdowns to pro tips and common mistakes, you will be equipped with all the knowledge to impress your friends and family. Let’s dive into the rich world of red velvet cake and discover why it’s a must-have at every celebration.

Why You’ll Love This Recipe

  • Show-stopping appearance: The vibrant red color of the cake makes it a visual centerpiece for any occasion.
  • Rich, moist texture: This cake is not just about looks; it delivers a tender, moist bite that melts in your mouth.
  • Perfect pairing: The cream cheese frosting adds a tangy sweetness that beautifully complements the cake’s flavors.
  • Easy to customize: Whether you’re vegan or gluten-free, this recipe can be adapted to fit your dietary needs.
  • Foolproof method: With step-by-step instructions and expert tips, you’ll achieve perfect results every time.

Ingredient Breakdown

Understanding the ingredients is crucial for making a perfect red velvet cake. Below is a detailed breakdown of each component with possible substitutions.

  • Gluten-free flour: Substitute with all-purpose flour if gluten is not a concern.
  • Cocoa powder: Use unsweetened cocoa powder for a rich chocolate flavor.
  • Vegetable oil: Can be replaced with melted coconut oil for a subtle flavor change.
  • Buttermilk: Substitute with plain yogurt or a dairy-free alternative mixed with a bit of vinegar.
  • Red food coloring: Gel coloring offers a more vibrant hue than liquid options.

Mastering the Recipe: Step-by-Step Instructions

Vibrant Red Velvet Cake with creamy white frosting, displayed on a plate.

Follow this foolproof method to create your red velvet cake:

Step 1: Prepare Your Ingredients

Gather all your ingredients and ensure they’re at room temperature. This helps in achieving a uniform mixture.

Step 2: Mix the Dry Ingredients

  • In a bowl, whisk together gluten-free flour, cocoa powder, baking powder, baking soda, and salt.

Step 3: Combine Wet Ingredients

  • In a separate bowl, mix buttermilk, vegetable oil, eggs, vanilla extract, and red food coloring.

Step 4: Combine Mixtures

Gradually add the dry ingredients to the wet mixture, stirring gently until just combined. Avoid over-mixing, as this can lead to a dense cake.

Step 5: Bake the Cake

  • Pour batter into prepared pans and bake at 350°F (175°C) for 25-30 minutes or until a toothpick comes out clean.
  • Let the cakes cool in the pans for 10 minutes before transferring to wire racks.

Step 6: Cream Cheese Frosting

While the cake cools, prepare the cream cheese frosting:

  • Beat together cream cheese and butter until smooth.
  • Gradually add in powdered sugar and vanilla extract, mixing until well combined.

Step 7: Assemble the Cake

Once the cakes are completely cooled, place one layer on a serving plate. Spread frosting on top, add the second layer, and frost the top and sides of the cake.

Pro Tips for Success

  • Room temperature ingredients: Always ensure your eggs, butter, and cream cheese are at room temperature for optimal mixing.
  • Don’t skip the vinegar: A small amount of vinegar enhances the cake’s tenderness.
  • Check for doneness: Always perform the toothpick test to ensure the cake is fully baked.
  • Let it cool completely: Frost only when the cake is completely cool to avoid melting the frosting.
  • Chill the frosting: If your frosting is too soft, chill it slightly to make it easier to spread.

Common Mistakes and Troubleshooting

Even with the best intentions, mistakes happen. Here are common pitfalls and how to avoid them:

  • Dense Cake: Over-mixing the batter can lead to a dense texture. Mix gently until just combined.
  • Dry Cake: Ensure you measure your flour correctly; too much can lead to dryness.
  • Too Sweet Frosting: If your cream cheese frosting is too sweet, add a pinch of salt to balance the flavors.

Delicious Variations

Feel free to get creative with your red velvet cake. Here are some exciting variations:

  • Chocolate Red Velvet Cake: Add an extra tablespoon of cocoa powder for a richer chocolate flavor.
  • Red Velvet Cupcakes: Use the same batter to make delightful cupcakes, adjusting the baking time to 15-20 minutes.
  • Layered Cake: Create a multi-layered cake, alternating layers with different fillings like raspberry jam or whipped cream.
  • Vegan Red Velvet: Substitute eggs with flaxseed meal and use plant-based butter and milk for a vegan version.

Storage and Make-Ahead Instructions

To keep your red velvet cake fresh and delicious:

  • Room Temperature: Store covered at room temperature for up to 3 days.
  • Refrigeration: For longer storage, refrigerate for up to a week. Bring to room temperature before serving.
  • Freezing: Freeze unfrosted cake layers for up to 3 months. Thaw before frosting.

Frequently Asked Questions (FAQs)

  • Can I use different food coloring? Yes, gel food coloring provides a vibrant hue without altering the cake’s consistency.
  • What can I substitute for buttermilk? Mix 1 cup of milk with 1 tablespoon of vinegar or lemon juice.
  • Is it possible to make this cake dairy-free? Absolutely! Substitute dairy products with plant-based alternatives.
  • Can I make this cake ahead of time? Yes, you can make it a day in advance. Just store it properly.
  • What’s the best way to decorate my cake? Use fresh berries or chocolate shavings for an elegant touch.
  • How can I prevent my cake from sinking in the middle? Ensure your oven is preheated and avoid opening the door while baking.
  • What should I do if my frosting is too runny? Chill it for a while or add more powdered sugar to thicken.
  • Can I add nuts or chocolate chips? Yes, feel free to fold in walnuts or chocolate chips for added texture.

Nutritional Insights and Dietary Adaptations

When considering dietary needs, here are some insights:

  • Caloric Content: A standard slice of red velvet cake can range from 300-500 calories, depending on the frosting.
  • Gluten-free option: Using gluten-free flour ensures those with gluten sensitivities can enjoy this cake.
  • Lower-sugar alternative: Substitute some sugar with a natural sweetener like honey or agave syrup.

Essential Equipment Recommendations

Having the right tools can make your baking process smoother:

  • Mixing bowls: A set of various sizes is essential for mixing and prepping.
  • Electric mixer: An electric mixer will save time and ensure a uniform batter.
  • Cake pans: Two 9-inch round cake pans are ideal for this recipe.
  • Cooling rack: A cooling rack allows for even cooling, preventing sogginess.
  • Offset spatula: Perfect for spreading frosting evenly over your cake.

Serving Suggestions

To elevate your red velvet cake experience, consider these serving ideas:

  • Pair with coffee: The rich flavors of the cake harmonize beautifully with a cup of coffee.
  • Serve with ice cream: A scoop of vanilla ice cream adds a delightful contrast in temperature.
  • Fresh fruit topping: Garnish with fresh berries to add a refreshing touch.

Conclusion

Congratulations! You’re now equipped with all the knowledge needed to create a stunning and delicious red velvet cake. With its rich history and delightful flavor, this dessert is sure to impress at any gathering. Remember, practice makes perfect, so don’t hesitate to experiment and make this recipe your own. Happy baking!

Red Velvet Cake with Cream Cheese Frosting

Prep Time 30 minutes
Cook Time 30 minutes
Total Time 1 hour
Servings 12 slices
Calories 450
A rich and moist red velvet cake topped with creamy cream cheese frosting, perfect for celebrations.

Ingredients

Cake Batter

  • 2 1/2 cups gluten free flour
  • 3 tbsp cocoa powder
  • 2 cups sugar
  • 1 1/2 tsp baking powder
  • 1 1/2 tsp baking soda
  • 2 eggs eggs
  • 1 cup buttermilk
  • 1 tsp kosher salt
  • 1/2 cup vegetable oil
  • 1 tsp espresso powder
  • 1 cup fresh brewed coffee
  • 2 tsp vanilla extract
  • 2 1/2 tbsp red food coloring

Frosting

  • 16 oz cream cheese, room temperature
  • 1 cup butter, room temperature
  • 5 1/2 cups powdered sugar
  • 2 tsp vanilla extract

Instructions 

  • Preheat oven to 350°F (175°C). Grease and flour cake pans.
  • Mix dry ingredients, then add wet ingredients and food coloring. Divide batter into pans.
  • Bake for 30 minutes or until a toothpick comes out clean. Cool completely.
  • Beat cream cheese and butter, then gradually add powdered sugar and vanilla to make frosting.
  • Frost cooled cake layers. Serve and enjoy!

Notes

Ensure ingredients are at room temperature for best results.
Calories: 450kcal
Cost: $15
Course: Dessert
Cuisine: American
Keyword: red velvet

Unlocking the Secrets of Strawberry Truffles

Welcome to the delightful world of strawberry truffles, where rich flavors meet effortless elegance. In this comprehensive guide, you’ll learn how to create these indulgent treats that are perfect for any occasion. Whether you’re looking to impress guests, celebrate a special day, or simply indulge yourself, this recipe will yield delicious results every time. Let’s dive into the art of crafting strawberry truffles!

Why You’ll Love This Recipe

  • Quick and Easy: This recipe is designed for simplicity, taking only about 30 minutes of active preparation time, with minimal hands-on effort.
  • Deliciously Versatile: Customize the flavor with various extracts or toppings, making each batch uniquely yours.
  • Perfect for Gifting: Homemade strawberry truffles make thoughtful gifts for friends and family, beautifully packaged in a box.
  • Kid-Friendly Fun: Involve your kids in the rolling and decorating process for a fun family activity.
  • Impressive Presentation: These little treats look stunning, making them ideal for parties, weddings, or any gathering.

Ingredient Breakdown

To create your strawberry truffles, you’ll need the following ingredients:

  • 1 cup white chocolate chips: Use high-quality chocolate for the best flavor.
  • ¼ cup unsalted butter: Helps create a smooth and creamy texture.
  • 3 tablespoons heavy whipping cream: Adds richness to the truffle mixture.
  • ½ teaspoon strawberry extract: Provides that essential strawberry flavor.
  • ¼ teaspoon vanilla extract: Enhances the overall taste.
  • 1 drop pink food coloring: Optional, for a vibrant appearance.
  • ¼ cup powdered sugar: For rolling the truffles and adding sweetness.

Substitutions and Alternatives

  • Chocolate Chips: You can replace white chocolate chips with dark chocolate or milk chocolate for a different flavor profile.
  • Butter: Coconut oil can be used as a dairy-free alternative.
  • Heavy Cream: A non-dairy creamer or coconut cream can substitute for a vegan option.
  • Strawberry Extract: If unavailable, use pureed fresh strawberries, but adjust the quantity to achieve desired flavor intensity.

How to Make Strawberry Truffles

Luscious strawberry truffles displayed, featuring a melting chocolate exterior.

Follow these simple steps to create your delectable strawberry truffles:

  1. Add the white chocolate chips to a medium bowl and set aside.
  2. In a small saucepan, melt the butter. Stir in the heavy cream and bring to a simmer over medium heat.
  3. As soon as the mixture comes to a simmer, pour it over the white chocolate chips. Allow the mixture to sit for 1 to 2 minutes to soften the chocolate.
  4. Add the extracts and food coloring and whisk the mixture until smooth and fully incorporated.
  5. If needed, heat the mixture for 15 seconds at a time in the microwave if the chocolate has not melted all the way.
  6. Cover the mixture with plastic wrap and chill in the refrigerator for 30 minutes to 1 hour.
  7. Scoop 1 to 1½ tablespoons of the strawberry truffle mixture and form into balls, then roll the balls in the powdered sugar.
  8. Refrigerate the truffles for another 30 minutes to 1 hour before serving.

Pro Tips for Perfect Truffles

  • Quality Ingredients: Always use high-quality chocolate and fresh ingredients for the best flavor.
  • Chill Time: Ensure adequate chilling time for the mixture to firm up properly, making it easier to shape.
  • Rolling Technique: Wet your hands slightly to prevent sticking when rolling the truffles.
  • Decorative Touches: Experiment with toppings like crushed nuts, sprinkles, or cocoa powder for added flair.
  • Flavor Variations: Try different extracts like almond or orange to switch up the flavor profile.
  • Storage Tips: Keep truffles in an airtight container in the fridge to maintain freshness.
  • Serving Style: Serve truffles on a decorative platter for an impressive presentation.
  • Gifting Ideas: Package in a beautiful box or jar for a thoughtful homemade gift.

Common Mistakes and Troubleshooting

If you encounter issues while making your strawberry truffles, here are some common mistakes and how to troubleshoot them:

  • Chocolate Not Melting: Ensure the cream mixture is hot enough before pouring it over the chocolate chips.
  • Truffles Too Soft: If the mixture is too soft to shape, chill it for a longer time.
  • Sticky Truffles: If truffles are sticky, dust your hands with powdered sugar to make rolling easier.
  • Flavor Too Mild: If the strawberry flavor is not strong enough, increase the amount of strawberry extract or use fresh strawberries.

Delicious Variations

Take your strawberry truffles to the next level with these creative variations:

  • Chocolate-Covered Truffles: Dip the truffles in melted chocolate for an extra layer of indulgence.
  • Nutty Delight: Roll truffles in crushed pistachios or almonds for added crunch and flavor.
  • Fruit Fusion: Incorporate other extracts like raspberry or lemon for a mixed berry truffle experience.
  • Spiced Truffles: Add a dash of cinnamon or nutmeg for a warm, spiced flavor.

Storage and Make-Ahead Instructions

To keep your strawberry truffles fresh and delicious:

  • Refrigeration: Store truffles in an airtight container in the fridge for up to one week.
  • Freezing: For longer storage, freeze truffles in a single layer, then transfer to a container. They can be frozen for up to three months.
  • Thawing: To enjoy frozen truffles, thaw them in the fridge overnight before serving.

Frequently Asked Questions

  • Can I use fresh strawberries? Yes, but incorporate them into the mixture carefully to avoid excess moisture.
  • How do I know when the truffle mixture is ready? The mixture should be smooth and thick enough to hold its shape when formed into balls.
  • Can I make these truffles dairy-free? Absolutely! Use dairy-free chocolate and coconut cream as substitutes.
  • How long do strawberry truffles last? When stored properly in the fridge, they last about one week.
  • Can I add alcohol to the truffles? Yes, a splash of liqueur like strawberry schnapps can enhance the flavor.
  • What is the best way to gift these truffles? Package them in decorative boxes or jars, and consider adding a personalized note.
  • Can I make these truffles in advance? Yes, they can be made a few days ahead of time and stored in the fridge.
  • What should I serve with strawberry truffles? They pair beautifully with coffee, tea, or a glass of dessert wine.

Nutritional Tips and Dietary Adaptations

For those mindful of dietary restrictions, here are some tips:

  • Reduced Sugar: Use sugar-free chocolate and adjust the powdered sugar accordingly.
  • Gluten-Free: This recipe is naturally gluten-free, making it suitable for those with gluten sensitivities.
  • Low-Fat Option: Swap heavy cream for a lighter alternative, but expect a slight change in texture.

Equipment Recommendations

To achieve the best results, consider having the following equipment on hand:

  • Medium Mixing Bowl: For combining ingredients easily.
  • Small Saucepan: To melt butter and cream without burning.
  • Whisk: For smooth mixing of chocolate and cream.
  • Cookie Scoop: To portion out uniform truffle sizes.
  • Plastic Wrap: To cover and chill the mixture effectively.

Serving Suggestions

When it comes to serving your strawberry truffles, consider these ideas:

  • Elegant Platter: Arrange truffles on a beautiful serving platter for an eye-catching presentation.
  • Custom Boxes: Place truffles in gift boxes tied with ribbons for a charming touch.
  • Chocolate Drizzle: Drizzle melted chocolate over the truffles for added decoration and flavor.

In conclusion, making strawberry truffles is not only a rewarding experience but also a delightful way to indulge in a sweet treat. Whether for yourself or as a thoughtful gift, this recipe ensures that you can create something truly special with ease. Enjoy the process and the delicious results!

Strawberry Truffles

Prep Time 10 minutes
Cook Time 10 minutes
Total Time 20 minutes
Servings 12 pieces
Calories 150
Delight in these rich, chocolatey truffles infused with strawberry flavor, perfect for a sweet treat or gift.

Ingredients

Chocolate and Dairy

  • 1 cup white chocolate chips
  • ¼ cup unsalted butter
  • 3 tablespoons heavy whipping cream

Flavorings and Color

  • ½ teaspoon strawberry extract
  • ¼ teaspoon vanilla extract
  • 1 drop pink food coloring
  • ¼ cup powdered sugar

Instructions 

  • Melt the white chocolate chips and butter together.
  • Stir in the heavy cream, strawberry extract, vanilla, and food coloring until smooth.
  • Chill the mixture in the refrigerator for 30-60 minutes until firm.
  • Form into balls and roll in powdered sugar.
  • Refrigerate for another 30 minutes before serving.

Notes

Keep the truffles refrigerated until ready to serve for best texture.
Calories: 150kcal
Cost: $10
Course: Dessert
Cuisine: American
Keyword: strawberry