Author

robert

Browsing

Transform Your Dinner: The Ultimate Creamy Tuscan Shrimp Experience

When it comes to quick yet delightful meals, Creamy Tuscan Shrimp is a standout choice that blends rich, savory flavors with the convenience of a 30-minute cooking time. This recipe is perfect for busy weeknights and is designed to elevate your dining experience without overwhelming your schedule. With its luscious sauce, succulent shrimp, and a vibrant mix of ingredients, you’ll discover why this dish is a must-try.

In this comprehensive guide, we will walk you through the steps to create a restaurant-quality dish in your own kitchen. Whether you’re cooking for family or impressing guests, this recipe will ensure that every bite is packed with flavor and satisfaction.

Why You’ll Love This Recipe

  • Quick and Easy: Ready in just 30 minutes, making it ideal for busy evenings.
  • Rich Flavors: Combines the creaminess of heavy cream with the zest of sun-dried tomatoes and spinach for a decadent taste.
  • Versatile: Pairs well with pasta, rice, or crusty bread, allowing you to customize your meal.
  • Healthy Ingredients: Packed with protein from shrimp and nutrients from spinach, this dish is as wholesome as it is delicious.
  • Impressive Presentation: The vibrant colors and finishing touch of grated Parmesan cheese make it visually appealing for any table setting.

Ingredient Breakdown

To craft this delightful dish, gather the following ingredients:

  • 1 pound shrimp: Peeled and deveined for convenience.
  • 2 tablespoons olive oil: For sautéing and adding flavor.
  • 4 cloves garlic, minced: Essential for that aromatic base.
  • 1 cup heavy cream: Creates the luxurious sauce that makes this dish stand out.
  • 1 cup spinach, fresh: Adds color and nutrients.
  • ½ cup sun-dried tomatoes, chopped: Provides a sweet and tangy burst of flavor.
  • 1 teaspoon Italian seasoning: Enhances the dish with classic Tuscan flavor.
  • Salt and pepper, to taste: Essential for seasoning.
  • Grated Parmesan cheese, for serving: Adds a rich, nutty flavor.

Pro Tips for an Unforgettable Dish

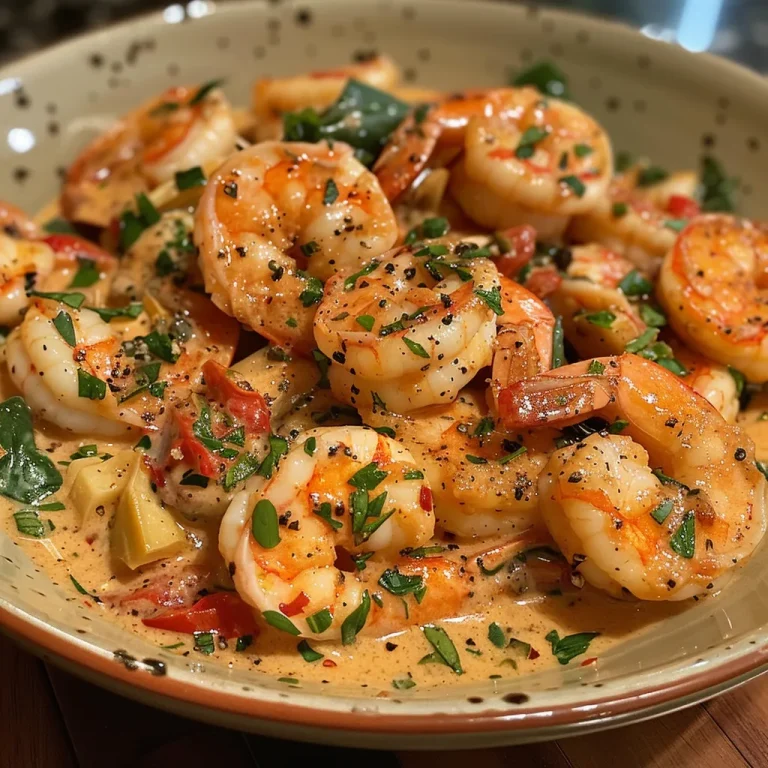
A vibrant image of creamy Tuscan shrimp, emphasizing the creamy texture and garnished with grated Parmesan.

Enhance your cooking experience with these expert tips:

  • Quality Shrimp: Use large, fresh or frozen shrimp that are peeled and deveined to save time.
  • Don’t Overcook: Cook the shrimp just until they turn pink and opaque to maintain their tenderness.
  • Fresh Ingredients: Opt for fresh spinach and high-quality sun-dried tomatoes for the best flavor.
  • Adjust Creaminess: If you prefer a lighter sauce, consider reducing the amount of heavy cream or substituting with half-and-half.
  • Customize Seasoning: Feel free to adjust Italian seasoning according to your taste preferences.
  • Experiment with Cheese: Try different cheeses like feta or goat cheese for a unique twist.
  • Serve Hot: This dish is best enjoyed immediately after cooking while the sauce is warm and creamy.
  • Pasta Pairing: For a hearty meal, serve over your favorite pasta or alongside a fresh salad.

Common Mistakes and Troubleshooting

Here are some pitfalls to avoid when making Creamy Tuscan Shrimp:

  • Overcooking Shrimp: Be careful not to let the shrimp cook too long, as they can become tough and rubbery.
  • Burning Garlic: Sauté garlic until fragrant, but avoid browning it, which can lead to a bitter taste.
  • Too Thick Sauce: If the sauce becomes too thick, add a splash of pasta water or broth to reach your desired consistency.
  • Insufficient Seasoning: Always taste and adjust seasoning at the end to ensure balanced flavors.

Delicious Variations

Feel free to get creative with these variations:

  • Spicy Kick: Add a pinch of red pepper flakes for a spicy twist.
  • Mushroom Medley: Include sautéed mushrooms for an earthy flavor.
  • Vegetarian Option: Replace shrimp with chickpeas for a plant-based alternative.
  • Herb Infusion: Incorporate fresh basil or parsley for a fresh herbal note.

Storage and Make-Ahead Instructions

This recipe can be made ahead and stored for later enjoyment:

  • Refrigeration: Store leftovers in an airtight container in the fridge for up to 3 days.
  • Freezing: While not ideal due to the cream, you can freeze the shrimp and sauce separately for up to 2 months. Reheat gently on the stove.
  • Make-Ahead: Prepare the shrimp and sauce, then store in the refrigerator until ready to heat and serve.

Frequently Asked Questions

Here are some common queries regarding this dish:

  • Can I use frozen shrimp? Yes, just make sure to thaw them before cooking.
  • What can I substitute for heavy cream? You can use half-and-half or a dairy-free alternative like coconut cream.
  • How do I make it dairy-free? Substitute cream with coconut milk and use a dairy-free cheese for serving.
  • Can I add other vegetables? Absolutely! Bell peppers or zucchini can also be great additions.
  • Is this recipe gluten-free? Yes, as long as you ensure any added pasta or sides are gluten-free.
  • Can I make this dish in advance? While best served fresh, you can prep the ingredients ahead and cook right before serving.
  • What’s the best way to serve this dish? It pairs well with pasta, rice, or a side of crusty bread for dipping.
  • How spicy is this dish? The recipe is mild, but you can adjust the heat with red pepper flakes if desired.

Nutrition Tips and Dietary Adaptations

For those watching their diet, consider the following:

  • Lower Calories: Use low-fat cream or reduce the quantity of heavy cream.
  • Increase Fiber: Serve with a side of whole-grain pasta or brown rice for added fiber.
  • Protein Boost: Add beans or legumes for an extra protein kick.

Recommended Equipment

To make your cooking experience seamless, consider these tools:

  • Non-Stick Skillet: Ideal for sautéing shrimp and preventing sticking.
  • Wooden Spoon: Perfect for stirring your sauce without scratching your cookware.
  • Measuring Cups and Spoons: Ensure accuracy in your ingredients for consistent results.

Serving Suggestions

When it comes to serving Creamy Tuscan Shrimp, the possibilities are endless. Here are some ideas:

  • Pasta: Toss the shrimp and sauce with fettuccine or linguine for a hearty meal.
  • Rice: Serve over fluffy white or brown rice to soak up all the delicious sauce.
  • Crusty Bread: A loaf of warm, crusty bread is perfect for dipping into the creamy sauce.
  • Salad: Pair with a fresh garden salad for a light and complete meal.

Conclusion

Your journey to culinary excellence starts here with this Creamy Tuscan Shrimp recipe. By following the steps and tips outlined in this guide, you can create a dish that not only satisfies your taste buds but also impresses anyone you share it with. Remember, great meals don’t have to be complicated; they just require the right approach and a dash of creativity. Dive into this recipe, enjoy the cooking process, and savor every bite. Happy cooking!

Creamy Tuscan Shrimp: An Amazing Ultimate Recipe

Prep Time 10 minutes
Cook Time 15 minutes
Total Time 25 minutes
Servings 4 servings
Calories 450
Enjoy this rich and flavorful Creamy Tuscan Shrimp, a quick and delicious dish perfect for any occasion.

Ingredients

Shrimp

  • 1 pound shrimp, peeled and deveined
  • 2 tablespoons olive oil
  • 4 cloves garlic, minced
  • 1 cup heavy cream
  • 1 cup spinach, fresh
  • ½ cup sun-dried tomatoes, chopped
  • 1 teaspoon Italian seasoning
  • to taste Salt and pepper
  • for serving Grated Parmesan cheese

Instructions 

  • Heat olive oil in a skillet over medium-high heat.
  • Add shrimp, season with salt and pepper, cook 2-3 minutes per side until pink. Remove and set aside.
  • Sauté garlic in the same skillet for 1 minute.
  • Pour in heavy cream, add spinach and sun-dried tomatoes, simmer until spinach wilts.
  • Stir in Italian seasoning, return shrimp to skillet, cook 2 more minutes. Serve with Parmesan cheese.
Notes

This dish pairs well with pasta or crusty bread for a complete meal.
Calories: 450kcal
Cost: $15
Course: Main Course
Cuisine: Italian
Keyword: Shrimp

Transform Your Weeknight Dinners with Effortless Sheet Pan Fajitas

In today’s fast-paced world, finding time to prepare a delicious meal can be a challenge. Enter Sheet Pan Fajitas Chicken—a vibrant, one-pan dish that combines tender chicken and colorful bell peppers, all baked to perfection in under twenty minutes. This recipe is not just about convenience; it’s a culinary experience that brings the flavors of restaurant-quality fajitas right into your kitchen. Let’s explore why this dish is a must-try for busy weeknights!

Why You’ll Love This Recipe

  • Quick Dinner Solution: With just 15-20 minutes of cooking time, this recipe is perfect for weeknights when you need a satisfying meal without the fuss.
  • One-Pan Wonder: Everything cooks on a single sheet pan, minimizing cleanup and maximizing flavor. Less time washing dishes means more time enjoying your meal!
  • Customizable Ingredients: Use any combination of your favorite vegetables—like zucchini or mushrooms—to suit your taste or whatever you have on hand.
  • Healthy and Flavorful: Packed with lean protein and fresh vegetables, these fajitas are a nutritious option that doesn’t skimp on flavor.
  • Perfect for Meal Prep: Make a big batch ahead of time and enjoy leftovers for lunch or dinner throughout the week.

What You’ll Need

Gather these ingredients to create your sheet pan fajitas:

  • 1 ½ pounds boneless, skinless chicken breasts (cut into thin strips)
  • 1 red bell pepper (cut into strips)
  • 1 yellow bell pepper (cut into strips)
  • 1 orange bell pepper (cut into strips)
  • 1 red onion (cut into wedges)
  • 3 cloves garlic (minced)
  • 3 tablespoons olive oil
  • ¼ cup fresh cilantro (chopped)
  • 2 tablespoons lime juice (freshly squeezed)
  • 6 8-inch flour or corn tortillas (warmed)
  • 2 teaspoons chili powder
  • 2 teaspoons ground cumin
  • 2 teaspoons dried oregano
  • 1 teaspoon smoked paprika
  • to taste kosher salt
  • to taste black pepper

Detailed Ingredient Breakdown

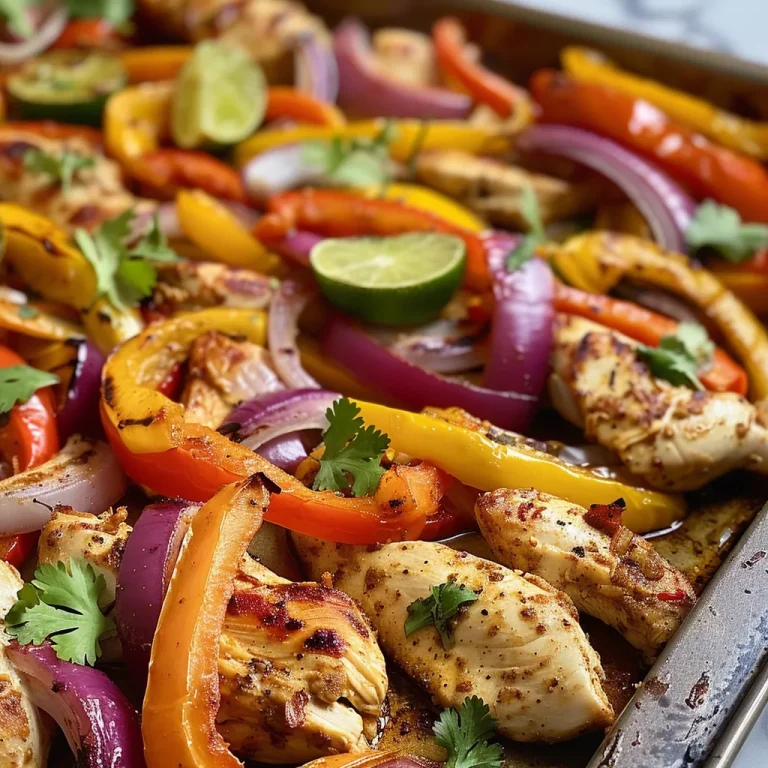
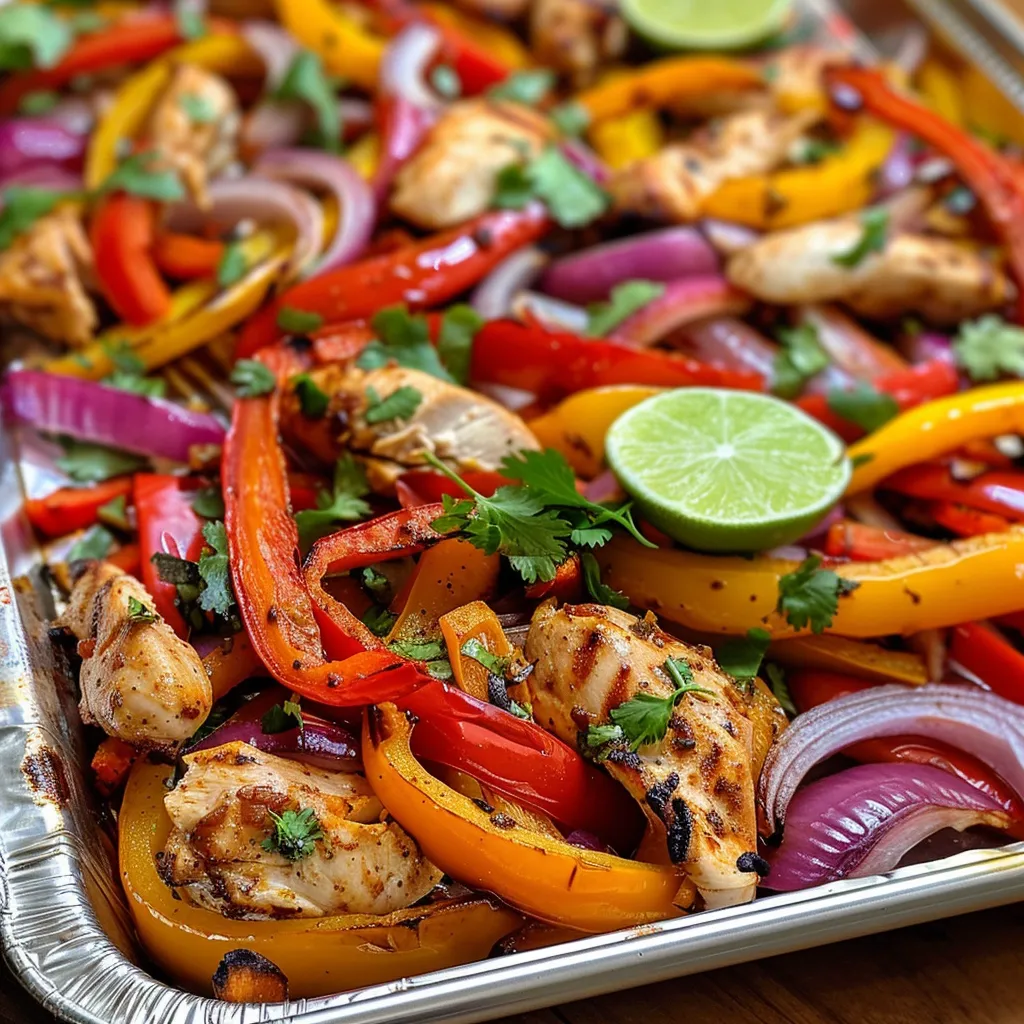
Delicious sheet pan fajitas showcasing chicken, peppers, and onions, ready to be served with tortillas.

Each ingredient plays a crucial role in developing the flavor profile of your fajitas. Here’s a closer look:

  • Chicken: Boneless skinless breasts are lean and cook quickly. For a twist, try thighs for extra juiciness.
  • Bell Peppers: A mix of colors adds visual appeal and different flavor notes. Feel free to swap in any seasonal veggies.
  • Onion: Red onion provides a sweet and slightly tangy flavor that complements the other ingredients beautifully.
  • Spices: The chili powder, cumin, oregano, and smoked paprika create a rich, savory seasoning that elevates the dish.
  • Lime Juice: Freshly squeezed lime brightens the flavors and adds a zesty finish.

How to Make Sheet Pan Fajitas Chicken

Follow these easy steps for a delicious meal:

  1. Slice chicken breasts into thin strips, about half an inch thick. Cut bell peppers and red onion into similar-sized strips so they roast evenly.
  2. Whisk together chili powder, cumin, oregano, smoked paprika, kosher salt, and black pepper. Sprinkle this seasoning over the chicken and veggies, drizzle with olive oil, and toss to coat evenly.
  3. Preheat your oven to 425°F. Spread the seasoned chicken and vegetables in a single layer on a sheet pan.
  4. Roast for 15–20 minutes until the chicken is cooked through, and vegetables are tender with slight char.
  5. Remove from the oven, squeeze fresh lime juice over everything, and sprinkle with chopped cilantro. Serve immediately with warmed tortillas.

Expert Tips for Perfect Fajitas

  • Cut Uniformly: Ensure chicken and veggies are cut into similar sizes for even cooking.
  • High Heat: Roasting at a high temperature helps achieve that perfect char and caramelization.
  • Toss Midway: Halfway through cooking, give everything a stir to ensure even roasting.
  • Rest Before Serving: Let the fajitas sit for a couple of minutes after removing from the oven to allow juices to redistribute.
  • Customize Your Seasoning: Feel free to adjust spices according to your preference—add more chili powder for heat or more oregano for herbiness.

Common Mistakes and Troubleshooting

Here are some pitfalls to avoid when making your sheet pan fajitas:

  • Overcrowding the Pan: If the pan is too crowded, the chicken and vegetables will steam instead of roast. Use two pans if necessary.
  • Not Preheating the Oven: Always preheat the oven to ensure the fajitas cook properly and develop a nice char.
  • Ignoring the Toppings: Don’t forget to top your fajitas with shredded cheese, sour cream, or avocado for added flavor and creaminess.

Variations to Try

Mix things up with these fun variations:

  • Spicy Shrimp Fajitas: Substitute shrimp for chicken and adjust cooking time to about 10 minutes.
  • Vegetarian Fajitas: Use a mix of mushrooms, zucchini, and eggplant instead of chicken for a hearty, meat-free version.
  • BBQ Chicken Fajitas: Toss the chicken with your favorite BBQ sauce before roasting for a smoky flavor.
  • Breakfast Fajitas: Add scrambled eggs and top with avocado for a breakfast twist.

Storage and Make-Ahead Instructions

You can make your fajitas in advance:

  • Storage: Store leftovers in an airtight container in the refrigerator for up to 3 days.
  • Reheating: Reheat in the oven at 350°F until warmed through, or in the microwave in 30-second intervals.
  • Make-Ahead: Pre-cut your chicken and veggies and store them in the fridge with the spices mixed in for up to 24 hours before cooking.

Frequently Asked Questions

Here are some common questions about sheet pan fajitas:

  • Can I use frozen chicken? Yes, but it’s best to thaw it first to ensure even cooking.
  • What can I serve with fajitas? Consider serving with rice, beans, or a fresh salad for a complete meal.
  • Can I make this recipe gluten-free? Absolutely! Just use corn tortillas or serve over rice instead.
  • How do I make the fajitas spicier? Add sliced jalapeños or increase the amount of chili powder in the seasoning.
  • Can I use other proteins? Yes! This recipe works well with beef, pork, or tofu.
  • What if I don’t have all the spices? You can substitute with a store-bought fajita seasoning mix.
  • How do I reheat leftovers? Reheat in a skillet or microwave until warmed through.
  • Can I freeze leftovers? Yes, but it’s best to eat them fresh for the best texture.

Nutrition Tips and Dietary Adaptations

This recipe is not only flavorful but also adaptable to various dietary needs:

  • Low-Carb Option: Serve over a bed of lettuce instead of tortillas for a low-carb meal.
  • High-Protein Variation: Increase the quantity of chicken or add beans for a protein boost.
  • Dairy-Free Option: Omit cheese and sour cream or use dairy-free substitutes.

Equipment Recommendations

For the best results, use these kitchen tools:

  • Sheet Pan: A sturdy, rimmed sheet pan is essential for roasting.
  • Cutting Board and Knife: A good quality knife and board make prep work easier and safer.
  • Whisk: For mixing the spices and oil together seamlessly.

Serving Suggestions

Serve your fajitas with:

  • Fresh Cilantro: Chopped cilantro adds freshness and a burst of flavor.
  • Sour Cream: A classic topping that adds creaminess.
  • Shredded Cheese: Cheddar or Monterey Jack are great options.
  • Guacamole: For a rich and creamy twist, serve with guacamole on the side.

With this comprehensive guide to Sheet Pan Fajitas Chicken, you’re well-equipped to impress your family and friends with a delightful meal that’s quick, easy, and bursting with flavor. Embrace the simplicity of cooking and enjoy the process—great food is just a sheet pan away!

Sheet Pan Fajitas Chicken

Prep Time 10 minutes
Cook Time 20 minutes
Total Time 30 minutes
Servings 4 servings
Calories 350
Enjoy flavorful, easy-to-make chicken fajitas roasted on a sheet pan, perfect for a quick and delicious meal.

Ingredients

Protein

  • 1.5 pounds boneless, skinless chicken breasts (cut into thin strips)
  • 1 red bell pepper red bell pepper (cut into strips)
  • 1 yellow bell pepper yellow bell pepper (cut into strips)
  • 1 orange bell pepper orange bell pepper (cut into strips)
  • 1 red onion red onion (cut into wedges)
  • 3 cloves garlic (minced)
  • 3 tablespoons olive oil
  • 0.25 cup fresh cilantro (chopped)
  • 2 tablespoons lime juice (freshly squeezed)
  • 6 8-inch flour or corn tortillas (warmed)
  • 2 teaspoons chili powder
  • 2 teaspoons ground cumin
  • 2 teaspoons dried oregano
  • 1 teaspoon smoked paprika
  • to taste kosher salt kosher salt
  • to taste black pepper black pepper

Instructions 

  • Slice chicken into thin strips and cut vegetables into similar-sized strips.
  • Mix chili powder, cumin, oregano, paprika, salt, and pepper; coat chicken and vegetables with the spice mixture and olive oil.
  • Roast on a sheet pan at 425°F (220°C) for 15–20 minutes until cooked and slightly charred.
  • Finish by squeezing lime juice over everything, sprinkle with cilantro, and serve with warm tortillas.

Notes

For extra flavor, marinate the chicken with spices and lime juice for 30 minutes before roasting.
Calories: 350kcal
Cost: $15
Course: Main Course
Cuisine: Mexican
Keyword: Chicken, fajitas, sheet pan

Unleashing the Flavor: Perfectly Easy Greek Yogurt Pancakes with Almond Flour

Are you ready to transform your breakfast game? These Greek yogurt pancakes made with almond flour are not only delicious but also packed with nutrition. With a light and fluffy texture that rivals traditional pancakes, this recipe is a quick and healthy option for busy mornings or leisurely brunches. In just minutes, you can whip up a stack that everyone will love!

Why You’ll Love This Recipe

This recipe is designed with your needs in mind. Here are five compelling reasons to make these pancakes a staple in your kitchen:

  • Protein Power: With Greek yogurt and egg whites, these pancakes are a high-protein breakfast option that keeps you full and energized.
  • Low-Carb Delight: Using almond flour makes them a fantastic choice for those following low-carb or gluten-free diets.
  • Quick Preparation: You can have these pancakes ready in under 20 minutes—perfect for mornings when you’re short on time.
  • Customizable: This recipe is versatile; feel free to add fruits or spices to tailor them to your taste.
  • Kid-Approved: They’re so tasty that even the pickiest eaters will ask for seconds!

Ingredients Breakdown

To make these delectable pancakes, you’ll need the following ingredients:

  • 2/3 cup almond flour: A gluten-free alternative that adds a nutty flavor. I recommend using King Arthur for a finer grind.
  • 2 tbsp coconut flour: Helps absorb moisture and adds a subtle sweetness.
  • 1/2 cup Greek yogurt: I prefer Fage 2% for its ideal consistency, which enhances the pancake’s fluffiness.
  • 1/2 tsp vanilla: For an aromatic, sweet flavor.
  • 1/4 tsp baking powder: This is essential for fluffiness.
  • 1/4 cup egg whites: Adds protein and helps bind the ingredients.
  • Pinch of salt: Balances the sweetness and enhances flavor.

Substitutions and Variations

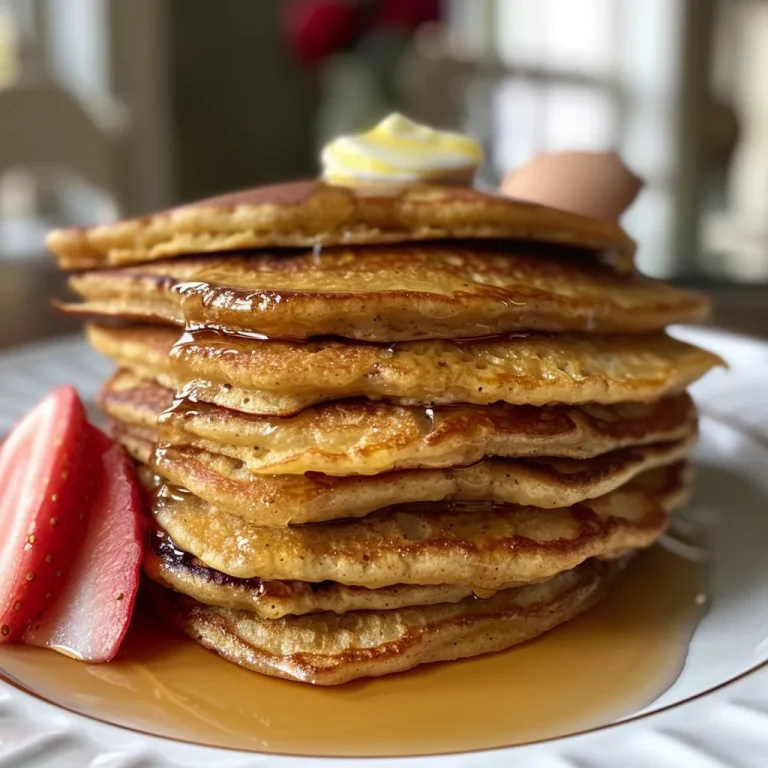
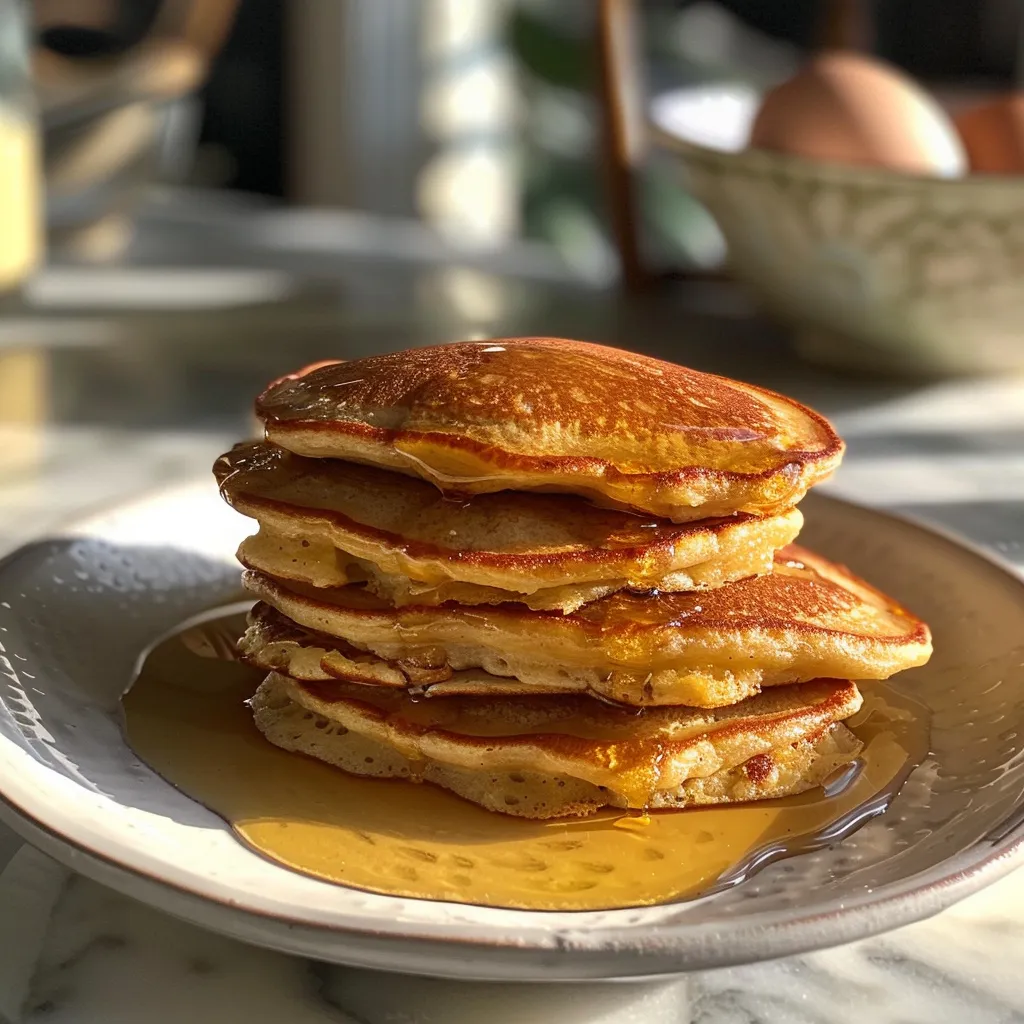
Juicy pancakes made with Greek yogurt and almond flour, served with maple syrup, captured in natural light.

If you don’t have all the ingredients or want to switch things up, here are some easy substitutions:

  • Flour alternatives: You can use oat flour or whole wheat flour instead of almond flour if you prefer.
  • Yogurt options: Any plain yogurt works, but Greek yogurt offers the best consistency.
  • Egg replacements: Use flaxseed meal mixed with water as a vegan alternative to egg whites.
  • Sweeteners: Consider adding honey or maple syrup instead of vanilla extract for additional sweetness.

Pro Tips for Perfect Pancakes

To ensure your pancakes turn out perfectly every time, keep these expert tips in mind:

  • Don’t Overmix: Stir the batter until just combined. Overmixing can lead to dense pancakes.
  • Preheat the Pan: Ensure your skillet is hot before pouring the batter to get that nice golden brown.
  • Test the Heat: Drop a few drops of water on the pan; if they sizzle and evaporate, it’s ready!
  • Use a Cookie Scoop: For even-sized pancakes, a cookie scoop helps portion out the batter perfectly.
  • Keep Warm: Place cooked pancakes in a warm oven (200°F) while you finish the batch.
  • Adjust Thickness: If the batter is too thick, add a splash of milk or water to achieve your desired consistency.
  • Flavor Boost: Consider adding spices like cinnamon or nutmeg for extra warmth and flavor.
  • Serving Size: This recipe makes about 4 servings, perfect for a family breakfast!

Avoiding Common Mistakes

Even the best cooks can have off days. Here are some common pitfalls and how to avoid them:

  • Flat Pancakes: Ensure your baking powder is fresh; old leavening agents can result in flat pancakes.
  • Burnt Edges: If the edges burn before the center cooks, your pan may be too hot. Lower the heat for more even cooking.
  • Too Dense: If your pancakes are dense, you may have overmixed the batter. Remember, just mix until combined.
  • Sticky Batter: If the batter sticks to the pan, ensure it’s adequately greased and heated.

Storage and Make-Ahead Instructions

If you’d like to prepare these pancakes in advance, here’s how to store and reheat them:

  • Storing Leftovers: Store leftover pancakes in an airtight container in the fridge for up to 3 days.
  • Freezing: Place cooked pancakes in a single layer on a baking sheet, freeze until solid, then transfer to a freezer bag. They can be frozen for up to 3 months.
  • Reheating: Reheat in the microwave for about 30 seconds or in a toaster for a crispy finish.

Serving Suggestions

Elevate your pancake experience with these delicious serving ideas:

  • Fresh Fruits: Top with berries, sliced bananas, or peaches for added sweetness and nutrition.
  • Nut Butters: Drizzle with almond or peanut butter for a protein boost.
  • Maple Syrup: A classic choice; just a drizzle goes a long way!
  • Yogurt Topping: Add a dollop of Greek yogurt on top for extra creaminess.

Frequently Asked Questions

Here are some common questions about making Greek yogurt pancakes:

  • Can I make these pancakes gluten-free? Yes! Use almond flour and ensure all other ingredients are gluten-free.
  • Can I use regular flour instead of almond flour? Yes, but the texture and nutritional profile will change.
  • What can I use instead of Greek yogurt? Any plain yogurt works, but Greek yogurt offers the best consistency and protein content.
  • How do I know when the pancakes are ready to flip? Look for bubbles forming on the surface and edges that appear set.
  • Can these pancakes be made vegan? Yes, substitute the egg whites with a flaxseed mixture and use plant-based yogurt.
  • How do I make the batter thinner? Add a little milk or water until you reach your desired consistency.
  • What’s the best way to store leftover pancakes? Store in an airtight container in the fridge for up to 3 days, or freeze for longer storage.
  • Can I add mix-ins to the batter? Absolutely! Consider adding chocolate chips, nuts, or spices for extra flavor.

Nutrition Tips and Dietary Adaptations

These pancakes are not only tasty but also nutritious. Here are some dietary tips:

  • Boost Fiber: Add chia seeds or flaxseeds to the batter for additional fiber and omega-3 fatty acids.
  • Lower Sugar: Use unsweetened applesauce in place of sweeteners for a lower-sugar option.
  • Vegan Options: As mentioned, switch out the egg whites and yogurt for plant-based alternatives.
  • Protein-Packed: To increase protein content, consider adding a scoop of protein powder to the batter.

Now that you have all the tools and tips, it’s time to grab your ingredients and start cooking! These perfectly easy Greek yogurt pancakes are waiting to bring joy and satisfaction to your breakfast table. With a few simple steps, you’ll have a delightful dish that everyone will love. Happy cooking!

Easy Greek Yogurt Pancakes with Almond Flour - myjoyfulkitchen

Prep Time 5 minutes
Cook Time 10 minutes
Total Time 15 minutes
Servings 2 servings
Calories 250
These fluffy Greek yogurt pancakes with almond flour are quick to make and perfect for a healthy breakfast.

Ingredients

dry ingredients

  • 2/3 cup almond flour (King Arthur for finer grind)
  • 2 tbsp coconut flour
  • 1/2 cup greek yogurt (Fage 2% for perfect consistency)
  • 1/2 tsp vanilla
  • 1/4 tsp baking powder
  • 1/4 cup egg whites

pinch of salt

Instructions 

  • Mix all dry ingredients in a bowl.
  • In a separate bowl, combine Greek yogurt, vanilla, and egg whites.
  • Pour wet ingredients into dry and stir until combined.
  • Heat a non-stick skillet over medium heat and pour batter to form pancakes.
  • Cook until bubbles form, then flip and cook until golden.

Notes

For extra flavor, add a drizzle of honey or fresh berries.
Calories: 250kcal
Cost: $8
Course: Breakfast
Cuisine: Greek
Keyword: Almond Flour, Pancakes, Yogurt

Discover the Ultimate Garlic Butter Steak Bites Recipe

If you’re looking to elevate your dinner experience without spending hours in the kitchen, you’ve landed in the right place. This Garlic Butter Steak Bites recipe is not just a meal; it’s a culinary experience that combines rich flavors and tender cuts for a dish that’s as delightful as it is easy to prepare. In about 20 minutes, you can impress your family or guests with perfectly seared steak bites drizzled with aromatic garlic butter. Let’s dive into this deliciously simple recipe!

Why You’ll Love This Recipe

  • Quick Preparation: Ready in just 20 minutes, it’s perfect for busy weeknight dinners.
  • Flavor Explosion: The combination of garlic butter and soy sauce creates a mouthwatering marinade that infuses every bite.
  • Versatile Dish: Enjoy them as an appetizer, main course, or even as a topping for salads and rice bowls.
  • Easy Ingredients: Requires only a few pantry staples, making it budget-friendly and accessible.
  • Impressive Presentation: These steak bites not only taste amazing but also look gourmet on the plate, elevating your dining experience.

Ingredient Breakdown

Here’s what you’ll need to make these irresistible Garlic Butter Steak Bites:

  • 1 lb sirloin or ribeye steak: Cut into bite-sized cubes. Sirloin is lean yet flavorful, while ribeye offers more marbling.
  • 4 cloves fresh garlic: Minced. Fresh garlic enhances the dish’s aroma and flavor.
  • 4 tbsp unsalted butter: Adds richness; feel free to use salted butter for extra flavor.
  • 2 tbsp olive oil: For searing; can be replaced with canola or vegetable oil if preferred.
  • 2 tbsp low-sodium soy sauce: Balances flavors; tamari can be used for a gluten-free option.
  • 2 tbsp fresh parsley: Chopped for garnish; adds a fresh touch and color.

Expert Tips for Perfect Steak Bites

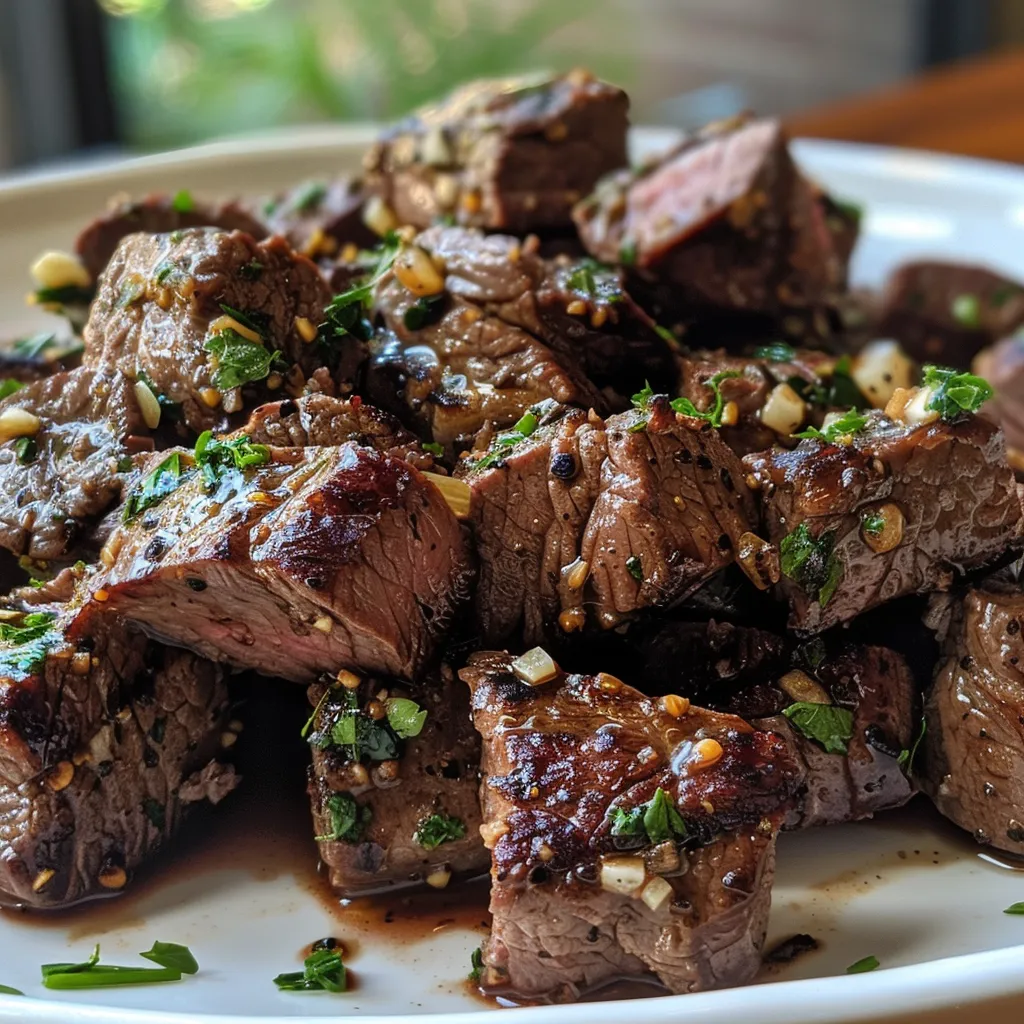
Flavorful steak cubes in a rich garlic butter sauce, ready to serve.
  • Use a hot pan: Ensure your skillet is hot enough to sear the steak properly, which locks in juices and flavor.
  • Don’t overcrowd the pan: Cook in batches to maintain high heat and achieve a nice crust on all sides.
  • Rest the steak: Allow the cooked steak bites to rest for a few minutes before serving to retain moisture.
  • Adjust seasoning: Feel free to add your favorite seasonings, like smoked paprika or cayenne pepper, for additional flavor.
  • Try different cuts: Experiment with different cuts of steak, like flank or tenderloin, for varied textures and flavors.
  • Serve immediately: These steak bites are best enjoyed right after cooking; they can lose their appeal if left to sit.
  • Pair with sides: Consider serving with mashed potatoes, rice, or a fresh salad for a complete meal.
  • Use a meat thermometer: For perfect doneness, aim for 130°F for medium-rare or 140°F for medium.

Common Mistakes and Troubleshooting

Even a simple recipe can have its pitfalls. Here’s how to avoid common mistakes:

  • Overcooking: Steak bites can become tough if overcooked. Keep a close eye on cooking times.
  • Not seasoning enough: Make sure to season the steak generously with salt and pepper before cooking.
  • Using cold steak: Let your steak come to room temperature before cooking for even cooking.
  • Not letting the garlic cook: Add garlic after searing the steak to prevent burning and bitterness.

Variations to Try

Switch things up with these delicious variations:

  • Spicy Garlic Butter: Add red pepper flakes to the garlic butter for a kick.
  • Mushroom Garlic Butter: Sauté sliced mushrooms alongside the garlic for added texture and flavor.
  • Herbed Garlic Butter: Mix in fresh herbs like thyme or rosemary for a fragrant twist.
  • Asian-style Marinade: Replace soy sauce with teriyaki sauce for a sweeter flavor profile.

Storage and Make-Ahead Instructions

Planning ahead? Here’s how to store and reheat your steak bites:

  • Storing: Keep leftovers in an airtight container in the fridge for up to 3 days.
  • Reheating: Reheat in a skillet over medium heat for best results, adding a splash of water or broth to keep them moist.
  • Make-ahead: You can season and cut the steak ahead of time, keeping it refrigerated until ready to cook.

Frequently Asked Questions

Here are some common questions about making Garlic Butter Steak Bites:

  • Can I use frozen steak? Yes, but ensure it’s fully thawed before cooking for even results.
  • What’s the best cut of steak for steak bites? Sirloin and ribeye are great, but feel free to experiment with your favorites.
  • Can I make these steak bites in the oven? Yes, roast them at 400°F for about 15-20 minutes, flipping halfway through.
  • How can I make these steak bites gluten-free? Use gluten-free soy sauce or tamari as a substitute.
  • What should I serve with Garlic Butter Steak Bites? They pair well with mashed potatoes, a fresh salad, or garlic bread.
  • Is it necessary to let the steak rest? Yes, this helps retain juices and improves texture.
  • Can I double the recipe? Absolutely! Just be mindful of cooking in batches to avoid overcrowding the pan.
  • How do I know when the steak is done? Use a meat thermometer for accuracy; 130°F for medium-rare, 140°F for medium.

Nutrition Tips and Dietary Adaptations

This recipe can be easily adapted for various dietary needs:

  • Low-carb: Pair with non-starchy vegetables instead of grains for a keto-friendly meal.
  • Dairy-free: Substitute vegan butter for a dairy-free option.
  • Protein-packed: Add more protein by serving with a side of beans or lentils.

Equipment Recommendations

To make the best Garlic Butter Steak Bites, consider the following kitchen tools:

  • Heavy skillet: A cast iron or stainless-steel skillet is ideal for high-heat cooking.
  • Meat thermometer: Ensures your steak is cooked to perfection every time.
  • Chopping board: For easy prep and cutting of your steak and garlic.

Serving Suggestions

Enhance your meal by serving these steak bites with:

  • Mashed potatoes: Creamy and rich, they complement the steak perfectly.
  • Jasmine rice: Fluffy rice soaked in the garlic butter sauce is irresistible.
  • Garlic bread: Perfect for soaking up the delicious juices from the steak.
  • Skillet green beans: A fresh, crunchy side that contrasts nicely with the tender steak bites.

In conclusion, this Garlic Butter Steak Bites recipe is a standout dish that showcases the beauty of simple, high-quality ingredients. With a little time and care, you can create a meal that not only satisfies your taste buds but also impresses anyone you share it with. Happy cooking!

Garlic Butter Steak Bites

Prep Time 10 minutes
Cook Time 10 minutes
Total Time 20 minutes
Servings 4 servings
Calories 350
Delicious tender steak bites cooked in garlic butter and soy sauce, perfect for a quick and flavorful meal.

Ingredients

Meat

  • 1 lb sirloin or ribeye steak, cut into bite-sized cubes
  • 4 cloves fresh garlic, minced
  • 4 tbsp unsalted butter
  • 2 tbsp olive oil
  • 2 tbsp fresh parsley, chopped (for garnish)
  • 2 tbsp low-sodium soy sauce

Instructions 

  • Season steak cubes with salt and pepper.
  • Heat olive oil in a skillet over medium-high heat.
  • Sear steak in batches for 4-5 minutes until browned.
  • Add garlic and butter; stir until melted and fragrant.
  • Pour in soy sauce and cook for 1 minute.
  • Garnish with chopped parsley before serving.

Notes

Serve immediately for best flavor.
Calories: 350kcal
Cost: $15
Course: Main Course
Cuisine: American
Keyword: Steak

Welcome to a culinary adventure that will transform your weeknight dinners! This Air Fryer Honey Garlic Chicken recipe is not just a meal; it’s a delightful fusion of sweet and savory flavors that comes together in a matter of minutes. With the air fryer’s magic, you’ll achieve tender, juicy chicken enveloped in a rich honey garlic sauce that makes every bite a treat. Whether you’re a busy professional or a home cook looking for a quick dinner solution, this recipe is designed with you in mind.

Why You’ll Love This Recipe

  • Quick and Easy: This dish can be on your table in under 30 minutes, making it perfect for hectic weeknights.
  • Healthier Cooking: Using the air fryer allows you to enjoy crispy chicken with significantly less oil than traditional frying methods.
  • Simple Ingredients: Most components are pantry staples, which means you can whip this up even when you’re low on groceries.
  • Versatile Meal: Pair it with rice, quinoa, or a fresh salad for a balanced meal, or enjoy it as a standalone dish.
  • Family Favorite: The sweet and savory flavor profile appeals to both kids and adults, ensuring everyone at the table will love it.

Ingredients Breakdown

Below is a detailed list of the ingredients you’ll need, along with some smart substitutions for a personalized touch:

  • Chicken: 1 pound of diced chicken breast or thighs. Thighs are juicier and more forgiving during cooking.
  • Cornflour: 3 tablespoons for that crispy coating. You can substitute with arrowroot starch for a gluten-free option.
  • Salt: 1 teaspoon, to taste. Use sea salt or kosher salt for better flavor.
  • Black Pepper: 1/2 teaspoon, freshly ground for enhanced aroma.
  • Soy Sauce: 1 teaspoon for umami richness. Tamari or coconut aminos work well for a gluten-free alternative.
  • Butter: 1 tablespoon for a richer flavor. You can substitute with olive oil if preferred.
  • Minced Garlic: 1 tablespoon, fresh or jarred. For a kick, consider adding minced ginger.
  • Honey: 5 tablespoons for sweetness. Maple syrup can be used for a vegan option.
  • Chicken Stock: 1/4 cup, homemade or store-bought, adds depth to the sauce.
  • Rice Vinegar: 1 tablespoon for a tangy contrast; use apple cider vinegar as a substitute.
  • Cayenne Pepper: 1/2 teaspoon for a spicy kick; adjust according to your heat preference.

Step-by-Step Cooking Instructions

Follow these straightforward steps to create your Air Fryer Honey Garlic Chicken:

  1. Prepare the Chicken: In a mixing bowl, combine the diced chicken with cornflour, salt, and pepper. Toss until evenly coated.
  2. Make the Sauce: In a small saucepan, melt butter over medium heat. Add minced garlic and sauté until fragrant (about 1 minute). Mix in honey, chicken stock, soy sauce, rice vinegar, and cayenne pepper. Stir until well combined and simmer for 2-3 minutes.
  3. Preheat the Air Fryer: Set your air fryer to 375°F (190°C) for about 5 minutes.
  4. Cook the Chicken: Place the chicken in the air fryer basket in a single layer. Air fry for 10-12 minutes, flipping halfway through, until the chicken is golden and cooked through.
  5. Glaze the Chicken: Once cooked, toss the chicken in the honey garlic sauce until fully coated.
  6. Serve: Enjoy your dish immediately, garnished with sliced green onions or sesame seeds if desired.

Pro Tips for Perfect Results

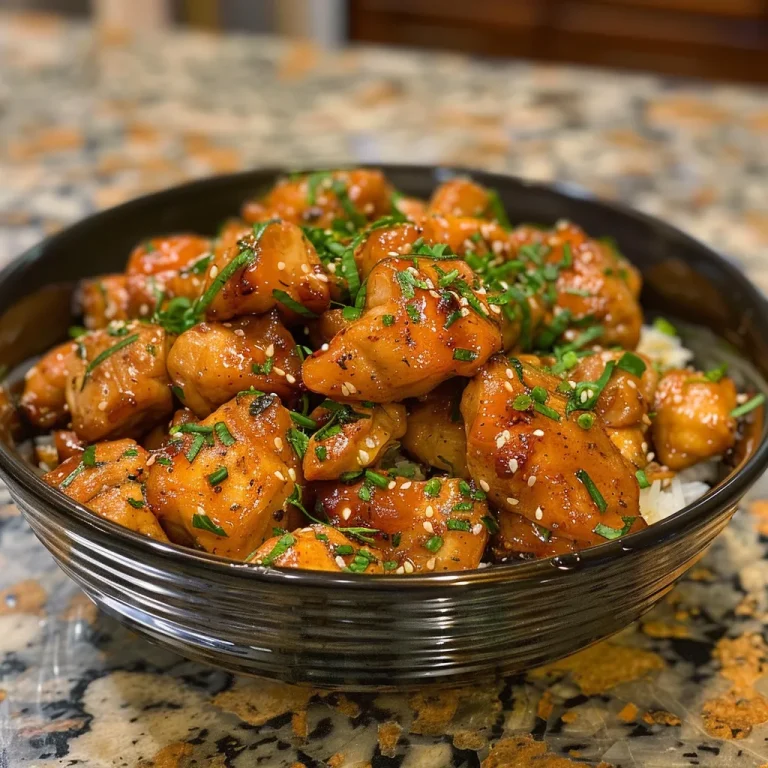
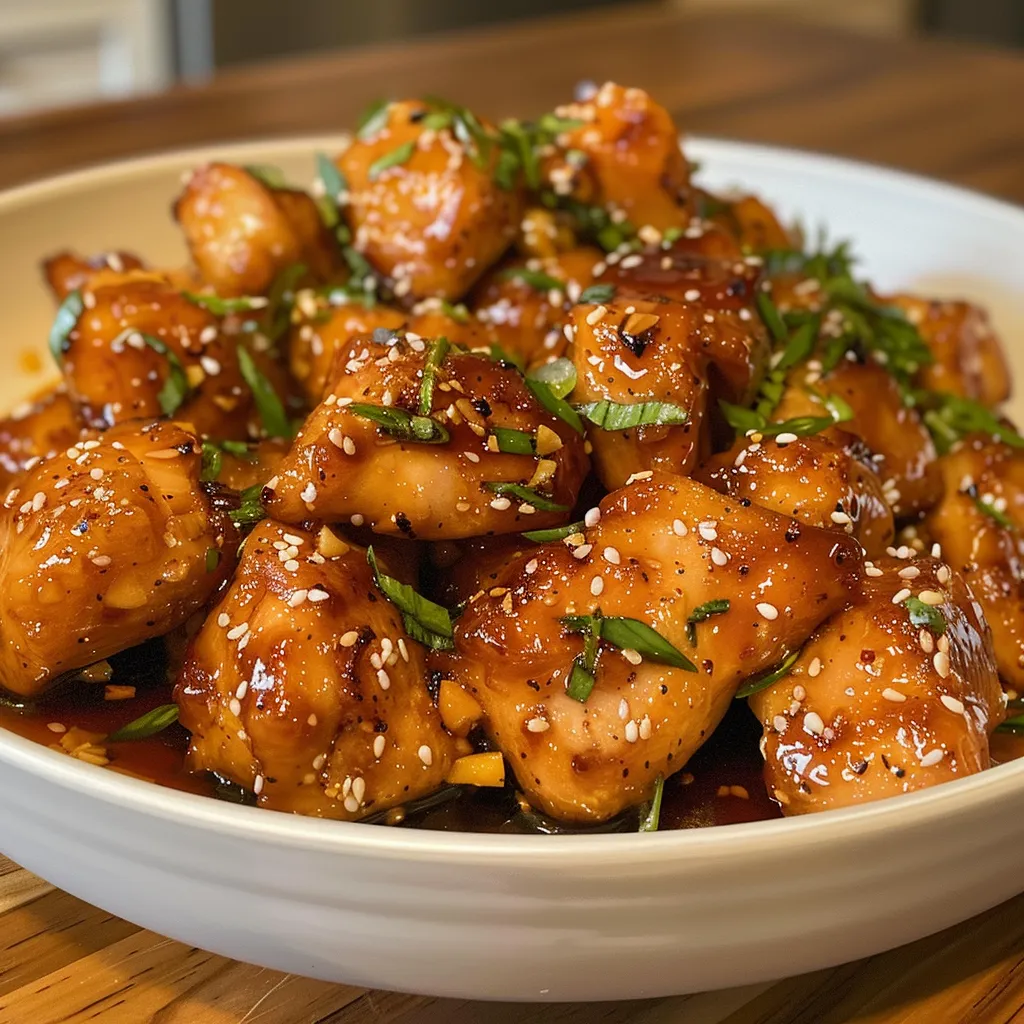
Delicious chunks of chicken coated in a glossy honey garlic glaze.
  • Don’t Overcrowd: To ensure even cooking, avoid overcrowding the air fryer basket. Cook in batches if necessary.
  • Marinate Ahead: For deeper flavor, marinate the chicken in the sauce for 30 minutes before cooking.
  • Check Doneness: Use a meat thermometer to ensure the chicken reaches an internal temperature of 165°F (74°C).
  • Experiment with Flavors: Add extra spices like paprika or herbs like thyme for additional complexity.
  • Use Fresh Ingredients: Fresh garlic and high-quality honey make a noticeable difference in flavor.
  • Serve Immediately: This dish is best enjoyed fresh. Reheating can alter the texture.
  • Pair with Sides: Serve with steamed veggies, rice, or a crisp salad for a well-rounded meal.
  • Make it a Meal Prep: Prepare the chicken and sauce ahead of time. Store separately in the fridge for quick assembly later.

Common Mistakes to Avoid

Here are some common pitfalls and how to avoid them:

  • Burning the Sauce: Keep an eye on the sauce while simmering. If it gets too thick, add a splash of water or stock.
  • Chicken Texture: If your chicken turns out tough, it may have been overcooked. Always check doneness early.
  • Skipping the Cornflour: This is essential for that crispy texture. Don’t skip this step!
  • Ignoring Cook Times: Every air fryer is slightly different. Adjust cooking times based on your model.

Variations to Try

Feel free to customize this recipe with these variations:

  • Spicy Honey Garlic Chicken: Add more cayenne or a splash of hot sauce to the marinade for heat.
  • Honey Garlic Chicken Skewers: Thread marinated chicken onto skewers and grill or air fry for a fun twist.
  • Honey Garlic Cauliflower: Substitute chicken with cauliflower for a vegetarian option that’s just as delicious.
  • Honey Garlic Chicken Stir-Fry: Toss cooked chicken with stir-fried vegetables for a quick, wholesome dish.

Storage and Make-Ahead Instructions

If you want to save leftovers or prepare in advance:

  • Refrigeration: Store leftover chicken in an airtight container in the fridge for up to 3 days.
  • Freezing: Freeze cooked chicken for up to 3 months. Thaw in the fridge before reheating.
  • Reheating: Reheat in the air fryer or oven for best results. Microwaving can result in a soggy texture.

Frequently Asked Questions

Here are some common questions about making Air Fryer Honey Garlic Chicken:

  • Can I use frozen chicken? Yes, but ensure to adjust cooking time accordingly. It may take longer to cook through.
  • What can I substitute for honey? Maple syrup is a great alternative for a vegan option.
  • How do I know when the chicken is done? Use a meat thermometer; the internal temperature should be 165°F (74°C).
  • Can I double the recipe? Yes, just be mindful of not overcrowding the air fryer basket.
  • What sides pair well with this dish? Serve with rice, steamed vegetables, or a light salad for a complete meal.
  • Can I make this dish gluten-free? Yes, use tamari instead of soy sauce and ensure other ingredients are gluten-free.
  • Is this recipe kid-friendly? Absolutely! The sweet flavor of honey makes it appealing to children.
  • How long can I store leftovers? In the fridge, leftovers are good for up to 3 days in an airtight container.

Nutritional Tips and Dietary Adaptations

This recipe is not only delicious but can also be tailored to fit various dietary needs:

  • Low-Carb Option: Serve over cauliflower rice for a lower-carb meal.
  • Gluten-Free: Use tamari or coconut aminos to ensure the dish is gluten-free.
  • Lower Sugar Option: Reduce the amount of honey or substitute with a sugar-free syrup.
  • High-Protein: Pair with a protein-rich side like quinoa for a more filling meal.

Equipment Recommendations

To make the best Air Fryer Honey Garlic Chicken, here’s what you’ll need:

  • Air Fryer: A reliable air fryer that fits your kitchen space. Brands like Ninja or Cosori are popular choices.
  • Mixing Bowl: For marinating and mixing your ingredients together.
  • Small Saucepan: Essential for preparing the honey garlic sauce.
  • Meat Thermometer: To ensure your chicken is fully cooked and safe to eat.

Serving Suggestions

When it’s time to serve, consider these pairing ideas:

  • With Rice: Serve over white or brown rice to soak up the delicious sauce.
  • On a Bed of Greens: Serve it atop a fresh salad for a lighter option.
  • With Quinoa: Quinoa adds a nutty flavor and enhances the dish’s protein content.
  • As a Wrap: Use lettuce leaves to create a low-carb wrap with the chicken and veggies.

In conclusion, your journey to creating the perfect Air Fryer Honey Garlic Chicken is just a recipe away! With the right ingredients and a few simple steps, you can enjoy a meal that’s quick, flavorful, and satisfying. Whether it’s a busy weeknight or a casual dinner gathering, this dish is sure to impress. Happy cooking!

Flavorsome Air Fryer Honey Garlic Chicken

Prep Time 10 minutes
Cook Time 15 minutes
Total Time 25 minutes
Servings 4 servings
Calories 450
Enjoy tender and flavorful honey garlic chicken cooked to perfection in the air fryer for a quick and delicious meal.

Ingredients

Protein

  • 1 pound chicken breast or thighs, diced into small pieces
  • 3 tablespoons cornflour
  • 1 teaspoon salt
  • 1/2 teaspoon ground black pepper
  • 1 teaspoon soy sauce
  • 1 tablespoon butter
  • 1 tablespoon minced garlic
  • 5 tablespoons honey
  • 1/4 cup chicken stock
  • 1 tablespoon rice vinegar
  • 1 tablespoon soy sauce
  • 1/2 teaspoon crushed red pepper flakes

Instructions 

  • Toss diced chicken with cornflour, salt, and black pepper.
  • Air fry the chicken at 400°F (200°C) for 10-12 minutes until cooked and crispy.
  • In a small saucepan, melt butter and sauté garlic until fragrant.
  • Add honey, chicken stock, soy sauce, rice vinegar, and red pepper flakes; simmer until slightly thickened.
  • Toss cooked chicken in the honey garlic sauce and serve hot.

Notes

For extra flavor, garnish with chopped green onions or sesame seeds.
Calories: 450kcal
Cost: $12
Course: Main Course
Cuisine: fusion
Keyword: Chicken

Effortless Chocolate Banana Oatmeal Bars: A Busy Morning Essential

Start your day right with these easy-to-make Chocolate Banana Oatmeal Breakfast Bars. Packed with flavor and nutrition, they’re perfect for on-the-go mornings. With simple ingredients and a straightforward process, these bars not only satisfy your cravings but also provide the energy you need to tackle your day. Let’s dive into why this recipe is a must-try and how you can make it a staple in your breakfast routine.

Why You’ll Love This Recipe

  • Quick and Easy: With only a few steps, you can prepare these bars in under 30 minutes, making them ideal for busy mornings.
  • Healthy Ingredients: Packed with ripe bananas, oats, and almond butter, these bars are a great source of fiber, healthy fats, and natural sweetness.
  • Customizable: You can easily tweak the recipe to suit your dietary preferences or ingredient availability, ensuring you get a delicious outcome every time.
  • Meal Prep Friendly: Make a batch at the beginning of the week, and you’ll have a nutritious snack ready to go each day.
  • Kid-Approved: These bars are not only healthy but also delicious, making them a favorite among kids and adults alike.

Ingredients Breakdown

Here’s what you’ll need to make these delectable bars:

  • 3 large ripe bananas: Approximately 1 ½ cups mashed, the riper the bananas, the sweeter and more flavorful your bars will be.
  • ½ cup creamy almond butter: This adds healthy fats and a smooth texture. You can substitute with peanut butter if desired.
  • 1 1/2 cups quick oats: Quick oats help bind the bars without making them too dense. Avoid instant oats as they may lead to a mushy texture.
  • ⅓ cup cocoa powder: For that rich chocolate flavor. You can use unsweetened cocoa or Dutch-processed cocoa for a deeper taste.
  • 1/2 cup to 1 cup chocolate chips: Totally optional but recommended for chocolate lovers! Use semi-sweet, dark, or dairy-free chips as desired.
  • ¼ tsp sea salt: Enhances the overall flavor of the bars.
  • 2 Tbsp pure maple syrup: Adds a touch of natural sweetness. You can adjust this based on the ripeness of your bananas.
  • 1 tsp pure vanilla extract: Elevates the flavor profile.
  • 1 tsp ground cinnamon: Optional, but it adds a warm spice that complements the chocolate and banana.

Pro Tips for Perfect Bars

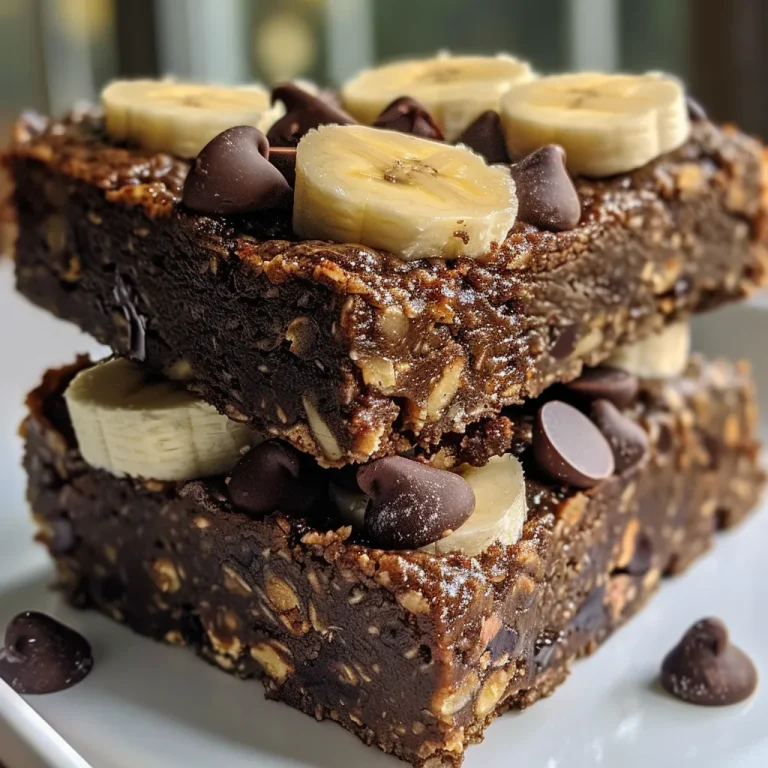
Delicious Chocolate Banana Oatmeal Breakfast Bar featuring a glossy chocolate layer and oats.
  • Use Overripe Bananas: The more speckles on the banana peel, the better. Overripe bananas are sweeter and mash easily, providing a natural sugar boost.
  • Don’t Skip the Salt: A pinch of salt can balance the sweetness and enhance the chocolate flavor.
  • Mix Well: Ensure all ingredients are thoroughly combined for even texture and flavor throughout the bars.
  • Check for Doneness: The bars are ready when the edges are firm, and a toothpick inserted into the center comes out clean.
  • Let Them Cool: Allow the bars to cool completely in the pan before slicing to avoid crumbling.
  • Storage Matters: Store bars in an airtight container. They can last up to a week in the fridge or up to three months in the freezer.
  • Experiment with Add-ins: Feel free to add nuts, seeds, or dried fruits to the mix for extra texture and flavor.
  • Use the Right Pan: A square 8-inch baking pan is perfect for even baking. Line it with parchment paper for easier removal.

Common Mistakes and Troubleshooting

Even the best recipes can have hiccups. Here are common issues you might encounter and how to solve them:

  • Bars Are Too Crumbly: This usually happens if the mixture is too dry. Ensure you have enough wet ingredients or consider adding a bit more almond butter or banana.
  • Baking Time Issues: If the bars are still wet in the center after the suggested baking time, give them a few more minutes. Every oven is different, so keep an eye on them.
  • Too Much Chocolate: If you’re finding the bars too rich, reduce the amount of chocolate chips next time, or try a lighter chocolate.
  • Uneven Texture: Make sure to mix the batter well; lumps can lead to uneven baking.
  • Burnt Edges: If you notice the edges are browning too quickly, cover the pan with foil halfway through baking.

Variations to Try

Once you’ve mastered the basic recipe, why not shake things up? Here are some delicious variations:

  • Nutty Banana Oat Bars: Add chopped walnuts or pecans for a crunchy texture.
  • Berry Blast: Incorporate fresh or frozen berries like blueberries or raspberries for a fruity twist.
  • Peanut Butter Swirl: Instead of almond butter, use peanut butter and swirl some into the batter before baking.
  • Spiced Pumpkin Bars: Substitute ½ cup of pumpkin puree for bananas and add pumpkin pie spice for a seasonal treat.

Storage and Make-Ahead Instructions

These bars are perfect for meal prep! Here’s how to store and make them ahead of time:

  • Refrigeration: Store in an airtight container in the fridge for up to a week. They’re great chilled or at room temperature.
  • Freezing: Cut the bars into squares, wrap them individually in plastic wrap, and then place them in a freezer bag. They can be frozen for up to 3 months.
  • Thawing: To enjoy frozen bars, simply take them out of the freezer and let them thaw at room temperature for about 30 minutes.
  • Batch Cooking: Make a double batch to ensure you have plenty on hand for busy days!

FAQ: Your Questions Answered

  • Can I use instant oats instead of quick oats? No, instant oats will make the bars mushy. Stick to quick oats for the right texture.
  • Why are my bars falling apart? This can happen if they’re not cooled completely before slicing or if there are not enough binding ingredients.
  • Can I make these without chocolate chips? Absolutely! The bars are delicious even without chocolate. You can add nuts or dried fruit instead.
  • How do I know when the bars are done baking? The edges should be firm, and a toothpick inserted in the center should come out clean.
  • Can I double this recipe? Yes, you can double the ingredients and use a larger baking pan, but adjust the baking time as needed.
  • What can I substitute for almond butter? You can use peanut butter or sunflower seed butter as alternatives.
  • Can I add protein powder? Yes, you can mix in a scoop of protein powder if you’re looking to boost the protein content.
  • What’s the best way to slice the bars? For clean cuts, use a sharp knife and cut the bars after they’ve cooled completely.

Nutrition Tips and Dietary Adaptations

These Chocolate Banana Oatmeal Breakfast Bars offer a balanced blend of nutrients:

  • High Fiber: The oats and bananas provide dietary fiber, aiding digestion and keeping you full.
  • Natural Sweetness: Using ripe bananas means you can reduce added sugars while still enjoying sweet bars.
  • Gluten-Free Option: Use certified gluten-free oats to make these bars suitable for those with gluten sensitivities.
  • Vegan Adaptation: Substitute almond butter with a nut-free option and omit chocolate chips or choose dairy-free versions.

Essential Equipment for Success

Having the right tools can make a huge difference in your cooking experience. Here’s what you’ll need:

  • 8-inch Square Baking Pan: Perfect for even cooking and easy removal with parchment paper.
  • Mixing Bowls: A large bowl for combining wet ingredients and another for dry.
  • Masher: For easily mashing ripe bananas to a creamy consistency.
  • Spatula: To mix and spread the batter evenly in the pan.

Serving Suggestions

These bars are versatile and can be enjoyed in several ways:

  • As a Snack: Perfect for a mid-morning or afternoon pick-me-up.
  • With Yogurt: Serve with Greek yogurt and fresh fruit for a balanced breakfast.
  • On-the-Go: Wrap them individually for a convenient breakfast or snack.
  • Drizzled with Nut Butter: Add a drizzle of peanut or almond butter on top for an extra protein boost.

In conclusion, these Chocolate Banana Oatmeal Breakfast Bars are not only easy to make but also a wholesome addition to your morning routine. With their rich flavor, customizable features, and health benefits, you’ll find yourself reaching for them time and time again. Enjoy the process of making them, and savor each delicious bite!

Chocolate Banana Oatmeal Breakfast Bars

Prep Time 10 minutes
Cook Time 15 minutes
Total Time 25 minutes
Servings 8 bars
Calories 180
Enjoy a healthy and delicious breakfast with these easy-to-make chocolate banana oatmeal bars, perfect for on-the-go mornings.

Ingredients

Bananas

  • 3 large ripe bananas ((1 ½ cups mashed))
  • ½ cup creamy almond butter ((*))
  • 1.5 cups quick oats
  • cup cocoa powder
  • ½ to 1 cup chocolate chips ((optional**))
  • ¼ tsp sea salt ((to taste))
  • 2 Tbsp pure maple syrup
  • 1 tsp pure vanilla extract
  • 1 tsp ground cinnamon

Instructions 

  • Preheat oven to 350°F (175°C) and line an 8-inch square pan with parchment.
  • Mash bananas, then stir in almond butter and maple syrup until combined.
  • Add oats, cocoa powder, salt, and cinnamon; mix into a thick batter. Fold in chocolate chips if desired.
  • Spread batter evenly in the pan, then bake for 12-16 minutes until firm.
  • Cool before slicing into bars and serving.

Notes

Store in an airtight container for up to 3 days.
Calories: 180kcal
Cost: $10
Course: Breakfast
Keyword: banana, chocolate, Oats

Discover the Joy of Garlic Butter Steak Bites

Welcome to the ultimate guide for making Garlic Butter Steak Bites. This dish is a delicious blend of juicy steak and rich garlic butter that is not only easy to prepare but also perfect for any occasion—from busy weeknights to impressive dinner parties. With just a few ingredients and simple techniques, you can create a meal that bursts with flavor and satisfaction. Let’s dive into the details that will elevate your cooking game!

Why You’ll Love This Recipe

Here are just a few reasons why this Garlic Butter Steak Bites recipe is a must-try:

  • Quick and Easy: With a total cooking time of about 20 minutes, this recipe is perfect for busy schedules.
  • Minimal Ingredients: Using just three key ingredients, you can create a dish that feels indulgent without the fuss.
  • Versatile Pairing: These steak bites complement a variety of sides, making them suitable for any meal.
  • Flavor Packed: The combination of garlic and butter creates a rich and savory sauce that enhances the steak’s natural flavors.
  • Impressive Presentation: Serve these bites on a platter for an eye-catching dish that will wow your guests.

Ingredient Breakdown for Garlic Butter Steak Bites

Understanding your ingredients is key to achieving the best results. Here’s a detailed look at what you’ll need:

  • 1 lb sirloin or ribeye steak: Cut into 1-inch cubes. Choose ribeye for more marbling and flavor, or sirloin for a leaner option.
  • 4 tbsp unsalted butter: Divided; helps create that rich garlic butter sauce. Use unsalted to control the saltiness of your dish.
  • 4 cloves garlic: Minced; fresh garlic provides the best flavor, but you can use garlic powder in a pinch.
  • 1 tsp salt: Essential for seasoning; adjust based on your preference.
  • ½ tsp black pepper: Freshly ground for the best flavor.
  • 2 tbsp fresh parsley: Chopped; adds color and freshness to the dish.

Pro Tips for Perfect Garlic Butter Steak Bites

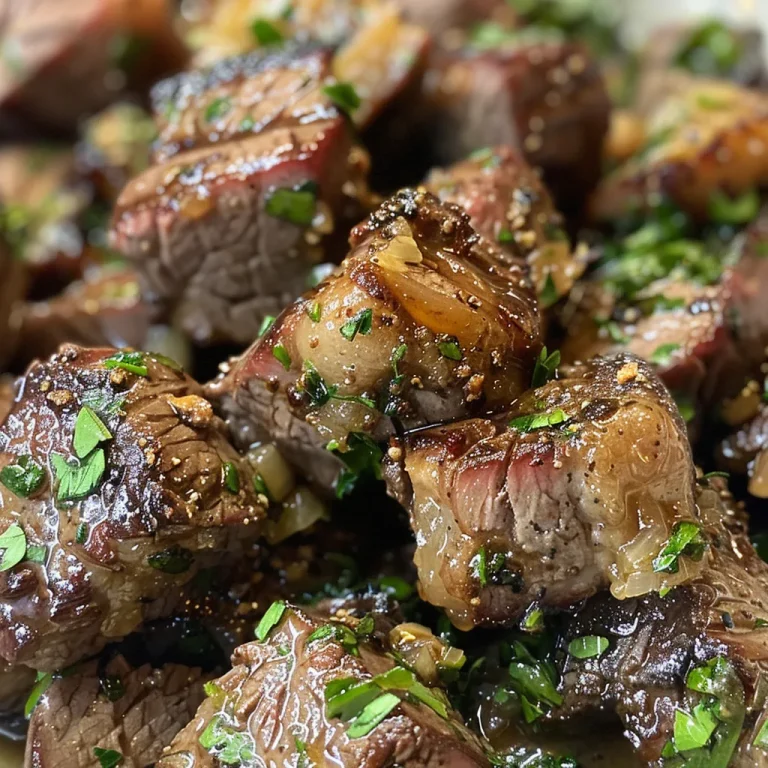
Appetizing garlic butter steak bites garnished with fresh parsley.

To ensure your steak bites turn out perfectly every time, follow these expert tips:

  • Choose the Right Cut: For tender steak bites, opt for cuts like ribeye or sirloin that are known for their flavor and tenderness.
  • Preheat Your Pan: Ensure your skillet is hot before adding the steak. A hot pan creates a nice sear and locks in juices.
  • Don’t Overcrowd the Pan: Cook the steak in batches to avoid steaming. This allows each piece to sear beautifully.
  • Let the Steak Rest: After cooking, allow the steak to rest for a few minutes. This helps retain juices and ensures tenderness.
  • Finish with Fresh Herbs: Adding fresh parsley at the end brightens the dish and adds a pop of color.
  • Adjust Seasoning: Taste and adjust the seasoning before serving. You can always add more salt or pepper if needed.
  • Experiment with Variations: Feel free to add spices or sauces to customize the flavor to your liking.
  • Use a Meat Thermometer: For perfect doneness, use a meat thermometer to check the internal temperature.

Avoid Common Mistakes and Troubleshooting

Here are some common pitfalls to avoid when making garlic butter steak bites:

  • Overcooking: Keep an eye on your steak; overcooked steak bites can become tough. Ideal internal temperatures are 130°F for medium-rare and 145°F for medium.
  • Insufficient Searing: If you don’t sear the steak properly, you may miss out on that delicious crust. Ensure your pan is hot enough.
  • Skipping the Resting Period: Don’t skip letting the steak rest after cooking. This step is crucial for juicy bites.

Delicious Variations of Garlic Butter Steak Bites

Mix things up with these tasty variations:

  • Spicy Garlic Butter: Add crushed red pepper flakes to the garlic butter for a spicy kick.
  • Herb-Infused Butter: Mix in fresh herbs like thyme or rosemary to the butter for an aromatic twist.
  • Asian-Inspired: Add soy sauce and sesame oil for an Asian flavor profile.
  • Lemon Garlic Butter: Squeeze fresh lemon juice into the garlic butter for a zesty finish.

Storage and Make-Ahead Instructions

Here’s how to store your garlic butter steak bites:

  • Refrigeration: Store leftover steak bites in an airtight container in the fridge for up to 3 days.
  • Freezing: Freeze cooked steak bites in a single layer on a baking sheet, then transfer to a freezer-safe container for up to 3 months.
  • Reheating: To reheat, warm gently in a skillet over low heat, adding a little butter or oil to prevent drying out.

Frequently Asked Questions

Here are answers to some common questions about garlic butter steak bites:

  • Can I use other cuts of beef? Yes, you can use any steak cut you prefer, though cooking times may vary.
  • How do I know when the steak is done? Use a meat thermometer for accurate results. Aim for 130°F for medium-rare.
  • Can I prepare the garlic butter ahead of time? Absolutely! You can make the garlic butter and refrigerate it until ready to use.
  • What sides go well with steak bites? Mashed potatoes, rice, or a fresh salad make great accompaniments.
  • Is this recipe gluten-free? Yes, all the ingredients are naturally gluten-free.
  • Can I use margarine instead of butter? While margarine can be used, it won’t provide the same rich flavor as butter.
  • Can I double the recipe? Yes, just ensure you cook in batches to maintain the quality of the sear.
  • What’s the best way to cut the steak? Cut against the grain to ensure tender bites.

Nutrition Tips and Dietary Adaptations

This recipe can easily be adapted to fit different dietary needs:

  • Keto-Friendly: This recipe is naturally low in carbs, making it perfect for keto diets.
  • Paleo Option: Use grass-fed beef and eliminate butter for a paleo-friendly version.
  • Low-Sodium: Reduce or eliminate the added salt to cater to low-sodium diets.

Equipment Recommendations

Here’s what you’ll need to make your garlic butter steak bites:

  • Skillet: A heavy-bottomed skillet or cast-iron pan is ideal for achieving a good sear.
  • Meat Thermometer: Essential for checking the doneness of your steak.
  • Cutting Board and Knife: For prepping your ingredients efficiently.

Serving Suggestions for Garlic Butter Steak Bites

Here are some delicious ways to serve your steak bites:

  • On a Platter: Arrange the steak bites on a serving platter and drizzle with the garlic butter for an impressive presentation.
  • With Dipping Sauce: Serve with a side of chimichurri or spicy aioli for added flavor.
  • Garnished: Top with fresh herbs or a sprinkle of flaky sea salt before serving for an extra touch.

In conclusion, making Garlic Butter Steak Bites is not only easy but also a rewarding culinary experience. With the right ingredients, techniques, and a little creativity, you can impress your friends and family with this delightful dish. Whether it’s a quick weeknight dinner or a special occasion, these steak bites are sure to be a hit. Happy cooking!

Garlic Butter Steak Bites

Prep Time 10 minutes
Cook Time 10 minutes
Total Time 20 minutes
Servings 4 servings
Calories 350
Enjoy tender, flavorful steak bites cooked in garlic butter for a quick and delicious meal.

Ingredients

Meat

  • 1 lb sirloin or ribeye steak, cut into 1-inch cubes

Dairy

  • 4 tbsp unsalted butter, divided

Produce

  • 4 cloves garlic, minced
  • 1 tsp salt
  • ½ tsp black pepper

Herbs

  • 2 tbsp fresh parsley, chopped

Instructions 

  • Cut steak into 1-inch cubes and mince garlic.
  • Season steak with salt and pepper.
  • Melt 2 tbsp butter in a skillet over medium-high heat. Sear steak in batches for 2-3 minutes per side.
  • Add remaining butter and garlic; cook for 1 minute until fragrant.
  • Return steak to skillet, toss in garlic butter for 1 minute, then garnish with parsley.

Notes

Serve immediately for best flavor.
Calories: 350kcal
Cost: $15
Course: Main Course
Cuisine: American
Keyword: Steak

Welcome to the world of quick, nutritious, and delicious meals! If you’re seeking a delightful way to kickstart your day or an indulgent snack that doesn’t compromise your health goals, look no further than this Peanut Butter Banana Smoothie. This creamy concoction blends ripe bananas with rich peanut butter and almond milk, creating a satisfying drink that’s as nourishing as it is tasty. In this comprehensive guide, we’ll explore everything from the recipe itself to tips for customization, common pitfalls, and much more.

Why You’ll Love This Recipe

  • Quick and Easy: Whip this smoothie up in under 10 minutes—perfect for busy mornings or when you’re on the go.
  • Nutritious Boost: Packed with protein from peanut butter and potassium from bananas, this smoothie is great for muscle recovery and energy.
  • Customizable: Tailor it to your taste buds by adding ingredients like spinach, cocoa powder, or different nut butters.
  • Family-Friendly: Kids love it! The sweet and creamy flavor makes it an easy way to sneak in some healthy ingredients.
  • Dairy-Free Option: Easily made vegan by using almond milk or other plant-based milks.

Ingredient Breakdown

Let’s dive into the specific ingredients you’ll need for this Peanut Butter Banana Smoothie and some alternatives to consider:

  • 1 ripe banana: The foundation of your smoothie. Opt for overripe bananas for maximum sweetness.
  • 2 tablespoons peanut butter: This provides protein and creaminess. You can substitute with almond butter or sunflower seed butter for a nut-free option.
  • 1 cup almond milk: A great dairy-free base. Feel free to use any milk you prefer, such as oat or soy milk.
  • 1 tablespoon honey (optional): For additional sweetness, especially if your banana isn’t very ripe. Maple syrup is a good vegan alternative.
  • ½ teaspoon vanilla extract: Enhances the flavor profile beautifully.
  • 1 tablespoon chia seeds (optional): Adds omega-3 fatty acids and fiber. You can omit them if you prefer a smoother texture.
  • Ice cubes (to taste): For a refreshing chill. Adjust based on your desired thickness.

How to Make a Peanut Butter Banana Smoothie

Here’s a step-by-step guide to making your smoothie:

  • Peel the ripe banana and break it into pieces.
  • Add the banana pieces to a blender.
  • Include the peanut butter in the blender.
  • Pour in the almond milk.
  • Add honey for sweetness, if desired.
  • Include vanilla extract for flavor.
  • Add chia seeds for extra nutrition, if using.
  • Add a handful of ice cubes for a refreshing texture.
  • Blend all ingredients on high until smooth and creamy.
  • Taste and adjust sweetness or thickness as needed by adding more honey or milk.

Pro Tips for the Perfect Smoothie

Refreshing peanut butter banana smoothie with ice cubes visible.
  • Frozen Bananas: For a thicker consistency, freeze your bananas ahead of time. They blend beautifully and add a creamy texture.
  • Balance Flavors: If the smoothie is too sweet, a pinch of salt can enhance the flavors and reduce sweetness.
  • Nut Butter Variations: Experiment with different nut butters like almond or cashew for varied flavors.
  • Add Greens: Sneak in a handful of spinach or kale for added nutrients without altering the taste.
  • Protein Boost: To increase protein content, add a scoop of protein powder or Greek yogurt.
  • Meal Prep: Prepare smoothie packs by portioning out the banana and peanut butter in advanced, so you can blend on busy mornings.
  • Mix and Match: Try adding different fruits like berries or mango for a tropical twist on your smoothie.
  • Texture Control: Adjust the amount of almond milk based on your preferred consistency—more for a thinner smoothie, less for a thicker one.

Common Mistakes and Troubleshooting

Even simple recipes can present challenges. Here’s how to avoid common pitfalls:

  • Too Thick: If your smoothie turns out thicker than desired, simply add more milk or water until you reach your desired consistency.
  • Too Sweet: If it’s overly sweet, add a splash of lemon juice or a pinch of salt to balance the flavors.
  • Not Blending Well: Make sure your blender is powerful enough to handle ice and frozen fruits. If it struggles, blend the liquids first before adding solids.

Variations to Try

Mix things up with these creative variations:

  • Chocolate Peanut Butter Banana Smoothie: Add 1 tablespoon of cocoa powder for a chocolatey twist.
  • Berry Peanut Butter Banana Smoothie: Include a handful of mixed berries for added flavor and antioxidants.
  • Green Peanut Butter Banana Smoothie: Toss in a small handful of spinach or kale for extra nutrients without compromising taste.
  • Protein-Packed Peanut Butter Banana Smoothie: Incorporate a scoop of vanilla or chocolate protein powder for a post-workout treat.

Storage and Make-Ahead Instructions

This smoothie is best enjoyed fresh but can be stored for a short time:

  • Store any leftovers in an airtight container in the refrigerator for up to 24 hours. Shake well before consuming.
  • If you want to make it ahead, consider prepping smoothie packs with all the solid ingredients (bananas, peanut butter, chia seeds) and freeze them. Just add your liquid and blend when ready.

Comprehensive FAQ

Got questions? Here are some common inquiries about the Peanut Butter Banana Smoothie:

  • Can I use almond butter instead of peanut butter? Yes, almond butter works wonderfully and provides a different flavor profile.
  • How long can I store the smoothie if I make extra? It can be stored in the refrigerator for up to 24 hours, but it’s best consumed immediately for optimal taste and texture.
  • Why does my smoothie sometimes come out too thick? This can happen if you use frozen bananas or too much peanut butter. Adjust by adding more liquid as needed.
  • Is this smoothie good for pre-workout energy? Absolutely! The combination of carbohydrates from the banana and protein from the peanut butter makes it a great fuel source.
  • Can I make this smoothie dairy-free? Yes! Use almond milk or any other plant-based milk to keep it dairy-free.
  • Can I add protein powder to this smoothie? Yes, adding protein powder is a great way to increase the protein content, especially for post-workout recovery.
  • What can I substitute for honey? Maple syrup or agave nectar are great vegan alternatives to honey.
  • Can I add other fruits? Yes, feel free to mix in other fruits like strawberries or blueberries for additional flavor and nutrients.

Nutritional Tips and Dietary Adaptations

This Peanut Butter Banana Smoothie is not only delicious but can also be adapted to fit various dietary needs:

  • Vegan: Simply use maple syrup instead of honey and almond milk as your base.
  • Protein-Rich: Add Greek yogurt or protein powder for a protein-packed version.
  • Low-Sugar: Use less honey or omit it altogether if your banana is sweet enough.

Equipment Recommendations

For best results, consider using:

  • High-Powered Blender: A quality blender ensures a smooth, creamy texture.
  • Measuring Cups: Accurate measurements help achieve the perfect balance of flavors.
  • Storage Containers: Airtight containers for storing any leftovers or prepped smoothie packs.

Serving Suggestions

Serve your Peanut Butter Banana Smoothie in a tall glass, garnished with a sprinkle of chia seeds or a slice of banana on the rim for that extra touch. It pairs perfectly with:

  • Granola: A sprinkle of granola on top adds a satisfying crunch.
  • Whole Grain Toast: Enjoy alongside a slice of whole grain toast topped with avocado or nut butter for a balanced meal.

In conclusion, this Peanut Butter Banana Smoothie is more than just a beverage; it’s a versatile, nutritious addition to your meal repertoire. Whether you’re rushing out the door or enjoying a leisurely breakfast, this recipe delivers on taste and health. With its simplicity and adaptability, you can make it your own every time. So gather your ingredients and blend your way to a deliciously rewarding experience!

Peanut Butter Banana Smoothie

Prep Time 5 minutes
Total Time 5 minutes
Servings 2 cups
Calories 350
A delicious and nutritious smoothie perfect for a quick breakfast or snack, combining the creamy flavors of banana and peanut butter.

Ingredients

Fruits

  • 1 piece ripe banana

Add-ins

  • 2 tablespoons peanut butter
  • 1 cup almond milk
  • 1 tablespoon honey (optional)
  • ½ teaspoon vanilla extract
  • 1 tablespoon chia seeds (optional)
  • Ice cubes to taste Ice cubes

Instructions 

  • Peel the banana and break into pieces.
  • Add banana, peanut butter, almond milk, honey, vanilla, chia seeds, and ice to a blender.
  • Blend until smooth and creamy.
  • Taste and adjust sweetness or thickness as needed.

Notes

For a colder smoothie, add more ice or freeze the banana beforehand.
Calories: 350kcal
Cost: $8
Course: Breakfast, Snack
Cuisine: American
Keyword: banana, Peanut Butter

Kickstart Your Day with Strawberry Oatmeal

Are you ready to elevate your breakfast game? Welcome to your ultimate guide to making strawberry oatmeal that is not only delicious but also incredibly nutritious. This easy recipe combines rolled oats, almond milk, fresh strawberries, and a hint of sweetness to create a breakfast that energizes your day. Whether you’re a busy professional, a parent on the go, or just someone who loves a good meal, this strawberry oatmeal is tailored for you. Let’s dive into the details!

Why You’ll Love This Recipe

Here are some compelling reasons why this strawberry oatmeal recipe should be your go-to breakfast:

  • Quick and Easy: With only a few simple steps, you can have a warm, comforting breakfast ready in under 10 minutes.
  • Nutritious: Packed with fiber from rolled oats and antioxidants from strawberries, this meal supports your health goals.
  • Customizable: You can tailor the recipe to your taste by adding various toppings or mix-ins.
  • Meal Prep Friendly: Make a large batch and store it for easy breakfasts throughout the week.
  • Dairy-Free Option: Easily adapted to vegan diets with almond milk or any plant-based milk of your choice.

Ingredients Breakdown

To make this strawberry oatmeal, you’ll need the following ingredients:

  • 1 cup rolled oats: Provides a hearty base; consider using gluten-free oats if needed.
  • 1 cup almond milk: A creamy alternative; feel free to substitute with any milk you prefer.
  • 1 cup water: Helps achieve the perfect texture.
  • 1 cup fresh strawberries: Finely diced for sweetness and color; frozen strawberries can also work.
  • 1-2 tbsp maple syrup: Adds natural sweetness; adjust based on your taste preference.
  • 1 tsp vanilla extract: Enhances flavor; optional but recommended.
  • 1/2 tsp cinnamon: Adds warmth and depth to the dish.
  • 1/8 tsp salt: Balances flavors.
  • Toppings of choice: Fresh fruit, nut butter, nuts, seeds, or granola for added texture.

How to Make Strawberry Oatmeal

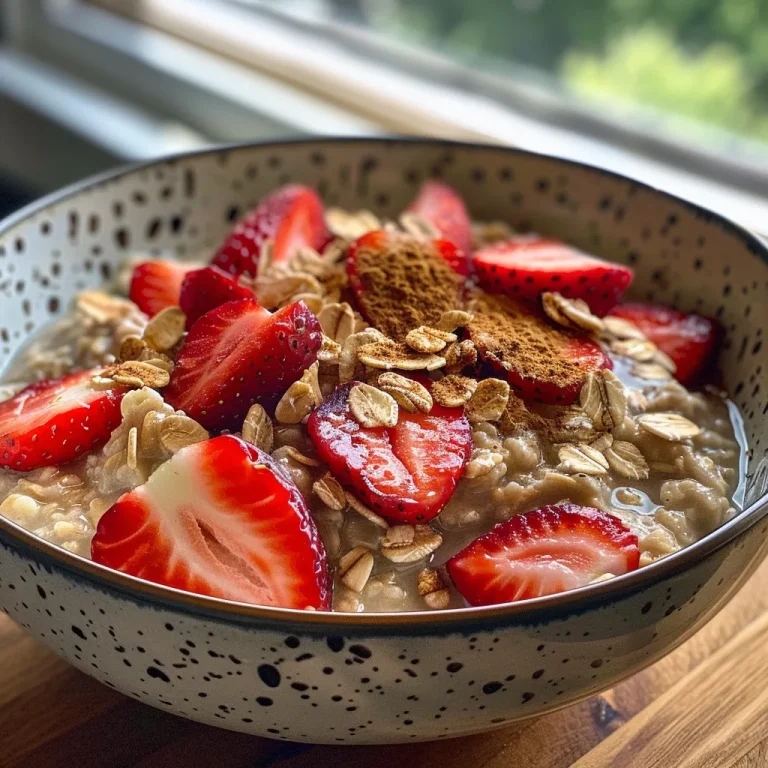
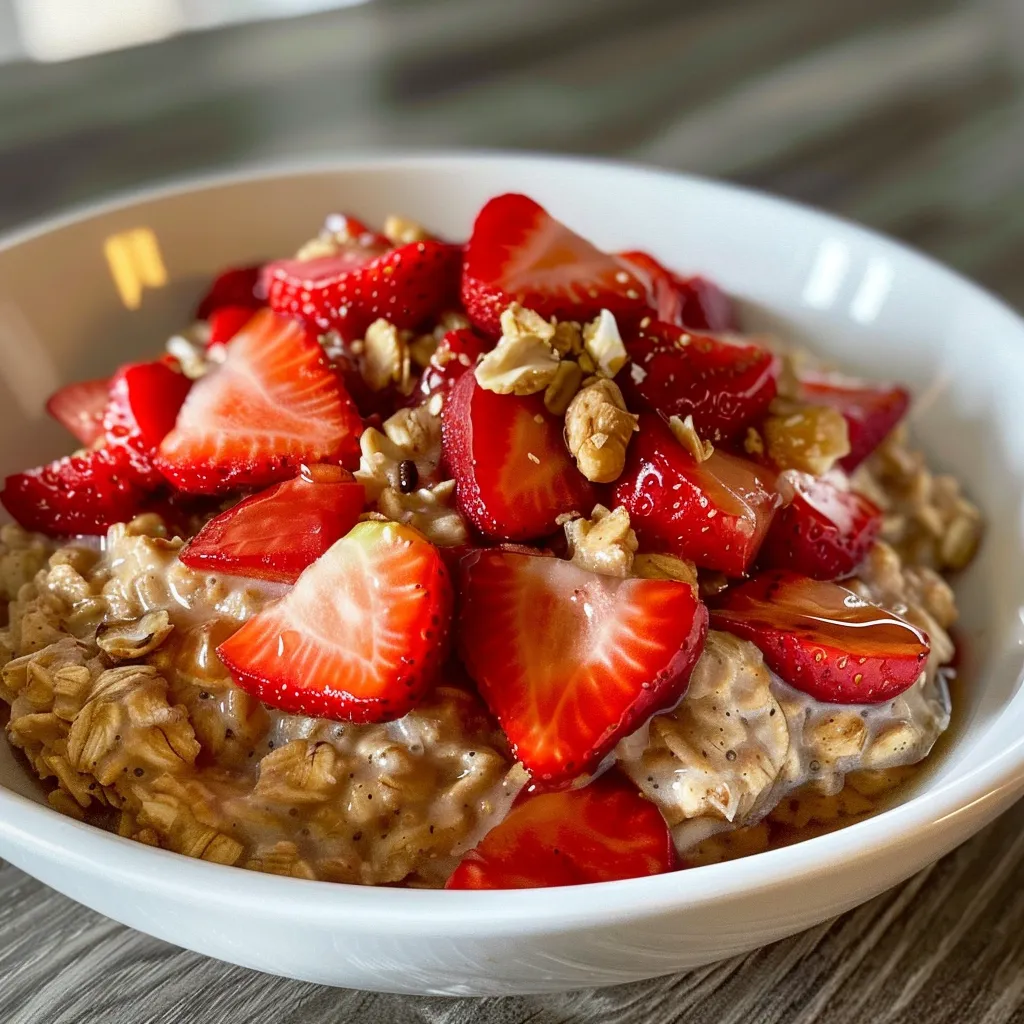
Textured close-up of oatmeal with vibrant, finely diced strawberries and a hint of nuts.

Follow these simple steps to prepare your strawberry oatmeal:

  1. Combine all ingredients in a small pot.
  2. Transfer the pot to a stovetop and cook over medium-high heat, stirring frequently. Cook until the mixture thickens and becomes creamy, about 7-8 minutes, mashing the strawberries as you go.
  3. Transfer oatmeal to bowl(s) and add your favorite toppings such as fresh fruit, nut butter, or granola. Enjoy!

Pro Tips for Perfect Strawberry Oatmeal

To ensure your oatmeal turns out perfectly every time, consider these expert tips:

  • Consistency control: If you prefer a thicker oatmeal, cook it a bit longer. For creamier oatmeal, add more milk or water.
  • Freshness matters: Use ripe strawberries for the best flavor; they should be sweet and juicy.
  • Sweetness balance: Taste your oatmeal before serving and adjust the maple syrup to your liking.
  • Mix-ins: Experiment with nut butter, chia seeds, or protein powder for added nutrition.
  • Flavor alternatives: Try different spices like nutmeg or cardamom for a unique twist.
  • Batch cooking: Make a big batch at once; store leftovers in the fridge for up to 4 days.
  • Reheating: Add a splash of milk or water when reheating to restore creaminess.
  • Storage: Store in airtight containers for easy grab-and-go breakfasts during the week.

Common Mistakes and Troubleshooting

Even the best cooks make mistakes! Here are some common pitfalls and how to avoid them:

  • Overcooking: Watch the pot closely to prevent the oatmeal from sticking to the bottom or burning.
  • Too thick: If your oatmeal thickens too much, simply stir in a bit more milk or water.
  • Insufficient sweetness: If it tastes bland, a little extra maple syrup or a pinch of salt can elevate the flavor.
  • Wrong texture: If you prefer a smoother oatmeal, consider blending the mixture at the end for a creamy finish.

Variations to Try

Here are some delicious variations to keep your breakfast exciting:

  • Berry Medley: Swap out strawberries for a mix of your favorite berries, like blueberries and raspberries.
  • Nutty Delight: Stir in almond butter or peanut butter for a protein boost.
  • Chocolate Lovers: Add cocoa powder and mini chocolate chips for a decadent treat.
  • Banana Bliss: Incorporate sliced bananas for a naturally sweet flavor contrast.

Storage and Make-Ahead Instructions

Want to save time? Here’s how to store and prepare your oatmeal ahead:

  • Refrigerate: Store leftovers in an airtight container in the fridge for up to 4 days.
  • Freezing: Freeze portions in airtight bags or containers for up to 3 months.
  • Reheat: Simply microwave with a splash of milk or water until warmed through.

Frequently Asked Questions

Here are some common questions about making strawberry oatmeal:

  • Can I use frozen strawberries? Yes, frozen strawberries can be used! Just thaw and chop them before adding.
  • Is this oatmeal healthy? Absolutely! It’s packed with fiber, vitamins, and minerals while being low in added sugars.
  • Can I make it gluten-free? Yes, just ensure you use certified gluten-free rolled oats.
  • How can I make it vegan? Use almond milk or any plant-based milk, and avoid honey or dairy toppings.
  • What if I want to add protein? Consider mixing in protein powder or Greek yogurt for a protein boost.
  • Can I prepare this overnight? Yes! Combine ingredients in a jar and refrigerate overnight for a quick grab-and-go breakfast.
  • What are some good toppings? Fresh fruits, nuts, seeds, and nut butters all make excellent toppings.
  • How do I know when the oatmeal is done? It’s ready when it’s thick and creamy, typically around 7-8 minutes of cooking.

Nutrition Tips and Dietary Adaptations

For a balanced breakfast, consider these nutritional adaptations:

  • Protein boost: Add protein powder or top with Greek yogurt.
  • Reduce sugar: Use less maple syrup or replace it with mashed bananas for sweetness.
  • Increase fiber: Mix in chia seeds or flaxseeds for additional fiber content.
  • Healthy fats: Incorporate nuts or seeds to enhance the healthy fat profile.

Equipment Recommendations

To prepare your strawberry oatmeal, you’ll need:

  • Small pot: For cooking the oatmeal over the stovetop.
  • Wooden spoon or spatula: For stirring the mixture.
  • Measuring cups and spoons: To accurately measure your ingredients.

Serving Suggestions

Enhance your strawberry oatmeal experience with these serving ideas:

  • Serve hot: Enjoy immediately after cooking for the best texture.
  • Garnish: Top with a drizzle of honey or extra maple syrup for a touch of sweetness.
  • Pair with: A side of yogurt or a smoothie for a complete breakfast.

In conclusion, this strawberry oatmeal recipe is more than just a meal; it’s a canvas for your creativity and a foundation for your health. With its flexibility, ease of preparation, and delicious flavor, it truly is the perfect breakfast. So go ahead, give it a try, and transform your mornings into something special!

Strawberry Oatmeal

Prep Time 5 minutes
Cook Time 8 minutes
Total Time 13 minutes
Servings 2 servings
Calories 250
A quick and delicious oatmeal recipe infused with fresh strawberries and warm spices, perfect for a nutritious breakfast.

Ingredients

Dried ingredients

  • 1 cup rolled oats
  • 1 cup almond milk
  • 1 cup water
  • 1 cup fresh strawberries, finely diced
  • 1-2 tbsp maple syrup
  • 1 tsp vanilla extract
  • 1/2 tsp cinnamon
  • 1/8 tsp salt

Toppings of choice

Instructions 

  • Combine oats, almond milk, water, strawberries, maple syrup, vanilla, cinnamon, and salt in a pot.
  • Cook over medium-high heat, stirring frequently until thick and creamy, about 7-8 minutes, mashing strawberries as they soften.
  • Transfer to bowls and add your favorite toppings. Serve and enjoy!

Notes

You can customize toppings for added flavor and texture.
Calories: 250kcal
Cost: $4
Course: Breakfast
Cuisine: American
Keyword: Oats, strawberries

Discover the Joy of Effortless Blueberry Yogurt Clusters

Are you ready to indulge in a delightful, healthy snack that’s easy to prepare? Look no further than these Blueberry Yogurt Clusters. This simple frozen treat combines the rich creaminess of Greek yogurt with the sweet burst of fresh blueberries, making it the perfect solution for your sweet cravings without the guilt. In this comprehensive guide, we’ll dive into the details of creating these delectable clusters, share tips for success, and explore variations to suit any palate.

Why You’ll Love This Recipe

Here are five reasons that make this recipe a must-try:

  • Quick and Easy: With just two main ingredients, making these blueberry yogurt clusters takes minimal time and effort, perfect for busy schedules.
  • Healthy Snack Option: This treat is not only delicious but also packed with nutrients, making it an excellent choice for a healthy snack.
  • Customizable: You can easily modify the ingredients to suit dietary preferences or to experiment with different flavors.
  • Kid-Friendly: A fun and engaging snack that kids will love making and eating, encouraging healthy habits from a young age.
  • Perfect for Meal Prep: These clusters can be made ahead of time and stored in the freezer for a quick snack whenever you need it.

Ingredients for Blueberry Yogurt Clusters

To create these delightful clusters, you’ll need the following ingredients:

  • 1 pint fresh blueberries: Look for plump, juicy berries that are firm to the touch. You can substitute frozen blueberries, but ensure they are thawed and patted dry to avoid excess moisture.
  • 1 cup vanilla Greek yogurt: Opt for a high-quality Greek yogurt that’s creamy and rich in flavor. You can also use dairy-free yogurt for a vegan option.

How to Make Blueberry Yogurt Clusters

Fresh blueberries surrounded by a thick layer of vanilla yogurt, presented as a frozen treat.

Follow these simple steps to create your blueberry yogurt clusters:

  1. Wash and Prepare: Wash and dry the blueberries thoroughly. Make sure there’s no excess water, or the yogurt won’t adhere properly.
  2. Combine Ingredients: In a mixing bowl, combine the blueberries with the Greek yogurt until each berry is evenly coated.
  3. Dollop Clusters: Using a spoon, dollop small clusters of yogurt-coated blueberries onto a parchment-lined plate or tray.
  4. Initial Freeze: Place the tray into the freezer and allow the clusters to set completely, which should take about 1–2 hours.
  5. Enjoy or Store: Once frozen, enjoy your clusters immediately or transfer them to an airtight container for later snacking.

Pro Tips for Success

Maximize your blueberry yogurt cluster experience with these expert tips:

  • Pat Dry: Ensure blueberries are dry before coating; this helps the yogurt stick better.
  • Freezing Time: Allow enough time for the clusters to freeze solid; otherwise, they may not hold their shape.
  • Uniform Size: Aim for uniform dollops to ensure even freezing and consistent portions.
  • Flavor Boost: Add a splash of vanilla extract to the yogurt for an extra layer of flavor.
  • Chocolate Drizzle: For a decadent twist, drizzle melted chocolate over the clusters before serving.
  • Healthy Toppings: Consider adding nuts or seeds for added crunch and nutrition.
  • Storage: Store clusters in an airtight container to maintain freshness and prevent freezer burn.
  • Batch Size: Make a larger batch to have on hand for quick snacks throughout the week.

Common Mistakes and Troubleshooting

Here are some common pitfalls to avoid when making your blueberry yogurt clusters:

  • Too Much Moisture: Excess water on blueberries can prevent yogurt from sticking. Always dry them thoroughly.
  • Overcrowding: If clusters are too close together on the tray, they may freeze together. Give them space!
  • Not Enough Freezing Time: If clusters are not frozen long enough, they may become mushy. Patience is key!
  • Using Low-Quality Yogurt: Cheap yogurt may not have the same flavor or texture. Invest in good-quality Greek yogurt.

Delicious Variations

Experiment with these fun variations to keep your snacks exciting:

  • Cocoa Clusters: Mix in cocoa powder with the yogurt for a chocolatey treat.
  • Nutty Bliss: Add chopped almonds or walnuts for extra crunch and nutrition.
  • Berry Medley: Substitute blueberries with mixed berries like strawberries or raspberries.
  • Spiced Delight: Sprinkle with cinnamon or nutmeg for a warm, spiced flavor.

Storage and Make-Ahead Instructions

These blueberry yogurt clusters are perfect for meal prep. Here’s how to store them:

  • Freezer Storage: Keep in an airtight container in the freezer for up to 3 months.
  • Thawing: For a quick snack, you can eat them straight from the freezer or allow them to thaw for a few minutes before enjoying.
  • Batch Making: Prepare multiple batches at once to ensure you always have a healthy snack on hand.

FAQs About Blueberry Yogurt Clusters

Here are some frequently asked questions about blueberry yogurt clusters:

  • Can I use frozen blueberries? Yes, but ensure they are thawed and dried to avoid excess moisture.
  • How long do these clusters last in the freezer? They can last up to three months in the freezer when stored properly.
  • Can I substitute the yogurt? Absolutely! You can use dairy-free yogurts or different flavored yogurts for variations.
  • What if I don’t have parchment paper? You can use a silicone baking mat or a non-stick tray.
  • Can I add toppings? Yes, feel free to add toppings like granola, crushed nuts, or a drizzle of honey before freezing.
  • What is the best way to serve these clusters? They are best enjoyed frozen, either as a quick snack or as a refreshing dessert.
  • Can I make this recipe in advance? Yes, these clusters can be prepared ahead of time and stored in the freezer.
  • Are these clusters suitable for a keto diet? Yes, as long as you choose a low-sugar yogurt option, they’re a great keto-friendly treat.

Nutritional Tips and Dietary Adaptations

These blueberry yogurt clusters are not only delicious but also nutritious. Here are some tips to enhance their health benefits:

  • Protein Power: Greek yogurt is rich in protein, making these clusters a filling snack.
  • Antioxidants: Blueberries are packed with antioxidants, supporting overall health and wellness.
  • Low-Calorie Treat: With minimal ingredients, these clusters are a low-calorie option compared to traditional desserts.
  • Vegan Adaptation: Use plant-based yogurt and dairy-free chocolate for a vegan-friendly version.

Equipment Recommendations

Here’s what you’ll need to make blueberry yogurt clusters:

  • Mixing Bowl: A medium-sized bowl to mix your yogurt and blueberries.
  • Spoon or Ice Cream Scoop: For dolloping your clusters onto the tray.
  • Parchment Paper or Silicone Mat: To line your tray for easy removal after freezing.
  • Airtight Container: For storing your frozen clusters safely in the freezer.

Serving Suggestions

These blueberry yogurt clusters can be enjoyed in various ways:

  • As a Snack: Perfect for a quick, healthy snack on the go.
  • In Smoothie Bowls: Toss them into your smoothie bowl for added texture and nutrition.
  • With Breakfast: Pair with oatmeal or yogurt for a nutritious breakfast option.
  • As a Dessert: Serve them as a light dessert after meals for a refreshing finish.

In conclusion, these Blueberry Yogurt Clusters are not just a treat; they are a delightful way to enjoy healthy eating without sacrificing taste. With their versatility, ease of preparation, and nutritional benefits, they are sure to become a go-to snack in your home. So gather your ingredients, follow the steps, and enjoy the deliciousness that awaits!

Blueberry Yogurt Clusters A Sweet & Simple Frozen Treat

Prep Time 10 minutes
Cook Time 2 hours
Total Time 2 hours 10 minutes
Servings 4 servings
Calories 150
Enjoy these easy, frozen blueberry yogurt clusters for a refreshing treat anytime.

Ingredients

Fruits

  • 1 pint fresh blueberries
  • 1 cup vanilla Greek yogurt

Instructions 

  • Wash and dry the blueberries thoroughly.
  • Mix blueberries with Greek yogurt until coated.
  • Spoon small clusters onto a parchment-lined tray.
  • Freeze for 1-2 hours until set.
  • Enjoy immediately or store in the freezer.

Notes

Use fresh, dry blueberries for best results.
Calories: 150kcal
Cost: $10
Course: Dessert
Cuisine: American
Keyword: Blueberries