Author

robert

Browsing

Indulge in the Delight of Mini Black Forest Layer Cakes

Welcome to your new favorite dessert: the mini black forest layer cakes. These delightful treats offer a perfect blend of rich chocolate sponge, luscious cherry filling, and fluffy whipped cream, making them a showstopper for any occasion. Whether you’re celebrating a birthday, an anniversary, or simply treating yourself, these mini cakes are sure to impress. In this guide, we’ll explore everything you need to know to create these stunning desserts that are not only delicious but also easy to make.

Why You’ll Love This Recipe

This recipe isn’t just about baking; it’s about creating an experience. Here are five compelling reasons to dive into making these mini black forest layer cakes:

  • Portion Control: These cakes are perfectly sized to satisfy your sweet tooth without overindulging.
  • Visual Appeal: Their petite size and beautiful presentation make them a stunning centerpiece for any dessert table.
  • Easy to Customize: You can easily modify the flavors or toppings to suit your taste or dietary needs.
  • Quick to Assemble: The straightforward steps allow for a stress-free baking experience, even for beginners.
  • Perfect for Sharing: Ideal for parties or gatherings, these mini cakes are a delightful way to share sweetness with others.

Ingredients for Mini Black Forest Layer Cakes

Here’s what you’ll need to create these flavorful mini cakes:

  • 1 cup all-purpose flour: The base for your cake that gives it structure.
  • ½ cup unsweetened cocoa powder: Essential for that rich chocolate flavor.
  • 1 cup sugar: Sweetens the batter and balances the flavors.
  • ½ tsp baking powder: Helps the cakes rise.
  • ½ tsp baking soda: Works with the baking powder for a fluffy texture.
  • ¼ tsp salt: Enhances flavor and balances sweetness.
  • 1 large egg: Provides moisture and richness.
  • ½ cup milk: Adds moisture to the batter.
  • ½ cup hot coffee (or hot water): Enhances the chocolate flavor and helps to create a moist cake.
  • ⅓ cup vegetable oil: Keeps the cake tender and moist.
  • 1 tsp vanilla extract: Adds depth to the flavor.
  • 1 ½ cups cherry pie filling or homemade: The fruity layer that gives the black forest its name.
  • Optional: 1–2 tbsp Kirsch: A traditional cherry brandy for added flavor.
  • 1 ½ cups cold heavy cream: For the luscious whipped topping.
  • ¼ cup powdered sugar: Sweetens the whipped cream.
  • 1 tsp vanilla extract: To flavor the whipped cream.
  • Optional: 2 tbsp cream cheese for stability: Helps the whipped cream hold its shape.
  • Fresh cherries (with stems): For the perfect decorative touch.
  • Chocolate shavings or curls: For an elegant finish.

How to Make Mini Black Forest Layer Cakes

An appetizing display of mini black forest layer cakes garnished with chocolate curls and whipped cream.

Follow these steps to create your mini masterpieces:

  1. Preheat and Prepare: Preheat your oven to 175°C (350°F) and prepare a sheet pan or two round cake tins lined with parchment paper.
  2. Mix Dry Ingredients: In a mixing bowl, whisk together the flour, cocoa powder, sugar, baking powder, baking soda, and salt until well combined.
  3. Combine Wet Ingredients: Add in the egg, milk, oil, and vanilla extract. Mix until the batter is smooth.
  4. Incorporate Hot Coffee: Gradually pour in the hot coffee, mixing gently. The batter will be thin, which is perfect for a moist cake.
  5. Bake the Cakes: Spread the batter evenly in your prepared pan and bake for 12–15 minutes, or until a toothpick inserted comes out clean. Allow to cool completely.
  6. Cut Out Cake Circles: Once cooled, use a 2.5–3 inch round cutter to cut out 12 small circles. Each cake will require 2 circles (or 3 for extra height).
  7. Prepare the Whipped Cream: In a mixing bowl, beat the heavy cream, powdered sugar, and vanilla extract until stiff peaks form. You can add cream cheese if you want a sturdier whipped cream.
  8. Assemble the Cakes: Place one chocolate circle at the bottom, pipe or spoon a thick layer of whipped cream, and add cherry filling. Top with the second sponge circle. Pipe more whipped cream on top, sprinkle with chocolate shavings, and place 3–4 fresh cherries on top.

Expert Tips for Success

To ensure your mini black forest cakes turn out perfectly, consider these expert insights:

  • Cool Completely: Always let the cakes cool completely before assembling to prevent the whipped cream from melting.
  • Use High-Quality Ingredients: For the best flavor, use high-quality cocoa powder, real cherries, and fresh cream.
  • Stability in Whipped Cream: Adding cream cheese to the whipped cream will help maintain its shape for longer.
  • Chill Your Tools: Chill the mixing bowl and beaters before whipping the cream to achieve better volume.
  • Experiment with Flavors: Feel free to add a splash of different liqueurs or flavor extracts to the whipped cream for a unique twist.
  • Make Ahead: These cakes can be made a day in advance; just store them in an airtight container in the fridge.
  • Mind the Moisture: If your cakes are slightly dry, brush them with a little cherry juice or syrup before assembling.
  • Serve Chilled: These mini cakes are best served chilled, enhancing their refreshing taste.

Common Mistakes and Troubleshooting

Even the best bakers can make mistakes. Here’s how to troubleshoot:

  • Cakes are Too Dry: Ensure you’re measuring flour correctly and not overbaking your cakes.
  • Whipped Cream is Runny: This could be due to under-whipping or using warm cream; make sure to chill everything.
  • Cakes Fall Apart When Assembling: This may happen if the cakes are too warm; always let them cool completely.

Variations on Mini Black Forest Layer Cakes

Looking to mix things up? Here are four delightful variations:

  • Nutty Addition: Incorporate chopped nuts like walnuts or hazelnuts into the cake batter for added crunch.
  • Fruit Layers: Swap the cherry filling for other fruits like raspberries or strawberries for a fresh twist.
  • Chocolate Ganache Filling: Replace the cherry filling with a rich chocolate ganache for a double chocolate experience.
  • Vegan Option: Substitute egg with flaxseed meal and use plant-based milk and cream for a vegan-friendly version.

Storage and Make-Ahead Instructions

To keep your mini black forest layer cakes fresh:

  • Refrigerate: Store in an airtight container in the refrigerator for up to 5 days.
  • Freezing: You can freeze the baked sponge layers for up to 2 months. Assemble them with cream once defrosted.
  • Make Ahead: The cakes can be prepared a day in advance; just add the whipped cream right before serving to ensure freshness.

FAQs About Mini Black Forest Layer Cakes

Here are some common questions and answers to help you:

  • Can I use different fruits?: Absolutely! Feel free to experiment with other fruit fillings.
  • What is Kirsch?: Kirsch is a cherry brandy, traditionally used in black forest cakes; it adds a rich flavor.
  • Can I make these gluten-free?: Yes, you can substitute all-purpose flour with a gluten-free blend.
  • How do I make whipped cream stable?: Adding a bit of cream cheese or gelatin can help stabilize whipped cream.
  • What’s the best way to slice the cakes?: Use a sharp knife and wipe it clean between cuts for neat slices.
  • Can I use store-bought whipped cream?: Certainly, but homemade whipped cream offers better flavor and texture.
  • How far in advance can I make these?: The sponge can be made 1-2 days ahead, but assemble just before serving for the best texture.
  • What should I serve with these cakes?: Consider pairing with a scoop of vanilla ice cream or a drizzle of chocolate sauce.

Nutrition Tips and Dietary Adaptations

To make your mini black forest cakes more nutritious:

  • Reduce Sugar: You can cut down on sugar without compromising taste by using less or opting for natural sweeteners.
  • Whole Wheat Flour: Substitute part of the all-purpose flour with whole wheat flour for added fiber.
  • Lower Fat Options: Use low-fat milk and light cream for a lighter version of the whipped topping.

Recommended Equipment

Equip yourself with these essentials to make the process smoother:

  • Mixing Bowls: A set of mixing bowls in various sizes will help with ingredient prep.
  • Electric Mixer: An electric mixer makes beating the whipped cream effortless.
  • Round Cake Cutter: A round cutter helps achieve uniform cake layers.
  • Spatula: A good spatula is essential for spreading the batter and whipped cream.

Serving Suggestions

Enhance your mini black forest layer cakes with these serving ideas:

  • Chill before serving: These cakes are best enjoyed cold, so keep them in the fridge until just before serving.
  • Garnish: Top with extra chocolate shavings and fresh cherries for an elegant touch.
  • Pair with beverages: Serve alongside coffee, tea, or a dessert wine to enhance the flavors.

Final Thoughts

Creating mini black forest layer cakes is a delightful adventure that combines flavors and visual appeal, making them a favorite among dessert lovers. With this comprehensive guide, you’re fully equipped to bake and enjoy these charming treats in your home. Remember, the joy of baking lies not just in the finished product but in the process itself. Happy baking!

Mini Black Forest Layer Cakes: A Delightful Recipe!

Prep Time 30 minutes
Cook Time 15 minutes
Total Time 45 minutes
Servings 6 cakes
Calories 350
These mini Black Forest layer cakes are a perfect combination of rich chocolate, cherry filling, and whipped cream, making them an elegant and delicious treat.

Ingredients

Batter

  • 1 cup all-purpose flour
  • ½ cup unsweetened cocoa powder
  • 1 cup sugar
  • ½ tsp baking powder
  • ½ tsp baking soda
  • ¼ tsp salt
  • 1 large egg
  • ½ cup milk
  • ½ cup hot coffee (or hot water)
  • cup vegetable oil
  • 1 tsp vanilla extract

Filling & Topping

  • 1 ½ cups cherry pie filling or homemade
  • Optional: 1–2 tbsp Kirsch (traditional) (optional)
  • 1 ½ cups cold heavy cream
  • ¼ cup powdered sugar
  • 1 tsp vanilla extract
  • Optional: 2 tbsp cream cheese for stability (optional)
  • Fresh cherries with stems for the perfect look

Instructions 

  • Preheat oven to 175°C (350°F). Prepare a pan or tins with parchment.
  • Mix flour, cocoa, sugar, baking powder, baking soda, and salt. Add egg, milk, oil, vanilla; mix until smooth.
  • Pour hot coffee into batter; bake for 12–15 minutes. Cool completely.
  • Cut out 12 circles with a 2.5–3 inch cutter. Beat heavy cream, powdered sugar, vanilla, and optional cream cheese until stiff peaks form.
  • Assemble cakes: place a chocolate circle, add whipped cream and cherry filling, top with another circle, more whipped cream, chocolate shavings, and cherries.

Notes

Use fresh cherries for the best presentation and flavor.
Calories: 350kcal
Cost: $15
Course: Dessert
Cuisine: German
Keyword: cherry, chocolate, layer cake

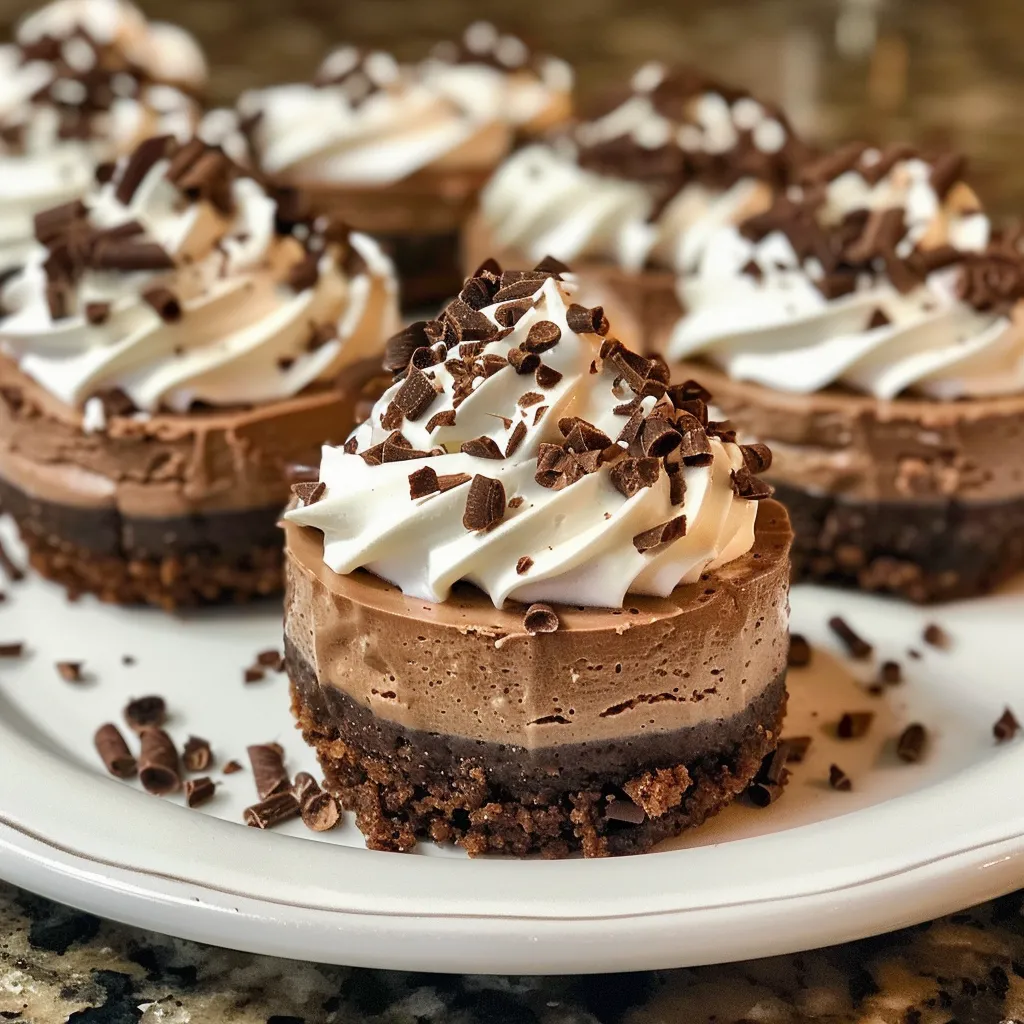
Welcome to your ultimate guide for crafting the best no bake chocolate cheesecake. This indulgent dessert combines rich chocolate with a creamy cheesecake texture, resulting in a treat that requires no oven and minimal effort. Perfect for any occasion, this recipe will elevate your dessert game while saving you time in the kitchen. Let’s dive into why this recipe is a must-try!

Why You’ll Love This Recipe

  • No Baking Required: Save time and hassle with a recipe that doesn’t require an oven. Simply chill and serve!
  • Rich Chocolate Flavor: The combination of dark chocolate and creamy cheesecake provides a decadent flavor profile that chocolate lovers will adore.
  • Customizable Ingredients: Easily swap out ingredients to suit dietary preferences or pantry availability, making it versatile for any occasion.
  • Effortless Preparation: With just a few steps and minimal equipment, you can create a stunning dessert that looks and tastes gourmet.
  • Perfect for Make-Ahead: This cheesecake can be prepared in advance, freeing up your time for other tasks on the day of your event.

Ingredient Breakdown & Substitutions

Before you start, let’s look at the ingredients you’ll need and some potential substitutions.

  • Chocolate Cookies: 25 chocolate cookies (like Oreos) create a flavorful crust. You can substitute with graham crackers for a different taste.
  • Unsalted Butter: 5 tbsp melted butter binds the crust. Coconut oil can be used for a dairy-free option.
  • Dark Chocolate: 250g of dark chocolate adds richness. Semi-sweet chocolate or even milk chocolate can be used based on your sweetness preference.
  • Cream Cheese: 24 oz softened cream cheese makes the filling creamy. For a lighter version, you can substitute with Greek yogurt.
  • Granulated Sugar: 1 cup sugar sweetens the cheesecake. Consider using coconut sugar for a less refined option.
  • Heavy Cream: 1 ½ cups of heavy cream is essential for whipping. Use a non-dairy whipped cream alternative if needed.
  • Salt: ½ tsp salt enhances flavor. This can be omitted for a low-sodium version.

How to Make Your No Bake Chocolate Cheesecake

Now, let’s walk through the steps to create this delicious cheesecake.

  • Step 1: Prepare a 9-inch springform pan by brushing it with butter and optionally lining the bottom with parchment paper for easy removal.
  • Step 2: In a food processor, blend the chocolate cookies with the melted butter until fine crumbs form. Press this mixture into the bottom of the pan to create a solid crust and refrigerate to set.
  • Step 3: Melt the dark chocolate with ¾ cup of heavy cream in a heat-safe bowl over simmering water, stirring until smooth. Let it cool slightly before use.
  • Step 4: In a mixing bowl, beat the softened cream cheese, sugar, and salt on medium speed until creamy and smooth.
  • Step 5: Add the cooled ganache to the cream cheese mixture and mix until just combined.
  • Step 6: Whip the remaining heavy cream until stiff peaks form, then gently fold it into the cheesecake filling to maintain that light, airy texture.
  • Step 7: Pour the filling over the chilled crust, spreading it evenly. Refrigerate for at least six hours or overnight to ensure it sets properly.
  • Step 8: Serve chilled, garnished with optional toppings like whipped cream or fresh fruit for an extra touch.

Expert Tips for Success

Rich chocolate cheesecake slice showcasing the smooth filling and crust.

To ensure your cheesecake turns out perfectly every time, consider these expert insights:

  • Room Temperature Ingredients: Make sure your cream cheese is at room temperature to avoid lumps in the filling.
  • Cooling Chocolate: Allow the melted chocolate to cool before mixing it with the cream cheese to prevent curdling.
  • Whipping Cream: Don’t overbeat the heavy cream – stop once stiff peaks form for the best texture.
  • Chill Time: For a firmer cheesecake, longer chilling (12-24 hours) is beneficial, especially in warmer months.
  • Garnish Wisely: Top with chocolate shavings, berries, or a drizzle of chocolate sauce for a beautiful presentation.
  • Check for Stiffness: Before serving, gently shake the cheesecake to ensure it has set properly. It should have a slight jiggle but not be liquid.

Common Mistakes & Troubleshooting

Even the best chefs can make mistakes. Here are some common issues and how to fix them:

  • Crust Falling Apart: Ensure the butter is well-mixed with the cookie crumbs and press firmly into the pan.
  • Lumpy Filling: Blend cream cheese until smooth before adding other ingredients for a silky texture.
  • Not Setting Properly: If your cheesecake isn’t firm after chilling, it may need more time or you may not have whipped the cream enough.
  • Overly Sweet: Adjust the sugar according to your taste preference; you can always add more later!

Delicious Variations to Try

Feel free to get creative with these variations:

  • Mint Chocolate Cheesecake: Add 1 tsp of peppermint extract to the filling for a refreshing twist.
  • Fruit Topped Cheesecake: Top with fresh berries or a fruit compote for a burst of flavor and color.
  • Nutty Crunch: Mix in crushed nuts like walnuts or pecans into the crust for added texture.
  • Peanut Butter Swirl: Add a swirl of creamy peanut butter to the filling for a delightful flavor combination.

Storage and Make-Ahead Instructions

This cheesecake can be made ahead of time and stored for later enjoyment:

  • Refrigeration: Store covered in the refrigerator for up to 5 days.
  • Freezing: For longer storage, freeze for up to 2 months. Thaw in the refrigerator overnight before serving.

Frequently Asked Questions

Here are some common queries regarding the no bake chocolate cheesecake:

  • Can I use low-fat cream cheese? Yes, low-fat cream cheese can be used, but it may alter the taste and texture slightly.
  • What if I don’t have a springform pan? A regular pie dish can work, but it may be more challenging to remove slices.
  • Can I make this cheesecake dairy-free? Yes, substitute with dairy-free cream cheese and whipped cream alternatives.
  • How long should I chill the cheesecake? Chill for at least 6 hours, but overnight is ideal for best results.
  • How do I know when it’s set? The cheesecake should have a slight jiggle but should not be liquid when you gently shake it.
  • What toppings go well with it? Whipped cream, chocolate shavings, or fresh fruits work wonderfully.
  • Can I add flavors to the crust? Absolutely! Try adding spices or cocoa powder to the crust for extra depth.
  • Is this recipe suitable for kids? Yes, with adult supervision for melting chocolate, this is a fun and easy recipe for kids to help with!

Nutritional Tips & Dietary Adaptations

To make this cheesecake healthier or fit various dietary needs, consider these tips:

  • Reduce Sugar: Use a sugar substitute like Stevia or monk fruit for a lower-calorie version.
  • Add Protein: Incorporate protein powder into the filling for a post-workout treat.
  • Gluten-Free Option: Use gluten-free cookies for the crust to make this cheesecake gluten-free.

Equipment Recommendations

Here’s what you’ll need to successfully make your cheesecake:

  • Springform Pan: Essential for easy release and presentation.
  • Food Processor: For quick blending of the crust ingredients.
  • Mixing Bowls: Use separate bowls for the filling and mixing components.
  • Whisk or Electric Mixer: For whipping the cream to stiff peaks.

Serving Suggestions

Present your cheesecake beautifully with these serving ideas:

  • Slice and Plate: Serve individual slices on dessert plates garnished with fresh fruit.
  • Elegant Platter: Arrange slices on a decorative platter, topped with chocolate shavings.
  • Coffee Pairing: Serve alongside a rich cup of coffee or espresso for a delightful dessert experience.

In conclusion, this best no bake chocolate cheesecake recipe is not only easy to follow but also adaptable and delicious, making it a go-to dessert for any gathering. With these tips and tricks in hand, you can create a cheesecake that impresses and delights your friends and family. Happy baking!

BEST NO BAKE CHOCOLATE CHEESECAKE RECIPE

Prep Time 20 minutes
Cook Time 10 minutes
Total Time 30 minutes
Servings 8 pieces
Calories 480
A rich and creamy no-bake chocolate cheesecake that's perfect for any occasion. Easy to prepare with a luscious chocolate filling and a crunchy cookie crust.

Ingredients

Cookies and crust

  • 25 pieces chocolate cookies (such as Oreos)
  • 5 tbsp unsalted butter, melted

Chocolate and ganache

  • 250 g dark chocolate
  • 0.75 cup heavy cream (for melting chocolate)
  • 24 oz cream cheese, softened
  • 1 cup granulated sugar
  • 1.5 cups heavy cream (divided) (for whipping and ganache)
  • 0.5 tsp salt

Instructions 

  • Prepare a 9" springform pan by brushing with butter and lining with parchment paper.
  • Blend cookies with melted butter until fine crumbs, press into pan, and refrigerate.
  • Melt dark chocolate with ¾ cup heavy cream over simmering water, then cool slightly.
  • Beat cream cheese, sugar, and salt until creamy, then add cooled ganache and mix.
  • Whip remaining heavy cream until stiff peaks, fold into filling, pour over crust, and chill.

Notes

Ensure the cheesecake is chilled for at least 6 hours for best results.
Calories: 480kcal
Cost: $15
Course: Dessert
Keyword: cheesecake, chocolate

Welcome to the World of Decadent Vegan Strawberry Dark Chocolate Truffles

Are you ready to indulge in a dessert that combines rich flavors with a simple preparation? This recipe for Decadent Vegan Strawberry Dark Chocolate Truffles is not just a delightful treat but also a testament to how easy it can be to create gourmet desserts at home. In just four ingredients, you’ll discover how to make a luxurious dessert that will impress your friends and family. Whether you’re celebrating a special occasion or simply treating yourself, these truffles are sure to satisfy your sweet tooth.

Let’s dive into the details of making these luscious truffles, exploring not only how to prepare them but also why you’ll love this recipe!

Why You’ll Love This Recipe

  • Effortless Preparation: With only four ingredients, you can whip up these truffles in no time, making them perfect for busy schedules or unexpected guests.
  • Rich, Decadent Flavor: The combination of dark chocolate and freeze-dried strawberries creates a flavor explosion that is both indulgent and refreshing.
  • Dairy-Free Delight: These truffles cater to vegan and dairy-free diets without sacrificing taste or texture.
  • Customizable: You can easily adapt this recipe with different toppings or variations, making it versatile for any occasion.
  • Perfect for Gifting: Pack them in a beautiful box, and you have a thoughtful, homemade gift that anyone would love!

Ingredient Breakdown

Let’s take a closer look at the ingredients you’ll need to create these delectable vegan truffles:

  • 1/2 cup full fat, unsweetened coconut milk: This is the base for your truffles, providing a creamy texture. If you want a lighter version, you could substitute with almond or oat milk, but coconut milk gives the best richness.
  • 9 oz dark chocolate (at least 70%): The quality of chocolate matters here; opt for a high-quality dark chocolate to enhance the flavor. You can also use dairy-free chocolate chips if preferred.
  • 1 oz freeze-dried strawberries: These add a burst of fruity flavor and beautiful color. If you can’t find freeze-dried strawberries, crushed nuts or cocoa powder can be used as a substitute.
  • 1/4 tsp sea salt: Enhances the sweetness and depth of the chocolate. You can omit this if you are watching your sodium intake.

How to Make Vegan Strawberry Dark Chocolate Truffles

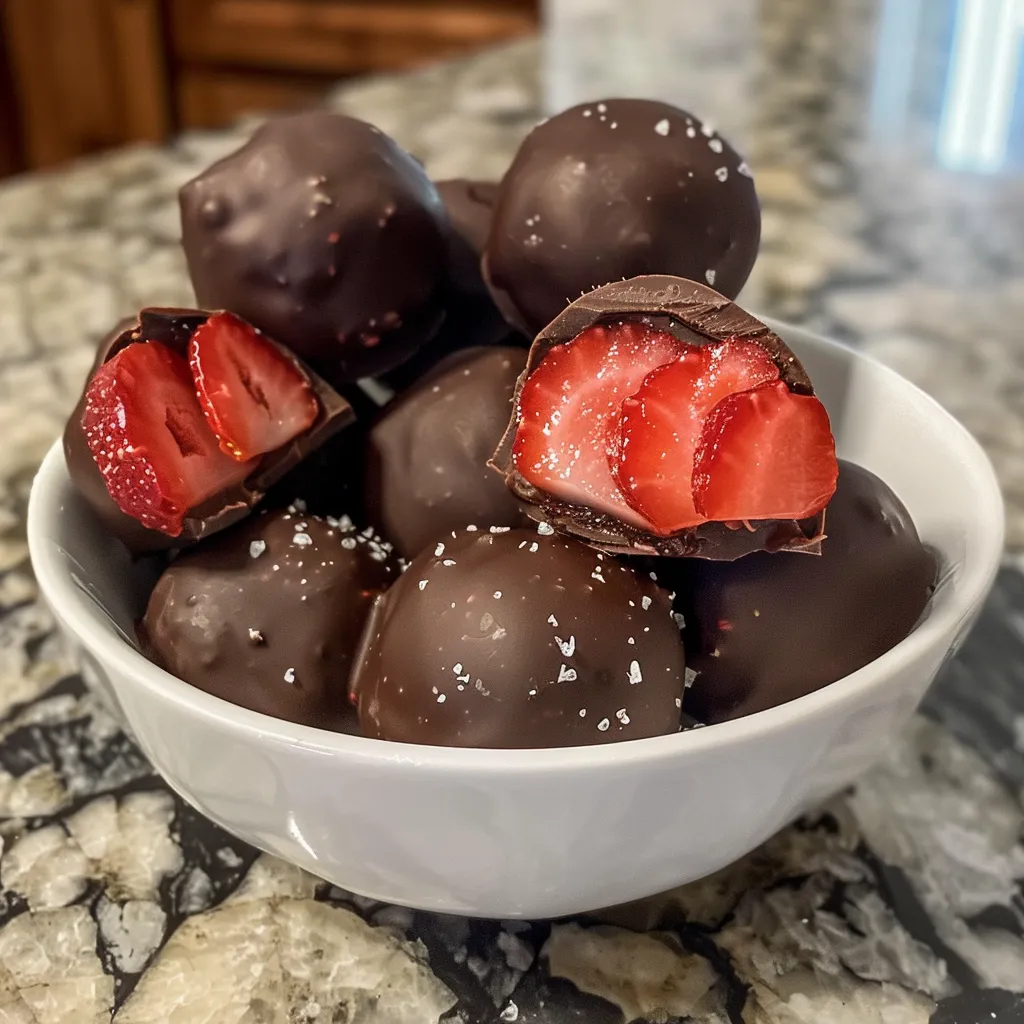
Close view of luxurious strawberry dark chocolate truffles, emphasizing their creamy appearance and inviting color.

Now that we have our ingredients ready, let’s get into the step-by-step process of making these delightful truffles:

  1. Add the coconut milk to a large glass bowl and microwave until very warm but not boiling. This can also be done over the stove.
  2. Immediately add the dark chocolate and cover with a plate. Let sit for 5 minutes to melt, then stir until smooth. If there’s any unmelted chocolate left, microwave in 10-second intervals until completely melted.
  3. Place in the fridge to chill for about 1 hour, or until firm.
  4. Place the freeze-dried strawberries in a sealable plastic bag. Gently tap with a rolling pin or another heavy object until finely crushed. Spread onto a plate.
  5. Use a tablespoon or small cookie scoop to scoop the chocolate mixture. Use your hands to roll into small balls, then toss with the strawberry dust to coat.
  6. Enjoy immediately or store in the fridge for 5-6 days in an airtight container. For the best texture, allow to come to room temperature before serving.

Pro Tips for Perfect Truffles

  • Choose Quality Chocolate: Always opt for high-quality dark chocolate with at least 70% cocoa content for a richer flavor.
  • Control the Temperature: Don’t let the coconut milk boil; it should be warm enough to melt the chocolate but not boiling to avoid curdling.
  • Chill for Texture: Make sure to chill the mixture adequately to ensure the truffles maintain their shape when rolled.
  • Experiment with Coatings: Try different coatings like crushed nuts, cocoa powder, or even coconut flakes for added texture and flavor.
  • Use a Cookie Scoop: This tool helps in making uniform truffles, ensuring each one is the same size and looks appealing.
  • Store Properly: Keep truffles in an airtight container in the fridge to maintain freshness and flavor.
  • Let Them Warm Up: For the best taste, let truffles sit at room temperature for a few minutes before serving.
  • Be Creative: Feel free to add spices like cinnamon or cardamom to the chocolate mixture for an unexpected flavor twist.

Common Mistakes and Troubleshooting

Even the best cooks encounter challenges, so let’s address some common mistakes and how to fix them:

  • Chocolate Won’t Melt: If your chocolate doesn’t melt properly, ensure your coconut milk is warm enough and consider adding a bit more coconut milk to help it along.
  • Truffles Too Soft: If your truffles are too soft to roll, chill them longer in the fridge until they firm up.
  • Coating Doesn’t Stick: Ensure your truffles are slightly moist when rolling them in the coating; if they’re too dry, the coating won’t adhere.
  • Too Sweet or Bitter: Adjust the chocolate percentage to balance sweetness; using a lower cocoa content chocolate will yield a sweeter truffle.
  • Not Enough Flavor: Add a touch of vanilla extract or a pinch of espresso powder to enhance the chocolate flavor.

Variations to Try

Feel free to switch things up with these creative variations:

  • Chocolate Coconut Truffles: Replace the freeze-dried strawberries with shredded coconut for a tropical twist.
  • Mint Chocolate Truffles: Add a few drops of peppermint extract to the chocolate mixture for a refreshing mint flavor.
  • Nutty Delight: Incorporate finely chopped nuts (like almonds or hazelnuts) into the chocolate mix for added texture.
  • Spicy Chocolate Truffles: Add a pinch of cayenne pepper or chili powder for a spicy kick that complements the sweetness.

Storage and Make-Ahead Instructions

These truffles can be made ahead of time, making them perfect for parties or as a sweet snack throughout the week:

  • Refrigerator Storage: Store truffles in an airtight container in the fridge for up to 5-6 days. They taste best at room temperature.
  • Freezing: You can freeze truffles for up to 2 months. Just ensure they are in a single layer in a freezer-safe container to prevent sticking.
  • Thawing Instructions: To thaw, place truffles in the refrigerator overnight before serving.

Frequently Asked Questions

  • Can I use other types of chocolate? Yes, you can use milk chocolate or white chocolate, but make sure they are vegan-friendly if you need them to be dairy-free.
  • Is there a substitute for coconut milk? You can use almond milk or any plant-based milk, but coconut milk gives the best creamy texture.
  • How do I make these truffles gluten-free? This recipe is naturally gluten-free, just ensure that all ingredients, especially chocolate, are certified gluten-free.
  • Can I add flavors to the chocolate? Absolutely! Adding extracts like vanilla or almond can enhance the flavor profile.
  • What should I do if the mixture is too runny? If the mixture is runny, chill it longer to help it firm up before rolling into truffles.
  • How can I make these sugar-free? Use sugar-free chocolate and a sugar substitute that melts well.
  • What’s the best way to serve these truffles? Allow them to sit at room temperature for a few minutes before serving for the best texture and flavor.
  • Can I use fresh strawberries instead of freeze-dried? Fresh strawberries have too much moisture; it’s best to stick with freeze-dried for this recipe.

Nutritional Information and Dietary Adaptations

These truffles are not only delicious but also provide some nutritional benefits:

  • Vegan-Friendly: Suitable for those following a vegan lifestyle.
  • Dairy-Free: No dairy ingredients, making them perfect for lactose intolerance.
  • Rich in Antioxidants: Dark chocolate is packed with antioxidants, promoting heart health.
  • Low in Sugar: This recipe can be adapted to reduce sugar, making it a healthier dessert option.

Essential Equipment for Success

To make these truffles, you don’t need a lot of fancy equipment, but here’s what can make the process easier:

  • Microwave or Double Boiler: For melting chocolate smoothly and evenly.
  • Mixing Bowls: A large glass bowl to mix and chill the truffle mixture.
  • Cookie Scoop: For uniform truffle sizes; it ensures each truffle looks professional.
  • Seal-able Plastic Bag: To crush the freeze-dried strawberries without making a mess.

Serving Suggestions

These truffles can be enjoyed in various ways. Here are some serving ideas:

  • On a Dessert Platter: Arrange them on a beautiful platter for a stunning dessert display.
  • With Coffee: Pair with a cup of coffee or tea for a delightful afternoon treat.
  • Gift Giving: Package in a decorative box tied with a ribbon for a thoughtful homemade gift.
  • As Party Favors: Individually wrap them for guests to take home after a gathering.

In conclusion, these Decadent Vegan Strawberry Dark Chocolate Truffles are not only easy to make but also incredibly satisfying. With a rich chocolate flavor and a fruity twist, they are perfect for any occasion. Try making them today, and elevate your dessert game with this simple yet impressive recipe!

Strawberry Dark Chocolate Truffles (Vegan)

Prep Time 10 minutes
Cook Time 5 minutes
Total Time 1 hour 5 minutes
Servings 12 pieces
Calories 150
Delight in these rich, vegan strawberry dark chocolate truffles that combine smooth coconut milk with intense dark chocolate and a hint of strawberry flavor.

Ingredients

Dairy-Free Chocolate

  • 1/2 cup full fat, unsweetened coconut milk (from a well-shaken can)
  • 9 oz dark chocolate (at least 70%)
  • 1 oz freeze dried strawberries
  • 1/4 tsp sea salt

Instructions 

  • Heat coconut milk until very warm, then pour over chopped dark chocolate. Cover and let sit for 5 minutes, then stir until smooth.
  • Chill the mixture in the fridge for about 1 hour until firm.
  • Crush freeze dried strawberries into a dust and spread on a plate.
  • Use a spoon to scoop the chocolate mixture, roll into balls, then coat with strawberry dust.
  • Enjoy immediately or store in an airtight container in the fridge for up to 6 days.

Notes

For best texture, allow the truffles to come to room temperature before serving.
Calories: 150kcal
Cost: $15
Course: Dessert
Cuisine: vegan
Keyword: chocolate, strawberry

Unleashing the Flavor: The Irresistible Garlic Parmesan Bread Bites

Welcome to the world of Garlic Parmesan Bread Bites, where every bite offers a delightful combination of flavors that are simply addicting. These little treasures are perfect for any occasion, whether you’re hosting a gathering, enjoying a cozy night in, or looking for a quick snack to satisfy those taste buds. This recipe combines crusty bread, buttery garlic, and rich parmesan cheese, resulting in a snack that is not just delicious but also incredibly easy to make. In this comprehensive guide, we’ll explore not just how to make these bread bites but also the best practices, variations, and answers to your burning questions.

Why You’ll Love This Recipe

This recipe isn’t just about making food; it’s about creating memorable experiences. Here are five reasons why you’ll fall in love with these Garlic Parmesan Bread Bites:

  • Quick and Simple: With minimal prep time and straightforward steps, you can whip these up in under 30 minutes.
  • Perfectly Flavorful: The combination of garlic, butter, and parmesan cheese creates a burst of flavor in every bite.
  • Versatile Snack: Whether for parties, movie nights, or as a side dish, these bites fit any occasion.
  • Crispy on the Outside, Soft on the Inside: Each bite offers a delightful contrast in texture that keeps you coming back for more.
  • Customizable: You can easily adapt the recipe to suit your personal taste or dietary needs.

Ingredients You’ll Need

To create your own batch of these buttery garlic parmesan bread bites, gather the following ingredients:

  • 4 cups fresh crusty bread, cut into bite-sized cubes (French or Italian bread recommended)
  • 1/2 cup unsalted butter, melted
  • 3 cloves garlic, finely minced
  • 1/2 cup finely grated parmesan cheese
  • 1 teaspoon Italian seasoning
  • 1/2 teaspoon salt
  • 1/4 teaspoon black pepper
  • 2 tablespoons fresh parsley, chopped

Ingredient Substitutions

If you’re missing an ingredient or want to experiment, here are some substitutions:

  • Butter: Substitute with olive oil for a healthier option.
  • Parmesan Cheese: Grana Padano or Pecorino Romano can also work well.
  • Fresh Garlic: Garlic powder can be used in a pinch, though fresh garlic provides the best flavor.
  • Bread Variations: Use whole wheat or sourdough for a different texture and flavor.

How to Make Garlic Parmesan Bread Bites

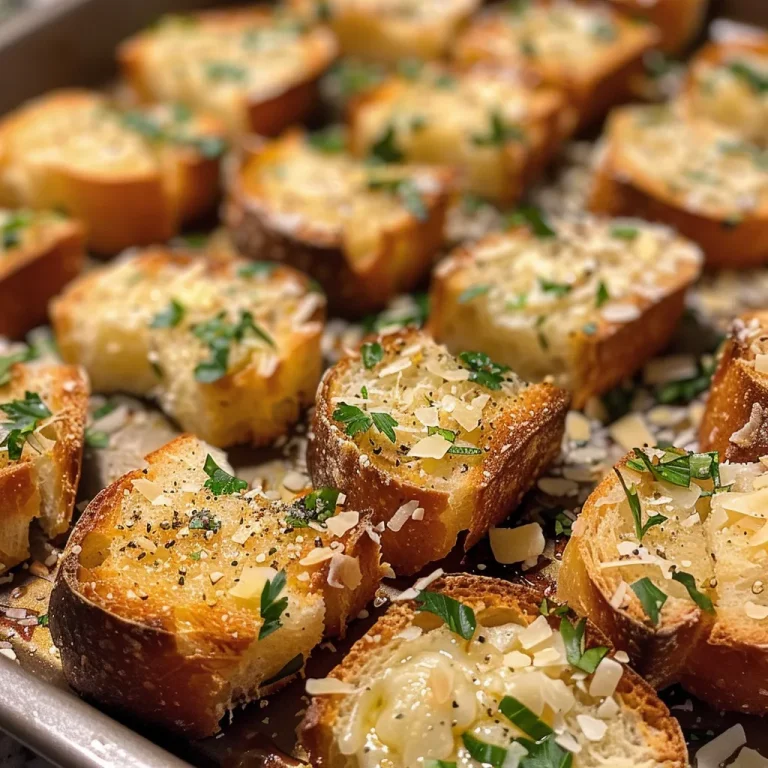
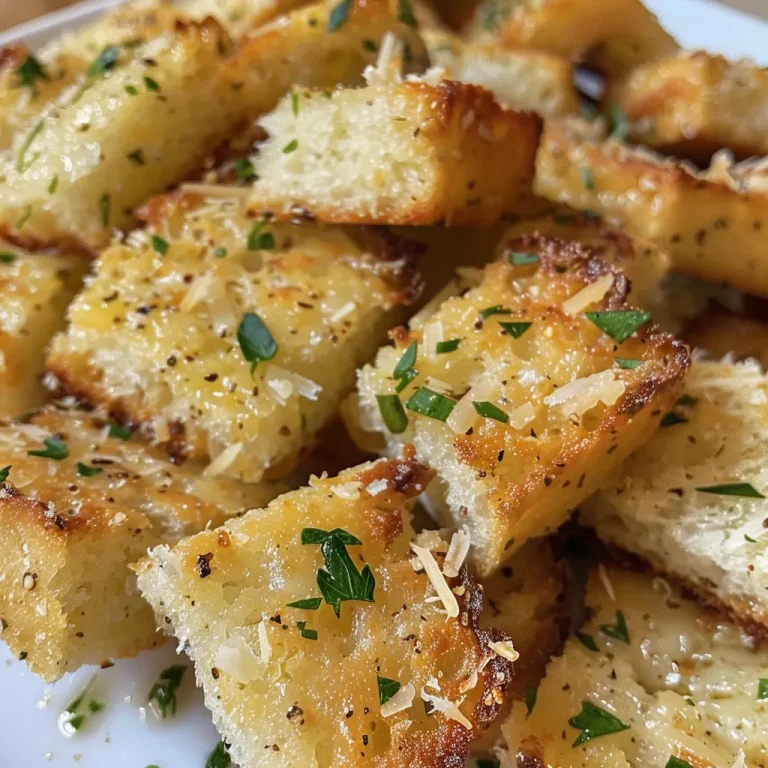
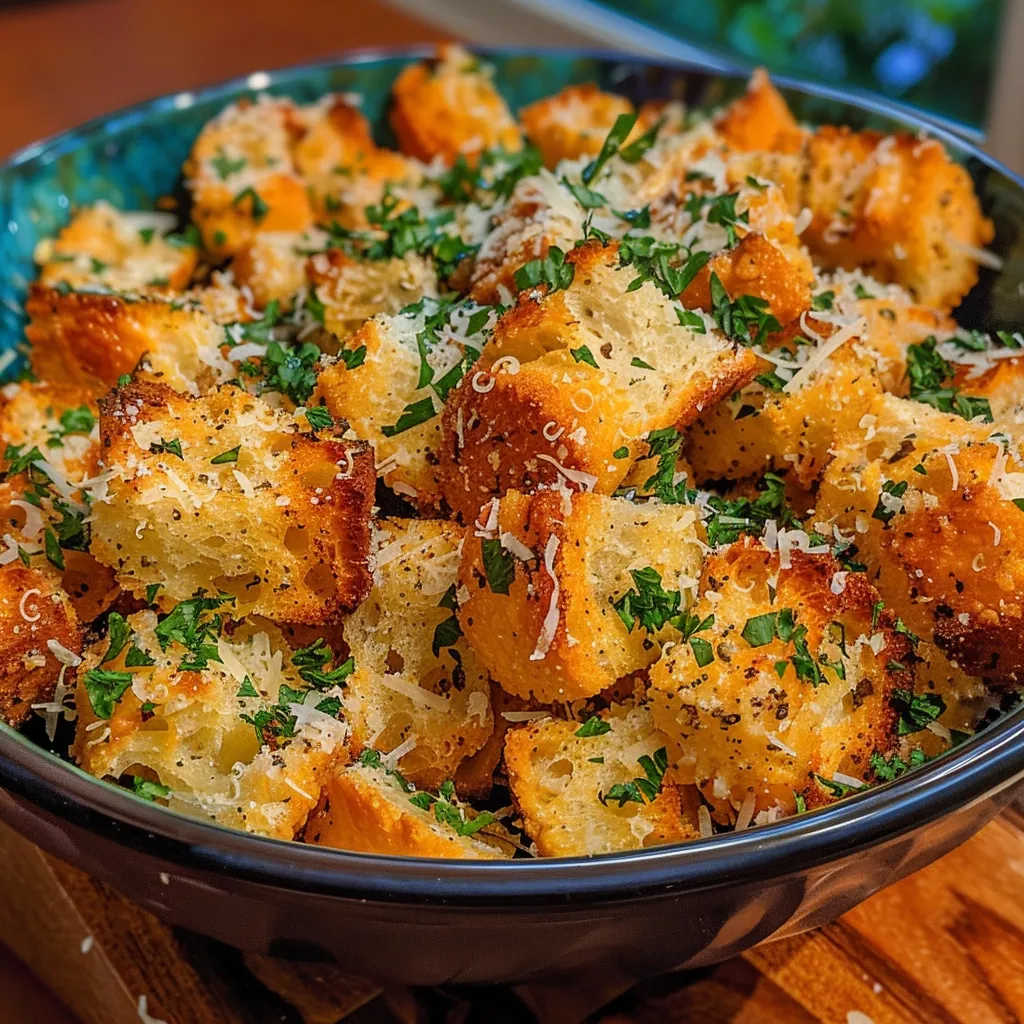
Freshly baked garlic parmesan bread cubes arranged attractively on a plate.

Now that you have all your ingredients ready, let’s dive into the step-by-step process to create these mouthwatering bites:

  1. Prepare the Bread: Cut fresh bread into uniform bite-sized cubes. If you use day-old bread, it will hold its shape better during baking.
  2. Make the Garlic Parmesan Butter: Melt butter in a saucepan or microwave. Stir in minced garlic, grated parmesan, Italian seasoning, salt, and pepper until well combined.
  3. Toss the Bread Cubes: Place the bread cubes in a large bowl. Pour the garlic parmesan butter over them and toss gently but thoroughly to ensure each piece is evenly coated.
  4. Spread and Bake: Spread the coated bread cubes in a single layer on a parchment-lined baking sheet. Bake at 375°F (190°C) for 10-12 minutes or until golden brown and crispy around the edges.
  5. Garnish and Serve: Remove from the oven, sprinkle with freshly chopped parsley, and serve warm for the best flavor and texture.

Pro Tips for Making Garlic Parmesan Bread Bites

To ensure your bread bites turn out perfectly every time, consider these expert tips:

  • Use Fresh Ingredients: Fresh bread and garlic enhance the overall flavor significantly.
  • Don’t Overcrowd the Baking Sheet: Space between the bread cubes allows for even cooking and crispiness.
  • Check for Doneness: Keep an eye on your bread bites while baking to avoid burning; they should be golden brown.
  • Experiment with Herbs: Add a sprinkle of rosemary or thyme for an extra layer of flavor.
  • Try Different Cheeses: Mixing different cheeses like mozzarella or cheddar can create a delightful cheesy experience.
  • Adjust Garlic Levels: If you love garlic, feel free to increase the number of cloves used.
  • Make Ahead: You can prepare the bread bites ahead of time and bake them just before serving.
  • Store Properly: Keep leftovers in an airtight container to maintain their texture.

Common Mistakes and Troubleshooting

Here are some common pitfalls to avoid when making your bread bites:

  • Using Stale Bread: Fresh bread yields better texture. If using stale bread, ensure it’s not too hard.
  • Overbaking: Keep a close eye on the bites; they can go from golden to burnt quickly.
  • Not Enough Seasoning: Don’t shy away from seasoning your butter mixture; it’s key to flavor.
  • Uneven Coating: Make sure all bread pieces are well-coated for consistent flavor in every bite.

Variations to Try

Feel free to adjust the recipe to suit your taste preferences with these delicious variations:

  • Cheesy Herb Bites: Add a blend of Italian herbs and extra cheese for a herbaceous twist.
  • Spicy Garlic Bites: Incorporate red pepper flakes into the garlic butter for a spicy kick.
  • Sweet and Savory: Drizzle a bit of honey over the bites before serving for a sweet contrast.
  • Vegetable Infusion: Toss in some finely chopped spinach or sun-dried tomatoes for added flavor and nutrients.

Storage and Make-Ahead Instructions

To ensure your bread bites stay fresh and delicious:

  • Storing Leftovers: Place any leftovers in an airtight container and refrigerate for up to 3 days.
  • Reheating: Reheat in the oven at 350°F (175°C) for about 5 minutes to restore crispiness.
  • Make Ahead: You can prepare the garlic butter and cut the bread cubes in advance, storing them separately until you’re ready to bake.

Serving Suggestions

These garlic parmesan bread bites can be enjoyed on their own or paired with various dishes:

  • As a Snack: Perfect as a standalone snack during movie nights or gatherings.
  • With Dips: Serve with marinara sauce, ranch dressing, or garlic aioli for dipping.
  • As a Side Dish: Complement your favorite pasta, soup, or salad with these flavorful bites.

Frequently Asked Questions

Here are some common questions about making Garlic Parmesan Bread Bites:

  • Can I use frozen bread? Yes, but thaw and dry it slightly before cutting and baking to avoid sogginess.
  • How do I make them gluten-free? Use gluten-free bread as a substitute for regular bread.
  • Can I make these in advance? Yes, prepare the mixture ahead of time and bake them right before serving.
  • What’s the best bread to use? French or Italian bread works best for a balance of crustiness and softness.
  • How do I store leftovers? Keep them in an airtight container in the fridge for up to 3 days.
  • Can I add other flavors? Absolutely! Feel free to get creative with spices and herbs.
  • Are these bites suitable for a party? They are perfect for parties, serving as a crowd-pleasing appetizer.
  • What are some dipping options? Marinara, ranch, or even a creamy garlic dip pairs wonderfully.

Nutrition Tips and Dietary Adaptations

If you’re looking to adapt this recipe to fit specific dietary needs:

  • Low-Carb Option: Use cauliflower bread or alternative low-carb bread.
  • Dairy-Free: Substitute butter with a dairy-free alternative and skip the cheese or use a dairy-free cheese.
  • Herb Infusion: Adding fresh herbs can enhance the nutritional profile and flavor.

Equipment Recommendations

While making Garlic Parmesan Bread Bites is straightforward, having the right tools can make the process smoother:

  • Baking Sheet: Use a large, rimmed baking sheet for even baking.
  • Parchment Paper: Line your baking sheet for easier cleanup and to prevent sticking.
  • Mixing Bowl: A large bowl for tossing your bread with the garlic butter mixture.

Final Thoughts

Garlic Parmesan Bread Bites are not just a recipe; they are a gateway to creating delightful culinary experiences. With their rich flavors and textural contrasts, these bites are sure to impress anyone who tries them. Remember, cooking is an art that encourages creativity—don’t hesitate to make this recipe your own. Enjoy your culinary adventure in making these buttery garlic parmesan bites, and watch as they disappear from your table in no time!

Garlic Parmesan Bread Bites – Buttery & Addictively Good!

Prep Time 10 minutes
Cook Time 12 minutes
Total Time 22 minutes
Servings 4 servings
Calories 250
These crispy, cheesy bread bites are infused with garlic and herbs, making them the perfect snack or appetizer.

Ingredients

Bread

  • 4 cups fresh crusty bread, cut into bite-sized cubes (French or Italian bread recommended)
  • 0.5 cup unsalted butter, melted
  • 3 cloves garlic, finely minced
  • 0.5 cup finely grated parmesan cheese
  • 1 teaspoon Italian seasoning
  • 0.5 teaspoon salt
  • 0.25 teaspoon black pepper
  • 2 tablespoons fresh parsley, chopped

Instructions 

  • Cut bread into bite-sized cubes. Melt butter and mix with garlic, parmesan, Italian seasoning, salt, and pepper.
  • Toss bread cubes with garlic parmesan butter until evenly coated.
  • Spread on a parchment-lined baking sheet and bake at 375°F (190°C) for 10-12 minutes until golden and crispy.
  • Remove from oven, sprinkle with chopped parsley, and serve warm.

Notes

Use day-old bread for better shape retention during baking.
Calories: 250kcal
Cost: $15
Course: Appetizer
Cuisine: Italian
Keyword: bread, garlic, parmesan

Welcome to the delightful world of mini chocolate cakes, where taste meets simplicity. If you’re looking for a way to satisfy your sweet tooth without the hassle of a large cake, you’ve landed in the right place. This recipe for mini chocolate cakes topped with fresh berries is not only easy to make but also perfect for any occasion. Whether it’s a birthday celebration, a cozy gathering, or simply a treat for yourself, these cakes will impress without overwhelming you in the kitchen.

In this comprehensive guide, we’ll walk you through the process of creating these delicious mini treats, ensuring that every step is clear and straightforward. By the end, you’ll be equipped with all the knowledge you need to bake like a pro, even if you’re just starting your baking journey.

Why You’ll Love This Recipe

  • Quick and Easy: This recipe requires minimal prep and cooking time, making it ideal for busy cooks.
  • Rich Flavor: The combination of chocolate and ganache creates a decadent taste experience.
  • Customizable: With various decoration options, you can tailor these cakes to suit any occasion.
  • Perfect Portions: Mini cakes mean no leftover slices, so you can enjoy them fresh!
  • Great for Sharing: These cute little cakes are perfect for parties and gatherings, allowing guests to indulge without overindulging.

Ingredients Breakdown

To create your mini chocolate cakes, you will need the following ingredients:

  • For the ganache:
    3.5 oz. (100g) heavy cream
    7 oz. (250g) chocolate Santas (milk chocolate)
  • For the cakes:
    3/4 cup (150g) sugar
    1 cup (130g) all-purpose flour
    1.8 oz. (50g) cocoa powder
    1 1/2 tsp. baking powder
    1/4 tsp. salt
    2 medium eggs
    6 tbsp. milk
    4 tbsp. vegetable oil
    1/2 tsp. vanilla paste
    1/2 cup (120ml) hot water
    1 oz. (30g) chocolate Santas (milk chocolate), chopped
  • For the decoration:
    Some fresh berries (optional)
    Some grated chocolate (optional)

Ingredient Substitutions

Don’t have all the ingredients? Here are some substitutes you can use:

  • Heavy cream: Use coconut cream for a dairy-free option.
  • Sugar: Substitute with brown sugar for a deeper flavor.
  • All-purpose flour: Substitute with gluten-free flour for a gluten-free treat.
  • Eggs: Replace with flax eggs (1 tbsp ground flaxseed + 2.5 tbsp water for each egg).

How to Make Mini Chocolate Cakes

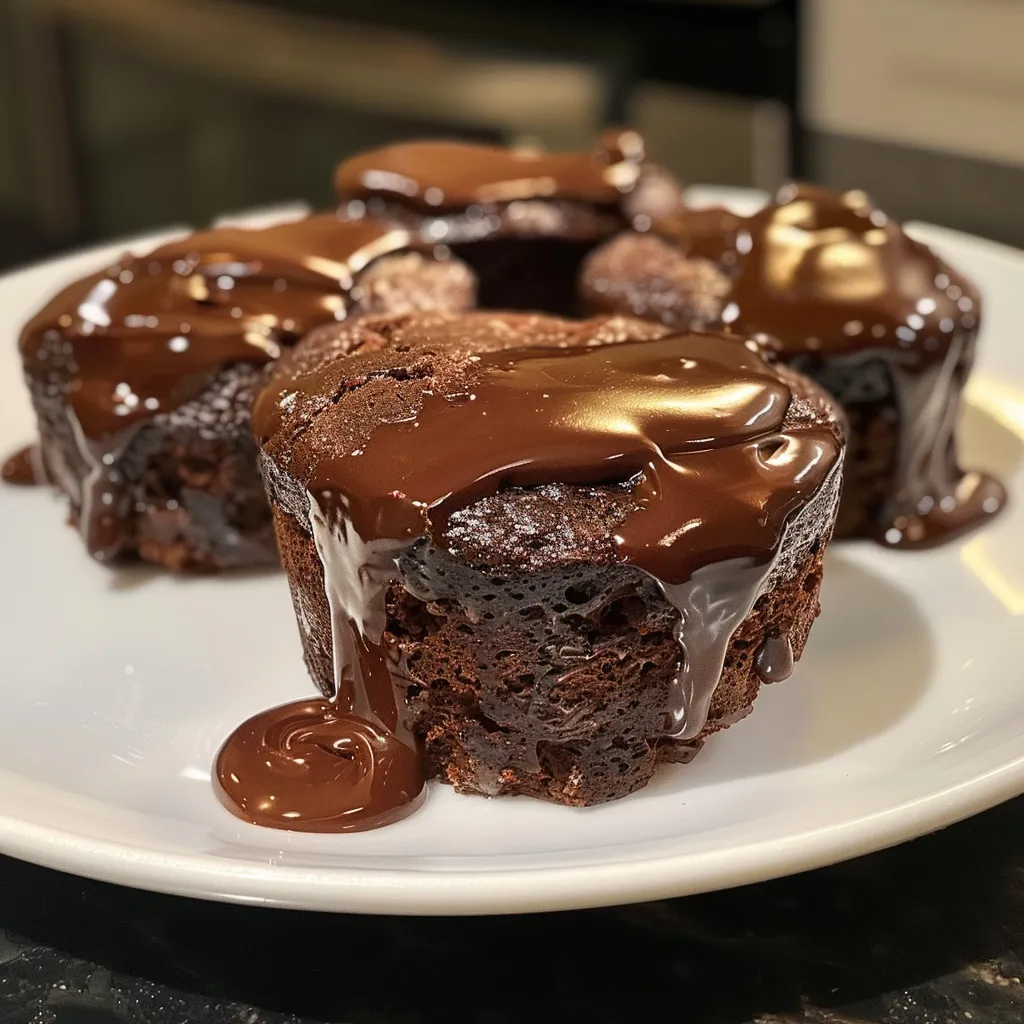
Mini chocolate cakes arranged elegantly with vibrant berries on top, highlighting their tempting texture.

Now that we have our ingredients ready, let’s dive into the steps to make these delightful mini cakes:

  • Step 1: Start by preparing the chocolate ganache. Chop the chocolate Santas and place them in a bowl. Pour in the heavy cream and heat it gently in the microwave until the chocolate melts completely. Stir until smooth and let it cool until it solidifies.
  • Step 2: Preheat the oven to 350°F (180°C). Lightly grease four 4-inch (10cm) baking tins and set them aside.
  • Step 3: In a large bowl, combine the sugar, flour, cocoa powder, baking powder, and salt. Mix well. Add the eggs, milk, oil, and vanilla paste, stirring until fully combined. Gradually add the hot water, mixing until just combined, then fold in the chopped chocolate.
  • Step 4: Divide the batter between the baking tins. If using only two tins, bake in two rounds. Bake for 18-23 minutes, or until a toothpick inserted into the center comes out clean. Let the cakes cool completely.
  • Step 5: Whisk the cooled ganache until light and fluffy. Fill a piping bag with the ganache and pipe dollops onto half of the mini cakes. Place the remaining cakes on top and decorate with more ganache, fresh berries, and grated chocolate.

Expert Tips for Success

Enhance your baking skills with these pro tips:

  • Room Temperature Ingredients: Ensure that your eggs and milk are at room temperature for better mixing.
  • Don’t Overmix: Mix the batter just until combined to keep your cakes light and airy.
  • Use a Toothpick: Test doneness by inserting a toothpick into the center; it should come out clean.
  • Chill the Ganache: Chill the ganache for a smoother, more spreadable texture.
  • Alternate Baking: If you have limited tins, bake in two rounds to ensure even cooking.
  • Keep an Eye on the Oven: Ovens can vary, so start checking your cakes a few minutes before the recommended time.
  • Let Cakes Cool: Allow cakes to cool completely before frosting to prevent melting the ganache.
  • Pipe with Precision: Use a round piping tip for elegant decoration.

Common Mistakes to Avoid

Here are some common pitfalls and how to avoid them:

  • Underbaking: Always check with a toothpick; better to bake a bit longer than to have gooey centers.
  • Using Cold Ingredients: Cold ingredients can lead to a dense cake; always use room temperature.
  • Skipping the Ganache: The ganache is vital for moisture and flavor; don’t skip it!

Variations to Try

Feel free to experiment with these variations:

  • Fruit-Filled: Add raspberry or strawberry puree to the batter for a fruity twist.
  • Nutty Delight: Fold in chopped nuts like walnuts or hazelnuts for added texture.
  • Minty Fresh: Add a few drops of peppermint extract to the ganache for a mint chocolate flavor.
  • Coffee Kick: Incorporate instant coffee granules into the batter for a mocha flavor.

Storage and Make-Ahead Instructions

Want to prepare ahead of time? Here’s how:

  • Storage: Store mini cakes in an airtight container in the fridge for up to 3 days.
  • Make-Ahead: Bake the cakes and ganache a day in advance; assemble just before serving for best texture.

Frequently Asked Questions

Here are some common questions about this recipe:

  • Can I freeze the mini cakes? Yes, wrap them tightly in plastic wrap and freeze for up to 2 months.
  • What’s the best way to thaw frozen cakes? Thaw them overnight in the fridge for best results.
  • Can I use different types of chocolate? Absolutely! Dark chocolate or white chocolate can be used in place of milk chocolate.
  • What can I use instead of ganache? Cream cheese frosting or whipped cream can be great alternatives.
  • How do I know when the cakes are done? A toothpick inserted in the center should come out clean or with a few moist crumbs.
  • Can I make these cakes gluten-free? Yes, use a gluten-free all-purpose flour blend.
  • How can I make them dairy-free? Use coconut cream and a dairy-free chocolate.
  • What are some serving suggestions? Serve with a scoop of ice cream or a dollop of whipped cream for extra indulgence.

Nutrition Tips and Dietary Adaptations

For a healthier option, consider these adaptations:

  • Reduce Sugar: Use a sugar substitute to lower the calorie count.
  • Whole Grain Flour: Substitute part of the all-purpose flour with whole wheat flour for added fiber.
  • Portion Control: Limit the number of cakes you eat in one sitting to maintain a balanced diet.

Essential Equipment Recommendations

Here’s what you need to get started:

  • Baking Tins: Four 4-inch round baking tins are ideal for this recipe.
  • Piping Bags: A good quality piping bag will help you create beautiful decorations.
  • Mixing Bowls: Have a large mixing bowl for the batter and a smaller one for the ganache.
  • Whisk: A whisk is essential for achieving a smooth ganache and batter.

Serving Suggestions

Enhance your mini chocolate cakes with these serving ideas:

  • Fresh Berries: Top with strawberries, raspberries, or blueberries for a pop of color and flavor.
  • Icing Sugar Dusting: A light dusting of icing sugar adds a beautiful finish.
  • Chocolate Shavings: Decorate with chocolate shavings for an elegant touch.

Conclusion

With this guide, you’re now equipped to create the most delightful mini chocolate cakes that are sure to impress anyone around your table. Remember, baking should be enjoyable, and with the right steps and a little creativity, you can turn a simple recipe into a masterpiece. So roll up your sleeves, gather your ingredients, and enjoy the journey of baking these charming treats!

Simple Mini Chocolate Cakes (with Berries)

Prep Time 20 minutes
Cook Time 20 minutes
Total Time 40 minutes
Servings 4 cakes
Calories 350
Delight in these easy mini chocolate cakes topped with luscious ganache and fresh berries for a perfect treat.

Ingredients

For the ganache

  • 3.5 oz heavy cream
  • 7 oz chocolate Santas (milk chocolate)

For the cakes

  • 3/4 cup sugar
  • 1 cup all-purpose flour
  • 1.8 oz cocoa powder
  • 1 1/2 tsp baking powder
  • 1/4 tsp salt
  • 2 medium eggs
  • 6 tbsp milk
  • 4 tbsp vegetable oil
  • 1/2 tsp vanilla paste
  • 1/2 cup hot water
  • 1 oz chocolate Santas (milk chocolate), chopped

For the decoration

  • some fresh berries (optional)
  • some grated chocolate (optional)

Instructions 

  • Chop the chocolate Santas and heat with heavy cream until melted, then cool until solid.
  • Preheat oven to 350°F (180°C). Grease four 4-inch tins.
  • Mix dry ingredients, add eggs, milk, oil, vanilla, then hot water. Fold in chopped chocolate. Divide batter and bake for 18-23 minutes. Cool completely.
  • Whisk ganache until fluffy, pipe onto cakes, and top with berries and grated chocolate if desired.

Notes

For best results, prepare the ganache a day ahead to ensure it firms up properly.
Calories: 350kcal
Cost: $15
Course: Dessert
Keyword: chocolate

Whisk Up Love: Heart-Shaped Pancakes for Every Occasion

Welcome to the world of delightful breakfast treats! These heart-shaped pancakes are not just a visual treat; they are a delicious way to express your affection on Valentine’s Day or any special occasion. With a simple and effective recipe, you can whip up these beautiful pancakes effortlessly. Whether you’re celebrating love or just want to brighten someone’s morning, this guide will help you master the art of making perfect heart-shaped pancakes.

Why You’ll Love This Recipe

Here are five reasons this heart-shaped pancake recipe will become your go-to:

  • Quick and Easy: With minimal ingredients and straightforward steps, you can create a stunning breakfast in no time.
  • Customizable: This pancake batter serves as a blank canvas; you can add your favorite flavors or toppings to suit any palate.
  • Perfect for Any Occasion: Whether it’s a romantic breakfast in bed or a fun family brunch, these pancakes fit the bill.
  • Kid-Friendly: Involve the little ones in the kitchen. Kids love helping out, and these pancakes are simple enough for them to assist.
  • Impressive Presentation: The heart shape adds a touch of charm that elevates your breakfast experience.

Ingredient Breakdown

To make these heart-shaped pancakes, you will need the following ingredients:

  • 1 ½ cups all-purpose flour: The base for your pancakes, providing the necessary structure.
  • 3 ½ teaspoons baking powder: This will give your pancakes the fluffiness you desire.
  • 1 teaspoon salt: Balances the sweetness and enhances flavors.
  • 1 tablespoon granulated sugar: Adds just the right amount of sweetness.
  • 1 ¼ cups milk: Use whole or low-fat milk for the best results.
  • 1 egg: Binds the ingredients together and adds moisture.
  • 3 tablespoons unsalted butter (melted): For richness and flavor.

If you need substitutions, here are some suggestions:

  • Flour: Whole wheat flour or a gluten-free blend can be used.
  • Milk: Almond, soy, or oat milk are great alternatives for dairy-free options.
  • Butter: Coconut oil or vegetable oil can replace butter, especially for dairy-free diets.

Pro Tips for Perfect Pancakes

Heart-shaped pancakes viewed in a close-up shot, highlighting their inviting texture.

Here are some expert insights to elevate your pancake game:

  • Don’t Overmix: Stir the batter until just combined. A few lumps are okay; overmixing can lead to tough pancakes.
  • Let it Rest: Allow the batter to sit for 5-10 minutes before cooking. This helps the baking powder activate and improves texture.
  • Preheat Your Pan: Make sure your pan is hot enough before pouring in the batter to ensure a good rise and golden color.
  • Use a Cookie Cutter: For perfectly shaped pancakes, use a heart-shaped cookie cutter. Just grease it lightly before pouring the batter.
  • Experiment with Heat: Adjust the heat as needed. If pancakes are browning too quickly, lower the heat to cook them through without burning.
  • Check for Doneness: Flip when bubbles form on the surface. Cook until golden brown on both sides.
  • Keep Warm: Place cooked pancakes on a baking sheet in a low oven to keep them warm while you cook the rest.
  • Personalize Toppings: Offer a variety of toppings like fresh fruit, whipped cream, or flavored syrups to enhance the experience.

Troubleshooting Common Mistakes

Even the best cooks face challenges. Here’s how to troubleshoot some common issues:

  • Pancakes are too dense: Ensure your baking powder is fresh and avoid overmixing the batter.
  • Pancakes are too dry: Add a touch more milk or melted butter to the batter.
  • Pancakes are sticking to the pan: Use a non-stick pan and ensure it’s adequately greased.
  • Pancakes are burning: Lower the heat and allow more time for each side to cook.

Delicious Variations

Feel free to play around with this recipe! Here are a few variations you can try:

  • Chocolate Chip Pancakes: Add ½ cup of chocolate chips to the batter for a sweet twist.
  • Berry-Infused: Fold in fresh or frozen berries like blueberries or raspberries for added flavor and nutrition.
  • Nutty Banana: Mash a banana into the batter and add chopped nuts for a delightful texture.
  • Spiced Pumpkin: Add ½ cup of pumpkin puree and a teaspoon of pumpkin spice for a seasonal treat.

Storage and Make-Ahead Instructions

If you want to prepare in advance, here’s how:

  • Make-Ahead Batter: Prepare the batter the night before and store it in the fridge. Stir gently before cooking.
  • Leftover Pancakes: Cool completely and store in an airtight container in the fridge for up to 3 days or freeze for up to 2 months.
  • Reheating: To reheat, place pancakes in a toaster or microwave until warm.

Comprehensive FAQ

Here are answers to common questions about making heart-shaped pancakes:

  • Can I use whole wheat flour? Yes, whole wheat flour works well for a healthier option.
  • How do I prevent pancakes from sticking? Use a good non-stick pan and ensure you grease it well.
  • Can I make these pancakes vegan? Absolutely! Use plant-based milk and a flax egg instead of a regular egg.
  • What toppings are best? Fresh fruits, maple syrup, whipped cream, or specialty syrups all work wonderfully.
  • Can I double the recipe? Yes, simply double all ingredients for more servings.
  • How do I know when pancakes are done? Look for bubbles forming on the surface and a golden color on the edges before flipping.
  • What if my batter is too thick? Add a splash of milk to thin it out to your desired consistency.
  • How can I make these pancakes lower in sugar? Reduce the amount of sugar or use a sugar alternative.

Nutrition Tips and Dietary Adaptations

For those watching their diet, here are some tips:

  • Protein Boost: Add a scoop of protein powder to your batter for a more filling meal.
  • Fiber Addition: Incorporate flaxseed or chia seeds for added health benefits.
  • Sugar Alternatives: Use honey, agave, or stevia as substitutes for granulated sugar.

Equipment Recommendations

For the best results, consider the following tools:

  • Non-Stick Skillet: Essential for easy flipping and cooking.
  • Heart-Shaped Cookie Cutter: For perfectly shaped pancakes.
  • Mixing Bowls: Use a large bowl for mixing and a medium bowl for wet ingredients.
  • Whisk: A good whisk helps combine ingredients efficiently.

Serving Suggestions

Make your heart-shaped pancakes even more special by serving them with:

  • Fresh Berries: Strawberries, raspberries, or blueberries add freshness and color.
  • Whipped Cream: A dollop on top elevates the presentation.
  • Syrups: Try maple syrup, chocolate syrup, or flavored syrups for extra sweetness.

In conclusion, these heart-shaped pancakes are not just a treat for the taste buds; they are a way to show love and care. Whether you’re celebrating Valentine’s Day or simply enjoying a cozy breakfast, this recipe is your key to creating delightful moments. Happy cooking!

Heart-Shaped Pancakes

Prep Time 10 minutes
Cook Time 15 minutes
Total Time 25 minutes
Servings 4 servings
Calories 200
Delight your loved ones with these charming heart-shaped pancakes, perfect for a special breakfast or brunch.

Ingredients

Dry ingredients

  • 1.5 cups all-purpose flour
  • 3.5 teaspoons baking powder
  • 1 teaspoon salt
  • 1 tablespoon granulated sugar

Wet ingredients

  • 1.25 cups milk
  • 1 egg egg
  • 3 tablespoons unsalted butter (melted)

Instructions 

  • Mix dry ingredients in a bowl.
  • Whisk wet ingredients in a separate bowl.
  • Combine wet and dry, stir gently until smooth.
  • Rest batter for 5–10 minutes.
  • Heat pan, use a heart-shaped cutter or squeeze bottle to cook pancakes until golden.

Notes

Use a heart-shaped cookie cutter or squeeze bottle for best results.
Calories: 200kcal
Cost: $10
Course: Breakfast
Cuisine: American
Keyword: Pancakes

Elevate Your Holiday Baking with Our Ultimate Red Velvet Cheesecake Recipe

Welcome to the world of festive baking! Our Christmas Red Velvet Cheesecake is not just a dessert; it’s an experience that combines the richness of red velvet cake with the creaminess of cheesecake. This stunning dessert is perfect for holiday celebrations and will surely impress your guests. With a few simple steps, you’ll create a vibrant centerpiece that tastes as good as it looks!

Why You’ll Love This Recipe

  • Decadent Flavor: The combination of rich red velvet and creamy cheesecake creates a luxurious dessert that is perfect for special occasions.
  • Festive Presentation: The vibrant red color and creamy layers make this cheesecake a showstopper at any holiday gathering.
  • Easy to Follow: With clear instructions and tips, even novice bakers can achieve great results.
  • Make-Ahead Friendly: Prepare this cheesecake in advance to save time on the day of your celebration.
  • Versatile Variations: Easily adapt the recipe with various flavors and toppings to suit your taste.

Ingredient Breakdown

Let’s dive into the ingredients needed for our Christmas Red Velvet Cheesecake. Each component plays a vital role in achieving the perfect balance of flavor and texture.

  • All-purpose Flour: Essential for structure; can be substituted with gluten-free flour for a gluten-free version.
  • Unsweetened Cocoa Powder: Adds depth to the flavor; look for high-quality cocoa for the best taste.
  • Baking Powder & Baking Soda: These leavening agents give the cake its rise; don’t skip them!
  • Salt: Enhances the flavors and balances the sweetness.
  • Granulated Sugar: Sweetens both the cake and cheesecake layers; can be reduced for a less sweet option.
  • Vegetable Oil: Keeps the cake moist; can be replaced with melted coconut oil for a different flavor.
  • Buttermilk: Adds richness and acidity; substitute with milk mixed with a tablespoon of vinegar if needed.
  • Eggs: Provide structure and moisture; use flax eggs for a vegan option.
  • Red Food Coloring: Creates the signature vibrant red; gel food coloring works best.
  • Vanilla Extract: Enhances overall flavor.
  • White Vinegar: Reacts with baking soda for a fluffier cake.
  • Cream Cheese: Essential for the cheesecake layer; ensure it’s at room temperature for smooth mixing.
  • Sour Cream: Adds tanginess to the cheesecake; can be replaced with Greek yogurt.
  • Unsalted Butter: Used in the frosting; helps achieve a creamy consistency.
  • Powdered Sugar: Sweetens the frosting and gives it a smooth texture.

Step-by-Step Instructions

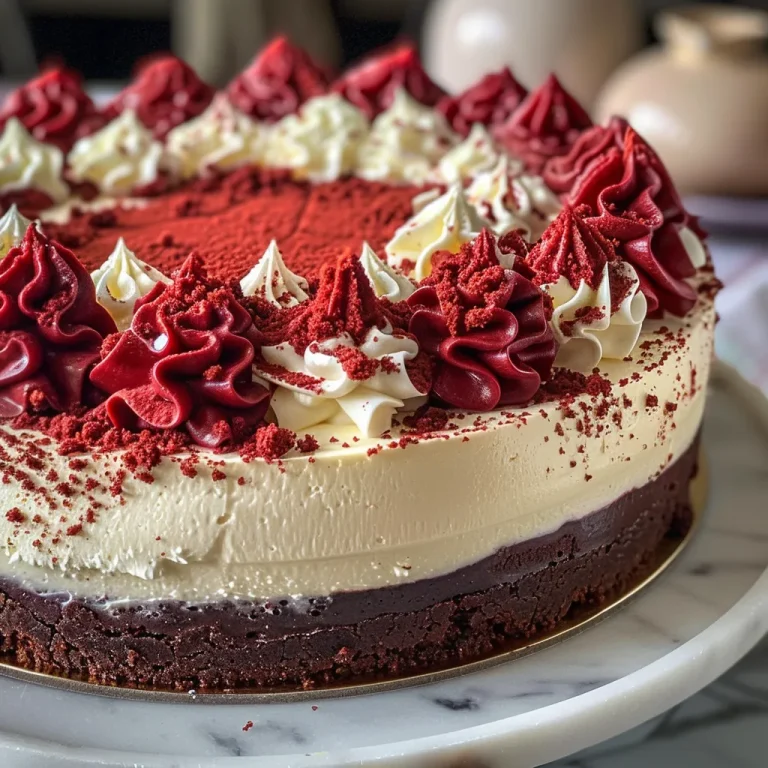
A delicious slice of Red Velvet Cheesecake with layers of cream cheese and red velvet cake.

Follow these detailed steps to create a perfect Christmas Red Velvet Cheesecake:

  • Step 1: Prepare the Cheesecake Layer
    Preheat your oven to 325°F (162°C). In a mixing bowl, beat 16 oz of cream cheese with 1/2 cup granulated sugar, 1/2 cup sour cream, 2 large eggs, and 1 tsp vanilla extract until smooth. Pour into a greased 9-inch springform pan and bake for 40–45 minutes. Once done, let it cool completely before chilling in the refrigerator.
  • Step 2: Bake Red Velvet Cake Layers
    Increase the oven temperature to 350°F (175°C). In another bowl, whisk together 2 1/2 cups flour, 2 tbsp cocoa powder, 1 tsp baking powder, 1 tsp baking soda, and 1/2 tsp salt. In a separate bowl, mix 1 3/4 cups sugar, 3/4 cup vegetable oil, 1 cup buttermilk, 2 large eggs, 1–2 tbsp red food coloring, 1 tsp vanilla extract, and 1 tsp white vinegar. Combine wet and dry ingredients and mix until smooth. Divide the batter into two greased 9-inch round cake pans and bake for 25–30 minutes. Cool completely.
  • Step 3: Make the Cream Cheese Frosting
    In a mixing bowl, beat 8 oz cream cheese, 1/2 cup unsalted butter, 3 cups powdered sugar, and 1 tsp vanilla extract until creamy and smooth.
  • Step 4: Assemble the Cake
    On a serving platter, place one red velvet layer, top with the cooled cheesecake layer, and then the second red velvet layer. Cover the entire cake with cream cheese frosting.
  • Step 5: Chill and Serve
    Chill the assembled cake for at least 1 hour before serving to allow the layers to set.

Pro Tips for Perfection

  • Room Temperature Ingredients: Ensure cream cheese, eggs, and butter are at room temperature for smooth mixing.
  • Chill Time: Allow the cheesecake to chill completely before assembly for a better texture.
  • Even Layers: Level your cakes with a serrated knife for even stacking.
  • Decorate Wisely: For a festive touch, decorate with seasonal fruits or edible glitter.
  • Knife Technique: For clean slices, dip your knife in hot water and wipe it dry between cuts.
  • Flavor Enhancements: Add a hint of almond extract for an additional flavor dimension.
  • Storage Tips: Keep leftovers covered in the fridge for up to 5 days.
  • Freezing Option: This cheesecake can be frozen for up to 2 months; wrap tightly to prevent freezer burn.

Common Mistakes and Troubleshooting

Even experienced bakers can encounter issues. Here are solutions to common problems:

  • Cracked Cheesecake: Avoid overbaking and ensure your oven temperature is accurate. A water bath can also help.
  • Dry Cake: Check your oven temperature and avoid overmixing the batter.
  • Too Sweet: Balance sweetness with a pinch of salt or a touch of acidity in the frosting.
  • Crumbling Layers: Ensure cakes are fully cooled before assembling to maintain structure.

Variations & Substitutions

Feel free to customize your Christmas Red Velvet Cheesecake with these variations:

  • Chocolate Drizzle: Add melted chocolate on top for a richer flavor.
  • Nutty Crunch: Incorporate crushed nuts like pecans or walnuts into the frosting.
  • Fruit Toppings: Top with fresh berries or a raspberry sauce for a tart contrast.
  • Spiced Version: Add a pinch of cinnamon or nutmeg to the cake batter for a warm spice flavor.

Storage and Make-Ahead Instructions

This cheesecake is perfect for planning ahead:

  • Make-Ahead: Prepare the cheesecake and cake layers a day in advance.
  • Storage: Keep the assembled cheesecake in the refrigerator or freeze for later enjoyment.

Comprehensive FAQ

Here are some frequently asked questions to help you succeed with your baking:

  • Can I use a different type of food coloring? Yes, gel food coloring is recommended for a vibrant color without altering the texture.
  • Is there a vegan alternative? Yes, substitute ingredients such as flax eggs for eggs and coconut cream for cream cheese.
  • How do I prevent the cheesecake from cracking? Bake in a water bath and avoid overmixing the batter.
  • What can I serve with this cheesecake? Great pairings include whipped cream, fresh fruits, or a chocolate sauce.
  • Can I make mini cheesecakes? Absolutely! Use a muffin tin and adjust baking time accordingly.
  • How long does this cheesecake last? It can be stored in the refrigerator for up to 5 days or frozen for up to 2 months.
  • What’s the best way to slice the cheesecake? Use a warm, wet knife for clean cuts.
  • Can I use a different frosting? Yes, cream cheese frosting can be replaced with whipped cream or buttercream.

Nutritional Tips and Dietary Adaptations

Here are a few tips to keep your cheesecake delicious while considering dietary needs:

  • Low-Sugar Option: Substitute granulated sugar with a sugar alternative for a lower-calorie dessert.
  • Gluten-Free Version: Use gluten-free flour blends for the cake layers.
  • Dairy-Free Adaptations: Use dairy-free cream cheese and butter alternatives.

Equipment Recommendations

To ensure your baking process is smooth, here are some essential tools:

  • 9-Inch Springform Pan: Ideal for baking and serving cheesecakes.
  • Mixing Bowls: A set of various sizes for mixing and preparing ingredients.
  • Electric Mixer: Needed for achieving a smooth and creamy frosting.
  • Offset Spatula: Great for spreading frosting evenly on the cake.

Serving Suggestions

When it comes to serving your Christmas Red Velvet Cheesecake, presentation matters:

  • Garnish with Fresh Berries: Place berries on top for a pop of color.
  • Serve with Whipped Cream: A dollop of whipped cream complements the flavors beautifully.
  • Pair with Coffee or Tea: The richness of the cheesecake pairs excellently with warm beverages.

In conclusion, your journey to baking the perfect Christmas Red Velvet Cheesecake is just a step away. With this comprehensive guide, you’re equipped to create a dessert that not only impresses but also delights. Remember, baking should be fun and rewarding. Happy baking!

Christmas Red Velvet Cheesecake Recipe

Prep Time 30 minutes
Cook Time 45 minutes
Total Time 1 hour 15 minutes
Servings 12 pieces
Calories 650
A festive and indulgent layered cheesecake combining rich red velvet cake with creamy cheesecake and frosting, perfect for holiday celebrations.

Ingredients

Cake Batter

  • 2 1/2 cups all-purpose flour
  • 2 tbsp unsweetened cocoa powder
  • 1 tsp baking powder
  • 1 tsp baking soda
  • 1/2 tsp salt
  • 1 3/4 cups granulated sugar
  • 3/4 cup vegetable oil
  • 1 cup buttermilk
  • 2 large eggs
  • 1–2 tbsp red food coloring
  • 1 tsp vanilla extract

Cheesecake Layer

  • 16 oz cream cheese
  • 1/2 cup granulated sugar
  • 1/2 cup sour cream
  • 2 large eggs
  • 1 tsp vanilla extract
  • 8 oz cream cheese
  • 1/2 cup unsalted butter
  • 3 cups powdered sugar

Frosting

  • 1 tsp vanilla extract

Instructions 

  • Bake the cheesecake layer at 325°F (160°C) for 40–45 minutes, then chill.
  • Prepare red velvet cake layers at 350°F (175°C) for 25–30 minutes and cool completely.
  • Make cream cheese frosting by beating cream cheese, butter, powdered sugar, and vanilla until smooth.
  • Assemble the cake by layering red velvet, cheesecake, and frosting. Cover with frosting and chill for 1 hour before serving.

Notes

Ensure thorough chilling for best texture and flavor.
Calories: 650kcal
Cost: $20
Course: Dessert
Cuisine: American
Keyword: cheesecake, holiday, red velvet

Valentine’s Day is the perfect occasion to express your love and appreciation through delightful baked goods. These Valentine sugar cookies are not only simple to make but also incredibly delicious, making them the ideal treat for sharing with your loved ones. With a handful of ingredients and straightforward techniques, you can create beautiful cookies that are sure to impress. Let’s dive into the world of baking and discover how to make these sweet delights!

Why You’ll Love This Recipe

This recipe for Valentine sugar cookies stands out for several reasons:

  • Quick and Easy: With a simple list of ingredients and straightforward steps, you can whip up these cookies in no time, making them perfect for busy schedules.
  • Customizable: You can easily adapt this recipe to suit your taste, using different flavors and decorations to personalize your cookies for any occasion.
  • Impressive Presentation: These cookies can be beautifully decorated with icing and sprinkles, making them a stunning addition to any Valentine’s Day celebration.
  • Perfect Texture: The cookies have a delightful balance of crispiness on the edges while remaining soft and chewy in the center, ensuring a satisfying bite every time.
  • Make-Ahead Friendly: You can prepare the dough in advance and store it in the fridge or freezer, making it easy to bake fresh cookies whenever you need them.

Ingredient Breakdown

Understanding your ingredients is crucial for achieving the best results. Here’s what you’ll need to make these delightful sugar cookies:

  • 1 cup butter, room temperature (unsalted): Use unsalted butter for better control over the cookie’s saltiness.
  • 1 cup sugar (granulated): This provides sweetness and helps the cookies spread perfectly.
  • 1 ½ teaspoons vanilla: Adds a warm, fragrant flavor that complements the sweetness.
  • 1 egg: Binds the ingredients together and adds moisture.
  • 1 teaspoon water (a bit more if needed): Adjusts the dough consistency, making it easier to roll out.
  • 3 cups flour: The foundation of the cookies; use all-purpose flour for the best results.
  • 1 ½ teaspoons baking powder: Helps the cookies rise and become fluffy.
  • ¼ teaspoon salt: Enhances the flavors in the cookies.

Ingredient Substitutions

If you need to make adjustments based on dietary preferences or ingredient availability, consider the following substitutions:

  • Butter: You can use margarine or coconut oil for a dairy-free option.
  • Granulated sugar: Substitute with coconut sugar or a sugar alternative for a lower-calorie version.
  • Flour: Use gluten-free flour blends for gluten-sensitive individuals.
  • Egg: Replace with a flaxseed egg (1 tablespoon ground flaxseed mixed with 2.5 tablespoons water) for a vegan option.

How to Make Valentine Sugar Cookies

Follow these simple steps to create your Valentine sugar cookies:

  1. Cream butter, sugar, and vanilla: In a mixing bowl, beat together the butter, sugar, and vanilla until light and fluffy.
  2. Add egg and water: Mix in the egg and water, beating until well combined.
  3. Combine dry ingredients: In a separate bowl, sift together the flour, baking powder, and salt.
  4. Blend dry mixture into creamed mixture: Gradually add the dry ingredients to the wet ingredients until fully incorporated. Divide the dough in half.
  5. Chill the dough: Wrap each half in waxed paper or plastic wrap and chill in the refrigerator for one hour.
  6. Roll the dough: On a floured surface, roll the dough to about a quarter-inch thick. If the dough is sticky, sprinkle with a little flour.
  7. Cut out cookies: Use cookie cutters to create fun shapes and place them on a baking sheet lined with parchment paper.
  8. Bake: Preheat the oven to 375°F (190°C) and bake for 6-8 minutes. Watch them carefully and remove them before the edges turn brown.

Expert Tips for Perfect Valentine Cookies

Heart-shaped sugar cookies adorned with festive icing for Valentine's Day.

To elevate your cookie-making game, here are some pro tips:

  • Chill your dough: Chilling the dough helps prevent the cookies from spreading too much in the oven.
  • Use cold ingredients: Start with cold butter for easier dough handling and better shape retention.
  • Don’t overmix: When combining the dry and wet ingredients, mix just until incorporated to avoid tough cookies.
  • Test your oven: Ovens can vary in temperature; consider using an oven thermometer for accuracy.
  • Experiment with flavors: Add almond extract or lemon zest for a unique twist on traditional sugar cookies.

Common Mistakes and Troubleshooting

Even experienced bakers can encounter challenges. Here are solutions to common issues:

  • Cookies spread too much: Ensure your dough is chilled before baking and that you use enough flour.
  • Dough is too sticky: Add more flour gradually until the dough is manageable.
  • Cookies are hard: This may result from overbaking; keep a close eye on the baking time.
  • Flavor is lacking: Make sure to add the correct amounts of vanilla and salt to enhance flavor.

Delicious Variations of Valentine Sugar Cookies

Want to switch things up? Here are some creative variations to try:

  • Chocolate Chip Valentine Cookies: Fold in 1 cup of chocolate chips for a delightful twist.
  • Sprinkle Surprise: Roll the dough in colorful sprinkles before cutting out shapes for a festive touch.
  • Red Velvet Sugar Cookies: Add cocoa powder and red food coloring to create rich, red cookies.
  • Nutty Delight: Incorporate chopped nuts like almonds or walnuts for added crunch.

Storage and Make-Ahead Instructions

Planning ahead can save you time and effort:

  • Store baked cookies: Keep them in an airtight container at room temperature for up to one week.
  • Freeze baked cookies: Layer them with parchment paper in a freezer-safe container for up to three months.
  • Prepare dough in advance: Wrap the unbaked dough tightly and refrigerate for up to a week or freeze for up to three months.
  • Thawing: Allow frozen cookies to thaw at room temperature before serving or decorating.

Comprehensive FAQ About Valentine Sugar Cookies

Here are answers to some frequently asked questions:

  • Can I make the dough ahead of time? Yes, you can prepare the dough ahead and store it in the fridge or freezer.
  • Do Valentine Sugar Cookies hold their shape when baked? Yes, if you follow the chilling instructions, they should maintain their shape well.
  • What is the best way to decorate these cookies? Use royal icing or buttercream for a beautiful finish; sprinkles can add a fun touch.
  • How do I make the icing? Combine powdered sugar, water, and flavoring to desired consistency.
  • Can I use whole wheat flour? Yes, but the texture will be denser; consider mixing with all-purpose flour.
  • Can these cookies be made gluten-free? Absolutely, use a gluten-free flour blend for a suitable alternative.
  • What flavors can I add to the dough? Almond, lemon, or orange zest can enhance the cookie flavor.
  • How do I know when the cookies are done? They should be set around the edges but soft in the center; watch closely!

Nutritional Tips and Dietary Adaptations

For those mindful of nutrition, consider these tips:

  • Reduce sugar: Use less sugar or a sugar substitute to lower calories.
  • Whole grain options: Opt for whole wheat flour for added fiber.
  • Lower fat content: Replace part of the butter with unsweetened applesauce for a healthier version.

Essential Equipment for Baking

To achieve the best results, ensure you have the following tools:

  • Mixing bowls: A set of varying sizes for mixing ingredients easily.
  • Rolling pin: For rolling out the dough to an even thickness.
  • Cookie cutters: Fun shapes to create memorable cookies for your loved ones.
  • Baking sheets: Non-stick or lined with parchment paper for easy cookie removal.
  • Cooling rack: To cool cookies evenly after baking.

Serving Suggestions

These cookies are perfect for any celebration. Here are some serving ideas:

  • Gift Wrapped: Present them in a decorative box or tin as a sweet gift for friends and family.
  • Party Platters: Arrange them on a festive platter alongside other treats for a dessert table.
  • Personal Touch: Include a handwritten note with each gift to add a personal touch.

Conclusion

In conclusion, these effortless Valentine sugar cookies are not just a treat; they’re a way to show your love and creativity. With this comprehensive guide, you have all the tools and knowledge needed to bake cookies that will impress anyone. So gather your ingredients, follow the steps, and enjoy the process of making these sweet delights. Happy baking!

The Best Valentine Sugar Cookies

Prep Time 20 minutes
Cook Time 8 minutes
Total Time 28 minutes
Servings 24 cookies
Calories 150
Delight in these classic, buttery sugar cookies perfect for Valentine's Day or any special occasion.

Ingredients

Dough

  • 1 cup butter, room temperature (unsalted)
  • 1 cup sugar (granulated)
  • 1 ½ teaspoons vanilla
  • 1 egg egg
  • 1 teaspoon water (a bit more if needed)

Dry ingredients

  • 3 cups flour
  • 1 ½ teaspoons baking powder
  • ¼ teaspoon salt

Instructions 

  • Cream butter, sugar, and vanilla until smooth.
  • Add egg and water; beat until fluffy.
  • Mix dry ingredients; gradually blend into wet mixture. Chill dough for 1 hour.
  • Roll dough on floured surface to ¼ inch thickness. Cut into shapes.
  • Bake at 375°F (190°C) for 6-8 minutes until edges are lightly golden.

Notes

Chill the dough thoroughly for best results and avoid overbaking.
Calories: 150kcal
Cost: $10
Course: Dessert
Cuisine: American
Keyword: sugar cookies

Indulge in Decadent No-Bake Mini Chocolate Cheesecakes

Welcome to a world where rich flavors meet effortless preparation! These no-bake mini chocolate cheesecakes are the perfect solution for anyone craving a delightful dessert without the fuss of baking. With just a handful of simple ingredients, you can whip up these delectable treats that are sure to impress your family and friends. Whether it’s a special occasion or a casual gathering, this recipe caters to all, making it a must-have in your dessert repertoire.

Why You’ll Love This Recipe

This recipe not only promises a mouthwatering experience but also offers numerous benefits:

  • Effortless Preparation: With no baking required, you can create these mini cheesecakes in under an hour, allowing you to focus on enjoying your time with loved ones.
  • Endless Customization: Feel free to experiment with different flavors and toppings to suit your taste or the occasion.
  • Perfectly Portion-Controlled: Mini cheesecakes are ideal for serving at parties, ensuring everyone gets their own individual dessert.
  • Rich and Creamy Texture: The combination of cream cheese and heavy cream creates a luxurious mouthfeel that melts in your mouth.
  • Quick Chilling Time: These cheesecakes set quickly in the fridge, making them a great last-minute dessert option.

Detailed Ingredient Breakdown

Let’s dive deeper into the ingredients you’ll need to create these mini chocolate cheesecakes:

  • 1.5 cups Chocolate cookie crumbs: This forms the base; feel free to substitute with graham cracker crumbs for a different flavor profile.
  • 4 tablespoons Unsalted butter, melted: This binds the crumbs together, creating a cohesive crust.
  • 8 ounces Cream cheese, softened: The star of the show, providing that signature creamy texture.
  • 0.5 cups Powdered sugar: For sweetness without grittiness; can be adjusted based on your preference.
  • 0.25 cups Cocoa powder: Enhances the rich chocolate flavor; consider dark cocoa for an intense taste.
  • 1 cup Heavy cream: Adds lightness and helps achieve that fluffy texture.
  • 1 teaspoon Vanilla extract: Elevates the overall flavor profile.
  • Chocolate ganache or whipped cream (optional): Use as a luxurious topping for extra indulgence.

Step-by-Step Instructions

Side profile of a mini chocolate cheesecake, highlighting its smooth texture and chocolate topping.

Follow these simple steps to make your no-bake mini chocolate cheesecakes:

  • In a mixing bowl, combine the chocolate cookie crumbs and melted butter until the mixture resembles wet sand.
  • Press the mixture firmly into the bottom of lined muffin tins or mini cheesecake pans to form a solid crust.
  • In a separate bowl, beat the softened cream cheese until smooth, then gradually add the powdered sugar and cocoa powder, mixing until well combined.
  • In another bowl, whip the heavy cream to soft peaks, then fold it gently into the cream cheese mixture until fully incorporated.
  • Evenly distribute the cheesecake filling over the crusts and smooth the tops with a spatula.
  • Cover with plastic wrap and refrigerate for at least 4 hours, or until set.
  • Before serving, top with chocolate ganache or whipped cream if desired.

Pro Tips for Perfection

To ensure your cheesecakes turn out perfectly every time, consider these expert insights:

  • Use Room Temperature Ingredients: Ensure your cream cheese is softened for a smoother mixture and easier incorporation.
  • Chill the Bowl: For whipped cream, chill your mixing bowl beforehand to achieve better volume and stability.
  • Don’t Overmix: When folding the whipped cream into the mixture, do so gently to maintain the light texture.
  • Consider Miniature Serving Dishes: Using mini mason jars or silicone molds can add an attractive presentation.
  • Flavor Variations: Experiment with different extracts like almond or peppermint for unique twists.
  • Use Quality Chocolate: Opt for high-quality chocolate to enhance the overall flavor of your cheesecakes.
  • Let Them Chill Longer: For firmer cheesecakes, allow them to set overnight.
  • Top Creatively: Get creative with toppings like fresh berries, crushed nuts, or flavored syrups.

Common Mistakes and Troubleshooting

If you run into issues while making your cheesecakes, here are common pitfalls and how to avoid them:

  • Crust Falling Apart: Ensure the cookie crumbs are well-coated with butter and pressed firmly into the pan.
  • Filling Not Setting: Make sure to refrigerate for long enough; consider adding more heavy cream if it appears too thin.
  • Bitter Taste: Always taste your filling as you go; adjust sweetness as needed.
  • Over-whipped Cream: Stop whipping as soon as you see soft peaks to prevent a grainy texture.

Delicious Variations

Feel free to change things up with these tasty variations:

  • Peanut Butter Swirl: Mix in 1/2 cup of peanut butter into the cheesecake filling for a delicious twist.
  • Mint Chocolate: Add peppermint extract to the filling for a refreshing minty flavor.
  • Fruit Topped: Top with fresh fruits like strawberries or raspberries for a fruity finish.
  • Coconut Chocolate: Incorporate shredded coconut into the crust for a tropical flair.

Storage and Make-Ahead Instructions

These mini chocolate cheesecakes can be made ahead of time and stored in the fridge:

  • Refrigeration: Keep them covered in the fridge for up to 5 days.
  • Freezing: For longer storage, freeze the cheesecakes for up to 2 months. Thaw overnight in the fridge before serving.

Frequently Asked Questions

Here are some common questions about making no-bake mini chocolate cheesecakes:

  • Can I use a store-bought crust? Yes, using a pre-made crust can save time.
  • Can these be made dairy-free? Substitute cream cheese with a dairy-free alternative and use coconut cream in place of heavy cream.
  • How do I know when the filling is set? The filling should be firm to the touch and not jiggle when shaken.
  • Can I make these in advance? Absolutely! They actually taste better after chilling overnight.
  • What if I want a different flavor? Feel free to infuse the filling with different extracts or mix-ins.
  • Can I use milk chocolate instead of semi-sweet? Yes, but it may alter the sweetness, so adjust sugar accordingly.
  • How do I serve these cheesecakes? They are best served chilled with your choice of toppings.
  • What equipment do I need? You will need a mixing bowl, electric mixer, and muffin tins or mini cheesecake pans.

Nutritional Tips and Dietary Adaptations

To make these mini cheesecakes fit various dietary needs:

  • Low-Sugar Option: Use sugar substitutes like stevia or erythritol in place of powdered sugar.
  • Gluten-Free Version: Ensure your cookie crumbs are gluten-free or use gluten-free alternatives.
  • Lower Fat Version: Substitute cream cheese with low-fat or Greek yogurt.

Serving Suggestions

These mini cheesecakes can be served in various delightful ways:

  • Plated Dessert: Serve individually on plates with a drizzle of chocolate sauce.
  • Party Platter: Arrange them on a dessert table for an eye-catching display.
  • Garnished: Add fresh mint leaves or edible flowers for a beautiful touch.

In conclusion, these no-bake mini chocolate cheesecakes are a delightful treat that combines easy preparation with rich flavors. With the tips and variations provided, you can truly make this recipe your own. Enjoy impressing your guests and savoring each creamy bite!

No-Bake Mini Chocolate Cheesecakes

Prep Time 20 minutes
Total Time 20 minutes
Servings 8 pieces
Calories 250
Delight in these creamy, chocolatey mini cheesecakes that require no baking and come together quickly for a perfect treat.

Ingredients

Crust

  • 1.5 cups Chocolate cookie crumbs (For that perfect crust.)
  • 4 tablespoons Unsalted butter (To bind the cookies together.)

Filling

  • 8 ounces Cream cheese (The main ingredient that gives cheesecake its delightful creaminess.)
  • 0.5 cups Powdered sugar (For sweetness without the graininess.)
  • 0.25 cups Cocoa powder (Adding that rich chocolate flavor.)
  • 1 cups Heavy cream (For the fluffy texture.)
  • 1 teaspoon Vanilla extract (To enhance flavors.)

Optional Topping

  • to taste Chocolate ganache or whipped cream (Optional, but oh-so-rewarding!)

Instructions 

  • Combine cookie crumbs and melted butter, then press into mini muffin tins to form crusts.
  • Beat softened cream cheese, powdered sugar, and cocoa powder until smooth.
  • Whip heavy cream and vanilla until stiff peaks form, then fold into the cream cheese mixture.
  • Spoon the filling into crusts and chill for at least 2 hours.
  • Top with chocolate ganache or whipped cream before serving, if desired.

Notes

Ensure the cheesecakes are well chilled for the best texture.
Calories: 250kcal
Cost: $12
Course: Dessert
Cuisine: American
Keyword: cheesecake, chocolate

Unleash the Flavor of Garlic Bread Bits

Garlic Bread Bits are a delightful, quick snack that combines the classic flavor of garlic bread with the irresistible crunch of Ritz crackers. Perfect for any occasion, whether it’s a casual gathering or a cozy night in, these savory bites are sure to impress. With minimal effort and simple ingredients, you can create these flavor-packed snacks in just minutes. Let’s dive into why these Garlic Bread Ritz Bits will become your new go-to recipe.

Why You’ll Love This Recipe

  • Quick Preparation: With a total time of just 15 minutes, you can whip up a batch of these garlic bread bites in no time, making them perfect for unexpected guests or last-minute cravings.
  • Minimal Ingredients: Made with common pantry staples like Ritz crackers, garlic powder, and Parmesan cheese, you don’t have to buy special ingredients.
  • Versatile Serving Options: These bits are great on their own or paired with your favorite soups, salads, or dips, making them an excellent addition to any meal.
  • Great for Sharing: This recipe yields around 16 servings, making it ideal for parties or family gatherings.
  • Make-Ahead Friendly: Prepare a double batch and store it for later; they freeze well and can be reheated, maintaining their crunchy texture.

Ingredient Breakdown and Substitutions

To make your Garlic Bread Ritz Bits, you will need the following ingredients:

  • 1 cup whole Ritz crackers: The base of this recipe, providing a buttery crunch.
  • 1/2 cup grated Parmesan cheese: Adds richness and a savory flavor; you can substitute with pecorino or nutritional yeast for a vegan option.
  • 1 tablespoon garlic powder: Essential for that beloved garlic flavor; fresh minced garlic can also be used for a bolder taste.
  • 1 teaspoon dried parsley: For a touch of color and herbal flavor; feel free to use fresh parsley or other herbs like oregano for a different twist.
  • 1/2 teaspoon salt: Enhances the overall flavors; adjust according to taste.
  • 1/4 teaspoon ground black pepper: Adds a slight kick; you can omit it for a milder version.
  • 1/4 cup unsalted butter, melted: This is key for coating the crackers; olive oil or vegan butter can work as alternatives.

Step-by-Step Instructions

Tasty garlic bread snacks with a sprinkle of herbs, ready to be enjoyed.

Follow these simple steps to create your Garlic Bread Ritz Bits:

  1. Preheat your oven: Set the oven to 350°F (175°C) for optimal baking.
  2. Prepare the mixture: In a medium bowl, combine whole Ritz crackers, grated Parmesan cheese, garlic powder, dried parsley, salt, and ground black pepper.
  3. Coat with butter: Pour the melted unsalted butter evenly over the cracker mixture.
  4. Toss gently: Use a spatula to coat the crackers thoroughly with the butter and seasonings.
  5. Spread evenly: Arrange the coated crackers in a single layer on a baking sheet lined with parchment paper.
  6. Bake: Place in the preheated oven and bake for 10 to 12 minutes, or until the crackers are golden and crisp.
  7. Cool before serving: Allow the garlic bread bits to cool on the baking sheet for about 5 minutes before serving.

Pro Tips for the Best Garlic Bread Bits

  • Don’t overcrowd the baking sheet: Ensure even cooking and crispiness by spreading the crackers out in a single layer.
  • Check for doneness: Keep an eye on them in the oven; they can go from perfectly golden to burnt quickly.
  • Experiment with flavors: Add a pinch of red pepper flakes for a spicy kick or incorporate different herbs for varied flavors.
  • Store properly: Use an airtight container to keep them fresh for up to a week.
  • Reheat effectively: For best results, reheat in the oven to regain that crunch rather than using the microwave.
  • Customize the cheese: Try different cheeses like cheddar or mozzarella for a unique flavor twist.
  • Pair wisely: These bits pair wonderfully with marinara sauce, ranch dressing, or even a simple garlic aioli.
  • Make it a meal: Serve alongside a hearty soup or salad for a complete dining experience.

Common Mistakes and Troubleshooting

Avoid these common pitfalls to ensure your Garlic Bread Ritz Bits turn out perfectly:

  • Not preheating the oven: Always preheat for even cooking.
  • Overmixing the ingredients: Gently toss to coat; overmixing can break the crackers apart.
  • Using stale crackers: Fresh Ritz crackers yield the best texture and flavor.
  • Ignoring cooling time: Letting them cool on the baking sheet allows them to crisp up even more.

Variations to Try

Feel free to get creative with these variations of the classic Garlic Bread Ritz Bits:

  • Cheesy Garlic Bits: Mix in shredded mozzarella or cheddar with the Parmesan for a gooey, cheesy texture.
  • Herb-Infused: Add fresh herbs like rosemary, thyme, or basil for an aromatic twist.
  • Sweet and Savory: Incorporate a drizzle of honey or maple syrup before baking for a sweet contrast.
  • Gluten-Free Version: Substitute Ritz crackers with gluten-free crackers to cater to dietary restrictions.

Storage and Make-Ahead Instructions

Making a large batch of Garlic Bread Ritz Bits? Here’s how to store and prepare them for later:

  • Short-Term Storage: Keep in an airtight container at room temperature for up to 5 days.
  • Long-Term Storage: Freeze in a single layer on a baking sheet, then transfer to an airtight container for up to 3 months.
  • Reheating: For best results, reheat in the oven at 350°F (175°C) for 5-7 minutes to restore crispiness.

Frequently Asked Questions

Here are some common questions regarding Garlic Bread Ritz Bits:

  • Can I use other crackers? Yes, any buttery cracker can work, but Ritz provides the best flavor and texture.
  • How do I make these bits spicier? Add red pepper flakes or cayenne pepper to the mixture before baking.
  • What can I serve these with? They pair excellently with marinara sauce, soups, or as a side to salads.
  • Can I make these vegan? Yes, substitute the butter with vegan butter and use nutritional yeast instead of cheese.
  • How do I keep them crispy? Store in an airtight container and avoid humidity.
  • Can I add other spices? Absolutely! Paprika, Italian seasoning, or even lemon zest can enhance the flavors.
  • How do I know when they are done? Look for a golden-brown color and a noticeable crispiness.
  • Can I double the recipe? Yes, just ensure there’s enough space on the baking sheet for even cooking.

Nutrition Tips and Dietary Adaptations

If you’re conscious about nutrition, consider these adaptations:

  • Low-Fat Option: Use reduced-fat cheese and butter substitutes to lower the calorie count.
  • Herb Benefits: Incorporate fresh herbs for added vitamins and antioxidants.
  • Whole Grain Alternatives: Opt for whole grain crackers for increased fiber content.

Essential Equipment

Here’s what you’ll need to make these Garlic Bread Ritz Bits:

  • Baking Sheet: A standard baking sheet works perfectly for even baking.
  • Parchment Paper: Optional, but helps prevent sticking and makes cleanup easier.
  • Medium Mixing Bowl: For combining your ingredients.
  • Spatula: Essential for tossing and mixing the cracker mixture.

Serving Suggestions

Here are some ideas for serving your Garlic Bread Ritz Bits:

  • With Dips: Serve alongside marinara, ranch, or tzatziki for a delicious appetizer.
  • As a Side: Pair with your favorite soup or salad for a comforting meal.
  • Garnished: Top with fresh parsley or grated cheese before serving for an attractive presentation.

Conclusion

Garlic Bread Ritz Bits are not just a snack; they’re a versatile, flavorful addition to any meal or gathering. With simple ingredients and straightforward preparation, you can easily enjoy these delightful bites any time. Whether you’re hosting friends, enjoying a movie night, or simply craving something savory, this recipe is sure to satisfy. So gather your ingredients and get ready to impress with these irresistible garlic-infused treats!

Garlic Bread Bits Snack

Prep Time 5 minutes
Cook Time 12 minutes
Total Time 17 minutes
Servings 4 servings
Calories 150
A delicious and easy snack featuring crispy garlic-flavored cracker bites, perfect for sharing.

Ingredients

Crackers and Seasonings

  • 1 cup whole Ritz crackers
  • 1/2 cup grated Parmesan cheese
  • 1 tablespoon garlic powder
  • 1 teaspoon dried parsley
  • 1/2 teaspoon salt
  • 1/4 teaspoon ground black pepper
  • 1/4 cup unsalted butter, melted

Instructions 

  • Preheat oven to 350°F (175°C).
  • Mix crackers, Parmesan, garlic powder, parsley, salt, and pepper in a bowl.
  • Pour melted butter over the mixture and toss to coat evenly.
  • Spread the coated crackers on a baking sheet in a single layer.
  • Bake for 10-12 minutes until golden and crisp. Cool for 5 minutes before serving.

Notes

Store leftovers in an airtight container for up to 2 days for best freshness.
Calories: 150kcal
Cost: $8
Course: Snack
Keyword: appetizer, crackers, garlic