Author

robert

Browsing

Fuel Your Day with Quick and Nutritious Pistachio Protein Balls

Looking for a delicious and easy way to boost your energy levels throughout the day? These pistachio protein balls are the perfect solution! With 10 grams of protein packed into each bite, they serve as an ideal post-workout snack or a quick energy boost during your busy day. Made with simple, wholesome ingredients like pistachios, oats, and peanut butter, this no-bake recipe is not only easy to prepare but also full of flavor. Let’s dive into why you’ll love making these nutritious treats!

Why You’ll Love This Recipe

  • Quick and Easy Preparation: With minimal steps and no baking involved, these protein balls can be ready in just minutes.
  • High Protein Content: Each ball contains 10 grams of protein, making them perfect for muscle recovery or a healthy snack.
  • Customizable Ingredients: Substitute ingredients to suit your dietary preferences or what you have on hand.
  • Healthy Sweetness: Sweetened naturally with maple syrup, eliminating the need for refined sugars.
  • Versatile Snack: Ideal for any time of the day, whether as a breakfast boost, midday snack, or pre/post workout fuel.

Ingredients Breakdown

Here’s what you’ll need to make these delightful pistachio protein balls:

  • 1 cup shelled pistachios: Packed with healthy fats and protein. Feel free to substitute with almonds or any nut of your choice.
  • 1/2 cup rolled oats: A great source of fiber, which helps keep you full longer. Gluten-free oats can be used if necessary.
  • 1/2 cup vanilla protein powder: Choose a protein powder that fits your dietary needs (whey, plant-based, etc.).
  • 1/2 cup natural peanut butter: Adds creaminess and flavor. Almond butter can also work well.
  • 1/4 cup maple syrup: Provides natural sweetness. You can substitute with honey or agave syrup.
  • 1/2 tsp vanilla extract: Enhances the flavor profile.
  • Pinch of salt: Balances the sweetness and enhances overall taste.

Step-by-Step Instructions

Ready to make your own no bake pistachio protein balls? Follow these simple steps:

  1. Add pistachios to a food processor and pulse until coarsely ground.
  2. Add rolled oats and pulse again until combined.
  3. Add vanilla protein powder, peanut butter, maple syrup, vanilla extract, and salt. Blend until the mixture is sticky and well combined.
  4. Using your hands, roll the mixture into balls (about 2 tablespoons per ball).
  5. Place the balls on a tray and refrigerate for at least 30 minutes to set.
  6. Store in an airtight container in the fridge for up to 1 week or freeze for longer storage.

Pro Tips for Perfect Pistachio Protein Balls

  • Texture Control: For a creamy texture, blend the mixture until just combined; avoid over-processing.
  • Chill Time: Ensure to refrigerate the balls adequately for the best texture.
  • Experiment with Coatings: Roll in crushed pistachios, shredded coconut, or cacao powder for added flavor.
  • Flavor Boost: Add a tablespoon of cocoa powder for a chocolatey twist or a scoop of your favorite superfood powder.
  • Nut-Free Version: Substitute nut butter with sunflower seed butter to make it nut-free.
  • Protein Boost: Add a tablespoon of chia seeds or flaxseeds for extra nutrients.
  • Sweetness Level: Adjust the maple syrup to your taste preference; feel free to use less for a less sweet snack.
  • Mixing Method: If you don’t have a food processor, you can mix by hand, though it may take longer.

Common Mistakes and Troubleshooting

Even the best cooks run into a few hiccups now and then. Here are some common issues and their solutions:

  • Too Crumbly: If the mixture is too crumbly, add a little more peanut butter or maple syrup until it holds together.
  • Too Sticky: If the mixture is too sticky, add a bit more protein powder or oats to balance the consistency.
  • Flavor Lacking: Adjust the vanilla extract or add a pinch of cinnamon for additional flavor depth.
  • Dry Texture: If they turn out dry, ensure that the mixture is well combined and consider adding a bit more nut butter.

Variations to Keep Things Interesting

Switching up the ingredients can make your protein balls even more enjoyable! Here are some tasty variations:

  • Chocolate Lovers: Mix in chocolate chips or drizzle melted dark chocolate over the balls for a sweet treat.
  • Fruit-Filled: Add dried fruits like cranberries or apricots for added sweetness and chewiness.
  • Nutty Crunch: Incorporate crushed nuts or seeds for an extra crunch in every bite.
  • Spiced Up: Add a pinch of cinnamon or a dash of cayenne pepper for a spicy kick.

Storage and Make-Ahead Instructions

These pistachio protein balls are perfect for meal prep!

  • Refrigeration: Store in an airtight container in the fridge for up to a week.
  • Freezing: For longer storage, freeze the balls in a single layer on a tray, then transfer to a zip-top bag for up to 3 months.
  • Thawing: To enjoy, simply remove from the freezer and let them sit at room temperature for a few minutes to soften.

Frequently Asked Questions (FAQs)

Here are some common questions about pistachio protein balls:

  • What are the main ingredients for pistachio protein balls? The main ingredients are pistachios, oats, protein powder, peanut butter, maple syrup, vanilla extract, and salt.
  • How long do these protein balls last? They can be stored in the fridge for up to 1 week or frozen for up to 3 months.
  • Can I use other nuts? Absolutely! Almonds, cashews, or walnuts would work well as substitutes.
  • Is this recipe gluten-free? Yes, as long as you use certified gluten-free oats, this recipe is gluten-free.
  • Can I make these without protein powder? Yes, you can omit the protein powder, but the protein content will be lower.
  • What’s the best way to roll the balls? Wet your hands slightly to prevent the mixture from sticking while rolling.
  • Can I add chocolate to this recipe? Yes, you can fold in chocolate chips or drizzle melted chocolate on top!
  • How can I make these sweeter? You can add more maple syrup or incorporate a spoonful of honey or agave.

Nutrition Tips and Dietary Adaptations

To enhance the nutritional profile of your pistachio protein balls, consider the following:

  • Protein Variants: Use a plant-based protein powder for a vegan-friendly version.
  • Healthy Fats: Incorporate chia seeds or flaxseeds for omega-3 fatty acids.
  • Vitamins and Minerals: Adding a scoop of greens powder can boost the micronutrient content.

Equipment Recommendations

Here’s a short list of equipment that will make your cooking experience smoother:

  • Food Processor: Essential for quickly blending the ingredients.
  • Measuring Cups: Accurate measurements ensure consistent results.
  • Spatula: Great for scraping down the sides of your processor.
  • Airtight Container: Important for storing your protein balls to maintain freshness.

Serving Suggestions

These protein balls can be enjoyed in various ways:

  • As a Snack: Perfect for a quick snack on the go or a midday energy boost.
  • Post-Workout: Great for recovery, providing necessary protein and carbohydrates.
  • Breakfast Option: Serve with yogurt and fruit for a balanced breakfast.

In conclusion, these pistachio protein balls are more than just a snack; they are a versatile, nutritious option that fits into any lifestyle. With their quick preparation, high protein content, and customizable ingredients, they are sure to become a staple in your kitchen. So go ahead, give this recipe a try, and fuel your day with delicious energy!

Easy Pistachio Protein Balls (10g Protein per Ball)

Prep Time 15 minutes
Total Time 15 minutes
Servings 10 balls
Calories 150
These delicious and nutritious pistachio protein balls are perfect for a quick snack or post-workout boost. Easy to make and packed with flavor, they provide a healthy source of protein and healthy fats.

Ingredients

Dried ingredients

  • 1 cup shelled pistachios
  • 1/2 cup rolled oats
  • 1/2 cup vanilla protein powder
  • 1/2 cup natural peanut butter
  • 1/4 cup maple syrup
  • 1/2 tsp vanilla extract
  • Pinch salt

Instructions 

  • Add pistachios to a food processor and pulse until coarsely ground.
  • Add oats and pulse again until combined.
  • Add protein powder, peanut butter, maple syrup, vanilla extract, and salt. Blend until sticky.
  • Roll mixture into 10 balls (about 2 tbsp each).
  • Refrigerate for at least 30 minutes to set.

Notes

Store in an airtight container in the fridge for up to 1 week.
Calories: 150kcal
Cost: $15
Course: Snack
Cuisine: Healthy
Keyword: Pistachios

Discover the Ultimate Lemon Blueberry Loaf Cake

If you’re on the hunt for a deliciously moist and flavorful loaf cake, look no further! This Lemon Blueberry Loaf Cake with Greek yogurt is not only easy to make but also bursts with the bright flavors of fresh lemons and juicy blueberries. Perfect for breakfast, dessert, or a snack, this cake is a delightful treat that everyone will love. Let’s dive into the details, and I promise you’ll be baking this cake time and time again!

Why You’ll Love This Recipe

  • Moist Texture: The addition of Greek yogurt ensures the cake remains incredibly moist, making it a perfect treat any time of day.
  • Bright Flavor Palette: The fresh lemon juice and zest combined with blueberries deliver a refreshing flavor that’s perfect for spring and summer.
  • Easy to Follow: With straightforward steps and common ingredients, even novice bakers can whip this up with confidence.
  • Versatile Enjoyment: This loaf cake is ideal for breakfast, afternoon tea, or as a sweet treat after dinner.
  • Make Ahead Friendly: Bake in advance and store for a quick grab-and-go option during busy weeks.

Ingredient Breakdown

This Lemon Blueberry Loaf Cake recipe uses simple, accessible ingredients, ensuring that you can whip it up without a trip to specialty stores. Here’s what you’ll need:

  • ¾ cup granulated sugar (150 g): Adds sweetness and helps achieve that golden crust.
  • 2 Tablespoons lemon zest: Zest from about two fresh lemons for a vibrant lemon flavor.
  • ¼ cup fresh lemon juice (59 ml): Brightens the cake and adds moisture.
  • ½ cup neutral flavored oil: Such as avocado or canola oil, keeping the cake tender.
  • 2 large eggs: Provides structure and richness.
  • ½ cup plain whole Greek yogurt (113 g): For moisture and a slight tang that balances the sweetness.
  • 1 teaspoon vanilla extract: Enhances the overall flavor.
  • 1 ¾ cups all-purpose flour (218 g): The base of our cake.
  • 2 teaspoons baking powder: Helps the cake rise.
  • ½ teaspoon salt: Balances the sweetness.
  • 1 cup fresh blueberries (148 g): Bursting with flavor and nutrition.
  • ½ cup powdered sugar (65g): For a sweet, tangy glaze.
  • 1 Tablespoon fresh lemon juice (for glaze): Adds a zesty finish to the cake.

Pro Tips for Perfecting Your Loaf Cake

A moist lemon blueberry loaf cake slice displaying vibrant blueberries and a hint of lemon zest.

Follow these expert tips to elevate your baking game:

  • Room Temperature Ingredients: Ensure your eggs and yogurt are at room temperature for a smoother batter.
  • Don’t Overmix: Mix the batter just until combined; a few lumps are okay to prevent a dense cake.
  • Coat Blueberries in Flour: Tossing blueberries in flour before adding them to the batter prevents them from sinking.
  • Check Doneness: Use a toothpick to check for doneness; it should come out clean or with a few crumbs.
  • Cooling Time: Allow the cake to cool in the pan for 10 minutes before transferring to a wire rack to cool completely.
  • Experiment with Flavors: Consider adding a hint of almond extract or substituting some of the sugar with honey for a different flavor profile.
  • Use Fresh Ingredients: For the best flavor, use fresh lemons and blueberries. Frozen can be used, but adjust for extra moisture.
  • Perfect Glaze: Adjust the powdered sugar and lemon juice ratio until you reach your desired glaze consistency.

Common Mistakes and Troubleshooting

Even the best bakers can encounter hiccups. Here’s how to troubleshoot common issues:

  • Overbaking: If your cake is dry, you may have baked it too long. Keep an eye on it during the last few minutes.
  • Dense Texture: This can occur from overmixing. Remember to mix just until combined.
  • Sinking Blueberries: Not coating the blueberries in flour can lead to sinking. Always toss them in a little flour before adding.
  • Too Sweet: If the cake is overly sweet, reduce the sugar slightly in future batches.

Variations to Try

This recipe is versatile! Here are some delicious variations:

  • Gluten-Free: Substitute all-purpose flour with a gluten-free flour blend for a gluten-free version.
  • Mixed Berries: Substitute blueberries with raspberries, blackberries, or a mix for a berry medley.
  • Lemon Poppy Seed: Add 2 tablespoons of poppy seeds for a delightful crunch and flavor.
  • Coconut Lime: Replace lemon juice with lime juice and add shredded coconut for a tropical twist.

Storage and Make-Ahead Instructions

This Lemon Blueberry Loaf Cake can be made ahead of time and stored for later enjoyment:

  • Room Temperature: Store wrapped in plastic wrap or in an airtight container for up to 3 days.
  • Refrigerator: For longer storage, keep in the fridge for up to a week.
  • Freezer: Freeze the loaf (wrapped tightly) for up to 3 months. Thaw in the fridge overnight before serving.

Comprehensive FAQ

Have questions? I’ve got answers! Here are common inquiries:

  • Can I use frozen blueberries? Yes, but they might add extra moisture. Make sure to toss them in flour.
  • Can I substitute Greek yogurt? Absolutely! You can use sour cream or even buttermilk in a pinch.
  • How can I make this cake dairy-free? Substitute Greek yogurt with a dairy-free yogurt alternative.
  • What’s the best way to zest a lemon? Use a microplane or zester to get fine zest without the bitter pith.
  • Can I make mini loaves? Yes, simply adjust the baking time to around 30-40 minutes for mini loaves.
  • Should I grease the pan? Yes, always grease or line with parchment paper for easy release.
  • How do I know when the cake is done? A toothpick inserted in the center should come out clean or with a few moist crumbs.
  • Can I add nuts? Definitely! Walnuts or pecans add a nice crunch and flavor.

Nutrition Tips and Dietary Adaptations

This cake can be made healthier with a few tweaks:

  • Reduce Sugar: Cut the sugar by a third for a less sweet loaf.
  • Use Whole Wheat Flour: Substitute half the all-purpose flour with whole wheat for added fiber.
  • Sweetener Alternatives: Try natural sweeteners like honey or maple syrup in moderation.

Equipment Recommendations

To make this Lemon Blueberry Loaf Cake, you’ll need:

  • 9×5-inch loaf pan: A sturdy, heavy-duty pan is ideal for even baking.
  • Mixing bowls: A large bowl for mixing the wet ingredients and a smaller one for dry.
  • Whisk: For combining ingredients smoothly.
  • Rubber spatula: Great for folding in the blueberries gently.

Serving Suggestions

Enjoy this delicious loaf cake in various ways:

  • With a Cup of Tea: Perfect alongside your favorite herbal or black tea.
  • Fresh Fruit: Serve with additional fresh blueberries or a side of mixed fruit.
  • With a Dollop of Cream: Add whipped cream or a scoop of vanilla ice cream for a dessert option.

In conclusion, this Lemon Blueberry Loaf Cake with Greek yogurt is a must-try recipe that combines luscious flavors and textures, making it a favorite in any household. With easy steps and adaptable options, you can enjoy this delightful cake all year round. Happy baking!

Lemon Blueberry Loaf Cake (w/ Yogurt!)

Prep Time 15 minutes
Cook Time 50 minutes
Total Time 1 hour 5 minutes
Servings 8 slices
Calories 350
A moist and tangy lemon blueberry loaf cake made with Greek yogurt, perfect for a bright, flavorful treat.

Ingredients

Dried ingredients

  • 150 g granulated sugar
  • 59 ml fresh lemon juice
  • 118 ml neutral flavored oil
  • 2 large eggs
  • 113 g plain whole Greek yogurt
  • 1 teaspoon vanilla extract
  • 218 g all-purpose flour (plus one tablespoon for coating blueberries)
  • 2 teaspoons baking powder
  • 0.5 teaspoon salt
  • 148 g fresh blueberries
  • 65 g powdered sugar
  • 1 tablespoon fresh lemon juice

Instructions 

  • Preheat oven to 350°F (175°C). Grease a loaf pan or line with parchment.
  • Rub lemon zest into sugar, then whisk in lemon juice, oil, eggs, yogurt, and vanilla until smooth.
  • Gently fold in flour, baking powder, and salt. Toss blueberries with remaining flour, then layer batter and blueberries in the pan.
  • Bake for 45-55 minutes until a toothpick comes out clean. Cool in pan, then transfer to wire rack.
  • Mix powdered sugar and lemon juice to make glaze. Drizzle over cooled loaf before serving.

Notes

For best results, do not overmix the batter to keep the loaf light and tender.
Calories: 350kcal
Cost: $15
Course: Dessert
Cuisine: American
Keyword: Blueberry, lemon, loaf

Elevate Your Mornings with High Protein Breakfast Bagels

Start your day right with a High Protein Breakfast Bagel that’s not just a meal but an experience. Packed with essential nutrients like eggs, cottage cheese, and cheddar, this recipe is designed to fuel your morning efficiently while providing you with a satisfying and delicious start. Whether you’re rushing out the door or enjoying a leisurely breakfast, these bagels will keep you energized and satisfied.

In this guide, you will discover everything you need to know about making these high protein bagels, including specific benefits, detailed ingredient breakdowns, expert pro tips, and common troubleshooting advice. Let’s dive into the world of high protein breakfasts!

Why You’ll Love This Recipe

  • High Protein Content: Each bagel is loaded with protein from eggs, cottage cheese, and cheddar, making it a filling breakfast option that keeps you full for hours.
  • Quick and Easy: With just a few simple steps, you can whip up these bagels in under 30 minutes, perfect for busy mornings.
  • Nutritious Ingredients: This recipe is packed with wholesome ingredients that contribute to a balanced diet, including healthy fats and vitamins.
  • Customizable: You can easily adapt the ingredients to suit your taste buds or dietary preferences, making it versatile for any breakfast routine.
  • Delicious Flavor: The combination of creamy cottage cheese, savory cheddar, and fluffy eggs creates a rich and satisfying flavor profile that everyone will love.

Ingredient Breakdown

Understanding the ingredients is crucial for achieving the best results. Here’s a detailed look at each component of the High Protein Breakfast Bagel:

  • Plain Bagels: Choose whole grain or regular bagels for added fiber. You can also opt for gluten-free options if necessary.
  • Eggs: Fresh large eggs offer the best flavor. They are a great source of protein and essential nutrients.
  • Egg Whites: Using egg whites lowers the fat content while maintaining protein levels, making this recipe even healthier.
  • Cottage Cheese: This ingredient adds creaminess and additional protein. Opt for low-fat or fat-free varieties for a lighter option.
  • Cheddar Cheese: Sharp cheddar adds a rich flavor; feel free to substitute with mozzarella or a dairy-free alternative if desired.
  • Salt and Black Pepper: Essential for seasoning, adjust according to your taste preferences.
  • Butter: Used for cooking, it adds flavor. You can substitute with olive oil or a non-dairy alternative if preferred.

Ingredient Substitutions

A delicious breakfast bagel with melted cheese and fluffy eggs.

If you’re missing an ingredient or want to customize your bagels, here are some substitutions:

  • Bagels: Use whole wheat, everything, or gluten-free bagels.
  • Egg Whites: You can replace with additional whole eggs if preferred.
  • Cottage Cheese: Greek yogurt can be a great substitute for a tangy flavor and similar texture.
  • Cheddar Cheese: Try feta, gouda, or a vegan cheese alternative for different flavor profiles.
  • Butter: Coconut oil or a plant-based butter works well for dairy-free options.

Pro Tips for Perfect Results

To help you achieve the perfect high protein breakfast bagels, here are some expert insights:

  • Use Low Heat: Cooking the eggs on medium-low heat ensures they stay fluffy and tender.
  • Whisk Thoroughly: Make sure to whisk the egg mixture well to combine the cottage cheese and eggs for a smooth consistency.
  • Toast the Bagels: Toast bagels right before assembling to add a delightful crunch and enhance flavor.
  • Slow Cooking: Stir gently and frequently as the eggs cook to prevent them from becoming rubbery.
  • Layer Wisely: Place the cheddar on the eggs just before they are fully cooked to allow for perfect melting.
  • Experiment with Flavors: Add herbs or spices like chives or paprika to the egg mixture for extra flavor.
  • Make Ahead: Prepare the egg mixture the night before and store it in the fridge for a quick breakfast option.
  • Use Fresh Ingredients: Whenever possible, use fresh eggs and dairy for the best taste and texture.

Common Mistakes and Troubleshooting

Even with the best intentions, mistakes can happen. Here’s how to troubleshoot common issues:

  • Rubbery Eggs: This often occurs from cooking at too high a temperature; always keep the heat low.
  • Bagels Too Soggy: Ensure bagels are toasted adequately before adding the filling, and avoid overloading them.
  • Egg Mixture Too Runny: If your mixture seems too loose, add a bit more egg white or cottage cheese to thicken it.
  • Cheese Not Melting: Make sure the eggs are hot enough when you add the cheese; cover the skillet briefly to help it melt faster.

Variations of High Protein Breakfast Bagels

Feel free to get creative with your bagels by trying these variations:

  • Veggie-Packed Bagels: Add spinach, bell peppers, or tomatoes to the egg mixture for extra nutrients and flavor.
  • Smoked Salmon Bagels: Top your filled bagels with smoked salmon and capers for a gourmet twist.
  • Southwestern Style: Incorporate black beans, corn, and salsa into the egg mixture for a zesty kick.
  • Sweet and Savory: Use a drizzle of honey or maple syrup over the cheese for a unique flavor combination.

Storage and Make-Ahead Instructions

These bagels can be made ahead and stored for later enjoyment:

  • Refrigeration: Store cooked bagels in an airtight container in the refrigerator for up to 3 days.
  • Freezing: For longer storage, freeze filled bagels in individual portions. Reheat in the oven or microwave when ready to eat.
  • Make-Ahead Option: Prepare the egg mixture the night before and refrigerate it. Just cook it fresh each morning for a quick breakfast.

Nutritional Snapshot

Here’s a quick overview of the nutritional benefits per serving:

  • Protein: Approximately 25g per bagel, making it an excellent choice for a protein-packed breakfast.
  • Carbohydrates: Balanced carbs from the bagels provide energy to kickstart your day.
  • Healthy Fats: The inclusion of eggs and cheese contributes to healthy fat intake.
  • Vitamins and Minerals: Packed with essential nutrients, including calcium from cheese and vitamins from eggs.

Frequently Asked Questions

Here are answers to some common questions:

  • Can I use different types of bagels? Yes, feel free to use any bagel type you prefer, including whole grain or gluten-free options.
  • Can I make these bagels ahead of time? Absolutely! Prepare the filling ahead and store it in the fridge for a quick breakfast.
  • What can I use instead of cottage cheese? Greek yogurt is a fantastic substitute that also adds protein.
  • How do I store leftovers? Keep them in an airtight container in the fridge for up to 3 days or freeze for longer storage.
  • Can I add vegetables? Yes! Feel free to add your favorite vegetables to the egg mixture for added nutrition.
  • Is this recipe suitable for meal prep? Yes, these bagels make for an excellent meal prep option for busy mornings.
  • How can I make these bagels spicier? Add diced jalapeños or a sprinkle of cayenne pepper to the egg mixture for a kick.
  • What should I serve with these bagels? Pair with fresh fruit or a side salad for a well-rounded meal.

Equipment Recommendations

For this recipe, you’ll need a few key kitchen tools:

  • Non-Stick Skillet: Essential for cooking the egg mixture without sticking.
  • Whisk: A good whisk helps combine the ingredients smoothly.
  • Spatula: A silicone spatula is great for gently stirring the eggs.
  • Toaster: For toasting the bagels to perfection before assembly.

Serving Suggestions

Enhance your bagel experience with these serving ideas:

  • Fresh Herbs: Garnish with fresh chives or parsley for a burst of flavor.
  • Hot Sauce: Drizzle your favorite hot sauce on top for an extra kick.
  • Sliced Avocado: A side of avocado adds healthy fats and creaminess.
  • Fruit Slices: Serve with fresh fruit for a refreshing contrast to the savory bagels.

In conclusion, the High Protein Breakfast Bagel is not just a meal; it’s a step towards a healthier lifestyle. With its rich protein content and customizable ingredients, this breakfast option caters to both busy individuals and those who enjoy leisurely mornings. Try this recipe today and elevate your breakfast routine!

High Protein Breakfast Bagel

Prep Time 5 minutes
Cook Time 10 minutes
Total Time 15 minutes
Servings 2 servings
Calories 450
A delicious and protein-packed breakfast featuring toasted bagels filled with creamy eggs and melted cheese.

Ingredients

Bread

  • 2 pieces plain bagels, sliced
  • 4 large eggs
  • 0.5 cup egg whites
  • 0.5 cup cottage cheese
  • 4 slices cheddar cheese
  • 0.5 teaspoon salt
  • 0.25 teaspoon black pepper
  • 1 tablespoon butter

Instructions 

  • Heat butter in a skillet over medium-low heat.
  • Whisk eggs, egg whites, cottage cheese, salt, and pepper until smooth.
  • Cook the egg mixture gently until just set, then add cheese slices to melt.
  • Toast bagels until lightly crisp.
  • Fill bagels with egg and cheese mixture and serve warm.

Notes

For extra flavor, add herbs or hot sauce.
Calories: 450kcal
Cost: $12
Course: Breakfast
Keyword: Bagel, Cheese, Eggs

Welcome to your new favorite weeknight dinner recipe! This Effortless Sheet Pan BBQ Chicken with Potatoes and Green Beans is not just a meal; it’s a solution for busy nights when you crave something delicious yet simple. In this guide, we’ll walk through a delightful combination of juicy BBQ chicken, tender Yukon gold potatoes, and crisp green beans—all cooked together on a single sheet pan. With minimal prep and cleanup, you’ll have more time to enjoy your meal and less time worrying about the mess. Let’s dive into the details!

Why You’ll Love This Recipe

  • One-Pan Wonder: Everything cooks together on a single sheet pan, which means minimal prep, easy cleanup, and more time to relax after dinner.
  • Flavorful and Satisfying: The combination of BBQ chicken, potatoes, and green beans creates a well-balanced meal that satisfies the whole family.
  • Customizable: Adjust the recipe by swapping in your favorite vegetables or BBQ sauce to cater to your taste.
  • Quick and Easy: With just a few simple steps, this dish can be on the table in under an hour, making it perfect for busy weeknights.
  • Healthy and Nutritious: Packed with protein and fiber, this dish offers a wholesome option for dinner that feels indulgent without the guilt.

Ingredients You’ll Need

To create this delicious sheet pan BBQ chicken, gather the following ingredients:

  • 2 lbs. Yukon gold potatoes: Cut into bite-sized pieces for even cooking.
  • 2 teaspoons neutral oil: I recommend refined avocado oil for a high smoke point.
  • 1 packet Lipton onion soup mix: Adds depth and flavor to your chicken.
  • 3 to 6 boneless, skinless chicken breasts: The star of the dish, providing juicy protein.
  • 2 to 3 teaspoons chicken seasoning/rub: I like using Kinder’s Chicken seasoning for its robust flavor.
  • 1 cup BBQ sauce: Choose your favorite brand or homemade version for best results.
  • 12 ounces fresh green beans: Rinsed and ends snapped for convenience.
  • 1 teaspoon neutral oil: For the green beans, to enhance their flavor.
  • Salt and pepper: To taste, ensuring a well-seasoned dish.

Pro Tips for the Best Results

  • Uniform Sizing: Cut your potatoes and chicken breasts into similar sizes to ensure even cooking.
  • Preheat Your Oven: Ensure your oven is fully preheated to 400°F (200°C) for optimal roasting.
  • Don’t Overcrowd the Pan: Give each ingredient enough space to roast properly, preventing steaming.
  • Baste for Flavor: Halfway through cooking, baste the chicken with BBQ sauce for a sticky, flavorful glaze.
  • Use Parchment Paper: Lining your pan makes for easy cleanup and helps prevent sticking.
  • Experiment with Spices: Feel free to add your favorite herbs or spices to the chicken seasoning for a unique twist.
  • Let It Rest: Allow the chicken to rest for a few minutes after baking for juicier results.
  • Check for Doneness: Use a meat thermometer to ensure the chicken reaches an internal temperature of 165°F (75°C).

Common Mistakes and Troubleshooting

Cooking is all about learning from experience! Here are some common mistakes to avoid:

  • Undercooking the Chicken: Always check the internal temperature to ensure it’s safe to eat.
  • Overcooking the Vegetables: Add the green beans halfway through cooking to avoid mushiness.
  • Using Too Much Sauce: Too much BBQ sauce can lead to sogginess; a light coating works best.
  • Not Preheating the Oven: Cooking in a cold oven can lead to uneven cooking; always preheat!

Variations to Try

If you want to mix things up, here are some delicious variations:

  • Sweet Potato Swap: Replace Yukon gold potatoes with sweet potatoes for a different flavor profile.
  • Vegetarian Option: Substitute chicken with tofu or tempeh and use a plant-based BBQ sauce.
  • Spicy Kick: Add jalapeños or a spicy BBQ sauce for a heat boost.
  • Herb Infusion: Incorporate fresh herbs like rosemary or thyme for added flavor.

Storage and Make-Ahead Instructions

This dish is perfect for meal prep!

  • Refrigeration: Store leftovers in an airtight container for up to 4 days.
  • Freezing: You can freeze the cooked dish for up to 3 months. Reheat in the oven for best results.
  • Make-Ahead Tip: Prep the potatoes and chicken the night before, marinating the chicken in BBQ sauce beforehand.

Frequently Asked Questions

  • Can I use frozen chicken? Yes, but you may need to adjust the cooking time to ensure it’s fully cooked.
  • What BBQ sauce works best? Use your favorite brand—homemade or store-bought—as long as it has a flavor you enjoy!
  • Can I add other vegetables? Absolutely! Carrots, bell peppers, or zucchini would be great additions.
  • Is this recipe gluten-free? Yes, as long as the BBQ sauce and onion soup mix are gluten-free.
  • How do I reheat leftovers? Reheat in the oven at 350°F (175°C) until heated through for the best texture.
  • Can I make this recipe in advance? Yes, you can prepare and marinate the chicken the night before.
  • What can I serve with this dish? It pairs well with a side salad or cornbread for a complete meal.
  • Can I adjust the serving size? Yes, simply scale the ingredients up or down based on your needs.

Nutrition Tips and Dietary Adaptations

For a nutritious meal:

  • Opt for Whole Grains: Serve with brown rice or quinoa for added fiber.
  • Reduce Sodium: Use low-sodium BBQ sauce and onion soup mix to manage salt intake.
  • Increase Veggies: Feel free to load up on extra green beans or other colorful vegetables.

Equipment Recommendations

To make this recipe, you will need:

  • Large Baking Sheet: A sturdy, rimmed sheet pan ensures even cooking.
  • Mixing Bowls: For tossing the ingredients with seasonings and oil.
  • Chef’s Knife: A good knife is essential for prepping your ingredients.
  • Meat Thermometer: Ensure your chicken is cooked to perfection.

Serving Suggestions

This sheet pan BBQ chicken is a complete meal on its own, but here are some serving ideas:

  • Fresh Salad: Serve with a side salad for added freshness and crunch.
  • Homemade Bread: Pair with warm rolls or cornbread for a comforting touch.
  • Fruit Salad: A light fruit salad can be a refreshing side dish.

By following this guide, you’ll not only create a delicious sheet pan BBQ chicken dish, but you’ll also gain the confidence to adapt and make it your own. Enjoy your cooking journey and savor the delightful flavors of this effortless meal!

Sheet Pan BBQ Chicken, Potatoes, and Green Beans

Prep Time 10 minutes
Cook Time 35 minutes
Total Time 45 minutes
Servings 4 servings
Calories 650
A delicious and easy sheet pan meal combining tender chicken, crispy potatoes, and fresh green beans coated in BBQ sauce.

Ingredients

Vegetables

  • 2 lbs Yukon gold potatoes (cut into bite-sized pieces)
  • 12 ounces fresh green beans (rinsed and ends snapped)

Proteins

  • 3 to 6 pieces boneless, skinless chicken breasts

Seasonings and Sauces

  • 2 teaspoons teaspoons neutral oil (refined avocado oil)
  • 1 packet Lipton onion soup mix
  • 2 to 3 teaspoons teaspoons chicken seasoning/rub (Kinder’s Chicken seasoning)
  • 1 cup cups BBQ sauce
  • 1 teaspoon teaspoon neutral oil (refined avocado oil)
  • salt and pepper to taste

Instructions 

  • Preheat oven to 400°F (200°C). Toss potatoes with 1 teaspoon oil, salt, and pepper; spread on a sheet pan.
  • Season chicken breasts with chicken seasoning/rub. Place on the sheet pan with potatoes.
  • Bake for 25-30 minutes until chicken is cooked through and potatoes are crispy.
  • While baking, toss green beans with 1 teaspoon oil, salt, and pepper. Add to the sheet pan during the last 10 minutes.
  • Remove from oven, brush chicken with BBQ sauce, and serve with green beans and potatoes.

Notes

For extra flavor, marinate the chicken with BBQ sauce before baking.
Calories: 650kcal
Cost: $15
Course: Main Course
Cuisine: American
Keyword: BBQ, Chicken, Green Beans, Potatoes

Unlocking the Secrets to the Perfect Lemon Blueberry Yogurt Loaf

Welcome to your new favorite breakfast delight—the Lemon Blueberry Yogurt Loaf. This recipe combines the zesty brightness of lemon with the sweet burst of blueberries, all while maintaining a moist and tender crumb thanks to the addition of yogurt. Whether you’re looking to impress guests at brunch or simply want a delightful start to your day, this loaf is sure to become a staple in your kitchen. Let’s dive into why you’ll love this recipe and how to make it perfectly every time.

Why You’ll Love This Recipe

  • Moist and Flavorful: The inclusion of Greek yogurt ensures that every bite is rich and tender, making your loaf incredibly moist.
  • Quick and Easy: With simple ingredients and straightforward steps, you can whip this loaf up in no time, perfect for busy mornings.
  • Versatile Ingredients: Many of the ingredients are pantry staples, and substitutions can easily be made for dietary preferences.
  • Make-Ahead Friendly: This loaf stores well, so you can bake it in advance and enjoy it throughout the week.
  • Perfect for Any Occasion: Whether it’s a cozy breakfast or a delightful afternoon snack, this loaf fits the bill perfectly.

Ingredients You’ll Need

Here’s a detailed breakdown of the ingredients required for this delicious Lemon Blueberry Yogurt Loaf. Each ingredient plays a crucial role in achieving the perfect texture and flavor.

  • 2 cups All-Purpose Flour: Provides structure for the loaf. If you prefer a gluten-free option, you can substitute with a gluten-free flour blend.
  • 1 cup Granulated Sugar: Adds sweetness to balance the tartness of the lemon. Consider using coconut sugar for a lower glycemic alternative.
  • 1 cup Plain Greek Yogurt: Ensures moisture and adds protein. You can swap with full-fat or dairy-free yogurt for a vegan option.
  • 1/3 cup Vegetable Oil or Melted Unsalted Butter: Provides fat for richness; coconut oil is a great dairy-free alternative.
  • 2 large Eggs: Bind the ingredients together. For an egg-free version, use flax eggs (1 tablespoon ground flaxseed mixed with 2.5 tablespoons water per egg).
  • 1/4 cup Fresh Lemon Juice: Fresh is always best for vibrant taste; bottled lemon juice can work in a pinch.
  • 1 tablespoon Lemon Zest: Adds a concentrated lemon flavor; if you don’t have zest, increase the lemon juice slightly.
  • 2 teaspoons Baking Powder: Ensures your loaf rises nicely; make sure it’s fresh for the best results.
  • 1 teaspoon Baking Soda: Works with the yogurt to create a moist loaf.
  • 1/2 teaspoon Salt: Balances the sweetness and enhances flavor.
  • 1 cup Fresh Blueberries: Adds sweetness and bursts of flavor; if using frozen, don’t thaw them and drain excess moisture.

How to Make Your Lemon Blueberry Yogurt Loaf

An appetizing Lemon Blueberry Yogurt Loaf showing its rich color and fresh blueberries.

Now that you have your ingredients ready, let’s walk through the process of making this delightful loaf.

  1. Prep Your Oven and Pan: Preheat your oven to 350°F (175°C) and grease a 9×5 inch loaf pan with non-stick spray or line it with parchment paper for easy removal.
  2. Mix Dry Ingredients: In a medium bowl, whisk together the flour, baking powder, baking soda, and salt until combined.
  3. Mix Wet Ingredients: In a large bowl, combine the Greek yogurt, sugar, lemon juice, lemon zest, and eggs. Whisk until smooth.
  4. Combine Wet and Dry Ingredients: Gradually add the dry mixture into the wet mixture, stirring gently until just combined. Avoid overmixing to keep the loaf tender.
  5. Prep and Fold in the Blueberries: Gently fold in the blueberries, ensuring they’re evenly distributed throughout the batter without crushing them.
  6. Pour and Bake: Pour the batter into the prepared loaf pan and smooth the top. Bake for 50-60 minutes, or until a toothpick inserted in the center comes out clean.
  7. Make the Lemon Syrup: While the loaf is baking, you can prepare a lemon syrup by combining 1/4 cup lemon juice and 1/4 cup sugar in a small saucepan over medium heat until dissolved.
  8. Soak and Cool: Once the loaf is out of the oven, allow it to cool for 10 minutes in the pan. Then, carefully remove it and place it on a wire rack. Brush the warm loaf with the lemon syrup to keep it moist and add extra flavor.
  9. Glaze and Slice: After the loaf has cooled completely, you can drizzle a simple glaze made from powdered sugar and lemon juice if desired before slicing.

Pro Tips for the Best Lemon Blueberry Yogurt Loaf

To ensure your loaf turns out perfectly, consider these expert tips:

  • Use Fresh Ingredients: Fresh lemons and blueberries make a significant difference in flavor.
  • Room Temperature Ingredients: Having your eggs and yogurt at room temperature helps create a smoother batter.
  • Avoid Overmixing: Mix only until combined to keep the loaf tender and fluffy.
  • Check for Doneness: Ovens vary; check your loaf a few minutes before the suggested baking time.
  • Cool Completely: Allow the loaf to cool fully before slicing to prevent it from crumbling.
  • Experiment with Spices: Add a pinch of cinnamon or nutmeg for a warm flavor twist.
  • Use a Toothpick: Insert a toothpick into the center; if it comes out clean, your loaf is ready.
  • Store Properly: Wrap the loaf in plastic wrap or foil to keep it fresh longer.

Common Mistakes and Troubleshooting

Here are some common pitfalls to avoid when making your Lemon Blueberry Yogurt Loaf:

  • Overbaking: This can lead to a dry loaf. Keep an eye on it during the last few minutes of baking.
  • Using Cold Ingredients: Cold eggs and yogurt can cause the batter to be lumpy; always let them reach room temperature first.
  • Not Folding Blueberries Gently: Crushing blueberries can lead to a blue-tinged loaf; fold them in softly.
  • Skipping the Syrup: The syrup adds moisture and flavor; don’t skip it!

Variations to Try

Feel free to mix things up with these creative variations:

  • Banana Blueberry Loaf: Substitute mashed bananas for half the yogurt for a fruity twist.
  • Coconut Lemon Blueberry Loaf: Add shredded coconut for a tropical flavor.
  • Chocolate Chip Lemon Blueberry Loaf: Fold in mini chocolate chips for a sweet contrast.
  • Nutty Lemon Blueberry Loaf: Add chopped walnuts or pecans for extra texture.

Storage and Make-Ahead Instructions

This loaf keeps well and can be made ahead of time:

  • Room Temperature: Store in an airtight container for up to 3 days.
  • Refrigerator: For longer freshness, refrigerate for up to a week.
  • Freezer: Wrap tightly in plastic wrap and foil to freeze for up to 3 months. Thaw in the fridge overnight before serving.

Frequently Asked Questions (FAQs)

  • Can I use frozen blueberries? Yes, just don’t thaw them before adding to the batter.
  • What can I substitute for Greek yogurt? You can use regular yogurt, sour cream, or a dairy-free alternative.
  • How can I make this loaf gluten-free? Substitute all-purpose flour with a gluten-free blend.
  • What’s the best way to store leftovers? Wrap in plastic wrap or store in an airtight container at room temperature.
  • Can I add more lemon flavor? Absolutely! Increase the lemon zest or juice to enhance the lemony taste.
  • How do I know when the loaf is done? A toothpick inserted into the center should come out clean when it’s ready.
  • Can I double the recipe? Yes, simply double the ingredients and use a larger loaf pan or two pans.
  • What should I serve with this loaf? Enjoy it plain, with a dollop of yogurt, or a drizzle of honey.

Nutritional Tips and Dietary Adaptations

This Lemon Blueberry Yogurt Loaf can be adapted to fit various dietary needs:

  • Lower Sugar Option: Reduce the sugar by half or substitute with a natural sweetener.
  • Vegan Option: Use flax eggs, dairy-free yogurt, and coconut oil.
  • High-Protein Option: Increase the Greek yogurt to boost protein content.

Equipment Recommendations

Ensure you have the right tools for a successful bake:

  • 9×5 inch Loaf Pan: A standard size for optimal baking.
  • Mixing Bowls: Use both large and medium sizes for easy mixing.
  • Whisk and Rubber Spatula: Essential for mixing and folding the batter.
  • Cooling Rack: Helps cool the loaf evenly and prevents sogginess.

Serving Suggestions

This Lemon Blueberry Yogurt Loaf is versatile and can be enjoyed in many ways:

  • Breakfast Treat: Serve with a side of fresh fruit or yogurt.
  • Snack Time: Perfect as an afternoon pick-me-up with a cup of tea.
  • Brunch Centerpiece: Dress it up with a drizzle of glaze and lemon slices for a beautiful presentation.

In conclusion, the Lemon Blueberry Yogurt Loaf is not just a recipe; it’s an experience that brings brightness to your table. With its ease of preparation, delightful flavors, and adaptability, it’s sure to become a beloved recipe in your collection. So gather your ingredients, follow the steps, and enjoy the delicious results. Happy baking!

Easy Lemon Blueberry Yogurt Loaf: Your New Go-To Breakfast Delight

Prep Time 10 minutes
Cook Time 50 minutes
Total Time 1 hour
Servings 8 slices
Calories 250
Start your day with this moist and flavorful lemon blueberry yogurt loaf, perfect for breakfast or brunch.

Ingredients

Dry Ingredients

  • 2 cups All-Purpose Flour (You can substitute with a gluten-free flour blend.)
  • 1 cup Granulated Sugar (Consider using coconut sugar for a lower glycemic alternative.)
  • 2 teaspoons Baking Powder (Ensure it’s fresh for the best rise.)
  • 1 teaspoon Baking Soda (Contributes to a moist loaf.)
  • 1/2 teaspoon Salt (Balances sweetness.)

Wet Ingredients

  • 1 cup Plain Greek Yogurt (Swap with full-fat or dairy-free yogurt for a vegan option.)
  • 1/3 cup Vegetable Oil or Melted Unsalted Butter (Switching to coconut oil makes it dairy-free.)
  • 2 large Eggs (Use flax eggs for an egg-free option.)
  • 1/4 cup Fresh Lemon Juice (Fresh is always best for vibrant taste.)
  • 1 tablespoon Lemon Zest (If you don’t have zest, lemon juice is a suitable substitute.)

Blueberries

  • 1 cup Fresh Blueberries (If using frozen, drain excess moisture before folding into batter.)

Instructions 

  • Preheat oven to 350°F (175°C). Grease a loaf pan.
  • In a bowl, whisk together dry ingredients: flour, sugar, baking powder, baking soda, and salt.
  • In another bowl, combine yogurt, oil, eggs, lemon juice, and lemon zest.
  • Pour wet ingredients into dry ingredients and gently fold in blueberries.
  • Pour batter into prepared loaf pan and bake for 50 minutes or until a toothpick inserted comes out clean.

Notes

For added flavor, sprinkle with extra lemon zest before baking.
Calories: 250kcal
Cost: $15
Course: Breakfast
Cuisine: American
Keyword: Blueberry, lemon, Yogurt

Elevate Your Dinner Game with Sticky Honey Garlic Beef

Are you ready to elevate your dinner experience with a dish that is not just easy to prepare but also bursting with flavor? This Sticky Honey Garlic Beef recipe is your answer. Perfect for busy weeknights, it combines tender flank steak with a sweet and savory glaze that’s ready in under 30 minutes. In this comprehensive guide, we will delve into everything you need to know to make this dish a standout in your weeknight rotation.

From ingredient breakdowns to expert tips, and common mistakes to avoid, this article is designed to ensure your cooking experience is smooth and enjoyable. Let’s get started!

Why You’ll Love This Recipe

  • Quick and Easy Preparation: With just 30 minutes from start to finish, this dish is ideal for those hectic evenings when you need a delicious meal in a hurry.
  • Flavorful and Satisfying: The combination of honey, soy sauce, and garlic creates a mouthwatering glaze that enhances the natural flavors of the beef.
  • Versatile and Customizable: You can easily adjust the spice levels or substitute ingredients based on what you have on hand.
  • Perfect for Meal Prep: This recipe is not only great for dinner but also works well for leftovers, making it a fantastic option for lunch the next day.
  • Family-Friendly: With its sweet and savory profile, this dish is sure to please even the pickiest of eaters.

Ingredients for Sticky Honey Garlic Beef

To make this delectable dish, gather the following ingredients:

  • 1 lb flank steak: A lean cut that cooks quickly and remains tender when sliced against the grain.
  • 1 tablespoon sesame oil: Adds a rich, nutty flavor that complements the other ingredients.
  • 1/4 cup soy sauce: The base of the sauce, bringing a savory and umami depth.
  • 1 tablespoon Worcestershire sauce: Enhances the flavor complexity of the beef.
  • 1 teaspoon freshly grated ginger: Provides a fresh zing that balances the sweetness of the honey.
  • 1 teaspoon hot Chinese mustard: Adds a kick, but you can adjust based on your heat preference.
  • 1/4 teaspoon red pepper flakes: For an additional layer of heat and flavor.
  • 1 teaspoon garlic (minced): Essential for that classic garlic flavor.
  • 1/4 cup honey (or maple syrup): The star ingredient that creates the sticky glaze.
  • Green onions, sliced: For garnish, adding freshness and color.
  • Sesame seeds: Optional, but they provide a lovely crunch and visual appeal.

How to Make Sticky Honey Garlic Beef

Follow these steps to create your Sticky Honey Garlic Beef:

  1. Slice the flank steak into 2-inch chunks or longer, thinner strips, ensuring you cut against the grain for maximum tenderness.
  2. In a medium bowl, whisk together the soy sauce, Worcestershire sauce, grated ginger, hot Chinese mustard, red pepper flakes, minced garlic, and honey to create the marinade. Set aside.
  3. Add the sesame oil to a medium cast iron pan over medium-high heat. Allow it to heat until shimmering.
  4. Add the sliced flank steak in a single layer. Let it brown nicely for 1-2 minutes without moving it, then use tongs to turn the beef over and brown for another 2-3 minutes.
  5. Reduce the heat to low-medium and pour the marinade over the beef. Stir to combine and simmer for about 5 minutes until the sauce reduces by half and becomes sticky.
  6. Serve the beef over steamed rice or noodles. Garnish with chopped green onions and sesame seeds for an extra touch.

Pro Tips for Perfecting Your Dish

  • Choosing the Right Cut: Flank steak is ideal, but you can also use sirloin or ribeye for richer flavor.
  • Marinating Time: If time allows, marinate the beef for 30 minutes to 2 hours for deeper flavor absorption.
  • Cooking Temperature: Ensure your pan is hot enough to sear the beef; this helps lock in juices and flavor.
  • Don’t Overcrowd the Pan: Cook in batches if necessary to ensure the beef browns evenly.
  • Adjusting Sweetness: Feel free to modify the amount of honey based on your sweetness preference.
  • For a Thicker Sauce: If you prefer a thicker glaze, allow the sauce to simmer longer.
  • Serving Suggestions: Pair with steamed vegetables like broccoli or bell peppers for a complete meal.
  • Garnishing Wisely: Fresh herbs like cilantro or parsley can enhance the dish visually and flavor-wise.

Common Mistakes and Troubleshooting

Even the best cooks can make mistakes. Here are some common issues and how to address them:

  • Beef is Tough: This often results from cutting against the grain. Always slice beef properly to maintain tenderness.
  • Too Salty: If the sauce turns out too salty, add a dash of sugar or additional honey to balance it out.
  • Not Sticky Enough: If the sauce isn’t reducing as expected, increase the heat slightly to encourage thickening.
  • Burnt Garlic: Garlic can burn quickly; add it later in the cooking process if you’re worried about it burning.

Variations on Sticky Honey Garlic Beef

Get creative with these variations:

  • Honey Ginger Beef: Add more ginger for a zesty twist.
  • Vegetable Stir-Fry: Incorporate vegetables like bell peppers and snap peas for a colorful dish.
  • Spicy Honey Garlic Beef: Increase the amount of red pepper flakes or add sriracha to the marinade.
  • Honey Soy Beef Stir Fry: Swap out flank steak for chicken or tofu for a different protein option.

Storage and Make-Ahead Instructions

Leftovers can be stored in the refrigerator for up to 3 days in an airtight container. For longer storage, consider freezing the beef and sauce together in a freezer-safe container for up to 3 months. To reheat, simply thaw in the refrigerator overnight and warm in a pan over low heat, stirring occasionally.

FAQs About Sticky Honey Garlic Beef

  • Can I use a different cut of beef for this recipe? Yes, sirloin or ribeye can also work well.
  • Is this recipe gluten-free? Use gluten-free soy sauce to make it suitable for gluten-free diets.
  • Can I make this ahead of time? Yes, you can prepare the beef and sauce in advance and store them separately until ready to cook.
  • What can I serve with Sticky Honey Garlic Beef? It pairs well with rice, noodles, or steamed vegetables.
  • How spicy is this dish? The spice level can be adjusted based on your preference by modifying the amount of red pepper flakes.
  • Can I use a slow cooker for this recipe? Yes, you can adapt the recipe for a slow cooker; cook on low for 6-8 hours.
  • What if I don’t have sesame oil? You can substitute with vegetable oil or olive oil for cooking.
  • How can I make this recipe healthier? Use less honey and add more vegetables to increase fiber and nutrients.

Nutrition Tips and Dietary Adaptations

To make this dish healthier, consider the following:

  • Lean Protein: Opt for lean cuts of beef to reduce fat content.
  • Whole Grains: Serve over brown rice or quinoa for added fiber.
  • Vegetable Boost: Add a variety of colorful vegetables to increase nutrient density and make the dish more filling.
  • Low-Sugar Alternatives: Substitute honey with a sugar-free alternative if you’re watching your sugar intake.

Equipment Recommendations

For a successful cooking experience, make sure you have:

  • Cast Iron Pan: Ideal for searing meat and achieving a perfect glaze.
  • Whisk: Essential for mixing the marinade evenly.
  • Meat Thermometer: Helps ensure your beef is cooked to the perfect temperature.
  • Sharp Knife: For easy and clean slicing of the beef.

Serving Suggestions

To elevate your meal presentation, consider these serving suggestions:

  • Garnish with Fresh Herbs: Add chopped cilantro or parsley for a touch of freshness.
  • Serve with Colorful Sides: Pair with steamed broccoli, snap peas, or a vibrant salad.
  • Use a Beautiful Platter: Present the beef on a stylish serving platter to impress your guests.

In conclusion, your journey to mastering Sticky Honey Garlic Beef is just a few simple steps away. With its delightful combination of flavors and ease of preparation, it’s bound to become a favorite in your household. Whether you’re cooking for family, friends, or just yourself, this dish is sure to deliver satisfaction every time. Happy cooking!

Sticky Honey Garlic Beef

Prep Time 10 minutes
Cook Time 15 minutes
Total Time 25 minutes
Servings 4 servings
Calories 450
A flavorful and sticky beef dish with honey and garlic, perfect for a quick dinner.

Ingredients

Meat

  • 1 lb flank steak

Sauce

  • 1 tablespoon sesame oil
  • 1/4 cup soy sauce
  • 1 tablespoon Worcestershire sauce
  • 1 teaspoon freshly grated ginger
  • 1 teaspoon hot Chinese mustard
  • 1/4 teaspoon red pepper flakes
  • 1 teaspoon garlic (minced)
  • 1/4 cup honey (or maple syrup)

Garnish

  • Green onions sliced
  • Sesame seeds

Instructions 

  • Slice the flank steak into 2-inch (5 cm) strips across the grain.
  • Whisk soy sauce, Worcestershire sauce, ginger, mustard, red pepper flakes, garlic, and honey; set aside.
  • Heat sesame oil in a pan over medium-high heat. Add steak and brown for 1-2 minutes per side.
  • Add sauce, simmer for 5 minutes until sticky and glazed.
  • Serve over rice, garnished with green onions and sesame seeds.

Notes

Use thinly sliced beef for best results and quick cooking.
Calories: 450kcal
Cost: $15
Course: Main Course
Cuisine: Asian
Keyword: beef

Indulge in a Healthy Sweet Treat

If you’re on the hunt for a delightful yet healthy snack, look no further than these Chocolate Strawberry Yogurt Clusters. This recipe combines the creaminess of Greek yogurt, the freshness of strawberries, and the richness of dark chocolate into bite-sized clusters that satisfy your sweet tooth while keeping the nutritional profile in check. Perfect for busy schedules or an afternoon pick-me-up, these clusters are not only easy to make but also packed with flavor and essential nutrients.

In this article, we will explore the reasons why you’ll love this recipe, provide a detailed ingredient breakdown, offer pro tips, and share common mistakes to avoid. Additionally, we will discuss variations, storage options, and a comprehensive FAQ to ensure you have all the information you need to create these delicious clusters.

Why You’ll Love This Recipe

Here are five compelling reasons to whip up these Chocolate Strawberry Yogurt Clusters:

  • Quick and Easy: With just a few simple ingredients and minimal prep time, you can create a delicious snack in under 30 minutes.
  • High Protein Content: Using Greek yogurt means you’re getting a protein-rich snack that helps keep you full and satisfied.
  • Versatile Ingredients: Customize the clusters to suit your taste preferences by swapping in different fruits or yogurt flavors.
  • Healthier Indulgence: Dark chocolate provides antioxidants, and when paired with fresh fruit, it becomes a guilt-free treat.
  • Family-Friendly: These clusters are not only loved by adults but also appeal to kids, making them a perfect snack for all ages.

Ingredient Breakdown

To create these delightful clusters, you will need the following ingredients:

  • 1 cup plain Greek yogurt: A thick and creamy base; feel free to substitute with dairy-free yogurt alternatives like almond or coconut yogurt.
  • 1/2 cup fresh strawberries, hulled and sliced: Fresh strawberries add vibrant flavor; you can also use blueberries or raspberries for variety.
  • 2 tbsp honey or maple syrup: Acts as a natural sweetener; choose maple syrup for a vegan option.
  • 1 tsp lemon zest: Adds a refreshing citrusy note that balances the sweetness.
  • 1 cup dark chocolate chips (70% cacao or higher): Rich in flavor and antioxidants; the higher the cacao percentage, the less sweet it will be.
  • A pinch of sea salt: Enhances the flavors of the chocolate and yogurt.

Step-by-Step Instructions

Follow these simple steps to make your Chocolate Strawberry Yogurt Clusters:

  1. Line a baking sheet with parchment paper and set aside.
  2. In a bowl, gently stir honey and lemon zest into the Greek yogurt. Fold in the sliced strawberries until evenly mixed.
  3. Spoon the yogurt-berry mixture onto the baking sheet in bite-size mounds, leaving space between each.
  4. Melt the dark chocolate in a double boiler. Drizzle a thin ribbon of the chocolate over each mound using a spoon or pastry bag.
  5. Sprinkle a pinch of sea salt on each cluster and refrigerate for 10-15 minutes until the chocolate hardens.

Pro Tips for Perfect Clusters

To ensure your clusters turn out perfectly, consider the following expert insights:

  • Use cold ingredients: Ensure the yogurt and strawberries are cold for better texture and taste.
  • Don’t over-mix: Gently combine the ingredients to maintain the integrity of the strawberries.
  • Choose quality chocolate: Opt for high-quality dark chocolate for the best flavor and health benefits.
  • Experiment with flavors: Try adding vanilla extract or nutmeg to the yogurt for a unique twist.
  • Make them bite-sized: Form smaller mounds for easy snacking and portion control.
  • Keep the clusters chilled: Store them in the refrigerator to maintain their shape and texture.
  • Variations are key: Don’t hesitate to swap in other fruits, nuts, or yogurt types to keep it interesting.
  • Consider a chocolate coating: For a thicker chocolate shell, dip the entire cluster instead of drizzling.

Common Mistakes and Troubleshooting

Even the best chefs can make mistakes. Here are some common pitfalls to avoid:

  • Chocolate too hot: If chocolate is too hot when drizzling, it may melt the yogurt. Allow it to cool slightly before use.
  • Too much liquid: If the yogurt mixture is too watery, try using a thicker Greek yogurt or straining it slightly.
  • Clusters spreading: Ensure there’s enough space on the baking sheet to prevent them from merging together during freezing.
  • Skipping the salt: A pinch of sea salt not only enhances flavor but also balances sweetness.

Delicious Variations

These clusters are highly customizable. Here are four variations to try:

  • Nutty Delight: Add chopped nuts like almonds or walnuts for an extra crunch and healthy fats.
  • Berry Medley: Mix different fruits such as raspberries, blueberries, or kiwi for a colorful twist.
  • Chocolate Peanut Butter: Swirl in creamy peanut butter into the yogurt mixture before assembling.
  • Minty Fresh: Add a few drops of peppermint extract to the yogurt for a refreshing flavor.

Storage and Make-Ahead Instructions

To keep your Chocolate Strawberry Yogurt Clusters fresh:

  • Refrigerate: Store in an airtight container in the refrigerator for up to one week.
  • Freeze: For longer storage, freeze the clusters in a single layer, then transfer to a freezer-safe bag for up to three months.
  • Make ahead: Prepare the yogurt mixture and strawberries a day in advance and assemble the clusters right before serving.

Frequently Asked Questions

Here are some of the most common questions regarding this recipe:

  • Can I use flavored yogurt? Yes, flavored yogurt can add a unique taste, but it may alter the sweetness.
  • What chocolate percentage works best? Opt for chocolate with at least 70% cacao for richer flavor and lower sugar.
  • Can I use frozen strawberries? Yes, but fresh strawberries yield better texture and flavor.
  • How do I prevent the chocolate from cracking? Make sure the chocolate is not too hot and allow the clusters to set in the fridge.
  • Is this recipe suitable for a vegan diet? Yes, substitute Greek yogurt with coconut yogurt and honey with maple syrup.
  • How can I make these clusters more filling? Add protein powder to the yogurt mixture for an extra boost.
  • What else can I drizzle on top? Try using white chocolate or yogurt drizzle for a decorative touch.
  • Are these clusters good for meal prep? Absolutely! They make for a convenient and healthy grab-and-go snack.

Nutrition Tips and Dietary Adaptations

These clusters can easily fit into various dietary plans:

  • High Protein: Greek yogurt provides a great source of protein, essential for muscle repair and growth.
  • Low Sugar: Opt for dark chocolate and natural sweeteners like honey or maple syrup to keep sugar content low.
  • Gluten-Free: This recipe is naturally gluten-free, making it accessible for those with gluten sensitivities.
  • Dairy-Free Option: Substitute Greek yogurt with dairy-free alternatives for a vegan-friendly version.

Essential Equipment Recommendations

To make these Chocolate Strawberry Yogurt Clusters, you’ll need:

  • Baking Sheet: A sturdy baking sheet lined with parchment paper for easy cleanup.
  • Double Boiler: For melting chocolate evenly without burning.
  • Mixing Bowls: Use a medium bowl for the yogurt mixture and a small one for melting chocolate.
  • Pastry Bag or Spoon: For drizzling chocolate over the clusters.

Serving Suggestions

These clusters not only make a great snack but can also be served in various ways:

  • As a dessert: Serve them as a light dessert after a meal.
  • At parties: Present them on a platter as an eye-catching treat during gatherings.
  • In lunchboxes: Include them in kids’ lunchboxes for a sweet surprise.
  • With breakfast: Pair with a smoothie or oatmeal for a nutritious breakfast boost.

Conclusion

These Chocolate Strawberry Yogurt Clusters are more than just a snack; they are a delightful way to enjoy healthy ingredients without sacrificing flavor. Easy to prepare, customizable, and perfect for any occasion, this recipe is sure to become a staple in your kitchen. So gather your ingredients, follow the steps, and indulge in these delicious clusters that prove healthy can be incredibly tasty!

Chocolate Strawberry Yogurt Clusters

Prep Time 10 minutes
Cook Time 15 minutes
Total Time 25 minutes
Servings 8 pieces
Calories 250
Delight in these easy-to-make yogurt clusters topped with fresh strawberries and drizzled with rich dark chocolate for a sweet, healthy treat.

Ingredients

Dairy

  • 1 cup plain Greek yogurt
  • 1/2 cup fresh strawberries, hulled and sliced
  • 2 tbsp honey or maple syrup
  • 1 tsp lemon zest
  • 1 cup dark chocolate chips (70% cacao or higher)
  • A pinch sea salt

Instructions 

  • Line a baking sheet with parchment paper.
  • Mix honey and lemon zest into yogurt, then fold in strawberries.
  • Spoon mixture onto sheet as small mounds.
  • Melt chocolate, drizzle over clusters.
  • Sprinkle sea salt and refrigerate until chocolate hardens.

Notes

For best results, serve immediately or store in an airtight container in the fridge.
Calories: 250kcal
Cost: $10
Course: Dessert
Cuisine: American
Keyword: chocolate, strawberry, Yogurt

Transform Your Weeknight Dinners with BBQ Salmon Bowls and Mango Avocado Salsa

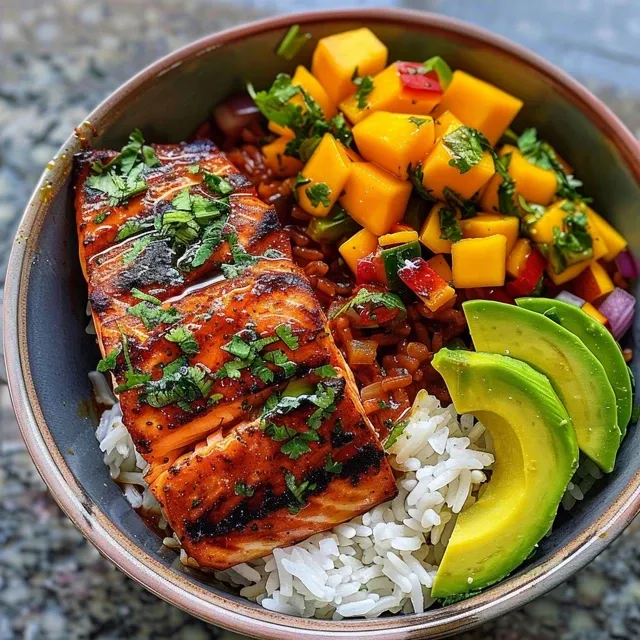
Are you looking for a quick, delicious, and nutritious meal that can elevate your weeknight dinner? Look no further! Our BBQ Salmon Bowls with Mango Avocado Salsa are the perfect solution. This recipe is designed to fit seamlessly into your busy schedule, offering a delightful combination of flavors and textures. Not only is it easy to prepare, but it also packs a powerful nutritional punch, making it ideal for any occasion—from busy weeknights to weekend gatherings.

Let’s dive into why you’ll love this recipe, how to prepare it, and some expert tips to make your cooking experience as enjoyable as possible.

Why You’ll Love This Recipe

  • Quick and Easy: With a total prep and cooking time of just 30 minutes, this meal is perfect for when you’re short on time but still want something delicious.
  • Flavor Explosion: The combination of BBQ salmon and fresh mango avocado salsa creates a burst of flavor that will leave everyone wanting more.
  • Nutrient-Rich: Packed with healthy fats from salmon and avocado, this dish is both satisfying and nourishing, making it a great choice for health-conscious eaters.
  • Customizable: This recipe allows for easy substitutions; swap out ingredients based on what you have on hand or your personal preferences.
  • Impressive Presentation: The vibrant colors of the salsa and the beautifully cooked salmon create an Instagram-worthy dish that will impress your family and friends.

Ingredients Breakdown

Here’s what you’ll need to make your BBQ Salmon Bowls with Mango Avocado Salsa:

  • Salmon: 1-2 lbs. fresh salmon fillet. You can use skin-on or skinless, depending on your preference.
  • Brown Sugar: 2 tablespoons, for a touch of sweetness that balances the savory flavors.
  • Spices: 2 teaspoons smoked paprika, 2 teaspoons onion powder, 1 teaspoon garlic powder, and 1/2 teaspoon chili powder to create a flavorful BBQ rub.
  • Salt: 1/2 teaspoon kosher salt, adjust as needed for larger fillets.
  • Olive Oil: 2 tablespoons, to keep the salmon moist during cooking.
  • Mangoes: 2 ripe mangoes, diced for a sweet and juicy salsa.
  • Avocado: 1 ripe avocado, diced to add creaminess.
  • Cilantro: 1/4 cup minced for fresh herb flavor.
  • Red Onion: 1/4 cup minced for a bit of crunch and sharpness.
  • Jalapeño: 1/2 minced (optional, to taste) for a spicy kick.
  • Honey: 1 teaspoon to enhance the sweetness of the salsa.
  • Lime Juice and Zest: 2 tablespoons lime juice + 1 teaspoon lime zest for brightness.
  • Rice: 1 1/2 cups cooked rice as the base for your bowl.

Step-by-Step Instructions

Juicy BBQ salmon surrounded by vibrant mango and avocado salsa.

Follow these simple steps to prepare your BBQ Salmon Bowls:

  1. In a mixing bowl, combine diced mango, avocado, cilantro, red onion, jalapeño (if using), honey, lime juice, lime zest, and a pinch of salt to prepare the salsa. Set aside.
  2. Cook rice according to package instructions. Choose your preferred type, whether jasmine, brown, or cauliflower rice for a low-carb option.
  3. Preheat your oven to 475°F (or broil at 500°F for a crispy top). Line a baking sheet with foil for easy cleanup.
  4. In a small bowl, mix brown sugar, smoked paprika, onion powder, garlic powder, chili powder, salt, and olive oil. Rub this spice mixture evenly over the skin-side down salmon on the baking sheet.
  5. Bake salmon for 6-12 minutes, depending on thickness, until it flakes easily with a fork.
  6. To assemble bowls: Start with a base of rice at the bottom, place flaked salmon on top, add generous amounts of mango avocado salsa, and drizzle with fresh lime juice.

Pro Tips for Perfect BBQ Salmon Bowls

  • Choose Fresh Ingredients: Using ripe, fresh mango and avocado ensures maximum flavor and texture in your salsa.
  • Adjust Spice Levels: Feel free to tweak the amount of chili powder and jalapeño to match your heat preference.
  • Use a Meat Thermometer: Ensure your salmon is cooked perfectly by checking for an internal temperature of 145°F.
  • Let It Rest: Allow the salmon to rest for a couple of minutes before flaking to retain its juices.
  • Customize Your Bowl: Add your favorite toppings such as sliced radishes, corn, or a dollop of Greek yogurt for extra creaminess.
  • Make It Ahead: Prep the salsa in advance and store it in the refrigerator for up to 2 days for a speedy meal.
  • Experiment with Grains: Swap rice for quinoa, couscous, or even a leafy green base for variation.
  • Perfect Leftovers: If you have any leftovers, store the components separately to maintain freshness.

Common Mistakes and Troubleshooting

Cooking can sometimes be tricky, but here are some common pitfalls and how to avoid them:

  • Overcooking Salmon: Keep an eye on your salmon to prevent it from drying out. Use a timer and check doneness early.
  • Unripe Produce: Ensure your mango and avocado are ripe for the best flavor. If they’re not, let them ripen at room temperature before using.
  • Too Much Lime: If your salsa turns out too tangy, balance it with a touch more honey or diced avocado.
  • Broken Salsa: If your salsa becomes too watery, drain the excess liquid before serving.

Variations to Try

Get creative with your BBQ Salmon Bowls! Here are some delicious variations:

  • Spicy BBQ Chicken: Substitute salmon with grilled chicken breast and use a spicy BBQ sauce.
  • Vegetarian Option: Replace salmon with grilled tofu or chickpeas for a plant-based bowl.
  • Fruit Twist: Swap mango for peaches or pineapple for a different sweet flavor profile.
  • Asian-Inspired: Use teriyaki sauce instead of BBQ, and add edamame and shredded carrots.

Storage and Make-Ahead Instructions

This recipe is perfect for meal prep! Here’s how to store leftovers:

  • Refrigeration: Store components in airtight containers. The salsa can last up to 2 days, while cooked salmon can be stored for up to 3 days.
  • Freezing: If you want to freeze salmon, wrap it tightly in plastic wrap and then aluminum foil. It can be stored for up to 3 months.
  • Reheating: When ready to enjoy your leftovers, gently reheat the salmon in the oven or microwave until warmed through.

Frequently Asked Questions

  • Can I use frozen salmon? Yes, just ensure it’s fully thawed before cooking for the best results.
  • How do I know when salmon is done? Salmon should flake easily with a fork and have an internal temperature of 145°F.
  • Can I prepare the salsa in advance? Absolutely! You can make the salsa up to 2 days ahead of time and keep it stored in the refrigerator.
  • What can I use instead of rice? Quinoa, farro, or cauliflower rice are all excellent alternatives.
  • Is this recipe gluten-free? Yes, all ingredients used in this recipe are gluten-free.
  • Can I add more vegetables? Definitely! Feel free to add any of your favorite veggies like bell peppers, corn, or zucchini.
  • How can I make this dish spicier? Increase the amount of jalapeño or add a pinch of cayenne pepper to the salmon rub.
  • What’s a good side dish to serve with this? A simple green salad or grilled asparagus pairs beautifully with this dish.

Nutritional Tips and Dietary Adaptations

This BBQ Salmon Bowl is not only delicious but also offers a range of nutritional benefits:

  • Omega-3 Fatty Acids: Salmon is rich in omega-3s, which are essential for heart health.
  • Vitamins and Minerals: Avocado adds potassium and healthy fats, while mango is packed with vitamins A and C.
  • Customization: Adjust the recipe to fit dietary needs—use brown rice for added fiber or swap out ingredients to make it dairy-free or low-carb.

Equipment Recommendations

To make your cooking process smoother, consider these essential tools:

  • Baking Sheet: A sturdy baking sheet lined with foil for easy cleanup.
  • Mixing Bowls: Various sizes for preparing the salsa and mixing spices.
  • Sharp Knife: For dicing your fresh ingredients with ease.
  • Meat Thermometer: To ensure your salmon is cooked perfectly every time.

Serving Suggestions

To take your BBQ Salmon Bowls to the next level, consider these serving ideas:

  • Garnish: Top with extra cilantro, lime wedges, or sesame seeds for added flavor and presentation.
  • Side Dishes: Serve with grilled vegetables or a refreshing cucumber salad to complement the meal.
  • Drink Pairing: A chilled white wine or a refreshing iced tea pairs wonderfully with this dish.

In conclusion, BBQ Salmon Bowls with Mango Avocado Salsa are a fantastic way to enjoy a quick, nutritious, and flavorful meal. With the outlined tips, variations, and troubleshooting advice, you’ll be well-equipped to create a stunning dish that will impress your family and friends. Enjoy your cooking adventure!

BBQ Salmon Bowls with Mango Avocado Salsa

Prep Time 15 minutes
Cook Time 15 minutes
Total Time 30 minutes
Servings 4 servings
Calories 550
Enjoy a flavorful bowl combining tender baked salmon with fresh mango avocado salsa over rice for a vibrant, healthy meal.

Ingredients

Protein

  • 1-2 lbs fresh salmon (skin-on preferred)
  • 2 tablespoons brown sugar
  • 2 teaspoons smoked paprika
  • 2 teaspoons onion powder
  • 1 teaspoon garlic powder
  • 1/2 teaspoon chili powder
  • 1/2 teaspoon kosher salt (more for larger filet)
  • 2 tablespoons olive oil

Produce

  • 2 mangoes mangoes, diced
  • 1 avocado avocado, diced
  • 1/4 cup minced cilantro
  • 1/4 cup minced red onion
  • 1/2 jalapeño jalapeño, minced (optional) (to taste)
  • 1 teaspoon honey
  • 2 tablespoons lime juice
  • 1 teaspoon lime zest
  • salt to taste salt
  • 1 1/2 cups rice

Instructions 

  • Mix mango, avocado, cilantro, red onion, jalapeño (if using), honey, lime juice, lime zest, and salt for salsa. Set aside.
  • Cook rice according to package instructions.
  • Preheat oven to 475°F (or broil at 500°F). Line a baking sheet with foil.
  • Mix spices and olive oil; rub over salmon. Bake for 6-12 minutes.
  • Assemble bowls with rice, flaked salmon, salsa, and lime drizzle.

Notes

Adjust spice levels and salsa ingredients to taste.
Calories: 550kcal
Cost: $15
Course: Main Course
Cuisine: American
Keyword: Salmon

Elevate Your Weeknight Meals with Honey Lime Cilantro Chicken & Rice Bowls

In today’s fast-paced world, finding a meal that is both quick to prepare and bursting with flavor can be a challenge. That’s where this Honey Lime Cilantro Chicken & Rice Bowls recipe comes in. Not only is it simple to make, but it also integrates vibrant ingredients that delight the palate and nourish the body. In just one meal, you’ll experience the zest of fresh lime, the sweetness of honey, and the freshness of cilantro, all while enjoying tender marinated chicken and colorful veggies. Perfect for busy weeknights or festive gatherings, this dish caters to the needs of real-life cooks who want to create outstanding meals without unnecessary complexity.

Why You’ll Love This Recipe

  • Speedy Preparation: Ready in under 30 minutes, making it ideal for those busy weeknights when time is of the essence.
  • Flavor Explosion: The combination of honey, lime, and cilantro creates a vibrant marinade that infuses the chicken with mouth-watering taste.
  • Customizable Ingredients: Swap in your favorite veggies or grains to create a dish that fits your personal preferences.
  • Balanced Nutrition: Each bowl is packed with protein, healthy fats, and vitamins, ensuring a well-rounded meal.
  • Meal Prep Friendly: This recipe can be made ahead of time, ideal for lunches or quick dinners throughout the week.

Ingredients for Honey Lime Cilantro Chicken & Rice Bowls

Here’s what you’ll need to get started:

  • 1 pound boneless skinless chicken thighs or breasts: Choose either cut for a succulent base that’s easy to cook.
  • 2 tablespoons olive oil: Helps to create a perfect sear on the chicken.
  • Juice and zest of 2 limes: Adds a bright, tangy flavor that complements the sweetness of the honey.
  • 1/4 cup honey: Natural sweetness that enhances the overall flavor profile.
  • 1/4 cup fresh cilantro, chopped: Brings a fresh, herbal note that brightens the dish.
  • 2 cups cooked rice: You can use white, brown, or cauliflower rice to fit dietary preferences.
  • Fresh veggies: Such as cherry tomatoes, avocado, corn, or red onion to enhance the texture and color.

Pro Tips for the Best Honey Lime Chicken

A vibrant chicken and rice bowl showcasing honey-lime glaze and cilantro.
  • Marinate Smart: For optimal flavor, let the chicken marinate for at least 30 minutes, but not exceed 3 hours to avoid over-tenderizing.
  • Use a Meat Thermometer: Ensure the chicken reaches an internal temperature of 165°F for safety and perfect doneness.
  • High Heat Cooking: Use medium-high heat for searing the chicken to achieve a nice caramelization.
  • Experiment with Grains: Try quinoa or farro instead of rice for a different texture and flavor.
  • Freshness Matters: Always use fresh lime juice and cilantro for the best flavor.
  • Extra Dressing: Reserve some honey-lime dressing for drizzling over the assembled bowls for added flavor.
  • Garnish Generously: Top with sesame seeds or extra cilantro for an appealing presentation.
  • Meal Prep: Cook the chicken and rice ahead of time, then assemble your bowls when ready to eat.

Common Mistakes and Troubleshooting

Even with a straightforward recipe, hiccups can occur. Here are common pitfalls and how to avoid them:

  • Overcooking Chicken: Monitor cooking time closely to avoid dry chicken; use a thermometer for accuracy.
  • Insufficient Marination: Skipping or shortening the marination process can lead to bland chicken—plan ahead!
  • Neglecting Flavor Balance: Adjust honey and lime ratios based on your taste preferences to achieve the perfect balance.
  • Using Dried Herbs: Fresh cilantro is key; dried herbs won’t provide the same vibrant flavor.

Variations to Try

If you’re feeling adventurous, consider these variations to shake things up:

  • Spicy Kick: Add jalapeños or red pepper flakes to the marinade for some heat.
  • Tropical Twist: Substitute lime juice with orange juice for a sweeter citrus flavor.
  • Veggie Boost: Incorporate grilled or roasted vegetables like bell peppers or zucchini.
  • Protein Alternatives: Use shrimp or tofu for a different protein source that pairs well with the marinade.

Storage and Make-Ahead Instructions

This recipe is excellent for meal prep! Here’s how to store and reheat:

  • Refrigeration: Store leftovers in an airtight container in the fridge for up to 3 days.
  • Freezing: Freeze marinated chicken before cooking for up to 3 months; thaw in the fridge before cooking.
  • Reheating: Gently reheat chicken in a skillet or microwave to avoid drying it out.

Frequently Asked Questions

  • Can I make this dish vegetarian? Yes! Substitute chicken with firm tofu or chickpeas and adjust the marinade accordingly.
  • How do I know when the chicken is done? Use a meat thermometer to check that it has reached an internal temperature of 165°F.
  • Can I use bottled lime juice? While fresh juice is best, bottled can be used in a pinch.
  • What sides pair well with this dish? Consider serving it with a simple green salad or grilled vegetables.
  • How can I adjust the sweetness? Modify the amount of honey to suit your taste; you can also add more lime for extra tartness.
  • Is this recipe gluten-free? Absolutely! As long as you use gluten-free rice and ensure other ingredients are certified gluten-free.
  • Can I make this dish ahead of time? Yes! You can marinate the chicken and cook it when ready to serve for maximum freshness.
  • How long can I store leftovers? Leftovers can be refrigerated for up to 3 days.

Nutrition Tips and Dietary Adaptations

This Honey Lime Cilantro Chicken & Rice Bowls recipe is not only delicious but also adaptable to various dietary needs:

  • Low-Carb Option: Use cauliflower rice instead of regular rice for a low-carb meal.
  • Dairy-Free: This recipe is naturally dairy-free, making it suitable for those with lactose intolerance.
  • Low-Sugar Adaptation: Reduce honey or substitute with a sugar-free sweetener if you’re watching sugar intake.

Equipment Recommendations

To prepare this recipe, you’ll need a few essential tools:

  • Grill or Skillet: For cooking the chicken to perfection.
  • Measuring Cups and Spoons: For precise ingredient measurements.
  • Meat Thermometer: To ensure your chicken is cooked safely.
  • Mixing Bowl: For marinating the chicken and mixing the ingredients.

Serving Suggestions

To serve this dish, consider the following:

  • Layered Presentation: Place rice at the bottom, topped with sliced chicken and assorted veggies for a colorful display.
  • Drizzle Extra Dressing: A light drizzle of extra honey lime dressing enhances flavor.
  • Garnish with Fresh Herbs: Sprinkle additional cilantro or other fresh herbs for extra freshness.

In conclusion, these Honey Lime Cilantro Chicken & Rice Bowls are a perfect blend of flavor, nutrition, and ease of preparation. Whether you’re cooking for yourself or a family, this meal will surely impress. Dive into this recipe, and enjoy the vibrant tastes while simplifying your weeknight cooking!

Honey Lime Cilantro Chicken & Rice Bowls

Prep Time 10 minutes
Cook Time 20 minutes
Total Time 30 minutes
Servings 4 servings
Calories 450
Enjoy a vibrant and flavorful bowl featuring marinated chicken, fresh veggies, and fluffy rice, all drizzled with a honey-lime dressing.

Ingredients

Protein

  • 1 pound boneless skinless chicken thighs or breasts
  • 2 tablespoons olive oil
  • Juice and zest of 2 limes lime juice and zest
  • 1/4 cup honey
  • 1/4 cup fresh cilantro, chopped
  • 2 cups cooked rice (white, brown, or cauliflower)

Fresh veggies

  • as desired cherry tomatoes, avocado, corn, red onion (assorted fresh vegetables)

Instructions 

  • Marinate chicken in lime juice, zest, honey, olive oil, cilantro, salt, pepper, cumin, and paprika for 30 minutes.
  • Grill or skillet-cook chicken over medium-high heat for 6-7 minutes per side until cooked through.
  • Prepare rice according to package instructions.
  • Assemble bowls with rice, sliced chicken, and fresh veggies.
  • Drizzle with honey-lime dressing and garnish with cilantro before serving.

Notes

Use fresh ingredients for best flavor and adjust veggie toppings to taste.
Calories: 450kcal
Cost: $15
Course: Main Course
Cuisine: fusion
Keyword: Chicken, Honey, lime, Rice

Effortless Elegance: Your Guide to 20-Minute Sheet Pan Garlic Butter Shrimp

Welcome to the world of quick, delicious cooking! This 20-Minute Sheet Pan Garlic Butter Shrimp recipe combines the rich flavors of garlic and butter with succulent shrimp, all while being incredibly simple to prepare. Perfect for busy weeknights, this dish allows you to impress your family or guests with minimal effort. It’s ready in under 20 minutes, making it an ideal choice for those evenings when time is tight but flavor is essential.

Why You’ll Love This Recipe

This recipe isn’t just quick; it offers a range of benefits that make it a standout choice for any home cook:

  • Speedy Preparation: Ready in just 20 minutes, this dish is perfect for those who want a delicious meal without spending hours in the kitchen.
  • Simple Ingredients: Featuring just a handful of ingredients, you can whip this up without needing a lengthy grocery list.
  • Low Carb Delight: This recipe is low in carbohydrates, making it an excellent choice for those following a keto or low-carb diet.
  • Impressive Presentation: The vibrant colors and aromas of this dish will impress anyone you serve it to, turning a simple meal into an elegant feast.
  • Versatile Pairings: Serve it with rice, pasta, or a fresh salad for a balanced meal that caters to various tastes.

Ingredients Breakdown

Here’s what you’ll need to create this flavorful dish:

  • 24 oz Raw Jumbo Shrimp: Peeled and deveined, these shrimp are the star of the dish. You can substitute with large shrimp or even scallops if desired.
  • 0.5 cup Butter: Melted, this ingredient adds a rich, creamy texture to the dish.
  • 3 cloves Garlic: Minced, to infuse the shrimp with a robust flavor.
  • 1 tablespoon Olive Oil: Helps the shrimp roast evenly and prevents sticking.
  • 0.5 Lemon: Zest and juice add brightness and acidity, balancing the richness of the butter.
  • 2 tablespoons Fresh Parsley: Chopped, for a fresh finish that adds a pop of color.
  • 0.5 teaspoon Smoked Paprika: This brings a subtle smokiness that complements the shrimp beautifully.
  • Salt and Black Pepper: To taste, elevating all the flavors in the dish.

Pro Tips for Perfect Garlic Butter Shrimp

To ensure your shrimp come out perfectly every time, consider these expert insights:

  • Thawing Frozen Shrimp: If using frozen shrimp, be sure to thaw them completely for even cooking. Ideally, do this in the refrigerator overnight.
  • Don’t Overcook: Shrimp cook quickly; they’re done when they turn pink and opaque, usually around 8-10 minutes in the oven.
  • Customize the Heat: Add a pinch of red pepper flakes if you enjoy a little spice. It complements the garlic nicely!
  • Keep it Fresh: Use fresh garlic and parsley for the best flavor; dried herbs can’t replicate the freshness.
  • Use a Large Baking Sheet: This ensures the shrimp roast evenly and don’t steam, which can happen if crowded.
  • Rest Before Serving: Let the dish sit for a few minutes before serving to allow the flavors to meld.
  • Save Leftovers: Store any leftovers in an airtight container in the refrigerator for up to two days.
  • Experiment with Flavors: Don’t hesitate to add different herbs or spices to suit your palate.

Common Mistakes and Troubleshooting

Even the best cooks can face challenges. Here’s how to avoid common pitfalls:

  • Overcooked Shrimp: Keep a close eye as shrimp can become rubbery. Start checking them at the 8-minute mark.
  • Too Much Butter: While it’s a garlic butter shrimp recipe, too much butter can overwhelm the shrimp. Stick to the recommended amount.
  • Inconsistent Cooking: Make sure the shrimp are in a single layer on the baking sheet to promote even cooking.
  • Not Enough Flavor: Season adequately! Taste and adjust the salt and pepper before baking.

Variations to Try

Here are some delicious variations to keep your meals exciting:

  • Garlic Butter Shrimp Tacos: Serve the shrimp in warm tortillas with avocado, cabbage, and a squeeze of lime.
  • Sheet Pan Garlic Butter Shrimp and Asparagus: Add asparagus to the pan for a colorful one-pan meal.
  • Spicy Garlic Butter Shrimp: Incorporate chili paste or sriracha into the butter for a fiery kick.
  • Garlic Butter Shrimp Pasta: Toss the shrimp with cooked pasta and a splash of pasta water for a creamy dish.

Storage and Make-Ahead Instructions

Planning ahead? Here’s how to store and reheat your shrimp:

  • Refrigerator: Store leftovers in an airtight container for up to 2 days.
  • Freezing: If you want to freeze leftovers, place them in a freezer-safe container, and they’ll keep for up to 3 months. Thaw in the refrigerator before reheating.
  • Reheating: For best results, reheat in the oven at 350°F (175°C) for about 10 minutes to maintain the texture.

Frequently Asked Questions (FAQs)

Got questions? Here are some common inquiries about this recipe:

  • Can I use frozen shrimp for this recipe? Yes, just make sure to thaw them completely before cooking.
  • What can I serve with garlic butter shrimp? This dish pairs well with rice, quinoa, or a fresh salad.
  • How do I know when shrimp are done cooking? They should be pink and opaque when fully cooked.
  • Can I substitute the butter? You can use olive oil for a lighter version, but the flavor will differ.
  • Can I add vegetables? Absolutely! Bell peppers and zucchini roast beautifully alongside the shrimp.
  • How do I store leftovers? Keep them in an airtight container in the refrigerator for up to 2 days.
  • Is this recipe gluten-free? Yes, as long as you use certified gluten-free ingredients.
  • Can I make this dish ahead of time? While best fresh, you can prep the shrimp and marinade in advance and cook them just before serving.

Nutrition Tips and Dietary Adaptations

This shrimp dish is naturally low in carbs and high in protein, making it a great option for a balanced meal. To cater to dietary needs:

  • Keto-Friendly: With minimal carbs, it fits perfectly into a ketogenic diet.
  • Dairy-Free Option: Substitute the butter with vegan butter or olive oil.
  • Paleo-Friendly: This recipe is compliant with paleo diets when you use clean ingredients.

Equipment Recommendations

For best results, here’s what you’ll need:

  • Baking Sheet: A large, rimmed baking sheet will help ensure even cooking and prevent spills.
  • Mixing Bowl: For combining your shrimp with the marinade.
  • Measuring Cups and Spoons: Precision is key in cooking; having the right tools makes a difference.
  • Spatula or Tongs: Useful for flipping shrimp or serving once cooked.

Serving Suggestions

To elevate your meal, consider these serving ideas:

  • Garnish with Fresh Herbs: A sprinkle of chopped parsley or cilantro adds a fresh touch.
  • Serve with Lemon Wedges: A squeeze of fresh lemon juice brightens the dish.
  • Pair with a Side Salad: A simple green salad complements the richness of the shrimp.
  • Offer Crusty Bread: Perfect for soaking up the delicious garlic butter sauce.

Conclusion

This 20-Minute Sheet Pan Garlic Butter Shrimp recipe is a testament to the idea that great meals don’t have to be complicated. With its blend of simple ingredients, quick prep time, and impressive flavors, it’s a must-try for any home cook. Whether you’re cooking for family or entertaining guests, this dish is sure to impress. So gather your ingredients, preheat your oven, and get ready to enjoy a meal that’s both effortless and elegant!

20-Minute Sheet Pan Garlic Butter Shrimp

Prep Time 5 minutes
Cook Time 15 minutes
Total Time 20 minutes
Servings 4 servings
Calories 250
Quick and flavorful shrimp roasted on a sheet pan with garlic, butter, and herbs, perfect for a speedy dinner.

Ingredients

Protein

  • 24 oz Raw Jumbo Shrimp (peeled and deveined)

Dairy

  • 0.5 cup Butter (melted)

Produce

  • 3 cloves Garlic (minced)
  • 0.5 lemon Lemon Zest and Juice (from ½ a lemon)

Oils

  • 1 tablespoon Olive Oil

Herbs & Spices

  • 0.5 teaspoon Smoked Paprika

Herbs

  • 2 tablespoons Fresh Parsley (divided)

Seasonings

  • to taste Salt
  • to taste Black Pepper

Instructions 

  • Preheat oven to 400°F (200°C). Toss shrimp with garlic, lemon juice, lemon zest, smoked paprika, salt, pepper, and olive oil.
  • Spread shrimp evenly on a sheet pan and dot with melted butter. Sprinkle with half of the parsley.
  • Bake for 12-15 minutes until shrimp are pink and cooked through.
  • Remove from oven, garnish with remaining parsley, and serve immediately.

Notes

Serve with crusty bread or over rice for a complete meal.
Calories: 250kcal
Cost: $12
Course: Main Course
Cuisine: American
Keyword: Shrimp