

Welcome to a world of **delightful desserts** that require minimal effort but deliver maximum flavor! In this guide, we’ll dive deep into creating **No-Bake Strawberry Crunch Cheesecake Cups**, a treat that’s perfect for any occasion—from summer gatherings to spontaneous family celebrations. With layers of creamy cheesecake, fresh strawberries, and a crunch topping, this recipe promises to impress without the fuss of baking.
Let’s explore why this recipe is a must-try and how to make it seamlessly at home!
Why You’ll Love This Recipe
- No baking required: Enjoy a delicious dessert without turning on the oven, making it perfect for hot days.
- Quick and easy: With a preparation time under 30 minutes, these cheesecake cups are a lifesaver for busy schedules.
- Individual servings: These cups are perfect for parties, allowing guests to enjoy their own portion without any mess.
- Rich flavors: The combination of cream cheese, fresh strawberries, and crunchy topping creates a delightful contrast in textures and tastes.
- Customizable: This recipe offers numerous variations, allowing you to tailor it to your preferences or dietary needs.
Ingredients
To create these **strawberry crunch cheesecake cups**, gather the following ingredients:
- 1.5 cups crushed golden sandwich cookies: These provide a sweet and crunchy base.
- 4 tbsp melted butter: This binds the crust together, adding richness.
- 8 oz cream cheese (softened): The creamy filling that makes the cheesecake luscious.
- 0.5 cup powdered sugar: Sweetens the filling and adds to the creamy texture.
- 1 tsp vanilla extract: Enhances the overall flavor of the cheesecake.
- 1 cup heavy whipping cream: Whipped to perfection for a light, airy texture.
Step-by-Step Instructions
Follow these simple steps to assemble your **strawberry crunch cheesecake cups**:
- Step 1: Mix the crushed cookies with melted butter until well combined. Press this mixture firmly into the bottom of your serving cups to form the crust.
- Step 2: In a mixing bowl, beat together the softened cream cheese, powdered sugar, and vanilla extract until smooth and creamy.
- Step 3: In a separate bowl, whip the heavy cream until stiff peaks form. Carefully fold this whipped cream into the cream cheese mixture until fully combined.
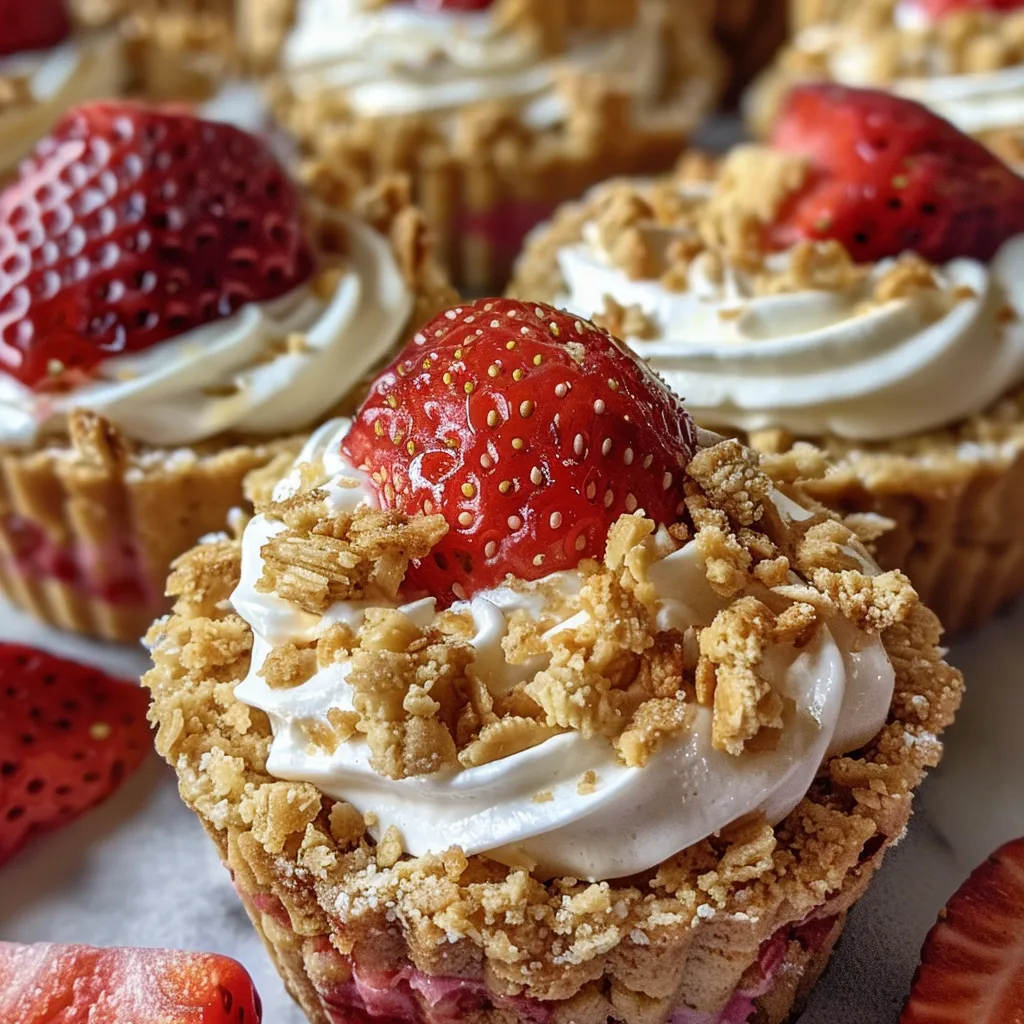
- Step 4: Layer the crust, followed by the cheesecake filling, and then top with fresh strawberries and the crunch topping.
- Step 5: Chill the cups in the refrigerator for at least 1-2 hours before serving to allow the flavors to meld and the layers to set.
Pro Tips for Perfect Cheesecake Cups
To ensure your **no-bake cheesecake** turns out perfectly every time, consider these expert tips:
- Use softened cream cheese: Make sure your cream cheese is at room temperature for a smooth filling.
- Don’t overwhip the cream: Whip the heavy cream just until stiff peaks form, otherwise, it may become grainy.
- Experiment with toppings: Try adding chocolate shavings, nuts, or different fruits for a unique twist.
- Keep it cool: Ensure your cheesecake cups are well chilled before serving for the best texture and flavor.
- Clear cups for presentation: Using clear cups allows you to showcase the beautiful layers of this dessert.
- Adjust sweetness: Feel free to taste the cream cheese mixture and adjust the sugar to your preference.
- Make it ahead: These cups can be made a day in advance, making them a great option for gatherings.
Common Mistakes and Troubleshooting
Even simple recipes can encounter issues. Here are some common mistakes to avoid:
- Crust too crumbly: Ensure the butter is fully mixed into the cookie crumbs to create a cohesive crust.
- Filling too runny: Make sure to whip the cream to stiff peaks and fold it in gently to maintain volume.
- Strawberries not fresh: Use only fresh strawberries for the best flavor and texture.
Variations to Try
Get creative with these variations on the classic **strawberry crunch cheesecake**:
- Chocolate Crunch Cheesecake Cups: Substitute chocolate sandwich cookies for the crust and add chocolate ganache on top.
- Berry Medley Cups: Use a mix of berries like blueberries and raspberries for a colorful twist.
- Nut Butter Swirl: Add a swirl of peanut or almond butter to the cheesecake filling for a nutty flavor.
- Dairy-Free Option: Use coconut cream and dairy-free cream cheese for a vegan-friendly dessert.
Storage and Make-Ahead Instructions
Your cheesecake cups can be stored in the refrigerator for up to 3 days. To make ahead, prepare the cups and layer them as instructed, but hold off on adding the crunch topping until just before serving to maintain its crispiness.
Comprehensive FAQ
- Can I freeze cheesecake cups? Yes, you can freeze them, but the texture may change once thawed.
- What can I use instead of cream cheese? You can use mascarpone cheese or a dairy-free cream cheese alternative.
- How can I make this recipe sugar-free? Substitute powdered sugar with a sugar alternative like erythritol.
- Can I use different cookies for the crust? Absolutely! Try graham crackers or even chocolate cookies for a different taste.
- How long do these last in the fridge? They can be kept for up to 3 days in an airtight container.
- What’s the best way to serve these? Serve chilled with additional strawberries or a drizzle of chocolate on top.
- Can I add more layers? Yes! Feel free to add layers of whipped cream or additional fruit to your cups.
- Is it safe to eat raw cream cheese? Yes, as long as the cream cheese is pasteurized, it is safe to eat raw.
Nutrition Tips and Dietary Adaptations
For a healthier option, consider the following tips:
- Use low-fat cream cheese: This can reduce the overall calorie count without sacrificing flavor.
- Add protein: Incorporate Greek yogurt into the filling for added protein and creaminess.
- Fresh fruit toppings: Load up on fresh berries for added vitamins and antioxidants.
Equipment Recommendations
To make your dessert preparation easier and more efficient, consider using:
- Mixing bowls: A set of nesting mixing bowls helps keep your workspace organized.
- Electric mixer: For quick and easy mixing of the cream cheese and whipping the cream.
- Measuring cups and spoons: Accurate measurements ensure the best results.
- Serving cups: Choose clear cups for a beautiful presentation of your layered dessert.
Serving Suggestions
These cheesecake cups are perfect on their own, but you can elevate your dessert experience with:
- Fresh mint leaves: Add a sprig of mint for a touch of color and freshness.
- Chocolate shavings: Sprinkle some dark chocolate shavings on top for a decadent finish.
- Coconut flakes: Toasted coconut adds flavor and a tropical twist.
With this comprehensive guide, you’re now equipped to create the most delightful **No-Bake Strawberry Crunch Cheesecake Cups** that are sure to impress. Enjoy the effortless indulgence and the delightful layers of flavor that make this dessert a true crowd-pleaser. Happy cooking!
No-Bake Strawberry Crunch Cheesecake Cups
Ingredients
Crust
- 1.5 cups crushed golden sandwich cookies
- 4 tbsp melted butter
Filling
- 8 oz cream cheese (softened)
- 0.5 cup powdered sugar
- 1 tsp vanilla extract
Topping
- 1 cup heavy whipping cream
- 1 cup sliced strawberries
- 0.5 cup crunch topping (e.g., granola or cookie crumbs)
Instructions
- Mix crushed cookies and melted butter, then press into cups to form crust.
- Beat softened cream cheese, powdered sugar, and vanilla until smooth.
- Whip heavy cream until stiff peaks form and fold into the cream cheese mixture.
- Layer the crust, filling, sliced strawberries, and crunch topping in cups.
- Chill for 1–2 hours before serving.