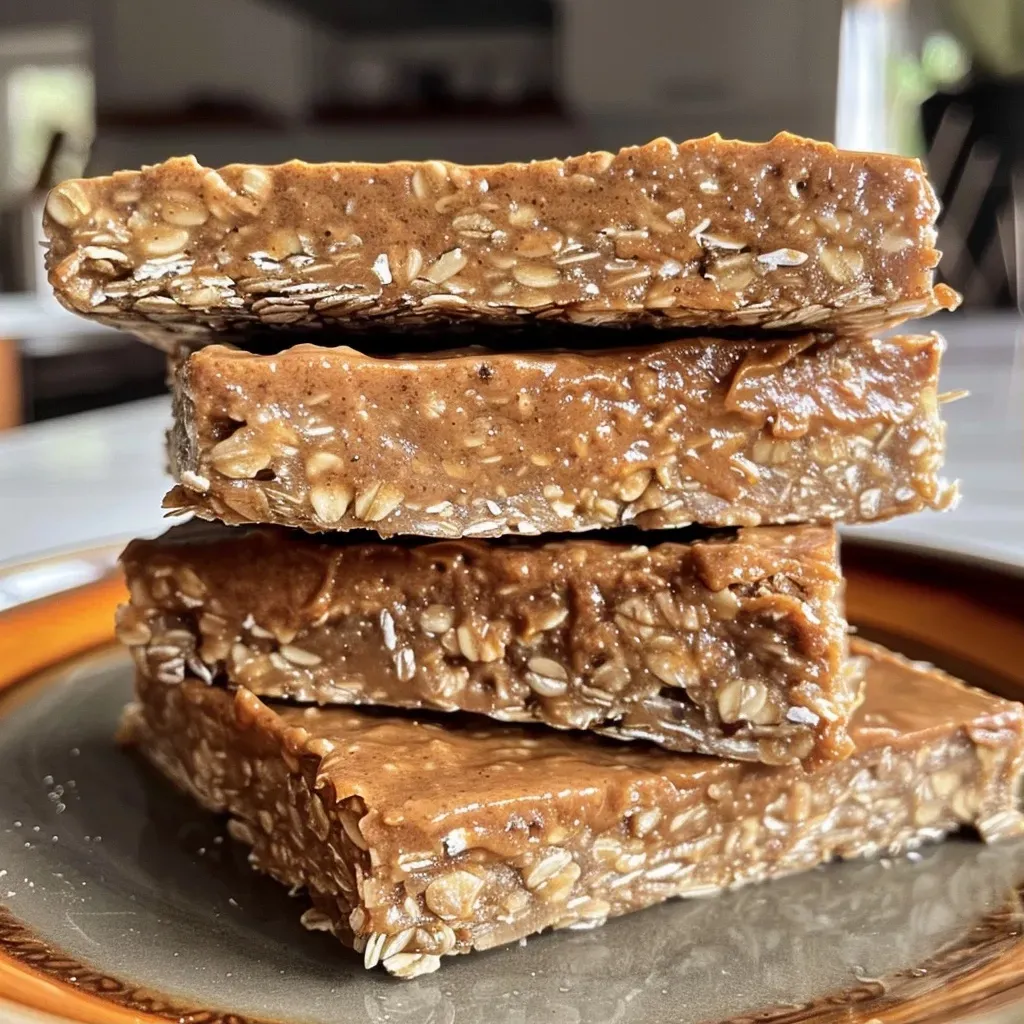
Welcome to your new go-to recipe for no-bake protein oat bars! In today’s busy world, we all need convenient, nutritious snacks that can keep up with our hectic lifestyles. This recipe combines wholesome ingredients to create delicious, high-protein bars that are not only easy to make but also perfect for on-the-go energy boosts. With minimal prep and no baking required, these bars are ideal for meal prep and can satisfy your cravings without the guilt.
Why You’ll Love This Recipe
Here are five compelling reasons to add these no-bake protein oat bars to your recipe collection:
- Quick and Easy: The straightforward preparation means you can whip these up in under 15 minutes. No baking or complicated steps required!
- Nutritious Energy Boost: Packed with rolled oats, hemp hearts, and peanut butter, these bars deliver a high-protein punch to fuel your day.
- Customizable Ingredients: Adjust the recipe to fit your taste preferences or dietary needs with various nut butters, sweeteners, and add-ins.
- Perfect for Meal Prep: Make a batch at the beginning of the week and enjoy a healthy snack throughout your busy days.
- Kid-Friendly and Delicious: With a naturally sweet flavor from bananas, even the pickiest eaters will love these bars!
Ingredient Breakdown
Understanding the ingredients is crucial to mastering this recipe. Let’s explore each one and discuss potential substitutions:
- Rolled Oats: The base of our bars, providing fiber and texture. If you need a gluten-free option, choose certified gluten-free oats.
- Hemp Hearts: A great source of plant-based protein and healthy fats. You can substitute with chia seeds or flaxseeds if preferred.
- Bananas: These add natural sweetness and moisture. Overripe bananas work best, but you can also swap with unsweetened applesauce if needed.
- Peanut Butter: Creamy and delicious, it also binds the bars together. Alternatives include almond butter or sunflower seed butter for nut-free options.
- Protein Powder: Enhances the protein content. Feel free to use your favorite type—whey, pea, or even a vegan blend.
- Cocoa Powder: Optional for an extra chocolatey flavor. You can leave it out or replace it with carob powder for a different taste.
- Water: Used to adjust the consistency of the mixture; add only as needed.
How to Make No-Bake Protein Oat Bars
Follow these simple steps to create your own no-bake protein oat bars:
As an Amazon Associate we earn from qualifying purchases.
Recommended Kitchen Tools 👇
These tools can help you make this recipe faster and easier.
- Prepare tray: Line a small baking pan (approximately 8×8 inches) with parchment paper for easy removal, or use individual silicone molds for portion control.
- Combine wet ingredients: In a large mixing bowl, mash the bananas thoroughly. Stir in the peanut or seed butter until the mixture is smooth and cohesive.
- Add dry ingredients: Mix in the rolled oats, hemp hearts, protein powder (if using), and cocoa powder (if using). Combine until a thick, uniform dough forms. If the mixture is too dry, gradually add water, one tablespoon at a time, until it holds together well.
- Press the mixture: Transfer the dough to your prepared tray or molds. Press down firmly to ensure even thickness. For a smoother surface, place a sheet of parchment on top and press with a flat object (like a measuring cup).
- Chill: Place in the freezer for at least 3 hours or refrigerate for 3–4 hours until fully set. This step is essential for the bars to hold their shape when cut.
- Slice and Serve: Once set, slice the bars into desired sizes. For refrigerated trays, slicing is cleaner when the bars are cold.
Pro Tips for Best Results
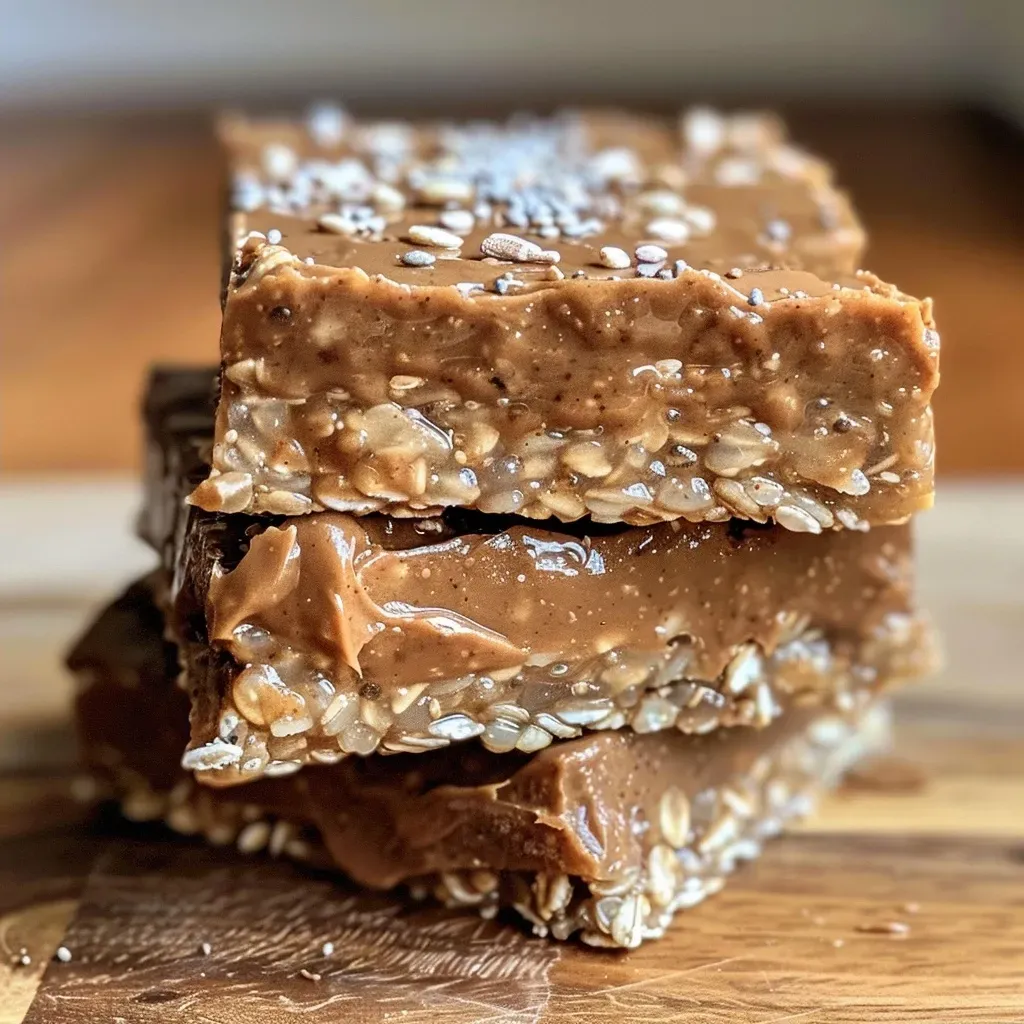
To ensure your no-bake protein oat bars turn out perfectly every time, consider these expert insights:
- Use Firm Nut Butter: Choose a smooth and firm nut butter to avoid crumbling bars. No-stir options are best!
- Mix Thoroughly: Ensure all ingredients are well combined to achieve the best texture and flavor.
- Adjust Sweetness: Taste the mixture before pressing it into the tray; add maple syrup or date syrup for extra sweetness if desired.
- Experiment with Add-Ins: Feel free to toss in extras like chocolate chips, dried fruit, or nuts for added flavor and texture.
- Store Wisely: Keep the bars in an airtight container in the fridge for up to a week or freeze for longer storage.
- Slice After Chilling: For the cleanest cuts, let the bars chill completely before slicing.
- Keep Ingredients Room Temperature: Using ingredients that are at room temperature helps in blending them smoothly.
- Monitor Consistency: If the mixture feels too dry, add a bit more water or nut butter to achieve the right texture.
Common Mistakes and Troubleshooting
Even the best recipes can have hiccups. Here are some common issues and how to resolve them:
- Bars Crumbling: If your bars are falling apart, it could be due to insufficient binding. Ensure you’ve added enough nut butter and that the mixture is pressed firmly.
- Too Dry: If the mixture isn’t sticking together, gradually add more water or nut butter until it holds together well.
- Too Sweet: If the bars taste overly sweet, balance it out by adding a pinch of salt or more oats to absorb some sweetness.
- Not Firming Up: If the bars are too soft after chilling, try freezing them for a bit longer, or check your ingredient ratios.
Variations to Try
Feel free to customize your bars with these delicious variations:
- Chocolate Chip Delight: Add 1/2 cup of dark chocolate chips to the mixture for a rich, chocolatey flavor.
- Fruity Nut Crunch: Incorporate 1/2 cup of chopped dried fruits like cranberries or apricots and 1/4 cup of chopped nuts for added texture.
- Spiced Pumpkin Bars: Substitute mashed banana with 1 cup of pumpkin puree and add 1 teaspoon of pumpkin spice for a seasonal twist.
- Matcha Green Tea Bars: Mix in 1 tablespoon of matcha powder for an energizing boost and a unique flavor and color.
Storage and Make-Ahead Instructions
Meal prepping these bars is a smart way to ensure you always have a healthy snack on hand:
- Refrigerator Storage: Store in an airtight container for up to one week. Place parchment paper between layers to prevent sticking.
- Freezer Storage: For longer storage, freeze the bars in a single layer on a baking sheet, then transfer to an airtight container or freezer bag. They can last for up to 3 months.
- Thawing Instructions: Simply remove from the freezer and allow to thaw in the refrigerator for a couple of hours before enjoying.
Frequently Asked Questions (FAQ)
Here are answers to some common questions about this recipe:
- Can I use quick oats instead of rolled oats? Quick oats will work, but rolled oats provide a better texture and chewiness.
- What can I substitute for peanut butter? Any nut or seed butter works well, such as almond or sunflower seed butter.
- How can I make these bars vegan? Use plant-based protein powder and substitute honey with maple syrup.
- Can I add protein powder? Yes, adding protein powder boosts the protein content significantly; just adjust the moisture as needed.
- How long do these bars last? They can be stored in the fridge for up to a week or frozen for up to three months.
- Are these bars gluten-free? Ensure you use certified gluten-free oats to make these bars safe for gluten-sensitive individuals.
- Can I use other fruits? Yes, you can experiment with applesauce or other pureed fruits, but keep in mind the moisture content.
- Should I skip the cocoa powder? If you’re not a chocolate fan, feel free to omit it or replace it with vanilla extract for a different flavor.
Nutrition Tips and Dietary Adaptations
These no-bake protein oat bars are naturally nutritious, but here are some tips for further enhancement:
- Boost Fiber: Add ground flaxseed or chia seeds to increase fiber and omega-3 content.
- Reduce Sugar: Opt for a sugar-free protein powder and limit added sweeteners to keep the bars lower in sugar.
- Boost Antioxidants: Mixing in dried fruit like goji berries can provide additional vitamins and antioxidants.
- Protein Variation: Choose a protein powder that aligns with your dietary preferences, whether it’s plant-based or whey.
Equipment Recommendations
To make the process smooth and efficient, consider having these tools on hand:
- Mixing Bowl: A large bowl for combining your ingredients.
- Measuring Cups and Spoons: Essential for accurate ingredient measurements.
- Spatula or Wooden Spoon: To mix the ingredients thoroughly.
- Baking Pan or Silicone Molds: For shaping the bars.
- Parchment Paper: Helps with easy removal and cleanup.
Serving Suggestions
These bars can be enjoyed in various ways:
- As a Snack: Perfect for a mid-morning or afternoon boost.
- With Coffee: Pair with your favorite coffee or tea for a delightful treat.
- On-the-Go Breakfast: Grab one as you head out the door for a quick breakfast option.
- Post-Workout Fuel: Ideal for replenishing energy after a workout.
In conclusion, these no-bake protein oat bars are not just a recipe; they’re a solution for busy days, a way to fuel your body with wholesome nutrition, and a canvas for your creativity in the kitchen. Enjoy experimenting with flavors and ingredients, and remember that cooking is about finding what works best for you. Happy snacking!
No-Bake Protein Oat Bars Recipe
Ingredients
Dry ingredients
- 4 cups rolled oats
- 1/2 cup hemp hearts
- 2 scoops unsweetened protein powder
- 2 tablespoons cocoa powder
Wet ingredients
- 4 medium bananas (mashed)
- 3/4 cup smooth peanut butter
- 2 tablespoons water (plus more as needed)
Instructions
- Line a small baking pan with parchment or use silicone molds.
- Mash bananas and stir in peanut butter until smooth.
- Add oats, hemp hearts, protein powder, and cocoa; mix until dough forms. Add water gradually if needed.
- Press mixture into the pan or molds, flatten, and cover with parchment.
- Freeze for at least 3 hours until set, then slice and serve.