Unlocking the Secrets of Classic Red Velvet Cake
If you’ve ever found yourself mesmerized by the rich, vibrant hue of a red velvet cake, you’re not alone. This iconic dessert has stood the test of time, captivating taste buds and hearts across generations. In this definitive guide, we’ll delve into everything you need to know about creating a stunning red velvet cake that combines moist texture, rich flavors, and a beautiful presentation. Whether it’s for a birthday, anniversary, or just a special treat, this recipe is sure to impress. Let’s explore how to make this timeless classic effortlessly.
Why You’ll Love This Recipe
When it comes to baking, not all recipes are created equal. Here are five compelling reasons to choose this red velvet cake recipe:
- Perfectly Moist: This recipe guarantees a cake that is moist and fluffy, thanks to the inclusion of buttermilk and oil, ensuring every bite is tender.
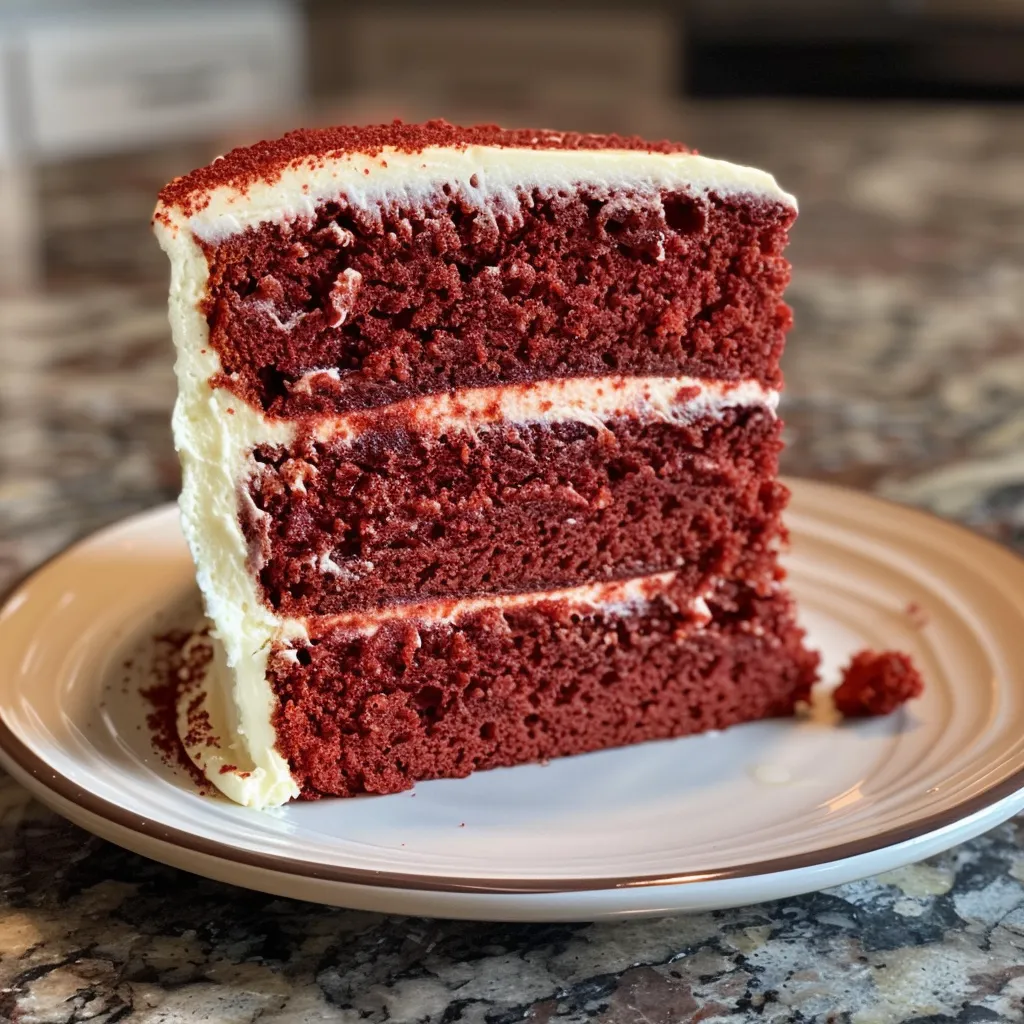
- Beautiful Presentation: The striking red color of the cake makes it visually stunning, perfect for celebrations and gatherings.
- Flavorful Frosting: Paired with a luscious cream cheese frosting, the combination of flavors will have everyone coming back for seconds.
- Simple Ingredients: You can create this cake with common pantry staples, making it accessible for any home baker.
- Versatile and Adaptable: This recipe can be easily modified for dietary preferences, such as gluten-free or vegan options.
Ingredient Breakdown and Substitutions
Understanding each ingredient’s role in a red velvet cake is key to mastering this recipe. Here’s a detailed look at what you’ll need and potential substitutions.
- Flour: Use all-purpose flour for the best results. For a lighter texture, cake flour can also be used. If you need a gluten-free option, substitute with a gluten-free all-purpose blend.
- Cocoa Powder: Unsweetened cocoa powder adds depth of flavor. If you prefer a slightly chocolatey taste, you can increase the cocoa powder to 3 tablespoons.
- Red Food Coloring: Traditional recipes call for liquid red food coloring, but you can also use gel food coloring for a more concentrated color.
- Buttermilk: If you don’t have buttermilk, make your own by mixing 1 tablespoon of white vinegar or lemon juice with 1 cup of milk and letting it sit for 5-10 minutes.
- Vinegar: Distilled white vinegar helps react with baking soda, giving the cake its lift. You can use apple cider vinegar as a substitute.
- Butter vs. Oil: While unsalted butter gives a rich flavor, using canola or vegetable oil ensures a moist cake. A combination of both can also work well.
- Eggs: Large eggs are essential for binding and moisture. For a vegan option, use flax eggs or applesauce.
Step-by-Step Instructions to Make Red Velvet Cake
Let’s get into the nitty-gritty of crafting your perfect red velvet cake. Follow these steps for delicious results:
- Preheat your oven to 350°F (175°C) and grease and flour two 9-inch round cake pans.
- In a medium bowl, whisk together 3 cups of flour, 2 tablespoons of cocoa powder, 1 teaspoon of baking soda, and 1/2 teaspoon of salt.
- In a large mixing bowl, beat 1/2 cup of softened unsalted butter and 2 cups of granulated sugar until light and fluffy.
- Add in 2 large eggs, one at a time, mixing well after each addition.
- In a separate bowl, combine 1 cup of buttermilk, 1 tablespoon of vanilla extract, 1 teaspoon of distilled white vinegar, and 2-3 drops of red food coloring. Mix until well combined.
- Gradually add the wet ingredients to the butter and sugar mixture, alternating with the dry ingredients, and mix until just combined.
- Divide the batter evenly between the prepared cake pans and bake for 25-30 minutes, or until a toothpick inserted in the center comes out clean.
- Let the cakes cool in the pans for 15 minutes before transferring them to a wire rack to cool completely.
How to Frost Your Red Velvet Cake
Frosting is where the magic happens! Here’s how to achieve a beautiful finish with cream cheese frosting:
- For the cream cheese frosting, beat together 8 oz of cream cheese and 1/2 cup of softened butter until smooth.
- Add 4 cups of powdered sugar and 1 teaspoon of vanilla extract, mixing until fluffy and well combined.
- Once the cakes are completely cool, level them using a serrated knife if necessary.
- Place one layer on a serving plate and spread a generous layer of frosting on top. Place the second layer on top and frost the entire cake, smoothing the frosting with an offset spatula.
- For a decorative touch, you can sprinkle cocoa powder or red sprinkles on top.
Expert Tips for Success
To ensure your red velvet cake is nothing short of perfection, consider these pro tips:
- Room Temperature Ingredients: Make sure all your ingredients, especially eggs and butter, are at room temperature for a smoother batter.
- Don’t Overmix: Mix the batter just until combined to avoid a dense cake.
- Correct Oven Temperature: Use an oven thermometer to ensure your oven is baking at the right temperature for even baking.
- Use Quality Food Coloring: For the best color, choose high-quality food coloring and adjust the amount to your preference.
- Cooling Time: Allow the cakes to cool completely before frosting to prevent melting the frosting.
- Crumb Coat: Apply a thin layer of frosting (crumb coat) before the final frosting layer to trap crumbs and create a smooth finish.
- Chill Your Cake: After frosting, chill the cake for at least 30 minutes to set the frosting, making it easier to slice.
- Serving Temperature: Allow the cake to sit at room temperature for about 30 minutes before serving for the best flavor and texture.
Common Mistakes and Troubleshooting
Even seasoned bakers can run into issues. Here are some common mistakes and how to troubleshoot them:
- Dry Cake: This can happen if you overbake. Always check for doneness a few minutes before the recommended baking time.
- Too Dense: Overmixing the batter can lead to a dense texture. Mix just until combined.
- Color Fading: If the red color fades during baking, it may be due to insufficient food coloring or not using enough vinegar.
- Frosting Melts: If your frosting is melting, make sure your cake is completely cool before applying the frosting.
Variations to Try
While classic red velvet is a favorite, here are some exciting variations to explore:
- Chocolate Red Velvet: Increase the cocoa powder for a more chocolatey flavor while maintaining the signature red hue.
- Layered Red Velvet: Create a multi-layered cake by baking in smaller pans and adding more layers of frosting in between.
- Red Velvet Cupcakes: Use the same batter to make delicious cupcakes, adjusting the baking time to about 18-20 minutes.
- Vegan Red Velvet: Substitute eggs with flax eggs and use plant-based butter for a cruelty-free version.
Storage and Make-Ahead Instructions
Planning ahead? Here’s how to store your red velvet cake:
- Room Temperature: Store the cake in an airtight container at room temperature for up to 2 days.
- Refrigeration: For longer storage, keep the cake in the fridge for up to a week. Allow it to come to room temperature before serving.
- Freezing: You can freeze the unfrosted cake layers for up to 3 months. Wrap tightly in plastic wrap and place in a freezer-safe bag.
Comprehensive FAQ
Here are some frequently asked questions regarding red velvet cake:
- Is red velvet cake just chocolate cake? No, while it contains cocoa powder, the flavor and texture are distinct due to the addition of buttermilk and vinegar.
- Can I use beet juice instead of food coloring? Yes, beet juice can provide a natural red color, although the flavor may vary slightly.
- What is the best frosting for red velvet cake? Cream cheese frosting is traditional and pairs perfectly with the cake’s flavors.
- Why does my cake have a strange taste? This could be due to using old ingredients or improper measurements. Always check your ingredients for freshness.
- How can I make my cake more moist? Ensure you’re using enough oil and buttermilk, and avoid overbaking your cake.
- Can I make this cake gluten-free? Yes, use a gluten-free flour blend in place of all-purpose flour.
- Why is my cake not rising? Ensure your baking soda is fresh, and double-check your ingredient measurements.
- Can I freeze leftover cake? Yes, you can freeze slices of cake for up to 3 months.
Nutrition Tips and Dietary Adaptations
For those mindful of nutrition, here are some tips:
- Lower Sugar: Reduce the sugar by up to half for a less sweet cake, but note this may affect moisture.
- Healthier Frosting: Substitute cream cheese with Greek yogurt mixed with a bit of honey for a lighter frosting option.
- Whole Wheat Flour: Use whole wheat flour for added fiber, though it may alter the cake’s texture slightly.
Equipment Recommendations
To make your baking experience seamless, here’s a list of recommended equipment:
- Mixing Bowls: Use large mixing bowls for combining ingredients easily.
- Measuring Cups: Accurate measurements are crucial; invest in quality measuring cups and spoons.
- Stand Mixer: A stand mixer can save time and effort, particularly when creaming butter and sugar.
- Offset Spatula: Essential for frosting your cake evenly and smoothly.
- Cooling Rack: Allows your cake to cool evenly, preventing sogginess.
Serving Suggestions
Make your red velvet cake even more delightful with these serving suggestions:
- Pair with Coffee: The rich flavor of the cake pairs beautifully with a cup of coffee or espresso.
- Add Fresh Berries: Fresh raspberries or strawberries can add a refreshing contrast to the sweet cake.
- Ice Cream: Serve with a scoop of vanilla or cream cheese ice cream for an indulgent dessert experience.
Conclusion
Now that you have all the tools and knowledge to create a stunning red velvet cake, it’s time to roll up your sleeves and start baking! With its beautiful color, rich flavor, and impressive appearance, this cake is sure to become a beloved recipe in your collection. Remember, practice makes perfect, and every bake brings you one step closer to mastering this classic treat. Enjoy the process and the delicious results!
Old Fashioned Red Velvet Cake
Ingredients
Dry Ingredients
- 3 cups flour
- 1 teaspoon baking soda
- 2 Tablespoons unsweetened natural cocoa powder
- 1/2 teaspoon salt
Wet Ingredients
- 1/2 cup unsalted butter (softened)
- 2 cups granulated sugar
- 1 cup canola oil
- 2 large eggs
- 1 Tablespoon pure vanilla extract
- 1 teaspoon distilled white vinegar
- 2-3 drops red food coloring
- 1 cup buttermilk (made by adding vinegar to milk)
Instructions
- Preheat oven to 350°F (175°C). Grease and flour two 9-inch pans.
- Mix dry ingredients: flour, cocoa, baking soda, salt.
- Cream butter and sugar until fluffy. Add eggs one at a time, then vanilla and vinegar.
- Combine buttermilk, oil, and food coloring. Alternately add wet and dry to batter.
- Divide batter into pans and bake 25-30 mins. Cool completely before frosting.