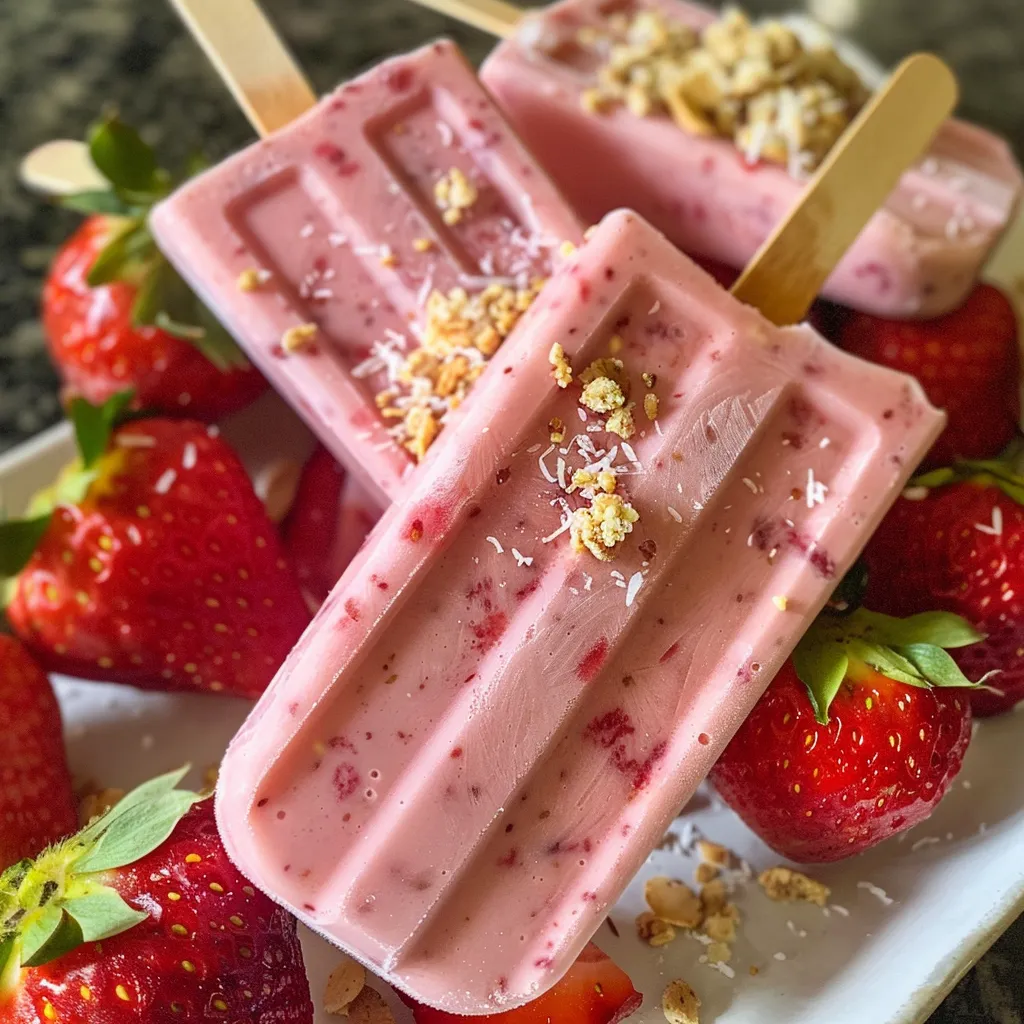
Why Choose Berry Bliss Strawberry Yogurt Pops?
If you’re looking for a refreshing treat that’s easy to make and bursting with flavor, you’ve come to the right place. Berry Bliss Strawberry Yogurt Pops are the perfect solution for those hot summer days when you want something sweet without the guilt. This delightful recipe combines the natural sweetness of fresh strawberries with the creamy goodness of Greek yogurt, creating a delicious dessert that’s both satisfying and nutritious. Not only are these popsicles a hit with kids, but they also serve as a wholesome treat for adults. Let’s explore the many reasons to love this recipe!
- Simple Ingredients: With just a handful of ingredients, you can whip up these pops in no time. All you need is fresh strawberries, Greek yogurt, honey or maple syrup, vanilla extract, and a pinch of salt.
- Customizable Sweetness: You have control over the sweetness! Taste the mixture and adjust the honey or maple syrup to suit your preference.
- Health Benefits: Greek yogurt is packed with protein and probiotics, making these pops a healthier alternative to store-bought treats.
- Versatile Flavor Combinations: You can easily experiment with different fruits or add-ins, making these pops adaptable to your taste.
- Kid-Friendly Cooking: Involve your kids in the preparation process; they’ll love blending and pouring the mixture into the molds!
Ingredient Breakdown
Understanding the ingredients is key to mastering this recipe. Let’s take a closer look at each component, along with some suggested substitutions to fit your dietary needs.
- Fresh Strawberries: The star of the show. Look for ripe, sweet strawberries for the best flavor. If strawberries aren’t in season, you can use frozen strawberries instead.
- Greek Yogurt: This provides creaminess and protein. You can use regular yogurt or dairy-free alternatives if needed.
- Honey or Maple Syrup: Both sweeteners work beautifully but choose based on your preference or dietary restrictions. Agave syrup can also be a great alternative.
- Vanilla Extract: This adds depth to the flavor. If you’re out, consider using almond extract for a unique twist.
- Salt: A pinch enhances the sweetness and balances flavors. Sea salt or kosher salt are great options.
- Coconut Flakes or Crushed Nuts (Optional): These add texture and a delightful crunch. Feel free to omit if you prefer smooth pops.
Step-by-Step Instructions
Making Berry Bliss Strawberry Yogurt Pops is straightforward. Follow these easy steps to enjoy your own batch of refreshing popsicles.
- Prep Your Ingredients: Start by hulling and chopping the fresh strawberries. Measure out your yogurt, sweetener, vanilla, and salt.
- Blend to Perfection: In a blender, combine the chopped strawberries, Greek yogurt, honey (or maple syrup), vanilla extract, and a pinch of salt. Blend on medium speed until smooth, but leave a few small strawberry bits for texture.
- Taste and Adjust: Before pouring, taste the mixture. If it needs more sweetness, gradually add honey or maple syrup, blending briefly after each addition.
- Incorporate Optional Ingredients: If using, gently fold in coconut flakes or crushed nuts to keep their crunchiness intact.
- Fill the Molds: Carefully pour the mixture into popsicle molds, leaving a small gap at the top for expansion during freezing.
- Insert Sticks and Freeze: Place popsicle sticks into the molds, ensuring they are centered. Freeze for at least 4-6 hours or until solid.
- Unmold and Enjoy: To release the popsicles, run warm water over the outside of the molds for a few seconds, then gently pull each pop out.
Pro Tips for Perfect Pops
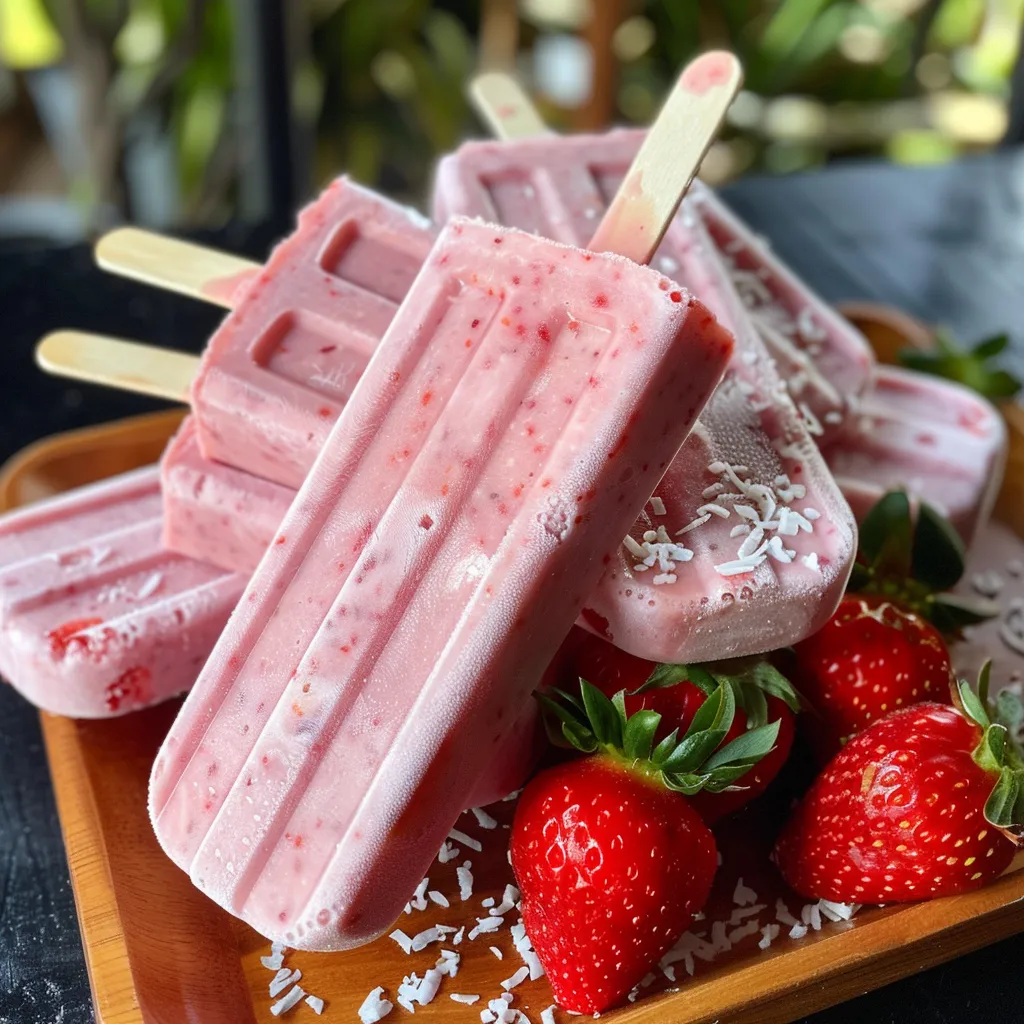
Enhance your popsicle-making skills with these expert tips!
- Use Room Temperature Ingredients: Let your yogurt and other ingredients sit out for a few minutes; this helps them blend more easily.
- Experiment with Flavors: Try adding other fruits like blueberries, mango, or peaches for unique flavor combinations.
- Check Freezer Temperature: Ensure your freezer is set to 0°F (-18°C) for optimal freezing results.
- Store Properly: Use a freezer-safe bag or container for leftover pops to prevent freezer burn. They can last for up to 6 weeks.
- Watch for Over-Filling: Leave space at the top of the molds to allow for expansion as the mixture freezes.
- Be Gentle When Unmolding: If a pop is stuck, run warm water over just the mold area, not the stick, to avoid melting the pops.
- Try Different Shapes: Use various molds for fun shapes that kids will love! Silicone molds are particularly easy to use.
- Involve the Family: Make it a fun family activity by having everyone choose their favorite fruits or toppings!
Common Mistakes and Troubleshooting
Even the best intentions can lead to mishaps. Here are some common mistakes and how to avoid them:
- Pops Not Freezing: If your pops are still slushy after the recommended freeze time, check your freezer’s temperature and adjust accordingly.
- Flavor Too Bland: Always taste the mixture before freezing. If it’s not flavorful enough, add more sweetener or vanilla extract.
- Too Icy or Crystalline Texture: This can happen if the mixture isn’t blended enough or if it freezes too quickly. Ensure proper blending and freeze gradually.
- Pops Sticking to Molds: If you find your pops are stuck, try running warm water over the molds longer, or consider using silicone molds for easier release.
Delicious Variations
Get creative! Here are some delightful variations to try:
- Berry Medley: Combine strawberries, blueberries, and raspberries for a colorful, fruity treat.
- Mango Coconut Bliss: Substitute strawberries with ripe mangoes and add shredded coconut for a tropical twist.
- Chocolate Strawberry Swirl: Drizzle melted dark chocolate into the molds before pouring in the yogurt mixture for a decadent surprise.
- Peach Yogurt Pops: Replace strawberries with fresh peaches and add a pinch of cinnamon for a warm flavor profile.
Storage and Make-Ahead Instructions
These pops are perfect for prepping ahead of time. Here’s how to store them effectively:
- Freezing: Once fully frozen, transfer pops to a plastic bag or airtight container, separating layers with parchment paper to prevent sticking.
- Labeling: Write the date on your container to keep track of freshness. They can last in the freezer for up to 6 weeks.
- Thawing: If you want to eat a pop but it’s too frozen, let it sit at room temperature for a few minutes for easier consumption.
Frequently Asked Questions
Here are some common questions about making Strawberry Yogurt Pops:
- Can I use frozen strawberries? Yes! Just ensure they are thawed before blending.
- What if I don’t have Greek yogurt? You can substitute with regular yogurt or dairy-free alternatives like almond or coconut yogurt.
- How can I make these pops dairy-free? Use coconut yogurt or almond yogurt instead of Greek yogurt.
- How long do they take to freeze? Typically, 4-6 hours, but for best results, overnight is ideal.
- Can I add protein powder? Absolutely! Mix a scoop into the yogurt for an added health boost.
- What’s the best way to serve them? Serve directly out of the freezer for a refreshing treat, or allow them to sit for a minute for easier eating.
- Are these pops suitable for toddlers? Yes, they are a healthy treat for young children, but always supervise when they are enjoying frozen treats.
- Can I make these without molds? Yes! You can use plastic cups and wooden sticks as an alternative.
Nutritional Tips and Dietary Adaptations
Berry Bliss Strawberry Yogurt Pops are not only delicious but also a smart choice for health-conscious individuals. Here are some nutritional insights:
- Protein Boost: Greek yogurt offers a great source of protein, essential for muscle repair and growth.
- Low Sugar Option: Control the sweetness by adjusting the amount of honey or maple syrup, or opt for a sugar substitute.
- Vitamins and Minerals: Fresh strawberries provide vitamin C, manganese, and antioxidants, essential for immune health.
- Fiber Source: If you add nuts or seeds, you’ll increase the fiber content, making these pops even more satisfying.
Essential Equipment for Making Strawberry Yogurt Pops
To make this recipe a breeze, here’s a list of recommended equipment:
- Blender: A high-quality blender is essential for achieving a smooth mixture.
- Popsicle Molds: Silicone molds work best for easy removal, but traditional plastic molds are also effective.
- Popsicle Sticks: These come with most molds, but you can purchase extra if needed.
- Measuring Cups and Spoons: Accurate measurements ensure the best flavor and texture.
Serving Suggestions
Once your Berry Bliss Strawberry Yogurt Pops are ready to enjoy, here are some fun serving ideas:
- Garnish with Fresh Fruit: Top each pop with a slice of fresh strawberry or a sprig of mint for a beautiful presentation.
- Serve with Dipping Sauces: Offer melted chocolate or yogurt dip on the side for a fun twist!
- Pair with Other Treats: Serve alongside a fruity salad or a scoop of granola for a delightful dessert combo.
In conclusion, making Berry Bliss Strawberry Yogurt Pops is not just a fun activity; it’s a delightful way to enjoy the flavors of summer while nourishing your body. These pops are simple, healthy, and endlessly customizable, making them a go-to recipe for any occasion. So grab your ingredients, gather your family, and start blending your way to a berry-filled summer treat!
Berry Bliss Strawberry Yogurt Pops
Ingredients
Fruits
- 2 cups fresh strawberries, hulled and chopped
- 1 cup plain Greek yogurt
- 0.5 cup honey or maple syrup
- 1 teaspoon pure vanilla extract
- 1 pinch salt
- 0.25 cup coconut flakes or crushed nuts (optional)
Instructions
- Blend strawberries, yogurt, honey, vanilla, and salt until smooth.
- Taste and add more honey if desired, blending briefly to combine.
- Fold in coconut flakes or nuts if using.
- Pour mixture into molds, insert sticks, and freeze for 4-6 hours.
- Run warm water over molds to loosen and remove pops.