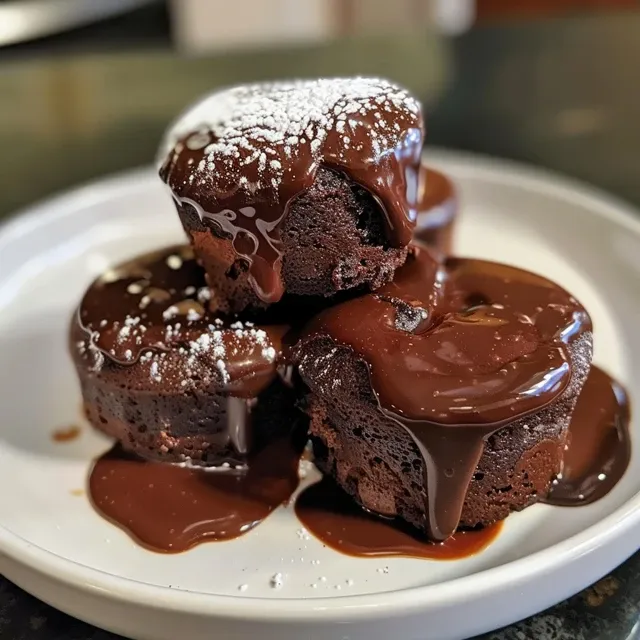
Indulge in Decadence: Mini Chocolate Lava Cakes for Two
Are you ready to elevate your dessert game? Mini Chocolate Lava Cakes are the epitome of indulgence, offering a luxurious treat that is surprisingly simple to prepare. With a gooey molten center and rich chocolate flavor, these cakes are perfect for a romantic evening or a cozy night in. This recipe is designed for two, making it an ideal choice for special occasions or a sweet surprise. In this comprehensive guide, we will cover everything you need to know to create these delightful desserts.
Why You’ll Love This Recipe
- Easy to Make: This recipe simplifies the baking process, ensuring that you can whip up these cakes in under an hour.
- Impressive Presentation: The molten center creates a stunning visual that is sure to impress your guests.
- Customizable: Add your favorite flavors or toppings to personalize your lava cakes.
- Perfect Portions: Designed for two, these mini cakes eliminate the temptation of overindulgence.
- Rich Flavors: Using high-quality ingredients results in a decadent dessert that is deliciously satisfying.
Ingredients You’ll Need
To make your Mini Chocolate Lava Cakes, gather the following ingredients:
- 1/2 cup unsalted butter: For a rich and buttery flavor.
- 1 cup semi-sweet chocolate chips: Use high-quality chocolate for the best flavor.
- 2 large eggs: Essential for structure and moisture.
- 1/4 cup granulated sugar: To add sweetness and balance the chocolate.
- 2 tablespoons all-purpose flour: Helps bind the ingredients together.
- 1/2 teaspoon vanilla extract: Enhances the overall flavor profile.
- Pinch of salt: Balances sweetness and enhances the chocolate flavor.
- Powdered sugar for dusting: Optional, for a beautiful finish.
Making Your Mini Chocolate Lava Cakes
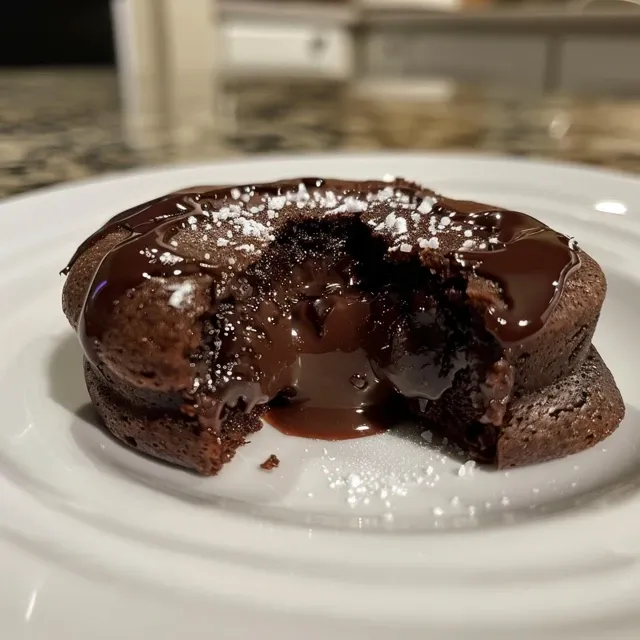
Follow these steps for a foolproof baking experience:
Step 1: Prepare the Baking Dish
Preheat your oven to 425°F (220°C). Grease two ramekins or muffin tins with butter and dust with cocoa powder to prevent sticking.
Step 2: Melt Chocolate and Butter
In a microwave-safe bowl, combine the butter and chocolate chips. Microwave in 30-second intervals, stirring in between, until completely melted and smooth.
Step 3: Mix the Batter
In a separate bowl, whisk together the eggs, granulated sugar, and vanilla extract until well combined. Gradually add the melted chocolate mixture, stirring gently. Finally, fold in the flour and a pinch of salt until just combined.
Step 4: Fill the Ramekins
Pour the batter evenly into the prepared ramekins or muffin tins, filling them about 2/3 full. This allows room for the cakes to rise.
Step 5: Bake to Perfection
Bake in the preheated oven for 12-14 minutes, or until the edges are firm but the center is still soft. The perfect bake will have a slightly jiggly center.
Step 6: Cool and Serve
Let the cakes cool for 1-2 minutes before carefully inverting them onto plates. Dust with powdered sugar if desired and serve immediately for a warm, gooey experience.
Pro Tips for Perfect Lava Cakes
- Use Quality Ingredients: Opt for high-quality chocolate and fresh eggs for the best flavor.
- Chill the Batter: If you want to prepare ahead, chill the batter in the ramekins and bake just before serving.
- Experiment with Flavors: Consider adding a splash of espresso or orange zest for a unique twist.
- Check for Doneness: The key is to ensure the edges are set while the center remains molten.
- Let Them Rest: Allowing the cakes to sit for a minute post-baking helps maintain the molten center.
- Serve Warm: These cakes are best enjoyed straight from the oven for that perfect gooey texture.
- Pair with Ice Cream: A scoop of vanilla ice cream complements the rich chocolate beautifully.
- Use a Toothpick Test: Insert a toothpick into the edge and ensure it comes out clean, while the center remains gooey.
- Don’t Overmix: Gently fold the ingredients together to avoid dense cakes.
Common Mistakes and Troubleshooting
- Overbaking: Keep a close eye on the baking time; the cakes should be soft in the center.
- Sticking to the Ramekins: Ensure proper greasing and dusting to avoid this issue.
- Too Dense: Overmixing can lead to dense cakes; mix just until combined.
- Cold Centers: Make sure to serve immediately after baking for that beautiful molten center.
Variations to Try
- Nutty Delight: Add chopped hazelnuts or walnuts for a crunchy texture.
- Fruit Infusion: Incorporate raspberry or strawberry puree into the batter for a fruity twist.
- Spicy Chocolate: Mix in a dash of cayenne pepper or chili powder for a chocolate cake with a kick.
- Gluten-Free Option: Substitute all-purpose flour with almond flour or a gluten-free blend.
Storage and Make-Ahead Instructions
These cakes are best enjoyed fresh, but you can prepare the batter ahead of time:
- Refrigerate the Batter: Store prepared batter in the fridge for up to 24 hours before baking.
- Freezing: Freeze the unbaked cakes in their ramekins for up to 2 months. Bake from frozen, adding a few extra minutes to the baking time.
Frequently Asked Questions
- Can I make these cakes ahead of time?: Yes, you can prepare the batter in advance and bake them just before serving.
- What if I don’t have ramekins?: Muffin tins work perfectly for individual portions.
- How can I tell when they are done?: The edges should be set while the center remains slightly jiggly.
- Can I use different types of chocolate?: Absolutely! Dark, semi-sweet, or even white chocolate can be used for different flavors.
- Can I add flavorings?: Yes, feel free to add extracts like almond or peppermint for a unique twist.
- Is this recipe gluten-free?: Substitute with gluten-free flour for a gluten-free version.
- How do I store leftovers?: Keep in the fridge for up to 3 days, but they are best eaten fresh.
- Can I serve these with ice cream?: Yes, a scoop of vanilla ice cream pairs wonderfully with the warm cakes.
Nutritional Information and Dietary Adaptations
For a single serving (one cake), the approximate nutritional content is:
- Calories: 350
- Fat: 24g
- Carbohydrates: 30g
- Protein: 5g
For a healthier twist, consider the following adaptations:
- Reduce Sugar: Cut the sugar by 1 tablespoon for a less sweet cake.
- Use Coconut Oil: Substitute butter with coconut oil for a dairy-free option.
- Swap Flour: Use oat flour for additional fiber and nutrients.
Essential Equipment Recommendations
- Ramekins: Essential for creating the individual cakes with perfect texture.
- Mixing Bowls: Use high-quality bowls to prevent heat loss during mixing.
- Spatula: A flexible spatula ensures you don’t waste any batter while transferring.
- Whisk: A sturdy whisk is necessary for properly mixing the eggs and sugar.
Serving Suggestions
For an extra touch, consider serving your Mini Chocolate Lava Cakes with:
- Fresh Berries: Strawberries or raspberries add a tart contrast to the rich chocolate.
- Whipped Cream: Light and airy whipped cream balances the intense chocolate flavor.
- Chocolate Sauce: Drizzle extra chocolate sauce over the top for chocolate lovers.
Conclusion: Your Chocolate Adventure Awaits!
Now that you have the ultimate guide to making Mini Chocolate Lava Cakes, it’s time to gather your ingredients and get baking! With their rich flavor and gooey center, these cakes are sure to become a favorite in your dessert repertoire. Don’t forget to share your creations with friends and family; after all, great food is meant to be enjoyed together. Happy baking!
Mini Chocolate Lava Cakes for Two An Amazing Ultimate Recipe
Ingredients
Dough
- 0.5 cup unsalted butter
- 1 cup semi-sweet chocolate chips
- 2 large eggs
- 0.25 cup granulated sugar
- 2 tablespoons all-purpose flour
- 0.5 teaspoon vanilla extract
Pinch of salt
- to taste Pinch of salt
For dusting
- as needed Powdered sugar for dusting, optional
Instructions
- Preheat oven to 425°F (220°C). Grease two ramekins.
- Melt butter and chocolate together until smooth.
- Whisk eggs, sugar, and vanilla into the chocolate mixture. Stir in flour and salt.
- Divide batter into ramekins and bake for 12 minutes.
- Let cool slightly, then invert onto plates. Dust with powdered sugar if desired.